Isn’t it great how Instagram’s “Explore” section displays content that matches your interests? When you open the application, the content and recommendations shown are almost always relevant to your specific likes, interests, connections, etc. While it may be fun to think we’re the center of the Instagram universe, the reality is that personalized, relevant content is also uniquely curated for 400 million other people daily.
This post is out of date and no longer works. You might be interested in our tutorial on how to build an Instagram Clone instead.
With 400M active users and 80M photos posted daily, how does Instagram decide what to put on your explore section? Let’s explore the key factors Instagram uses to determine scores for posts in your Instagram timeline and explore section. Before we get into the nitty-gritty, here are some features Instagram uses to determine what content to serve up:
- Timing: the more recent the post, the higher the score.
- Engagement: could be determined by the number of likes, comments and/or views. If a user engages with certain tags more often, such as snowboarding, that user will be shown more images of snowboarding.
- Previous Interactions: how often you have interacted with this user in the past. The more you engage with certain users indicates how relevant their posts are to you.
- Affinity: how you are related to this person. A friend of a friend, a friend that you haven’t connected with yet, or someone you don’t know?
Now, let’s use these features to build our own Instagram discovery engine. In order to query data from Instagram I am going to use the very cool, yet unofficial, Instagram API written by Pasha Lev. For Mac users, the following should get you up and running. All other libraries are pip installable, and all Python code was run within a Jupyter notebook.
Step 1: Setup Jupyter Notebook and Dependencies
To get up and running, run the following in your terminal:
brew install libxmlsec1 ffmpeg
pip install pandas tqdm jupyter networkx
pip install -e "git+https://github.com/LevPasha/Instagram-API-python.git#egg=InstagramAPI"
Then run jupyter notebook in your terminal, which will open in your default browser. I would also recommend verifying your Instagram phone number before continuing. This will prevent some unexpected redirects. Now on to the good stuff. Let’s start with finding my social network and a bit of graph analysis.
from InstagramAPI import InstagramAPI
from tqdm import tqdm
import pandas as pd
api = InstagramAPI("username", "password")
api.login() # login
If all goes well you should get a ‘Login success!’ response. We can now build a true social network by finding everyone I follow as well as everyone they follow. For a quick intro on social network analysis and personalized pagerank, take a look at this blog post. Before stepping into the code, let’s take a look at my own profile to see what we’re trying to analyze.

As you can see, I follow 42 people, who are considered my immediate network, which isn’t too many. If we start to look at 2nd degree connections that number quickly grows. In my case, if we look at 2nd degree connections the number of nodes reaches over 24,000. A nice visualization of this can be seen in step 2.
#first let's figure out who I am
api.getSelfUsernameInfo()
result = api.LastJson
user_id = result['user']['pk'] # my own personal user id
me = result['user']['full_name'] # my own personal username

api.getSelfUsersFollowing()
result = api.LastJson
follow_relationships = []
for user in tqdm(result['users']):
    followed_user_id = user['pk']
    followed_user_name = user['full_name']
    follow_relationships.append((user_id, followed_user_id, me, followed_user_name))
    api.getUserFollowings(followed_user_id)
    result2 = api.LastJson
    if result2.get('users') is not None:
        for user2 in result2['users']:
            follow_relationships.append((followed_user_id, user2['pk'],
                                         followed_user_name, user2['full_name']))
Cool, now let's get that into a nicely formated Pandas Dataframe.
df = pd.DataFrame(follow_relationships,
                  columns=['src_id','dst_id', 'src_name', 'dst_name'])
Step 2: Network Visualization (optional)
While it’s not essential to visualize your network in order to build your own discovery engine, it is pretty interesting and may help with understanding personal pageranks. I’m going to use one of my new favorite graph visualizations library, Graphistry (check them out sometime). However, if you don’t want to wait around for an API key (though I got a same day response), there are lots of other good libraries such as Lightning and NetworkX.
import graphistry
graphistry.register(key='Email pygraphistry@graphistry.com for an API key!')
graphistry.bind(source='src_name', destination='dst_name').edges(df).plot()
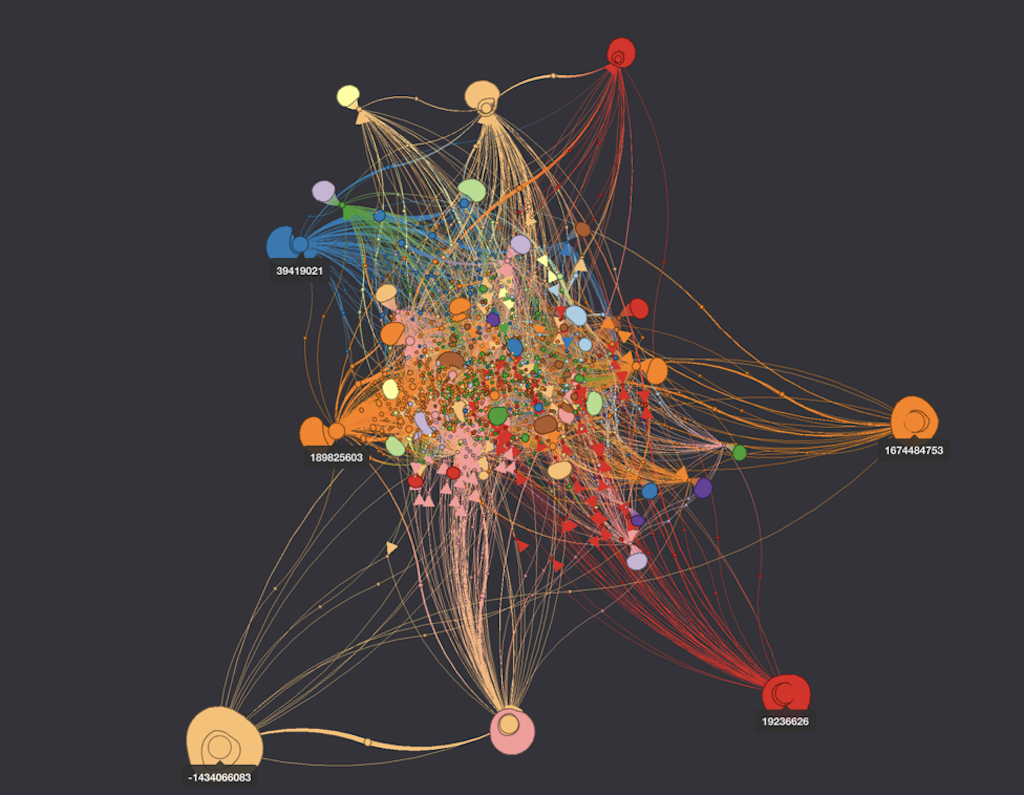
For this example, I’m going to display to src_id, and dst_id to give my friends a bit of privacy, though it is pretty fun to display usernames (which is what the below code will do). The first graph only displays edges that are sourced from me and filtered using the built in tools in Graphistry.

Isn’t that cool? You can already see a couple interesting features such as the few external centroids and how they interact with the rest of my social network.
Step 3: Finding Top Images from Social Network
It’s now time to grab the most recent images from everyone and rate them by how relevant they are to me. Since there about 24,000 nodes, it may take a while to download all the data. Let’s do a quick trial run of only the 44 people I immediately follow to make sure we’re on the right track. Based on what I thought might determine the relative score of Instagram posts, we need to grab the # of likes, # of comments and the time the photo was taken for all recent photos of people I follow (in this example I considered recent equivalent to one week and cut off photos older then that). It would also be useful to grab how many times I’ve ‘liked’ that user's posts and how connected that person is to me. Everything besides “how connected” that user is to me is a simple sum. To calculate the “connected” piece, we’ll use a personalized pagerank. Once we’ve compiled that information, we can define an importance metric like:

Alright, now that we have that defined, let’s see how it works! I apologize for the big chunk of code coming up, but don’t you worry...there is a picture of my new puppy at the end!
from IPython.display import Image, display
import networkx as nx
import numpy as np
import time
import datetime


#get all users that I am directly following
api.getSelfUsersFollowing()
result = api.LastJson
follow_relationships = []
for user in tqdm(result['users']):
    followed_user_id = user['pk']
    followed_user_name = user['full_name']
    follow_relationships.append((user_id, followed_user_id, me, followed_user_name))

df_local = pd.DataFrame(follow_relationships, columns=['src_id','dst_id', 'src_name', 'dst_name'])
all_user_ids_local = np.unique(df_local[['src_id', 'dst_id']].values.reshape(1,-1))


#grab all my likes from the past year
last_year = datetime.datetime.now() - datetime.timedelta(days=365)
now = datetime.datetime.now()
last_result_time = now
all_likes = []
max_id = 0

while last_result_time > last_year:
    api.getLikedMedia(maxid=max_id)
    results = api.LastJson
    [all_likes.append(item) for item in results['items']]
    max_id = results['items'][-1]['pk']
    last_result_time = pd.to_datetime(results['items'][-1]['taken_at'], unit='s')

like_counts = pd.Series([i['user']['pk'] for i in all_likes]).value_counts()


#calculate number of times I've liked each users post
for i in tqdm(like_counts.index):
    if i in df_local['dst_id'].values: # only count likes from people I follow (naive but simple)
        ind = df_local[(df_local['src_id'] == user_id) & (df_local['dst_id'] == i)].index[0]
        if like_counts[i] is not None:
            df_local = df_local.set_value(ind,'weight',like_counts[i])
ind = df_local[df_local['weight'].isnull()].index
df_local = df_local.set_value(ind,'weight',0.5)

#create social graph and calculate pagerank
G = nx.from_pandas_dataframe(df_local, 'src_id', 'dst_id')
#calculate personalized pagerank
perzonalization_dict = dict(zip(G.nodes(), [0]*len(G.nodes())))
perzonalization_dict[user_id] = 1
ppr = nx.pagerank(G, personalization=perzonalization_dict)

#this may take a while if you follow a lot of people
urls = []
taken_at = []
num_likes = []
num_comments = []
page_rank = []
users = []
weight = []
for user_id in tqdm(all_user_ids_local):
    api.getUserFeed(user_id)
    result = api.LastJson
    if 'items' in result.keys():
        for item in result['items']:
            if 'image_versions2' in item.keys(): #only grabbing pictures (no videos or carousels)
                # make sure we can grab keys before trying to append

                url = item['image_versions2']['candidates'][1]['url']
                taken = item['taken_at']
                try:
                    likes = item['like_count']
                except KeyError:
                    likes = 0
                try:
                    comments = item['comment_count']
                except KeyError:
                    comments = 0

                pr = ppr[item['user']['pk']]
                user = item['user']['full_name']
                if user != me: #don't count myself!
                    urls.append(url)
                    taken_at.append(taken)
                    num_likes.append(likes)
                    num_comments.append(comments)
                    page_rank.append(pr)
                    users.append(user)
                    weight.append(df_local[df_local['dst_name'] == user]['weight'].values[0])


#now we can make a dataframe with all of that information
scores_df = pd.DataFrame(
    {'urls': urls,
     'taken_at': taken_at,
     'num_likes': num_likes,
     'num_comments': num_comments,
     'page_rank': page_rank,
     'users': users,
     'weight': weight
    })
#don't care about anything older than 1 week
oldest_time = int((datetime.datetime.now()
                   - datetime.timedelta(weeks = 1)).strftime('%s'))

scores_df = scores_df[scores_df['taken_at'] > oldest_time]

# /1e5 to help out with some machine precision (numbers get real small otherwise)
scores_df['time_score'] = np.exp(-(int(time.time()) - scores_df['taken_at'])/1e5)

scores_df['total_score'] = (np.log10(scores_df['num_comments']+2) * np.log10(scores_df['num_likes']+1)
                            * scores_df['page_rank'] * scores_df['time_score']
                            * np.log(scores_df['weight']+1))


# calculate top ten highest rated posts
top_ten = scores_df['total_score'].nlargest(10)
top_rows = scores_df.loc[top_ten.index].values
top_personal_img = []


top_graph_img = []
#display the feed
for row in top_rows:
    img = Image(row[4], format='jpeg')
    top_graph_img.append(img)
    display(img)
    top_personal_img.append(img)
    print('taken_at: %s' % time.strftime('%Y-%m-%d %H:%M:%S', time.localtime(row[3])) )
    print('number of likes: %s' % row[1])
    print('number of comments: %s' % row[0])
    print('page_rank: %s' % row[2])
    print(row[5])
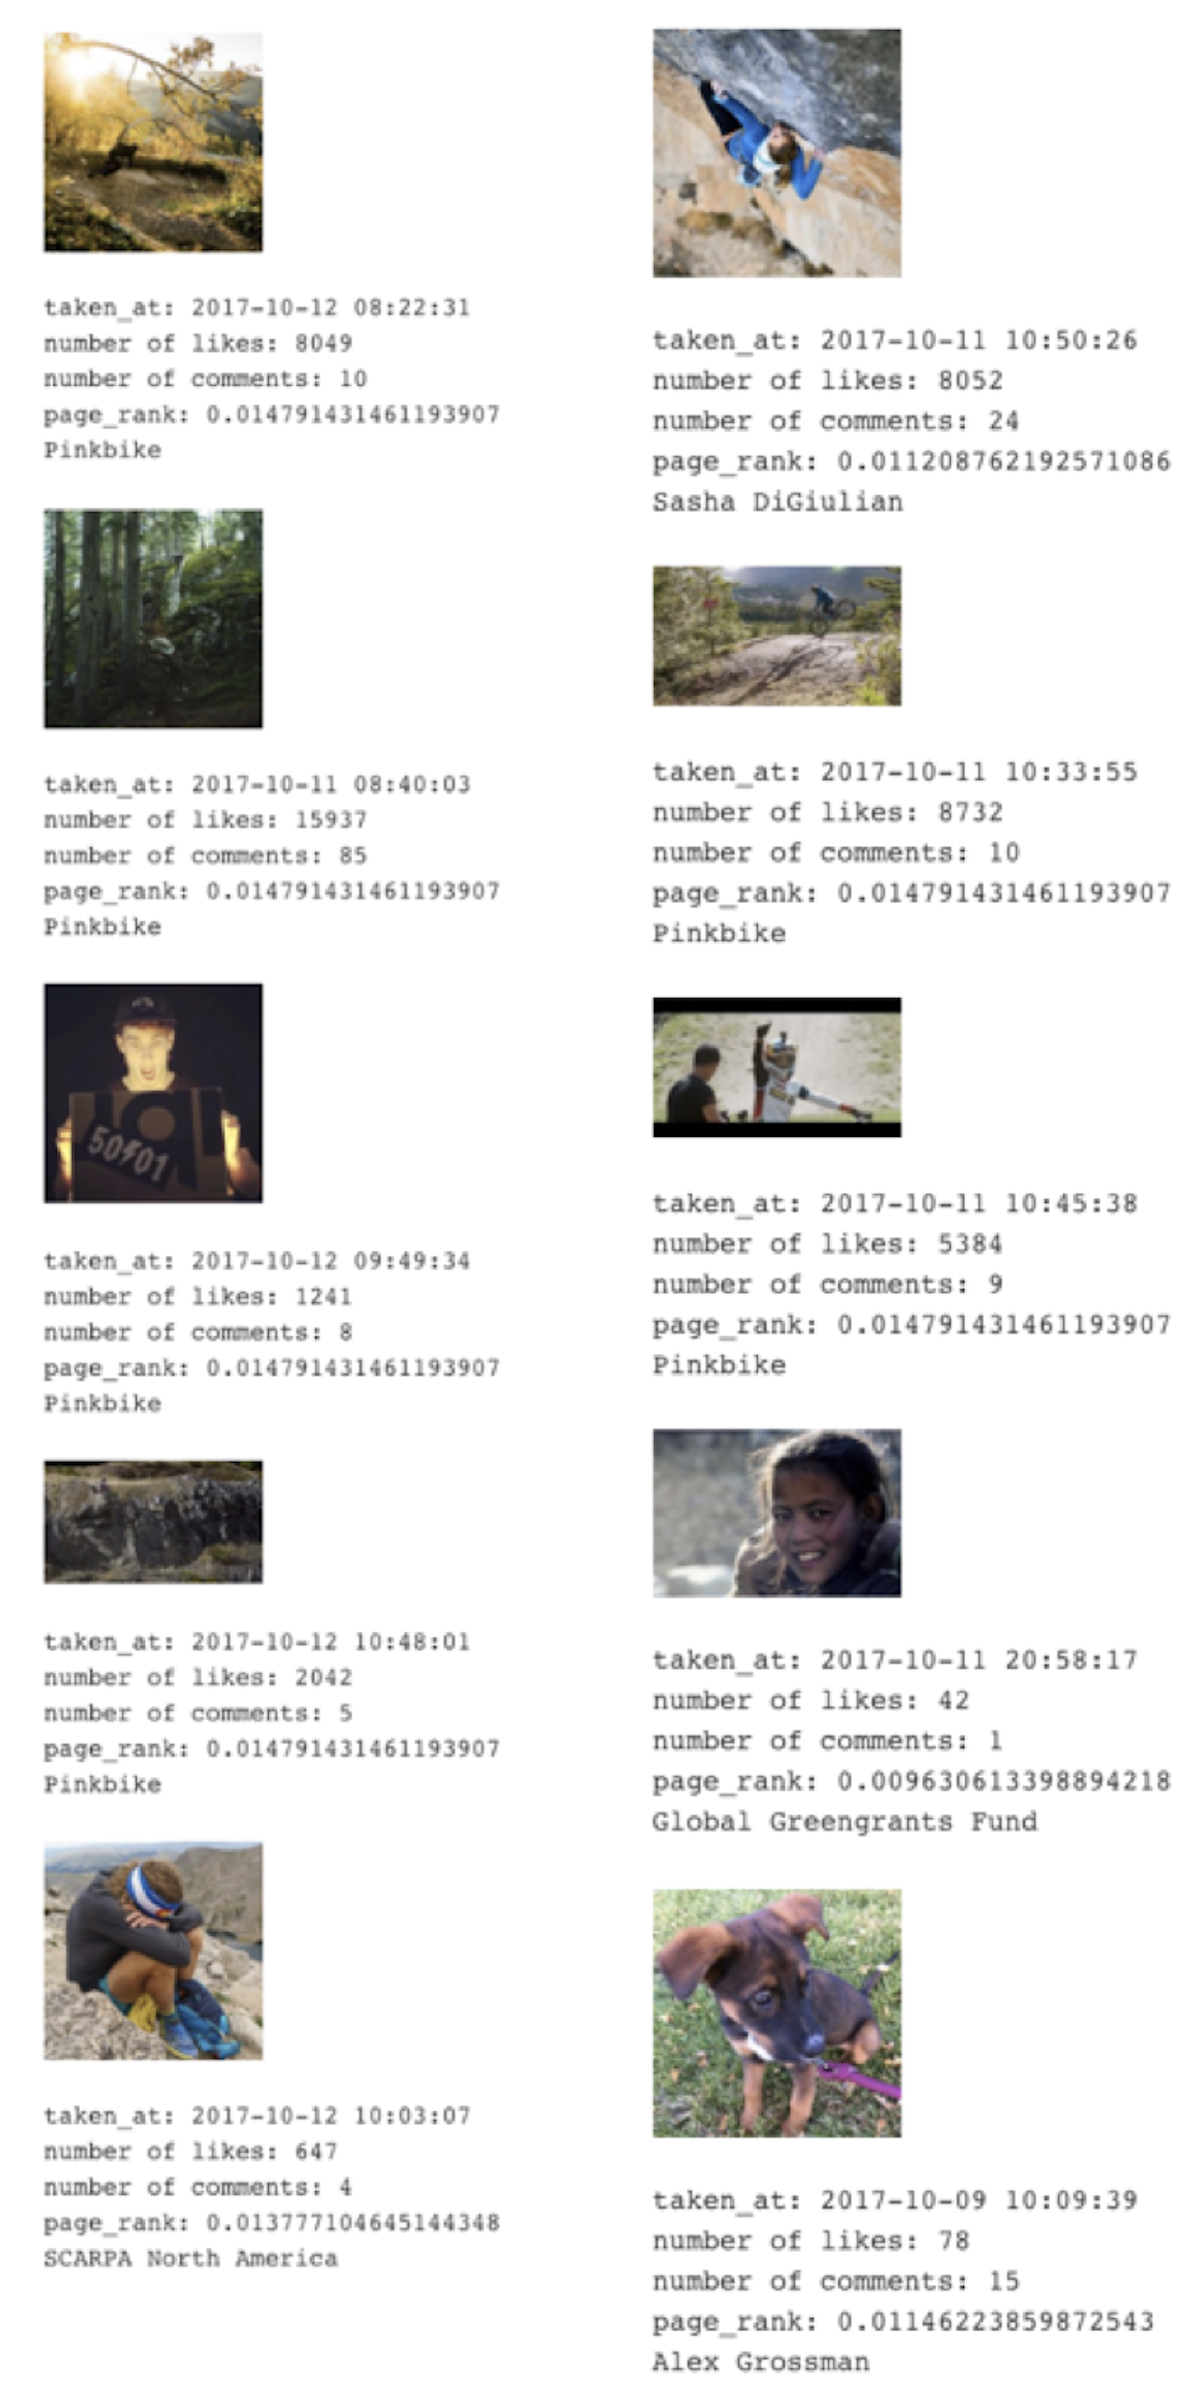
Which gives me: 
This actually looks very similar to my personal timeline - cool! Now that we know we're onto something, let's tackle the discovery section.
Step 4: Extending User Base
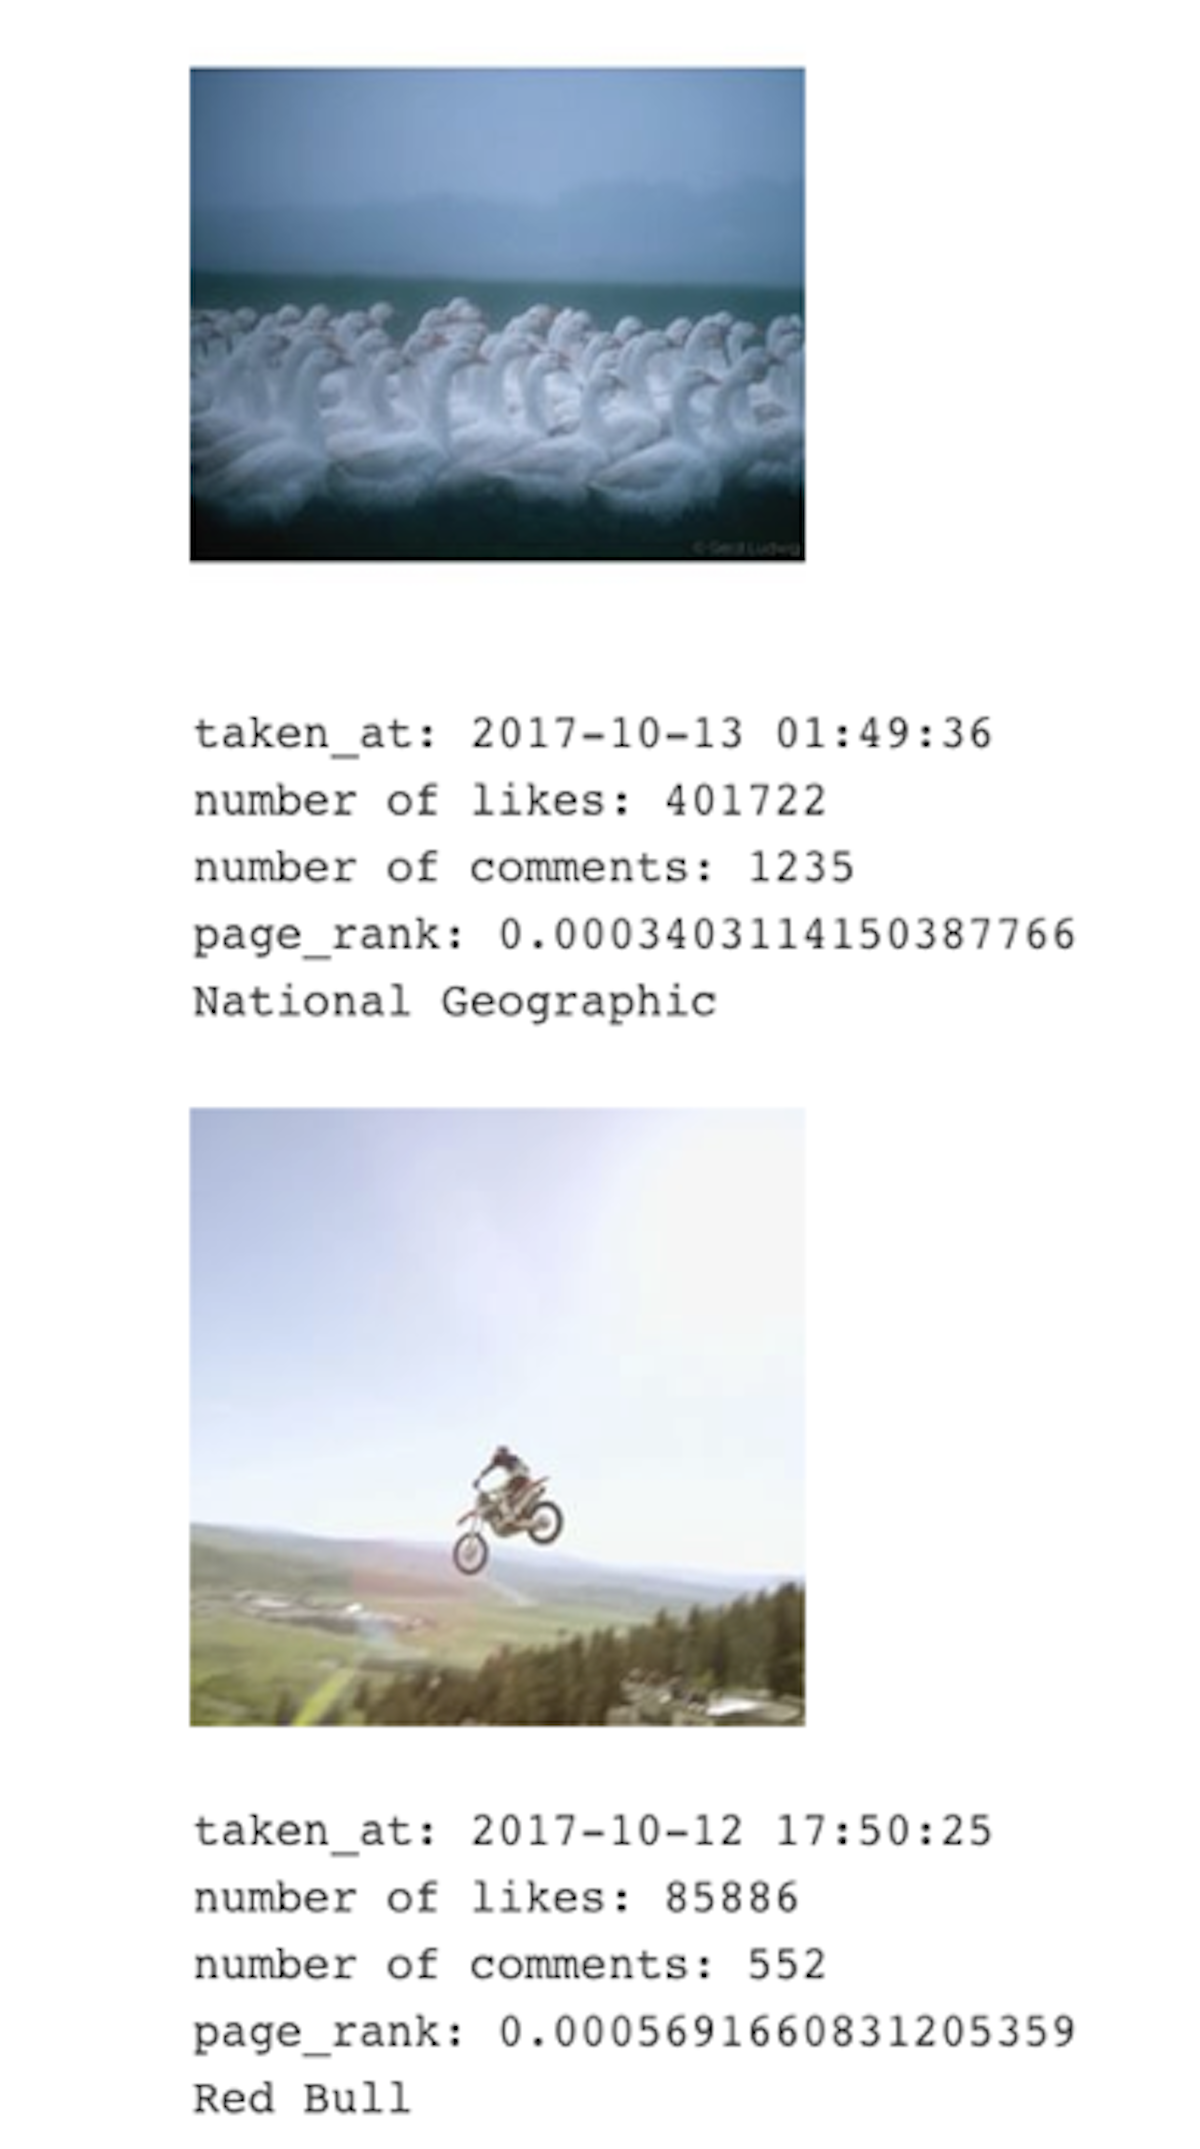
We can take the same approach as before by calculating the relative score of each photo of friends of friends. To do this, we’d start with the first social graph that we calculated...but that has over 24K nodes and I’m too lazy to wait for all the data. Instead, let's grab photos of friends of friends whose posts I’ve ‘liked’. This drops the number of nodes down to just over 1,500 which, depending on your internet speed, is the perfect amount of time for a coffee break. There are a couple minor tweaks to the above code that are needed to deal with the extended user base, but most of the code is the same. https://gist.github.com/astrotars/cfebc5a762db42f4f67ba65de1e251a7 The results ended up showing a lot of images from National Geographic and Red Bull, which I currently don’t follow, but might starting now! 
Step 5: Interest Based Analysis
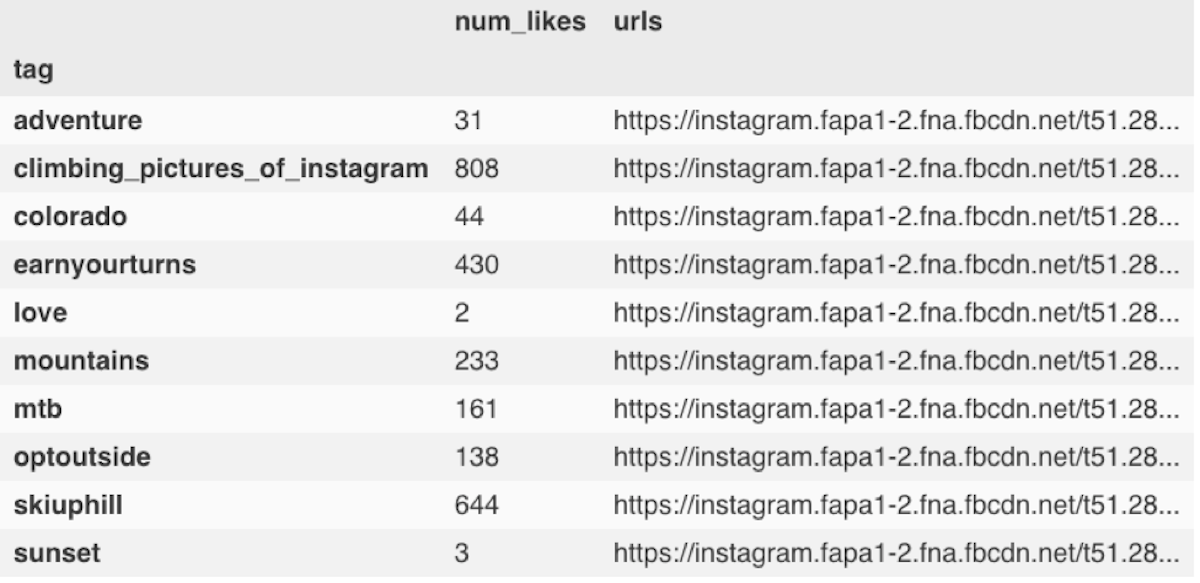
Interests haven’t yet been taken into account just yet. A nice aspect of Instagram is its rich set of #hashtags used to describe photos. Let’s see if we can discover my interests by using the hashtags of photos I’ve ‘liked’, and photos that I’ve been tagged in. While Instagram most likely uses click data alongside ‘like’ data, we don’t have access to clicks, so we’re going to stick with likes only. https://gist.github.com/astrotars/45560a6a4587333a9a59e1acf78edd61 Which gives: https://gist.github.com/astrotars/59c9fe8ce48d91edf5192a2015793993 Now let's grab the most popular images for each of those tags: https://gist.github.com/astrotars/34c5b33a231fbd5f21473781670a670c  Now that we have the most popular image from each hashtag feed, we can display them. https://gist.github.com/astrotars/5d7f0058429d30932039f44d5876db25
  Now let’s combine these two techniques.
Step 6: Putting it all Together
You may have noticed I was saving all the collected image data to top_graph_img and images_top_tags. Let’s combine them using a fairly naive technique, random sampling: https://gist.github.com/astrotars/c02c138fe66ea116f41197e719f198f2  That’s not too shabby! I personally find some of those photos pretty cool, but it definitely could be better. Ways to improve the discovery engine:
- With access to the entire social graph, we could run a similar analysis with weights between nodes, determined by the number of likes and comments.
- Combine click data alongside ‘like’ data to take advantage of implicit feedback and engagement metrics. This can be extremely useful for downgrading more clickbait style posts that don’t have very many likes, and showing interests of users who don’t tend to ‘like’ very often.
- Calculate image features using Convolutional Neural Nets. Remove the final dense layers, then calculate and display similar images to those the user has liked based on those features. Integrate Facebook’s social network to display images of people you're connected with.
- Use Matrix Factorization to see if we can recommend content. You could even use image features and hashtags to construct feature vectors for hybrid techniques.
- Use natural language processing (NLP) and clustering techniques to find similar hashtags (even ones with emoji’s!). This provides normalization of hashtags (bike vs biking) and similarity metrics (nature vs mountain)
This is by no means is an exhaustive list, so if you have any other ideas please let me know! For more information on discovery engines, check out our personalization page or schedule a demo to learn more about Stream’s personalized feeds. Happy building!

