Before you dive in, make sure you’ve read Building an Avengers Chat Application for Android (Part 1), where we cover foundational concepts like the app’s architecture, Gradle setup, integrating Stream, and more.
Once you’ve caught up, you can dive into part two, where you’ll learn to further customize your chat app and add more complex chat functionality.
Resources 👇
You can also refer to the links below for additional help:
- The AvengersChat GitHub repository (anyone can contribute!)
- Stream’s Android Chat SDK for messaging with Kotlin
- Stream’s Android Chat messaging Tutorial
Gradle Setup
Before getting started, make sure you’ve imported the Stream Android UI component SDK into your project. If you’ve imported it already, you can skip this step.
1234567891011repositories {
    google()
    mavenCentral()
    maven { url "https://jitpack.io" }
    jcenter()
}

dependencies {
    // Stream Chat Android SDK
    implementation "io.getstream:stream-chat-android-ui-components:4.24.0"
}
Note: To see the latest version of the chat SDK, check out Stream’s GitHub releases page.
Set Up Your Stream Account
In Part 1 of this tutorial, you covered how to integrate Stream into your application. But, if you still need to set up your account, just check out Your First Steps with Stream Chat on Android.
Build a Live Streaming Screen
Let’s dive into building the live streaming screen in the example below:
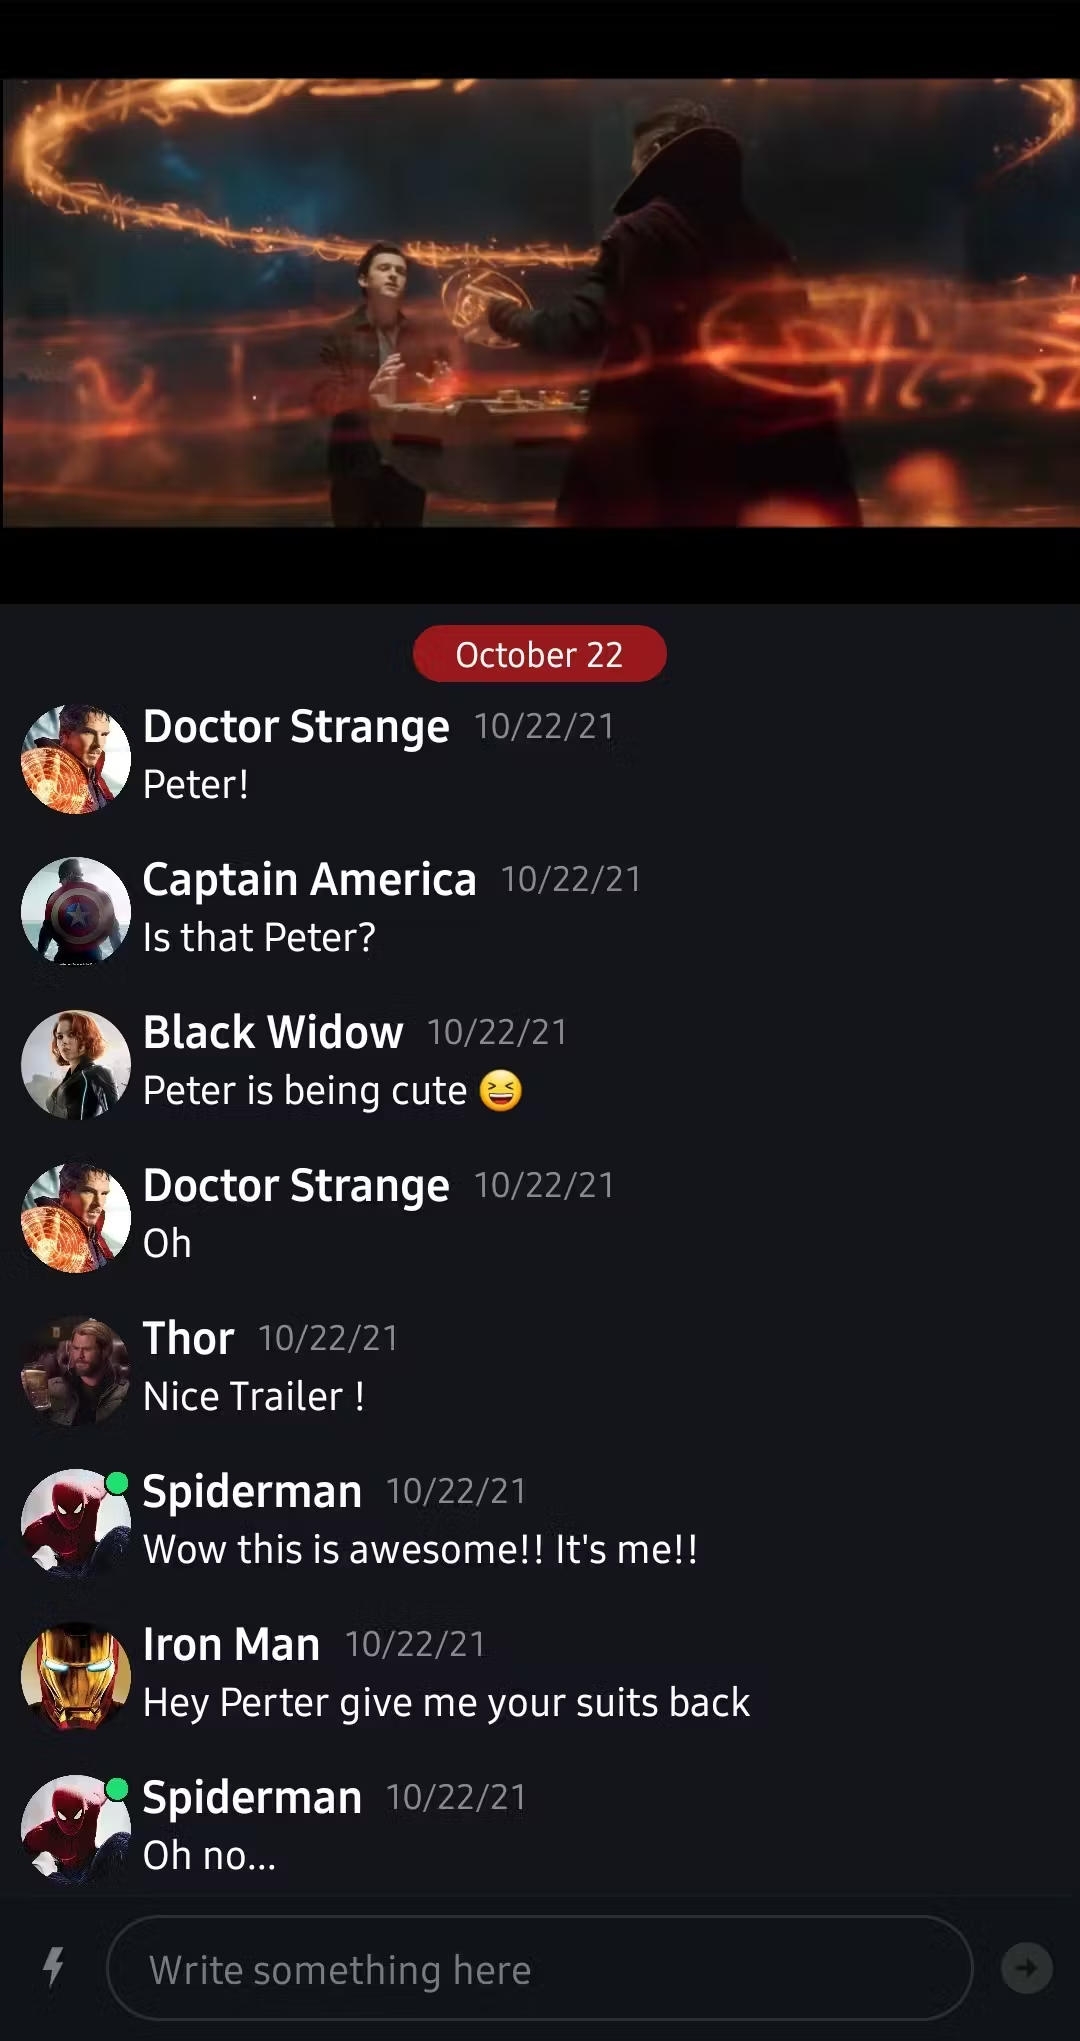
The LiveFragmentStream screen consists of three primary components: YoutubePlayerView, MessageListView, and MessageInputView.
- YoutubePlayerView renders a specific video that is uploaded on Youtube.
- MessageListView renders a list of messages and displays new messages in real-time.
- MessageInputView handles the message input, as well as attachments and Giphy.
This tutorial will walk you through each component step by step.
Build a Youtube Video Player Section
First, you will build the Youtube Video Player:
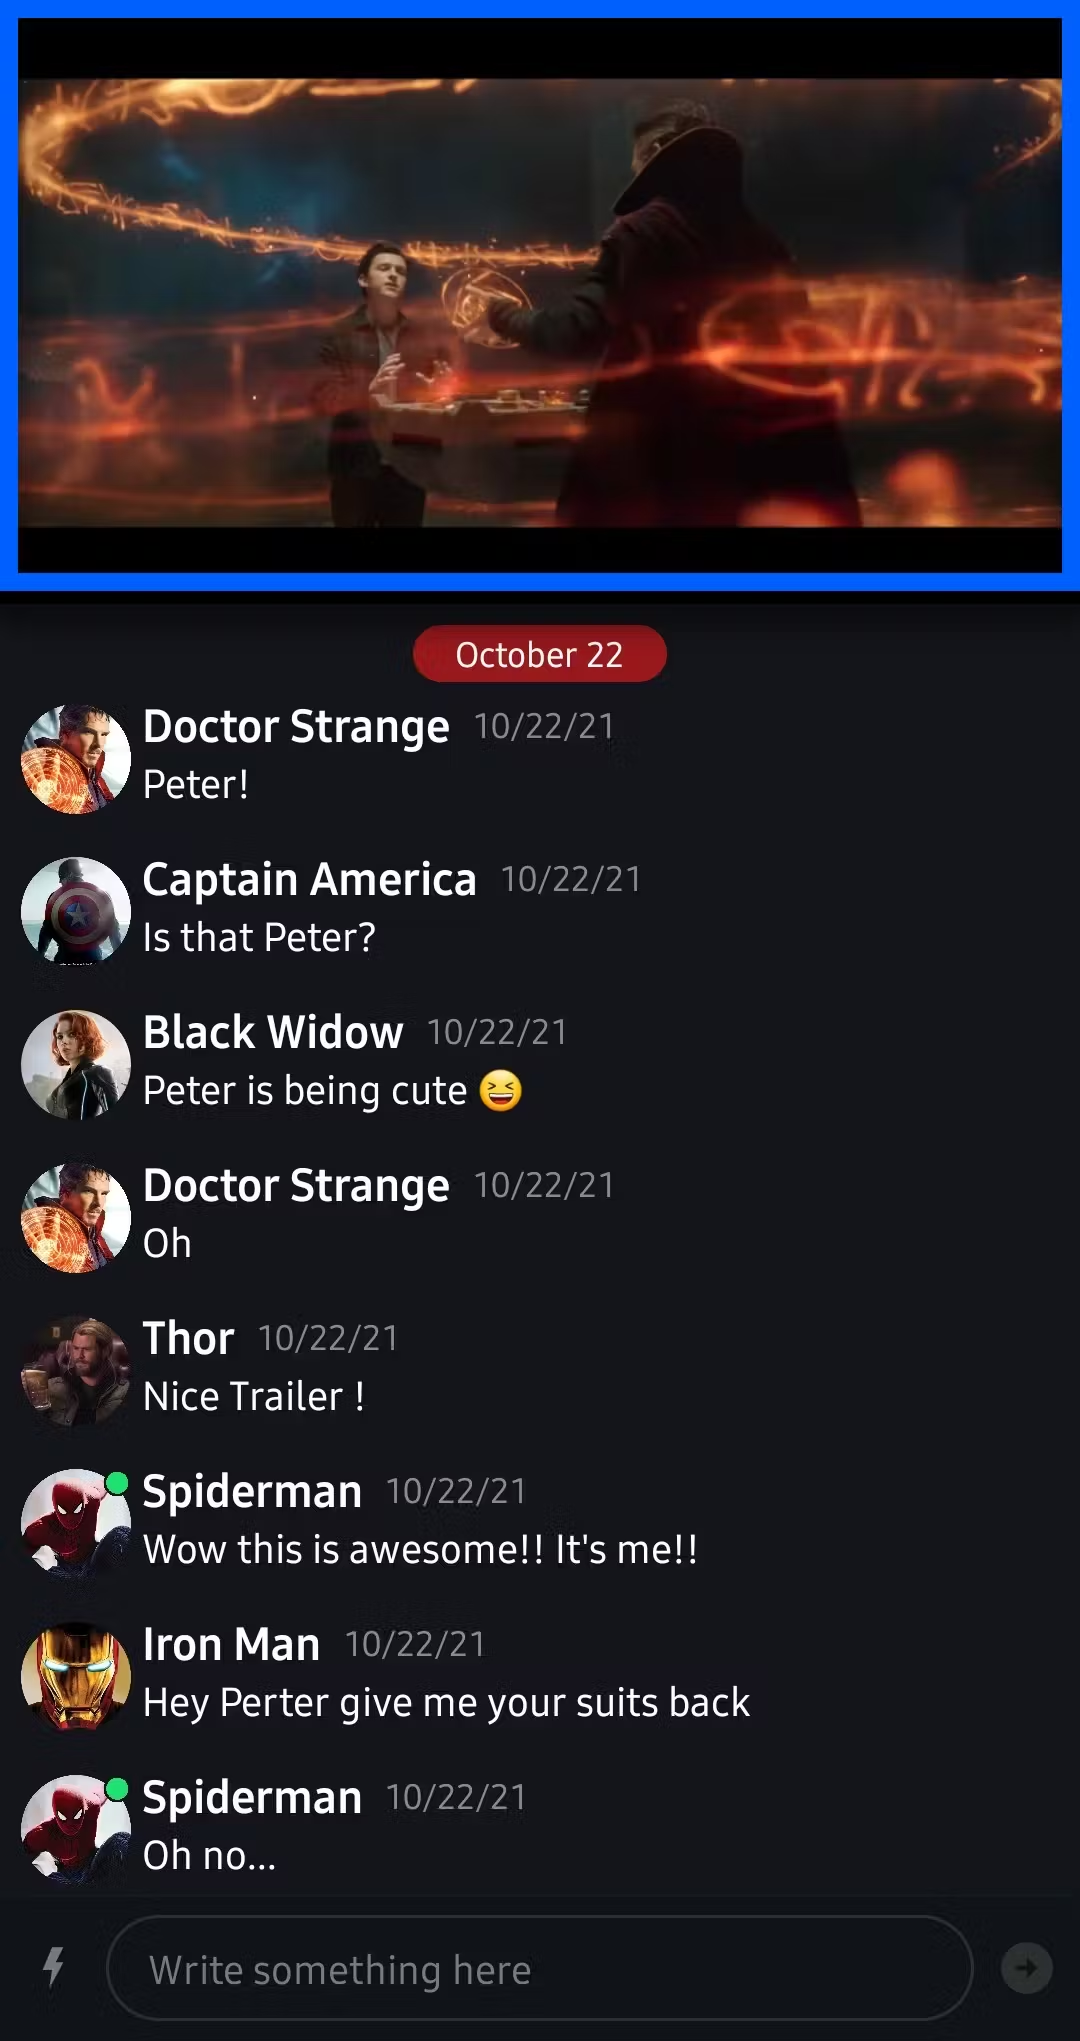
Before you go further, import the android-youtube-player into your project. Add the below dependency for your app-level build.gradle file:
123dependencies {
  implementation “com.pierfrancescosoffritti.androidyoutubeplayer:core:10.0.5”
}
1234567891011121314151617<androidx.constraintlayout.widget.ConstraintLayout
        android:layout_width="match_parent"
        android:layout_height="match_parent"
        android:background="@color/background">

        <com.pierfrancescosoffritti.androidyoutubeplayer.core.player.views.YouTubePlayerView
            android:id="@+id/youtubePlayerView"
            android:layout_width="0dp"
            android:layout_height="230dp"
            android:clickable="false"
            app:enableAutomaticInitialization="false"
            app:layout_constraintEnd_toEndOf="parent"
            app:layout_constraintStart_toStartOf="parent"
            app:layout_constraintTop_toTopOf="parent"
            app:showFullScreenButton="false" />

</androidx.constraintlayout.widget.ConstraintLayout>
You can initialize the YoutubePlayerView with two instances of AbstractYouTubePlayerListener and IFramePlayerOptions:
12345678910111213141516override fun onViewCreated(view: View, savedInstanceState: Bundle?) {
  super.onViewCreated(view, savedInstanceState)

  val playListener = object : AbstractYouTubePlayerListener() {
    override fun onReady(youTubePlayer: YouTubePlayer) {
      youTubePlayer.loadVideo(videoId = videoId, startSeconds = 0f)
    }
  }

  val playerOptions = IFramePlayerOptions.Builder()
        .controls(0)
        .rel(0)
        .build()

  binding.youtubePlayerView.initialize(playListener, false, playerOptions)
}
If you’d like to customize the listener and options to your tastes, check out the android-youtube-player repository.
AvengersChat Examples
The AvengersChat example shows you how to reduce initialization codes for YouTubePlayerView on your Activity or Fragment by using DataBinding, as seen in the example below:
12345@JvmStatic
@BindingAdapter("playYoutubeVideo")
fun bindPlayYoutubeVideo(youTubePlayerView: YouTubePlayerView, videoId: String) {
  // initializes YouTubePlayerView
}
After creating the BindingAdapter function, you can use it on your layout:
123456<com.pierfrancescosoffritti.androidyoutubeplayer.core.player.views.YouTubePlayerView
    android:id="@+id/youtubePlayerView"
    android:layout_width="0dp"
    android:layout_height="230dp"
    app:playYoutubeVideo="@{video}"
    app:showFullScreenButton="false" />
Build a Live Chat Section
Now, you will build a live chat section consisting of the MessageListView and MessageInputView components:
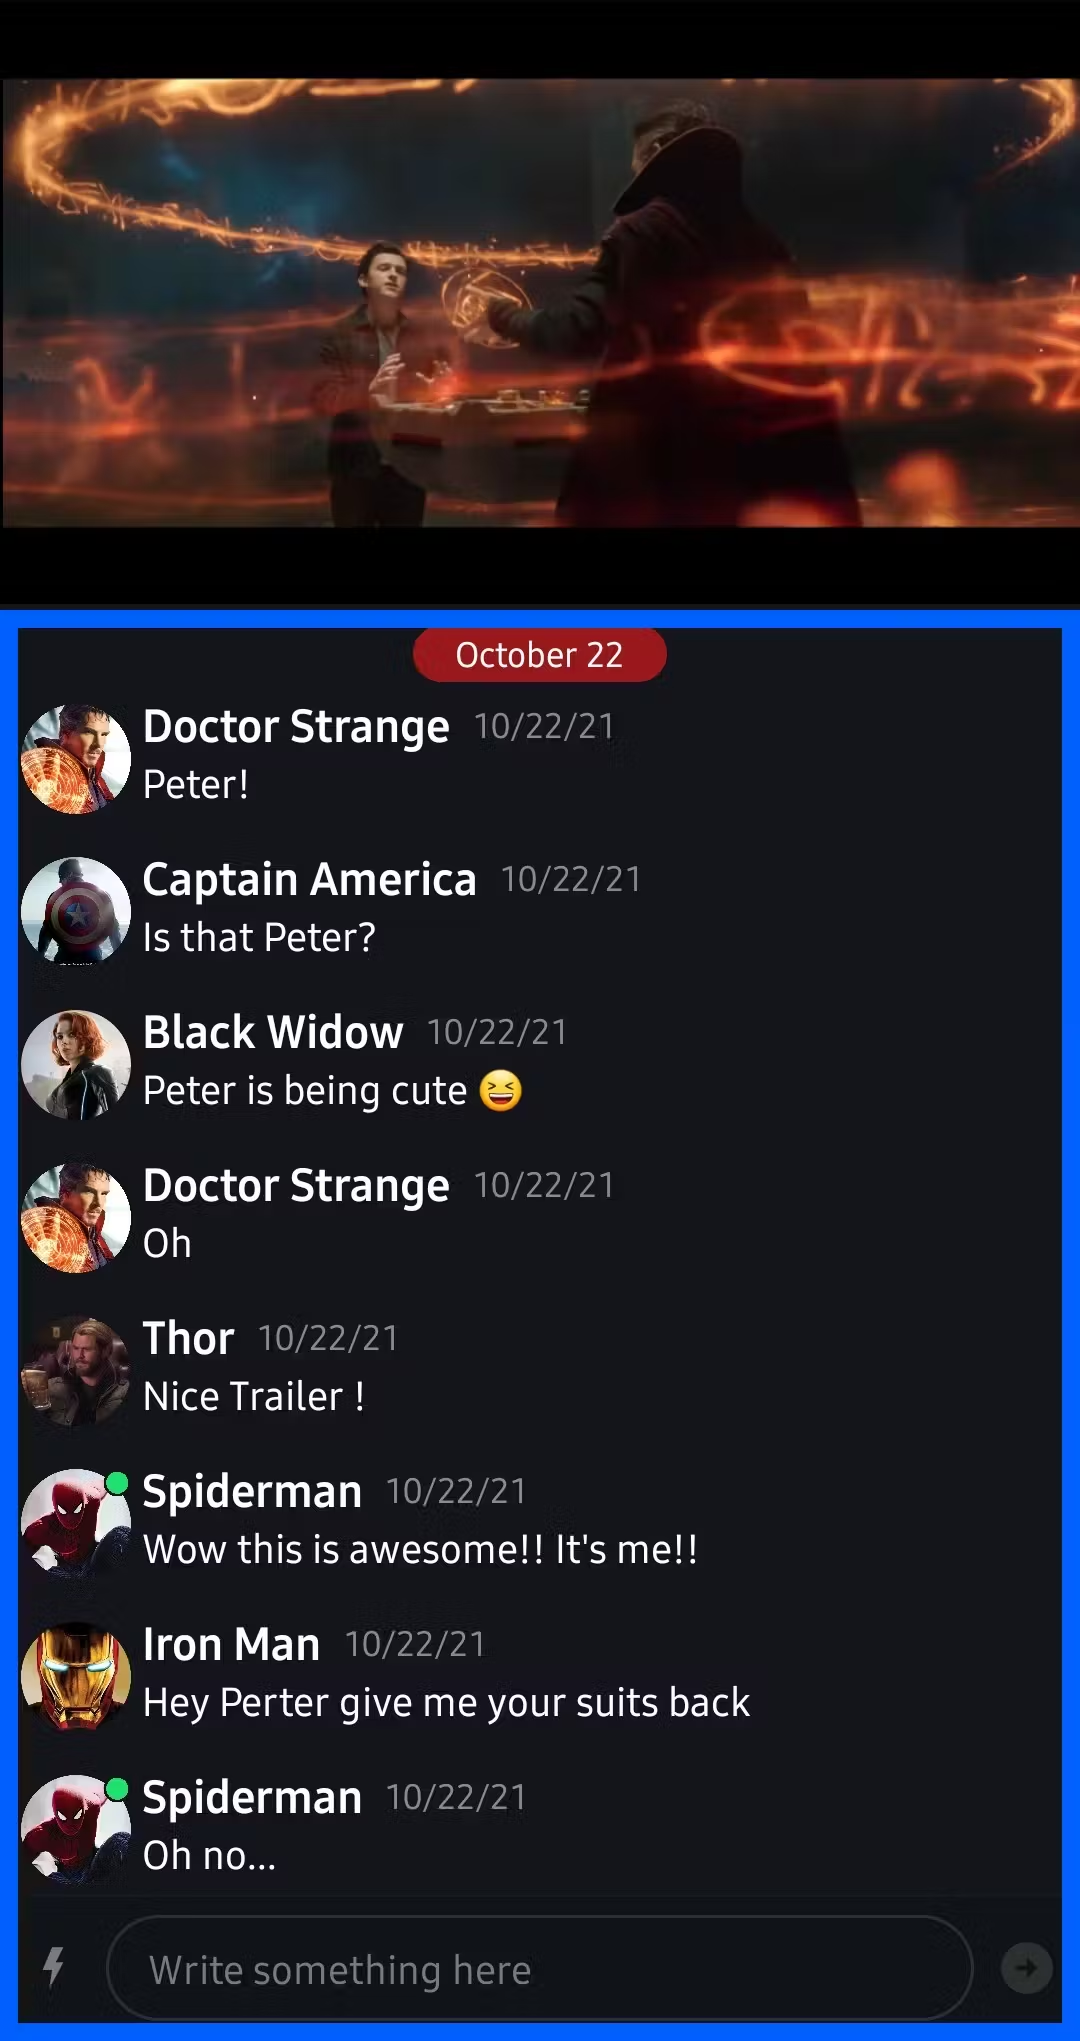
In Part 1 of this tutorial, you built a message list screen, which looks very similar to this section.
There is one difference from the example in Part 1, though: There‘s no MessageListHeaderView on the live streaming screen. In the below example, there is:
1234567891011121314151617181920212223242526272829303132333435363738394041424344<androidx.constraintlayout.widget.ConstraintLayout
        android:layout_width="match_parent"
        android:layout_height="match_parent"
        android:background="@color/background">

        <com.pierfrancescosoffritti.androidyoutubeplayer.core.player.views.YouTubePlayerView
            android:id="@+id/youtubePlayerView"
            android:layout_width="0dp"
            android:layout_height="230dp"
            android:clickable="false"
            app:enableAutomaticInitialization="false"
            app:layout_constraintEnd_toEndOf="parent"
            app:layout_constraintStart_toStartOf="parent"
            app:layout_constraintTop_toTopOf="parent"
            app:playYoutubeVideo="@{video}"
            app:showFullScreenButton="false" />

        <io.getstream.chat.android.ui.message.list.MessageListView
            android:id="@+id/messageListView"
            android:layout_width="0dp"
            android:layout_height="0dp"
            android:clipToPadding="false"
            app:layout_constraintBottom_toTopOf="@+id/messageInputView"
            app:layout_constraintEnd_toEndOf="parent"
            app:layout_constraintStart_toStartOf="parent"
            app:layout_constraintTop_toBottomOf="@id/youtubePlayerView"
            app:streamUiBackgroundColor="@color/stream_ui_white_smoke"
            app:streamUiFlagMessageConfirmationEnabled="true"
            app:streamUiMessageTextColorDateSeparator="@color/white"
            app:streamUiMessageTextSizeUserName="15sp"
            app:streamUiMessageTextStyleUserName="bold"
            app:streamUiMuteUserEnabled="false"
            app:streamUiPinMessageEnabled="true" />

        <io.getstream.chat.android.ui.message.input.MessageInputView
            android:id="@+id/messageInputView"
            android:layout_width="0dp"
            android:layout_height="wrap_content"
            app:layout_constraintBottom_toBottomOf="parent"
            app:layout_constraintEnd_toEndOf="parent"
            app:layout_constraintStart_toStartOf="parent"
            app:streamUiAttachButtonEnabled="false" />

</androidx.constraintlayout.widget.ConstraintLayout>
Business Logic
The business logic is also very similar to the example in Part 1. This example shows how to bind the layout with ViewModels on LiveStreamFragment.
123456789101112// initializes ViewModels
private val args: MessageListFragmentArgs by navArgs()
private val factory = MessageListViewModelFactory(args.cid)
private val messageListViewModel: MessageListViewModel by viewModels { factory }
private val messageInputViewModel: MessageInputViewModel by viewModels { factory }

override fun onViewCreated(view: View, savedInstanceState: Bundle?) {
    super.onViewCreated(view, savedInstanceState)

    messageListViewModel.bindView(binding.messageListView, viewLifecycleOwner)
    messageInputViewModel.bindView(binding.messageInputView, viewLifecycleOwner)
}
AvengersChat Examples
Check out LiveStreamFragment in AvengersChat with the code below:
123private val streamMessageListComponent: StreamUIComponent by streamMessageListComponent(
        cidProvider = { args.info.cid }
    )
This example reuses the StreamMessageListUIComponent that you built in the Part 1 tutorial. By reusing this component, you can significantly reduce repetition in similar layouts.
The streamMessageListComponent extension initializes StreamUIComponent, as well as receives a cidProvider lambda function. The cidProvider will be executed lazily for initializing MessageListViewModelFactorty. And they will be bound with layouts by calling the bindLayout method.
123456override fun onViewCreated(view: View, savedInstanceState: Bundle?) {
  super.onViewCreated(view, savedInstanceState)

  // initializes and bind layouts to Stream message list UI components.
  streamMessageListComponent.bindLayout(binding.root)
}
One of the biggest differences from the Part 1 tutorial is that you don’t need to call an initialization method like initIds(args.cid) for the StreamMessageListComponent. So, you can abstract those components with your own interface like a StreamUIComponent.
Customize Message Styles on The Live Streaming Screen
As you may have noticed already, the styles of the live streaming screen and channel message screen are a little bit different. Now, let’s jump into customizing the styles of message items on the live streaming screen.
MessageListView provides an API for creating custom ViewHolders. To use your own ViewHolder:
- Create your own custom XML layout.
- Implement a ViewHolder Factory that extends MessageListItemViewHolderFactory.
- Create a new instance of the factory and set it on MessageListView.
1. Create an XML Layout
First, you need to create your own custom XML layout like the below example:
item_live_message.xml
https://gist.github.com/skydoves/78516757885bcb273076687b382d7f76#file-item_live_message-xml
The layout consists of an AvatarView, and a few TextViews to compose the message item. You will use this layout to implement a custom MessageListItemViewHolderFactory.
2. Create a ViewHolder Factory
Next, you need to create a custom ViewHolder Factory that extends MessageListItemViewHolderFactory like in the example below:
123456789101112131415161718192021222324252627282930313233class LivestreamMessageItemVhFactory : MessageListItemViewHolderFactory() {

    override fun createViewHolder(
        parentView: ViewGroup,
        viewType: Int
    ): BaseMessageItemViewHolder<out MessageListItem> {
        return when (viewType) {
            MessageListItemViewType.PLAIN_TEXT -> PlainTextViewHolder(parentView)
            else -> super.createViewHolder(parentView, viewType)
        }
    }

    private class PlainTextViewHolder(
        parentView: ViewGroup,
        private val binding: ItemLiveMessageBinding = ItemLiveMessageBinding.inflate(
            LayoutInflater.from(parentView.context),
            parentView,
            false
        ),
    ) : BaseMessageItemViewHolder<MessageListItem.MessageItem>(binding.root) {

        override fun bindData(
            data: MessageListItem.MessageItem,
            diff: MessageListItemPayloadDiff?
        ) {
            binding.apply {
                this.data = data
                localDate = data.localDate(root.context)
                executePendingBindings()
            }
        }
    }
}
The LivestreamMessageItemVhFactory customizes a message list item for each item type (especially PLANE_TEXT). If you’d like to customize other types, like deleted messages, date dividers, or attachments, then you can create your own ViewHolders for each type of MessageListItemViewType.
3. Create a new instance of the factory and set it on
MessageListView
Finally, you can just create an instance of the LivestreamMessageItemVhFactory and set it on MessageListView. That’s it!
1234override fun onViewCreated(view: View, savedInstanceState: Bundle?) {
        super.onViewCreated(view, savedInstanceState)
       binding.messageListView.setMessageViewHolderFactory(LivestreamMessageItemVhFactory())
    }
Congratulations! 🎉 You've finished building your own live streaming screen. If you’d like to learn more about customizing messages, you can check out Custom Message Views as well.
Theming Stream UI Components
Now, take a look at how to theme Stream UI Components. You can customize themes in the following ways:
- Adding attributes to the UI Components in your XML layout.
- Applying global theming by using the TransformStyle object.
- Using Android themes to style all Views globally.
Note: Be careful when using multiple theming approaches. Themes are applied first, then XML attributes, then style transformations. Values applied later will override previously set values.
XML Attributes
You can customize your UI components independently by setting attributes on them in your XML layouts. The example below shows you how to customize the MessageListView in your XML layout:
fragment_live_stream.xml
https://gist.github.com/skydoves/4b77d5f599123a9109d6cf20caba925e#file-fragment_live_stream-xml
In the above example, there are a few custom attributions like streamUiMessageTextColorDateSeparator and streamUiMessageTextSizeUserName. By setting these custom attributes, you can customize each View independently.
Style Transformations
You can configure styles programmatically by overriding the corresponding StyleTransformer from the TrensformStyle object.
Note: You have to set up any custom
StyleTransformerinstances before theViewinstances are initialized, otherwise they won't take effect.
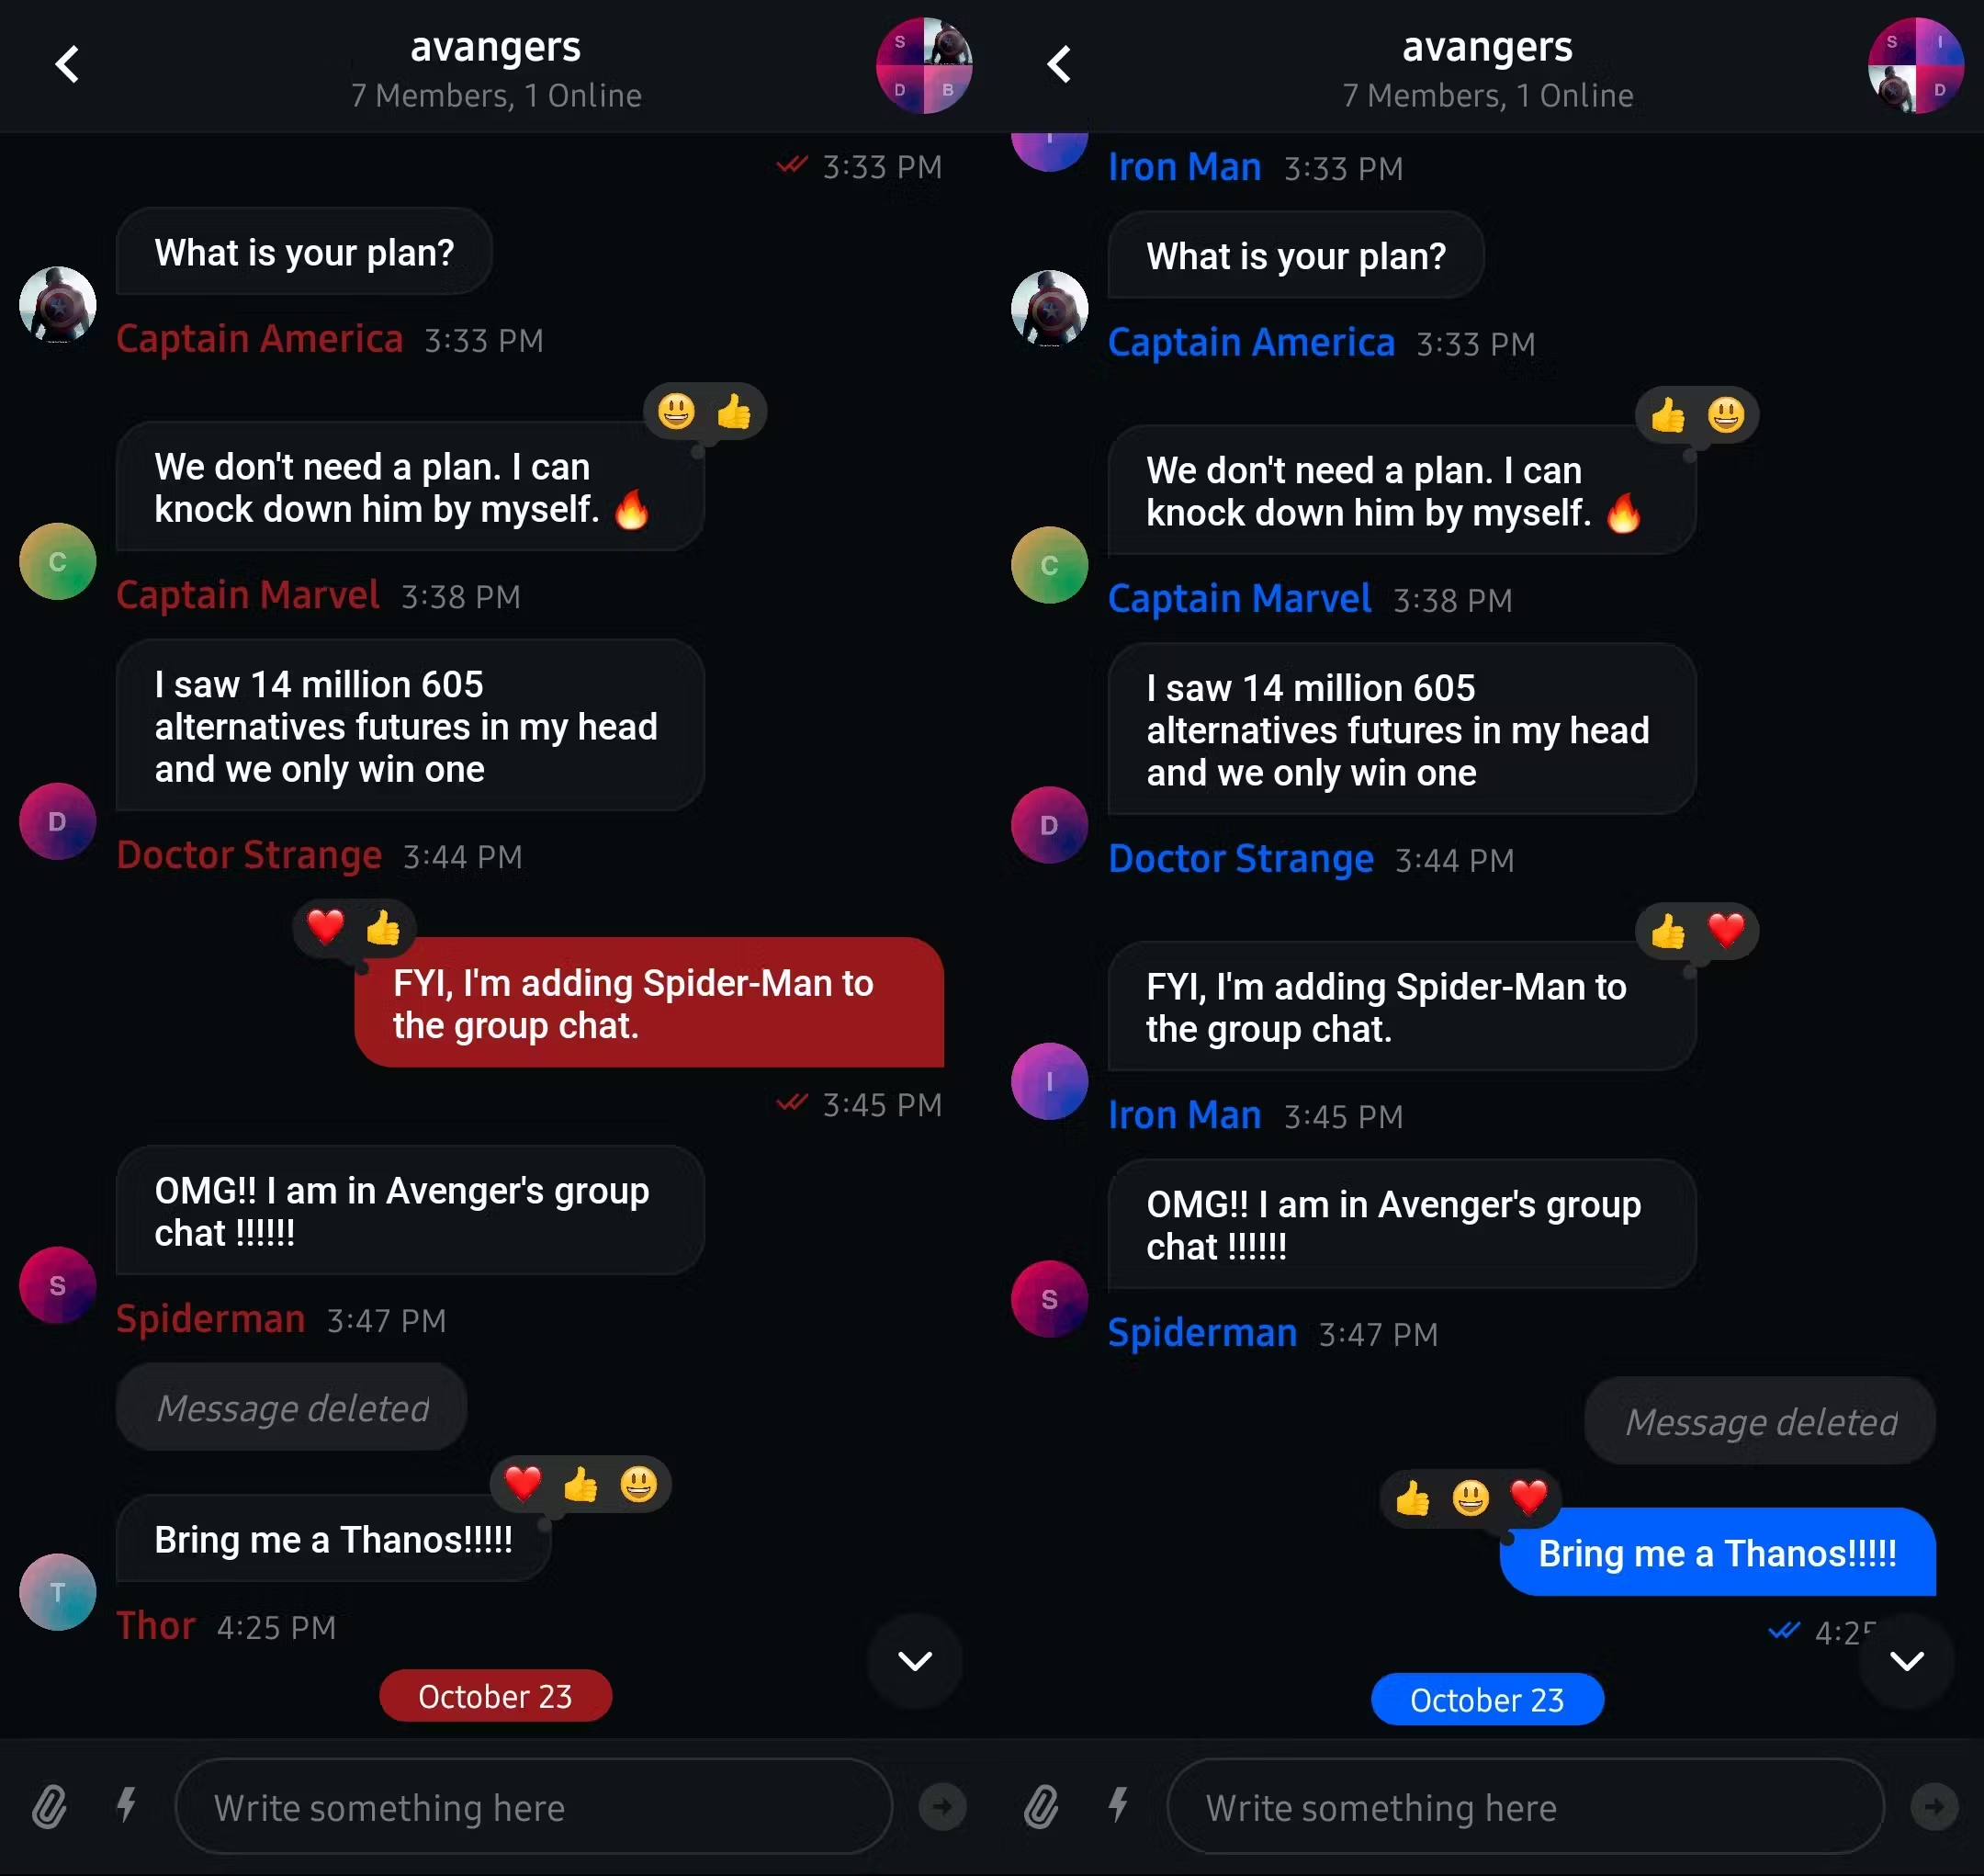
In AvengersChat, StreamGlobalStyles updates the styles when the user chooses a hero. This allows the user to apply different color styles by a chosen hero like the example below:
12345678910111213141516171819202122232425262728293031323334353637383940object StreamGlobalStyles {

    /**
     * updates and unifies the Stream UI components color themes.
     */
    fun updatePrimaryColorGlobalStyles(@ColorInt color: Int) {
        TransformStyle.channelListStyleTransformer =
            StyleTransformer { channelListStyle ->
                channelListStyle.copy(
                    indicatorReadIcon = channelListStyle.indicatorReadIcon.apply {
                        setTint(color)
                    },
                )
            }

        TransformStyle.messageListItemStyleTransformer =
            StyleTransformer { messageListItemStyle ->
                messageListItemStyle.copy(
                    messageBackgroundColorMine = color,
                    dateSeparatorBackgroundColor = color,
                    textStyleDateSeparator = messageListItemStyle.textStyleDateSeparator,
                    textStyleUserName = messageListItemStyle.textStyleUserName.copy(
                        color = color
                    ),
                    iconIndicatorRead = messageListItemStyle.iconIndicatorRead.apply {
                        setTint(color)
                    }
                )
            }

        TransformStyle.messageInputStyleTransformer =
            StyleTransformer { messageInputStyle ->
                messageInputStyle.copy(
                    sendButtonEnabledIcon = messageInputStyle.sendButtonEnabledIcon.apply {
                        setTint(color)
                    }
                )
            }
    }
}
This example will render the following result:
Android Themes
You can also use Android themes to set attributes for the UI Components globally. This article won’t cover using Android themes, but you can check out the official documentation for theming if you want to learn more.
Wrapping Up
This concludes part two of the tutorial on building the AvengersChat application using the Stream Chat SDK.
This edition covered how to customize the Stream Chat SDK's UI Components. Stream SDK supports fully customizable options to build your customized application. Also, you can integrate them with modern Android architectures so anyone can build chat features easily.
Remember that AvengersChat is an open-source repository, so anyone can contribute to improving the code, design, architectures, or whatever. So, let’s build something awesome! 😎
Here are a few more links to help you with the tutorial:
- GitHub - The AvengersChat Open Source Repository
- GitHub - Official Stream’s Android Chat Open Source Repository
- Stream’s Android In-App Messaging Tutorial
- Stream’s Android Chat Client Docs
- Stream’s Android UI Components Docs
In the next part of the tutorial, you will learn how to customize UI components and build a live stream example. Specifically, you will cover:
- Customizing message reactions
- Implementing direct message dialog
- Implementing user profile dialog
If you’d like to stay up to date with Stream, follow us on Twitter @getstream_io for more great technical content. You can also reach the author @github_skydoves if you have any questions or feedback.
Happy coding!

