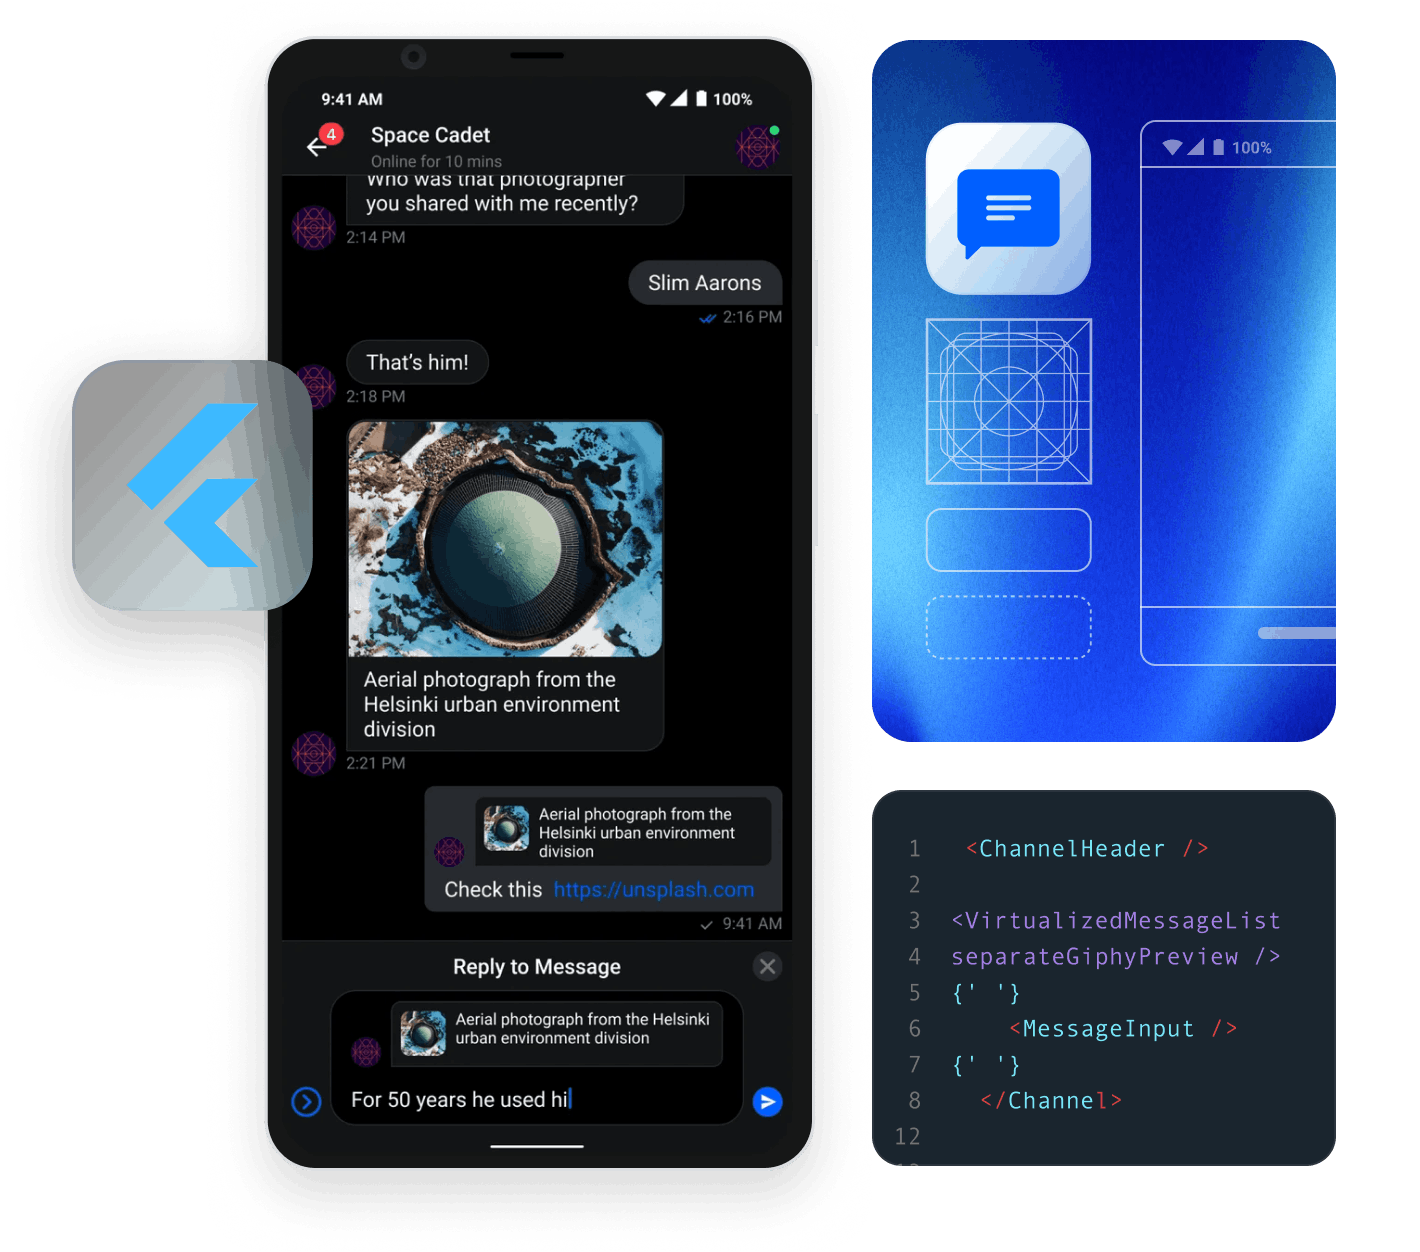
Flutter Chat SDK Setup
First of all we need to setup our new project and have a working development environment for Flutter. If you do not have Flutter or an IDE configured to work with it, we highly recommend following the Install and Set up an editor steps from the official documentation.
Please make sure you are using the latest version of Flutter from the stable channel:
12flutter channel stable
flutter upgrade
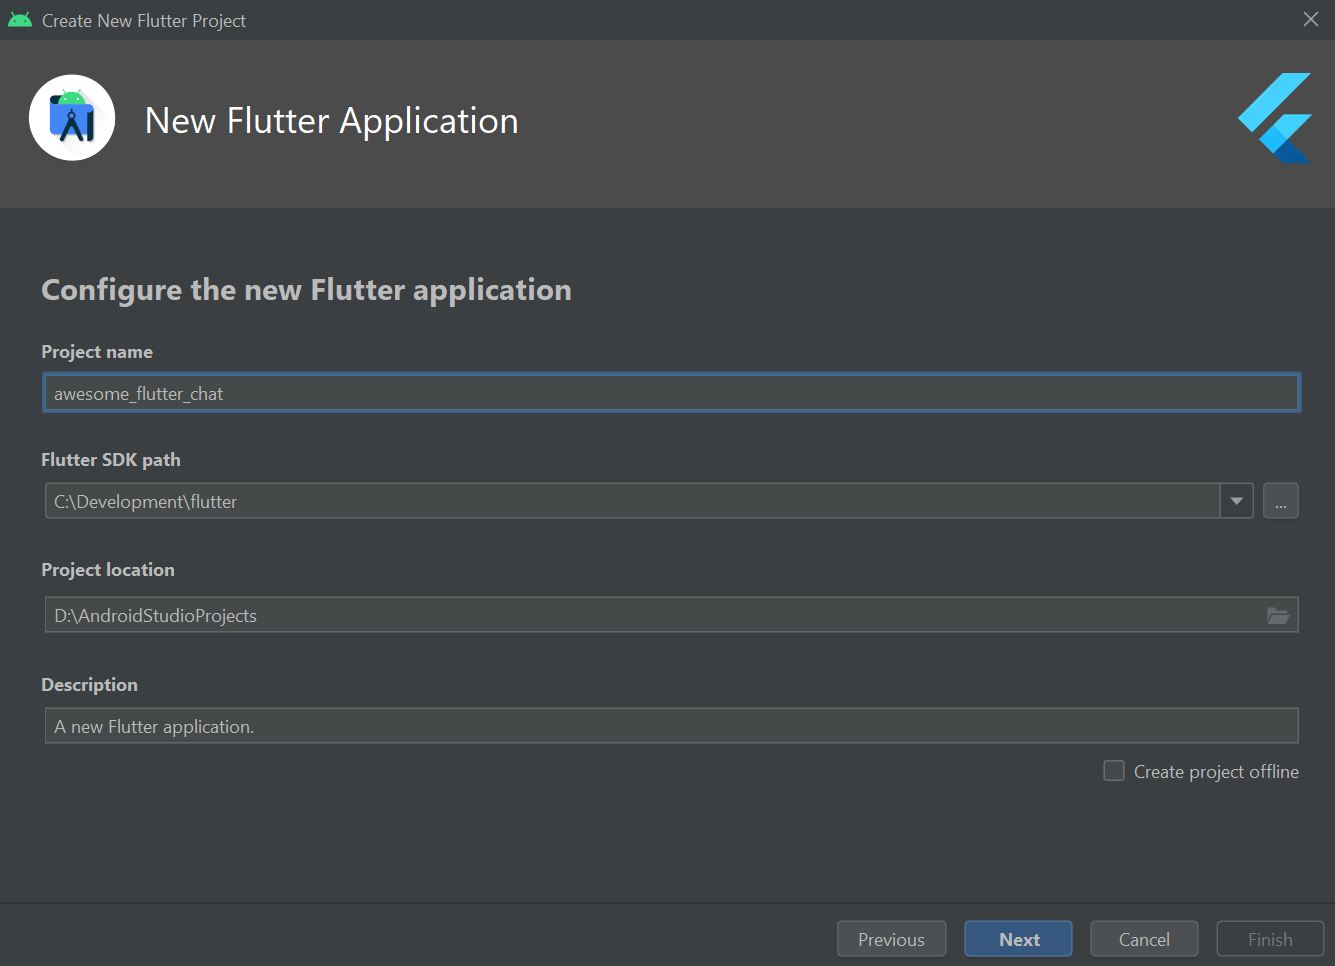
Now open your IDE and start a new Flutter application called awesome_flutter_chat. If you are using Android Studio (recommended) make sure to create the project as a Flutter application and keep all default settings.
Next step is to add stream_chat_flutter to your dependencies, to do that just open pubspec.yaml and add it inside the dependencies section.
12345dependencies:
  flutter:
    sdk: flutter

  stream_chat_flutter: ^6.0.0
Stream has several packages that you can use to integrate chat into your application.
In this tutorial, we will be using the stream_chat_flutter package which contains pre-built UI elements for you to use.
If you need more control over the UI, stream_chat_flutter_core provides bare-bones implementation with logic and controllers that you can use to build your own UI.
For the most possible control, the stream_chat package allows access to the low-level client.
Add Stream Chat to your Flutter application
Let’s start by adding the top-level Chat widget and initialize your application. There are three important things to notice that are common to all Flutter application using StreamChat:
- The Dart API client is initialized with your API Key
- The current user is set by calling connectUser on the client
- The client is then passed to the top-level StreamChat widget
StreamChat is an inherited widget and must be the parent of all Chat related widgets, we will cover later how you can leverage the inherited widget APIs to build more advanced customizations to your application.
Let’s open the main.dart file and replace its content with this:
12345678910111213141516171819202122232425262728293031323334353637383940414243444546474849505152535455565758596061626364656667686970717273747576777879808182838485868788899091import 'package:flutter/material.dart'; import 'package:stream_chat_flutter/stream_chat_flutter.dart'; void main() async { /// Create a new instance of [StreamChatClient] passing the apikey obtained from your /// project dashboard. final client = StreamChatClient( 'b67pax5b2wdq', logLevel: Level.INFO, ); /// Set the current user. In a production scenario, this should be done using /// a backend to generate a user token using our server SDK. /// Please see the following for more information: /// https://getstream.io/chat/docs/flutter-dart/tokens_and_authentication/?language=dart await client.connectUser( User(id: 'tutorial-flutter'), 'eyJhbGciOiJIUzI1NiIsInR5cCI6IkpXVCJ9.eyJ1c2VyX2lkIjoidHV0b3JpYWwtZmx1dHRlciJ9.S-MJpoSwDiqyXpUURgO5wVqJ4vKlIVFLSEyrFYCOE1c', ); /// Creates a channel using the type `messaging` and `flutterdevs`. /// Channels are containers for holding messages between different members. To /// learn more about channels and some of our predefined types, checkout our /// our channel docs: https://getstream.io/chat/docs/flutter-dart/creating_channels/?language=dart final channel = client.channel('messaging', id: 'flutterdevs'); /// `.watch()` is used to create and listen to the channel for updates. If the /// channel already exists, it will simply listen for new events. await channel.watch(); runApp( MyApp( client: client, channel: channel, ), ); } class MyApp extends StatelessWidget { /// To initialize this example, an instance of [client] and [channel] is required. const MyApp({ Key? key, required this.client, required this.channel, }) : super(key: key); /// Instance of [StreamChatClient] we created earlier. This contains information about /// our application and connection state. final StreamChatClient client; /// The channel we'd like to observe and participate. final Channel channel; Widget build(BuildContext context) { return MaterialApp( builder: (context, widget) { return StreamChat( client: client, child: widget, ); }, home: StreamChannel( channel: channel, child: const ChannelPage(), ), ); } } /// Displays the list of messages inside the channel class ChannelPage extends StatelessWidget { const ChannelPage({ Key? key, }) : super(key: key); Widget build(BuildContext context) { return Scaffold( appBar: const StreamChannelHeader(), body: Column( children: const <Widget>[ Expanded( child: StreamMessageListView(), ), StreamMessageInput(), ], ), ); } }
Please note that while Flutter can be used to build both mobile and web applications; in this tutorial we are going to focus on mobile, make sure when running the app you use a mobile device.
Let's have a look at what we've built so far:
- We set up the Chat Client with the API key
- We set the the current user for Chat with
StreamChatClient.connectUserand a pre-generated user token - We make
StreamChatthe root Widget of our application - We create a single ChannelPage widget under
StreamChatwith three widgets:StreamChannelHeader,StreamMessageListViewandStreamMessageInput
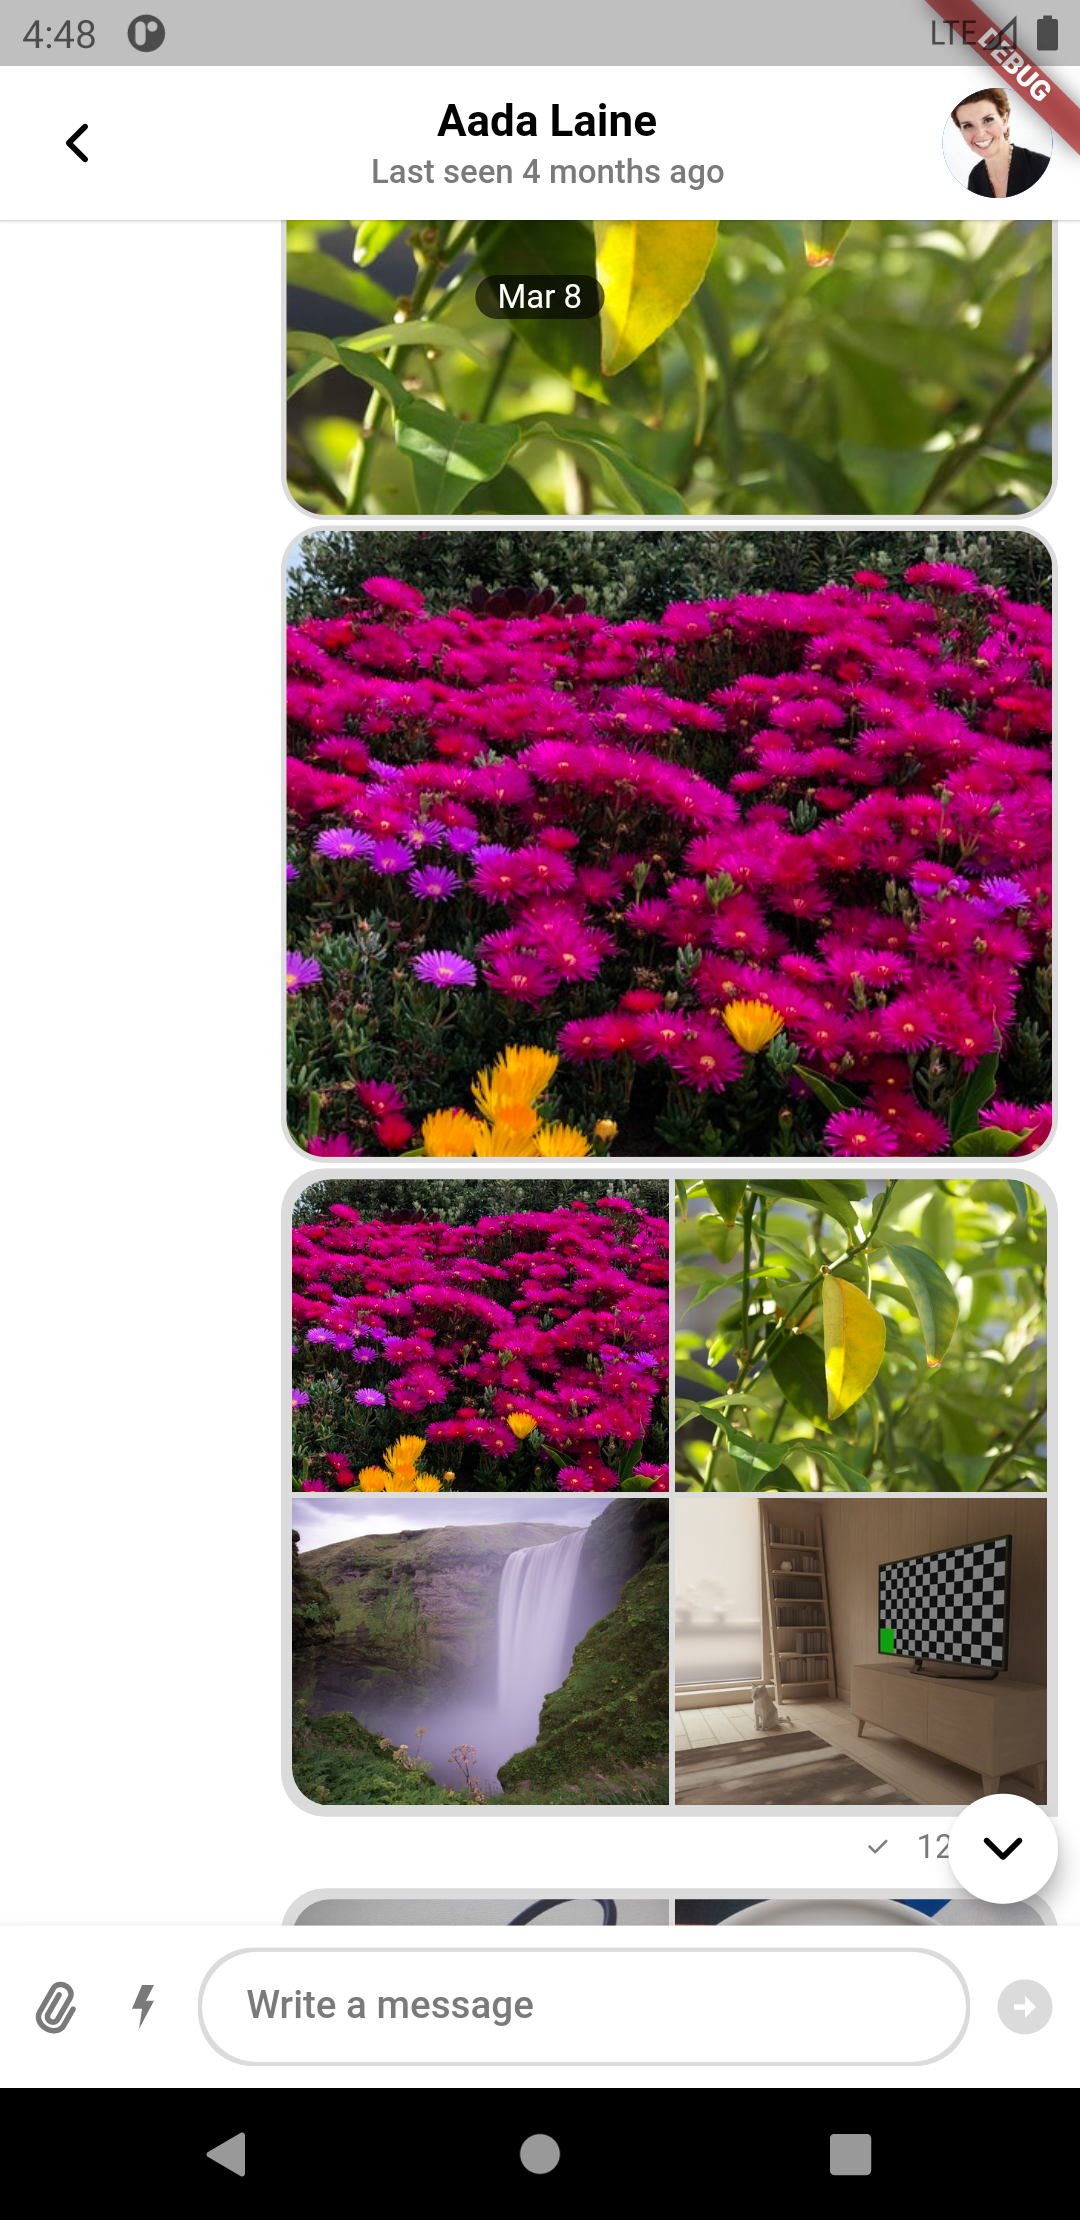
If you now run the simulator you will see a single channel UI.
Rich Messaging
The widgets we have dropped on our code earlier provide several rich interactions out of the box.
- URL previews
- User mentions
- Chat commands
- Image uploads
Multiple Conversations
Most chat applications handle more than just one single conversation. Apps like Facebook Messenger, Whatsapp and Telegram allows you to have multiple one to one and group conversations.
Let’s find out how we can change our application chat screen to display the list of conversations and navigate between them.
Note: the SDK uses Flutter’s Navigator to move from one route to another, this allows us to avoid any boiler-plate code. Of course you can take total control of how navigation works by customizing widgets like Channel and ChannelList.
Let’s open again main.dart and make some small changes:
123456789101112131415161718192021222324252627282930313233343536373839404142434445464748495051525354555657585960616263646566676869707172737475767778798081828384858687888990919293949596979899100101102103104105106107108109import 'package:flutter/material.dart'; import 'package:stream_chat_flutter/stream_chat_flutter.dart'; void main() async { final client = StreamChatClient( 'b67pax5b2wdq', logLevel: Level.INFO, ); await client.connectUser( User(id: 'tutorial-flutter'), 'eyJhbGciOiJIUzI1NiIsInR5cCI6IkpXVCJ9.eyJ1c2VyX2lkIjoidHV0b3JpYWwtZmx1dHRlciJ9.S-MJpoSwDiqyXpUURgO5wVqJ4vKlIVFLSEyrFYCOE1c', ); runApp( MyApp( client: client, ), ); } class MyApp extends StatelessWidget { const MyApp({ Key? key, required this.client, }) : super(key: key); final StreamChatClient client; Widget build(BuildContext context) { return MaterialApp( builder: (context, child) => StreamChat( client: client, child: child, ), home: const ChannelListPage(), ); } } class ChannelListPage extends StatefulWidget { const ChannelListPage({ Key? key, }) : super(key: key); State<ChannelListPage> createState() => _ChannelListPageState(); } class _ChannelListPageState extends State<ChannelListPage> { late final _listController = StreamChannelListController( client: StreamChat.of(context).client, filter: Filter.in_( 'members', [StreamChat.of(context).currentUser!.id], ), sort: const [SortOption('last_message_at')], limit: 20, ); void dispose() { _listController.dispose(); super.dispose(); } Widget build(BuildContext context) { return Scaffold( body: StreamChannelListView( controller: _listController, onChannelTap: (channel) { Navigator.of(context).push( MaterialPageRoute( builder: (context) { return StreamChannel( channel: channel, child: const ChannelPage(), ); }, ), ); }, ), ); } } class ChannelPage extends StatelessWidget { const ChannelPage({ Key? key, }) : super(key: key); Widget build(BuildContext context) { return Scaffold( appBar: const StreamChannelHeader(), body: Column( children: const <Widget>[ Expanded( child: StreamMessageListView(), ), StreamMessageInput(), ], ), ); } }
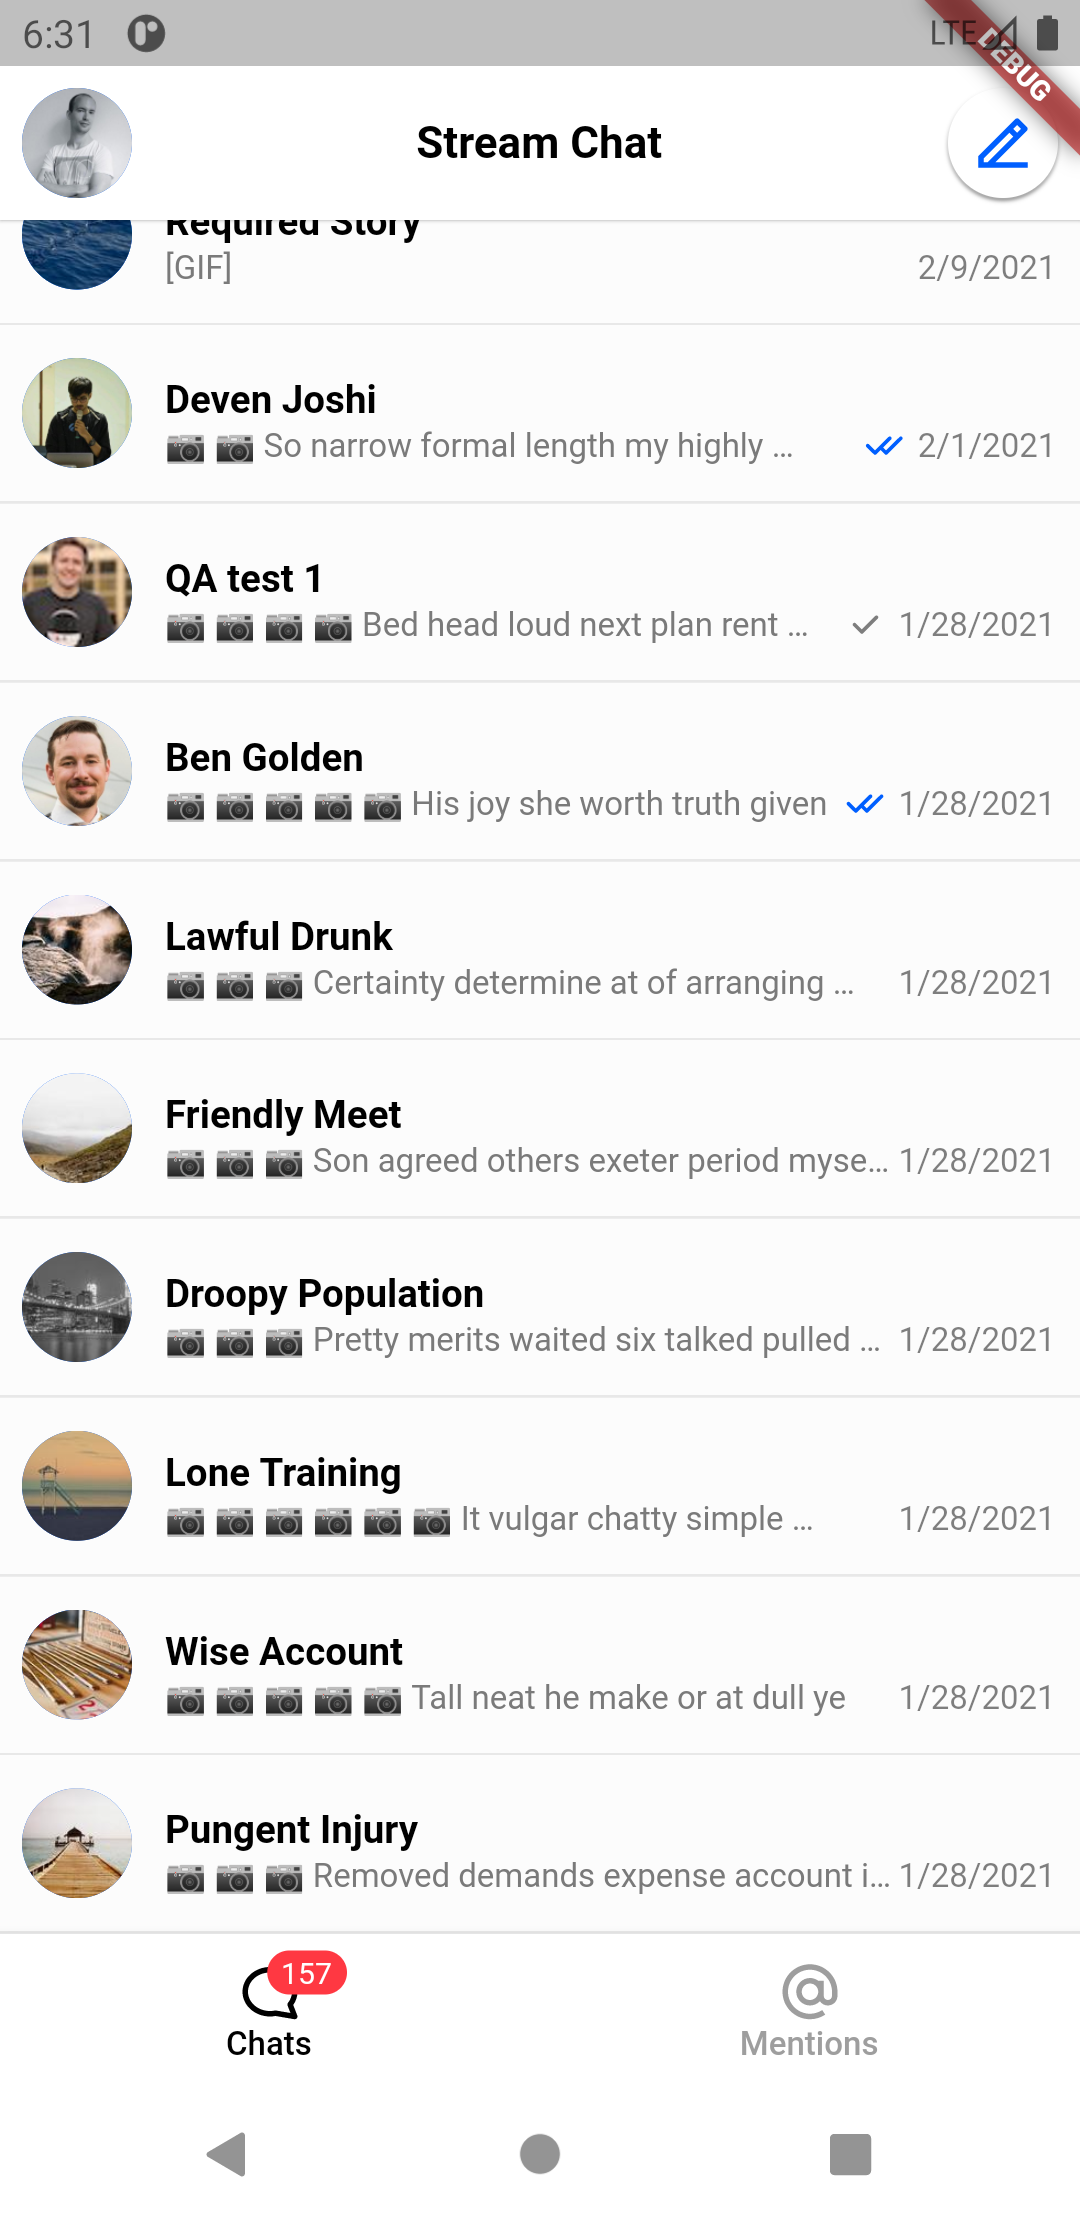
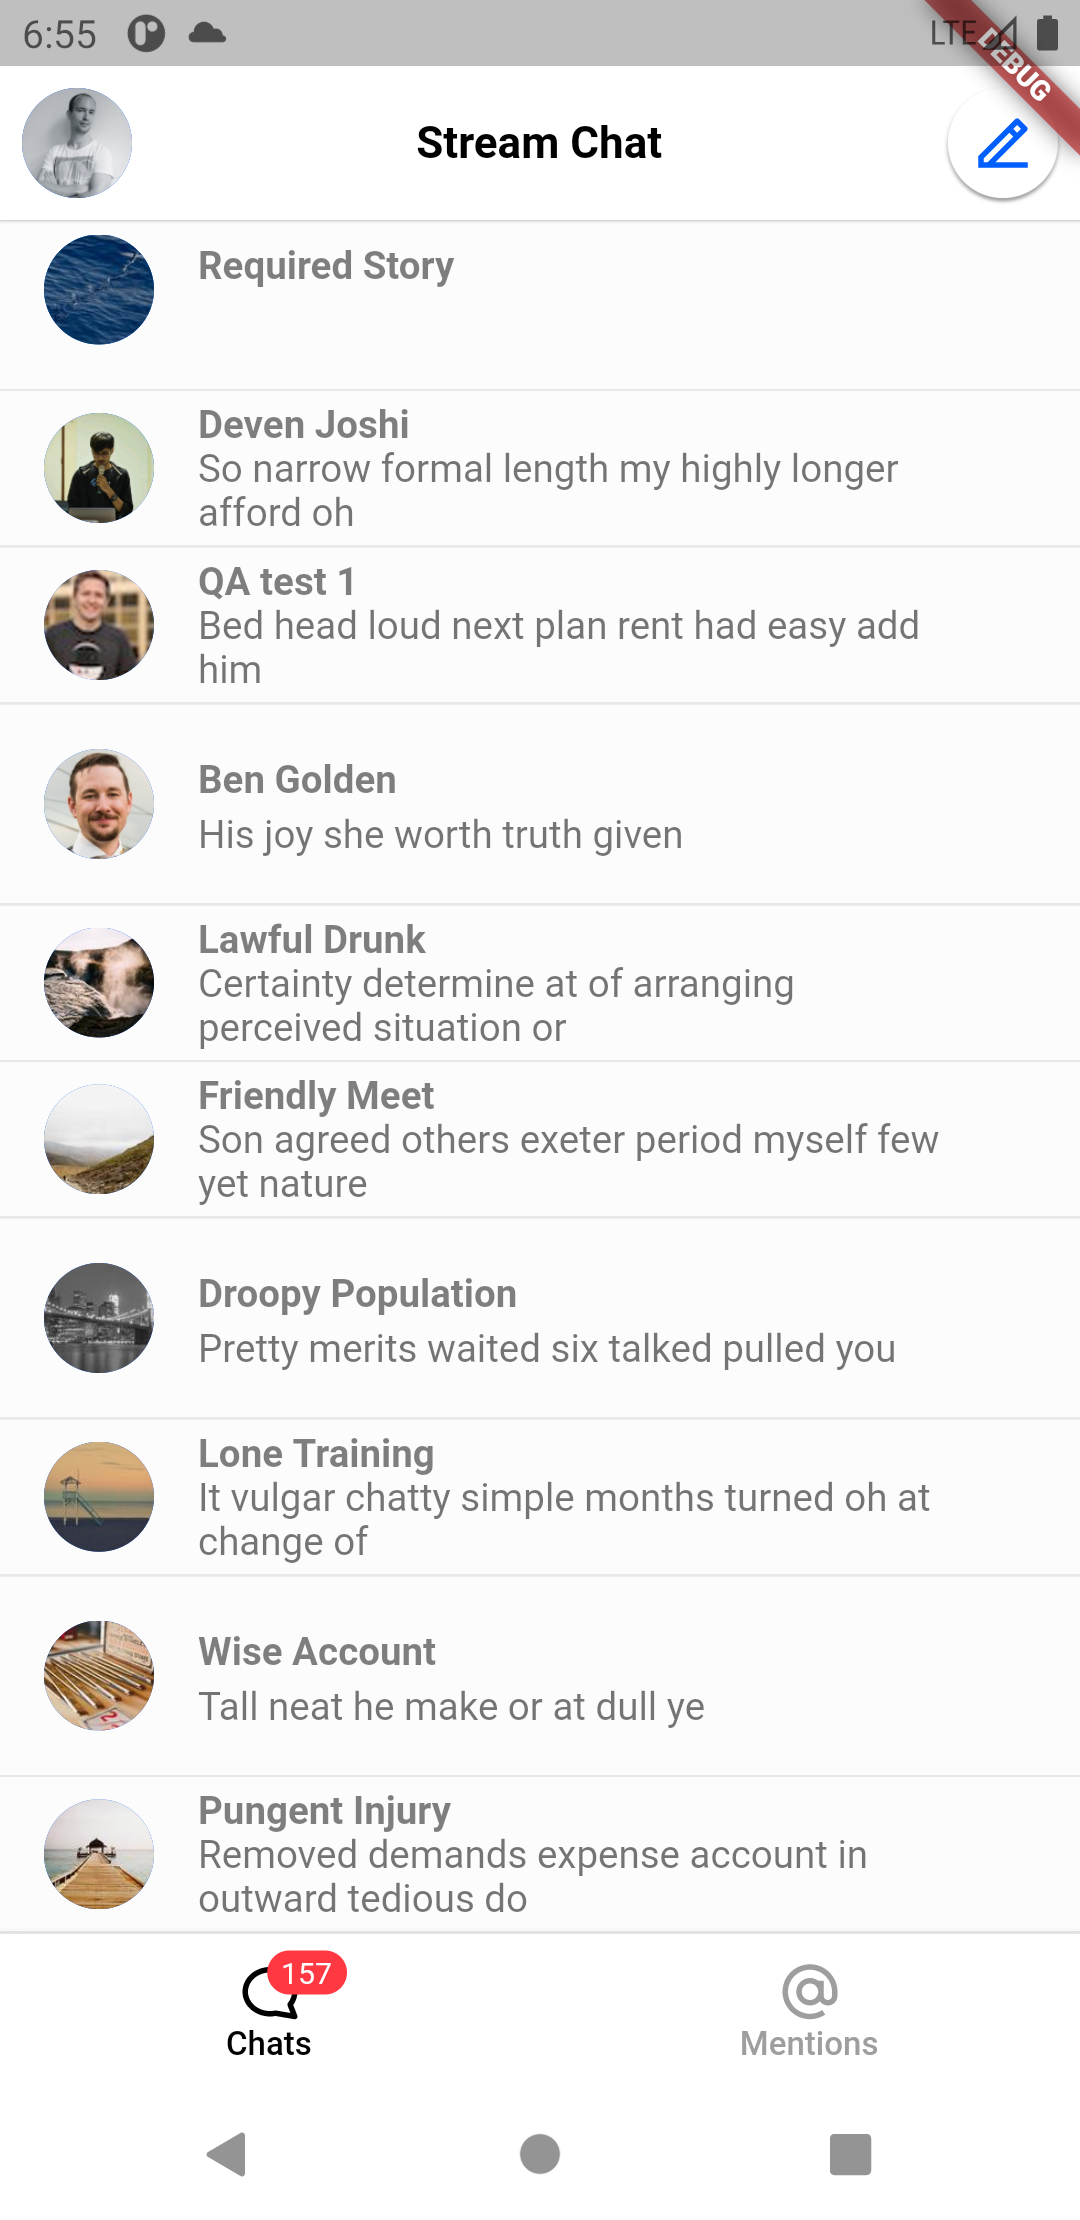
If you run your application now, you will see that the first screen shows a list of conversations, you can open each by tapping and go back to the list.
Every single widget involved in this UI can be customized or swapped with your own.
The ChannelListPage widget retrieves the list of channels based on a custom query and ordering as defined in the instance of the StreamChannelListController. In this case we are showing the list of channels the current user is a member and we order them based on the time they had a new message. StreamChannelListView handles pagination and updates automatically out of the box when new channels are created or when a new message is added to a channel.
Customize Channel Preview
So far you’ve learned how to use the default widgets. The library has been designed with composition in mind and to allow all common customizations to be very easy. This means that you can change any component in your application by swapping the default widgets with the ones you build yourself.
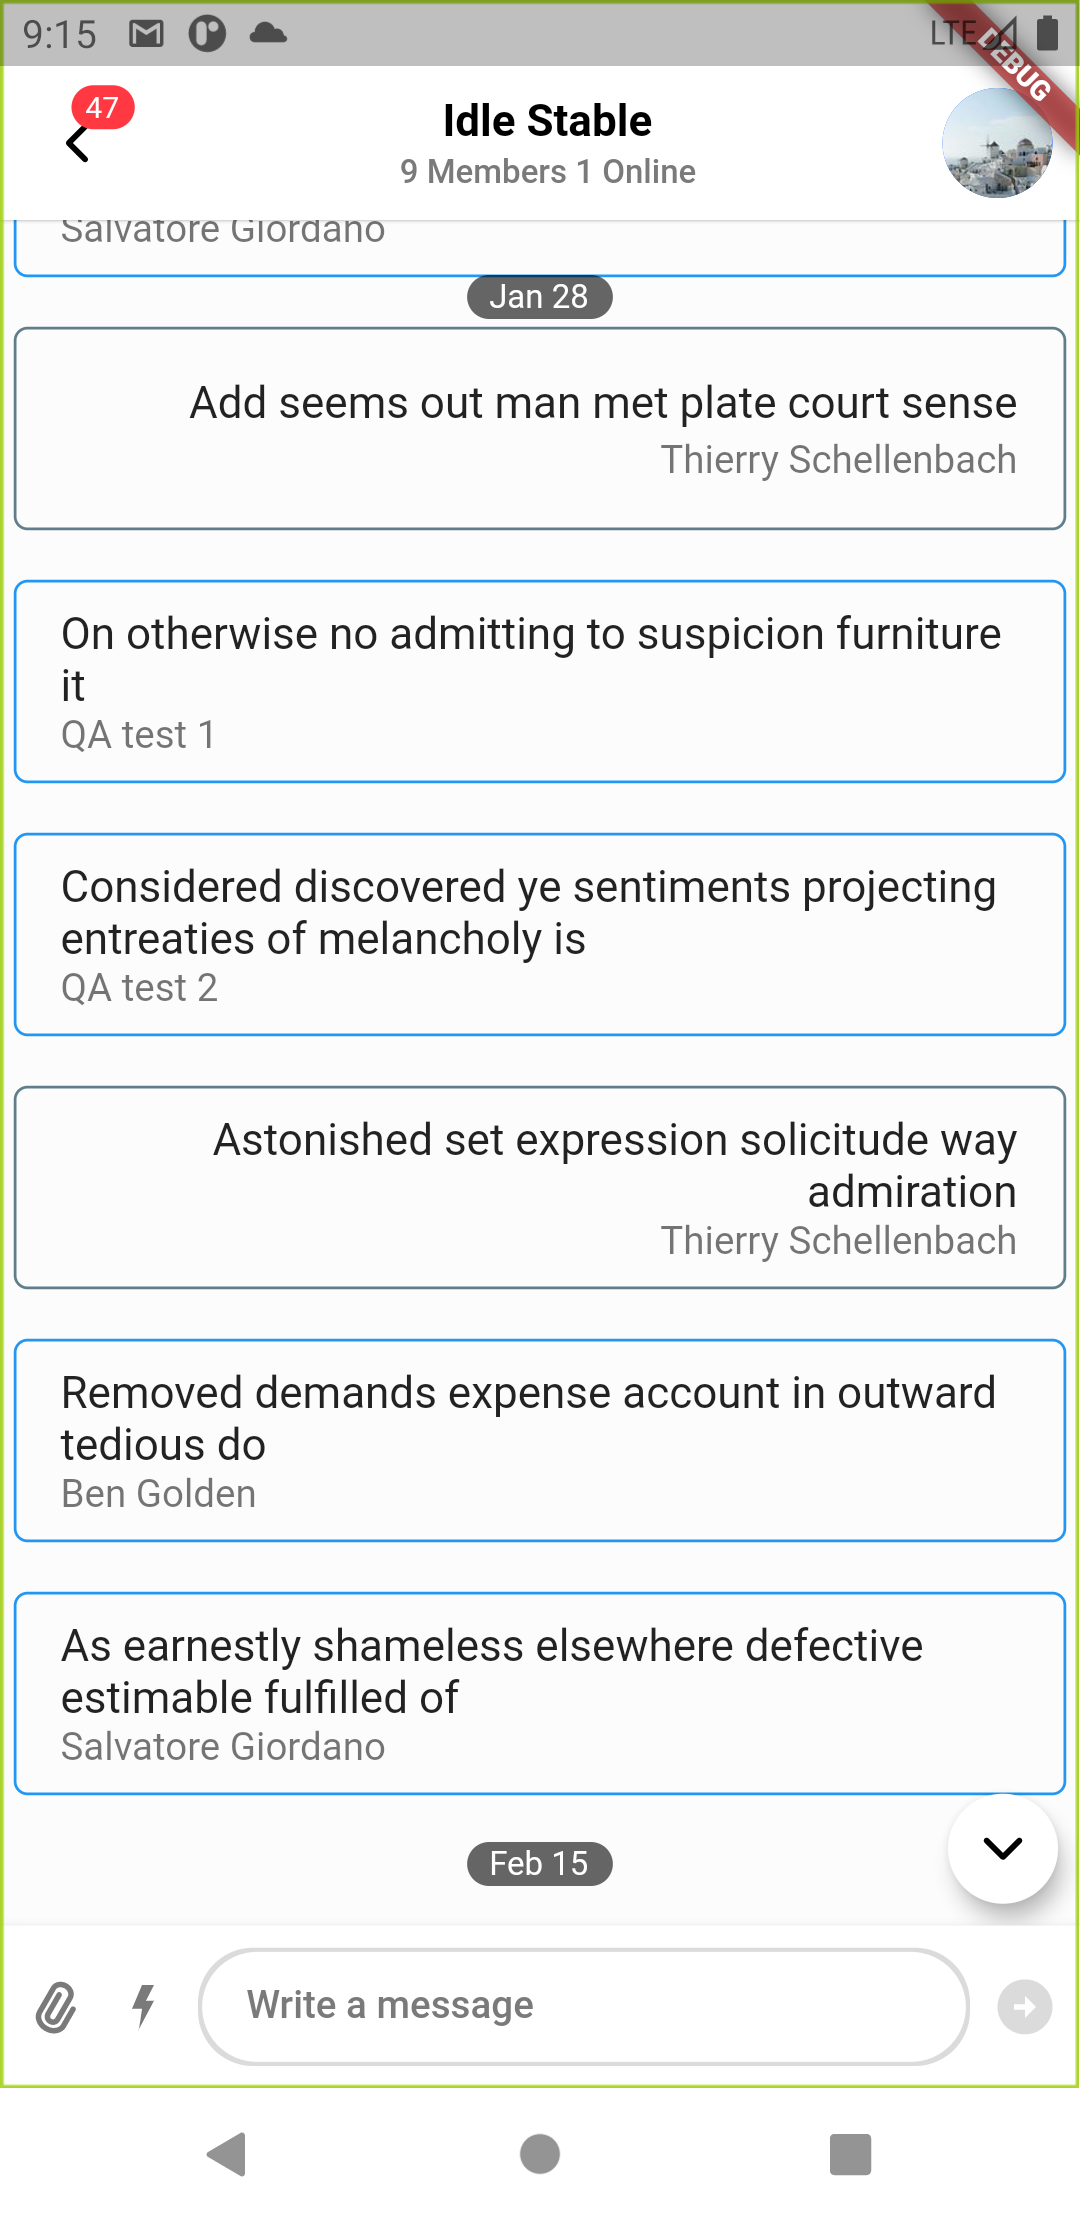
Let’s see how we can make some changes to the SDK’s UI components. We will start by changing how channel tiles are shown in the channel list and include the number of unread messages for each.
We're passing a custom widget to itemBuilder in the StreamChannelListView, this will override the default StreamChannelListTile and allows you to create one yourself.
12345678910111213141516171819202122232425262728293031323334353637383940414243444546474849505152535455565758596061626364656667686970717273747576777879808182838485868788899091class ChannelListPage extends StatefulWidget { const ChannelListPage({ Key? key, }) : super(key: key); State<ChannelListPage> createState() => _ChannelListPageState(); } class _ChannelListPageState extends State<ChannelListPage> { late final _listController = StreamChannelListController( client: StreamChat.of(context).client, filter: Filter.in_( 'members', [StreamChat.of(context).currentUser!.id], ), sort: const [SortOption('last_message_at')], limit: 20, ); void dispose() { _listController.dispose(); super.dispose(); } Widget build(BuildContext context) { return Scaffold( body: StreamChannelListView( controller: _listController, itemBuilder: _channelTileBuilder, onChannelTap: (channel) { Navigator.of(context).push( MaterialPageRoute( builder: (context) { return StreamChannel( channel: channel, child: const ChannelPage(), ); }, ), ); }, ), ); } Widget _channelTileBuilder(BuildContext context, List<Channel> channels, int index, StreamChannelListTile defaultChannelTile) { final channel = channels[index]; final lastMessage = channel.state?.messages.reversed.firstWhereOrNull( (message) => !message.isDeleted, ); final subtitle = lastMessage == null ? 'nothing yet' : lastMessage.text!; final opacity = (channel.state?.unreadCount ?? 0) > 0 ? 1.0 : 0.5; final theme = StreamChatTheme.of(context); return ListTile( onTap: () { Navigator.push( context, MaterialPageRoute( builder: (_) => StreamChannel( channel: channel, child: const ChannelPage(), ), ), ); }, leading: StreamChannelAvatar( channel: channel, ), title: StreamChannelName( channel: channel, textStyle: theme.channelPreviewTheme.titleStyle!.copyWith( color: theme.colorTheme.textHighEmphasis.withOpacity(opacity), ), ), subtitle: Text(subtitle), trailing: channel.state!.unreadCount > 0 ? CircleAvatar( radius: 10, child: Text(channel.state!.unreadCount.toString()), ) : const SizedBox(), ); } }
There are a couple interesting things we do in this widget:
- Instead of creating a whole new style for the channel name, we inherit the text style from the parent theme (
StreamChatTheme.of) and only change the color attribute - We loop over the list of channel messages to search for the first not deleted message(
channel.state.messages) - We retrieve the count of unread messages from channel.state
Message Threads
Stream Chat supports message threads out of the box. Threads allows users to create sub-conversations inside the same channel.
Using threaded conversations is very simple and mostly a matter of plugging the StreamMessageListView to another widget that renders the widget. To make this simple, such a widget only needs to build StreamMessageListView with the parent attribute set to the thread’s root message.
Here’s how the builder and the change to the channel page looks like:
123456789101112131415161718192021222324252627282930313233343536373839404142434445464748495051525354555657585960616263646566676869class ChannelPage extends StatelessWidget { const ChannelPage({ Key? key, }) : super(key: key); Widget build(BuildContext context) { return Scaffold( appBar: const StreamChannelHeader(), body: Column( children: <Widget>[ Expanded( child: StreamMessageListView( threadBuilder: (_, parentMessage) => ThreadPage( parent: parentMessage!, ), ), ), const StreamMessageInput(), ], ), ); } } class ThreadPage extends StatefulWidget { const ThreadPage({ Key? key, this.parent, }) : super(key: key); final Message? parent; State<ThreadPage> createState() => _ThreadPageState(); } class _ThreadPageState extends State<ThreadPage> { late final _controller = StreamMessageInputController( message: Message(parentId: widget.parent.id), ); void dispose() { _controller.dispose(); super.dispose(); } Widget build(BuildContext context) { return Scaffold( appBar: StreamThreadHeader( parent: widget.parent!, ), body: Column( children: <Widget>[ Expanded( child: StreamMessageListView( parentMessage: widget.parent, ), ), StreamMessageInput( messageInputController: _controller, ), ], ), ); } }
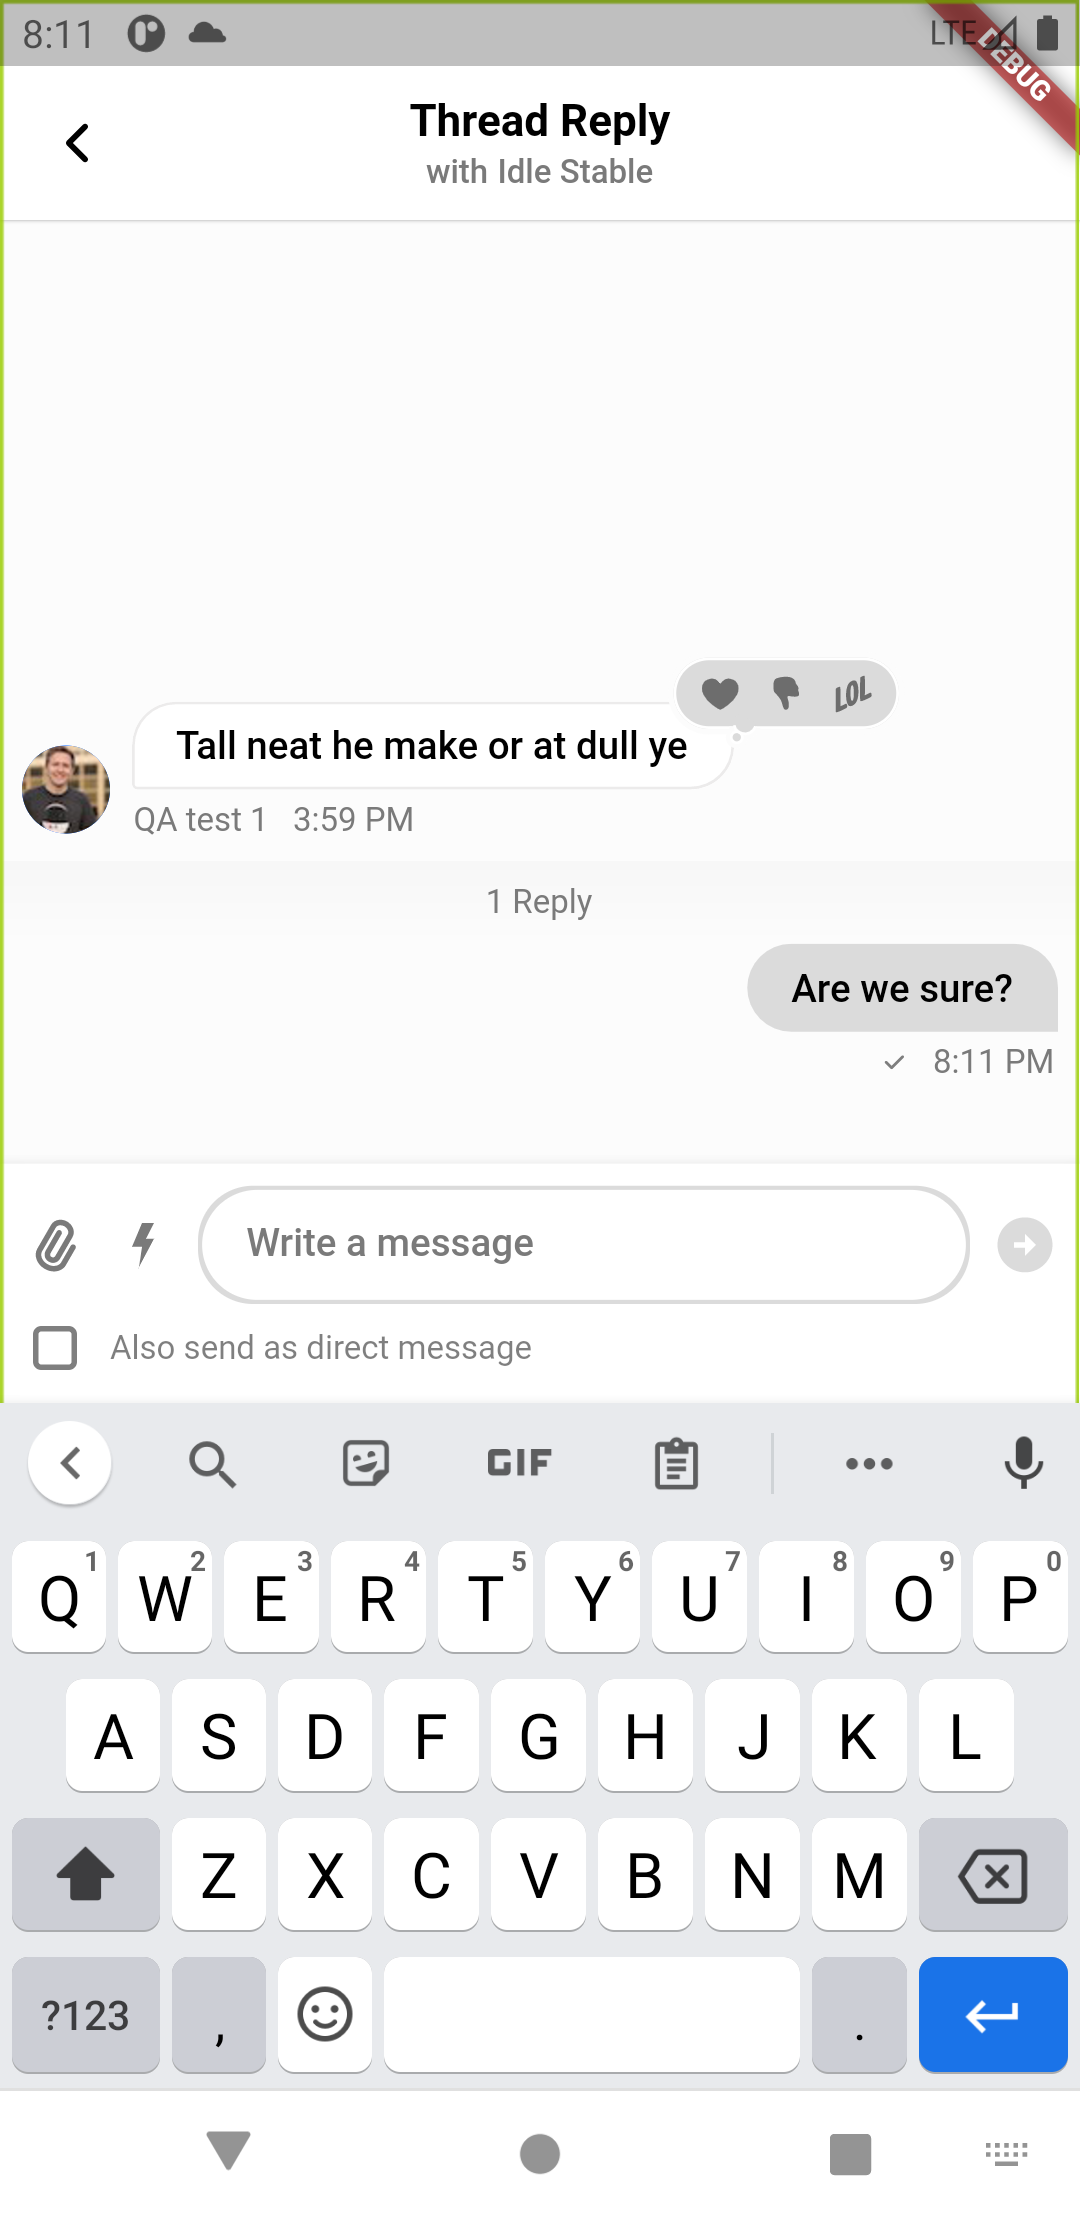
Now we can open threads and create new ones as well, if you long press a message you can tap on Reply and it will open the same ThreadPage.
Custom Message
Customizing how messages are rendered is another very common use-case that the SDK supports easily.
Replace the built-in message component with your own is done by passing it as a builder function to the StreamMessageListView widget.
The message builder function will get the usual context argument as well as the message object and its position inside the list.
12345678910111213141516171819202122232425262728293031323334353637383940414243444546474849505152535455565758class ChannelPage extends StatelessWidget { const ChannelPage({ Key? key, }) : super(key: key); Widget build(BuildContext context) { return Scaffold( appBar: const StreamChannelHeader(), body: Column( children: <Widget>[ Expanded( child: StreamMessageListView( messageBuilder: _messageBuilder, ), ), const StreamMessageInput(), ], ), ); } Widget _messageBuilder( BuildContext context, MessageDetails details, List<Message> messages, StreamMessageWidget defaultMessageWidget, ) { final message = details.message; final isCurrentUser = StreamChat.of(context).currentUser!.id == message.user!.id; final textAlign = isCurrentUser ? TextAlign.right : TextAlign.left; final color = isCurrentUser ? Colors.blueGrey : Colors.blue; return Padding( padding: const EdgeInsets.all(5), child: Container( decoration: BoxDecoration( border: Border.all( color: color, ), borderRadius: const BorderRadius.all( Radius.circular(5), ), ), child: ListTile( title: Text( message.text!, textAlign: textAlign, ), subtitle: Text( message.user!.name, textAlign: textAlign, ), ), ), ); } }
If you look at the code you can see that we use StreamChat.of to retrieve the current user so that we can style own messages in a different way.
Since custom widgets and builders are always children of StreamChat or part of a channel, you can use StreamChat.of, StreamChannel.of and StreamTheme.of to use the API client directly or to retrieve outer scope needed such as messages from the channel.state.
The last parameter of the messageBuilder function is the message widget that is already built by the SDK. This is useful if you want to modify the widget that is already built by the SDK using defaultMessageWidget.copyWith() and passing the parameters you want to override.
Custom Styles
The Flutter SDK comes with a fully designed set of widgets which you can customize to fit with your application style and typography. Changing the theme of Chat widgets works in a very similar way that MaterialApp and Theme do.
Out of the box all chat widgets use their own default styling, there are two ways to change the styling:
- Initialize the StreamChatTheme from your existing MaterialApp style
- Construct a custom theme ad provide all the customizations needed
Let’s first see how we can re-use an existing material design style to change the styling of your chat UI.
First we create a new Material Theme and pick green as swatch color. The theme is then passed to MaterialApp as usual.
123456789101112131415161718192021222324class MyApp extends StatelessWidget { const MyApp({ Key? key, required this.client, }) : super(key: key); final StreamChatClient client; Widget build(BuildContext context) { final theme = ThemeData( primarySwatch: Colors.green, ); return MaterialApp( theme: theme, builder: (context, child) => StreamChat( client: client, child: child, ), home: const ChannelListPage(), ); } }
With the next step we create a new StreamChatTheme from the green theme we just created. After saving the app, you will see the UI will update several widgets to match with the new color.
12345678910111213141516171819202122232425class MyApp extends StatelessWidget { const MyApp({ Key? key, required this.client, }) : super(key: key); final StreamChatClient client; Widget build(BuildContext context) { final theme = ThemeData( primarySwatch: Colors.green, ); return MaterialApp( theme: theme, builder: (context, child) => StreamChat( streamChatThemeData: StreamChatThemeData.fromTheme(theme), client: client, child: child, ), home: const ChannelListPage(), ); } }
Let’s now do something more complex such as changing the message color posted by the current user. You can perform these more granular style changes using StreamChatTheme.copyWith.
1234567891011121314151617181920212223242526272829303132333435363738394041class MyApp extends StatelessWidget { const MyApp({ Key? key, required this.client, }) : super(key: key); final StreamChatClient client; Widget build(BuildContext context) { final themeData = ThemeData(primarySwatch: Colors.green); final defaultTheme = StreamChatThemeData.fromTheme(themeData); final colorTheme = defaultTheme.colorTheme; final customTheme = defaultTheme.merge(StreamChatThemeData( channelPreviewTheme: StreamChannelPreviewThemeData( avatarTheme: StreamAvatarThemeData( borderRadius: BorderRadius.circular(8), ), ), otherMessageTheme: StreamMessageThemeData( messageBackgroundColor: colorTheme.textHighEmphasis, messageTextStyle: TextStyle( color: colorTheme.barsBg, ), avatarTheme: StreamAvatarThemeData( borderRadius: BorderRadius.circular(8), ), ), )); return MaterialApp( theme: themeData, builder: (context, child) => StreamChat( client: client, streamChatThemeData: customTheme, child: child, ), home: const ChannelListPage(), ); } }
Congratulations
We hope that you enjoyed this tutorial. By using Stream’s Chat Components, you and your team will be able to get your Flutter application, with chat, up and running in minutes.
Now that you’ve completed the tutorial on Stream Chat, you can build anything chat related with our components. If you have a use-case that doesn’t quite seem to work, or simply have questions, please don’t hesitate to reach out here.
Final Thoughts
In this chat app tutorial we built a fully functioning Flutter messaging app with our Flutter SDK component library. We also showed how easy it is to customize the behavior and the style of the Flutter chat app components with minimal code changes.
Both the chat SDK for Flutter and the API have plenty more features available to support more advanced use-cases such as push notifications, content moderation, rich messages and more. Please check out our React tutorial too. If you want some inspiration for your app, download our free chat interface UI kit.