

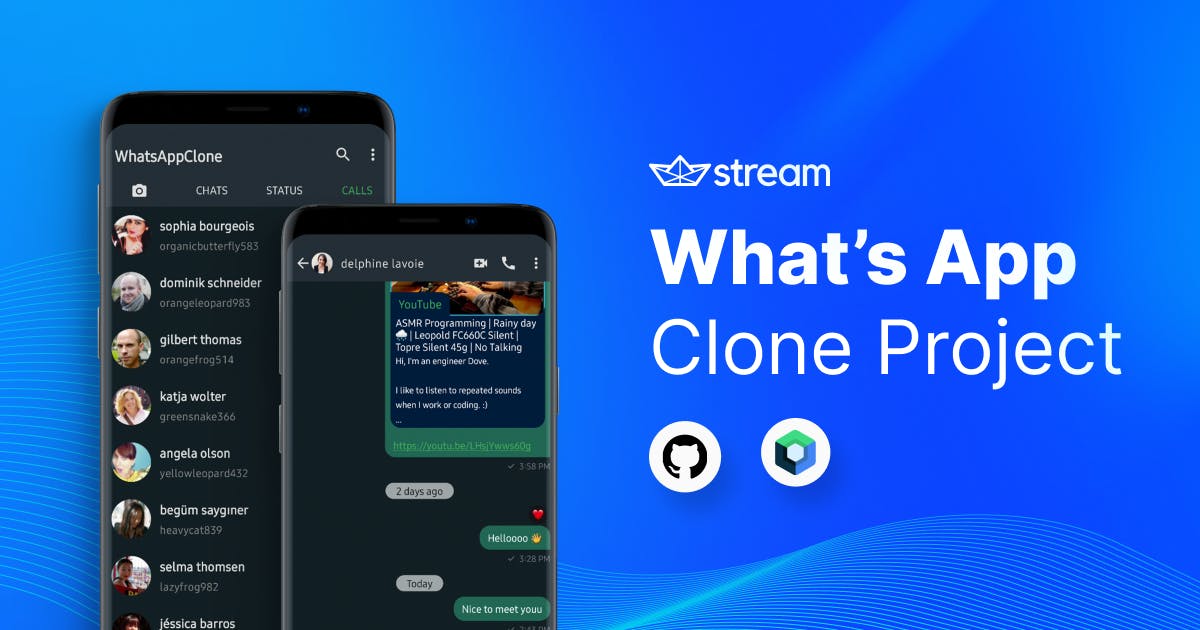
In this article, you will learn how to build your own real-time Android WhatsApp project with Jetpack Compose and Stream's versatile Compose Chat SDK.
Also, you will learn the overall architecture, each layer, and theming that are used in WhatsApp-Clone-Compose project.
Before you dive in, we recommend cloning the WhatsApp-Clone-Compose on your local device with the command below and opening the project with your Android Studio.
1git clone https://github.com/GetStream/WhatsApp-clone-compose.git
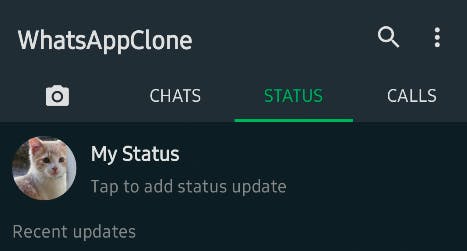
If you build WhatsApp Clone Compose on your device, the result will look like this:

App Architecture
WhatsApp Clone Compose follows Google's app architecture guide, which is the recommended architecture for building a robust, high-quality app. In this post, you'll learn how the app architecture was designed and how data flows between different layers.
As you see in the figure below, each layer has dedicated components that are very loosely coupled to each other. The arrow means the component has a dependency on the target component along the direction.

Fundamentally, the architecture is composed of two layers: UI layer and a Data layer.

Each layer has different responsibilities, as defined below:
- Each layer follows unidirectional event/data flow; the UI layer emits user events to the data layer, and the data layer exposes data as a stream to other layers.
- The data layer is designed to work independently from other layers and must be pure, which means it doesn't have any dependencies on the other layers.
With this loosely coupled architecture, you can increase the reusability of components and scalability of your app.
Now let's see how each layer works.
UI Layer
WhatsApp Clone Compose is built with 100% Jetpack Compose to draw UI elements, and it configures screens by observing UI states, which come from the ViewModel that holds UI states and restores data when configuration changes.

The ViewModel transforms the business data from the data layer into UI states, and UI elements configure screens following the UI states for success, loading, or error.
UI states represent the business data or exception following the single source-of-truth principle, so you can focus on how to draw UI elements depending on the UI states in the UI layer.
Data Layer
The data layer consists of repositories, which are exposed to other layers as public interfaces. Repositories include business logic that is mostly run on the background thread such as querying data from local databases and fetching remote data from the network.

By exposing the interface of repositories, other layers can observe the business data as a stream such as Kotlin's Flow.
Repositories have multiple data sources such as the local database and the network. To guarantee the single source-of-truth principle from the multiple resources, repositories are implemented as an offline-first source of business logic as the figure above.
Modularization
WhatsApp Clone Compose is built with multi-module strategies to improve app development.

-
Reusability: Modularizing reusable code properly enable opportunities for code sharing and restrict code access from other modules.
-
Parallel Building: Each module can be run in parallel and it reduces the build time.
-
Decentralize Team Focusing: Each developer team can assign their dedicated module and they can focus on their own modules.
Modularization allows you to build your feature and write test code independently without any dependencies on other features. As a result, you can achieve loose coupling between modules and high cohesion, which means each module has clearly defined responsibilities for its own domain logic.
Theming with Jetpack Compose
WhatsApp Clone Compose has theming components in the core-designsystem module. The module includes reusable components that are used in UI feature modules, and theme definitions, such as Theme, Background, and Typography.
In this post, you'll learn how WhatsApp Clone Compose styles the background and theme for overall UI elements.
Background
Styling background is a primary part of application design. To make UI elements have a consistent background color, WhatsApp Clone Compose implemented its own background composable, which is called WhatsAppCloneBackground:
12345678910111213141516171819202122232425@Immutable
data class BackgroundTheme(
  val color: Color = Color.Unspecified,
  val tonalElevation: Dp = Dp.Unspecified
)

val LocalBackgroundTheme = staticCompositionLocalOf { BackgroundTheme() }

@Composable
fun WhatsAppCloneBackground(
  modifier: Modifier = Modifier,
  content: @Composable () -> Unit
) {
  val color = LocalBackgroundTheme.current.color
  val tonalElevation = LocalBackgroundTheme.current.tonalElevation
  Surface(
    color = if (color == Color.Unspecified) Color.Transparent else color,
    tonalElevation = if (tonalElevation == Dp.Unspecified) 0.dp else tonalElevation,
    modifier = modifier.fillMaxSize()
  ) {
    CompositionLocalProvider(LocalAbsoluteTonalElevation provides 0.dp) {
      content()
    }
  }
}
The BackgroundTheme includes two properties below:
- Color: This property decides the background color of the
Surface. - Tonal Elevation: The surface tonal elevation highlights the components depending on the elevation levels. Surfaces at elevation levels +1 to +5 are tinted via color overlays based on the primary color, such as app bars or menus. For more information, check out Material Design 3 Color system.
By wrapping UI elements with WhatsAppCloneBackground composable like the example below, descendants of the composable content will have the same background color.
123456WhatsAppCloneBackground {
  WhatsAppNavHost(
    navHostController = navHostController,
    composeNavigator = composeNavigator
  )
}
Theme
Theming is one of the most essential parts of the app design, and you can achieve this easily in Jetpack Compose.
WhatsApp Clone Compose uses Material Theme for styling the overall UI elements, and defining custom color schemes with lightColorSceme and darkColorSceme methods:
1234567891011121314151617private val DarkWhatsAppColorScheme = darkColorScheme(
  primary = DARK_GREEN200,
  primaryContainer = DARK_GREEN300,
  secondary = GREEN500,
  background = DARK_GREEN300,
  tertiary = WHITE200,
  onTertiary = GRAY200
)

private val LightWhatsAppColorScheme = lightColorScheme(
  primary = GREEN500,
  primaryContainer = GREEN700,
  secondary = GREEN300,
  background = WHITE200,
  tertiary = WHITE200,
  onTertiary = GRAY200
)
Also, WhatsApp Clone Compose defines its own theme, WhatsAppCloneComposeTheme like the below:
123456789101112131415161718192021222324/** Light Android background theme */
private val LightAndroidBackgroundTheme = BackgroundTheme(color = Color.White)

/** Dark Android background theme */
private val DarkAndroidBackgroundTheme = BackgroundTheme(color = DARK_GREEN300)

@Composable
fun WhatsAppCloneComposeTheme(
  darkTheme: Boolean = isSystemInDarkTheme(),
  content: @Composable () -> Unit
) {
  val colorScheme = if (darkTheme) DarkWhatsAppColorScheme else LightWhatsAppColorScheme
  val backgroundTheme = if (darkTheme) DarkAndroidBackgroundTheme else LightAndroidBackgroundTheme

  CompositionLocalProvider(
    LocalBackgroundTheme provides backgroundTheme
  ) {
    MaterialTheme(
      colorScheme = colorScheme,
      typography = Typography,
      content = content
    )
  }
}
Color themes apply to different color schemes and background colors depending on whether the user device is in dark mode or not.
By wrapping your UI elements with WhatsAppCloneComposeTheme like the example below, you can see the result of the UI elements being colored according to the defined color scheme.
12345678910WhatsAppCloneComposeTheme {
  ..

  WhatsAppCloneBackground {
    WhatsAppNavHost(
      navHostController = navHostController,
      composeNavigator = composeNavigator
    )
  }
}
If you need to apply different colors for specific UI elements, you can just pull out and use the defined color value from the color scheme:
1234TabRow(
  backgroundColor = MaterialTheme.colorScheme.primary,
  ...
)
Build the above on your Android Studio, you can see the defined theme applied to the UI elements as shown in the image below:
Now, let's build a real-time WhatsApp chat feature!
Getting Started With the Stream Chat SDK
WhatsApp Clone Compose built the chat feature with Stream's versatile Compose Chat SDK. Stream Chat SDK offers performant chat solutions that have been used by billions of global end-users across thousands of different apps.
You can sign up for a free Stream chat trial plan quickly with your GitHub account. Small teams and individuals can also apply for a Maker Account that allows you to use Startup Plan for free.
Once you have an account, create a project in your Stream Dashboard.

After you create your project, note your API Key.

Lastly, We will disable authentication for convenience, so toggle the Disable Auth Checks button and click the Submit button on your project's Overview page. Note that this should only be done in development environments.

Gradle Setup
Before implementing any chat features, import the Stream SDK for Jetpack Compose into your project. Add the below dependencies for your module + app level build.gradle file:
123456789101112131415// settings.gradle
dependencyResolutionManagement {
    repositoriesMode.set(RepositoriesMode.FAIL_ON_PROJECT_REPOS)
    repositories {
        google()
        mavenCentral()
        maven { url "https://jitpack.io" }
    }
}

// app module's build.gradle
dependencies {
    // Stream Chat Android SDK
    implementation "io.getstream:stream-chat-android-compose:5.11.0"
}
Stream SDK is an open-source project, so you can see all source codes, commit histories, and releases on GitHub.
Note: If you're completely new to Stream Chat Android, you can also take a look at the Compose Chat Tutorial.
Initialize ChatClient With App Startup
ChatClient is the main entry point for all low-level chat operations, such as connecting and disconnecting users to the Stream server or sending and reacting to messages.
WhatsApp Clone Compose initializes the ChatClient with App Startup and connects a user at once for convenience. Note that we used a development token to connect a user as authentication is disabled.
123456789101112131415161718192021222324252627282930class StreamChatInitializer : Initializer<Unit> {

  override fun create(context: Context) {
    val logLevel = if (BuildConfig.DEBUG) ChatLogLevel.ALL else ChatLogLevel.NOTHING
    val offlinePluginFactory = StreamOfflinePluginFactory(
      config = Config(
        backgroundSyncEnabled = true,
        userPresence = true,
        persistenceEnabled = true,
        uploadAttachmentsNetworkType = UploadAttachmentsNetworkType.NOT_ROAMING
      ),
      appContext = context
    )
    val chatClient = ChatClient.Builder(**YOUR API KEY**, context)
      .withPlugin(offlinePluginFactory)
      .logLevel(logLevel)
      .build()

    val user = User(
      id = "stream",
      name = "stream",
      image = "https://placekitten.com/200/300"
    )

    val token = chatClient.devToken(user.id)
    chatClient.connectUser(user, token).enqueue()
  }

  override fun dependencies(): List<Class<out Initializer<*>>> = emptyList()
}
As we use an initializer, we need to define it inside your AndroidManifest.xml file, and it will be launched when your app started.
123456789<provider
  android:name="androidx.startup.InitializationProvider"
  android:authorities="io.getstream.whatsappclone.androidx-startup"
  android:exported="false"
  tools:node="merge">
  <meta-data
    android:name="io.getstream.whatsappclone.chats.initializer.StreamChatInitializer"
    android:value="androidx.startup" />
</provider>
Now, let's build a channel list screen.
Build a Channel List Screen
Stream SDK provides high-level UI components that allow you to build chat screens without much effort. You can build your channel list screen easily with the ChannelsScreen composable function:
12345678ChatTheme {
  ChannelsScreen(
    isShowingHeader = false,
    onItemClick = { channel ->
      // navigate to messages screen
    }
  )
}
As you see in the example above, you should wrap the ChannelsScreen with ChatTheme, which styles chat UI components, such as primary color, typography, and shapes.
Also, navigate your screen or launch activities to display the message list screen with the onItemClick lambda parameter when users click the channel item.
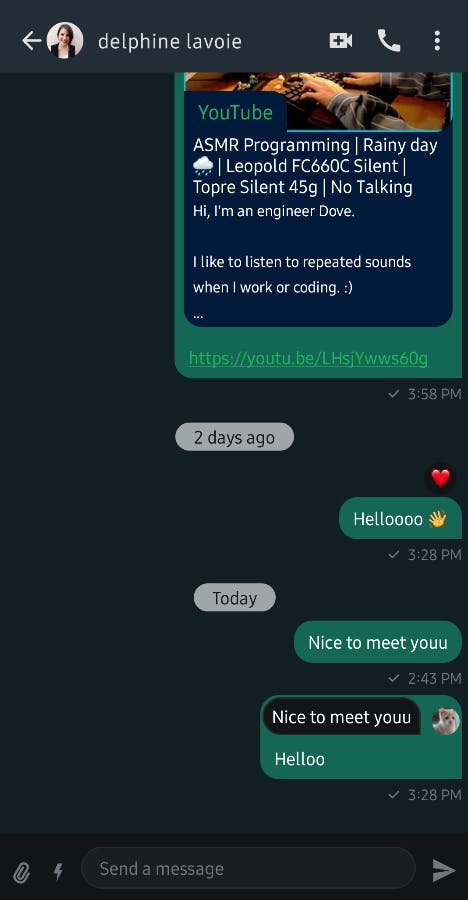
Build the above on your Android Studio, you will see the result below:

Build a Message List Screen
You can build the message list screen easily with the MessagesScreen composable function like the below:
1234567ChatTheme {
  MessagesScreen(
    channelId = channelId,
    showHeader = false,
    onBackPressed = { composeNavigator.navigateUp() }
  )
}
Next, you should build a TopAppBar that contains channel information, such as an image and name. To get the channel information, we need to fetch the data from the network using ChatClient like the below:
1234567891011121314151617181920@HiltViewModel
class WhatsAppMessagesViewModel @Inject constructor(
  @Dispatcher(WhatsAppDispatchers.IO) private val ioDispatcher: CoroutineDispatcher,
  private val chatClient: ChatClient
) : ViewModel() {
  private val messageMutableUiState =
    MutableStateFlow<WhatsAppMessageUiState>(WhatsAppMessageUiState.Loading)
  val messageUiSate: StateFlow<WhatsAppMessageUiState> = messageMutableUiState

  private fun fetchChannel(channelId: String) {
    viewModelScope.launch(ioDispatcher) {
      val result = chatClient.channel(channelId).watch().await()
      result.onSuccess {
        messageMutableUiState.value = WhatsAppMessageUiState.Success(result.data())
      }.onError {
        messageMutableUiState.value = WhatsAppMessageUiState.Error
      }
    }
  }
}
You can inject the ChatClient into your ViewModel with a dependency injection tool like Hilt or you can just get the instance with the ChatClient.instance() method.
After fetching the channel information via a network call, the WhatsAppMessagesViewModel transforms the result into UI states that are defined like the below:
12345sealed interface WhatsAppMessageUiState {
  data class Success(val channel: Channel) : WhatsAppMessageUiState
  object Loading : WhatsAppMessageUiState
  object Error : WhatsAppMessageUiState
}
WhatsApp Clone Compose models each user interaction as events to handle them in ViewModel.
1234567891011121314151617@HiltViewModel
class WhatsAppMessagesViewModel @Inject constructor(
 ..
) : ViewModel() {

 ..

 fun handleEvents(whatsAppMessageEvent: WhatsAppMessageEvent) {
    when (whatsAppMessageEvent) {
      is WhatsAppMessageEvent.FetchChannel -> fetchChannel(whatsAppMessageEvent.channelId)
    }
  }
}

sealed interface WhatsAppMessageEvent {
  class FetchChannel(val channelId: String) : WhatsAppMessageEvent
}
So you only need to exposehandleEvents method to your UI elements and reduce the API surfaces like the example below:
12345678910111213@Composable
fun WhatsAppMessages(
  channelId: String,
  composeNavigator: AppComposeNavigator,
  whatsAppMessagesViewModel: WhatsAppMessagesViewModel
) {
  LaunchedEffect(key1 = channelId) {
    whatsAppMessagesViewModel.handleEvents(
      WhatsAppMessageEvent.FetchChannel(channelId)
    )
  }
..
)
Finally, you can draw your composable functions depending on the UI states that comes from the ViewModel, such as success, loading, and error:
1234567891011121314151617181920212223242526272829303132333435363738394041424344@Composable
fun WhatsAppMessageTopBar(
  viewModel: WhatsAppMessagesViewModel,
  composeNavigator: AppComposeNavigator
) {
  val messageUiState by viewModel.messageUiSate.collectAsState()

  TopAppBar(
    modifier = Modifier.fillMaxWidth(),
    backgroundColor = MaterialTheme.colorScheme.primary,
    elevation = 0.dp
  ) {
    ..

    WhatsAppMessageUserInfo(messageUiState = messageUiState)

    ..
 }

@Composable
private fun WhatsAppMessageUserInfo(
  messageUiState: WhatsAppMessageUiState
) {
  when (messageUiState) {
    WhatsAppMessageUiState.Loading -> WhatsAppLoadingIndicator()
    WhatsAppMessageUiState.Error -> Unit
    is WhatsAppMessageUiState.Success -> {
      GlideImage(
        modifier = Modifier
          .size(32.dp)
          .clip(CircleShape),
        imageModel = messageUiState.channel.image,
        previewPlaceholder = io.getstream.whatsappclone.designsystem.R.drawable.placeholder
      )

      Text(
        modifier = Modifier.padding(start = 12.dp),
        text = messageUiState.channel.name,
        color = MaterialTheme.colorScheme.tertiary,
        style = MaterialTheme.typography.bodyLarge
      )
    }
  }
}
Note: To load a network image in the
TopAppBar, WhatsApp Clone Compose uses Landscapist, which allows you to fetch and display network images with Glide, Coil, and Fresco.
You will now see the result below:
Wrapping Up
In this tutorial, you explored the overall architecture of the WhatsApp Clone Compose project and how to build chat features with Stream's versatile Compose Chat SDK.
To explore the process of implementing a video calling feature for this project, refer to Build Video Calling for Your Android WhatsApp Clone With Jetpack Compose, the second part of this series.
To learn more about the Compose Chat SDK, try the Compose Chat Tutorial or check out the open-source projects below on GitHub:
- Twitch Clone Compose: Twitch clone project demonstrates modern Android development built with Jetpack Compose and Stream Chat/Video SDK for Compose.
- ChatGPT Android: ChatGPT Android demonstrates OpenAI's ChatGPT on Android with Stream Chat SDK for Compose.
- Slack Clone Android: A chat demo app built with Jetpack Compose and Stream Chat SDK following clean architecture principles.
You can find the author of this article on Twitter @github_skydoves or GitHub if you have any questions or feedback. If you'd like to stay up to date with Stream, follow us on Twitter @getstream_io for more great technical content.
As always, happy coding!