

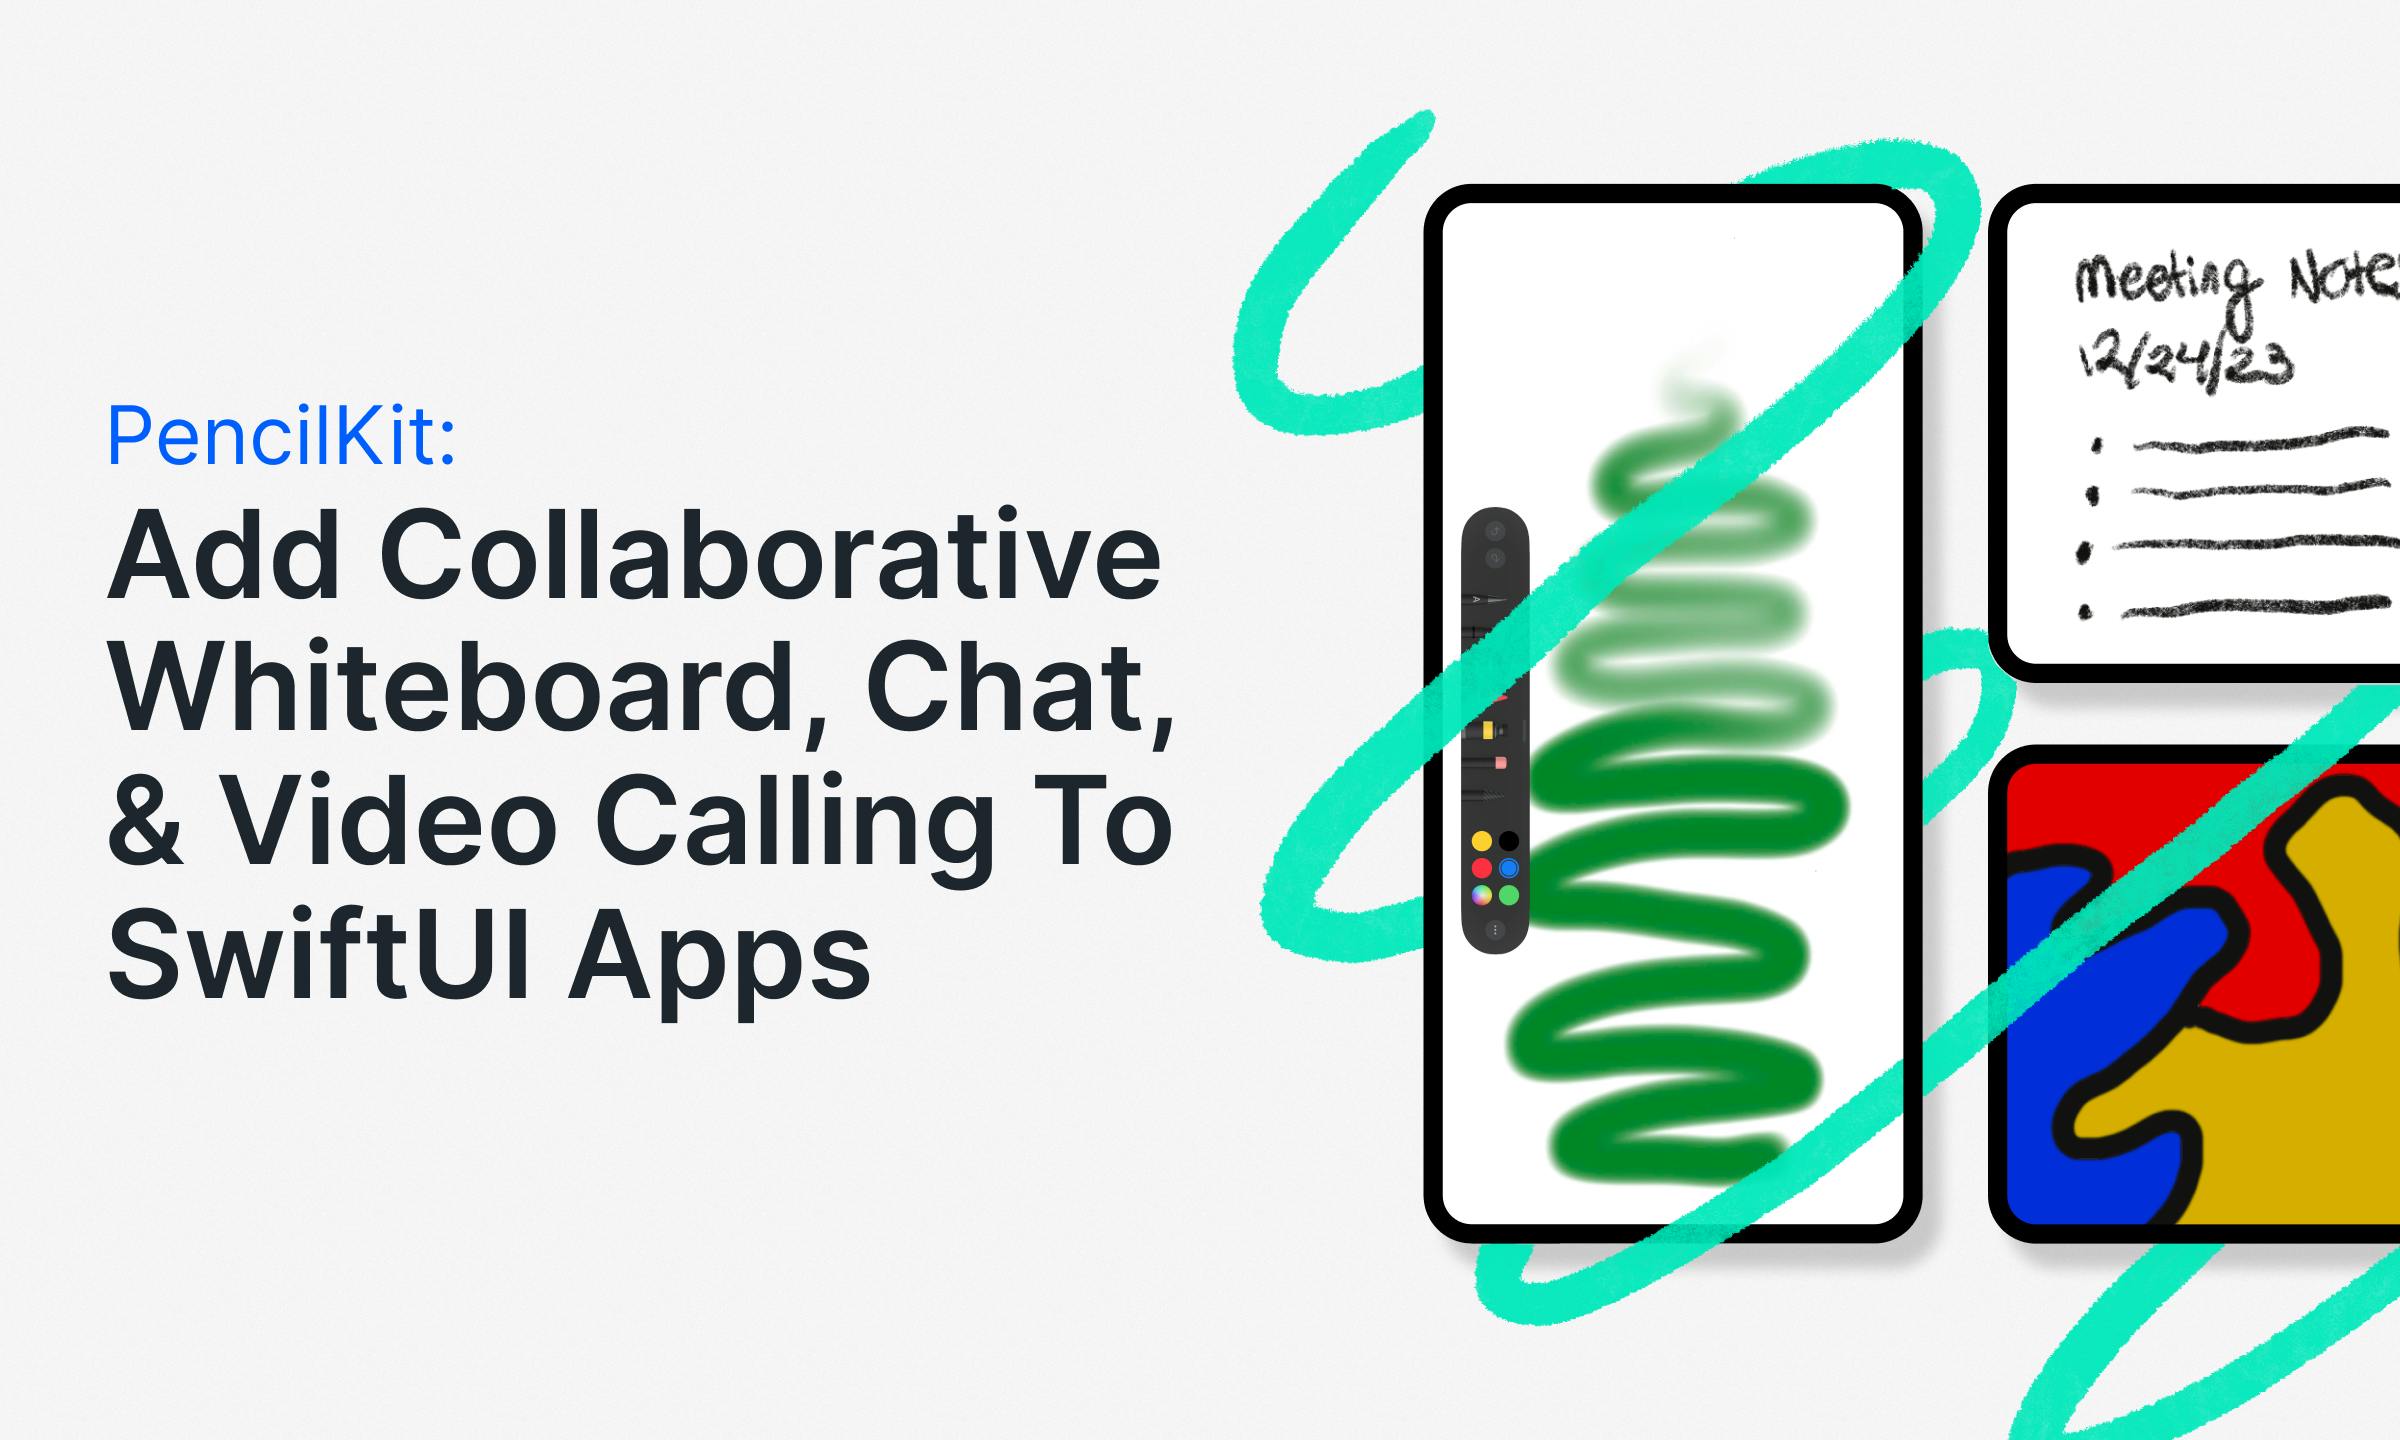
This tutorial teaches you how to implement freeform drawing, chat messaging, voice calling, and video calling into your SwiftUI apps. We will use Apple's PencilKit framework, equipped with an intuitive drawing canvas and a rich set of tools for making handwritten notes and sketches.
On the drawing canvas of the app, users can initiate voice and video calls, record, and share screens. Additionally, the whiteboard provides a seamless way to share and collaborate on ideas and whatever you draw with other channel members via chat messaging.
Find an Apple Pencil or make your fingers ready to draw with an iOS/SwiftUI app you build yourself in this tutorial. How fun is that? Let's begin.
Prerequisites
Completing the tutorial requires the following installations.
- Xcode 15: Our development environment.
- Stream Chat SwiftUI: To provide messaging functionality and the ability to attach free-form notes and drawings to messages.
- Stream Video SwiftUI: To provide audio and video calling functionalities.
- PencilKit: A framework for capturing finger and Apple Pencil inputs as drawings.
You can test all the app's features except the video calling capability with an iOS simulator. However, to get the best testing experience, you should use an Apple Pencil with an iPad or your finger to test it on an iPhone.
Explore the Final Sample Project
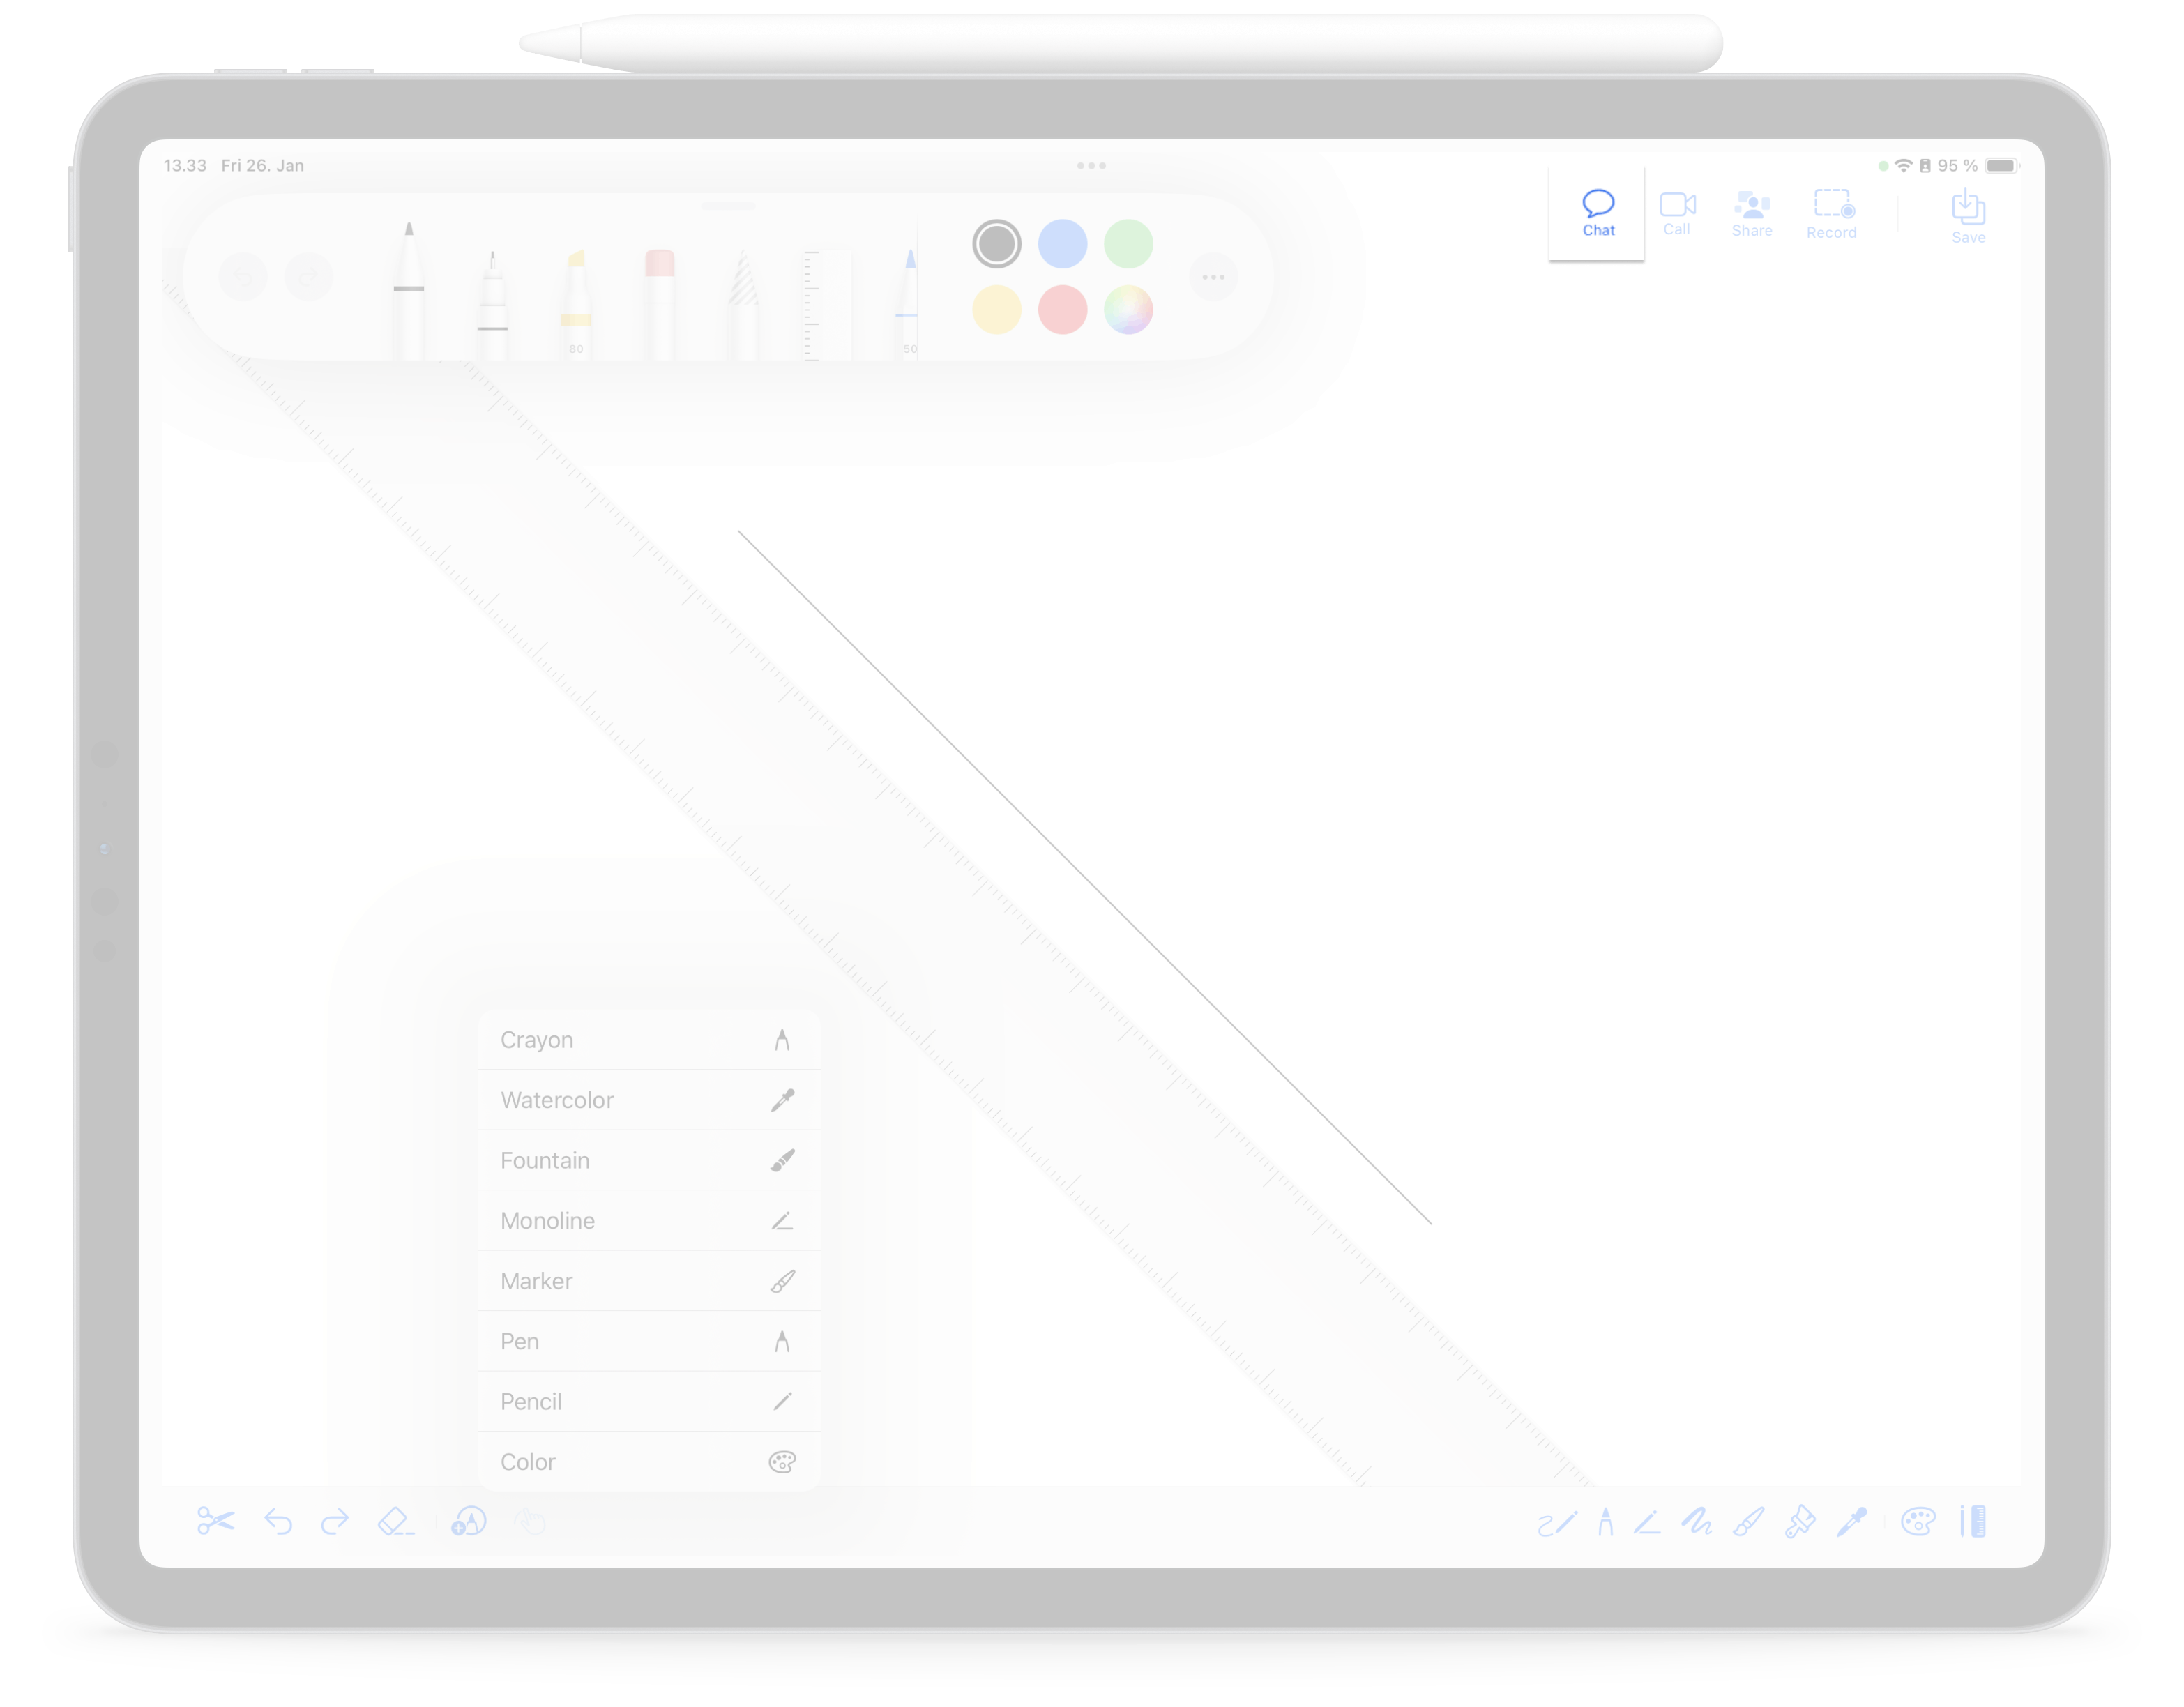
The video above represents the final project you will build in this tutorial. You can download it from GitHub. As shown in the video, collaboration tools are those on the top-right of the drawing canvas, the icons on the bottom-right are drawing tools, and those on the bottom-left are for making corrections to drawings. The app also provides default PencilKit drawing tools like the toolset on the top-left and a ruler for sketching straight and diagonal lines.
Project Setup
Let's create a new SwiftUI project in Xcode, name it FaceBoard, or use any preferred name, and do the following to make it ready for coding our demo app.
Add Folder Groups and Swift Files

In your newly created SwiftUI project, add the groups (folders) and Swift files shown above. You can also find each of them in the GitHub project. Let's add the Package Dependencies in the following section.
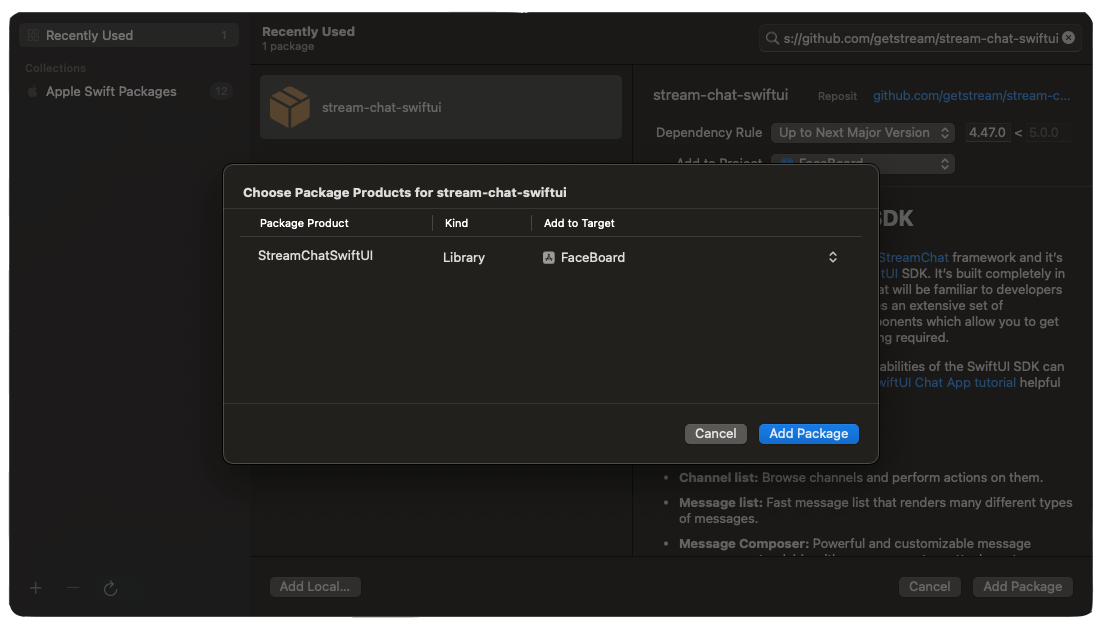
Install Stream Chat and Video SDKs
The image in the previous section shows the following package dependencies.
- StreamChat: To provide the app's chat feature.
- StreamChatSwiftUI: Customizable and reusable SwiftUI component for building chat experiences.
- StreamVideo: The core video calling SDK consists of SwiftUI components.
- StreamWebRTC: To provide the app's WebRTC based video calling feature.
- SwiftProtobuf: An alternative to JSON and XML, helping to serialize structured data.
Let's install Stream's Chat and Video SDKs for iOS to bring all the five package dependencies above. In your Xcode project, go to File -> Add Package Dependencies, copy and paste the following URLs, and follow the steps to install the chat and video SDKs.
- Stream Chat SwiftUI: /tutorials/ios-chat.
- Stream Video SwiftUI: /video/docs/ios

Set Permissions For Users' Protected Assets
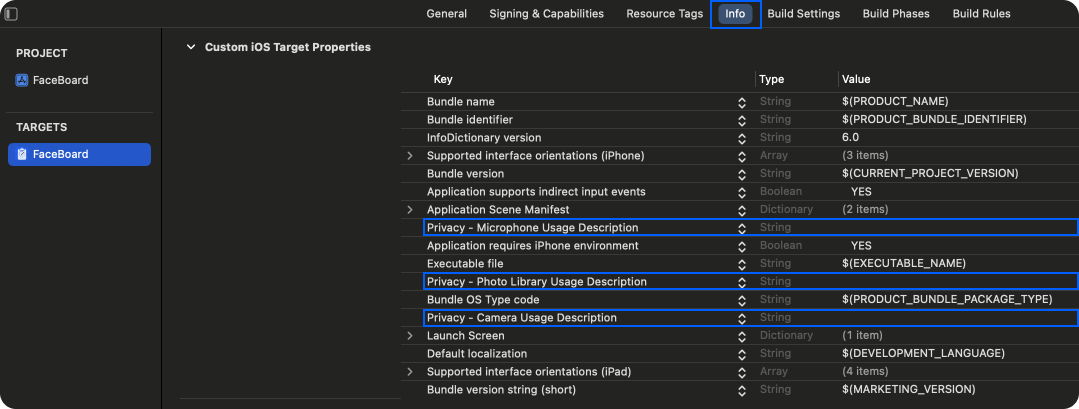
Users can make freeform sketches and notes in our app's drawing canvas, save them to their iOS device's Photos Library, and send them to other collaborators as message attachments. You should set permission in the Xcode project to allow the app to pick saved drawings from the user's Photos Library and send them to others.
The app's audio and video calling feature also requires people's microphones and cameras to make calls. The protected user assets above also require privacy configuration in Xcode. Select your main project's folder, click the Info tab, and add the privacies for photos, camera, and microphone usage as highlighted in the image above.
PencilKit Overview

PencilKit is a freeform drawing framework from Apple that allows the implementation of low-latency drawing in macOS, iOS, and visionOS apps by capturing and displaying drawing inputs from users' fingers and Apple Pencil. This framework lets developers quickly incorporate hand-drawn content, note-taking, and document or image markup into their apps. PencilKit has default drawing tools for creating, erasing, undoing, and selecting. The sketching environment supports tilt sensitivity and palm rejection to ensure pixel-perfect precision drawing for integrated apps.
PencilKit provides seamless support for the following features when you integrate it into your iOS app.
- Precision finger and pencil drawing: Users can draw, jot notes, and make precise illustrations.
- Ultra low-latency drawing: Drawing with the finger or Apple Pencil on the iOS device's screen feels as responsive as sketching with a physical pencil and paper.
- Pressure-sensitivity for illustrations: Its drawing tools, like the Fountain Pen, respond seamlessly to light and deep presses (pressure) to draw thin and thick lines and curves.
- Tilt-sensitivity for shading: The drawing canvas automatically supports the tilt-to-shade feature when using an Apple Pencil.
Collaboration Features: Drawing, Messaging, and Calling
With the sample SwiftUI drawing app we will create in this tutorial, you can work alone to jot your ideas, screen share your whiteboard, make video calls, and send drawings as message attachments to collaborate with others. To send jotted ideas to others, save whatever you draw on the canvas by tapping the save button on the top right. This action saves drawings on the canvas to the iOS Photos Library. Then, tap the chat icon to open a list of collaborators (chat channel list). Scroll through the collaborators, select one, pick the saved drawing from the Photos Library, and attach it to a message to share. The video above demonstrates drawing, saving, and attaching a drawn image to a message.
When you follow the steps below to complete the tutorial or run the app after downloading it from GitHub, tap the video button on the top-right to initiate a call. Once the call starts, you can invite collaborators to join the call by tapping the person.2 symbol on the top-right of the screen.
Add Collaborative Messaging Support
Previously, we looked at how to install the Stream's Chat SDKs and Video SDKs. Let's dive into what their setups involve.
The folder structure and files involved are shown in the image below for the chat part.

Create the folder ChatMessaging and add the contents of the following Swift files.
In this tutorial, we will not go into setting up the chat SDK. However, we have excellent resources that explain how to set it up in steps. Check out the chat tutorial in the iOS documentation to learn more.
Add Collaborative Video Calling Support

Similarly, the video calling settings are in the folder, as shown in the image below. Add the following Swift files and their content in the links below.

Check out this YouTube video and the video calling tutorial in our documentation to learn how to configure the video SDK.
Create the Freeform Drawing Canvas
To add a freeform drawing board to our SwiftUI project, let's implement it in a single Swift file for simplicity. Rename ContentView.swift that comes with the project creation with FreeFormDrawingView.swift. Feel free to choose any name you want. Replace the content of this file with the following sample code.
123456789101112131415161718192021222324252627282930313233343536373839404142434445464748495051525354555657585960616263646566676869707172737475767778798081828384858687888990919293949596979899100101102103104105106107108109110111112113114115116117118119120121122123124125126127128129130131132133134135136137138139140141142143144145146147148149150151152153154155156157158159160161162163164165166167168169170171172173174175176177178179180181182183184185186187188189190191192193194195196197198199200201202203204205206207208209210211212213214215216217218219220221222223224225226227228229230231232233234235236237238239240241242243244245246247248249250251252253254255256257258259260261262263264265266267268269270271272273274275276277278279280281282283284285286287288289290291292293294295296297298299300301302303304305306307308309310311312313314315316317318319320321322323324325326327328329330331332333334335336337338339340341342343344345346347348349350351352353354355356357358359// // FreeFormDrawingView.swift // FaceBoard import SwiftUI import PencilKit import StreamVideo import StreamVideoSwiftUI import StreamChat import StreamChatSwiftUI struct FreeFormDrawingView: View { @ObservedObject var viewModel: CallViewModel // Define a state variable to capture touches from the user's finger and Apple pencil. @State private var canvas = PKCanvasView() @State private var isDrawing = true @State private var color: Color = .black @State private var pencilType: PKInkingTool.InkType = .pencil @State private var colorPicker = false @State private var isMessaging = false @State private var isVideoCalling = false @State private var isScreenSharing = false @State private var isRecording = false @Environment(\.dismiss) private var dismiss @Environment(\.undoManager) private var undoManager var body: some View { NavigationStack { // Drawing View DrawingView(canvas: $canvas, isDrawing: $isDrawing, pencilType: $pencilType, color: $color) .navigationBarTitleDisplayMode(.inline) .toolbar { ToolbarItemGroup(placement: .bottomBar) { Button { // Clear the canvas. Reset the drawing canvas.drawing = PKDrawing() } label: { Image(systemName: "scissors") } Button { // Undo drawing undoManager?.undo() } label: { Image(systemName: "arrow.uturn.backward") } Button { // Redo drawing undoManager?.redo() } label: { Image(systemName: "arrow.uturn.forward") } Button { // Erase tool isDrawing = false } label: { Image(systemName: "eraser.line.dashed") } Divider() .rotationEffect(.degrees(90)) Button { // Tool picker //let toolPicker = PKToolPicker.init() @State var toolPicker = PKToolPicker() toolPicker.setVisible(true, forFirstResponder: canvas) toolPicker.addObserver(canvas) canvas.becomeFirstResponder() } label: { Image(systemName: "pencil.tip.crop.circle.badge.plus") } // Menu for pencil types and color Menu { Button { // Menu: Pick a color colorPicker.toggle() } label: { Label("Color", systemImage: "paintpalette") } Button { // Menu: Pencil isDrawing = true pencilType = .pencil } label: { Label("Pencil", systemImage: "pencil") } Button { // Menu: pen isDrawing = true pencilType = .pen } label: { Label("Pen", systemImage: "pencil.tip") } Button { // Menu: Marker isDrawing = true pencilType = .marker } label: { Label("Marker", systemImage: "paintbrush.pointed") } Button { // Menu: Monoline isDrawing = true pencilType = .monoline } label: { Label("Monoline", systemImage: "pencil.line") } Button { // Menu: pen isDrawing = true pencilType = .fountainPen } label: { Label("Fountain", systemImage: "paintbrush.pointed.fill") } Button { // Menu: Watercolor isDrawing = true pencilType = .watercolor } label: { Label("Watercolor", systemImage: "eyedropper.halffull") } Button { // Menu: Crayon isDrawing = true pencilType = .crayon } label: { Label("Crayon", systemImage: "pencil.tip") } } label: { Image(systemName: "hand.draw") } .sheet(isPresented: $colorPicker) { ColorPicker("Pick color", selection: $color) .padding() } Spacer() // Drawing Tools Button { // Pencil isDrawing = true pencilType = .pencil } label: { Label("Pencil", systemImage: "pencil.and.scribble") } Button { // Pen isDrawing = true pencilType = .pen } label: { Label("Pen", systemImage: "applepencil.tip") } Button { // Monoline isDrawing = true pencilType = .monoline } label: { Label("Monoline", systemImage: "pencil.line") } Button { // Fountain: Variable scribbling isDrawing = true pencilType = .fountainPen } label: { Label("Fountain", systemImage: "scribble.variable") } Button { // Marker isDrawing = true pencilType = .marker } label: { Label("Marker", systemImage: "paintbrush.pointed") } Button { // Crayon isDrawing = true pencilType = .crayon } label: { Label("Crayon", systemImage: "paintbrush") } Button { // Water Color isDrawing = true pencilType = .watercolor } label: { Label("Watercolor", systemImage: "eyedropper.halffull") } Divider() .rotationEffect(.degrees(90)) // Color picker Button { // Pick a color colorPicker.toggle() } label: { Label("Color", systemImage: "paintpalette") } Button { // Set ruler as active canvas.isRulerActive.toggle() } label: { Image(systemName: "pencil.and.ruler.fill") } } // Collaboration tools ToolbarItemGroup(placement: .topBarTrailing) { // Chat messaging Button { isMessaging.toggle() } label: { VStack { Image(systemName: "message") Text("Chat") .font(.caption2) } } .sheet(isPresented: $isMessaging, content: ChatSetup.init) // Video calling Button { isVideoCalling.toggle() } label: { VStack { Image(systemName: "video") Text("Call") .font(.caption2) } } .sheet(isPresented: $isVideoCalling, content: CallContainerSetup.init) // Screen sharing Button { isScreenSharing ? viewModel.stopScreensharing() : viewModel.startScreensharing(type: .inApp) isScreenSharing.toggle() } label: { VStack { Image(systemName: isScreenSharing ? "shared.with.you.slash" : "shared.with.you") .foregroundStyle(isScreenSharing ? .red : .blue) .contentTransition(.symbolEffect(.replace)) .contentTransition(.interpolate) withAnimation { Text(isScreenSharing ? "Stop" : "Share") .font(.caption2) .foregroundStyle(isScreenSharing ? .red : .blue) .contentTransition(.interpolate) } } } // Screen recording Button { isRecording.toggle() } label: { //Image(systemName: "rectangle.dashed.badge.record") VStack { Image(systemName: isRecording ? "rectangle.inset.filled.badge.record" : "rectangle.dashed.badge.record") .foregroundStyle(isRecording ? .red : .blue) .contentTransition(.symbolEffect(.replace)) .contentTransition(.interpolate) withAnimation { Text(isRecording ? "Stop" : "Record") .font(.caption2) .foregroundStyle(isRecording ? .red : .blue) .contentTransition(.interpolate) } } } Divider() .rotationEffect(.degrees(90)) // Save your creativity Button { saveDrawing() } label: { VStack { Image(systemName: "square.and.arrow.down.on.square") Text("Save") .font(.caption2) } } } } } } // Save drawings to Photos func saveDrawing() { // Get the drawing image from the canvas let drawingImage = canvas.drawing.image(from: canvas.drawing.bounds, scale: 1.0) // Save drawings to the Photos Album UIImageWriteToSavedPhotosAlbum(drawingImage, nil, nil, nil) } } struct DrawingView: UIViewRepresentable { // Capture drawings for saving in the photos library @Binding var canvas: PKCanvasView @Binding var isDrawing: Bool // Ability to switch a pencil @Binding var pencilType: PKInkingTool.InkType // Ability to change a pencil color @Binding var color: Color //let ink = PKInkingTool(.pencil, color: .black) // Update ink type var ink: PKInkingTool { PKInkingTool(pencilType, color: UIColor(color)) } let eraser = PKEraserTool(.bitmap) func makeUIView(context: Context) -> PKCanvasView { // Allow finger and pencil drawing canvas.drawingPolicy = .anyInput // Eraser tool canvas.tool = isDrawing ? ink : eraser canvas.alwaysBounceVertical = true // Toolpicker let toolPicker = PKToolPicker.init() toolPicker.setVisible(true, forFirstResponder: canvas) toolPicker.addObserver(canvas) // Notify when the picker configuration changes canvas.becomeFirstResponder() return canvas } func updateUIView(_ uiView: PKCanvasView, context: Context) { // Update tool whenever the main view updates uiView.tool = isDrawing ? ink : eraser } }
Let's summarize the code we just added. To add a drawing canvas and tools to any SwiftUI project, you should:
- First, make it available as
import PencilKit. - In the
FreeFormDrawingViewstruct, define a PKCanvasView object to capture users' finger and Apple Pencil inputs@State private var canvas = PKCanvasView(). - Next, define the following properties for drawing, color, pencil type, and undoing.
12345@State private var isDrawing = true @State private var color: Color = .black @State private var pencilType: PKInkingTool.InkType = .pencil @State private var colorPicker = false @Environment(\.undoManager) private var undoManager
- SwiftUI does not support PencilKit natively. Therefore, we should create a
DrawingViewstructand make itUIViewRepresentable. In thisstruct, we define binding properties for updating drawing inputs about whether a user is drawing, pencil type, and color. We create a computed variable to update the pencil type whenever a user picks a different pencil. Then, we create the functionmakeUIViewto enable finger and Apple Pencil drawing and show the default tool picker when the canvas becomes a first responder. TheupdateUIViewfunction watches the binding variables for changes.
1234567891011121314151617181920212223242526272829303132333435363738struct DrawingView: UIViewRepresentable {
  // Capture drawings for saving in the photos library
  @Binding var canvas: PKCanvasView
  @Binding var isDrawing: Bool
  // Ability to switch a pencil
  @Binding var pencilType: PKInkingTool.InkType
  // Ability to change a pencil color
  @Binding var color: Color

  //let ink = PKInkingTool(.pencil, color: .black)
  // Update ink type
  var ink: PKInkingTool {
    PKInkingTool(pencilType, color: UIColor(color))
  }

  let eraser = PKEraserTool(.bitmap)

  func makeUIView(context: Context) -> PKCanvasView {
    // Allow finger and pencil drawing
    canvas.drawingPolicy = .anyInput
    // Eraser tool
    canvas.tool = isDrawing ? ink : eraser
    canvas.alwaysBounceVertical = true

    // Toolpicker
    let toolPicker = PKToolPicker.init()
    toolPicker.setVisible(true, forFirstResponder: canvas)
    toolPicker.addObserver(canvas) // Notify when the picker configuration changes
    canvas.becomeFirstResponder()

    return canvas
  } // makeUIView

  func updateUIView(_ uiView: PKCanvasView, context: Context) {
    // Update tool whenever the main view updates
    uiView.tool = isDrawing ? ink : eraser
  } // updateUIView
} // DrawingView
Let's navigate back to the FreeFormDrawingView struct. In the body computed property, we add a NavigationStack and create an instance of the drawing view DrawingView(canvas: $canvas, isDrawing: $isDrawing, pencilType: $pencilType, color: $color). Then, we add a .toolbar and append the drawing tools, chat, and video buttons to the various sections of it. Eventually, we use the saveDrawing function to store whatever users scribble on the canvas in the iOS device's Photo Library.
1234567func saveDrawing() {
    // Get the drawing image from the canvas
    let drawingImage = canvas.drawing.image(from: canvas.drawing.bounds, scale: 1.0)

    // Save drawings to the Photos Album
    UIImageWriteToSavedPhotosAlbum(drawingImage, nil, nil, nil)
  }
Test the app
In the main app's file FaceBoardApp.swift, let's modify the Scene to display the drawing canvas FreeFormDrawingView and CallContainerSetup that contains the video call configurations.
123456789101112131415161718//
// FaceBoardApp.swift
// FaceBoard
//
import SwiftUI
import StreamVideo
import StreamVideoSwiftUI
@main
struct FaceBoardApp: App {
  var body: some Scene {
    WindowGroup {
      ZStack {
        CallContainerSetup()
        FreeFormDrawingView(viewModel: CallViewModel())
      }
    }
  }
}
Since these two files are in the entry point of the app WindowGroup, the whiteboard, its tools, and the calling functionality become immediately available when you run the app.
What's Next?
You discovered the fundamentals of creating a SwiftUI collaborative whiteboard and freeform drawing app in this article. To go beyond the basics, head to the PencilKit, Stream Chat, and Video for iOS documentation to learn more about building an iOS drawing app to help people work together or alone to bring their ideas to life.