
Authentication is a very important part of any application, so it should be implemented in such a way that it delivers a great user experience while keeping your users’ secrets safe.
One solution that works well for users and security is passwordless authentication.
What Is Passwordless Authentication?
Like it sounds, passwordless authentication is a means of identifying and signing into an application without a password.
The use of passwordless auth circumvents password requirements and the security vulnerabilities they introduce (like reusing passwords on multiple applications or choosing a weak password).
Going passwordless may include using an SMS-based one-time password (OTP), social logins (like Facebook), or an authentication link sent to your email address, also known as a magic link.
Fortunately, you don’t have to worry about building passwordless authentication yourself because third-party applications like Supabase provide passwordless authentication as a service.
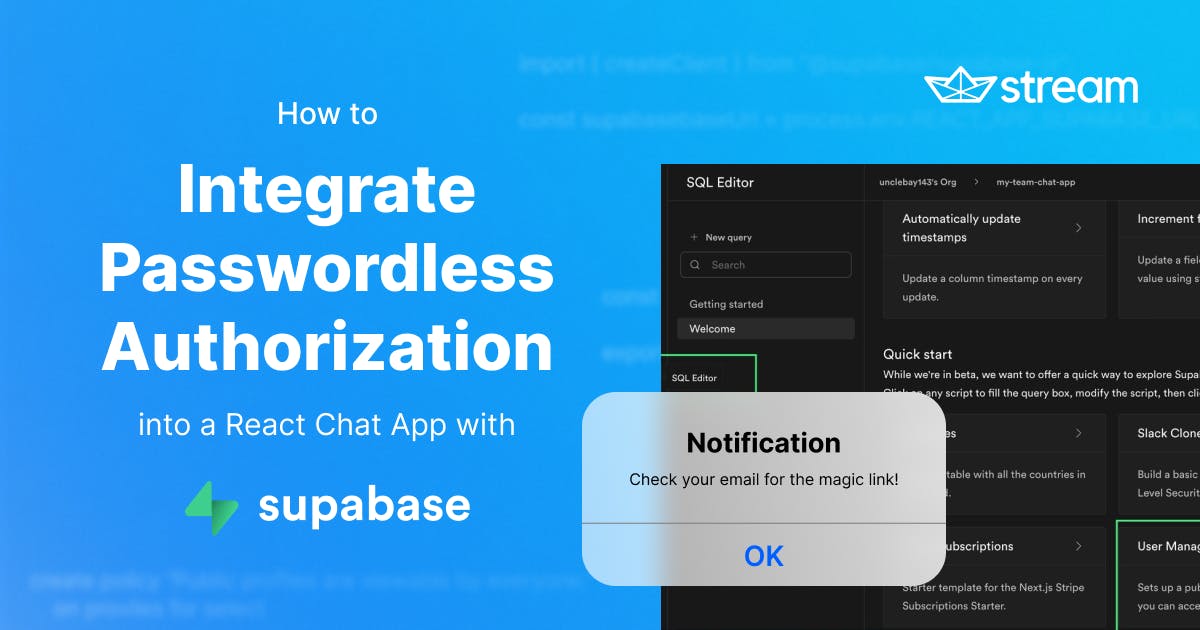
We’re going to leverage Supabase’s magic link authentication to build a team chat application using Stream’s React Chat SDK. Every user will only be required to provide their email address to be authenticated into our chat application.
Below is the demo of what we are going to build:
Developer Setup and Prerequisites
Before you continue with this tutorial, make sure you have Node.js installed and node package manager (npm) set up on your device. We’ll use Yarn specifically for this tutorial.
We’ll also use the stack listed below to build our chat application:
- React.js for frontend
- Node.js and Express.js for backend
- Axios for making API calls
- Supabase for passwordless authentication
- Stream’s React Chat SDK to power our chat application
- CSS module for styling our components
What Is Supabase?
Supabase is an open-source Firebase alternative. It provides all the backend services you need to build a product. Supabase handles all the behind-the-scenes stuff happening in your application’s backend, while also providing services such as a free Postgress database, authentication, file storage, and auto-generated APIs.
Setting Up Your Supabase Account
You have to create an account on the Supabase website in order to access their backend features. Supabase requires you to sign in with a GitHub account, so create an account if you don’t have one already.
Follow the steps below to create a Supabase account.
- Go to the Supabase homepage
- Click on Sign In With GitHub

- If you’re signing in for the first time, follow the GitHub authorization step to complete your signup process.
Create a New Supabase Project and Get Your API Keys
Once you've signed in, you'll need to create a new Supabase project for your application.
To do so:
- Go to your dashboard and click New Project.
- Select the default organization created with your GitHub username (mine was unclebay143).

- Fill in the required project information (for this example, the project name is my-team-chat-app).
- Create a secure password and select the region server nearest to your location for the best performance.
- Click on Create new project when you’re done.

After Supbase launches your project, you will get your Project API Keys keys (the anon/public key and the service_role/secret key). We’ll be using these keys along with the project URL to interact with our Supabase project.
Note: Copy your API keys and don’t share them with anyone.

Setting Up the Supabase Database Schema
Let’s set up our database schema. This is where our chat app’s user profiles will be stored.
We’re going to make use of the Supabase User Management Starter quickstart in the SQL Editor to set this up without writing any backend code.
Follow the steps below to set up a database schema for your project.
- Click on the SQL Editor sidebar icon.
- Under Quick Start, select User Management Starter.

- You will be redirected to the SQL Editor. We’re going to make use of the default SQL query to generate a table that will contain the username, avatar_url, and the user’s website URL.
Note: You can also modify the SQL query to suit your preferences.

- Click on RUN when you’re done and, if everything goes well, you’ll be prompted with a Success. No rows returned message.

Note: You can check and edit your tables in the database section as well.

What Is a Magic Link?
Now that you have your Supabase account set up, let’s take a brief look at what magic links are all about and how they handle authentication:
A Magic Link is a type of signup and login method that doesn't require a username or password. Instead, an email with a link is sent to the user's provided email. The user's token is embedded in the sent link and can be used to create a valid session.
The Supabase Magic Link can detect if a user is signing up for the first time or if the email belongs to an existing user. In development, it also redirects users to the localhost port, or you can define the final (hosted) URL of your app in your project settings.
Create Your Client (create-react-app)
Since we’re using React, let’s set up the frontend of our chat application using the create-react-app CLI command.
Inside your terminal, where you want your project to live, run the code below to create a new React app (we’ll call our app my-team-chat-app in this tutorial):
yarn create react-app my-team-chat-app
Run the code below to navigate to the newly created React project:
cd my-team-chat-app
Install axios:
yarn add axios
Install supabase-js (Javascript client for Supabase).
yarn add @supabase/supabase-js
In your src folder, create a supabaseClient.js file and paste the code below to initialize the Supabase client in our project (this is a programmatic way of getting access to our Supabase database):
123456import { createClient } from "@supabase/supabase-js";

const supabasebaseUrl = process.env.REACT_APP_SUPABASE_URL;
const supabasebaseAnonKey = process.env.REACT_APP_SUPABASE_ANON_KEY;

export const supabase = createClient(supabasebaseUrl, supabasebaseAnonKey)
We also need to add our Supabase keys as environment variables.
Create a .env file in the root of your project and replace the placeholders below with your project credentials that you copied earlier (you can also find your project keys on your Supabase dashboard by selecting Settings > Project settings > API):
12REACT_APP_SUPABASE_URL="<YOUR-SUPABASE-URL>"
REACT_APP_SUPABASE_ANON_KEY="<YOUR-SUPABASE-ANON-KEY>"
Start your React server by running yarn run start or npm run start. If your server is already running, restart your server after updating your .env file.

Create the Auth Component
Now that we have the Supabase client set up, let’s create an auth component that will handle both user logins and signups. Supabase will do the heavy work of detecting if a user is a new user or an already registered user.
We’ll make use of the supabase.auth.signIn() method to achieve this.
In your src folder:
- Create a new
main.module.cssfile. - Create a new
pagesfolder. - Next, create a new
Authenticationfolder inside thepagesfolder. - Finally, create an
Auth.jsxfile inside theAuthenticationfolder.
Your folder structure should look like this:

In the Auth.jsx file, copy and paste the code below:
123456789101112131415161718192021222324252627282930313233343536373839404142434445464748495051525354// pages/Auth.jsx
import { useState } from "react";
// importing the supabase helper
import { supabase } from "./../../supabaseClient";
// import styles
import Styles from "./../../main.module.css";
export default function Auth() {
  const [loading, setLoading] = useState(false);
  const [email, setEmail] = useState("");
  // function to handle the login and signup
  const handleAuthentication = async (email) => {
    try {
      setLoading(true);
      const { error } = await supabase.auth.signIn({ email });
      if (error) throw error;
      alert("Check your email for the magic link!");
    } catch (error) {
      alert(error.error_description || error.message);
    } finally {
      setLoading(false);
    }
  };
  return (
    <div className={Styles.Container}>
      <div className={Styles.FormWrap}>
        <h1 className={Styles.Heading}>My Team Chat App</h1>
        <p className={Styles.Description}>
          Enter your email to sign in via magic link
        </p>
        <div className={Styles.InputWrapper}>
          <input
            className={Styles.InputField}
            type='email'
            placeholder='john.doe@email.com'
            value={email}
            onChange={(e) => setEmail(e.target.value)}
          />
        </div>
        <div className={Styles.InputWrapper}>
          <button
            onClick={(e) => {
              e.preventDefault();
              handleAuthentication(email);
            }}
            className={Styles.Button}
            disabled={loading}
          >
            {loading ? <span>Loading</span> : <span>Send my magic link</span>}
          </button>
        </div>
      </div>
    </div>
  );
}
Let’s add some styles to the main.module.css:
12345678910111213141516171819202122232425262728293031323334353637383940414243/* src/main.module.css */
.Container {
  display: flex;
  justify-content: center;
  align-items: center;
  min-height: 90vh;
  font-family: Arial, Helvetica, sans-serif;
}
.FormWrap {
  border: 1px solid #cccccc;
  padding: 5rem;
}
.Heading {
  color: rgb(30, 144, 255);
  margin: 1rem 0;
}
.Description {
  margin: 0.8rem 0;
  color: #ff0000;
}
.FieldWrapper {
  width: 100%;
}
.InputField {
  width: 100%;
  margin-bottom: 1rem;
  padding: 8px;
  font-size: 0.9rem;
  border: 1px solid black;
}
.Button {
  width: 100%;
  display: inline-block;
  text-align: center;
  padding: 0.5rem 1rem;
  cursor: pointer;
  text-align: center;
  font-size: 1rem;
  text-transform: capitalize;
  background-color: rgb(30, 144, 255);
  color: white;
  border: none;
}
In your App.js file, render the Auth.jsx component like this:
123456789// App.js
import Auth from './pages/Authentication/Auth';
import './App.css';
function App() {
  return (
    <Auth />
  );
}
export default App;
Below is the expected output of the Auth.jsx component.

Resetting the Browser’s Default Styles
Let’s reset the browser default styles so that we can have a pixel-perfect layout:
- Delete all the
stylesin yourindex.css - In your
App.cssfile, replace thestyleswith the code below:
123456/* App.css */
* {
  padding: 0;
  margin: 0;
  box-sizing: border-box;
}
Now, our UI should be perfect 👌

Now, let’s test our magic link implementation:
- Enter a valid email address in the input box and click the Send My Magic Link button.

- Check your email for the magic link.
Note: Supabase will detect if an email address is from a new user and will send a signup link instead.

- You will be redirected back to localhost after clicking Confirm your mail.
For a few seconds, you’ll see the token in the URL bar like this:

To view the user’s token:
- Right-click on your screen and select the inspect option.
- Under the Application tab, select Local Storage.
You’ll find the Supabase authentication token and other information related to the currently logged-in user.

Seeing the user’s token in the local storage shows that our authentication implementation works as expected and a user is currently logged in.
But instead of redirecting the authenticated user to the login page, we want to redirect them to the chat page, which we’ll build with the React Chat SDK in a bit.
Setting Up Your Stream Account
To add chat to your app, you need to sign up for a free 30-day trial account.

Setting Up Your Chat Project
After successfully creating your account, you need to set up a chat application for your project.
Follow the steps below to create a new chat app:
- From your dashboard, click on Create App.

- In the pop-up form, enter your chat app’s name (we’re using my-team-chat-app for this tutorial).
- Select the closest location to your region for the best performance (this is where your chat app will be hosted) and leave the environment as Development.
- Click the Create App button when you’re done. You will be redirected to your new chat app’s dashboard.

- Locate your App Access Keys at the bottom of the page.

We’ll use these keys to build the frontend and backend parts of our chat application.
Update your React .env file with your API Key and restart your React app server:
1REACT_APP_STREAM_API_KEY=”<Your-API-Key>”
Installing the React Chat SDK
Now that we’ve set up our application and obtained the access keys, you need to install stream-chat and the stream-chat-react SDK to start building your messaging app with the React chat components.
To install the required chat dependencies in your React application, run:
yarn add stream-chat stream-chat-react
or
npm install stream-chat stream-chat-react
This will install the React Chat SDK components needed to build our social messaging application.
A Closer Look at the React SDK Components
We have so many exposed components from the stream-chat-react SDK. We have the React Context Provider, which includes the Chat and Channel components, as well as UI components like the ChannelHeader, MessageInput, MessageList, Window, and ChannelList.
The Chat and Channel components manage the ChatContext and share it with the other UI chat components.
To learn more about the React Chat SDK, check out the React chat app tutorial.
Authenticating a Logged-In User From Supabase on Stream
Now that we have our Supabase authentication running and our React app set up as well, let’s take a look at how to authenticate users on Stream using a logged-in user from Supabase.
But first, let’s understand how Stream Chat works:
Every chat user must have a valid Stream token generated from the backend before they can access the chat page. The generated token is then passed along with the user's id to the Stream connectUser() method in the frontend. This will create a new session for the user on the chat page.
Supabase only requires an email address for a user to be authenticated and by extension, the only information we have access to is their email address. Email addresses are invalid for generating a Stream token, as they contain special characters.
Thought process:
From the Supabase profile table we created earlier, each user profile contains a username, avartar_url, and website (URL) column.
We can follow the steps below so that the user is required to provide their username before accessing the chat page:
- After a user signs up with a magic link, they’ll be redirected to the chat page from their email inbox.
- On the chat page, we’ll query the user’s profile from our Supabase table.
- Next, we’ll check if the username is empty.
- If the username is empty, the user will be redirected to the profile update page.
- The user can now proceed to chat after a successful profile update.
Let’s build it!
The next part of this tutorial is divided into two sections: The Frontend Part and The Backend Part.
The Backend Part
We’ll begin with the backend part first so that we can generate the user’s tokens for the frontend.
Setting Up Your Node and Express Environment
Node.js is an open-source JavaScript environment that allows JavaScript to run outside of the web browser. We’ll also be making use of Express.js, a Node.js framework that makes it easier to build Rest APIs.
You can skip this step if you already have Node.js installed.
Run the code below to see if Node.js is already installed on your system:
1node --version
This will return the version of Node.js that you have installed. However if an error is returned, you most likely do not have Node.js installed. Download Node.js for free to continue the tutorial.
Step 1 — Setting Up the Project
Follow the instructions below to set up a Node.js and Express.js environment:
- Create a new folder and name it my-team-chat-app-backend.
- Navigate to the folder in your terminal and run
yarn init -yornpm init -yto create a package.json file. - Install Express.js with
yarn add expressornpm install express. - Install cors with
yarn add corsornpm install cors. - Install nodemon with
yarn add nodemon --devornpm install --save-dev nodemon. - Install the Stream Chat Node.js SDK with
yarn add stream-chatornpm install stream-chat. - Install dotenv with
yarn add dotenvornpm install dotenv.
At this point, we’ve set up a new project to power the backend of our chat app with Express.
Your package.json should look like this:

We’ll make use of nodemon to restart our server automatically when we make changes to our files, and we only want to do this in the development environment.
Update your package.json file with the script below:
12345"scripts": { "start": "node index.js", "dev": "nodemon index.js", "test": "echo \"Error: no test specified\" && exit 1" },
Your package.json should now look like this:

Step 2 — Creating an Express Server
Now that we have all our dependencies installed, we can set up our Express.js server.
First, let’s add our Stream API keys as an environment variable just as we did in the frontend:
- Create a
.envfile and paste the code below:
123APP_PORT=1111
STREAM_CHAT_API_KEY="<YOUR-STREAM-CHAT-API-KEY>"
STREAM_CHAT_SECRET_KEY="<YOUR-STREAM-CHAT-SECRET-KEY>"
Here in the .env file, we’re setting our server port to 1111, but you can also set this to your preferred port (just make sure it’s not the same with the frontend server). You also need to replace the variable values with your Stream credentials.
- Create a new
app.jsfile and add the following code:
123const express = require("express"); // importing express
const app = express(); // instance of express
module.exports = app; // exporting app
The first line of code is importing the express module that we’ve installed. The second line will create an app instance from the express function, while the third line is exporting the app. We’ll be using the app variable to create our server.
Let’s import other dependencies. Update the app.js with the following lines of code:
1234567891011const express = require("express"); // importing express
const app = express(); // instance of express

// updated lines of code
app.use(express.json()); // json middleware
const cors = require("cors"); // importing cors
app.use(cors()); // cors middleware
require("dotenv").config(); // importing .env file
//

module.exports = app; // exporting app
Because the backend will accept a request object (the user id) from the frontend, the express.json() will help convert the incoming request object to a JSON object that we can access.
The next two lines of code are importing the cross origin resource sharing (CORS) module and applying it to our express app instance, granting us access to our chat frontend and any other origins that will interact with our backend routes.
In a production ready application, don't enable CORS for all routes. This could result in security vulnerabilities.
The dotenv module will allow us to access the environment variable in the .env file via process.env.
- After importing the required dependencies, create a new
index.jsfile and add the code below to create our server.
12345678const http = require("http") // importing http const app = require("./app"); // importing app.js const server = http.createServer(app); // creating server const { APP_PORT } = process.env; // importing port from .env file const PORT = process.env.PORT || APP_PORT; // setting port server.listen(PORT, () => { console.log(`Server is running 🏃♂️ on port ${PORT}`); });
Line 1 above is importing the in-built HTTP module from Node.js. The HTTP module is used to create an HTTP server that listens to server ports and gives a response back to the client (our chat frontend in this case).
Line 2 is importing the the express app that we exported from the app.js. We’re using the createServer() method from the HTTP module to create a server for the imported express app on line 3.
In case you want to host your server on platforms like Heroku, Iines 4 and 5 will instruct the server to either use the default port from your .env file or use the available port on the hosting platform if your default port is in use.
We’re telling our server to listen on the assigned port (the default port on local hosting). But, we need to start our server before this will work!
In your terminal, run yarn run dev or npm run dev to start your server.
We’ll get feedback from the terminal when the server runs 🏃 successfully:

Step 3 — Setting Up Stream and Node
Now that our server is up and running, we need to import the Stream Chat module and our API keys in app.js before we can create our /getToken route.
In your app.js file, update your code with the following:
1234567//...paste after dotenv config
// importing StreamChat
const StreamChat = require("stream-chat").StreamChat;
// importing secret key from .env file
const STREAM_CHAT_AP_KEY = process.env.STREAM_CHAT_AP_KEY;
// importing secret key from .env file
const STREAM_CHAT_SECRET_KEY = process.env.STREAM_CHAT_SECRET_KEY;
We’re importing the stream-chat module and API keys from the .env file. This will keep our API secure from anyone accessing the project codebase on GitHub.
Step 4 — Creating a Token API
This step will cover how to create a locally served API that will generate a user token from Stream.
Thought process:
- The frontend will make a POST request to the
/getTokenendpoint with the useridas payload. - The user
idis required for the token to be generated. - In the
/getTokenroute function, we'll make use of our API keys to create a new server-client and then use thecreateToken()method to generate a token with the user'sid. - We’ll return an object containing the user’s
token, a success message, and the username back to the frontend.
The following lines of code will help us do just that.
Update your app.js file with the /getToken route function below:
12345678910111213141516171819202122//...paste after Stream Chat Secret Key
// route to get user token
app.post("/getToken", (req, res) => {
  // if id is not provided
  if (!req.body.id) {
  // send error
    return res.status(400).send({ message: "user id is required" });
  }
  // creating instance of StreamChat
  const serverClient = new StreamChat(
    STREAM_CHAT_AP_KEY,
    STREAM_CHAT_SECRET_KEY
  );
  // creating token for user
  const token = serverClient.createToken(req.body.id);
  // sending response
  res.send({
    message: "token generated successfully",
    token: token,
    username: req.body.id
  });
});
Step 5 — Testing the Token API
It’s always a good practice to test your API endpoints with a testing tool before handing them over to the frontend; this ensures that they function as intended and saves the frontend some time.
We’re going to use Hopscotch to put our /getToken route endpoint to test.
Follow the steps below to test your API against the possible cases on Hoppscotch (you can use any API testing tool you want).
Test Case 1: User id is required.
Let’s test how the /getToken endpoint will respond when a user token is missing from the payload.
- Go to Hoppscotch.
- Select Settings and scroll down to the Interceptor section.
- Toggle on the Browser extension button and make sure either the Chrome or Firefox extension is installed.
Next, enter http://localhost:1111/getToken in the URL bar, select the POST method option, and hit the Send button.

The endpoint should return a 400 - Bad Request error with a message in the Response Body stating that a “user id is required”.
If you get any other error messages, make sure to update the port and the route name with your own if your setup differs from this tutorial — and don't forget to retrace your steps. I'll wait 🤞
Test Case 2: Generate a user token for “Sam”.
The first test case passed! Let's see if the /getToken endpoint generates and returns the user token when a user id ("Sam") is provided.
To pass the user id to the request body, go to Hoppscotch's Body tab and choose application.json from the Content-Type drop-down menu.
Copy and paste the JSON format below into the Raw Request Body, then click Send:
123{
    "id": "sam"
}
A 200 - OK success response with a JSON object containing a success message, the user’s token, and the username should be returned.

Note: These are the only two test cases required for this tutorial. You might want to add extra test cases for your API endpoint(s) in a production-ready application.
The Frontend Part
At this point, our chat application’s backend can generate a user token. Let’s create our chat interface.
Building the Chat Interface
The React SDK provides us with out-of-the-box UI components. The components include the following user interfaces:
- Message List
- Reactions
- Channel List
- Channel Header
These components will help us develop the interface for our chat application faster without having to write any (or much) CSS.
Follow the steps below to set up your chat interface:
- In your
pagesfolder, create a newChatPagefolder - Next, create a
ChatPage.jsxfile with aChatPagefunctional component
Your folder structure and ChatPage component should look like this:

Next, we need to import and render the components. We also need to create a state for our chat application to keep track of the chat instance.
1234567891011121314151617181920212223242526272829import React, { useState } from "react";
import {
  Chat,
  Channel,
  ChannelHeader,
  MessageInput,
  MessageList,
  Window,
  ChannelList,
} from "stream-chat-react";

export const ChatPage = () => {
  // keep track of chat instance state
  const [chatClient, setChatClient] = useState(null);
  return (
    <React.Fragment>
      <Chat client={chatClient} theme={"messaging dark"}>
        <ChannelList />
        <Channel>
          <Window>
            <ChannelHeader />
            <MessageList />
            <MessageInput />
          </Window>
        </Channel>
      </Chat>
    </React.Fragment>
  );
};
As shown above, the <Chat /> component accepts two props:
- the client prop, which is our chat app state
- the theme prop that allows us to select between the messaging dark or messaging light theme for our chat interface. (For this tutorial, we're using the messaging dark theme.)
In your app.js, comment out the <Auth /> component and render the <ChatPage /> component. We’ll also add the Stream’s CSS styles:
12345678910111213// App.js
import Auth from './pages/Authentication/Auth';
import { ChatPage } from './pages/ChatPage/ChatPage';
//stream chat css
import "stream-chat-react/dist/css/index.css";
import './App.css';
function App() {
  return (
    // <Auth />
    <ChatPage />
  );
}
export default App;
You'll see a white blank page on your browser. This is because Stream requires an active user to create a chat instance in order to render the chat UI components. We’ll pass and redirect the authenticated user from Supabase to our ChatPage component as a prop in the next section.

Redirecting Logged-In Users to the Chat Page
As shown above, we have to manually render the <ChatPage /> component by commenting out the <Auth /> component in app.js. To handle this programmatically, we’ll make use of the ternary operator.
In our ternary operator, when a user is not authenticated, we want to render the <Auth /> component, and when they are authenticated, we want to render the <ChatPage /> component.
To do this, we also have to keep track of the Supabase authentication session, which will allow us to determine whether or not a user is signed in.
Update your app.js with the following code:
12345678910111213141516171819202122232425262728//app.js
import React, { useState, useEffect } from "react";
import { supabase } from "./supabaseClient";
import Auth from "./pages/Authentication/Auth";
import { ChatPage } from "./pages/ChatPage/ChatPage";
import "stream-chat-react/dist/css/index.css";
import "./App.css";

export default function Home() {
  // keep track of the user's current state
  const [session, setSession] = useState(null);

  useEffect(() => {
    setSession(supabase.auth.session());
    supabase.auth.onAuthStateChange((_event, session) => {
      setSession(session);
    });
  }, []);
  return (
    <React.Fragment>
      {!session ? (
        <Auth />
      ) : (
        <ChatPage key={session.user.id} session={session} />
      )}
    </React.Fragment>
  );
}
Supabase will create a session for a user when they sign in, and we'll pass that session to our <ChatPage /> component as a prop. We’ll then make use of the session object to create a Stream Chat token for the user. You can go ahead to test this implementation by signing in.
Prompting First Time Users to Create a Username
Instead of showing the user a blank page because they don’t have a username set up, we want to redirect the first-time users to a page where they can create their username. We’ll name this component UpdateUserProfile.
In the ChatPage component, we’ll retrieve the user’s profile from our Supabase profile table, and then check if the user has a username.
Update your ChatPage component with the code below to query the user’s profile from Supabase.
123456789101112131415161718192021222324252627282930313233343536373839404142434445464748495051525354555657585960616263import React, { useEffect, useState } from "react";
import {
  Chat,
  Channel,
  ChannelHeader,
  MessageInput,
  MessageList,
  Window,
  ChannelList,
} from "stream-chat-react";
import { supabase } from "../../supabaseClient";
export const ChatPage = ({ session }) => {
  // keep track of chat instance state
  const [chatClient, setChatClient] = useState(null);
  const [username, setUsername] = useState(null);
  const [loading, setLoading] = useState(true);
  useEffect(() => {
    async function getProfile() {
      try {
        setLoading(true);
        const user = supabase.auth.user();
        let { data, error, status } = await supabase
          .from("profiles")
          .select(`username`)
          .eq("id", user.id)
          .single();
        if (error && status !== 406) {
          throw error;
        }
        if (data) {
          setUsername(data.username);
        }
      } catch (error) {
        alert(error.message);
      } finally {
        setLoading(false);
      }
    }
    // if the user is authenticated by the time the page loads, get their username
    // session from Supabase
    if (session) {
      getProfile();
    }
  }, []);
  // show loader while fetching profile
  if (loading) {
    return <h2>Loading profile</h2>;
  }
  return (
    <React.Fragment>
      <Chat client={chatClient} theme={"messaging dark"}>
        <ChannelList />
        <Channel>
          <Window>
            <ChannelHeader />
            <MessageList />
            <MessageInput />
          </Window>
        </Channel>
      </Chat>
    </React.Fragment>
  );
};
From the code above, the useEffect hook will execute the getProfile function if there is a session from Supabase before our ChatPage component is rendered to the user.
We also want to display a loading text to the user while fetching their profile. You might want to use a proper loader in a production ready application.
Our implementation should look like the video below. You can go ahead and sign in:
Once the user’s profile has been fetched, the ChatPage component is displayed (but still blank because there’s no username yet). Let’s fix that 👇.
Add the following code to redirect the user to the UpdateUserProfile component to create their username:
123456789101112//... after returning loading profile
const noUsername = !username;
if (noUsername) {
  return (
  <UpdateUserProfile
   key={session.user.id}
   session={session}
   setChatUsername={setUsername}
  />
 );
}
//...
Now, let’s create our UpdateUserProfile component.
In the pages folder:
- Create a new folder and name it
UpdateUserProfile - Next, in the
UpdateUserProfile, create a newUpdateUserProfile.jsxfile - Copy and paste the code below inside the
UpdateUserProfile.jsxfile
123456789101112131415161718192021222324252627282930313233343536373839404142434445464748495051525354555657585960616263646566676869707172737475767778798081828384858687888990919293949596// pages/UpdateUserProfile/UpdateUserProfile.jsx
import { useState, useEffect } from "react";
import { supabase } from "./../../supabaseClient";
import Styles from "./../../main.module.css";

export default function UpdateUserProfile({ session, setChatUsername }) {
  const [loading, setLoading] = useState(true);
  const [username, setUsername] = useState(null);

  useEffect(() => {
    getProfile();
  }, [session]);

  async function getProfile() {
    try {
      setLoading(true);
      const user = supabase.auth.user();
      let { data, error, status } = await supabase
        .from("profiles")
        .select(`username`)
        .eq("id", user.id)
        .single();
      if (error && status !== 406) {
        throw error;
      }
      if (data) {
        setUsername(data.username);
      }
    } catch (error) {
      alert(error.message);
    } finally {
      setLoading(false);
    }
  }

  async function updateProfile({ username }) {
    try {
      setLoading(true);
      const user = supabase.auth.user();
      const updates = {
        id: user.id,
        username,
        updated_at: new Date(),
      };
      let { error } = await supabase.from("profiles").upsert(updates, {
        returning: "minimal", // Supabase shouldn't return the value after inserting
      });
      if (error) {
        throw error;
      }
      // update the chatpage component about the new username
      setChatUsername(username);
    } catch (error) {
      alert(error.message);
    } finally {
      setLoading(false);
    }
  }
  return (
    <div className={Styles.Container}>
      <div className={Styles.FormWrap}>
        <h1 className={Styles.Heading}>Update Profile</h1>
        <p className={Styles.Description}>This cannot be changed</p>
        <div className={Styles.InputWrapper}>
          <label htmlFor='email'>Email</label>
          <input
            className={Styles.InputField}
            id='email'
            type='text'
            value={session.user.email}
            disabled
          />
        </div>
        <div className={Styles.InputWrapper}>
          <label htmlFor='username'>Username</label>
          <input
            className={Styles.InputField}
            id='username'
            type='text'
            value={username || ""}
            onChange={(e) => setUsername(e.target.value)}
          />
        </div>
        <div className={Styles.InputWrapper}>
          <button
            className={Styles.Button}
            onClick={() => updateProfile({ username })}
            disabled={loading}
          >
            {loading ? "Loading ..." : "Update"}
          </button>
        </div>
      </div>
    </div>
  );
}
Your ChatPage.jsx file complete code should look like this:
1234567891011121314151617181920212223242526272829303132333435363738394041424344454647484950515253545556575859606162636465666768697071727374import React, { useEffect, useState } from "react";
import {
  Chat,
  Channel,
  ChannelHeader,
  MessageInput,
  MessageList,
  Window,
  ChannelList,
} from "stream-chat-react";
import UpdateUserProfile from "./../UpdateUserProfile/UpdateUserProfile";
import { supabase } from "./../../supabaseClient";
export const ChatPage = ({ session }) => {
  // keep track of chat instance state
  const [chatClient, setChatClient] = useState(null);
  const [username, setUsername] = useState(null);
  const [loading, setLoading] = useState(true);
  useEffect(() => {
    async function getProfile() {
      try {
        setLoading(true);
        const user = supabase.auth.user();
        let { data, error, status } = await supabase
          .from("profiles")
          .select(`username`)
          .eq("id", user.id)
          .single();
        if (error && status !== 406) {
          throw error;
        }
        if (data) {
          setUsername(data.username);
        }
      } catch (error) {
        alert(error.message);
      } finally {
        setLoading(false);
      }
    }
    // if the user is authenticated by the time the page loads, get their username
    // session from Supabase
    if (session) {
      getProfile();
    }
  }, []);
  // show loader while fetching profile
  if (loading) {
    return <h2>Loading profile</h2>;
  }
  const noUsername = !username;
  if (noUsername) {
    return (
      <UpdateUserProfile
        key={session.user.id}
        session={session}
        setChatUsername={setUsername}
      />
    );
  }
  return (
    <React.Fragment>
      <Chat client={chatClient} theme={"messaging dark"}>
        <ChannelList />
        <Channel>
          <Window>
            <ChannelHeader />
            <MessageList />
            <MessageInput />
          </Window>
        </Channel>
      </Chat>
    </React.Fragment>
  );
};
The GIF below demonstrates the user journey of our chat application so far. If you try to login or refresh the ChatPage component where we left off from the last GIF, the user should be redirected to the user update page.
Now that the users can create a username for themselves on Supabase, we can now proceed to initiate a chat for the current user by connecting the user to the Stream Chat API. This will clear the alert error after updating the username.
We’ll wrap our chat logic in a function called initChat. We want this function to run each time the username changes by wrapping it in a useEffect hook.
Below are steps to initialize chat for a user:
- Create a new Stream Chat client with our Stream API key.
- Then, make a POST request to the
/getTokenendpoint. - Next, connect the user to our Stream Chat app with their token.
- Create a team channel (we need one as a default).
- Then, add the user as a member of the channel.
- Show a loader when the chat client is initializing.
- Finally, let’s chat! 💬
The lines of code below represent the steps listed above.
To create a new channel, you need to specify the channel type as one of the following:
For this tutorial, we will use team as our channel type.
You must also specify the channel name and image (you can add more details about your channel if you want).
Note:Check out the React docs for a more detailed explanation about creating a channel.
Update your <ChatPage /> component with the code below:
1234567891011121314151617181920212223242526272829303132333435363738394041424344454647484950515253// import Stream Chat
import { StreamChat } from "stream-chat";
// import axios
import axios from "axios";

// …
const [channel, setchannel] = useState(null);

useEffect(() => {
    async function initChat() {
      // 1. create a new Stream Chat client
      const client = StreamChat.getInstance(process.env.REACT_APP_STREAM_API_KEY);
      // 2. Generate a user token for the current user (use your port)
      const res = await axios.post("http://localhost:1111/getToken", {
        id: username,
      });
      // 3. Connect the current user to the Stream Chat API
      await client.connectUser(
        {
          id: username,
          name: username,
        },
        res.data.token
      );
      // 4. Create a team channel
      const channel = client.channel("team", "general", {
        name: "General",
        image:
          "https://images.pexels.com/photos/2422294/pexels-photo-2422294.jpeg?auto=compress&cs=tinysrgb&h=650&w=940",
      });
      await channel.create(); //create channel if it doesn't exist
      // 5. Add the current user to the channel members
      channel.addMembers([username]);
      setchannel(channel); //set channel as current channel
      setChatClient(client); //set chat client
    }
    if (username) {
      // initialize the chat app
      initChat();
    }
    return () => {
      // disconnect the chat client when the component unmounts
      if (chatClient) {
        chatClient.disconnectUser();
      }
    };
  }, [username]);

  // 6. Show a loader when the chat client is not yet initialized
  if (username && (!chatClient || !channel)) {
    return <h2>loading chat page</h2>;
  }
//…
Hurray 🎉
Users with a username can now access the chat page after signing in. Go ahead and test the implementation. I'll wait 🤞.
From the above GIF illustration, the channel header is showing the total number of members in the channel and the number of active users.
Currently, we only have one member and one online user.
Adding New Users to the Chat App
To add or invite a new user to your chat application, share the hosted link to another user, or login with a new email and username on your local server.
Because our chat application is not hosted online yet, let’s sign up with a new email address.
Note: If you click the magic link button from another device, make sure the device is running the React application.
There is one more thing! By default, only the user who created the channel can access their chat page; users cannot join or send messages on a chat channel not created by them.
To fix this, we’ll grant the chat users some permissions in the next section.

Adding User Permissions
In this section, we’ll add the following permissions for the channel users:
- CreateChannel (default)
- CreateDistinctChannelForOthers (default)
- UpdateChannelMembers
- ReadChannel
- CreateMessage
- CreateReaction
- ReadChannelMembers
For a detailed understanding of Stream user permissions, check out the user permission reference docs.
On your stream dashboard:
- Select your application (my-team-chat-app).
- In the nav bar, select chat and click on overview.

- On the next page, select your Channel Types (team).

- Scroll down and locate the Permissions section.

- Add the permissions below in the JSON editor and click Save button:
"UpdateChannelMembers",
"ReadChannel",
"CreateMessage",
"CreateReaction",
"ReadChannelMembers"
Your user permissions should look like this:

With the user permissions updated, invited users can now access the chat page and also send and view messages on the channel. You can always update any of your chat app permissions from your dashboard.
From the above GIF illustration, the channel header is now showing two members and also indicating that there are two online users. This will be automatically updated when new users join or leave the channel.
Overriding Default UI Component Styles
You can easily adjust any of the UI component styles to fit your specification. For instance, the incoming message text and the channel list are not visible because of the white text on the white background.
As a developer, you can easily override styles with the steps below:
- Use the browser inspector to extract the identifier (that is, the class or id of the element).

- Add your own custom style roles to the selectors in your
App.cssfile to override Stream’s defaults styles.css1234567.dark.str-chat .str-chat__message-simple-text-inner { background: #000000; color: #ffffff; } .str-chat-channel-list .str-chat__channel-list-messenger__main { background-color: #343434; }
The code above will produce the output below:

You’ll also notice that the number of online members is updated and shows one, while the number of members is two.
Note: If you’re making use of an external CSS, import your CSS file below the Stream Chat CSS. This is not an issue when using a scoped CSS method such as a Styled component or CSS module.
Testing Our Application
Follow the steps below to test your chat application:
- Open the react chat app on two different browsers (i.e chrome and safari).
- Login on the two browsers using two different emails.
- Click on the magic links received on the emails.
Now you can start chatting 🎉
Bringing it Together
In this article, you learned how to integrate passwordless authentication via Supabase and build a messaging application using the Stream Chat React SDK.
The thought process of implementing the Supabase magic link can be applied in a different project and you can use the same principle to integrate other passwordless authentication providers such as Firebase, Google, or GitHub.
If you'd like to check out the full project on GitHub, check out the frontend repo and the backend repo.
If you liked this tutorial, reach out to us on Twitter @getstream_io and let us know.
As always, keep coding!