

Why Video Image Effects and AI Filters Matter
Popular video communication applications like Snapchat, Instagram, and TikTok allow users to augment videos with custom makeup and retouches before posting them to the platforms.
Similarly, when users need to stream a live video to their followers, they can improve their camera feeds with face, lip, and background enhancements. Applying these enhancements to live video calls improves their look and can also help entertain followers. AI effects like background blur and removal help keep the environment private for large group video calls. Several frameworks allow developers to build these AI video effects into their apps.
This article will show you how to integrate non-AI filters and a machine learning face filter into a video conferencing app powered by Stream's iOS Swift SDK. We will begin by adding Core Image filters and, along the way, implement an AI face filter to the app using Apple's Vision framework. Eventually, you will discover other toolsets that will allow you to build video effects into your iOS apps.
Prerequisites
To follow this tutorial, you will need a Stream video calling or livestreaming app built with iOS/SwiftUI. Once you have any of the above Stream video options up and running, you can easily integrate AI effects. If you are new to the Stream Video SDK for iOS, check the links above.
You can sign up for a free Stream account to obtain credentials to run the app. Once you have an account, you can also use your Stream dashboard's API key to generate a token for a production app with our token generator or your server-side token-generation implementation.
AI Video Effects Use Cases
Users of live video calling and streaming have different video enhancement demands. For example, a host or co-host in a livestreaming app may want to apply digital face makeup and lipstick before going live to stream to the audience. Similarly, a team’s video call participant may wish to personalize the background with desired effects. The following are some other use cases.
- Establish a Focal Point of Focus: In a video call, for example, an AI background blur effect can help separate participants and focus more on them while participating in live group discussions.
- Portrait Enhancement: They help beautify live video hosts to make them appear attractive to their fans.
- Adjust Light Intensity: These effects can help light the video participants' camera feeds.
- Virtual Try-on: They can be used in a virtual try-on application to help users see how the outfits they are interested in fit their bodies.
- Video Reactions: An excellent example is an in-progress FaceTime call. During a FaceTime call, participants can use hand gestures to send reactions, fill the video frame with 3D effects, and express their feelings. Available reactions include hearts, balloons, thumbs up, thumbs down, rain, confetti, fireworks, and lasers.
Underlying Frameworks & Technologies
Filters can be integrated into video applications in many ways, such as using a machine learning algorithm to place objects on users' bodies in real time. The Vision Framework on iOS and other Apple platforms can achieve the above. Using the Core Image framework, you can also apply basic filters (non-AI-based) to video frames. The VideoToolbox framework can also be used for advanced compression and decompression of video effects.
- Core Image: It allows developers to use built-in and custom filters to process photos and video images. Check out the filter catalog docs for a list of all built-in filters.
- Vision Framework: It uses Swift Concurrency and machine learning to filter input images and videos.
- VideoToolbox: A low-level framework that provides developers direct access to hardware encoders and decoders for video compression and decompression.
Project Setup
The next section of this tutorial will require a fully working video calling app created with Stream’s Swift SDK. Building the calling app from scratch is not covered here. So, create a new SwiftUI project with Xcode 15 or later and configure permissions for camera and microphone usage by selecting the project's root directly and navigating to the Info tab.
- Privacy - Camera Usage Description
- Privacy - Microphone Usage Description
You can follow our video and audio calling tutorial for a step-by-step guide on installing and integrating the Swift Video SDK with a SwiftUI app.
Add Standard Video Image Filters
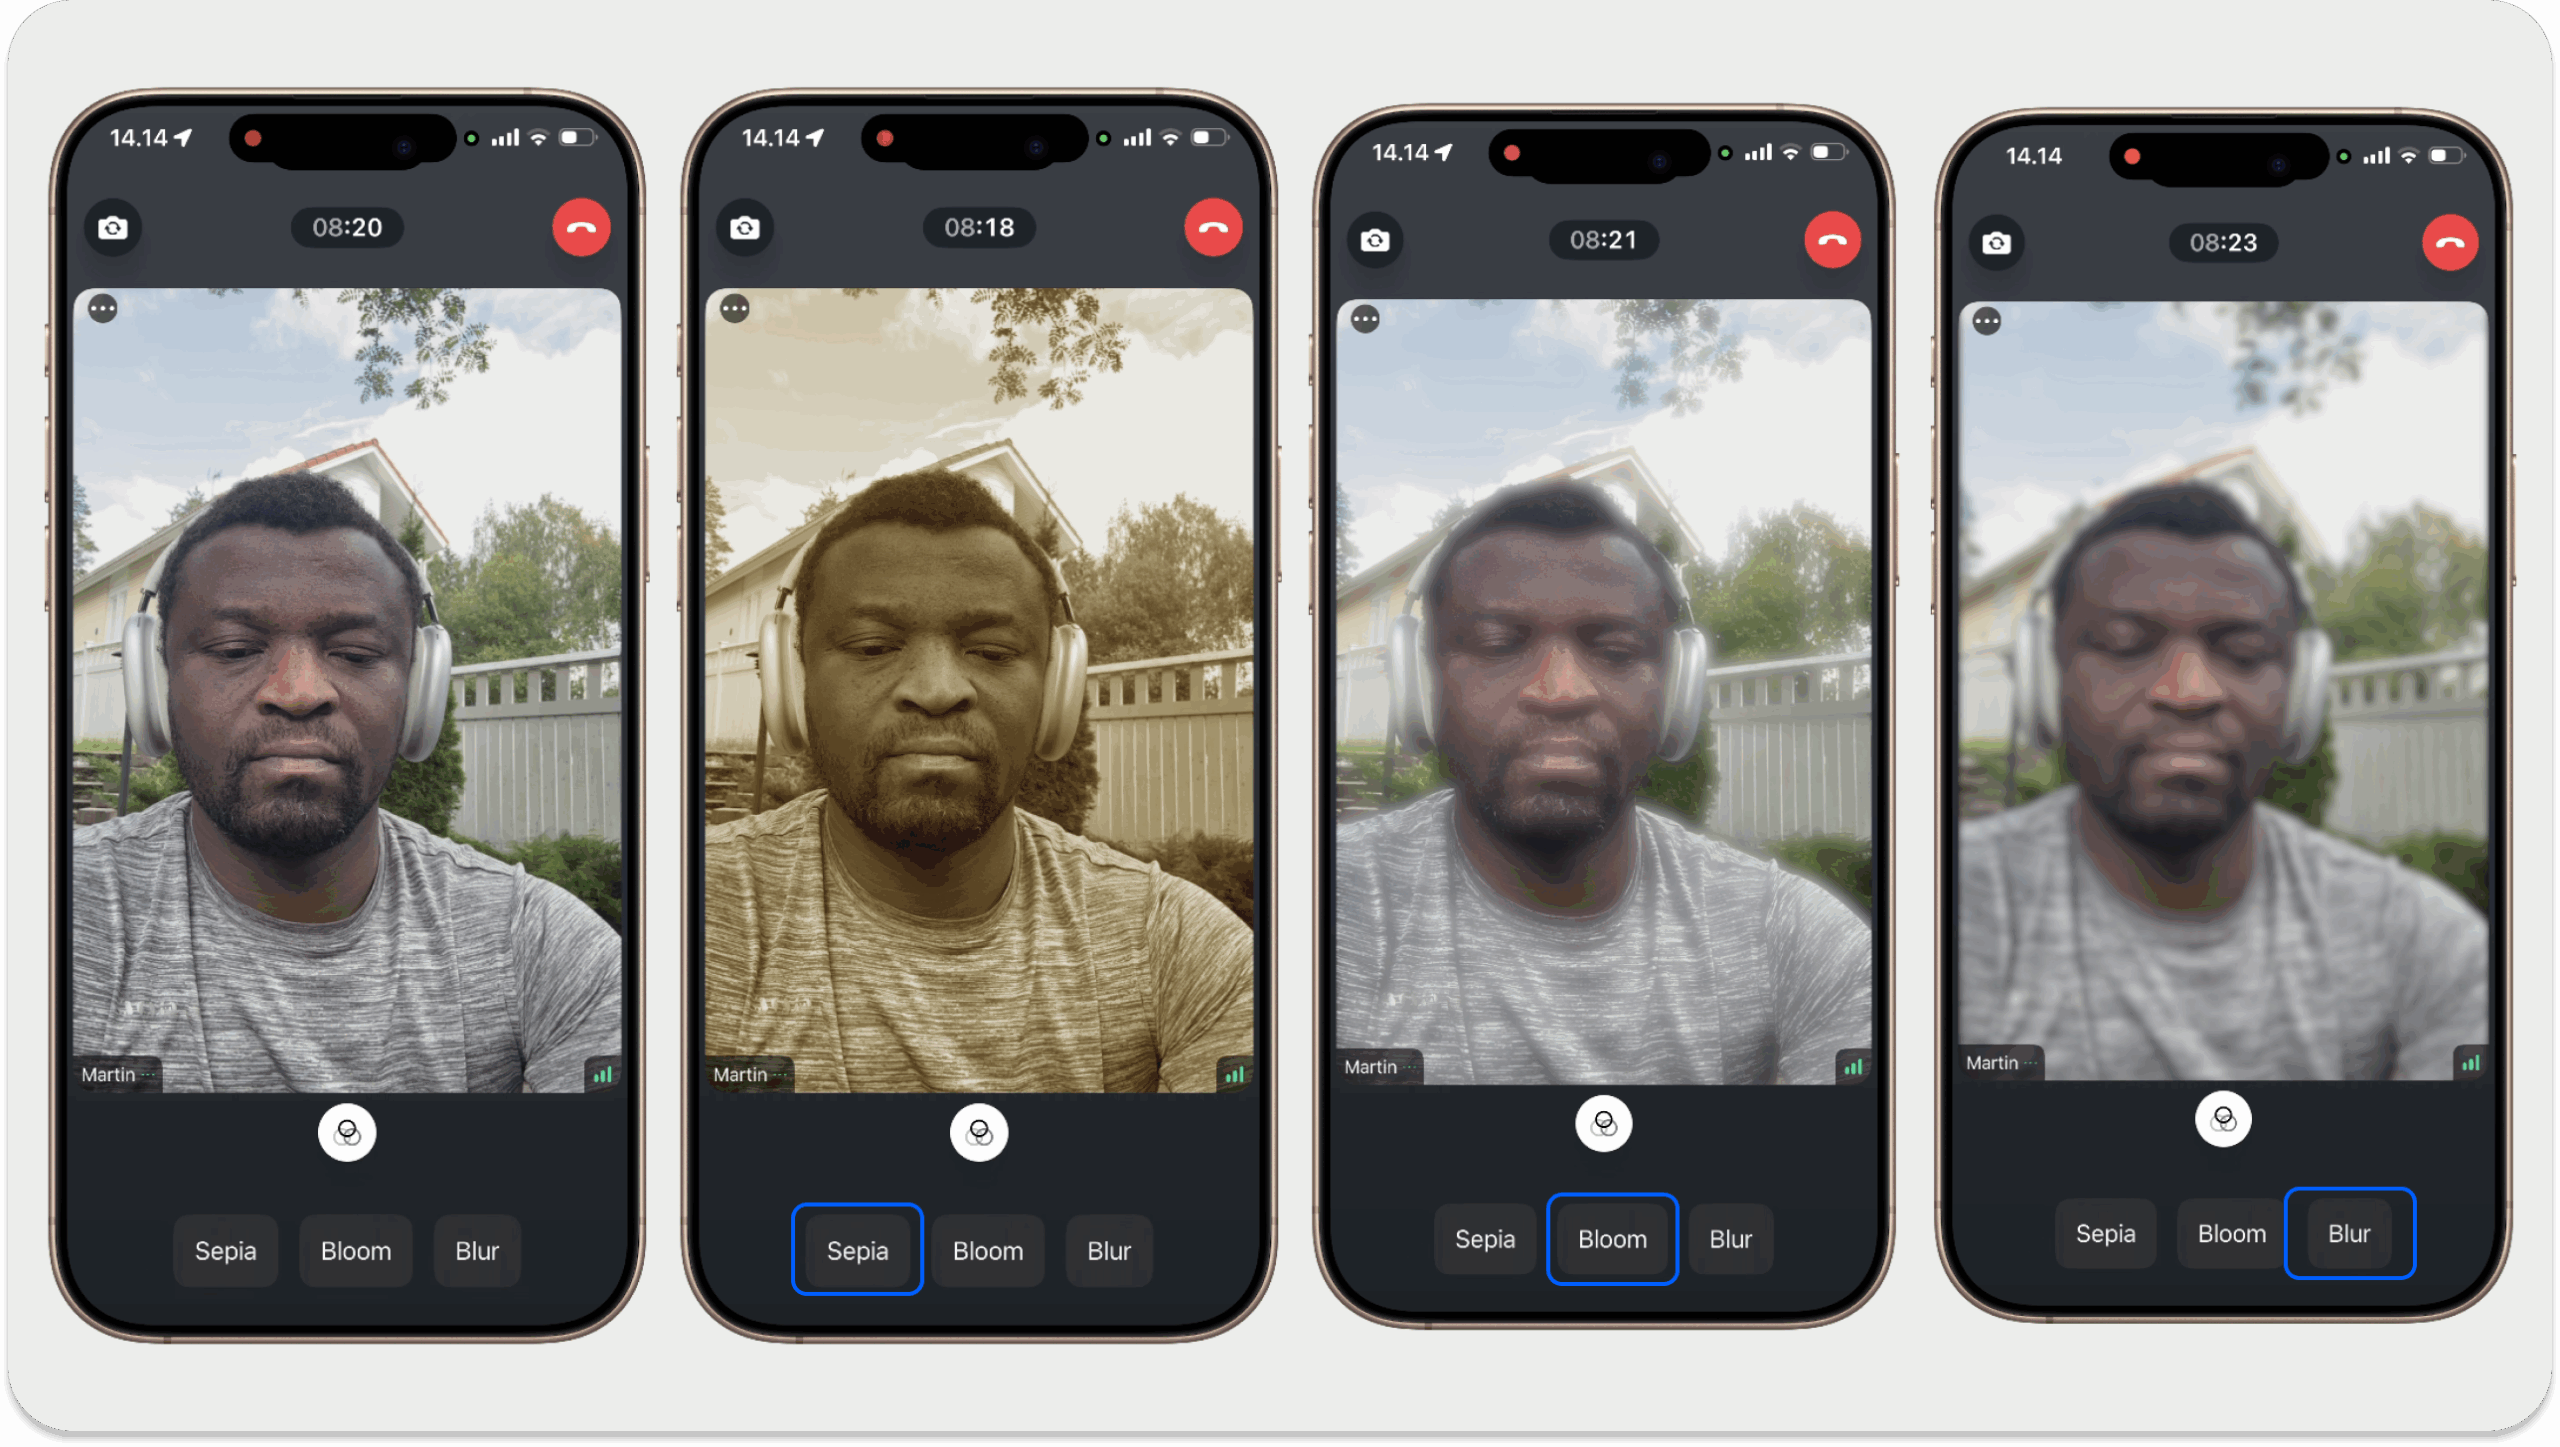
The Stream's Swift SDK supports all the built-in Core Image filters. Once you add the SDK to a SwiftUI app, you can access the standard filters and implement custom ones. The sample app in this section integrates bloom, blur, and sepia filters into Stream Video. Follow these steps to build the filter demo app from scratch.
Create Video Participants
After creating a new SwiftUI app and installing the Video SDK with Swift Package Manager, you should configure it to display videos from local and remote participants. Add a SwiftUI view, ParticipantsView.swift, to your Xcode project and replace its content with the following.
12345678910111213141516171819202122232425262728293031323334353637383940414243444546import SwiftUI
import StreamVideo
import StreamVideoSwiftUI

struct ParticipantsView: View {

    var call: Call
    var participants: [CallParticipant]
    var onChangeTrackVisibility: (CallParticipant?, Bool) -> Void

    var body: some View {
        GeometryReader { proxy in
            if !participants.isEmpty {
                ScrollView {
                    LazyVStack {
                        if participants.count == 1, let participant = participants.first {
                            makeCallParticipantView(participant, frame: proxy.frame(in: .global))
                                .frame(width: proxy.size.width, height: proxy.size.height)
                        } else {
                            ForEach(participants) { participant in
                                makeCallParticipantView(participant, frame: proxy.frame(in: .global))
                                    .frame(width: proxy.size.width, height: proxy.size.height / 2)
                            }
                        }
                    }
                }
            } else {
                Color.black
            }
        }
        .edgesIgnoringSafeArea(.all)
    }

    @ViewBuilder
    private func makeCallParticipantView(_ participant: CallParticipant, frame: CGRect) -> some View {
        VideoCallParticipantView(
            participant: participant,
            availableFrame: frame,
            contentMode: .scaleAspectFit,
            customData: [:],
            call: call
        )
        .onAppear { onChangeTrackVisibility(participant, true) }
        .onDisappear{ onChangeTrackVisibility(participant, false) }
    }
}
Next, use the content of FloatingParticipantView.swift to display the local iOS camera feed.
123456789101112131415161718192021222324252627import SwiftUI
import StreamVideo
import StreamVideoSwiftUI

struct FloatingParticipantView: View {

    var participant: CallParticipant?
    var size: CGSize = .init(width: 120, height: 120)

    var body: some View {
        if let participant = participant {
            VStack {
                HStack {
                    Spacer()

                    VideoRendererView(id: participant.id, size: size) { videoRenderer in
                        videoRenderer.handleViewRendering(for: participant, onTrackSizeUpdate: { _, _ in })
                    }
                    .frame(width: size.width, height: size.height)
                    .clipShape(RoundedRectangle(cornerRadius: 8))
                }
                Spacer()
            }
            .padding()
        }
    }
}
Create a Filter Service and Customize the Video Calling UI
Let's add FiltersService.swift to the project and define the types of filters we want the app to support. There are only three built-in Core Image filters: bloom, blur, and sepia. However, you can implement as many filters as you want or create custom-made ones.
12345678910111213141516171819202122232425262728293031323334353637383940414243444546474849// FiltersService.swift
// Shared video filter service for all call-related views
import Foundation
import Combine
import StreamVideo
import CoreImage

let sepia: VideoFilter = {
    let sepia = VideoFilter(id: "sepia", name: "Sepia") { input in
        let sepiaFilter = CIFilter(name: "CISepiaTone")
        sepiaFilter?.setValue(input.originalImage, forKey: kCIInputImageKey)
        return sepiaFilter?.outputImage ?? input.originalImage
    }
    return sepia
}()

let bloom: VideoFilter = {
    let bloom = VideoFilter(id: "bloom", name: "Bloom") { input in
        let bloomFilter = CIFilter(name: "CIBloom")
        bloomFilter?.setValue(input.originalImage, forKey: kCIInputImageKey)
        bloomFilter?.setValue(1.0, forKey: kCIInputIntensityKey) // Intensity of the bloom effect
        bloomFilter?.setValue(10.0, forKey: kCIInputRadiusKey) // Radius of the bloom effect
        return bloomFilter?.outputImage ?? input.originalImage
    }
    return bloom
}()

let blur: VideoFilter = {
    let blur = VideoFilter(id: "blur", name: "Blur") { input in
        let blurFilter = CIFilter(name: "CIGaussianBlur")
        blurFilter?.setValue(input.originalImage, forKey: kCIInputImageKey)
        blurFilter?.setValue(5.0, forKey: kCIInputRadiusKey) // Blur radius

        // Blur filter expands the image bounds, so we need to crop it back to the original extent
        if let blurredImage = blurFilter?.outputImage {
            let originalExtent = input.originalImage.extent
            return blurredImage.cropped(to: originalExtent)
        }
        return input.originalImage
    }
    return blur
}()

class FiltersService: ObservableObject {
    @Published var filtersShown = false
    @Published var selectedFilter: VideoFilter?

    static let supportedFilters = [sepia, bloom, blur]
}
By default, the Video SDK displays call controls at the bottom of the screen. Since our use case focuses on video filters and not calling, we can override the UI and add a filter menu to the call controls area to show and hide the supported filters. Add a new Swift file, FilterMenu.swift, and substitute its content with this sample code.
12345678910111213141516171819202122232425262728293031323334353637383940414243444546474849505152535455565758596061626364656667//
//  FilterMenu.swift
//  AIVideoEffectsFilters
//
//  Created by Amos Gyamfi on 17.8.2025.
//

import SwiftUI
import StreamVideo
import StreamVideoSwiftUI

struct ChatCallControls: View {
    @ObservedObject var filtersService: FiltersService
    @ObservedObject var viewModel: CallViewModel
    let size: CGFloat = 44
    init(viewModel: CallViewModel, filtersService: FiltersService? = nil) {
        self._viewModel = ObservedObject(initialValue: viewModel)
        // If a FiltersService is passed in, use it; otherwise create a local instance to avoid runtime crashes.
        self._filtersService = ObservedObject(initialValue: filtersService ?? FiltersService())
    }
    var body: some View {
        VStack {
            HStack {
                /* Skip unrelated code */
                // 1. Button to toggle filters view
                Button {
                    withAnimation(.bouncy) {
                        filtersService.filtersShown.toggle()
                    }
                } label: {
                    CallIconView(
                        icon: Image(systemName: "camera.filters"),
                        size: size,
                        iconStyle: filtersService.filtersShown ? .primary : .transparent
                    )
                }
                /* Skip unrelated code */
            }

            if filtersService.filtersShown {
                HStack(spacing: 16) {
                    // 2. Show a button for each filter
                    ForEach(FiltersService.supportedFilters, id: \.id) { filter in
                        Button {
                            withAnimation(.bouncy) {
                                // 3. Select or de-select filter on tap
                                if filtersService.selectedFilter?.id == filter.id {
                                    filtersService.selectedFilter = nil
                                } else {
                                    filtersService.selectedFilter = filter
                                }
                                viewModel.setVideoFilter(filtersService.selectedFilter)
                            }
                        } label: {
                            Text(filter.name)
                                //.background(filtersService.selectedFilter?.id == filter.id ? Color.blue : Color.gray)
                                .padding()
                                .glassEffect()
                                .padding(.top, 32)
                            /* more modifiers */
                        }
                    }
                }
            }
        }
    }
}
The filter menu expands and collapses with a bouncy spring animation. When expanded, it reveals three horizontally arranged buttons for applying the filters.
To superpose the filter menu UI on the active video call screen, you should wrap it (in the call controls area) in CustomVideoViewFactory.swift and use it to swap the default view factory from the SDK. Check out our docs for more information about options for view swapping and advanced customization.
123456789101112131415//
//  CustomVideoViewFactory.swift
//  AIVideoEffectsFilters
//
//  Created by Amos Gyamfi on 17.8.2025.
//

import SwiftUI
import StreamVideoSwiftUI

class VideoViewFactory: ViewFactory {
    func makeCallControlsView(viewModel: CallViewModel) -> some View {
        ChatCallControls(viewModel: viewModel)
    }
}
In the above sample code, we added the VideoViewFactory class to customize the SDK's default call controls to display our filter menu. The last configuration to perform to see the filters implemented is registering the VideoViewFactory class at the app's entry point. You should set it up in the Scene's WindowGroup when a new call is established.
CallContainer(viewFactory: VideoViewFactory(), viewModel: viewModel)
For a complete implementation, put the sample code below in the main SwiftUI app's entry file (e.g., VideoFiltersApp.swift).
12345678910111213141516171819202122232425262728293031323334353637383940414243444546474849505152535455565758596061626364//
//  AIVideoEffectsFiltersApp.swift
//  AIVideoEffectsFilters
//
//  Created by Amos Gyamfi on 11.8.2025.
//

import SwiftUI
import Combine
import StreamVideo
import StreamVideoSwiftUI

@main
struct AIVideoEffectsFiltersApp: App {
    @ObservedObject var viewModel: CallViewModel

    private var client: StreamVideo

    private let apiKey: String = "YOUR_STREAM_API_KEY"
    private let token: String = "YOUR_API_TOKEN"
    private let userId: String = "YOUR_USER_ID"
    private let callId: String = "YOUR_CALL_ID"

    // Audio & video filters are now defined in FiltersService.swift

    init() {
        let user = User(
            id: userId,
            name: "Martin", // name and imageURL are used in the UI
            imageURL: .init(string: "https://getstream.io/static/2796a305dd07651fcceb4721a94f4505/a3911/martin-mitrevski.webp")
        )

        // Initialize Stream Video client
        self.client = StreamVideo(
            apiKey: apiKey,
            user: user,
            token: .init(stringLiteral: token),
            // Audio & video filters
            videoConfig: VideoConfig(
                    videoFilters: FiltersService.supportedFilters
                ),
        )

        self.viewModel = .init()
    }

    var body: some Scene {
        WindowGroup {
            VStack {
                if viewModel.call != nil {
                    // Previous: DefaultViewFactory.shared
                    CallContainer(viewFactory: VideoViewFactory(), viewModel: viewModel)
                } else {
                    Text("loading...")
                }
            }.onAppear {
                Task {
                    guard viewModel.call == nil else { return }
                    viewModel.joinCall(callType: .default, callId: callId)
                }
            }
        }
    }
}
For testing, you can copy the credentials in step 3 of our video calling tutorial and replace the API key, token, user ID, and call ID. You can also use our token generator service, which is described in the Prerequisites section.
When you run the app now, you should see the integration of the Core Image built-in filters with Stream Video SwiftUI. You should be able to apply bloom, blur, and sepia filters to your video frame.
The following sections demonstrate how AI filters can be added to a Stream Video SwiftUI app.
Add AI Filters to Stream Video
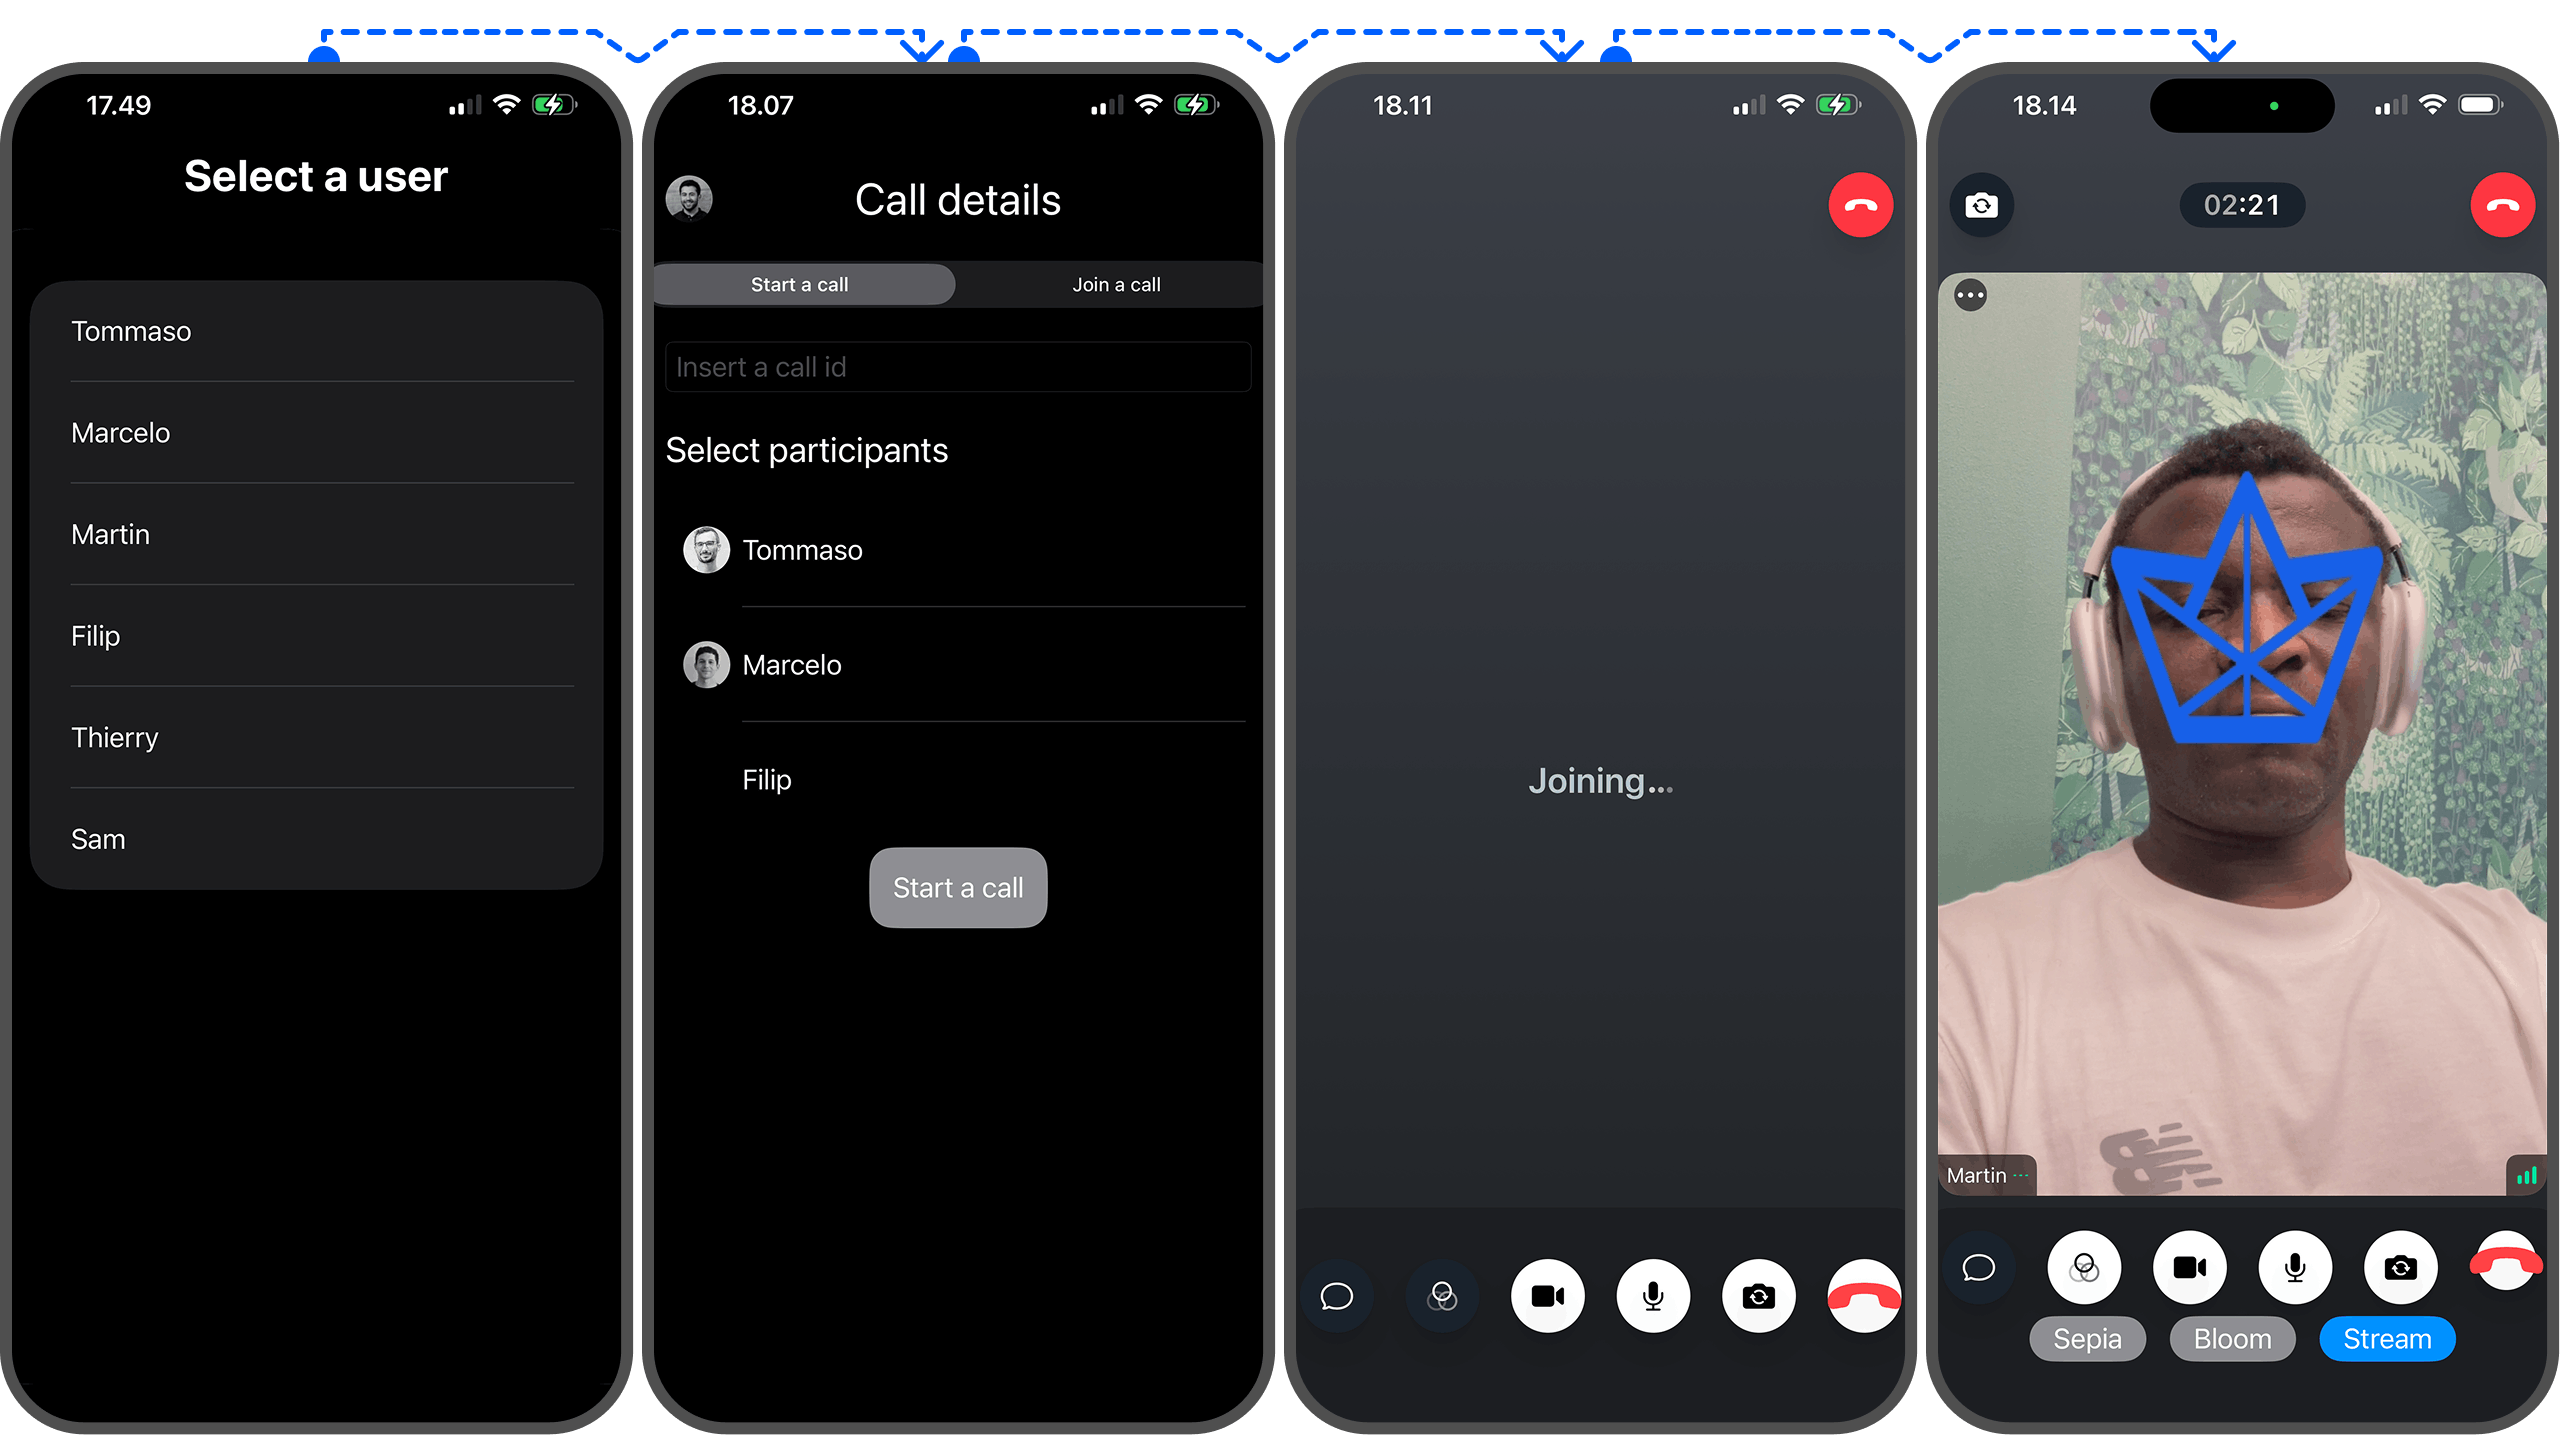
By supporting AI filters in your app, you can offer users more fun ways to enhance their videos during VoIP calls and livestreaming. The iOS 26/ SwiftUI app example in this section augments a host or local video call participant's face with an object. The object follows the direction and position of your face as you move your head in different directions. For simplicity and demonstration, we will use a logo as the object that moves toward the face's (head) location on the device's screen. You can modify the AI filter and apply it as digital eyeglasses or a mustache for a real-world use.
You can add a machine learning-based face filter using the following steps when using the Stream Swift Video SDK.
- Find a Face Within a Video Image.
- Convert the
CIImagetoUIImagewith Helper Functions. - Add a Custom AI Video Filter.
- Register the Custom AI Video Filter in Your
FilterServiceclass.
To try the demo app in this section, you should clone and run the Xcode project from this GitHub repo.
1. Find a Face Within a Video Image
With our app's platform being iOS, we can use the Vision framework to detect faces in video images and apply machine learning filters. First, you should send a request to find faces within a video image with VNDetectFaceRectanglesRequest. In return, the body or face detection request will display faces as rectangular bounding boxes with origin and size.
12345678910111213func detectFaces(image: CIImage) async throws -> CGRect {
    return try await withCheckedThrowingContinuation { continuation in
        let detectFaceRequest = VNDetectFaceRectanglesRequest { (request, error) in
            if let result = request.results?.first as? VNFaceObservation {
                continuation.resume(returning: result.boundingBox)
            } else {
                continuation.resume(throwing: ClientError.Unknown())
            }
        }
        let vnImage = VNImageRequestHandler(ciImage: image, orientation: .downMirrored)
        try? vnImage.perform([detectFaceRequest])
    }
}
2. Convert the CIImage to UIImage with Helper Functions
After detecting a face in an image, you should convert the CIImage to a UIImage and add the ability to draw on it using the following helper functions. The image conversion must be done because CIImage cannot hold and manage the actual pixel data of an image in your app.
123456789101112131415161718func convert(ciImage: CIImage) -> UIImage {
    let context = CIContext(options: nil)
    let cgImage = context.createCGImage(ciImage, from: ciImage.extent)!
    let image = UIImage(cgImage: cgImage, scale: 1, orientation: .up)
    return image
}

@MainActor
func drawImageIn(_ image: UIImage, size: CGSize, _ logo: UIImage, inRect: CGRect) -> UIImage {
    let format = UIGraphicsImageRendererFormat()
    format.scale = 1
    format.opaque = true
    let renderer = UIGraphicsImageRenderer(size: size, format: format)
    return renderer.image { context in
        image.draw(in: CGRect(origin: CGPoint.zero, size: size))
        logo.draw(in: inRect)
    }
}
3. Add a Custom AI Video Filter
Like implementing the previously built-in CIImage filters, you can add a new AI filter with the SDK's VideoFilter class. You can read more about this class in our docs.
123456789101112131415161718192021let stream: VideoFilter = {
    let stream = VideoFilter(id: "stream", name: "Stream") { input in
        // 1. detect, where the face is located (if there's any)
        guard let faceRect = try? await detectFaces(image: input.originalImage) else { return input.originalImage }
        let converted = convert(ciImage: input.originalImage)
        let bounds = input.originalImage.extent
        let convertedRect = CGRect(
            x: faceRect.minX * bounds.width - 80,
            y: faceRect.minY * bounds.height,
            width: faceRect.width * bounds.width,
            height: faceRect.height * bounds.height
        )
        // 2. Overlay the rectangle onto the original image
        let overlayed = drawImageIn(converted, size: bounds.size, streamLogo, inRect: convertedRect)

        // 3. convert the created image to a CIImage
        let result = CIImage(cgImage: overlayed.cgImage!)
        return result
    }
    return stream
}()
4. Register the Custom AI Video Filter in Your FilterService class
Lastly, you should implement the newly created AI filter (stream) above as a supported filter in the FiltersService class.
static let supportedFilters = [sepia, stream]
When you run the sample app, it will display a video conferencing UI similar to this one. As you move your head to a different location, the AI filter object (logo) moves along with the face's direction and position.
In addition to adding video image effects and AI filters to your Stream Video iOS app, you can integrate audio calling filters like noise cancellation, voice cloning, and swapping. Read more about audio filters in our video docs.
Live Video Enhancements with VideoToolbox
Besides the standard built-in and AI filters covered in the previous sections, Apple provides other frameworks, like VideoToolbox, for enhancing iOS apps with machine learning-based video effects. Video Toolbox is a framework for realtime and recorded video applications. It works seamlessly with the frame-by-frame video processing API, VTFrameProcessor on macOS and iOS 26.
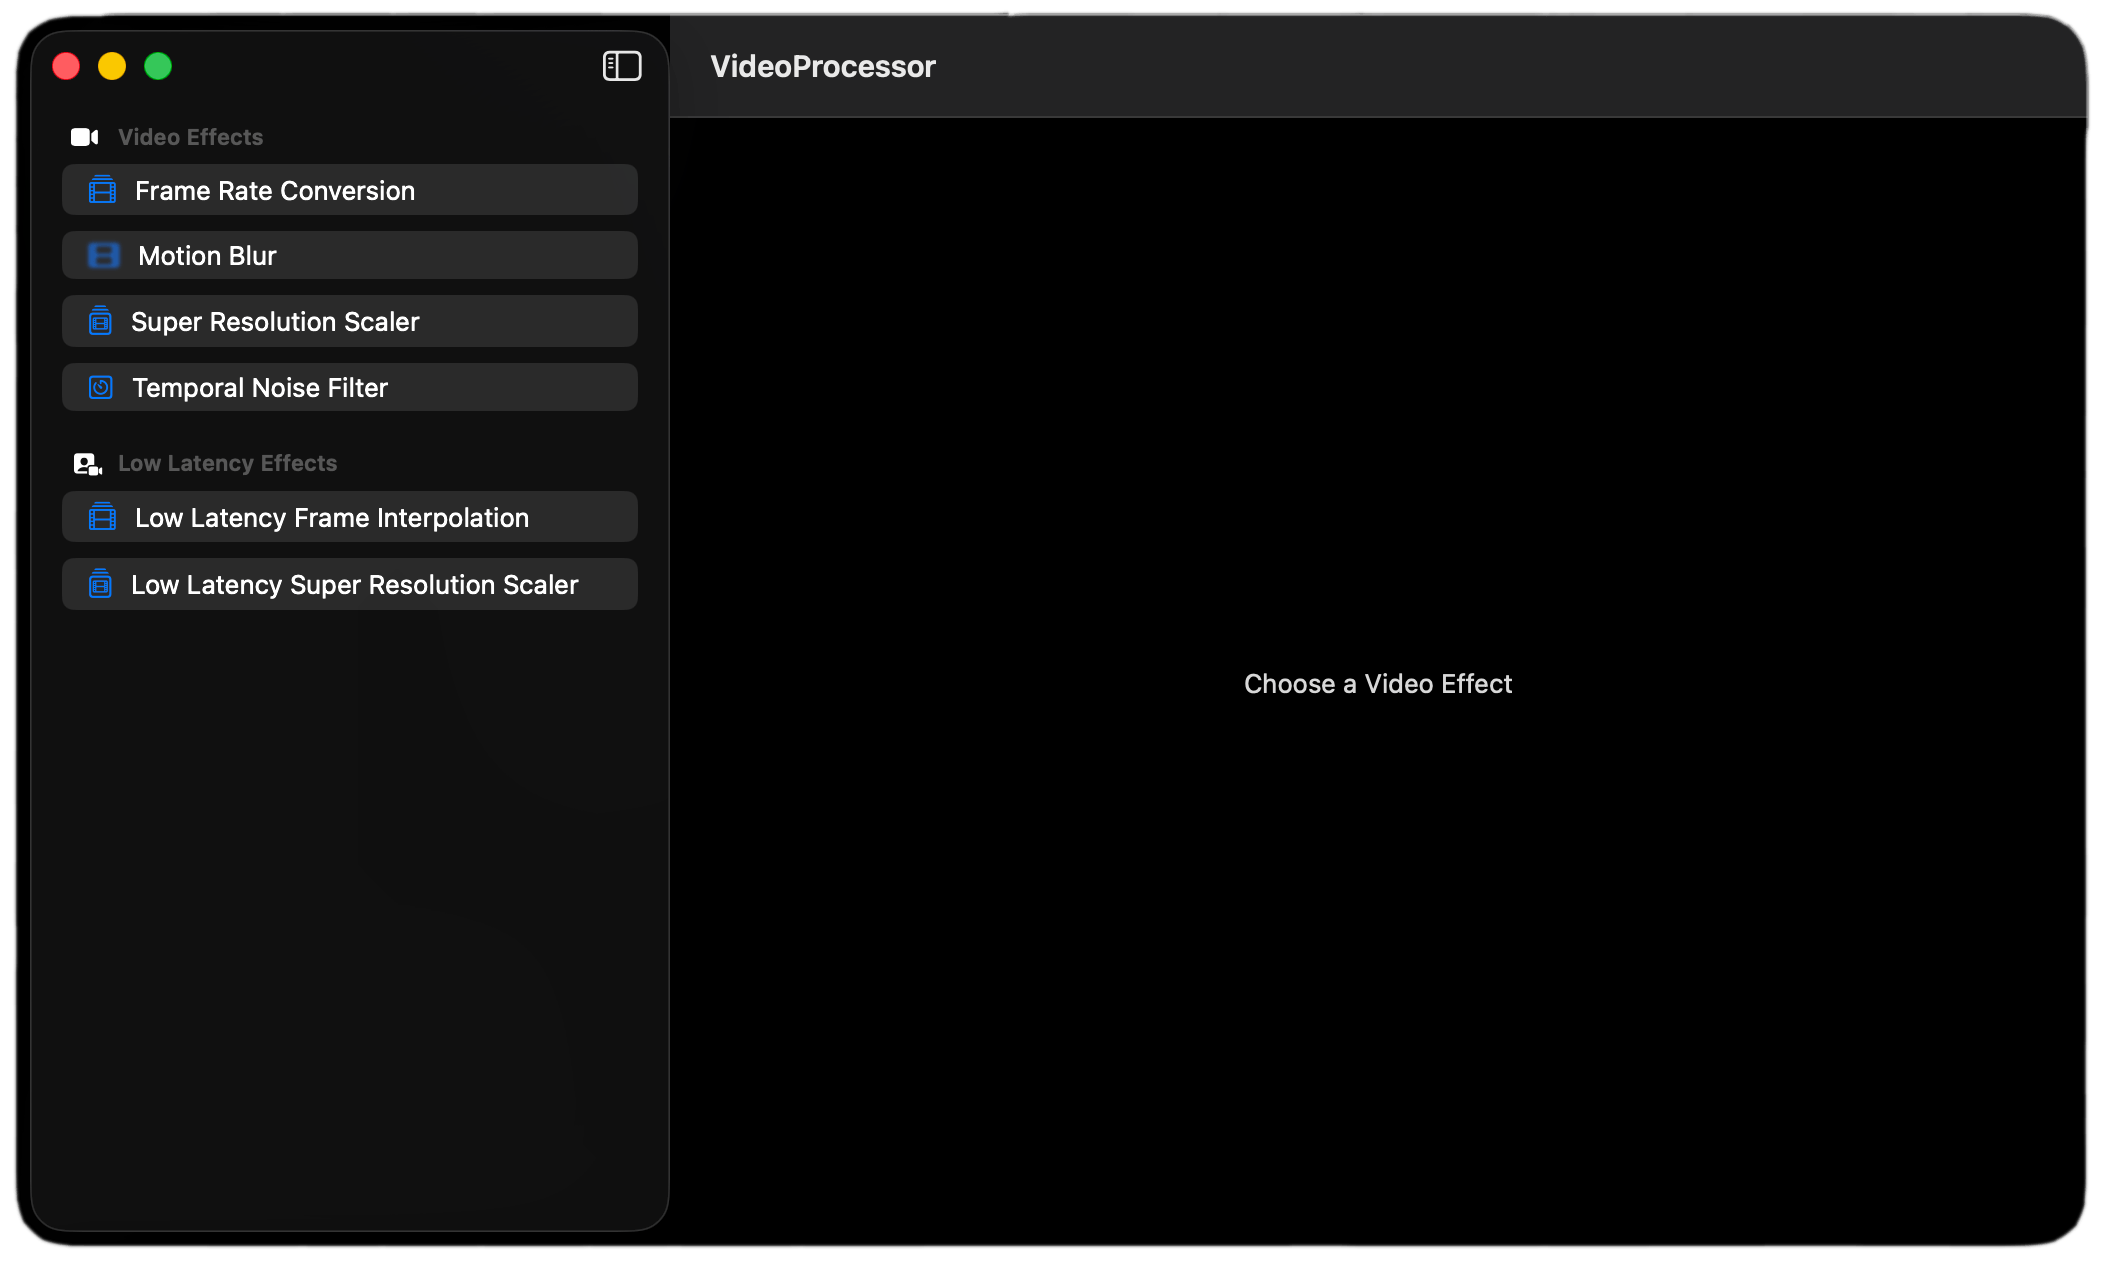
This section will examine different video enhancements you can apply to calling and conferencing apps. To test all the video effects in the image above, download the official macOS sample app from Apple. The app showcases six video effects. However, the following sections will look at the three for real-time video sessions.
The VideoToolbox framework has several filters developers can apply to live videos. Since this article covers building an iOS app that requires real-time video processing, let's focus on the temporal noise filter, low-latency frame interpolation, and low-latency super resolution.
Add a Temporal Noise Filter
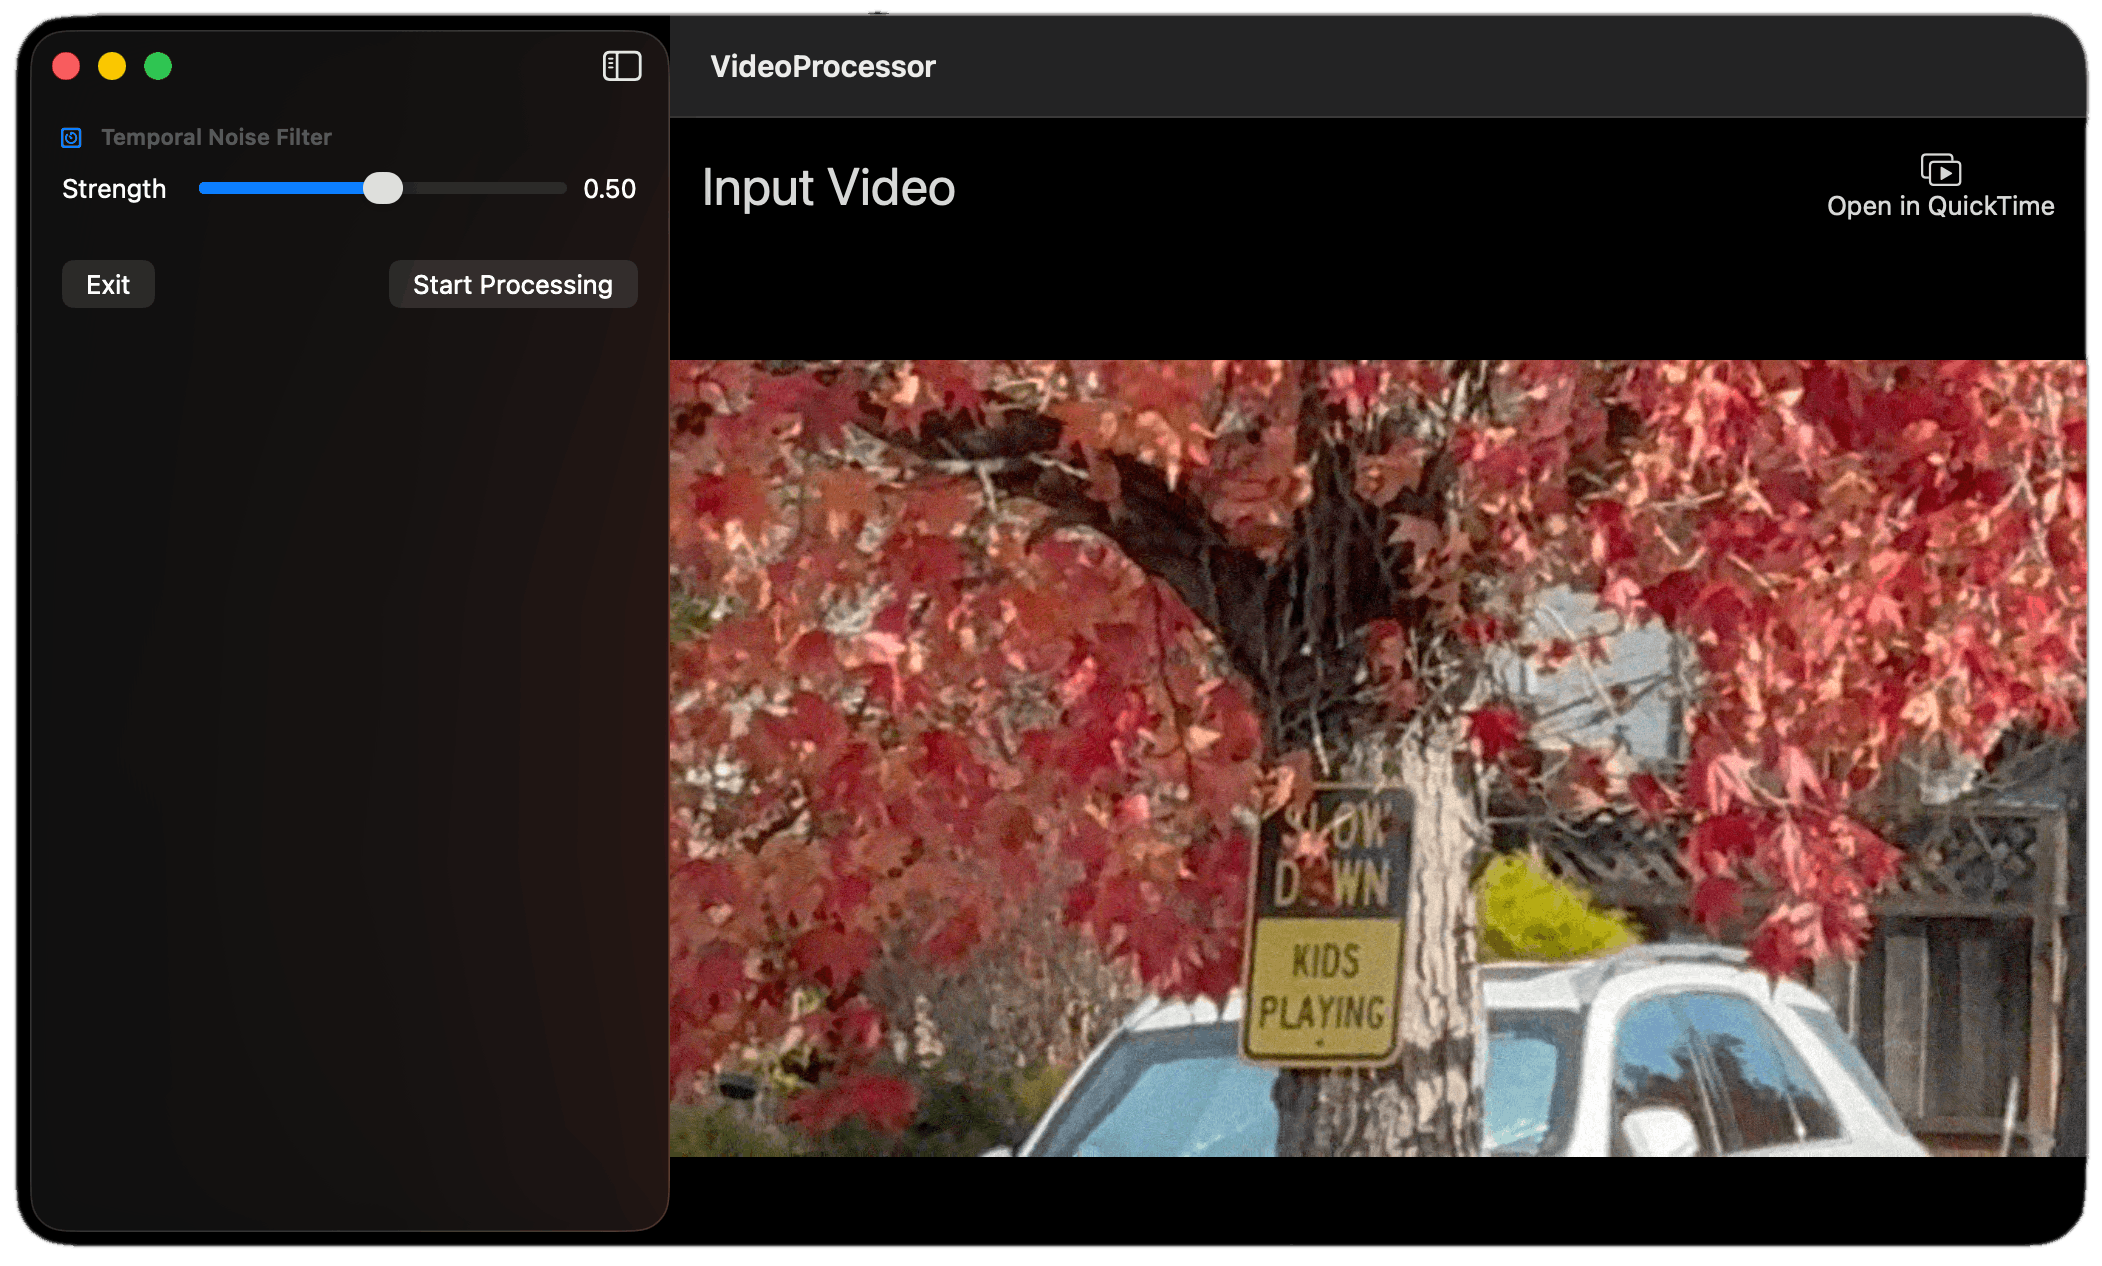
You can apply this filter to remove noise in video images. Check out the Apple documentation for more about temporal noise filter parameters and configuration options.
Add Low Latency Frame Interpolation
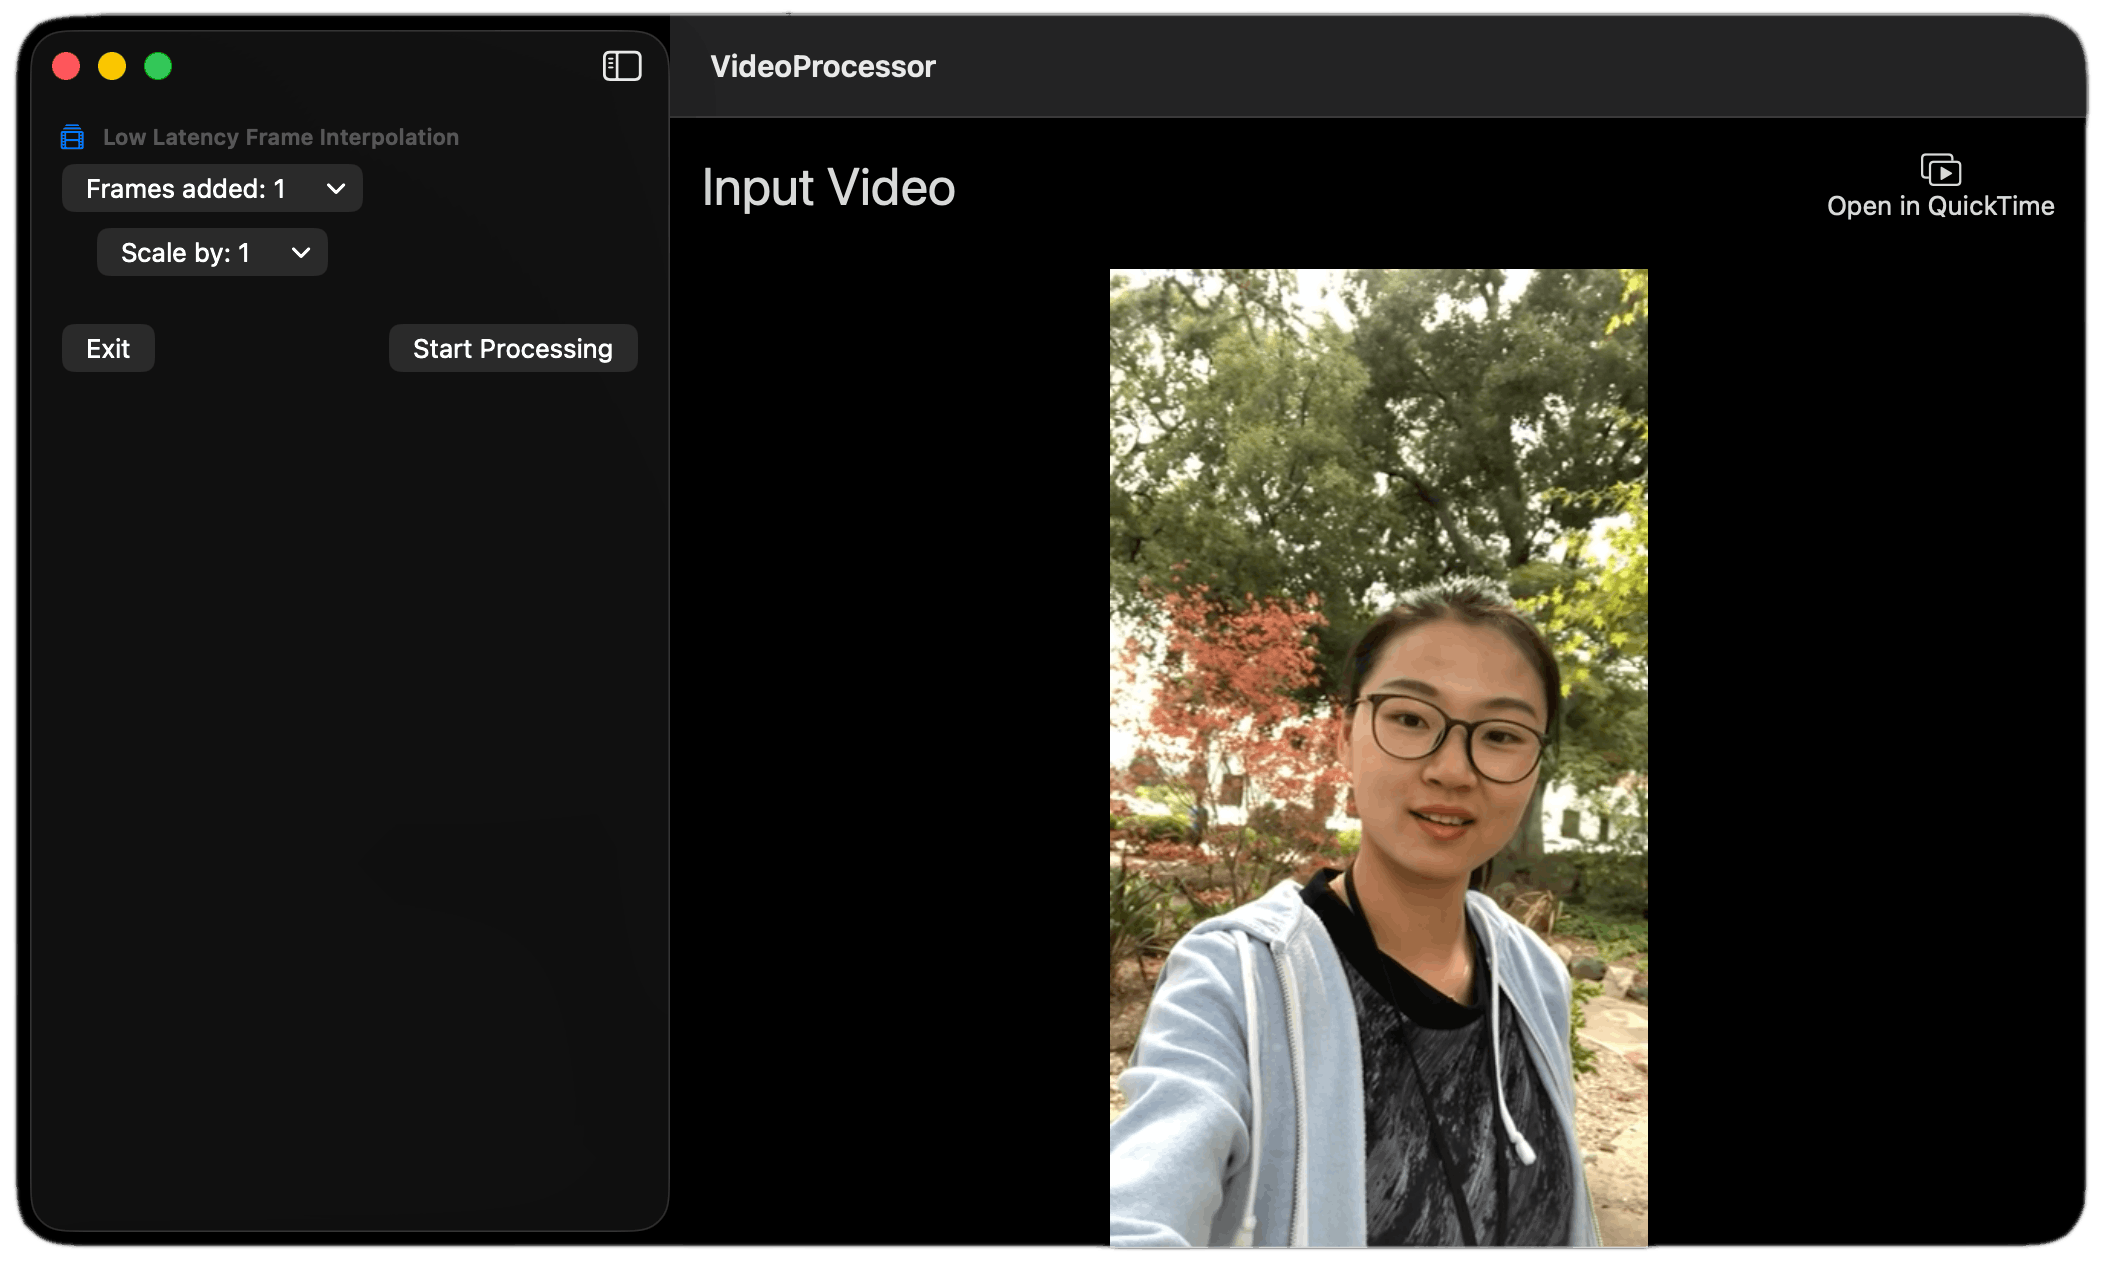
This filter helps you upsample a video's frame rate, especially under poor network conditions. It reduces choppiness or juddering, making the video smoother and more pleasant to watch. It can sharpen a video call participant’s face and enhance people’s backgrounds for improved livestreaming experiences.
Apply a Low Latency Super Resolution Filter
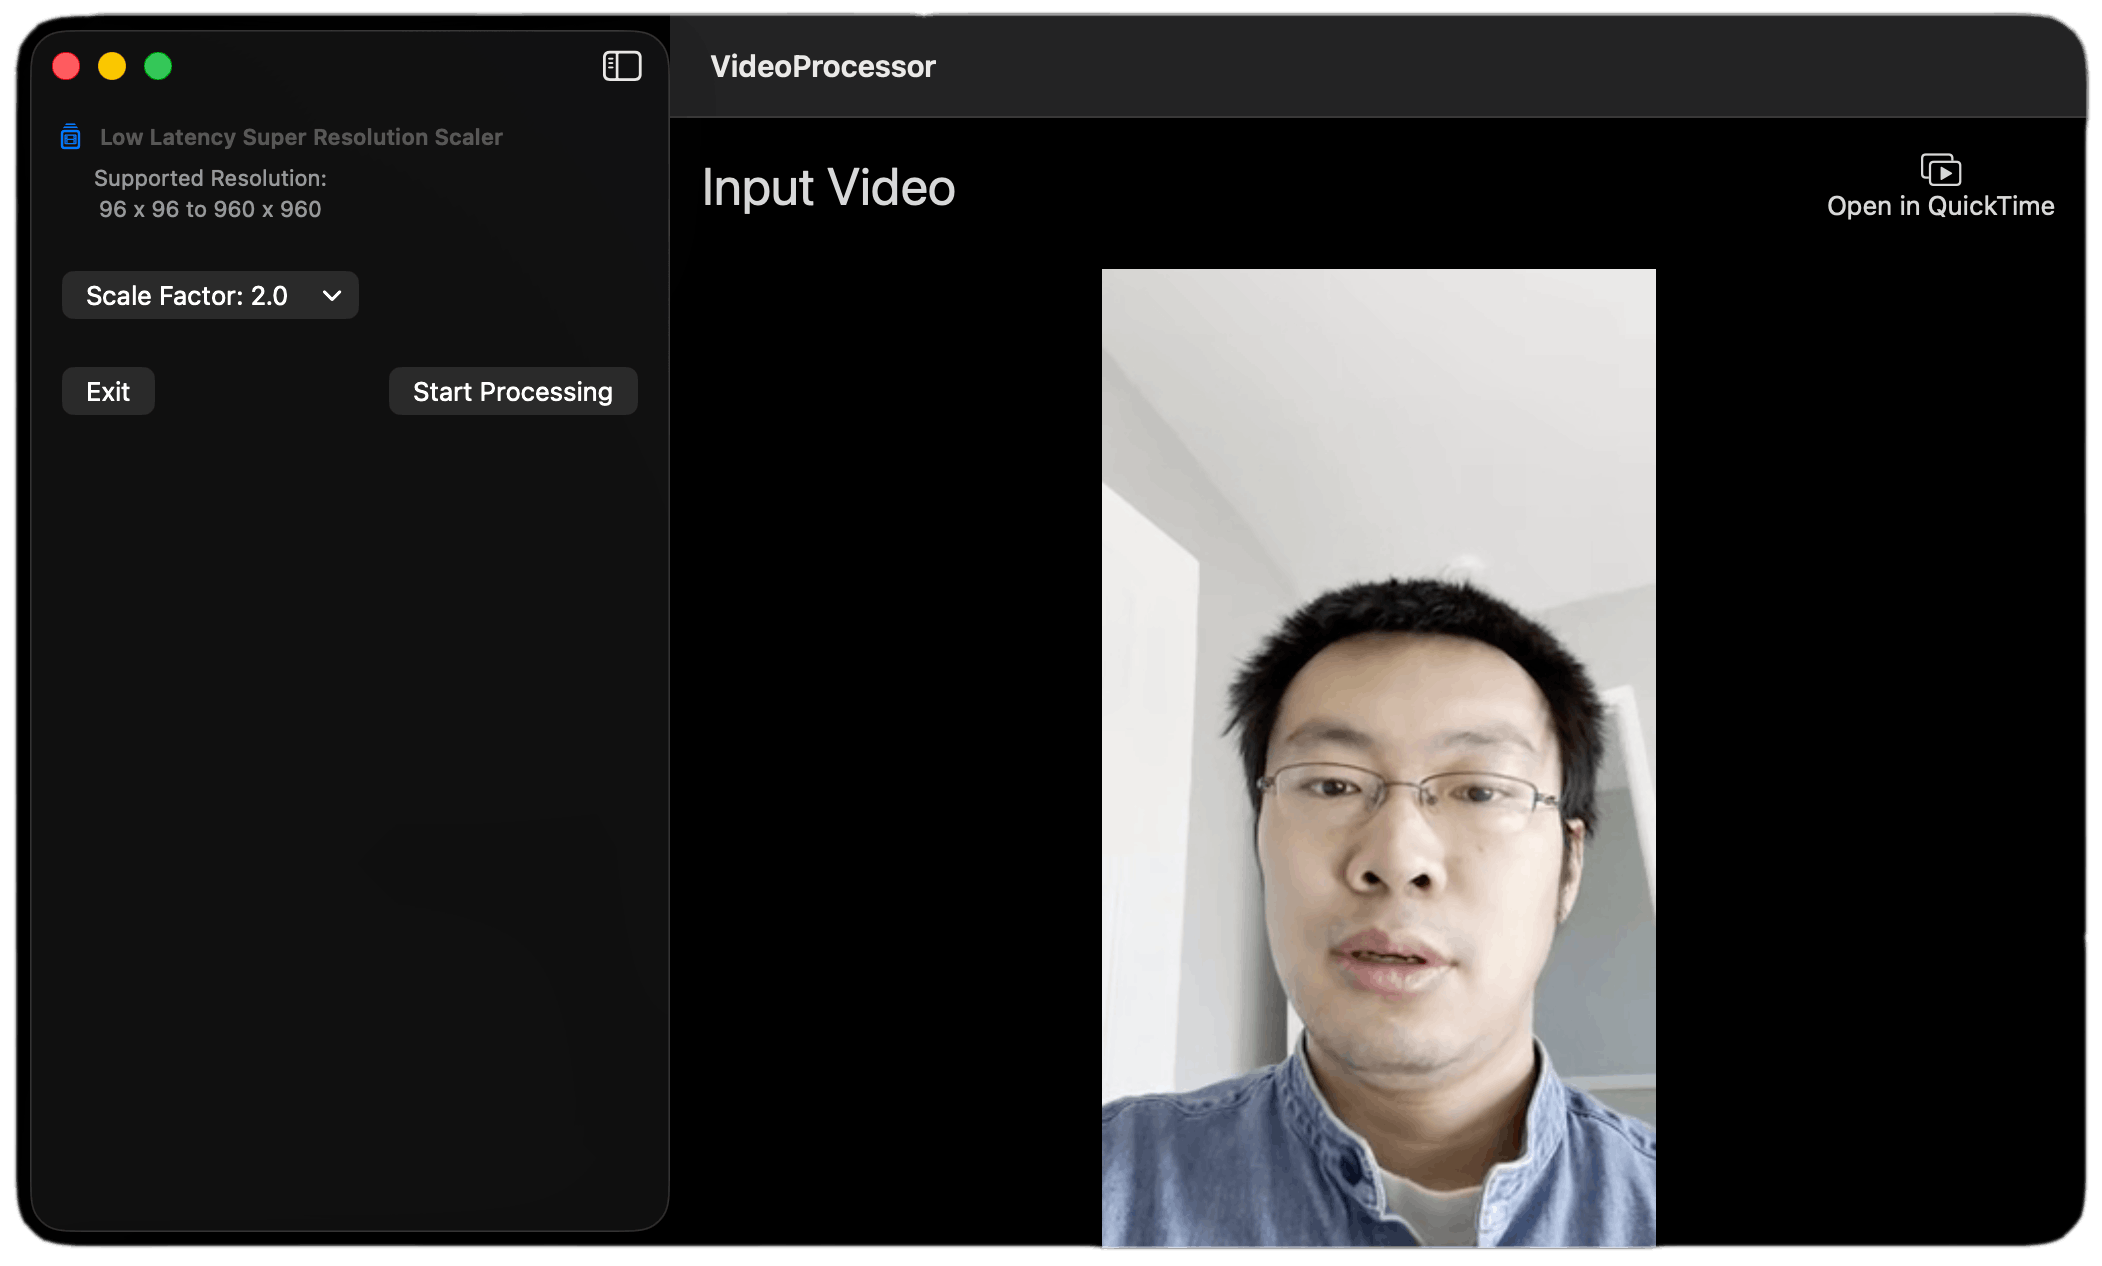
Super resolution helps to show details in a video by enhancing its resolution. The following are some benefits of super resolution:
- Realtime Video Conferencing Session: It enhances video frames, making the call participants' faces appear sharper. It can also improve the overall clarity of video calls.
- Media restoration: You can use it to enhance low-resolution videos to ensure natural movement.
- Media clarity: It can enhance the clarity and sharpness of video images during livestreaming and group video conferencing.
- Remove bluriness: It can show details in a video and make it less blurry.
To implement low-latency super resolution in your app, you should use the following classes:
- Configuration Class: VTLowLatencySuperResolutionScalerConfiguration requires a video frame's width, height, and scaling ratio.
- Parameters Class: VTLowLatencySuperResolutionScalerParameters requires frame buffers for source and destination.
Where To Go From Here
This article demonstrated how to enhance real-time video conferencing and livestreaming apps for iOS with video effects and machine learning filters.
We created a SwiftUI app to apply standard built-in CIImage filters to video streams. You also discovered how to integrate an AI filter with your app using the Stream's Swift SDK. Eventually, it showed you another possibility for augmenting a live video with effects using Apple's Video Toolbox framework.
The basic video filter sample app and the demo AI face filter for iOS are available on GitHub. You can also download Apple's macOS demo app, which showcases effects using the Video Toolbox framework, and read our video and audio filters docs.