

Update for August 2017: This guide has been updated for Restify 5 and Mongo 3.4 with modern Javascript practices. Clone the Github repo to get the full working project.
Choosing the Technology
With the multitude of JavaScript frameworks and databases available nowadays, there are countless options for building APIs. For this guide, we're working with Restify and Mongo. There are a few reasons to choose Restify and Mongo. In essence, we're avoiding potential pitfalls by picking the "shiny new thing" and focussing on the most important factors when it comes to building a REST API: developer experience, performance (and the software -ilities), along with support and availability of knowledge/experience within the JavaScript community. API performance is clearly of high priority and deserves special mention. In this recent performance benchmark, we see Hapi, Express, Koa, and Restify are all in a similar ballpark. This guide uses Restify, but it's always worthwhile considering a range of the options and ideally designing and running tests that consider the specific characteristics of the system you're building.
Before we start
Please note that this tutorial assumes that you understand git, the command line, Node.js, and the Node Package Manager (npm). For those of you who would like to see the boilerplate codebase, you can clone the repository from GitHub. If you happen to find any issues, please submit a pull request. You can follow the steps below in order, or deviate away as you'd like... just don't get lost ;). With that said, let's get started!
1. Create Your Directory
Inside of a directory of your choice, create a new directory called API. For this tutorial, we're going to build the API in the user's home directory.
$ cd ~
$ mkdir api && cd api
2. Install Required Dependencies
In addition to the Restify framework, we'll use a couple of popular Node modules available from the Node Package Manager (npm):
- Mongoose: an ODM for MongoDB
- Mongoose String Query: lightweight Mongoose plugin to help query your REST API
- Mongoose Timestamp: lightweight Mongoose plugin that adds support for createdAt and updatedAt timestamps
- Restify Errors: HTTP and REST errors abstracted from Restify
For the rest of the API, we'll use native Node.js APIs to keep things nice and clean. First, let's initialize our own Node.js package. Run the following command and answer the prompts (accepting the default is fine for this demo):
$ npm init
Woohoo! On completion, a file name package.json will be created in the current directory, /api. This file serves as the manifest for your NPM package. Next up, let's add those Node module dependencies listed above to our package. The following command retrieves and installs the packages in the /node_modules directory. This allows our application to reference and make use of the modules at runtime. Additionally, the modules are added to the dependencies section of our package.json manifest so that our application is portable and can be installed and will run on other machines.
$ npm install restify restify-plugins mongoose mongoose-timestamp mongoose-string-query restify-errors --save
Once the installation is complete, you'll notice that your package.json is now populated with your dependencies, and a new directory called node_modules now exists. You can easily check the contents of the package.json file with the following command:
$ cat package.json
3. Lay the Foundation
Now that we've covered the basics let's start to lay the foundation for our application. First off, we'll need to create a MongoDB database to house or data and connect our API. You have a couple of options here:
- Host locally and use a database manager such as Robo 3T (formerly known as Robomongo)
- Compose: A cloud platform for MongoDB deployments
- MongoDB Atlas: Another cloud service operated by the creators of MongoDB.
- Self-host on Google, AWS, or another provider
For simplicity and cost, we're going to be using a local version of MongoDB and Robo 3T to manage our database. I'm running OS X, so I'll be using Homebrew to install MongoDB and Robo 3T.
$ brew install mongodb
$ brew cask install robo-3t
You'll need to take a few additional steps to get MongoDB up and running 100%. With that said, please have a look at this tutorial by Treehouse. Robo 3T, on the other hand, will be installed in your /Applications directory on your computer. One thing that isn't covered in the tutorial by Treehouse is how to configure your database settings, so let's go ahead and do that now:
$ mongo
...
MongoDB shell version v3.4.7
connecting to: mongodb://127.0.0.1:27017
MongoDB server version: 3.4.7
> use api
> exit
Now that we have MongoDB setup to use the database api, let's go ahead and get our config.js file created (this will house all of our configuration data for the REST API):
$ touch config.js
Open your config.js file in an editor of your choice, and add the following contents to your file:
module.exports = {
  name: 'API',
  env: process.env.NODE_ENV || 'development',
  port: process.env.PORT || 3000,
  base_url: process.env.BASE_URL || 'http://localhost:3000',
  db: {
    uri: process.env.MONGODB_URI || 'mongodb://127.0.0.1:27017/api',
  },
};
Next, let's create our index.js file, the entry point for our REST API.
$ touch index.js
Open your index.js and add the following contents to your file:
/**
 * Module Dependencies
 */
const config = require('./config');
const restify = require('restify');
const mongoose = require('mongoose');
const restifyPlugins = require('restify-plugins');
/**
  * Initialize Server
  */
const server = restify.createServer({
  name: config.name,
  version: config.version,
});
/**
  * Middleware
  */
server.use(restifyPlugins.jsonBodyParser({ mapParams: true }));
server.use(restifyPlugins.acceptParser(server.acceptable));
server.use(restifyPlugins.queryParser({ mapParams: true }));
server.use(restifyPlugins.fullResponse());
/**
  * Start Server, Connect to DB & Require Routes
  */
server.listen(config.port, () => {
  // establish connection to mongodb
  mongoose.Promise = global.Promise;
  mongoose.connect(config.db.uri, { useMongoClient: true });
  const db = mongoose.connection;
  db.on('error', (err) => {
      console.error(err);
      process.exit(1);
  });
  db.once('open', () => {
      require('./routes')(server);
      console.log(`Server is listening on port ${config.port}`);
  });
});
As you can see from the entry point code above, we are very specific that we include resources.
- Module dependencies (These are our NPM modules that we installed)
- Server initialization (Where we set up the server instance using values from our config)
- Middleware (Standard middleware, included by default by Restify. More documentation can be found on the Restify website at:
http://restify.com/docs/plugins-api/
- Start the server and require in routes (Bind to port, initialize database connection and require in routes for route handling)
4. Create Your Database Models
Models are fancy constructors compiled from our Schema definitions. Basically, they allow us to tell the database what to store, and instances of these models represent documents that can be saved and retrieved from our database via Mongoose. These models handle all document creation and retrieval from the database, so let's go ahead and create our todo model:
$ mkdir models && cd models
$ touch todo.js
Next up, let's define our schema:
const mongoose = require('mongoose');
const mongooseStringQuery = require('mongoose-string-query');
const timestamps = require('mongoose-timestamp');

const TodoSchema = new mongoose.Schema(
  {
    task: {
      type: String,
      required: true,
      trim: true,
    },
    status: {
      type: String,
      required: true,
      enum: ['pending', 'complete', 'in progress', 'overdue'],
      default: 'pending',
    },
  },
  { minimize: false },
);

TodoSchema.plugin(timestamps);
TodoSchema.plugin(mongooseStringQuery);

const Todo = mongoose.model('Todo', TodoSchema);

module.exports = Todo;
Note: Our Mongoose Timestamp module will add the createdAt and updatedAt timestamps for us (ISO-8601), and MongoDB will automatically generate a UUID called _id.
5. Generate API routes
Now that we have our models in place, it's time to create our API routes. We'll create a basic REST API that consists of Create, Read, Update and Delete methods (also known as CRUD operations). Let's start by backing out of the models directory, creating a new directory called routes, and finally creating an index file to hold our methods:
$ cd ../ && mkdir routes && cd routes && touch index.js
Next up, we'll define the various routes that we will need to run CRUD operations:
- POST /todos (Creates a todo item)
- GET /todos (Lists all todos in the queue)
- GET /todos/:todo_id (Gets a specific todo item in the queue)
- PUT /todos/:todo_id (Updates a specific todo item in the queue)
- DELETE /todos/:todo_id (Destroys a specific todo item in the queue)
First, let's open up routes/index.js and start with our module dependencies:
/**
 * Module Dependencies
 */
const errors = require('restify-errors');

/**
 * Model Schema
 */
const Todo = require('../models/todo');
module.exports = function(server) {

  /**
   * POST
   */
  server.post('/todos', (req, res, next) => {
    if (!req.is('application/json')) {
      return next(
        new errors.InvalidContentError("Expects 'application/json'"),
      );
    }

    let data = req.body || {};
    let todo = new Todo(data);

    todo.save(function(err) {
      if (err) {
        console.error(err);
        return next(new errors.InternalError(err.message));
        next();
      }
      res.send(201);
      next();
    });

  });

  /**
   * LIST
   */
  server.get('/todos', (req, res, next) => {
    Todo.apiQuery(req.params, function(err, docs) {
      if (err) {
        console.error(err);
        return next(
          new errors.InvalidContentError(err.errors.name.message),
        );
      }

      res.send(docs);
      next();
    });
  });

  /**
   * GET
   */
  server.get('/todos/:todo_id', (req, res, next) => {
    Todo.findOne({ _id: req.params.todo_id }, function(err, doc) {
      if (err) {
        console.error(err);
        return next(
          new errors.InvalidContentError(err.errors.name.message),
        );
      }

      res.send(doc);
      next();
    });
  });

  /**
   * UPDATE
   */
  server.put('/todos/:todo_id', (req, res, next) => {
    if (!req.is('application/json')) {
      return next(
        new errors.InvalidContentError("Expects 'application/json'"),
      );
    }

    let data = req.body || {};
    if (!data._id) {
      data = Object.assign({}, data, { _id: req.params.todo_id });
    }

    Todo.findOne({ _id: req.params.todo_id }, function(err, doc) {
      if (err) {
        console.error(err);
        return next(
          new errors.InvalidContentError(err.errors.name.message),
        );
      } else if (!doc) {
        return next(
          new errors.ResourceNotFoundError(
            'The resource you requested could not be found.',
          ),
        );
      }
      Todo.update({ _id: data._id }, data, function(err) {
        if (err) {
          console.error(err);
          return next(
            new errors.InvalidContentError(err.errors.name.message),
          );
        }
        res.send(200, data);
        next();
      });
    });
  });

  /**
   * DELETE
   */
  server.del('/todos/:todo_id', (req, res, next) => {
    Todo.remove({ _id: req.params.todo_id }, function(err) {
      if (err) {
        console.error(err);
        return next(
          new errors.InvalidContentError(err.errors.name.message),
        );
      }

      res.send(204);
      next();
    });
  });
};
Start the Server
For our server to run, we'll need to make sure that MongoDB is up and running locally (you can bypass this step if you decided to go with a DBaaS). In a new terminal window, run the following command to start the process:
$ mongod
Now that MongoDB is started, we can run the following command from the main directory to start the server:
$ node index.js
Note: If you're rapidly coding an API, Nodemon is great to have in your toolbox. It will monitor your project directory and restart your API whenever a file change is detected. To install it, run npm install -g nodemon to install Nodemon globally. You can then start the API by typing nodemon . in the main directory.
7. Familiarizing Ourselves with Postman
Okay, we've taken the time to set up the necessary base infrastructure, setup the database, create our models and routes, etc. Let's better understand how to use the API. My tool of choice for testing REST APIs is Postman, a free application that can be downloaded here. Postman hits the sweet spot between functionality and usability by providing all of the HTTP functionality needed to interact with and test an API. Best of all, it's an intuitive user interface. Once installed, load up Postman from a new tab. You can set the URL to http://localhost:3000. Since we're developing a JSON API (it's the modern thing to do), let's go ahead and set the Content-Type header to application/json (under the Headers section of the dashboard).

With that in place, you can now hit the endpoints that you created! For example, we can send a POST to the /todos endpoint with the following payload to create a new todo item (notice that the response will be a 201 status code):
{
    "task": "Eat Jelly Beans",
    "status": "in progress"
}

We can then query the API via the /todos endpoint and get back the created object:
[
    {
        "_id": "59a0867835f56c7a9476ce92",
        "createdAt": "2017-08-25T20:20:08.864Z",
        "updatedAt": "2017-08-25T20:20:08.864Z",
        "task": "Eat Jelly Beans",
        "__v": 0,
        "status": "in progress"
    }
]

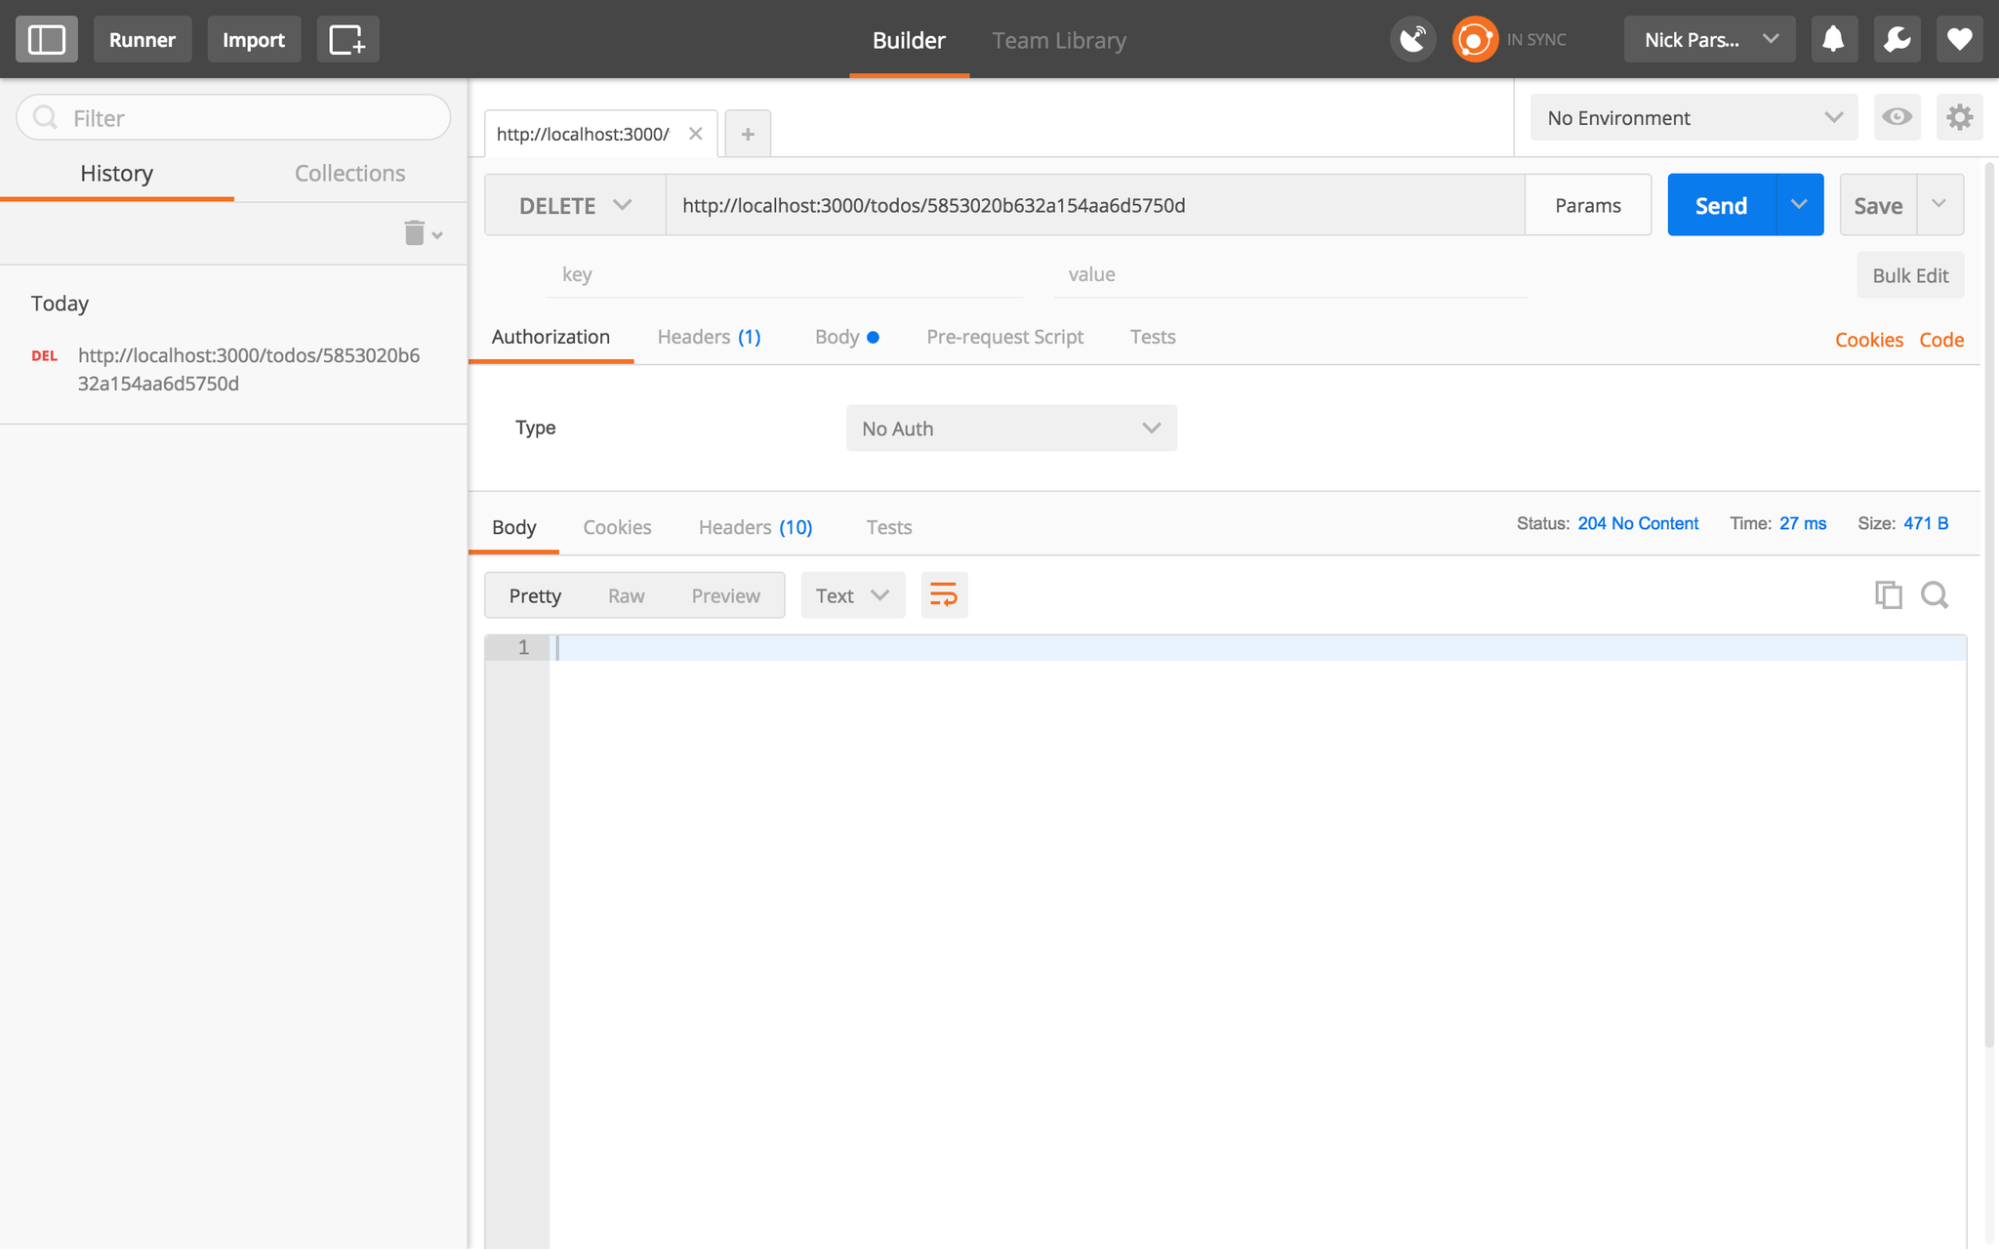
To update the status to "complete", simply send a PUT to the /todos/:todo_id endpoint (in our case /todos/59a0867835f56c7a9476ce92). And finally, if you'd like to delete the object, you can hit the /todos/:todo_id endpoint with a DELETE request:
8. Querying the API via Mongoose String Query
Remember that awesome Mongoose plugin that we installed called mongoose-string-query? While we won't be covering the queries here, a full rundown on the query options can be found on the GitHub Repo. You can do everything from adding intense filters, ordering in ascending order or descending order, latitude, and longitude lookups (should your todo list expand in functionality).
9. Wrapping Up
You now have five functional API endpoints to power a Todo List in which you can run full CRUD operations. Building a basic REST API is an incredibly valuable step towards becoming an accomplished developer. Well done! In some ways, we've only covered the tip of the iceberg, and there is a lot more to build full-scale applications. That said, rest assured you are well on your way to adding all the new API functionality you can imagine, simply by following the concepts and patterns you've learned in this tutorial.
Next steps
One important aspect of API development that we didn't cover is building out a test framework. Writing tests is entirely up to you. However, they are highly recommended and are totally worth it from a time perspective (trust me, tests have saved me from frustration and production-level bugs many times). For production applications, you'll want to pick a great test framework/library like Mocha or Chai. To get started, and for the early stages of development, a pragmatic approach can be to create repeatable tests with Postman, via the Jetpacks extension. If you're looking for a good read on MongoDB vs. Stream, check out this breakdown: /activity-feeds/mongodb/.