
We will, very creatively, call our clone Stream-agram. You’ll also learn a lot of Flutter concepts to improve animations, gestures, transitions, and state management.
The video linked above walks you through this entire blog post, step by step, with additional code instructions. If you get stuck, or if you prefer to learn through video, then the video is there to help you!
This clone will allow you to:
- sign in using different user accounts
- add and change profile pictures
- add photo posts to your own user feed (activities)
- subscribe/unsubscribe to other users’ feeds
- add comments and likes (reactions)
Instagram is a complicated application, and we can’t hope to replicate it all. But we will do our best, and in the process create an awesome Flutter app - complete with state management, gestures, animations, and transitions.
Whether you’re a beginner or experienced Flutter engineer, this article will have something of value to you. You will also learn the following Flutter concepts by completing this tutorial:
- How to neatly structure and organize your code.
- How to use Provider and basic Flutter components to easily manage your application state.
- Theming your app to support light and dark mode.
- Custom page transitions.
- Hero animations and how to customize them.
- When to use implicit animations and when to use explicit animations.
- How to create your own explicit animations.
- Performance considerations.
- A lot of Flutter layout and other tips.
- Extension methods.
- Using TextEditingController, PageController and FocusNode.
- Using AutomaticKeepAliveClientMixin to cache pages.

What Is an Activity Feed?
To understand what Stream’s Flutter Feed SDK offers you, you first need to understand what an activity feed is.
Sometimes called a newsfeed or activity stream, an activity feed is a real-time list of actions performed by users on an app or website. Activity feeds display information from a user’s online community such as likes, follows, comments, posts, and content shares.
Stream takes the complexity of managing these activity feeds and makes it simple, and the Stream Feed Flutter SDK makes it simple from a front-end perspective.
Building an Instagram Clone With Feeds
Let’s discuss how an activity feed will work in the context of building your Instagram clone. You will make a feed of user-generated picture posts (activities). These posts should also show user engagement and reactions in the form of likes and comments. Users should be allowed to follow specific users they are interested in and see a timeline of posts from all those they follow. They should also be able to see all of the posts that they’ve made.
With some of the higher-level concepts out of the way, we can finally start.
Create a Flutter Application
The first step on this journey is... to create a new Flutter application 🚀.
Run the following command in your terminal, in a directory of your choosing:
1$ flutter create stream_agram
You can change the application name to whatever you want.
Open the folder in your preferred IDE.
Package Dependencies
Open the pubspec.yaml file and add the following dependencies:
1234567891011dependencies:
  flutter:
    sdk: flutter
  cupertino_icons: ^1.0.2
  stream_feed_flutter_core: ^0.7.0+1
  provider: ^6.0.2
  google_fonts: ^2.3.1
  image_picker: ^0.8.4+9
  cached_network_image: ^3.2.0
  transparent_image: ^2.0.0
  jiffy: ^5.0.0
⚠️ NOTE: There may be updated versions of these packages at the time you’re reading this article. If you want to follow along exactly, it will be safer to use the versions mentioned above. Once you are familiar with all of the code, you can run
flutter pub outdatedto see which packages require updating.
Stream Setup
Before you can get to the code part, you will first need to create a Stream application to handle all of the feed infrastructure.
Creating an app on Stream is really easy and doesn’t take long. It’s also free and doesn’t require a credit card 💸 with the 30-day trial, or you can register for a Maker Account and access Stream Chat for free indefinitely.
Step One - Create an Account
To get started, register for an account.

Step Two - Create an App
After creating your account, create an app and name it:
- Go to your Stream dashboard.
- Select Create App.
- Enter an App Name (for example, Streamagram).
- Set your Server Location.
- Set the Environment to Development.
- Select Create App.
After creating your app, you should see it listed in your app’s dashboard. From here you can edit the app, create users and feed groups, access data, and do a lot of advanced operations. If you want to become familiar with Feeds, take a look at the Feeds 101 documentation.

Step Three - Create User and Timeline Instagram Feeds
To give your Instagram clone the same feeds interactivity you experience when using the app, you will create two Flat Feeds:
- user
- timeline
Flat feeds are the only feeds that can be followed, and therefore are a good type to set up for adding activities. Flat feeds can also be used to consume activities from other feeds - in a "timeline"-like manner.
Each user in your Instagram application will have their own unique feeds. The user flat feed will be the feed that users post their pictures to. These posts are called activities.
The timeline flat feed will be used to subscribe to other users, and our own, user feeds.
In summary, if you sign in to the Stream-agram application, the user feed will show all of your posts, and the timeline feed will show all the user feeds that you have subscribed to.
❓ Note: You can name these feeds anything you want, but user and timeline are two standard names, and you will be referencing these names later in your code.
To learn more about feed groups see the documentation on the different feeds types (Flat, Aggregated, Notification).
Now, click on the Add Feed Group button, and create a “user” and “timeline” flat feed. An example of creating the user feed is shown below.

After creating the feeds you should now see:

Great! Your feeds are set up. If you scroll down you should also see your application’s Key and Secret.

Your API Key is only an app identifier and safe to share publicly. Your Secret helps generate authenticated user tokens and perform sensitive API operations. The Secret should be kept private at all times - it is the equivalent of a password.
Please take note of your application’s Key and Secret, you will need them in the next section. 🕵️♀️
Step Four - Creating Frontend Tokens
Creating, and updating, users in Stream Feeds is simple. However, for your client application to communicate with the Stream Feeds API, you will first need authentication tokens to validate your server requests. You would normally do this by creating your own custom backend application that can execute various sensitive server operations and keep track of all your users.
However, for demonstration purposes, you will hardcode your users and their tokens in the application.
❗️ NOTE: This should only be done in a development environment - tokens should never be hardcoded in a production application.
Stream Feed offers a number of different backend-clients, including Dart! Seeing as we are Flutter developers, we will use the Dart client to generate tokens.
This Github repository contains code that shows you how you can use the Dart stream-feed package as a server-client to generate frontend tokens using your CLI.
If you’re interested in how the code works you can inspect it yourself. It is really straightforward, it:
- Reads in your API key and secret
- Reads in usernames
- It generates frontend tokens for the given usernames
To run the CLI, do the following:
git clone https://github.com/HayesGordon/stream-feed-clicd stream-feed-clidart run- Follow the prompts
You can create as many users as you want and name them as you wish in your Instagram clone. For this article, we will generate four users, with the following usernames (IDs):
- sacha-arbonel
- gordon-hayes
- reuben-turner
- sahil-kumar
Take note of the frontend tokens for all of the users. You will need it in the next section.
It may be simpler to follow along exactly and create these users as well, as it will require fewer code changes later on.
Coding Your Instagram Clone
You’re at the fun part of the tutorial.

Before continuing, let's quickly discuss our approach to building our Instagram clone.
Our Stream-agram app will consist of a few major UI components that we'll build off of throughout the rest of this tutorial:
- Login Screen: Where you'll login (A mock representation).
- Home Screen: Providing various navigation controls for other areas of the application (default showing the Timline Page).
- Timeline Page: Where you’ll see the feeds of users you follow.
- Profile Page: Where you’ll see profile information and all the posts that you’ve made.
- Search Page: Where you can follow and unfollow other users.
- Edit Profile Screen: Where you can edit your profile information by changing the profile picture.
- Add Post Screen: Where you can add new posts (activities) to your user feed.
We'll start with simplified versions of each of these screens and iterate on them as we add more complexity and functionality layer by layer. The end result will be a (near) identical Instagram clone.
Flutter File and Folder Structure
Each application is unique and will require its own folder structure. What is used in this tutorial is by no means better than any other method. It’s simply a convenient way to organize the code of this particular application.
This application groups everything under two high-level folders: app and components.
A component is anything that will be represented in UI, or you can think of it as a piece of the app that can operate in isolation, for example, pages, buttons, and widgets. The component directory also contains a folder called app_widgets, which contains general widgets used across the application.
The app directory contains classes that relate to the whole application, or code that multiple components will use. For example, app state and navigation.
This tutorial uses barrel files to neatly organize imports.
A barrel is a way to roll up imports from several files into a single convenient file.
By the end of this tutorial your file and folder layout should look like this. You can create all of this now, or as you follow the steps in the tutorial:
├── lib
|   ├── app
│   │   ├── navigation
│   │   │   └── custom_rect_tween.dart
|   |   |   └── hero_dialog_route.dart
|   |   |   └── navigation.dart *
|   |   ├── state
|   |   |   ├── models
|   |   |   |   └── models.dart *
|   |   |   |   └── user.dart
|   |   |   └── app_state.dart
|   |   |   └── demo_users.dart
|   |   |   └── state.dart *
|   |   └── app.dart *
|   |   └── stream_agram.dart
|   |   └── theme.dart
|   |   └── utils.dart
|   ├── components
│   │   ├── app_widgets
│   │   │   └── app_widgets.dart *
|   |   |   └── avatars.dart
|   |   |   └── comment_box.dart
|   |   |   └── favorite_icon.dart
|   |   |   └── tap_fade_icon.dart
|   |   ├── comments
|   |   |   ├── state
|   |   |   |   └── comment_state.dart *
|   |   |   |   └── state.dart
|   |   |   └── comment_screen.dart
|   |   |   └── comments.dart *
│   │   ├── home
│   │   │   └── home_screen.dart
|   |   |   └── home.dart *
|   |   ├── login
|   |   |   └── login_screen.dart
|   |   |   └── login.dart *
│   │   ├── new_post
│   │   │   └── new_post_screen.dart
|   |   |   └── new_post.dart *
|   |   ├── profile
|   |   |   └── edit_profile_screen.dart
|   |   |   └── profile_page.dart
|   |   |   └── profile.dart *
│   │   ├── search
│   │   │   └── search_page.dart
|   |   |   └── search.dart *
|   |   └── timeline
|   |   |   ├── widgets
|   |   |   |   └── post_card.dart
|   |   |   |   └── widgets.dart *
|   |       └── timeline_page.dart
|   |       └── timeline.dart *
│   └── main.dart
├── pubspec.lock
├── pubspec.yaml
⚠️ Note that Barrel files are indicated with an *
Creating Demo Instagram Users
As mentioned earlier, for demonstration purposes, in this tutorial you will hardcode demo users.
Create the file, app/state/demo_users.dart, and add the following:
123456789101112131415161718192021222324252627282930313233343536373839404142434445464748495051525354555657585960import 'package:stream_feed_flutter_core/stream_feed_flutter_core.dart';

/// Demo application users.
enum DemoAppUser {
  sahil,
  sacha,
  reuben,
  gordon,
}

/// Convenient class Extension on [DemoAppUser] enum
extension DemoAppUserX on DemoAppUser {
  /// Convenient method Extension to generate an [id] from [DemoAppUser] enum
  String? get id => {
        DemoAppUser.sahil: 'sahil-kumar',
        DemoAppUser.sacha: 'sacha-arbonel',
        DemoAppUser.reuben: 'reuben-turner',
        DemoAppUser.gordon: 'gordon-hayes',
      }[this];

  /// Convenient method Extension to generate a [name] from [DemoAppUser] enum
  String? get name => {
        DemoAppUser.sahil: 'Sahil Kumar',
        DemoAppUser.sacha: 'Sacha Arbonel',
        DemoAppUser.reuben: 'Reuben Turner',
        DemoAppUser.gordon: 'Gordon Hayes',
      }[this];

  /// Convenient method Extension to generate [data] from [DemoAppUser] enum
  Map<String, Object>? get data => {
        DemoAppUser.sahil: {
          'first_name': 'Sahil',
          'last_name': 'Kumar',
          'full_name': 'Sahil Kumar',
        },
        DemoAppUser.sacha: {
          'first_name': 'Sacha',
          'last_name': 'Arbonel',
          'full_name': 'Sacha Arbonel',
        },
        DemoAppUser.reuben: {
          'first_name': 'Reuben',
          'last_name': 'Turner',
          'full_name': 'Reuben Turner',
        },
        DemoAppUser.gordon: {
          'first_name': 'Gordon',
          'last_name': 'Hayes',
          'full_name': 'Gordon Hayes',
        },
      }[this];

  /// Convenient method Extension to generate a [token] from [DemoAppUser] enum
  Token? get token => <DemoAppUser, Token>{
        DemoAppUser.sahil: const Token(''), // TODO add token
        DemoAppUser.sacha: const Token(''), // TODO add token
        DemoAppUser.reuben: const Token(''), // TODO add token
        DemoAppUser.gordon: const Token(''), // TODO add token
      }[this];
}
There are a few TODOs in this file, as you will need to add the String tokens that you generated earlier. Be sure to add the correct token for the correct user.
If you are using different usernames then you will need to update other parts of this file as needed.
The code above has an enum class called DemoAppUser, with an extension, DemoAppUserX, to access various other data, such as the token and user name. This file isn’t too important, and you can choose to create your demo users in whatever way you wish to.
Create the app/state/state.dart barrel file and add the export:
1export 'demo_users.dart';
Then create a higher level barrel file, called app/app.dart, and add the following export:
1export 'state/state.dart';
Theming Your Instagram Clone
You will notice we use the same fonts and color schemes you see in Instagram, giving your clone the look and feel of the real-world app. Lastly, it’s important to note that our clone also includes a light ☀️ and a dark 🌚 mode. The preferred mode is based on the platform preferences. Getting your phone to switch modes based on the time of day, though, may be a bit outside the scope of this tutorial 😉
Create app/theme.dart and add the following:
123456789101112131415161718192021222324252627282930313233343536373839404142434445464748495051525354555657585960616263646566676869707172737475767778798081828384858687888990919293949596979899100101102103104105106107108109110111112113114115116117118119120121122123124125126127128129130131132133134135136137138139140141142143144145146147148149150151152153154155156157158159160161162163164165166167168169170171172173174175176177178179180181182183184185186187188189190191192193194195196197198199200201202203204205206207208209210211212213214215import 'package:flutter/material.dart';

/// Global reference to application colors.
abstract class AppColors {
  /// Dark color.
  static const dark = Colors.black;

  static const light = Color(0xFFFAFAFA);

  /// Grey background accent.
  static const grey = Color(0xFF262626);

  /// Primary text color
  static const primaryText = Colors.white;

  /// Secondary color.
  static const secondary = Color(0xFF0095F6);

  /// Color to use for favorite icons (indicating a like).
  static const like = Colors.red;

  /// Grey faded color.
  static const faded = Colors.grey;

  /// Light grey color
  static const ligthGrey = Color(0xFFEEEEEE);

  /// Top gradient color used in various UI components.
  static const topGradient = Color(0xFFE60064);

  /// Bottom gradient color used in various UI components.
  static const bottomGradient = Color(0xFFFFB344);
}

/// Global reference to application [TextStyle]s.
abstract class AppTextStyle {
  /// A medium bold text style.
  static const textStyleBoldMedium = TextStyle(
    fontWeight: FontWeight.w600,
  );

  /// A bold text style.
  static const textStyleBold = TextStyle(
    fontWeight: FontWeight.bold,
  );

  static const textStyleSmallBold = TextStyle(
    fontWeight: FontWeight.bold,
    fontSize: 13,
  );

  /// A faded text style. Uses [AppColors.faded].
  static const textStyleFaded =
      TextStyle(color: AppColors.faded, fontWeight: FontWeight.w400);

  /// A faded text style. Uses [AppColors.faded].
  static const textStyleFadedSmall = TextStyle(
      color: AppColors.faded, fontWeight: FontWeight.w400, fontSize: 11);

  /// A faded text style. Uses [AppColors.faded].
  static const textStyleFadedSmallBold = TextStyle(
      color: AppColors.faded, fontWeight: FontWeight.w500, fontSize: 11);

  /// Light text style.
  static const textStyleLight = TextStyle(fontWeight: FontWeight.w300);

  /// Action text
  static const textStyleAction = TextStyle(
    fontWeight: FontWeight.w700,
    color: AppColors.secondary,
  );
}

/// Global reference to the application theme.
class AppTheme {
  final _darkBase = ThemeData.dark();
  final _lightBase = ThemeData.light();

  /// Dark theme and its settings.
  ThemeData get darkTheme => _darkBase.copyWith(
        visualDensity: VisualDensity.adaptivePlatformDensity,
        backgroundColor: AppColors.dark,
        scaffoldBackgroundColor: AppColors.dark,
        appBarTheme: _darkBase.appBarTheme.copyWith(
          backgroundColor: AppColors.dark,
          foregroundColor: AppColors.light,
          iconTheme: const IconThemeData(color: AppColors.light),
          elevation: 0,
        ),
        bottomNavigationBarTheme: _darkBase.bottomNavigationBarTheme.copyWith(
          backgroundColor: AppColors.dark,
          selectedItemColor: AppColors.light,
        ),
        outlinedButtonTheme: OutlinedButtonThemeData(
          style: ButtonStyle(
            side: MaterialStateProperty.all(
              const BorderSide(
                color: AppColors.grey,
              ),
            ),
            foregroundColor: MaterialStateProperty.all<Color>(
              AppColors.light,
            ),
            backgroundColor: MaterialStateProperty.all<Color>(
              AppColors.dark,
            ),
            overlayColor: MaterialStateProperty.all<Color>(
              AppColors.grey,
            ),
          ),
        ),
        elevatedButtonTheme: ElevatedButtonThemeData(
          style: ButtonStyle(
            backgroundColor: MaterialStateProperty.all<Color>(
              AppColors.secondary,
            ),
            foregroundColor: MaterialStateProperty.all<Color>(
              AppColors.primaryText,
            ),
            overlayColor: MaterialStateProperty.all<Color>(
              AppColors.grey,
            ),
          ),
        ),
        textButtonTheme: TextButtonThemeData(
          style: ButtonStyle(
            foregroundColor: MaterialStateProperty.all<Color>(
              AppColors.secondary,
            ),
            overlayColor: MaterialStateProperty.all<Color>(
              AppColors.grey,
            ),
            textStyle: MaterialStateProperty.all<TextStyle>(
              const TextStyle(
                color: AppColors.secondary,
                fontSize: 16,
                fontWeight: FontWeight.w600,
              ),
            ),
          ),
        ),
        brightness: Brightness.dark,
        colorScheme:
            _darkBase.colorScheme.copyWith(secondary: AppColors.secondary),
      );

  ThemeData get lightTheme => _lightBase.copyWith(
        visualDensity: VisualDensity.adaptivePlatformDensity,
        backgroundColor: AppColors.light,
        scaffoldBackgroundColor: AppColors.light,
        appBarTheme: _lightBase.appBarTheme.copyWith(
          backgroundColor: AppColors.light,
          foregroundColor: AppColors.dark,
          iconTheme: const IconThemeData(color: AppColors.dark),
          elevation: 0,
        ),
        bottomNavigationBarTheme: _lightBase.bottomNavigationBarTheme.copyWith(
          backgroundColor: AppColors.light,
          selectedItemColor: AppColors.dark,
        ),
        snackBarTheme:
            _lightBase.snackBarTheme.copyWith(backgroundColor: AppColors.dark),
        outlinedButtonTheme: OutlinedButtonThemeData(
          style: ButtonStyle(
            side: MaterialStateProperty.all(
              const BorderSide(
                color: AppColors.ligthGrey,
              ),
            ),
            foregroundColor: MaterialStateProperty.all<Color>(
              AppColors.dark,
            ),
            backgroundColor: MaterialStateProperty.all<Color>(
              AppColors.light,
            ),
            overlayColor: MaterialStateProperty.all<Color>(
              AppColors.ligthGrey,
            ),
          ),
        ),
        elevatedButtonTheme: ElevatedButtonThemeData(
          style: ButtonStyle(
            backgroundColor: MaterialStateProperty.all<Color>(
              AppColors.secondary,
            ),
            foregroundColor: MaterialStateProperty.all<Color>(
              AppColors.primaryText,
            ),
            overlayColor: MaterialStateProperty.all<Color>(
              AppColors.ligthGrey,
            ),
          ),
        ),
        textButtonTheme: TextButtonThemeData(
          style: ButtonStyle(
            foregroundColor: MaterialStateProperty.all<Color>(
              AppColors.secondary,
            ),
            textStyle: MaterialStateProperty.all<TextStyle>(
              const TextStyle(
                color: AppColors.secondary,
                fontSize: 16,
                fontWeight: FontWeight.w600,
              ),
            ),
            overlayColor: MaterialStateProperty.all<Color>(
              AppColors.ligthGrey,
            ),
          ),
        ),
        brightness: Brightness.light,
        colorScheme:
            _lightBase.colorScheme.copyWith(secondary: AppColors.secondary),
      );
}
You can review this at your own pace, or explore it as you use some of these definitions later on in the tutorial.
Update the state/state.dart barrel file:
12export 'state/state.dart';
export 'theme.dart'; // ADD THIS
Models (User)
Can you believe that this big application will only require you to create one model class? 😱
Well, believe it, as most of the models will come from the Stream Feed packages.
Create app/state/models/user.dart and add the following:
123456789101112131415161718192021222324252627282930313233343536373839404142434445464748495051525354555657585960616263646566676869707172737475767778798081828384858687888990919293949596979899100101102103104105106107108109110111112113114import 'dart:convert'; import 'package:flutter/material.dart'; /// Data model for a feed user's extra data. class StreamagramUser { /// Data model for a feed user's extra data. const StreamagramUser({ required this.firstName, required this.lastName, required this.fullName, required this.profilePhoto, required this.profilePhotoResized, required this.profilePhotoThumbnail, }); /// Converts a Map to this. factory StreamagramUser.fromMap(Map<String, dynamic> map) { return StreamagramUser( firstName: map['first_name'] as String, lastName: map['last_name'] as String, fullName: map['full_name'] as String, profilePhoto: map['profile_photo'] as String?, profilePhotoResized: map['profile_photo_resized'] as String?, profilePhotoThumbnail: map['profile_photo_thumbnail'] as String?, ); } /// Converts json to this. factory StreamagramUser.fromJson(String source) => StreamagramUser.fromMap(json.decode(source) as Map<String, dynamic>); /// User's first name final String firstName; /// User's last name final String lastName; /// User's full name final String fullName; /// URL to user's profile photo. final String? profilePhoto; /// A 500x500 version of the [profilePhoto]. final String? profilePhotoResized; /// A small thumbnail version of the [profilePhoto]. final String? profilePhotoThumbnail; /// Convenient method to replace certain fields. StreamagramUser copyWith({ String? firstName, String? lastName, String? fullName, String? profilePhoto, String? profilePhotoResized, String? profilePhotoThumbnail, }) { return StreamagramUser( firstName: firstName ?? this.firstName, lastName: lastName ?? this.lastName, fullName: fullName ?? this.fullName, profilePhoto: profilePhoto ?? this.profilePhoto, profilePhotoResized: profilePhotoResized ?? this.profilePhotoResized, profilePhotoThumbnail: profilePhotoThumbnail ?? this.profilePhotoThumbnail, ); } /// Converts this model to a Map. Map<String, dynamic> toMap() { return { 'first_name': firstName, 'last_name': lastName, 'full_name': fullName, 'profile_photo': profilePhoto, 'profile_photo_resized': profilePhotoResized, 'profile_photo_thumbnail': profilePhotoThumbnail, }; } /// Converts this class to json. String toJson() => json.encode(toMap()); String toString() { return '''UserData(firstName: $firstName, lastName: $lastName, fullName: $fullName, profilePhoto: $profilePhoto, profilePhotoResized: $profilePhotoResized, profilePhotoThumbnail: $profilePhotoThumbnail)'''; } bool operator ==(Object other) { if (identical(this, other)) return true; return other is StreamagramUser && other.firstName == firstName && other.lastName == lastName && other.fullName == fullName && other.profilePhoto == profilePhoto && other.profilePhotoResized == profilePhotoResized && other.profilePhotoThumbnail == profilePhotoThumbnail; } int get hashCode { return firstName.hashCode ^ lastName.hashCode ^ fullName.hashCode ^ profilePhoto.hashCode ^ profilePhotoResized.hashCode ^ profilePhotoThumbnail.hashCode; } }
This is your User Data Class. It stores a number of fields and provides convenience methods, such as toMap, fromMap, and copyWith. These will come in handy later on. The reason you are creating this class is to easily create an object from the extra data that will be stored for each Stream Feed User.
Even though we only have one model, we will be good citizens and create our barrel file anyway.
Create app/state/models/models.dart and add the following:
1export 'user.dart';
And in the app/state/state.dart barrel file add:
123export 'demo_users.dart';
export 'app_state.dart';
export 'models/models.dart'; // ADD THIS
State Management (Provider)
A hot topic for debate.
For this Instagram Clone you will only need to manage basic application state, so that you can easily propagate changes to the UI.
The majority of the state will be managed by the stream_feed_flutter_core package, however, you still need an easy way to pass around some state in your application, for example, the current authenticated used.
This article is not trying to be opinionated about state management. A simple InheritedWidget is sometimes all you need, and Provider makes inherited widgets extremely easy, as well as giving some other great functionality that we will explore more in this tutorial.
Create the file app/state/app_state.dart and add the following:
12345678910111213141516171819202122232425262728293031323334353637383940414243444546474849505152import 'package:flutter/material.dart';
import 'package:stream_feed_flutter_core/stream_feed_flutter_core.dart';
import 'models/models.dart';

import 'demo_users.dart';

/// State related to Stream-agram app.
///
/// Manages the connection and stores a references to the [StreamFeedClient]
/// and [StreamagramUser].
///
/// Provides various convenience methods.
class AppState extends ChangeNotifier {
  /// Create new [AppState].
  AppState({
    required StreamFeedClient client,
  }) : _client = client;

  late final StreamFeedClient _client;

  /// Stream Feed client.
  StreamFeedClient get client => _client;

  /// Stream Feed user - [StreamUser].
  StreamUser get user => _client.currentUser!;

  StreamagramUser? _streamagramUser;

  /// The extraData from [user], mapped to an [StreamagramUser] object.
  StreamagramUser? get streamagramUser => _streamagramUser;

  /// Connect to Stream Feed with one of the demo users, using a predefined,
  /// hardcoded token.
  ///
  /// THIS IS ONLY FOR DEMONSTRATIONS PURPOSES. USER TOKENS SHOULD NOT BE
  /// HARDCODED LIKE THIS.
  Future<bool> connect(DemoAppUser demoUser) async {
    final currentUser = await _client.setUser(
      User(id: demoUser.id),
      demoUser.token!,
      extraData: demoUser.data,
    );

    if (currentUser.data != null) {
      _streamagramUser = StreamagramUser.fromMap(currentUser.data!);
      notifyListeners();
      return true;
    } else {
      return false;
    }
  }
}
This class isn’t too complicated. Later on, you will need to expand it a bit more.
For now, it only manages the local user and their data in a responsive way. A ChangeNotifier class is an easy way to manage state in a Flutter application. You store mutable variables in the class that you can then update; once updated you can notify any listeners by calling the notifyListeners method.
In this class, you will see a variable called _streamagramUser that is initially null, which will be set once you call the connect method, which requires a DemoAppUser.
The StreamFeedClient is probably the most important in this class. It has a variety of methods to easily interact with the Stream Feeds API. The setUser method, for example, is exactly that, it sets the current Stream Feeds user for the application locally, and then proceeds to either create or read the user on the Stream Feeds backend (depending on whether the user already exists).
The setUser method on StreamFeedClient requires a User object, which takes in:
- a unique user id (our username)
- extra data that will be used to set the user information on the server (name, profile picture URL, or anything you want)
- and the frontend token
This method is an asynchronous Future and once complete you update the local _streamagramUser object by calling the fromMap method, which creates a new object from the Map. After that, you call notifyListeners to update any listeners of the change.
Update the app/state/state.dart barrel file:
12export 'demo_users.dart';
export 'app_state.dart'; // ADD THIS
Initialization and Providers
Create a new file, app/stream_agram.dart, and add the following:
1234567891011121314151617181920212223242526272829303132333435363738394041424344454647484950515253import 'package:flutter/material.dart'; import 'package:provider/provider.dart'; import 'package:stream_agram/app/app.dart'; import 'package:stream_feed_flutter_core/stream_feed_flutter_core.dart'; import '../components/login/login.dart'; /// {@template app} /// Main entry point to the Stream-agram application. /// {@endtemplate} class StreamagramApp extends StatefulWidget { /// {@macro app} const StreamagramApp({ Key? key, required this.appTheme, }) : super(key: key); /// App's theme data. final AppTheme appTheme; State<StreamagramApp> createState() => _StreamagramAppState(); } class _StreamagramAppState extends State<StreamagramApp> { final _client = StreamFeedClient('YOUR KEY'); // TODO: Add API Key late final appState = AppState(client: _client); // Important to only initialize this once. // Unless you want to update the bloc state late final feedBloc = FeedBloc(client: _client); Widget build(BuildContext context) { return ChangeNotifierProvider.value( value: appState, child: MaterialApp( title: 'Stream-agram', theme: widget.appTheme.lightTheme, darkTheme: widget.appTheme.darkTheme, builder: (context, child) { // Stream Feeds provider to give access to [FeedBloc] // This class comes from Stream Feeds. return FeedProvider( bloc: feedBloc, child: child!, ); }, home: const LoginScreen(), ), ); } }
There are a few important things that you are doing in this file:
- Initialize the StreamFeedClient with your unique Stream application’s API Key.
- Create the AppState class, passing in the StreamFeedClient.
- Create a FeedBloc, which is the business logic for your Stream Feeds applications. This class comes from the Stream Feed package and you will be using it a lot later on in the tutorial.
- Wrap MaterialApp with a ChangeNotifierProvider exposing your AppState object. This will ensure that the whole application can easily access your application state. It is important to use the
.valuefactory, as that exposes the already createdappState, object. - Set the home argument to be the LoginScreen. You will create this screen soon.
- Use the builder argument to wrap your application with a FeedProvider, which exposes the
feedBlocobject to the whole application. The FeedProvider is needed by the Stream Feeds widgets to easily access the FeedBloc, wherever they are in the widget tree.
Update your app/app.dart barrel file:
123export 'state/state.dart';
export 'theme.dart';
export 'stream_agram.dart'; // ADD THIS
Extension Classes - Utilities
Next, create an app/utils.dart file that will contain some helpful extensions that you’ll use throughout the application. These extensions will make certain operation easier in your application’s UI, and reduce the amount of code needed to execute repetitive operations.
These extensions will allow you to:
- Remove and show a Snackbar with a provided message.
- Access AppState from BuildContext.
Add the following:
1234567891011121314151617181920212223import 'package:flutter/material.dart';

import 'package:provider/provider.dart';

import 'state/app_state.dart';

/// Extension method on [BuildContext] to easily perform snackbar operations.
extension Snackbar on BuildContext {
  /// Removes the current active [SnackBar], and replaces it with a new snackbar
  /// with content of [message].
  void removeAndShowSnackbar(final String message) {
    ScaffoldMessenger.of(this).removeCurrentSnackBar();
    ScaffoldMessenger.of(this).showSnackBar(
      SnackBar(content: Text(message)),
    );
  }
}

/// Extension method on [BuildContext] to easily retrieve providers.
extension ProviderX on BuildContext {
  /// Returns the application [AppState].
  AppState get appState => read<AppState>();
}
Now, update the app/app.dart barrel file for the last time 🥳: (for now, at least):
1234export 'state/state.dart';
export 'theme.dart';
export 'stream_agram.dart';
export 'utils.dart'; // ADD THIS
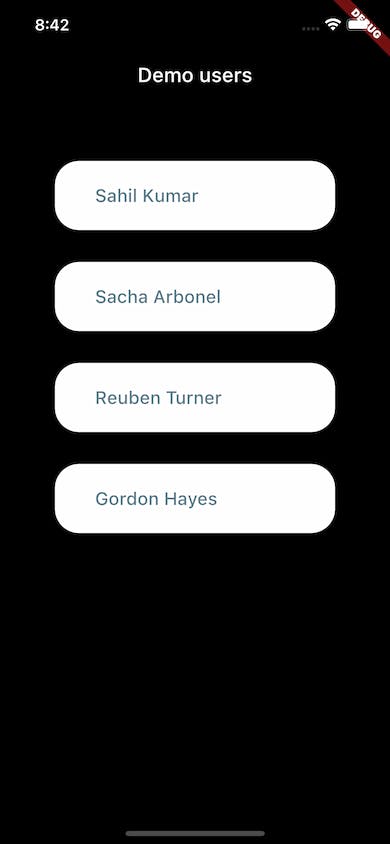
Create Your Mock Instagram Login Screen
Next, you will create a “login screen”, a mock screen to select one of the demo users.
Create the file components/login/login_screen.dart and add the following:
123456789101112131415161718192021222324252627282930313233343536373839404142434445464748495051525354555657585960616263646566676869707172737475767778798081828384858687888990import 'package:flutter/material.dart'; import '../../app/app.dart'; import '../home/home.dart'; /// {@template login_screen} /// Screen that presents an option of users to authenticate as. /// {@endtemplate} class LoginScreen extends StatefulWidget { /// {@macro login_screen} const LoginScreen({Key? key}) : super(key: key); _LoginScreenState createState() => _LoginScreenState(); } class _LoginScreenState extends State<LoginScreen> { Widget build(BuildContext context) { final size = MediaQuery.of(context).size; return Scaffold( appBar: AppBar(title: const Text('Demo users')), body: Padding( padding: const EdgeInsets.symmetric(horizontal: 24.0), child: SizedBox( width: size.width, height: size.height, child: SingleChildScrollView( child: Column( mainAxisAlignment: MainAxisAlignment.center, children: [ const SizedBox(height: 42), for (final user in DemoAppUser.values) Padding( padding: const EdgeInsets.all(16.0), child: ElevatedButton( style: ButtonStyle( backgroundColor: MaterialStateColor.resolveWith( (states) => Colors.white), padding: MaterialStateProperty.all( const EdgeInsets.symmetric(horizontal: 4.0), ), shape: MaterialStateProperty.all( RoundedRectangleBorder( borderRadius: BorderRadius.circular(24.0), ), ), ), onPressed: () async { context.removeAndShowSnackbar('Connecting user'); final success = await context.appState.connect(user); if (success) { context.removeAndShowSnackbar('User connected'); await Navigator.of(context).pushReplacement( MaterialPageRoute( builder: (_) => const HomeScreen(), ), ); } else { context .removeAndShowSnackbar('Could not connect user'); } }, child: Padding( padding: const EdgeInsets.symmetric( vertical: 24.0, horizontal: 36.0), child: SizedBox( width: 200, child: Text( user.name!, style: const TextStyle( fontSize: 18, color: Colors.blueGrey, ), ), ), ), ), ) ], ), ), ), ), ); } }
You can explore this file in detail on your own. As a quick summary this widget does the following:
- Displays buttons for each demo user, showing their name. On click, it will attempt to authenticate as that user.
- Calls
connecton AppState, and if the response is true navigate to the HomeScreen, otherwise display an error message in the Snackbar. - Shows Snackbar messages indicating the state of the connection.
Once you run your application it will look something like this:
Remember to create your login barrel file, components/login/login.dart:
1export 'login_screen.dart';
Creating Your Instagram-like Home Screen
This will be the main screen of your application, that is used to navigate users to various other areas of the application.
Opening the real-world Instagram app you’re presented with functionality to access various pages, through a bottom navigation bar:
- Timeline page (default)
- Search page
- Reels page
- Shopping page
- Profile page
The application also allows you to easily access commonly used features in the application bar, such as:
- Create a new post
- Navigate to activity timeline
- Navigate to messaging
For the time being, we will create a simplified version. Later on, you will expand the code to make some improvements in how the Home Screen looks and functions.
To begin, your Home screen will have navigation similar to the real-world Instagram clone by using a Flutter PageView and BottomNavigationBar to have the following pages:
- Timeline page (default)
- Search page
- Profile page
For the time being, all of these pages will have simple text placeholders, which you will expand later.
You’ll also create an AppBar, which, for now, will only contain the title. You’ll expand this later with more controls.
Create components/home/home_screen.dart and add the following:
123456789101112131415161718192021222324252627282930313233343536373839404142434445464748495051525354555657585960616263646566676869707172737475767778798081828384858687888990919293949596979899100101102103104105106107108109110111112113114115116117118119120121122import 'package:flutter/cupertino.dart'; import 'package:flutter/material.dart'; import 'package:google_fonts/google_fonts.dart'; import '../../app/app.dart'; /// HomeScreen of the application. /// /// Provides Navigation to various pages in the application and maintains their /// state. /// /// Default first page is [TimelinePage]. class HomeScreen extends StatefulWidget { /// Creates a new [HomeScreen] const HomeScreen({Key? key}) : super(key: key); /// List of pages available from the home screen. static const List<Widget> _homePages = <Widget>[ Center(child: Text('TimelinePage')), Center(child: Text('SearchPage')), Center(child: Text('ProfilePage')), ]; _HomeScreenState createState() => _HomeScreenState(); } class _HomeScreenState extends State<HomeScreen> { final PageController pageController = PageController(); Widget build(BuildContext context) { final iconColor = Theme.of(context).appBarTheme.iconTheme!.color!; return Scaffold( appBar: AppBar( title: Text('Stream-agram', style: GoogleFonts.grandHotel(fontSize: 32)), elevation: 0, centerTitle: false, ), body: PageView( controller: pageController, physics: const NeverScrollableScrollPhysics(), children: HomeScreen._homePages, ), bottomNavigationBar: _StreamagramBottomNavBar( pageController: pageController, ), ); } } class _StreamagramBottomNavBar extends StatefulWidget { const _StreamagramBottomNavBar({ Key? key, required this.pageController, }) : super(key: key); final PageController pageController; State<_StreamagramBottomNavBar> createState() => _StreamagramBottomNavBarState(); } class _StreamagramBottomNavBarState extends State<_StreamagramBottomNavBar> { void _onNavigationItemTapped(int index) { widget.pageController.jumpToPage(index); } void initState() { super.initState(); widget.pageController.addListener(() { setState(() {}); }); } Widget build(BuildContext context) { return Container( decoration: BoxDecoration( boxShadow: <BoxShadow>[ BoxShadow( color: (Theme.of(context).brightness == Brightness.dark) ? AppColors.ligthGrey.withOpacity(0.5) : AppColors.faded.withOpacity(0.5), blurRadius: 1, ), ], ), child: BottomNavigationBar( onTap: _onNavigationItemTapped, showSelectedLabels: false, showUnselectedLabels: false, elevation: 0, iconSize: 28, currentIndex: widget.pageController.page?.toInt() ?? 0, items: const [ BottomNavigationBarItem( icon: Icon(Icons.home_outlined), activeIcon: Icon(Icons.home), label: 'Home', ), BottomNavigationBarItem( icon: Icon(CupertinoIcons.search), activeIcon: Icon( Icons.search, size: 22, ), label: 'Search', ), BottomNavigationBarItem( icon: Icon(Icons.person_outline), activeIcon: Icon(Icons.person), label: 'Person', ) ], ), ); } }
Let’s break this down:
- This screen is split into three separate parts: AppBar, PageView, and BottomNavigationBar.
- A list of widgets is stored in the
_homePagesvariable. For now, they’re simple Text widget placeholders. - A PageController to navigate between the different PageView pages. This is used in the _StreamagramBottomNavBar. There is also a listener added to the controller to update the UI when it changes.
- The physics of the PageView is set to
NeverScrollableScrollPhysics. This ensures that the only way to update the PageView is by pressing one of the bottom navigation bar items. - Use the
grandHotelfont from the GoogleFonts package to create the AppBar title.
If you run the application now, the screen should look like this:
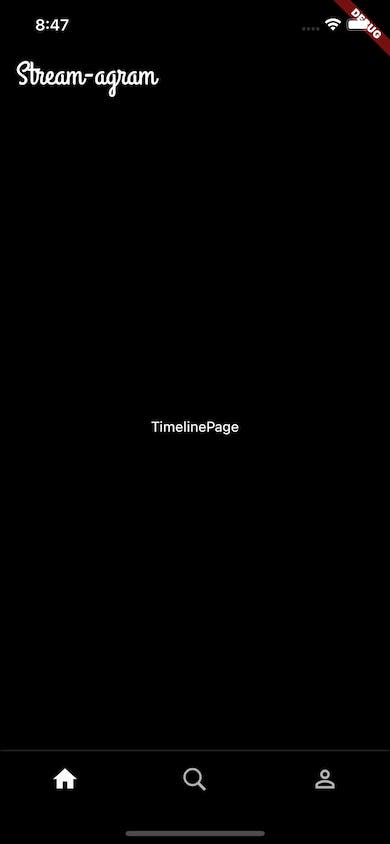
And you should be able to switch between the different pages in the PageView.
Application Entry Point (main.dart)
The final piece of the puzzle. Delete everything in main.dart and replace it with the following:
123456789import 'package:flutter/material.dart';

import 'app/app.dart';

void main() {
  WidgetsFlutterBinding.ensureInitialized();
  final theme = AppTheme();
  runApp(StreamagramApp(appTheme: theme));
}
You should now have a login screen, be able to select a user, and navigate to the Home screen. If you’re running into errors, make sure that the users’ tokens, ids, and your API Key are correct.
Awesome 🚀. With the basic building blocks done, you can proceed to the more advanced parts.

Creating an Instagram Avatar Widget
There are some global widgets that you will use throughout your Instagram clone. You will add a few of these over the course of this tutorial. For now, you’ll begin by creating a simple Avatar widget that displays the user’s profile image if set, or just their initials if no image is set.
Create components/app_widgets/avatars.dart, and add:
123456789101112131415161718192021222324252627282930313233343536373839404142434445464748495051525354555657585960616263646566676869707172737475767778798081828384858687888990919293949596979899100101102103104105106107108109110111112113114115116117118119120121122123124125126127128129130131132133134135136137138139140141142143144145146147148149150151152153154155156157158159160161162163164165166167168169170171172173174175176177178179180181182183184185186187188189190import 'package:cached_network_image/cached_network_image.dart'; import 'package:flutter/material.dart'; import '../../app/app.dart'; /// An avatar that displays a user's profile picture. /// /// Supports different sizes: /// - `Avatar.tiny` /// - `Avatar.small` /// - `Avatar.medium` /// - `Avatar.big` /// - `Avatar.huge` class Avatar extends StatelessWidget { /// Creates a tiny avatar. const Avatar.tiny({ Key? key, required this.streamagramUser, }) : _avatarSize = _tinyAvatarSize, _coloredCircle = _tinyColoredCircle, hasNewStory = false, fontSize = 12, isThumbnail = true, super(key: key); /// Creates a small avatar. const Avatar.small({ Key? key, required this.streamagramUser, }) : _avatarSize = _smallAvatarSize, _coloredCircle = _smallColoredCircle, hasNewStory = false, fontSize = 14, isThumbnail = true, super(key: key); /// Creates a medium avatar. const Avatar.medium({ Key? key, this.hasNewStory = false, required this.streamagramUser, }) : _avatarSize = _mediumAvatarSize, _coloredCircle = _mediumColoredCircle, fontSize = 20, isThumbnail = true, super(key: key); /// Creates a big avatar. const Avatar.big({ Key? key, this.hasNewStory = false, required this.streamagramUser, }) : _avatarSize = _largeAvatarSize, _coloredCircle = _largeColoredCircle, fontSize = 26, isThumbnail = false, super(key: key); /// Creates a huge avatar. const Avatar.huge({ Key? key, this.hasNewStory = false, required this.streamagramUser, }) : _avatarSize = _hugeAvatarSize, _coloredCircle = _hugeColoredCircle, fontSize = 30, isThumbnail = false, super(key: key); /// Indicates if the user has a new story. If yes, their avatar is surrounded /// with an indicator. final bool hasNewStory; /// The user data to show for the avatar. final StreamagramUser streamagramUser; /// Text size of the user's initials when there is no profile photo. final double fontSize; final double _avatarSize; final double _coloredCircle; // Small avatar configuration static const _tinyAvatarSize = 22.0; static const _tinyPaddedCircle = _tinyAvatarSize + 2; static const _tinyColoredCircle = _tinyPaddedCircle * 2 + 4; // Small avatar configuration static const _smallAvatarSize = 30.0; static const _smallPaddedCircle = _smallAvatarSize + 2; static const _smallColoredCircle = _smallPaddedCircle * 2 + 4; // Medium avatar configuration static const _mediumAvatarSize = 40.0; static const _mediumPaddedCircle = _mediumAvatarSize + 2; static const _mediumColoredCircle = _mediumPaddedCircle * 2 + 4; // Large avatar configuration static const _largeAvatarSize = 90.0; static const _largPaddedCircle = _largeAvatarSize + 2; static const _largeColoredCircle = _largPaddedCircle * 2 + 4; // Huge avatar configuration static const _hugeAvatarSize = 120.0; static const _hugePaddedCircle = _hugeAvatarSize + 2; static const _hugeColoredCircle = _hugePaddedCircle * 2 + 4; /// Whether this avatar uses a thumbnail as an image (low quality). final bool isThumbnail; Widget build(BuildContext context) { final picture = _CircularProfilePicture( size: _avatarSize, userData: streamagramUser, fontSize: fontSize, isThumbnail: isThumbnail, ); if (!hasNewStory) { return picture; } return Container( width: _coloredCircle, height: _coloredCircle, decoration: const BoxDecoration( color: Colors.red, shape: BoxShape.circle, ), child: Center(child: picture), ); } } class _CircularProfilePicture extends StatelessWidget { const _CircularProfilePicture({ Key? key, required this.size, required this.userData, required this.fontSize, this.isThumbnail = false, }) : super(key: key); final StreamagramUser userData; final double size; final double fontSize; final bool isThumbnail; Widget build(BuildContext context) { final profilePhoto = isThumbnail ? userData.profilePhotoThumbnail : userData.profilePhotoResized; return (profilePhoto == null) ? Container( width: size, height: size, decoration: const BoxDecoration( color: AppColors.secondary, shape: BoxShape.circle, ), child: Center( child: Text( '${userData.firstName[0]}${userData.lastName[0]}', style: TextStyle(fontSize: fontSize), ), ), ) : SizedBox( width: size, height: size, child: CachedNetworkImage( imageUrl: profilePhoto, fit: BoxFit.contain, imageBuilder: (context, imageProvider) => Container( width: size, height: size, decoration: BoxDecoration( shape: BoxShape.circle, image: DecorationImage(image: imageProvider, fit: BoxFit.cover), ), ), ), ); } }
You can explore this widget yourself. What is important is that it supports a few different named constructors with different default sizes (tiny, large, huge, etc.). This widget will be used wherever you show a user avatar. It also makes use of the cached_network_image package to cache images.
Create the components/app_widgets/app_widgets.dart barrel file, and export the file:
1export 'avatars.dart';
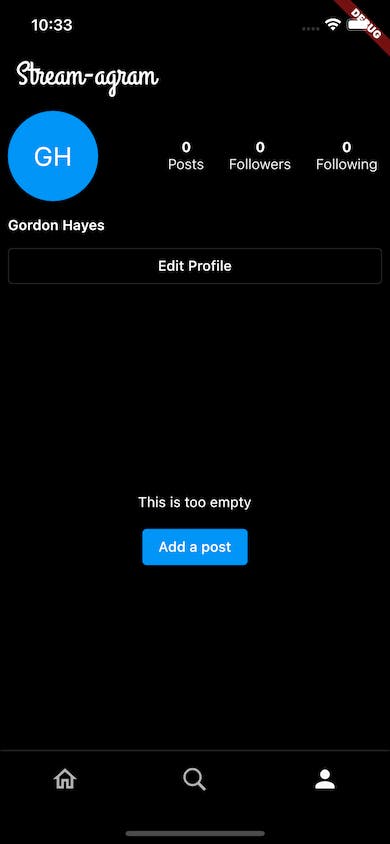
Creating Your Instagram-like Profile Page
An Instagram profile page, at a minimum, requires the following:
- An Avatar and User information.
- Followers and Following information.
- The functionality to easily edit profile information.
- A list of user created posts (activities).
- The ability to easily add new posts.
The following sections will discuss each of these steps in detail.
Create a Main Instagram Profile Page
Create the file components/profile/profile_page.dart and add:
123456789101112131415161718192021222324252627282930313233343536373839404142434445464748495051525354555657585960616263646566676869707172737475767778798081828384858687888990919293949596979899100101102103104105106107108109110111112113114115116117118119120121122123124125126127128129130131132133134135136137138139140141142143144145146147148149150151152153154155156157158159160161162163164165166167168169170171172173174175176177import 'package:flutter/material.dart'; import 'package:provider/provider.dart'; import 'package:stream_feed_flutter_core/stream_feed_flutter_core.dart'; import '../../app/app.dart'; import '../app_widgets/app_widgets.dart'; /// {@template profile_page} /// User profile page. List of user created posts. /// {@endtemplate} class ProfilePage extends StatelessWidget { /// {@macro profile_page} const ProfilePage({Key? key}) : super(key: key); Widget build(BuildContext context) { return FlatFeedCore( feedGroup: 'user', loadingBuilder: (context) => const Center(child: CircularProgressIndicator()), errorBuilder: (context, error) => const Center( child: Text('Error loading profile'), ), emptyBuilder: (context) => const CustomScrollView( slivers: [ SliverToBoxAdapter( child: _ProfileHeader( numberOfPosts: 0, ), ), SliverToBoxAdapter( child: _EditProfileButton(), ), SliverToBoxAdapter( child: SizedBox(height: 24), ), SliverFillRemaining(child: _NoPostsMessage()) ], ), feedBuilder: (context, activities) { return Text('TODO'); // TODO show activities }, ); } } class _EditProfileButton extends StatelessWidget { const _EditProfileButton({Key? key}) : super(key: key); Widget build(BuildContext context) { return Padding( padding: const EdgeInsets.symmetric(horizontal: 8.0), child: OutlinedButton( onPressed: () { // TODO handle onPressed }, child: const Text('Edit Profile'), ), ); } } class _ProfileHeader extends StatelessWidget { const _ProfileHeader({ Key? key, required this.numberOfPosts, }) : super(key: key); final int numberOfPosts; static const _statitisticsPadding = EdgeInsets.symmetric(horizontal: 12, vertical: 8.0); Widget build(BuildContext context) { final feedState = context.watch<AppState>(); final streamagramUser = feedState.streamagramUser; if (streamagramUser == null) return const SizedBox.shrink(); return Column( children: [ Row( children: [ Padding( padding: const EdgeInsets.all(8.0), child: Avatar.big( streamagramUser: streamagramUser, ), ), const Spacer(), Row( mainAxisSize: MainAxisSize.min, children: [ Padding( padding: _statitisticsPadding, child: Column( children: [ Text( '$numberOfPosts', style: AppTextStyle.textStyleBold, ), const Text( 'Posts', style: AppTextStyle.textStyleLight, ), ], ), ), Padding( padding: _statitisticsPadding, child: Column( children: [ Text( '${FeedProvider.of(context).bloc.currentUser?.followersCount ?? 0}', style: AppTextStyle.textStyleBold, ), const Text( 'Followers', style: AppTextStyle.textStyleLight, ), ], ), ), Padding( padding: _statitisticsPadding, child: Column( children: [ Text( '${FeedProvider.of(context).bloc.currentUser?.followingCount ?? 0}', style: AppTextStyle.textStyleBold, ), const Text( 'Following', style: AppTextStyle.textStyleLight, ), ], ), ), ], ), ], ), Align( alignment: Alignment.centerLeft, child: Padding( padding: const EdgeInsets.all(8.0), child: Text(streamagramUser.fullName, style: AppTextStyle.textStyleBoldMedium), ), ), ], ); } } class _NoPostsMessage extends StatelessWidget { const _NoPostsMessage({ Key? key, }) : super(key: key); Widget build(BuildContext context) { return Column( mainAxisAlignment: MainAxisAlignment.center, children: [ const Text('This is too empty'), const SizedBox(height: 12), ElevatedButton( onPressed: () { // TODO handle onPressed }, child: const Text('Add a post'), ) ], ); } }
In this file, you’re finally using some of the stream_chat_flutter_core widgets to easily display feed activities. You can explore the UI code at your own pace. Let’s discuss the most important parts:
- FlatFeedCore requires you to specify the
feedGroup, which will be “user” for the profile page. Remember that this is what you set at the beginning of this tutorial. - FlatFeedCore has four builders you need to give to handle the different states (
loadingBuilder,errorBuilder,emptyBuilder,feedBuilder). emptyBuilderreturns a CustomScrollView, that displays the _ProfileHeader, _EditProfileButton, and _NoPostsMessage widgets.- You will update
feedBuilderlater on. - The _ProfileHeader widget uses Provider to watch the state of AppState.
- There are a few TODOs that you will complete later.
The FlatFeedCore widget deals with all of the complexity of retrieving a specific feed’s activities and making it easy for you to display them how you want to. There are a number of different arguments you can give to this widget to help with pagination or filtering of feed content. For now, however, we won’t go into all of that detail. You can explore that after you’ve finished this tutorial.
Create the components/profile/profile.dart barrel file and add:
1export 'profile_page.dart';
Then go back to components/home/home_screen.dart and modify the _homePages variable to show the ProfilePage. It should look like this:
123456789...
import '../profile/profile.dart'; // ADD IMPORT
...
/// List of pages available from the home screen.
  static const List<Widget> _homePages = <Widget>[
    Center(child: Text('TimelinePage')),
    Center(child: Text('SearchPage')),
    ProfilePage(), // MODIFY THIS
  ];
If you run your Instagram clone now and navigate to the ProfilePage, you should see something similar to this:
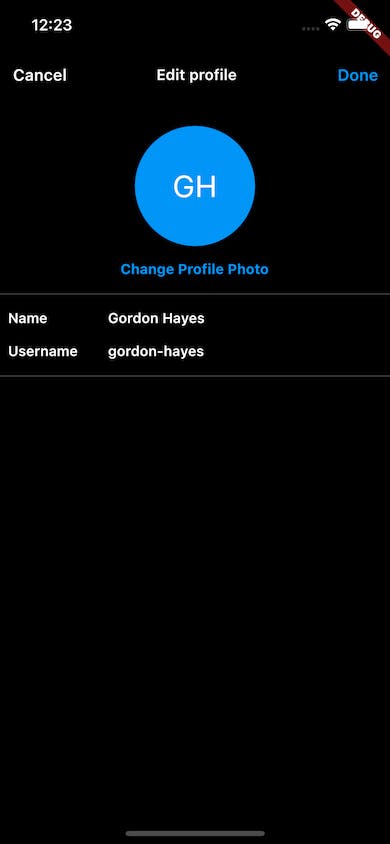
Create an Edit Profile Screen
The Edit Profile Screen displays user information (like your name) and allows users to update their profile picture. Of course, you can extend this page to add more functionality if you wish. But for now, we just want to display the user’s avatar, name, and username.
Updating the App State
Before creating the UI, you need to update the AppState class.
Open app/state/app_state.dart and modify it as follows:
123456789101112131415161718192021222324252627282930313233343536373839404142434445464748495051class AppState extends ChangeNotifier {

...

    var isUploadingProfilePicture = false;

...

    /// Uploads a new profile picture from the given [filePath].
  ///
  /// This will call [notifyListeners] and update the local [_streamagramUser] state.
  Future<void> updateProfilePhoto(String filePath) async {
    // Upload the original image
    isUploadingProfilePicture = true;
    notifyListeners();

    final imageUrl = await client.images.upload(AttachmentFile(path: filePath));
    if (imageUrl == null) {
      debugPrint('Could not upload the image. Not setting profile picture');
      isUploadingProfilePicture = false;
      notifyListeners();
      return;
    }
    // Get resized images using the Stream Feed client.
    final results = await Future.wait([
      client.images.getResized(
        imageUrl,
        const Resize(500, 500),
      ),
      client.images.getResized(
        imageUrl,
        const Resize(50, 50),
      )
    ]);

    // Update the current user data state.
    _streamagramUser = _streamagramUser?.copyWith(
      profilePhoto: imageUrl,
      profilePhotoResized: results[0],
      profilePhotoThumbnail: results[1],
    );

    isUploadingProfilePicture = false;

    // Upload the new user data for the current user.
    if (_streamagramUser != null) {
      await client.currentUser!.update(_streamagramUser!.toMap());
    }

    notifyListeners();
  }
The above code creates an isUploadingProfilePicture state variable that is initially set to false.
The updateProfilePhoto method does a few things:
- It takes in the file path to the image.
- Sets
isUploadingProfilePictureto true. This variable will be observed in your UI. - Uploads that file using the StreamFeedClient by giving an AttachmentFile. This uploads the file to Stream’s CDN.
- Creates resized versions of the profile picture using the
getResizedmethod. These are smaller versions of the profile picture that the application will use when the Avatar is displayed as tiny or small. - Updates the local
_streamagramUserwith the new profile photo URLs. - Sets
isUploadingProfilePictureto false. - Calls the
updatemethod on thecurrentUserto update the user on the Stream database as well.
The code also contains a few calls to notifyListeners to update the UI of changes.
Create an Instagram-like Image Picker
To select an image from the device’s photos for your Instagram clone profile picture, you will use the image_picker package.
See here for installation instructions. Depending on whether you are on Android or iOS, different steps may be required.
UI - Edit Profile Screen
Create components/profile/edit_profile_screen.dart and add:
123456789101112131415161718192021222324252627282930313233343536373839404142434445464748495051525354555657585960616263646566676869707172737475767778798081828384858687888990919293949596979899100101102103104105106107108109110111112113114115116117118119120121122123124125126127128129130131132133134135136137138139140141142143144145146147148149150151152153154155156157158159160161162163164165166167168169170171172173174175176177178179180181182import 'package:flutter/material.dart'; import 'package:image_picker/image_picker.dart'; import 'package:provider/provider.dart'; import '../../app/app.dart'; import '../app_widgets/app_widgets.dart'; /// {@template edit_profile_page} /// Screen to edit a user's profile info. /// {@endtemplate} class EditProfileScreen extends StatelessWidget { /// {@macro edit_profile_page} const EditProfileScreen({ Key? key, }) : super(key: key); /// Custom route to this screen. Animates from the bottom up. static Route get route => PageRouteBuilder( pageBuilder: (context, animation, secondaryAnimation) => const EditProfileScreen(), transitionsBuilder: (context, animation, secondaryAnimation, child) { final tween = Tween(begin: const Offset(0.0, 1.0), end: Offset.zero) .chain(CurveTween(curve: Curves.easeOutQuint)); final offsetAnimation = animation.drive(tween); return SlideTransition( position: offsetAnimation, child: child, ); }, ); Widget build(BuildContext context) { final streamagramUser = context .select<AppState, StreamagramUser?>((value) => value.streamagramUser); if (streamagramUser == null) { return const Scaffold( body: Center( child: Text('You should not see this.\nUser data is empty.'), ), ); } return Scaffold( appBar: AppBar( leading: TextButton( onPressed: () { Navigator.of(context).pop(); }, child: Text( 'Cancel', style: (Theme.of(context).brightness == Brightness.dark) ? const TextStyle(color: AppColors.light) : const TextStyle(color: AppColors.dark), ), ), leadingWidth: 80, title: const Text( ' Edit profile', style: TextStyle(fontSize: 15, fontWeight: FontWeight.w600), ), actions: [ TextButton( onPressed: () { Navigator.of(context).pop(); }, child: const Text('Done'), ), ], ), body: ListView( children: [ const _ChangeProfilePictureButton(), const Divider( color: Colors.grey, ), Padding( padding: const EdgeInsets.all(8), child: Row( children: [ const SizedBox( width: 100, child: Text( 'Name', style: AppTextStyle.textStyleBoldMedium, ), ), Text( '${streamagramUser.fullName} ', style: AppTextStyle.textStyleBoldMedium, ), ], ), ), Padding( padding: const EdgeInsets.all(8), child: Row( children: [ const SizedBox( width: 100, child: Text( 'Username', style: AppTextStyle.textStyleBoldMedium, ), ), Text( '${context.appState.user.id} ', style: AppTextStyle.textStyleBoldMedium, ), ], ), ), const Divider(color: Colors.grey), ], ), ); } } class _ChangeProfilePictureButton extends StatefulWidget { const _ChangeProfilePictureButton({ Key? key, }) : super(key: key); __ChangeProfilePictureButtonState createState() => __ChangeProfilePictureButtonState(); } class __ChangeProfilePictureButtonState extends State<_ChangeProfilePictureButton> { final _picker = ImagePicker(); Future<void> _changePicture() async { if (context.appState.isUploadingProfilePicture == true) { return; } final pickedFile = await _picker.pickImage( source: ImageSource.gallery, maxWidth: 800, maxHeight: 800, imageQuality: 70, ); if (pickedFile != null) { await context.appState.updateProfilePhoto(pickedFile.path); } else { context.removeAndShowSnackbar('No picture selected'); } } Widget build(BuildContext context) { final streamagramUser = context .select<AppState, StreamagramUser>((value) => value.streamagramUser!); final isUploadingProfilePicture = context .select<AppState, bool>((value) => value.isUploadingProfilePicture); return Padding( padding: const EdgeInsets.all(8.0), child: Column( mainAxisSize: MainAxisSize.min, children: [ SizedBox( height: 150, child: Center( child: isUploadingProfilePicture ? const CircularProgressIndicator() : GestureDetector( onTap: _changePicture, child: Avatar.huge(streamagramUser: streamagramUser), ), ), ), GestureDetector( onTap: _changePicture, child: const Text('Change Profile Photo', style: AppTextStyle.textStyleAction), ), ], ), ); } }
Let’s break down the above code:
- There is a custom PageRouteBuilder, which uses a SlideTransition to slide the page in from the bottom. Similar to how Instagram does it.
- Various UI and layout widgets to display user information.
- A
_changePicturemethod that uses the image_picker package to select an image from the gallery and upload it using theupdateProfilePhotomethod you made earlier. - You also specify the maxWidth, maxHeight, and imageQuality to reduce the image size that has to be uploaded.
The page should look something like this:
Modify the components/profile/profile.dart barrel file:
12export 'edit_profile_screen.dart'; // ADD THIS
export 'profile_page.dart';
And in components/profile/profile_page.dart, modify the TODO in the _EditProfileButton widget:
123456789101112131415161718192021222324... import 'package:stream_agram/components/profile/edit_profile_screen.dart'; ... class _EditProfileButton extends StatelessWidget { const _EditProfileButton({Key? key}) : super(key: key); Widget build(BuildContext context) { return Padding( padding: const EdgeInsets.symmetric(horizontal: 8.0), child: OutlinedButton( onPressed: () { Navigator.of(context).push(EditProfileScreen.route); // ADD THIS }, child: const Text('Edit Profile'), ), ); } } ...
Success!! 🥳
If you completed all of the steps above, your Instagram clone profile should let you update your placeholder Avatar with an image from your device:
Create a Tap Fade Icon
Time for another global app widget. This widget is just a simple icon widget that fades in and out when tapped.
Create components/app_widgets/tap_fade_icon.dart and add:
123456789101112131415161718192021222324252627282930313233343536373839404142434445464748495051525354555657585960616263646566676869import 'package:flutter/material.dart'; /// {@template tap_fade_icon} /// A tappable icon that fades colors when tapped and held. /// {@endtemplate} class TapFadeIcon extends StatefulWidget { /// {@macro tap_fade_icon} const TapFadeIcon({ Key? key, required this.onTap, required this.icon, required this.iconColor, this.size = 22, }) : super(key: key); /// Callback to handle tap. final VoidCallback onTap; /// Color of the icon. final Color iconColor; /// Type of icon. final IconData icon; /// Icon size. final double size; _TapFadeIconState createState() => _TapFadeIconState(); } class _TapFadeIconState extends State<TapFadeIcon> { late Color color = widget.iconColor; void handleTapDown(TapDownDetails _) { setState(() { color = widget.iconColor.withOpacity(0.7); }); } void handleTapUp(TapUpDetails _) { setState(() { color = widget.iconColor; }); widget.onTap(); // Execute callback. } void didUpdateWidget(covariant TapFadeIcon oldWidget) { super.didUpdateWidget(oldWidget); if (oldWidget.iconColor != widget.iconColor) { color = widget.iconColor; } } Widget build(BuildContext context) { return GestureDetector( onTapDown: handleTapDown, onTapUp: handleTapUp, child: Icon( widget.icon, color: color, size: widget.size, ), ); } }
You can inspect this widget on your own.
Add the class to the correct barrel file. Open components/app_widgets/app_widgets.dart and add:
12export 'avatars.dart';
export 'tap_fade_icon.dart'; // ADD THIS
Building Your Instagram User Feed
As mentioned earlier, our Instagram clone can be broken down into a user feed and a timeline feed. The “user” feed is unique to each user and will show all of the posts that an individual user has made. While the “timeline” feed is a combination of users’ “user” feeds.
In this section you will to create the functionality to push Activities directly to a “user” feed. Activities are the content that appear within a feed, for example, posts in an Instagram clone.
In order to code our Stream-agram app so that it looks, feels, and interacts like its real-world counterpart, we need to first finish the user feed by coding the following:
- Build out a screen for adding new posts
- Add a PictureViewer with interactivity and transition animations (hero animation)
- Update the AppBar so we can continue adding more posts
- Enable following and unfollowing other user feeds
With these parts out of the way, we can then pivot to building your Instagram timeline feed.
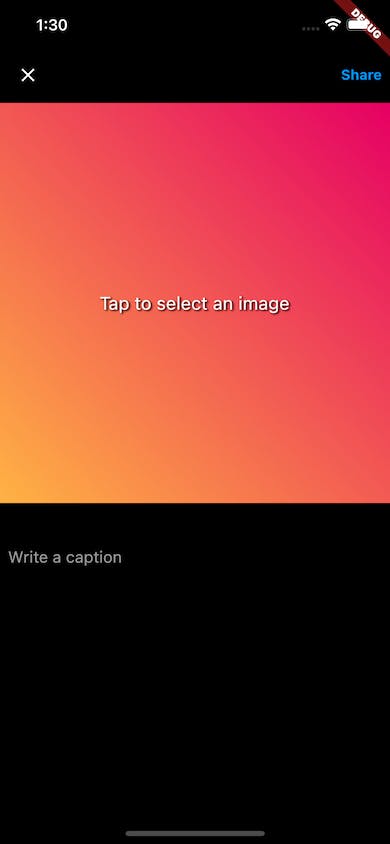
Creating the Instagram New Post Screen
This is the screen where you will add a photo, with a description, to your user feed.
Create the file components/new_post/new_post_screen.dart and add:
123456789101112131415161718192021222324252627282930313233343536373839404142434445464748495051525354555657585960616263646566676869707172737475767778798081828384858687888990919293949596979899100101102103104105106107108109110111112113114115116117118119120121122123124125126127128129130131132133134135136137138139140141142143144145146147148149150151152153154155156157158159160161162163164165166167168169170171172173174175176177178179180181182183184185186187188189190191192193194195196197198199200201202203204205206207208209210211212213214import 'dart:io'; import 'package:flutter/material.dart'; import 'package:image_picker/image_picker.dart'; import 'package:stream_feed_flutter_core/stream_feed_flutter_core.dart'; import 'package:transparent_image/transparent_image.dart'; import '../../app/app.dart'; import '../app_widgets/app_widgets.dart'; /// Screen to choose photos and add a new feed post. class NewPostScreen extends StatefulWidget { /// Create a [NewPostScreen]. const NewPostScreen({Key? key}) : super(key: key); /// Material route to this screen. static Route get route => MaterialPageRoute(builder: (_) => const NewPostScreen()); _NewPostScreenState createState() => _NewPostScreenState(); } class _NewPostScreenState extends State<NewPostScreen> { static const double maxImageHeight = 1000; static const double maxImageWidth = 800; final _formKey = GlobalKey<FormState>(); final _text = TextEditingController(); XFile? _pickedFile; bool loading = false; final picker = ImagePicker(); Future<void> _pickFile() async { _pickedFile = await picker.pickImage( source: ImageSource.gallery, maxHeight: maxImageHeight, maxWidth: maxImageWidth, imageQuality: 70, ); setState(() {}); } Future<void> _postImage() async { if (_pickedFile == null) { context.removeAndShowSnackbar('Please select an image first'); return; } if (!_formKey.currentState!.validate()) { context.removeAndShowSnackbar('Please enter a caption'); return; } _setLoading(true); final client = context.appState.client; var decodedImage = await decodeImageFromList(await _pickedFile!.readAsBytes()); final imageUrl = await client.images.upload(AttachmentFile(path: _pickedFile!.path)); if (imageUrl != null) { final _resizedUrl = await client.images.getResized( imageUrl, const Resize(300, 300), ); if (_resizedUrl != null && client.currentUser != null) { await FeedProvider.of(context).bloc.onAddActivity( feedGroup: 'user', verb: 'post', object: 'image', data: { 'description': _text.text, 'image_url': imageUrl, 'resized_image_url': _resizedUrl, 'image_width': decodedImage.width, 'image_height': decodedImage.height, 'aspect_ratio': decodedImage.width / decodedImage.height }, ); } } _setLoading(false, shouldCallSetState: false); context.removeAndShowSnackbar('Post created!'); Navigator.of(context).pop(); } void _setLoading(bool state, {bool shouldCallSetState = true}) { if (loading != state) { loading = state; if (shouldCallSetState) { setState(() {}); } } } void dispose() { _text.dispose(); super.dispose(); } Widget build(BuildContext context) { return Scaffold( appBar: AppBar( leading: TapFadeIcon( onTap: () => Navigator.pop(context), icon: Icons.close, iconColor: Theme.of(context).appBarTheme.iconTheme!.color!, ), actions: [ Padding( padding: const EdgeInsets.all(8.0), child: Center( child: GestureDetector( onTap: _postImage, child: const Text('Share', style: AppTextStyle.textStyleAction), ), ), ) ], ), body: loading ? Center( child: Column( mainAxisAlignment: MainAxisAlignment.center, children: const [ CircularProgressIndicator(), SizedBox(height: 12), Text('Uploading...') ], ), ) : ListView( children: [ InkWell( onTap: _pickFile, child: SizedBox( height: 400, child: (_pickedFile != null) ? FadeInImage( fit: BoxFit.contain, placeholder: MemoryImage(kTransparentImage), image: Image.file(File(_pickedFile!.path)).image, ) : Container( decoration: const BoxDecoration( gradient: LinearGradient( begin: Alignment.bottomLeft, end: Alignment.topRight, colors: [ AppColors.bottomGradient, AppColors.topGradient ]), ), height: 300, child: const Center( child: Text( 'Tap to select an image', style: TextStyle( color: AppColors.light, fontSize: 18, shadows: <Shadow>[ Shadow( offset: Offset(2.0, 1.0), blurRadius: 3.0, color: Colors.black54, ), Shadow( offset: Offset(1.0, 1.5), blurRadius: 5.0, color: Colors.black54, ), ], ), ), ), ), ), ), const SizedBox( height: 22, ), Form( key: _formKey, child: Padding( padding: const EdgeInsets.all(8.0), child: TextFormField( controller: _text, decoration: const InputDecoration( hintText: 'Write a caption', border: InputBorder.none, ), validator: (text) { if (text == null || text.isEmpty) { return 'Caption is empty'; } return null; }, ), ), ), ], ), ); } }
Let’s break this screen down:
- In a similar way as before, you’re using the image_picker package to select an image. Once an image is selected you set the local
_pickedFilevalue. - You create a TextFormField that requires you to enter a description for the image.
- Once an image has been picked and the description has been entered, then a user can press the Share button. If these conditions aren’t met, then a warning message is displayed.
- The Share button calls the
_postImagemethod, which does a few things:- Sets the loading state to true.
- Decodes the image - as this is needed to get the image size.
- Uploads the image to the Stream CDN.
- Creates a resized, smaller, version of the image, using
getResized. - Uses
FeedProvider.of(context).blocto retrieve the FeedBloc class and creates a new activity usingonAddActivity.
For our Instagram clone, an activity will require three pieces of information: an actor, a verb, and an object. The actor is the entity performing the action (the user). The verb is the type of action (a post). The object is the content of the activity itself (often a reference, but we will just say an image).
So basically, the current-user is posting an image to the “user” feed. Then you’re also specifying some extra data, which most notably includes:
- The image description
- The image aspect ratio (you will use this later on)
- The image and resized image URLs
For more information, see the Adding Activities documentation. Activities and feeds can be quite complex. But that complexity means you can do some advanced things! For now, however, the above is all you need.
The screen should look like this:
Create the components/new_post/new_post.dart barrel file:
1export 'new_post_screen.dart';
Add Navigation and Display Instagram Posts (Activities)
Open components/profile/profile_page.dart .
Modify the _NoPostsMessage widget to navigate to the NewPostScreen:
123456789101112131415161718192021222324252627282930... import '../new_post/new_post.dart'; ... class _NoPostsMessage extends StatelessWidget { const _NoPostsMessage({ Key? key, }) : super(key: key); Widget build(BuildContext context) { return Column( mainAxisAlignment: MainAxisAlignment.center, children: [ const Text('This is too empty'), const SizedBox(height: 12), ElevatedButton( onPressed: () { Navigator.of(context).push(NewPostScreen.route); // ADD THIS }, child: const Text('Add a post'), ) ], ); } } ...
Modify the ProfilePage widget’s feedBuilder to the following:
1234567891011121314151617181920212223242526272829303132333435363738394041424344454647484950515253545556import 'package:cached_network_image/cached_network_image.dart';

...

feedBuilder: (context, activities) {
  return RefreshIndicator(
    onRefresh: () async {
      await FeedProvider.of(context)
          .bloc
          .currentUser!
          .get(withFollowCounts: true);
      return FeedProvider.of(context)
          .bloc
          .queryEnrichedActivities(feedGroup: 'user');
    },
    child: CustomScrollView(
      slivers: [
        SliverToBoxAdapter(
          child: _ProfileHeader(
            numberOfPosts: activities.length,
          ),
        ),
        const SliverToBoxAdapter(
          child: _EditProfileButton(),
        ),
        const SliverToBoxAdapter(
          child: SizedBox(height: 24),
        ),
        SliverGrid(
          gridDelegate: const SliverGridDelegateWithFixedCrossAxisCount(
            crossAxisCount: 3,
            crossAxisSpacing: 1,
            mainAxisSpacing: 1,
          ),
          delegate: SliverChildBuilderDelegate(
            (context, index) {
              final activity = activities[index];
              final url =
                        activity.extraData!['resized_image_url'] as String;
              return CachedNetworkImage(
                key: ValueKey('image-${activity.id}'),
                width: 200,
                height: 200,
                fit: BoxFit.cover,
                imageUrl: url,
              );
            },
            childCount: activities.length,
          ),
        )
      ],
    ),
  );
},

...
Now that your Instagram clone has the ability to add activities (posts), you need to handle the scenario when there are activities to show. The above builder:
- Creates a CustomScrollView.
- Displays the _ProfileHeader with the number of posts set to the number of activities.
- Displays the _EditProfileButton.
- Displays a SliverGrid of all the activities, that returns a CachedNetworkImage, with the URL retrieved from the activity. Be sure to display the resized_image_url as it will be more performant to display smaller images, instead of Flutter decoding and caching large images.
- Wraps the list in a RefreshIndicator, that will allow users to pull the list down and initiate a page refresh, by getting the latest server data. This is achieved by calling
currentUser.getandbloc.queryEnrichedActivities.queryEnrichedActivitieswill update the FeedBloc state for the given feed group.
That’s it! You should now be able to log in as a user and upload an image to their user feed. Below is a video showing a demo:
Adding Picture Viewer Transition Animations
Before moving on to the timeline feed, let’s skill up a bit with page transitions.
When using Instagram, you'll notice the app provides seamless transitions when selecting an image for a post. To replicate this behavior in our Instagram clone, we'll create a picture viewer that performs a hero transition when an image is selected, while dynamically switching the low-resolution image for the higher resolution one. This will create a seamless transition from the grid view to the full screen. You’ll also add functionality to pan and zoom the picture.
There are a few steps needed to achieve the above described behavior:
- Creating a CustomRectTween for a custom Hero animation
- Creating a PageRoute that creates a FadeTransition
- Updating the UI in
components/profile/profile_page.dartto perform navigation - Make use of CachedNetworkImage to fade in the low-resolution cached image, for the high-resolution image
- Use the InteractiveViewer widget to add pan and zoom functionality
Navigation
First, you will need to create some helper classes for the transitions.
Create app/navigation/custom_rect_tween.dart and add the following:
12345678910111213141516171819202122232425262728import 'dart:ui'; import 'package:flutter/widgets.dart'; /// {@template custom_rect_tween} /// Linear RectTween with a [Curves.easeOut] curve. /// /// Less dramatic than the regular [RectTween] used in [Hero] animations. /// {@endtemplate} class CustomRectTween extends RectTween { /// {@macro custom_rect_tween} CustomRectTween({ required Rect? begin, required Rect? end, }) : super(begin: begin, end: end); Rect? lerp(double t) { final elasticCurveValue = Curves.easeOut.transform(t); if (begin == null || end == null) return null; return Rect.fromLTRB( lerpDouble(begin!.left, end!.left, elasticCurveValue)!, lerpDouble(begin!.top, end!.top, elasticCurveValue)!, lerpDouble(begin!.right, end!.right, elasticCurveValue)!, lerpDouble(begin!.bottom, end!.bottom, elasticCurveValue)!, ); } }
This class extends RectTween to create a custom lerp. You will use this later to replace the standard Hero transition. “lerp” is a term used to describe the interpolation between a start and an end value over time (t). This linearly transforms a Rect from a begin to an end value.
Next, create app/navigation/hero_dialog_route.dart and add the following:
123456789101112131415161718192021222324252627282930313233343536373839404142434445464748import 'package:flutter/material.dart'; /// {@template hero_dialog_route} /// Custom [PageRoute] that creates an overlay dialog (popup effect). /// /// Best used with a [Hero] animation. /// {@endtemplate} class HeroDialogRoute<T> extends PageRoute<T> { /// {@macro hero_dialog_route} HeroDialogRoute({ required WidgetBuilder builder, RouteSettings? settings, bool fullscreenDialog = false, }) : _builder = builder, super(settings: settings, fullscreenDialog: fullscreenDialog); final WidgetBuilder _builder; bool get opaque => false; bool get barrierDismissible => true; Duration get transitionDuration => const Duration(milliseconds: 300); bool get maintainState => true; Color get barrierColor => Colors.black54; Widget buildTransitions(BuildContext context, Animation<double> animation, Animation<double> secondaryAnimation, Widget child) { return FadeTransition(opacity: animation, child: child); } Widget buildPage(BuildContext context, Animation<double> animation, Animation<double> secondaryAnimation) { return _builder(context); } String get barrierLabel => 'Hero Dialog Open'; }
This is a custom PageRoute that performs a FadeTransition and has a black background. There are other ways you could also perform the same transition effect. Explore this class and play around with the overrides to see what you can create. Earlier in this tutorial you also made use of PageRouteBuilder, which is an alternative way to do the above. However, extending the class gives you more control.
Create the app/navigation/navigation.dart barrel file:
12export 'custom_rect_tween.dart';
export 'hero_dialog_route.dart';
Update the app/app.dart barrel file:
12345export 'state/state.dart';
export 'theme.dart';
export 'stream_agram.dart';
export 'utils.dart';
export 'navigation/navigation.dart'; // ADD THIS
UI
Open the components/profile/profile_page.dart file and add the following to the bottom:
12345678910111213141516171819202122232425262728293031323334353637383940414243444546474849505152535455565758596061626364... class _PictureViewer extends StatelessWidget { const _PictureViewer({ Key? key, required this.activity, }) : super(key: key); final EnrichedActivity activity; Widget build(BuildContext context) { final resizedUrl = activity.extraData!['resized_image_url'] as String?; final fullSizeUrl = activity.extraData!['image_url'] as String; final aspectRatio = activity.extraData!['aspect_ratio'] as double?; return Scaffold( appBar: AppBar( elevation: 0, backgroundColor: Colors.transparent, ), extendBodyBehindAppBar: true, body: InteractiveViewer( child: Center( child: Hero( tag: 'hero-image-${activity.id}', createRectTween: (begin, end) { return CustomRectTween(begin: begin, end: end); }, child: AspectRatio( aspectRatio: aspectRatio ?? 1, child: CachedNetworkImage( fadeInDuration: Duration.zero, placeholder: (resizedUrl != null) ? (context, url) => CachedNetworkImage( imageBuilder: (context, imageProvider) => DecoratedBox( decoration: BoxDecoration( image: DecorationImage( image: imageProvider, fit: BoxFit.contain, ), ), ), imageUrl: resizedUrl, ) : null, imageBuilder: (context, imageProvider) => DecoratedBox( decoration: BoxDecoration( image: DecorationImage( image: imageProvider, fit: BoxFit.contain, ), ), ), imageUrl: fullSizeUrl, ), ), ), ), ), ); } }
The above code is quite special. It does a few things:
- Retrieves the image and resized image URLs, as well as the aspect ratio.
- Returns a CachedNetworkImage which uses the image URL (full resolution), and specifies the
placeholderto be the current CachedNetworkImage for the resized URL that has already been cached. - Using the AspectRatio widget will ensure that both the cached image (resized URL), and the full resolution image, fill up the same amount of space.
- Sets the
fadeInDurationtoDuration.zero. - Wraps everything in a Hero widget with, using the CustomRectTween for the
createRectTweenargument. - Wraps everything in an InteractiveViewer to allow user’s to pan and zoom the image.
All of the above code will ensure the image smoothly fades from the small cached version to the full resolution one once it is retrieved – while also doing a hero transition at the same time! 🥳
Now, in the ProfilePage widget, update the SliverChildBuilderDelegate to the following:
123456789101112131415161718192021222324252627282930313233...

delegate: SliverChildBuilderDelegate(
  (context, index) {
    final activity = activities[index];
    final url =
        activity.extraData!['resized_image_url'] as String;
    return GestureDetector(
      onTap: () {
        Navigator.of(context).push(
          HeroDialogRoute(
            builder: (context) {
              return _PictureViewer(activity: activity);
            },
          ),
        );
      },
      child: Hero(
        tag: 'hero-image-${activity.id}',
        child: CachedNetworkImage(
          key: ValueKey('image-${activity.id}'),
          width: 200,
          height: 200,
          fit: BoxFit.cover,
          imageUrl: url,
        ),
      ),
    );
  },
  childCount: activities.length,
),

...
The above wraps the CachedNetworkImage in a Hero widget and a GestureDetector that performs a navigation using the newly created HeroDialogRoute, which opens the _PictureViewer widget.
⚠️ Ensure that the Hero tags are the same across the pages for the transition to work correctly. Also, ensure you do not show duplicate tags on the same screen - which is why you use the
activity.idto make it unique.
You should now have an awesome animation when clicking on an image. See the video below:
Update Your Instagram App Bar Actions
At the moment the AppBar is a little empty. You may have noted as well that there is currently no way to add more posts after the first post has been created.
Let’s change that.
Open components/home/home_screen.dart and update the AppBar with an actions argument:
1234567891011121314151617181920212223242526272829303132333435363738394041...

import '../app_widgets/app_widgets.dart';
import '../new_post/new_post.dart';

...

AppBar(

...

    actions: [
    Padding(
      padding: const EdgeInsets.all(8),
      child: TapFadeIcon(
        onTap: () => Navigator.of(context).push(NewPostScreen.route),
        icon: Icons.add_circle_outline,
        iconColor: iconColor,
      ),
    ),
    Padding(
      padding: const EdgeInsets.all(8),
      child: TapFadeIcon(
        onTap: () async {
          context.removeAndShowSnackbar('Not part of the demo');
        },
        icon: Icons.favorite_outline,
        iconColor: iconColor,
      ),
    ),
    Padding(
      padding: const EdgeInsets.all(8.0),
      child: TapFadeIcon(
        onTap: () => context.removeAndShowSnackbar('Not part of the demo'),
        icon: Icons.call_made,
        iconColor: iconColor,
      ),
    ),
  ],

...
This uses the TapFadeIcon you created earlier. Two of these icons are only for decoration, and not part of the demo app. However, the first will open the NewPostScreen when tapped.
The AppBar should now look like this, and it should be possible to add multiple posts:

Follow/Unfollow Instagram Users
Following and unfollowing other users (feeds) is a core Instagram feature. Without it, your users will only be posting pictures for themselves to see. 🤪
Create Your Instagram-like Search Page
Create the components/search/search_page.dart file, and add:
123456789101112131415161718192021222324252627282930313233343536373839404142434445464748495051525354555657585960616263646566676869707172737475767778798081828384858687888990919293949596979899100101102103104105106107108109110111112113114115116117118119120121122123124125126127128129130131132133134135136137138139140141142143144145146147148149150151152153154155156157158159160161162163164165166167168169170171172173174175176177import 'package:flutter/material.dart'; import 'package:stream_feed_flutter_core/stream_feed_flutter_core.dart'; import '../../app/app.dart'; import '../app_widgets/app_widgets.dart'; /// Page to find other users and follow/unfollow. class SearchPage extends StatelessWidget { /// Create a new [SearchPage]. const SearchPage({Key? key}) : super(key: key); Widget build(BuildContext context) { final users = List<DemoAppUser>.from(DemoAppUser.values) ..removeWhere((it) => it.id == context.appState.user.id); return ListView.builder( itemCount: users.length, itemBuilder: (context, index) { return _UserProfile(userId: users[index].id!); }, ); } } class _UserProfile extends StatefulWidget { const _UserProfile({ Key? key, required this.userId, }) : super(key: key); final String userId; __UserProfileState createState() => __UserProfileState(); } class __UserProfileState extends State<_UserProfile> { late StreamUser streamUser; late bool isFollowing; late Future<StreamagramUser> userDataFuture = getUser(); Future<StreamagramUser> getUser() async { final userClient = context.appState.client.user(widget.userId); final futures = await Future.wait([ userClient.get(), _isFollowingUser(widget.userId), ]); streamUser = futures[0] as StreamUser; isFollowing = futures[1] as bool; return StreamagramUser.fromMap(streamUser.data!); } /// Determine if the current authenticated user is following [user]. Future<bool> _isFollowingUser(String userId) async { return FeedProvider.of(context).bloc.isFollowingFeed(followerId: userId); } Widget build(BuildContext context) { return FutureBuilder<StreamagramUser>( future: userDataFuture, builder: (context, snapshot) { switch (snapshot.connectionState) { case ConnectionState.waiting: return const SizedBox.shrink(); default: if (snapshot.hasError) { return const Padding( padding: EdgeInsets.all(8.0), child: Text('Could not load profile'), ); } else { final userData = snapshot.data; if (userData != null) { return _ProfileTile( user: streamUser, userData: userData, isFollowing: isFollowing, ); } return const SizedBox.shrink(); } } }, ); } } class _ProfileTile extends StatefulWidget { const _ProfileTile({ Key? key, required this.user, required this.userData, required this.isFollowing, }) : super(key: key); final StreamUser user; final StreamagramUser userData; final bool isFollowing; __ProfileTileState createState() => __ProfileTileState(); } class __ProfileTileState extends State<_ProfileTile> { bool _isLoading = false; late bool _isFollowing = widget.isFollowing; Future<void> followOrUnfollowUser(BuildContext context) async { setState(() { _isLoading = true; }); if (_isFollowing) { final bloc = FeedProvider.of(context).bloc; await bloc.unfollowFeed(unfolloweeId: widget.user.id); _isFollowing = false; } else { await FeedProvider.of(context) .bloc .followFeed(followeeId: widget.user.id); _isFollowing = true; } FeedProvider.of(context) .bloc .queryEnrichedActivities( feedGroup: 'timeline', flags: EnrichmentFlags() ..withOwnReactions() ..withRecentReactions() ..withReactionCounts(), ); setState(() { _isLoading = false; }); } Widget build(BuildContext context) { return Row( children: [ Padding( padding: const EdgeInsets.all(8.0), child: Avatar.medium(streamagramUser: widget.userData), ), Padding( padding: const EdgeInsets.all(8.0), child: Column( crossAxisAlignment: CrossAxisAlignment.start, children: [ Text(widget.user.id, style: AppTextStyle.textStyleBold), Text( widget.userData.fullName, style: AppTextStyle.textStyleFaded, ), ], ), ), const Spacer(), Padding( padding: const EdgeInsets.symmetric(horizontal: 8.0), child: _isLoading ? const CircularProgressIndicator(strokeWidth: 3) : OutlinedButton( onPressed: () { followOrUnfollowUser(context); }, child: _isFollowing ? const Text('Unfollow') : const Text('Follow'), ), ) ], ); } }
This is quite a bit of code and might be easier for you to explore at your own pace. To summarize it, this code snippet:
- Gets all demo users, and removes the currently authenticated user from that list.
- Displays all the users using the _UserProfile widget.
- Calls the
getUsermethod in the _UserProfile widget state:- This method gets the latest user information from the server.
- Checks to see whether the current user is already following that user, using the
isFollowingFeedmethod on the FeedBloc.
- Uses a FutureBuilder widget to await the result of
getUser. - Returns a _ProfileTile widget for each user that neatly displays the user information, and makes it possible to follow/unfollow a user, by calling the
followOrUnfollowUsermethod. The FeedBloc class is used to easily follow/unfollow certain feeds based on ID. - The
followFeedandunfollowFeedmethods on FeedBloc have default values set to use the timeline and user feeds. You can customize these if needed if you used different names.
The followOrUnfollowUser method also executes:
1234567FeedProvider.of(context).bloc.queryEnrichedActivities(
          feedGroup: 'timeline',
          flags: EnrichmentFlags()
            ..withOwnReactions()
            ..withRecentReactions()
            ..withReactionCounts(),
        );
This forces the timeline feed to update. The flags argument is interesting: it tells the API to “enrich” the activities with these flags. What that basically means is that it will retrieve the activities and the reactions added to those activities. You will explore this later on in the tutorial.
Next, create the barrel file, components/search/search.dart:
1export 'search_page.dart';
Finally, you will need a way to navigate to this page. Open components/home/home_screen.dart and in the HomeScreen widget modify the _homePages variable:
1234567891011121314...

import 'package:stream_agram/components/search/search.dart';

...

/// List of pages available from the home screen.
static const List<Widget> _homePages = <Widget>[
  Center(child: Text('TimelinePage')),
  SearchPage(), // ADD THIS
  ProfilePage(),
];

...
If everything works correctly, you should now be able to navigate to the Search Page and see:
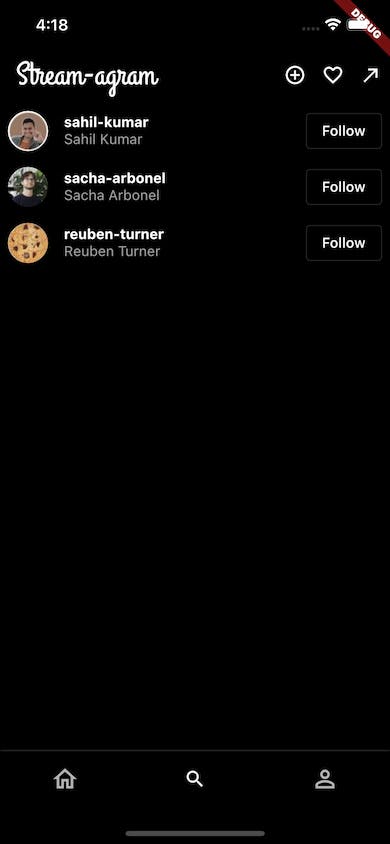
⚠️ NOTE: If you’re getting a “Could not load profile” error, then that probably means you have not created the user account yet. Be sure to sign in with each user account at least once!
Building Your Instagram Timeline Feed
Your Stream-agram users can post to their user feed and they can follow/unfollow specific user feeds, just like the real-world Instagram app. That means you’re now finally ready to display the timeline feed.
However, to get the UI and animation just right can be difficult. So instead of jumping into the deep end, let’s first create some of the UI widgets that this class relies on.
Creating a Favorite Icon and Comment Box
What would a social media app like Instagram be without the ability to react to posts? To add this functionality to our Instagram clone, you’ll need to create a widget that handles “favoriting” (or “liking”) a post and a widget to add comments to a post (a TextField).
Let’s start with the FavoriteIconButton.
Create components/app_widgets/favorite_icon.dart and:
123456789101112131415161718192021222324252627282930313233343536373839404142434445464748495051525354555657585960616263import 'package:flutter/material.dart'; import 'package:stream_agram/app/theme.dart'; /// {@template favorite_icon_button} /// Animated button to indicate if a post/comment is liked. /// /// Pass in onPressed to /// {@endtemplate} class FavoriteIconButton extends StatefulWidget { /// {@macro favorite_icon_button} const FavoriteIconButton({ Key? key, required this.isLiked, this.size = 22, required this.onTap, }) : super(key: key); /// Indicates if it is liked or not. final bool isLiked; /// Size of the icon. final double size; /// onTap callback. Returns a value to indicate if liked or not. final Function(bool val) onTap; _FavoriteIconButtonState createState() => _FavoriteIconButtonState(); } class _FavoriteIconButtonState extends State<FavoriteIconButton> { late bool isLiked = widget.isLiked; void _handleTap() { setState(() { isLiked = !isLiked; }); widget.onTap(isLiked); } Widget build(BuildContext context) { return GestureDetector( onTap: _handleTap, child: AnimatedCrossFade( firstCurve: Curves.easeIn, secondCurve: Curves.easeOut, firstChild: Icon( Icons.favorite, color: AppColors.like, size: widget.size, ), secondChild: Icon( Icons.favorite_outline, size: widget.size, ), crossFadeState: isLiked ? CrossFadeState.showFirst : CrossFadeState.showSecond, duration: const Duration(milliseconds: 200), ), ); } }
This is a simple widget that highlights a heart icon when tapped and calls the onTap callback. This widget is used to indicate that a post or comment has been liked.

Next, you’ll create the CommentBox widget. Create components/app_widgets/comment_box.dart and add:
123456789101112131415161718192021222324252627282930313233343536373839404142434445464748495051525354555657585960616263646566676869707172737475767778798081828384858687888990919293949596979899100101102103104105106107108109110111112113114115116117118119120121122123124125126127128129130131132133134135136137138139140141142143144145146147148149150151152153154155156157158159160161162163164165166167168169170171172173174175import 'package:flutter/material.dart'; import '../../app/app.dart'; import 'app_widgets.dart'; /// Displays a text field styled to easily add comments to posts. /// /// Quickly add emoji reactions. class CommentBox extends StatelessWidget { /// Creates a [CommentBox]. const CommentBox({ Key? key, required this.commenter, required this.textEditingController, required this.focusNode, required this.onSubmitted, }) : super(key: key); final StreamagramUser commenter; final TextEditingController textEditingController; final FocusNode focusNode; final Function(String?) onSubmitted; Widget build(BuildContext context) { final border = _border(context); return Container( decoration: BoxDecoration( color: (Theme.of(context).brightness == Brightness.light) ? AppColors.light : AppColors.dark, border: Border( top: BorderSide( color: (Theme.of(context).brightness == Brightness.light) ? AppColors.ligthGrey : AppColors.grey, )), ), child: Column( mainAxisSize: MainAxisSize.min, children: [ Padding( padding: const EdgeInsets.symmetric(vertical: 8.0), child: Row( mainAxisAlignment: MainAxisAlignment.spaceAround, children: [ _emojiText('❤️'), _emojiText('🙌'), _emojiText('🔥'), _emojiText('👏🏻'), _emojiText('😢'), _emojiText('😍'), _emojiText('😮'), _emojiText('😂'), ], ), ), Row( children: [ Padding( padding: const EdgeInsets.all(8.0), child: Avatar.medium(streamagramUser: commenter), ), Expanded( child: TextField( controller: textEditingController, focusNode: focusNode, onSubmitted: onSubmitted, minLines: 1, maxLines: 10, style: const TextStyle(fontSize: 14), decoration: InputDecoration( suffix: _DoneButton( textEditorFocusNode: focusNode, textEditingController: textEditingController, onSubmitted: onSubmitted, ), hintText: 'Add a comment...', isDense: true, contentPadding: const EdgeInsets.symmetric( horizontal: 16, vertical: 12), focusedBorder: border, border: border, enabledBorder: border), ), ), const SizedBox( width: 8, ), ], ), ], ), ); } OutlineInputBorder _border(BuildContext context) { return OutlineInputBorder( borderRadius: const BorderRadius.all(Radius.circular(24)), borderSide: BorderSide( color: (Theme.of(context).brightness == Brightness.light) ? AppColors.grey.withOpacity(0.3) : AppColors.light.withOpacity(0.5), width: 0.5, ), ); } Widget _emojiText(String emoji) { return GestureDetector( onTap: () { focusNode.requestFocus(); textEditingController.text = textEditingController.text + emoji; textEditingController.selection = TextSelection.fromPosition( TextPosition(offset: textEditingController.text.length)); }, child: Text( emoji, style: const TextStyle(fontSize: 24), ), ); } } class _DoneButton extends StatefulWidget { const _DoneButton({ Key? key, required this.onSubmitted, required this.textEditorFocusNode, required this.textEditingController, }) : super(key: key); final Function(String?) onSubmitted; final FocusNode textEditorFocusNode; final TextEditingController textEditingController; State<_DoneButton> createState() => _DoneButtonState(); } class _DoneButtonState extends State<_DoneButton> { final fadedTextStyle = AppTextStyle.textStyleAction.copyWith(color: Colors.grey); late TextStyle textStyle = fadedTextStyle; void initState() { super.initState(); widget.textEditingController.addListener(() { if (widget.textEditingController.text.isNotEmpty) { textStyle = AppTextStyle.textStyleAction; } else { textStyle = fadedTextStyle; } if (mounted) { setState(() {}); } }); } Widget build(BuildContext context) { return widget.textEditorFocusNode.hasFocus ? GestureDetector( onTap: () { widget.onSubmitted(widget.textEditingController.text); }, child: Text( 'Done', style: textStyle, ), ) : const SizedBox.shrink(); } }
As a summary, this widget:
- Takes in a StreamagramUser, which will be the current user, or
commenter, to display the user profile image. It also takes in a FocusNode, TextEditingController, and a callback method namedonSubmitted, which are all used in the text editing process. TheonSubmittedcallback will be called when the message is sent (Done button, or on return). - Provides various UI and styling. For example, enabling and disabling the Done button.
- Creates a convenient emoji box that updates the TextEditingController, with the selected emoji value, when pressed.

Finally, expose the files in the components/app_widgets/app_widgets.dart barrel file:
1234export 'avatars.dart';
export 'tap_fade_icon.dart';
export 'favorite_icon.dart'; // ADD THIS
export 'comment_box.dart'; // ADD THIS
Creating a Post Card Widget
This is a big one. This widget will show everything related to a “post”, or activity.
This widget will take too long to explain in detail 😅. Instead, let's just see what it looks like:

Everything in the above image is part of the PostCard widget:
- A header with the name and picture of the poster.
- The image/activity.
- A bar to like and add comments (the share and bookmark icons are only for UI).
- An Image description.
- A comment box.
To begin, create components/timeline/widgets/post_card.dart and add the following:
123456789101112131415161718192021222324252627282930313233343536373839404142434445464748495051525354555657585960616263646566676869707172737475767778798081828384858687888990919293949596979899100101102103104105106107108109110111112113114115116117118119120121122123124125126127128129130131132133134135136137138139140141142143144145146147148149150151152153154155156157158159160161162163164165166167168169170171172173174175176177178179180181182183184185186187188189190191192193194195196197198199200201202203204205206207208209210211212213214215216217218219220221222223224225226227228229230231232233234235236237238239240241242243244245246247248249250251252253254255256257258259260261262263264265266267268269270271272273274275276277278279280281282283284285286287288289290291292293294295296297298299300301302303304305306307308309310311312313314315316317318319320321322323324325326327328329330331332333334335336337338339340341342343344345346347348349350351352353354355356357358359360361362363364365366367368369370371372373374375376377378379380381382383384385386387388389390391392393394395396397398399400401402403404405406407408409410411412413414415416417418419420421422423424425426427428429430431432433434435436437438439440441442443444445446447448449450451452453454455456457458459460461import 'package:cached_network_image/cached_network_image.dart'; import 'package:flutter/material.dart'; import 'package:jiffy/jiffy.dart'; import 'package:provider/provider.dart'; import 'package:stream_feed_flutter_core/stream_feed_flutter_core.dart'; import '../../../app/app.dart'; import '../../app_widgets/app_widgets.dart'; typedef OnAddComment = void Function( EnrichedActivity activity, { String? message, }); /// {@template post_card} /// A card that displays a user post/activity. /// {@endtemplate} class PostCard extends StatelessWidget { /// {@macro post_card} const PostCard({ Key? key, required this.enrichedActivity, required this.onAddComment, }) : super(key: key); /// Enriched activity (post) to display. final EnrichedActivity enrichedActivity; final OnAddComment onAddComment; Widget build(BuildContext context) { final actorData = enrichedActivity.actor!.data; final userData = StreamagramUser.fromMap(actorData as Map<String, dynamic>); return Column( crossAxisAlignment: CrossAxisAlignment.start, children: [ _ProfileSlab( userData: userData, ), _PictureCarousal( enrichedActivity: enrichedActivity, ), _Description( enrichedActivity: enrichedActivity, ), _InteractiveCommentSlab( enrichedActivity: enrichedActivity, onAddComment: onAddComment, ), ], ); } } class _PictureCarousal extends StatefulWidget { const _PictureCarousal({ Key? key, required this.enrichedActivity, }) : super(key: key); final EnrichedActivity enrichedActivity; __PictureCarousalState createState() => __PictureCarousalState(); } class __PictureCarousalState extends State<_PictureCarousal> { late var likeReactions = getLikeReactions() ?? []; late var likeCount = getLikeCount() ?? 0; Reaction? latestLikeReaction; List<Reaction>? getLikeReactions() { return widget.enrichedActivity.latestReactions?['like'] ?? []; } int? getLikeCount() { return widget.enrichedActivity.reactionCounts?['like'] ?? 0; } Future<void> _addLikeReaction() async { latestLikeReaction = await context.appState.client.reactions.add( 'like', widget.enrichedActivity.id!, userId: context.appState.user.id, ); setState(() { likeReactions.add(latestLikeReaction!); likeCount++; }); } Future<void> _removeLikeReaction() async { late String? reactionId; // A new reaction was added to this state. if (latestLikeReaction != null) { reactionId = latestLikeReaction?.id; } else { // An old reaction has been retrieved from Stream. final prevReaction = widget.enrichedActivity.ownReactions?['like']; if (prevReaction != null && prevReaction.isNotEmpty) { reactionId = prevReaction[0].id; } } try { if (reactionId != null) { await context.appState.client.reactions.delete(reactionId); } } catch (e) { debugPrint(e.toString()); } setState(() { likeReactions.removeWhere((element) => element.id == reactionId); likeCount--; latestLikeReaction = null; }); } Widget build(BuildContext context) { return Column( crossAxisAlignment: CrossAxisAlignment.start, children: [ ..._pictureCarousel(context), _likes(), ], ); } /// Picture carousal and interaction buttons. List<Widget> _pictureCarousel(BuildContext context) { const iconPadding = EdgeInsets.symmetric(horizontal: 8, vertical: 4); var imageUrl = widget.enrichedActivity.extraData!['image_url'] as String; double aspectRatio = widget.enrichedActivity.extraData!['aspect_ratio'] as double? ?? 1.0; final iconColor = Theme.of(context).iconTheme.color!; return [ Padding( padding: const EdgeInsets.symmetric(vertical: 8.0), child: Center( child: ConstrainedBox( constraints: const BoxConstraints(maxHeight: 500), child: AspectRatio( aspectRatio: aspectRatio, child: CachedNetworkImage( imageUrl: imageUrl, ), ), ), ), ), Row( children: [ const SizedBox( width: 4, ), Padding( padding: iconPadding, child: FavoriteIconButton( isLiked: widget.enrichedActivity.ownReactions?['like'] != null, onTap: (liked) { if (liked) { _addLikeReaction(); } else { _removeLikeReaction(); } }, ), ), Padding( padding: iconPadding, child: TapFadeIcon( onTap: () { // TODO }, icon: Icons.chat_bubble_outline, iconColor: iconColor, ), ), Padding( padding: iconPadding, child: TapFadeIcon( onTap: () => context.removeAndShowSnackbar('Message: Not yet implemented'), icon: Icons.call_made, iconColor: iconColor, ), ), const Spacer(), Padding( padding: iconPadding, child: TapFadeIcon( onTap: () => context .removeAndShowSnackbar('Bookmark: Not yet implemented'), icon: Icons.bookmark_border, iconColor: iconColor, ), ), ], ) ]; } Widget _likes() { if (likeReactions.isNotEmpty) { return Padding( padding: const EdgeInsets.only(left: 16.0, top: 8), child: Text.rich( TextSpan( text: 'Liked by ', style: AppTextStyle.textStyleLight, children: <TextSpan>[ TextSpan( text: StreamagramUser.fromMap( likeReactions[0].user?.data as Map<String, dynamic>) .fullName, style: AppTextStyle.textStyleBold), if (likeCount > 1 && likeCount < 3) ...[ const TextSpan(text: ' and '), TextSpan( text: StreamagramUser.fromMap( likeReactions[1].user?.data as Map<String, dynamic>) .fullName, style: AppTextStyle.textStyleBold), ], if (likeCount > 3) ...[ const TextSpan(text: ' and '), const TextSpan( text: 'others', style: AppTextStyle.textStyleBold), ], ], ), ), ); } else { return const SizedBox.shrink(); } } } class _Description extends StatelessWidget { const _Description({ Key? key, required this.enrichedActivity, }) : super(key: key); final EnrichedActivity enrichedActivity; Widget build(BuildContext context) { return Padding( padding: const EdgeInsets.symmetric(horizontal: 16.0, vertical: 6), child: Text.rich( TextSpan( children: <TextSpan>[ TextSpan( text: enrichedActivity.actor!.id!, style: AppTextStyle.textStyleBold), const TextSpan(text: ' '), TextSpan( text: enrichedActivity.extraData?['description'] as String? ?? ''), ], ), ), ); } } class _InteractiveCommentSlab extends StatefulWidget { const _InteractiveCommentSlab({ Key? key, required this.enrichedActivity, required this.onAddComment, }) : super(key: key); final EnrichedActivity enrichedActivity; final OnAddComment onAddComment; _InteractiveCommentSlabState createState() => _InteractiveCommentSlabState(); } class _InteractiveCommentSlabState extends State<_InteractiveCommentSlab> { EnrichedActivity get enrichedActivity => widget.enrichedActivity; late final String _timeSinceMessage = Jiffy(widget.enrichedActivity.time).fromNow(); List<Reaction> get _commentReactions => enrichedActivity.latestReactions?['comment'] ?? []; int get _commentCount => enrichedActivity.reactionCounts?['comment'] ?? 0; Widget build(BuildContext context) { const textPadding = EdgeInsets.all(8); const spacePadding = EdgeInsets.only(left: 20.0, top: 8); final comments = _commentReactions; final commentCount = _commentCount; return Column( crossAxisAlignment: CrossAxisAlignment.start, children: [ if (commentCount > 0 && comments.isNotEmpty) Padding( padding: spacePadding, child: Text.rich( TextSpan( children: <TextSpan>[ TextSpan( text: StreamagramUser.fromMap( comments[0].user?.data as Map<String, dynamic>) .fullName, style: AppTextStyle.textStyleBold), const TextSpan(text: ' '), TextSpan(text: comments[0].data?['message'] as String?), ], ), ), ), if (commentCount > 1 && comments.isNotEmpty) Padding( padding: spacePadding, child: Text.rich( TextSpan( children: <TextSpan>[ TextSpan( text: StreamagramUser.fromMap( comments[1].user?.data as Map<String, dynamic>) .fullName, style: AppTextStyle.textStyleBold), const TextSpan(text: ' '), TextSpan(text: comments[1].data?['message'] as String?), ], ), ), ), if (commentCount > 2) Padding( padding: spacePadding, child: GestureDetector( onTap: () { // TODO }, child: Text( 'View all $commentCount comments', style: AppTextStyle.textStyleFaded, ), ), ), GestureDetector( behavior: HitTestBehavior.opaque, onTap: () { widget.onAddComment(enrichedActivity); }, child: Padding( padding: const EdgeInsets.only(left: 16.0, top: 3, right: 8), child: Row( children: [ const _ProfilePicture(), const Expanded( child: Padding( padding: EdgeInsets.only(left: 8.0), child: Text( 'Add a comment', style: TextStyle( color: AppColors.faded, fontSize: 14, ), ), ), ), GestureDetector( onTap: () { widget.onAddComment(enrichedActivity, message: '❤️'); }, child: const Padding( padding: textPadding, child: Text('❤️'), ), ), GestureDetector( onTap: () { widget.onAddComment(enrichedActivity, message: '🙌'); }, child: const Padding( padding: textPadding, child: Text('🙌'), ), ), ], ), ), ), Padding( padding: const EdgeInsets.only(left: 16.0, top: 4), child: Text( _timeSinceMessage, style: const TextStyle( color: AppColors.faded, fontWeight: FontWeight.w400, fontSize: 13, ), ), ), ], ); } } class _ProfilePicture extends StatelessWidget { const _ProfilePicture({Key? key}) : super(key: key); Widget build(BuildContext context) { final streamagramUser = context.watch<AppState>().streamagramUser; if (streamagramUser == null) { return const Icon(Icons.error); } return Avatar.small( streamagramUser: streamagramUser, ); } } class _ProfileSlab extends StatelessWidget { const _ProfileSlab({ Key? key, required this.userData, }) : super(key: key); final StreamagramUser userData; Widget build(BuildContext context) { return Padding( padding: const EdgeInsets.only(left: 8.0, right: 8.0, top: 16.0), child: Row( children: [ Avatar.medium(streamagramUser: userData), Padding( padding: const EdgeInsets.all(8.0), child: Text( userData.fullName, style: AppTextStyle.textStyleBold, ), ), const Spacer(), TapFadeIcon( onTap: () => context.removeAndShowSnackbar('Not part of the demo'), icon: Icons.more_horiz, iconColor: Theme.of(context).iconTheme.color!, ), ], ), ); } }
There is too much to cover in detail in this file. The important bits are:
- You pass in an EnrichedActivity to PostCard. Which is basically an Activity on steroids. This contains extra information, like child activities and reactions. A reaction can be anything added to an activity, such as a comment or a like.
- Pass in an OnAddComment callback. This will be called when the button is pressed to add a comment to this post. The reason you have this is so that when a user clicks one of the emojis, you can immediately fill in your CommentBox widget with that value.
- You locally manage the state of the like reactions that are added to an activity. The reason for this is that it is simpler to manage it yourself than to update the StreamFeedBloc directly, which will result in the entire list rebuilding when a post is liked.
It is worth taking a deeper look at the _addLikeReaction method in the _PictureCarousal widget.
If you need more information be sure to watch the companion video.
Create the components/timeline/widgets/widgets.dart barrel file and add:
1export 'post_card.dart';
Creating Your Instagram-like Timeline Page
Another big widget. On this page, you will use the FlatFeedCore widget to display the “timeline” feed. For each activity in the feed, you’ll display a PostCard. There is also some extra magic to create a floating CommentBox, that’s visibility is animated when creating a comment.
Create components/timeline/timeline_page.dart and add:
123456789101112131415161718192021222324252627282930313233343536373839404142434445464748495051525354555657585960616263646566676869707172737475767778798081828384858687888990919293949596979899100101102103104105106107108109110111112113114115116117118119120121122123124125126127128129130131132133134135136137138139140141142143144145146147148149150151152153154155156157158159160161162163164165166167168169170171172173174175176177178179180181182183184185186187188189190191192193194195196197198199200201202203import 'package:flutter/material.dart'; import 'package:stream_agram/app/app.dart'; import 'package:stream_agram/components/app_widgets/app_widgets.dart'; import 'package:stream_feed_flutter_core/stream_feed_flutter_core.dart'; import 'widgets/widgets.dart'; /// {@template timeline_page} /// Page to display a timeline of user created posts. Global 'timeline' /// {@endtemplate} class TimelinePage extends StatefulWidget { /// {@macro timeline_page} const TimelinePage({Key? key}) : super(key: key); State<TimelinePage> createState() => _TimelinePageState(); } class _TimelinePageState extends State<TimelinePage> { final ValueNotifier<bool> _showCommentBox = ValueNotifier(false); final TextEditingController _commentTextController = TextEditingController(); final FocusNode _commentFocusNode = FocusNode(); EnrichedActivity? activeActivity; void openCommentBox(EnrichedActivity activity, {String? message}) { _commentTextController.text = message ?? ''; _commentTextController.selection = TextSelection.fromPosition( TextPosition(offset: _commentTextController.text.length)); activeActivity = activity; _showCommentBox.value = true; _commentFocusNode.requestFocus(); } Future<void> addComment(String? message) async { if (activeActivity != null && message != null && message.isNotEmpty && message != '') { await FeedProvider.of(context).bloc.onAddReaction( kind: 'comment', activity: activeActivity!, feedGroup: 'timeline', data: {'message': message}, ); _commentTextController.clear(); FocusScope.of(context).unfocus(); _showCommentBox.value = false; } } void dispose() { _commentTextController.dispose(); _commentFocusNode.dispose(); super.dispose(); } Widget build(BuildContext context) { return GestureDetector( onTap: () { FocusScope.of(context).unfocus(); _showCommentBox.value = false; }, child: Stack( children: [ FlatFeedCore( feedGroup: 'timeline', errorBuilder: (context, error) => const Text('Could not load profile'), loadingBuilder: (context) => const SizedBox(), emptyBuilder: (context) => const Center( child: Text('No Posts\nGo and post something'), ), flags: EnrichmentFlags() ..withOwnReactions() ..withRecentReactions() ..withReactionCounts(), feedBuilder: (context, activities) { return RefreshIndicator( onRefresh: () { return FeedProvider.of(context).bloc.queryEnrichedActivities( feedGroup: 'timeline', flags: EnrichmentFlags() ..withOwnReactions() ..withRecentReactions() ..withReactionCounts(), ); }, child: ListView.builder( itemCount: activities.length, itemBuilder: (context, index) { return PostCard( key: ValueKey('post-${activities[index].id}'), enrichedActivity: activities[index], onAddComment: openCommentBox, ); }, ), ); }, ), _CommentBox( commenter: context.appState.streamagramUser!, textEditingController: _commentTextController, focusNode: _commentFocusNode, addComment: addComment, showCommentBox: _showCommentBox, ) ], ), ); } } class _CommentBox extends StatefulWidget { const _CommentBox({ Key? key, required this.commenter, required this.textEditingController, required this.focusNode, required this.addComment, required this.showCommentBox, }) : super(key: key); final StreamagramUser commenter; final TextEditingController textEditingController; final FocusNode focusNode; final Function(String?) addComment; final ValueNotifier<bool> showCommentBox; __CommentBoxState createState() => __CommentBoxState(); } class __CommentBoxState extends State<_CommentBox> with SingleTickerProviderStateMixin { late final AnimationController _controller; late final Animation<double> _animation = CurvedAnimation( parent: _controller, curve: Curves.easeOut, reverseCurve: Curves.easeIn, ); bool visibility = false; void initState() { super.initState(); _controller = AnimationController( vsync: this, duration: const Duration(milliseconds: 300), ); _controller.addStatusListener((status) { if (status == AnimationStatus.dismissed) { setState(() { visibility = false; }); } else { setState(() { visibility = true; }); } }); widget.showCommentBox.addListener(_showHideCommentBox); } void _showHideCommentBox() { if (widget.showCommentBox.value) { _controller.forward(); } else { _controller.reverse(); } } void dispose() { super.dispose(); _controller.dispose(); } Widget build(BuildContext context) { return Visibility( visible: visibility, child: FadeTransition( opacity: _animation, child: Builder(builder: (context) { return Align( alignment: Alignment.bottomCenter, child: CommentBox( commenter: widget.commenter, textEditingController: widget.textEditingController, focusNode: widget.focusNode, onSubmitted: widget.addComment, ), ); }), ), ); } }
The most important parts of this page:
- You create a Stack, with the first item a FlatFeedCore, with the
feedGroupset to “timeline”. This is similar to what you used in the Profile Page, however now you are:- Returning a PostCard in the
feedBuilder. - Setting the
flagsargument, with EnrichmentFlags. This will ensure that the FlatFeedCore creates EnrichedActivities that contains all of the current users reactions (withOwnReactions), all the recent reactions (withRecentReactions), and all reaction counts (withReactionCounts).
- Returning a PostCard in the
- The second, and final item, of the stack is a _CommentBox. This is private widget that does a fancy custom animation to show and hide the CommentBox widget that you created earlier.
- The animation is triggered when the
_showCommentBox's value changes. This is a ValueNotifier.
- The animation is triggered when the
- The
addCommentmethod uses the FeedBloc to add a reaction on the activity. The reaction that you’re adding is a comment (type), on the timeline (feed group), with a String message as extra data. - The
openCommentBoxmethod gets called when a users presses on the area to add a comment, or if they select one of the emojis. This does a number of different things to ensure the CommentBox is displayed and in focus. - The reason that _CommentBox uses a custom explicit animation is that you also want to set the Visibility to false when the animation is done and the comment box should be hidden. This improves performance as you do not want Flutter to go through the process of creating the CommentBox, and setting the opacity to zero when it is not needed. Applying opacity in Flutter can be quite expensive, especially when animating. The use of the FadeTransion widget is the most optimal way to animate opacity in Flutter.
Phew 😮💨. Okay, that was intense. Almost done.
Create a barrel file components/timeline/timeline.dart and add:
1export 'timeline_page.dart';
Then open components/home/home_screen.dart and modify the _homePages variable as follows:
1234567891011121314...

import 'package:stream_agram/components/timeline/timeline_page.dart';

...

/// List of pages available from the home screen.
static const List<Widget> _homePages = <Widget>[
  TimelinePage(), // ADD THIS
  SearchPage(),
  ProfilePage(),
];

...
You can finally run your Instagram clone and you should see some activity on the timeline (after you follow someone that has already posted something). You’ll also be able to like posts and add comments and have the feed update automatically 🥳.
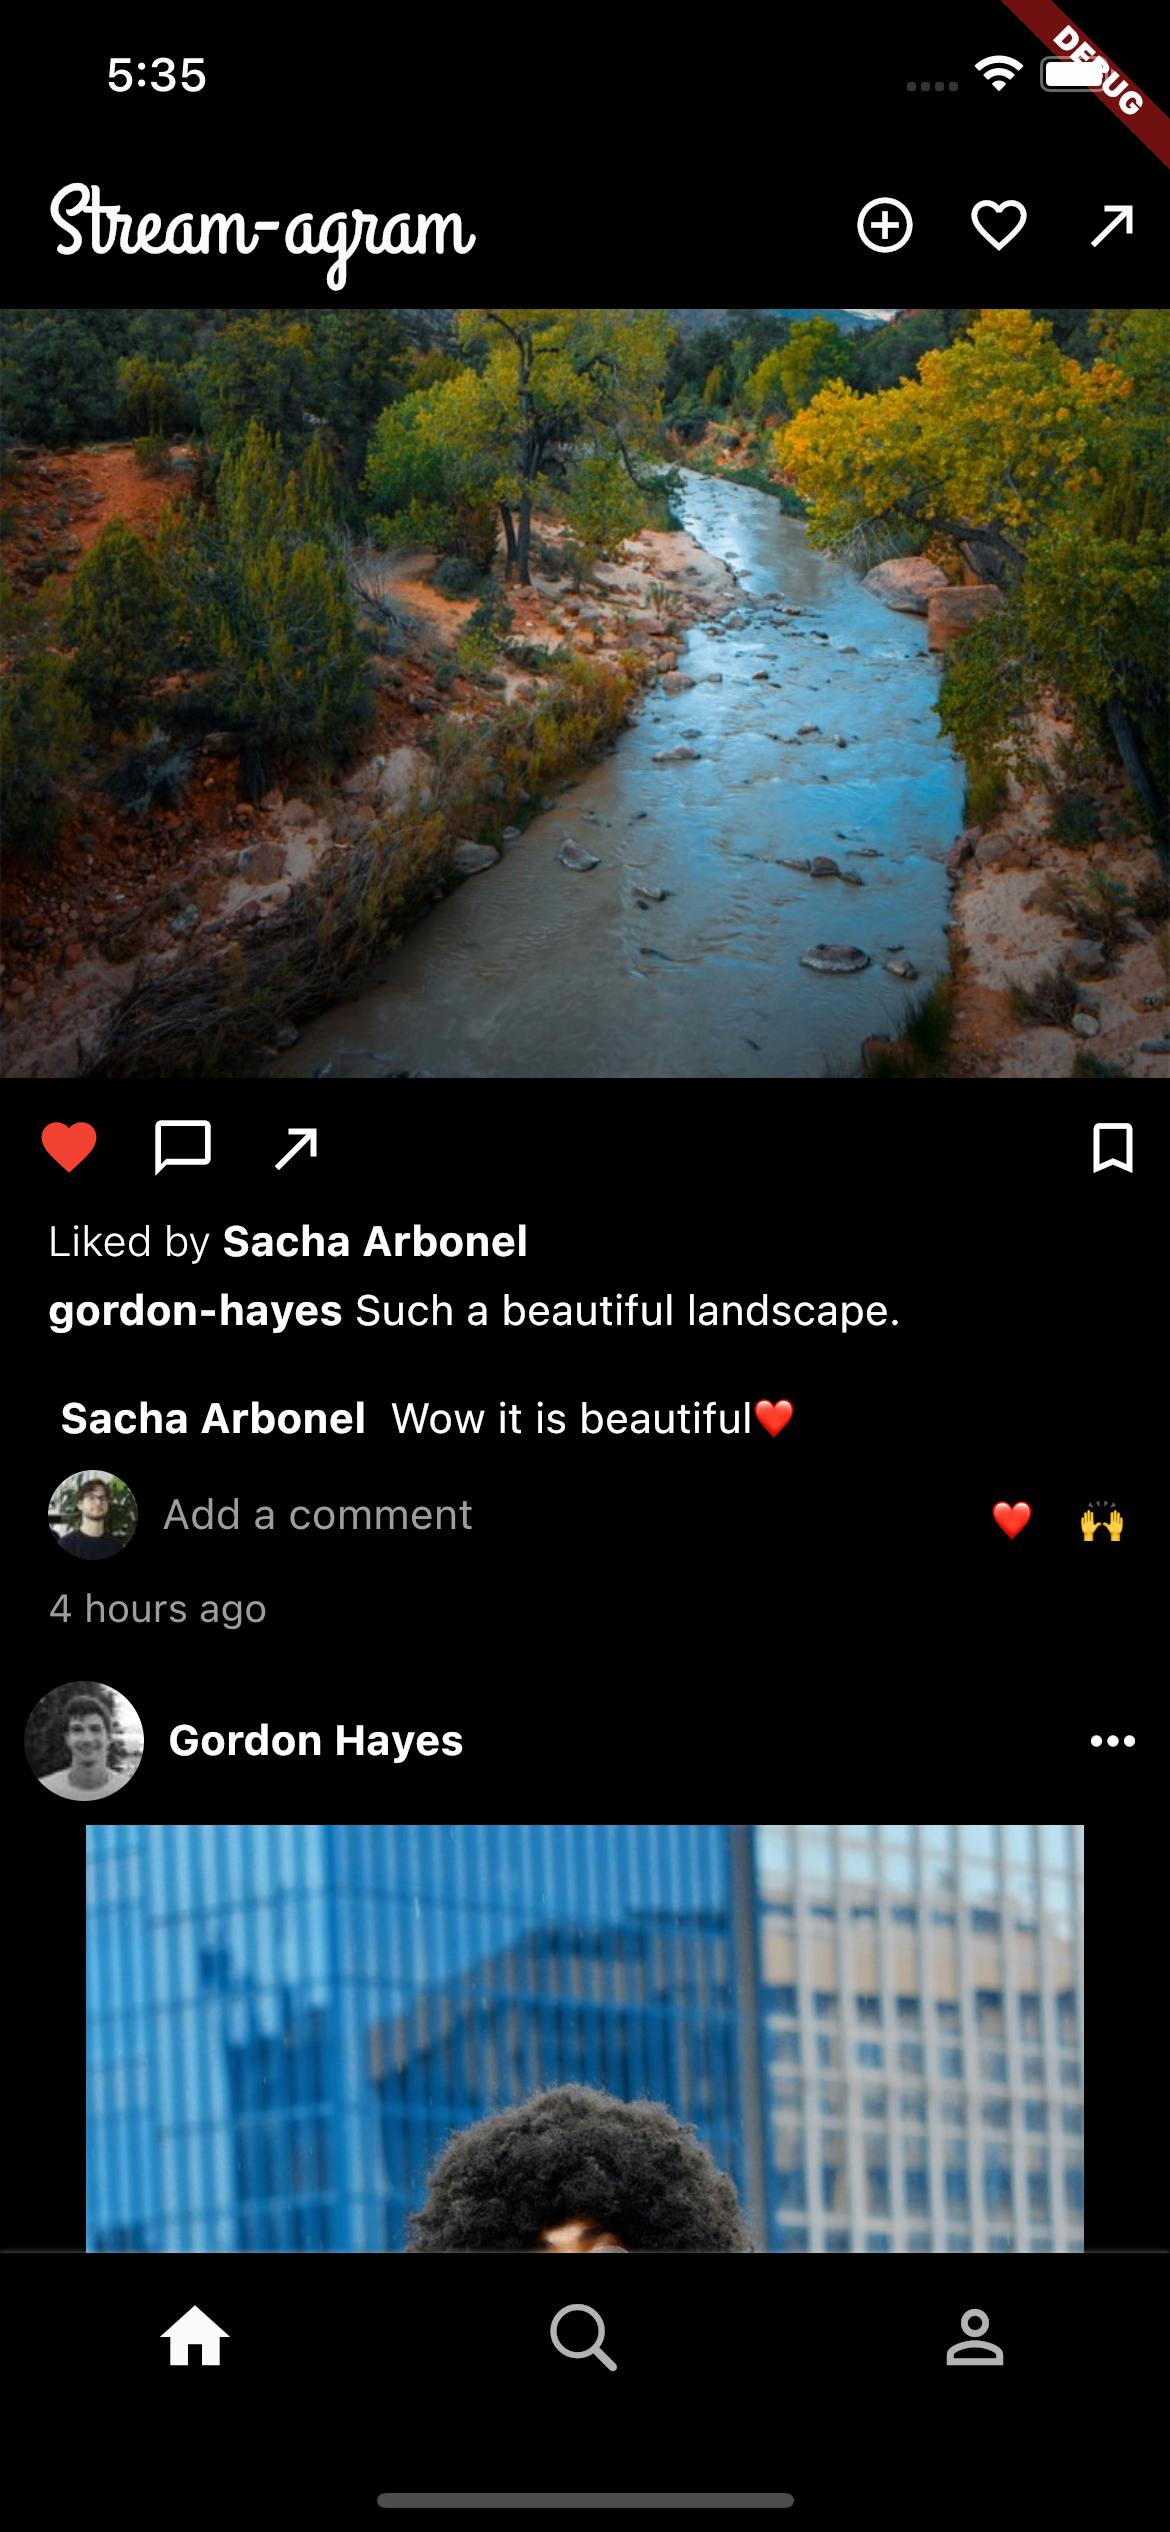
Adding More Instagram Likes and Comments
In Instagram, you'd expect to see all the comments for a given activity. For our Instagram clone, we'll create a comments screen that will expand and show all the comments related to an activity, and also allow users to add a comment to a comment, and a like to comment 😱. These are called child reactions.
This section is a combination of everything that you’ve learned so far!
Comment State
You will need a bit more complex state management for this section, as you need to keep track whether a user is adding a comment (reaction) to an activity, or if they’re adding a comment to a comment (child reaction).
Create components/comments/state/comment_state.dart and add:
1234567891011121314151617181920212223242526272829303132333435363738394041424344454647484950515253545556575859606162636465666768697071727374757677787980818283848586import 'package:flutter/material.dart';
import 'package:stream_feed_flutter_core/stream_feed_flutter_core.dart';

import '../../../app/state/models/models.dart';

/// Indicates the type of comment that was made.
/// Can be:
/// - Activity comment
/// - Reaction comment
enum TypeOfComment {
  /// Comment on an activity
  activityComment,

  /// Comment on a reaction
  reactionComment,
}

/// {@template comment_focus}
/// Information on the type of comment to make. This can be a comment on an
/// activity, or a comment on a reaction.
///
/// It also indicates the parent user on whom the comment is made.
/// {@endtemplate}
class CommentFocus {
  /// {@macro comment_focus}
  const CommentFocus({
    required this.typeOfComment,
    required this.id,
    required this.user,
    this.reaction,
  });

  final Reaction? reaction;

  /// Indicates the type of comment. See [TypeOfComment].
  final TypeOfComment typeOfComment;

  /// Activity or reaction id on which the comment is made.
  final String id;

  /// The user data of the parent activity or reaction.
  final StreamagramUser user;
}

/// {@template comment_state}
/// ChangeNotifier to facilitate posting comments to activities and reactions.
/// {@endtemplate}
class CommentState extends ChangeNotifier {
  /// {@macro comment_state}
  CommentState({
    required this.activityId,
    required this.activityOwnerData,
  });

  /// The id for this activity.
  final String activityId;

  /// UserData of whoever owns the activity.
  final StreamagramUser activityOwnerData;

  /// The type of commentFocus that is currently selected.

  late CommentFocus commentFocus = CommentFocus(
    typeOfComment: TypeOfComment.activityComment,
    id: activityId,
    user: activityOwnerData,
  );

  /// Sets the focus to which a comment will be posted to.
  ///
  /// See [postComment].
  void setCommentFocus(CommentFocus focus) {
    commentFocus = focus;
    notifyListeners();
  }

  /// Resets the comment focus to the parent activity.
  void resetCommentFocus() {
    commentFocus = CommentFocus(
      typeOfComment: TypeOfComment.activityComment,
      id: activityId,
      user: activityOwnerData,
    );
    notifyListeners();
  }
}
This ChangeNotifier manages what type of comment it is - TypeOfComment:
- A comment/like on an activity (reaction on a post).
- A comment/like on a reaction (child reaction on a comment).
This will be easier to understand after looking at the UI code.
Expose this class in your barrel file, components/comments/state/state.dart:
1export 'comment_state.dart';
Create Your Instagram-like Comments Screen
Create components/comments/comment_screen.dart, and add:
123456789101112131415161718192021222324252627282930313233343536373839404142434445464748495051525354555657585960616263646566676869707172737475767778798081828384858687888990919293949596979899100101102103104105106107108109110111112113114115116117118119120121122123124125126127128129130131132133134135136137138139140141142143144145146147148149150151152153154155156157158159160161162163164165166167168169170171172173174175176177178179180181182183184185186187188189190191192193194195196197198199200201202203204205206207208209210211212213214215216217218219220221222223224225226227228229230231232233234235236237238239240241242243244245246247248249250251252253254255256257258259260261262263264265266267268269270271272273274275276277278279280281282283284285286287288289290291292293294295296297298299300301302303304305306307308309310311312313314315316317318319320321322323324325326327328329330331332333334335336337338339340341342343344345346347348349350351352353354355356357358359360361362363364365366367368369370371372373374375376377378379380381382383384385386387388389390391392393394395396397398399400401402403404405406407408409410411412413414415416417418419420421422423424425426427428429430431432433434435436437438439440441442443444445446447448449450451452453454455456457458459460461462463464465466467468469470471472473474475476477478479480481482483484485486487488489490491import 'package:flutter/material.dart'; import 'package:jiffy/jiffy.dart'; import 'package:provider/provider.dart'; import 'package:stream_feed_flutter_core/stream_feed_flutter_core.dart'; import '../../app/app.dart'; import '../app_widgets/app_widgets.dart'; import 'state/comment_state.dart'; /// Screen that shows all comments for a given post. class CommentsScreen extends StatefulWidget { /// Creates a new [CommentsScreen]. const CommentsScreen({ Key? key, required this.enrichedActivity, required this.activityOwnerData, }) : super(key: key); final EnrichedActivity enrichedActivity; /// Owner / [User] of the activity. final StreamagramUser activityOwnerData; /// MaterialPageRoute to this screen. static Route route({ required EnrichedActivity enrichedActivity, required StreamagramUser activityOwnerData, }) => MaterialPageRoute( builder: (context) => CommentsScreen( enrichedActivity: enrichedActivity, activityOwnerData: activityOwnerData, ), ); _CommentsScreenState createState() => _CommentsScreenState(); } class _CommentsScreenState extends State<CommentsScreen> { late FocusNode commentFocusNode; late CommentState commentState; void initState() { super.initState(); commentFocusNode = FocusNode(); commentState = CommentState( activityId: widget.enrichedActivity.id!, activityOwnerData: widget.activityOwnerData, ); } void dispose() { commentFocusNode.dispose(); super.dispose(); } Widget build(BuildContext context) { return MultiProvider( providers: [ ChangeNotifierProvider.value(value: commentState), ChangeNotifierProvider.value(value: commentFocusNode), ], child: GestureDetector( onTap: () { commentState.resetCommentFocus(); FocusScope.of(context).unfocus(); }, child: Scaffold( appBar: AppBar( title: const Text('Comments', style: TextStyle(fontSize: 16, fontWeight: FontWeight.w600)), elevation: 0.5, shadowColor: Colors.white, ), body: Stack( children: [ _CommentsList( activityId: widget.enrichedActivity.id!, ), _CommentBox( enrichedActivity: widget.enrichedActivity, ), ], ), ), ), ); } } class _CommentsList extends StatelessWidget { const _CommentsList({ Key? key, required this.activityId, }) : super(key: key); final String activityId; Widget build(BuildContext context) { return ReactionListCore( lookupValue: activityId, kind: 'comment', loadingBuilder: (context) => const Center(child: CircularProgressIndicator()), errorBuilder: (context, error) => const Center(child: Text('Could not load comments.')), emptyBuilder: (context) => const Center(child: Text('Be the first to add a comment.')), reactionsBuilder: (context, reactions) { return ListView.builder( itemCount: reactions.length + 1, itemBuilder: (context, index) { if (index == reactions.length) { // Bottom padding to ensure [CommentBox] does not obscure // visibility return const SizedBox( height: 120, ); } return Padding( padding: const EdgeInsets.symmetric(vertical: 8.0), child: _CommentTile( key: ValueKey('comment-${reactions[index].id}'), reaction: reactions[index], ), ); }, ); }, flags: EnrichmentFlags() ..withOwnChildren() ..withOwnReactions() ..withRecentReactions(), ); } } class _CommentBox extends StatefulWidget { const _CommentBox({ Key? key, required this.enrichedActivity, }) : super(key: key); final EnrichedActivity enrichedActivity; __CommentBoxState createState() => __CommentBoxState(); } class __CommentBoxState extends State<_CommentBox> { late final _commentTextController = TextEditingController(); Future<void> handleSubmit(String? value) async { if (value != null && value.isNotEmpty) { _commentTextController.clear(); FocusScope.of(context).unfocus(); final commentState = context.read<CommentState>(); final commentFocus = commentState.commentFocus; if (commentFocus.typeOfComment == TypeOfComment.activityComment) { await FeedProvider.of(context).bloc.onAddReaction( kind: 'comment', activity: widget.enrichedActivity, feedGroup: 'timeline', data: {'message': value}, ); } else if (commentFocus.typeOfComment == TypeOfComment.reactionComment) { if (commentFocus.reaction != null) { await FeedProvider.of(context).bloc.onAddChildReaction( kind: 'comment', reaction: commentFocus.reaction!, activity: widget.enrichedActivity, data: {'message': value}, ); } } } } void dispose() { _commentTextController.dispose(); super.dispose(); } Widget build(BuildContext context) { final commentFocus = context.select((CommentState state) => state.commentFocus); final focusNode = context.watch<FocusNode>(); return Align( alignment: Alignment.bottomCenter, child: Container( color: (Theme.of(context).brightness == Brightness.light) ? AppColors.light : AppColors.dark, child: Column( mainAxisSize: MainAxisSize.min, children: [ AnimatedSwitcher( duration: const Duration(milliseconds: 200), transitionBuilder: (child, animation) { final tween = Tween(begin: const Offset(0.0, 1.0), end: Offset.zero) .chain(CurveTween(curve: Curves.easeOutQuint)); final offsetAnimation = animation.drive(tween); return SlideTransition( position: offsetAnimation, child: child, ); }, child: (commentFocus.typeOfComment == TypeOfComment.reactionComment) ? _replyToBox(commentFocus, context) : const SizedBox.shrink(), ), CommentBox( commenter: context.appState.streamagramUser!, textEditingController: _commentTextController, onSubmitted: handleSubmit, focusNode: focusNode, ), SizedBox( height: MediaQuery.of(context).padding.bottom, ) ], ), ), ); } Container _replyToBox(CommentFocus commentFocus, BuildContext context) { return Container( color: (Theme.of(context).brightness == Brightness.dark) ? AppColors.grey : AppColors.ligthGrey, child: Padding( padding: const EdgeInsets.all(16.0), child: Row( children: [ Text( 'Replying to ${commentFocus.user.fullName}', style: AppTextStyle.textStyleFaded, ), const Spacer(), TapFadeIcon( onTap: () { context.read<CommentState>().resetCommentFocus(); }, icon: Icons.close, size: 16, iconColor: Theme.of(context).iconTheme.color!, ), ], ), ), ); } } class _CommentTile extends StatefulWidget { const _CommentTile({ Key? key, required this.reaction, this.canReply = true, this.isReplyToComment = false, }) : super(key: key); final Reaction reaction; final bool canReply; final bool isReplyToComment; __CommentTileState createState() => __CommentTileState(); } class __CommentTileState extends State<_CommentTile> { late final userData = StreamagramUser.fromMap(widget.reaction.user!.data!); late final message = extractMessage; late final timeSince = _timeSinceComment(); late int numberOfLikes = widget.reaction.childrenCounts?['like'] ?? 0; late bool isLiked = _isFavorited(); Reaction? likeReaction; String _timeSinceComment() { final jiffyTime = Jiffy(widget.reaction.createdAt).fromNow(); if (jiffyTime == 'a few seconds ago') { return 'just now'; } else { return jiffyTime; } } String numberOfLikesMessage(int count) { if (count == 0) { return ''; } if (count == 1) { return '1 like'; } else { return '$count likes'; } } String get extractMessage { final data = widget.reaction.data; if (data != null && data['message'] != null) { return data['message'] as String; } else { return ''; } } bool _isFavorited() { likeReaction = widget.reaction.ownChildren?['like']?.first; return likeReaction != null; } Future<void> _handleFavorite(bool liked) async { if (isLiked && likeReaction != null) { await context.appState.client.reactions.delete(likeReaction!.id!); numberOfLikes--; } else { likeReaction = await context.appState.client.reactions.addChild( 'like', widget.reaction.id!, userId: context.appState.user.id, ); numberOfLikes++; } setState(() { isLiked = liked; }); } Widget build(BuildContext context) { return Column( mainAxisSize: MainAxisSize.min, crossAxisAlignment: CrossAxisAlignment.start, children: [ Row( crossAxisAlignment: CrossAxisAlignment.start, children: [ Padding( padding: const EdgeInsets.symmetric(horizontal: 8.0), child: (widget.isReplyToComment) ? Avatar.tiny(streamagramUser: userData) : Avatar.small(streamagramUser: userData), ), Expanded( child: Column( crossAxisAlignment: CrossAxisAlignment.start, mainAxisSize: MainAxisSize.min, children: [ Row( children: [ Expanded( child: Text.rich( TextSpan( children: <TextSpan>[ TextSpan( text: userData.fullName, style: AppTextStyle.textStyleSmallBold), const TextSpan(text: ' '), TextSpan( text: message, style: const TextStyle(fontSize: 13), ), ], ), ), ), Padding( padding: const EdgeInsets.symmetric(horizontal: 8.0), child: Center( child: FavoriteIconButton( isLiked: isLiked, size: 14, onTap: _handleFavorite, ), ), ) ], ), Padding( padding: const EdgeInsets.only(top: 4.0), child: Row( mainAxisAlignment: MainAxisAlignment.start, children: [ SizedBox( width: 80, child: Text( timeSince, style: AppTextStyle.textStyleFadedSmall, ), ), Visibility( visible: numberOfLikes > 0, child: SizedBox( width: 60, child: Text( numberOfLikesMessage(numberOfLikes), style: AppTextStyle.textStyleFadedSmall, ), ), ), Visibility( visible: widget.canReply, child: GestureDetector( onTap: () { context.read<CommentState>().setCommentFocus( CommentFocus( typeOfComment: TypeOfComment.reactionComment, id: widget.reaction.id!, user: StreamagramUser.fromMap( widget.reaction.user!.data!), reaction: widget.reaction, ), ); FocusScope.of(context) .requestFocus(context.read<FocusNode>()); }, child: const SizedBox( width: 50, child: Text( 'Reply', style: AppTextStyle.textStyleFadedSmallBold, ), ), ), ) ], ), ), ], ), ), ], ), Padding( padding: const EdgeInsets.only(left: 34.0), child: _ChildCommentList( comments: widget.reaction.latestChildren?['comment']), ), ], ); } } class _ChildCommentList extends StatelessWidget { const _ChildCommentList({ Key? key, required this.comments, }) : super(key: key); final List<Reaction>? comments; Widget build(BuildContext context) { return Column( mainAxisSize: MainAxisSize.min, children: comments ?.map( (reaction) => Padding( padding: const EdgeInsets.only(top: 8.0), child: _CommentTile( key: ValueKey('comment-tile-${reaction.id}'), reaction: reaction, canReply: false, isReplyToComment: true, ), ), ) .toList() ?? [], ); } }
A few important things in this file:
- You expose a FocusNode and a CommentState using a MultiProvider, to all of the child widgets of the CommentScreen.
- You create a Stack with a private _CommentList and _CommentBox widgets.
- The _CommentList uses a ReactionListCore to display all the reactions for a specific Activity. Similar to earlier, you specify EnrichmentFlags.
- Make use of AnimatedSwitcher to nicely show and hide a popup that indicates if you’re replying to someone else’s comment.
- Handle liking a comment in the
_handleFavoritemethod. - Display the time since the comment using the Jiffy package.
- In
handleSubmitdecide whether a comment should be a reaction, or a child reaction, and add it accordingly using the BlocFeed.
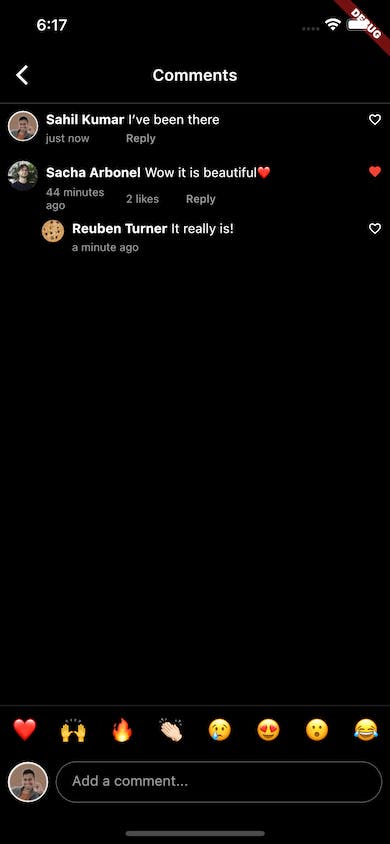
Create the components/comments/comments.dart barrel file:
1export 'comment_screen.dart';
Then update the TODOs in components/timeline/widgets/post_card.dart to navigate to the CommentsScreen:
123456789101112131415161718192021222324252627282930313233343536373839404142434445464748...

import '../../comments/comments.dart';

...

Padding(
  padding: iconPadding,
  child: TapFadeIcon(
    onTap: () {
            // ADD THIS
      final map = widget.enrichedActivity.actor!.data!;

            // AND THIS
      Navigator.of(context).push(
        CommentsScreen.route(
          enrichedActivity: widget.enrichedActivity,
          activityOwnerData: StreamagramUser.fromMap(map),
        ),
      );
    },
    icon: Icons.chat_bubble_outline,
    iconColor: iconColor,
  ),
),

...

if (commentCount > 2)
  Padding(
    padding: spacePadding,
    child: GestureDetector(
      onTap: () {
                // ADD THIS
        final map =
            widget.enrichedActivity.actor!.data as Map<String, dynamic>;
                // AND THIS
        Navigator.of(context).push(CommentsScreen.route(
          enrichedActivity: widget.enrichedActivity,
          activityOwnerData: StreamagramUser.fromMap(map),
        ));
      },
      child: Text(
        'View all $commentCount comments',
        style: AppTextStyle.textStyleFaded,
      ),
    ),
  ),
Following Your Own Instagram User Feed
You may have noticed this by yourself by now. But when you look at the timeline, the current logged-in user’s posts don’t show up?
Well, that is because you will need to tell Stream Feeds that you want to follow your own user feed.
Open app/state/app_state.dart and modify it as follows:
12345678910111213...

/// Current user's [FlatFeed] with name 'user'.
///
/// This feed contains all of a user's personal posts.
FlatFeed get currentUserFeed => _client.flatFeed('user', user.id);

/// Current user's [FlatFeed] with name 'timeline'.
///
/// This contains all posts that a user has subscribed (followed) to.
FlatFeed get currentTimelineFeed => _client.flatFeed('timeline', user.id);

...
And modify the connect method to also follow your own feed:
123456789101112131415Future<bool> connect(DemoAppUser demoUser) async {
    final currentUser = await _client.setUser(
      User(id: demoUser.id),
      demoUser.token!,
      extraData: demoUser.data,
    );
    if (currentUser.data != null) {
      _streamagramUser = StreamagramUser.fromMap(currentUser.data!);
      await currentTimelineFeed.follow(currentUserFeed); // ADD THIS -> Follow own feed
      notifyListeners();
      return true;
    } else {
      return false;
    }
  }
Now, if you restart the application and connect as a user, you should see their posts also show up on the timeline.
Caching your Instagram Pages State
Something else that you’ve probably noticed at this point is that the pages are recreated each time you navigate in the application (using the PageView). Annoying, isn’t it?
Well, luckily that is an easy fix.
Open components/home/home_screen.dart and at the bottom of the file add this class:
123456789101112131415161718192021222324class _KeepAlivePage extends StatefulWidget { const _KeepAlivePage({ Key? key, required this.child, }) : super(key: key); final Widget child; _KeepAlivePageState createState() => _KeepAlivePageState(); } class _KeepAlivePageState extends State<_KeepAlivePage> with AutomaticKeepAliveClientMixin { Widget build(BuildContext context) { super.build(context); return widget.child; } bool get wantKeepAlive => true; }
This uses the AutomaticKeepAliveClientMixin to keep the widget alive.
All you need to do now, is wrap all of the pages in a _KeepAlivePage widget. Update the _homePages widget to the following:
123456/// List of pages available from the home screen.
static const List<Widget> _homePages = <Widget>[
  _KeepAlivePage(child: TimelinePage()),
  _KeepAlivePage(child: SearchPage()),
  _KeepAlivePage(child: ProfilePage()),
];
Do a Hot Restart, and you should see that the pages are kept alive as you navigate in the app.
What is next?
Your application is finished 🥳
Using Flutter and Stream Feeds you were able to create an Instagram clone. Congratulation for making it all the way to the end.

As discussed throughout the tutorial, managing activity feeds can be quite complex, and Stream Feeds has a lot to offer that we have not explored in this tutorial.
The next step is to take what you’ve learned and create your own activity feeds application! Be sure to read up more on Aggregated and Notification feeds, and see if you can incorporate those.
We value your feedback and would be glad to take suggestions for content you would like to see in the future.
You can get the full source code on Github.