
Livestream shopping is changing how people discover and buy products online by combining real-time video with instant purchasing.
Platforms like TikTok have popularised this model, enabling creators and brands to showcase products live while viewers shop without leaving the stream.
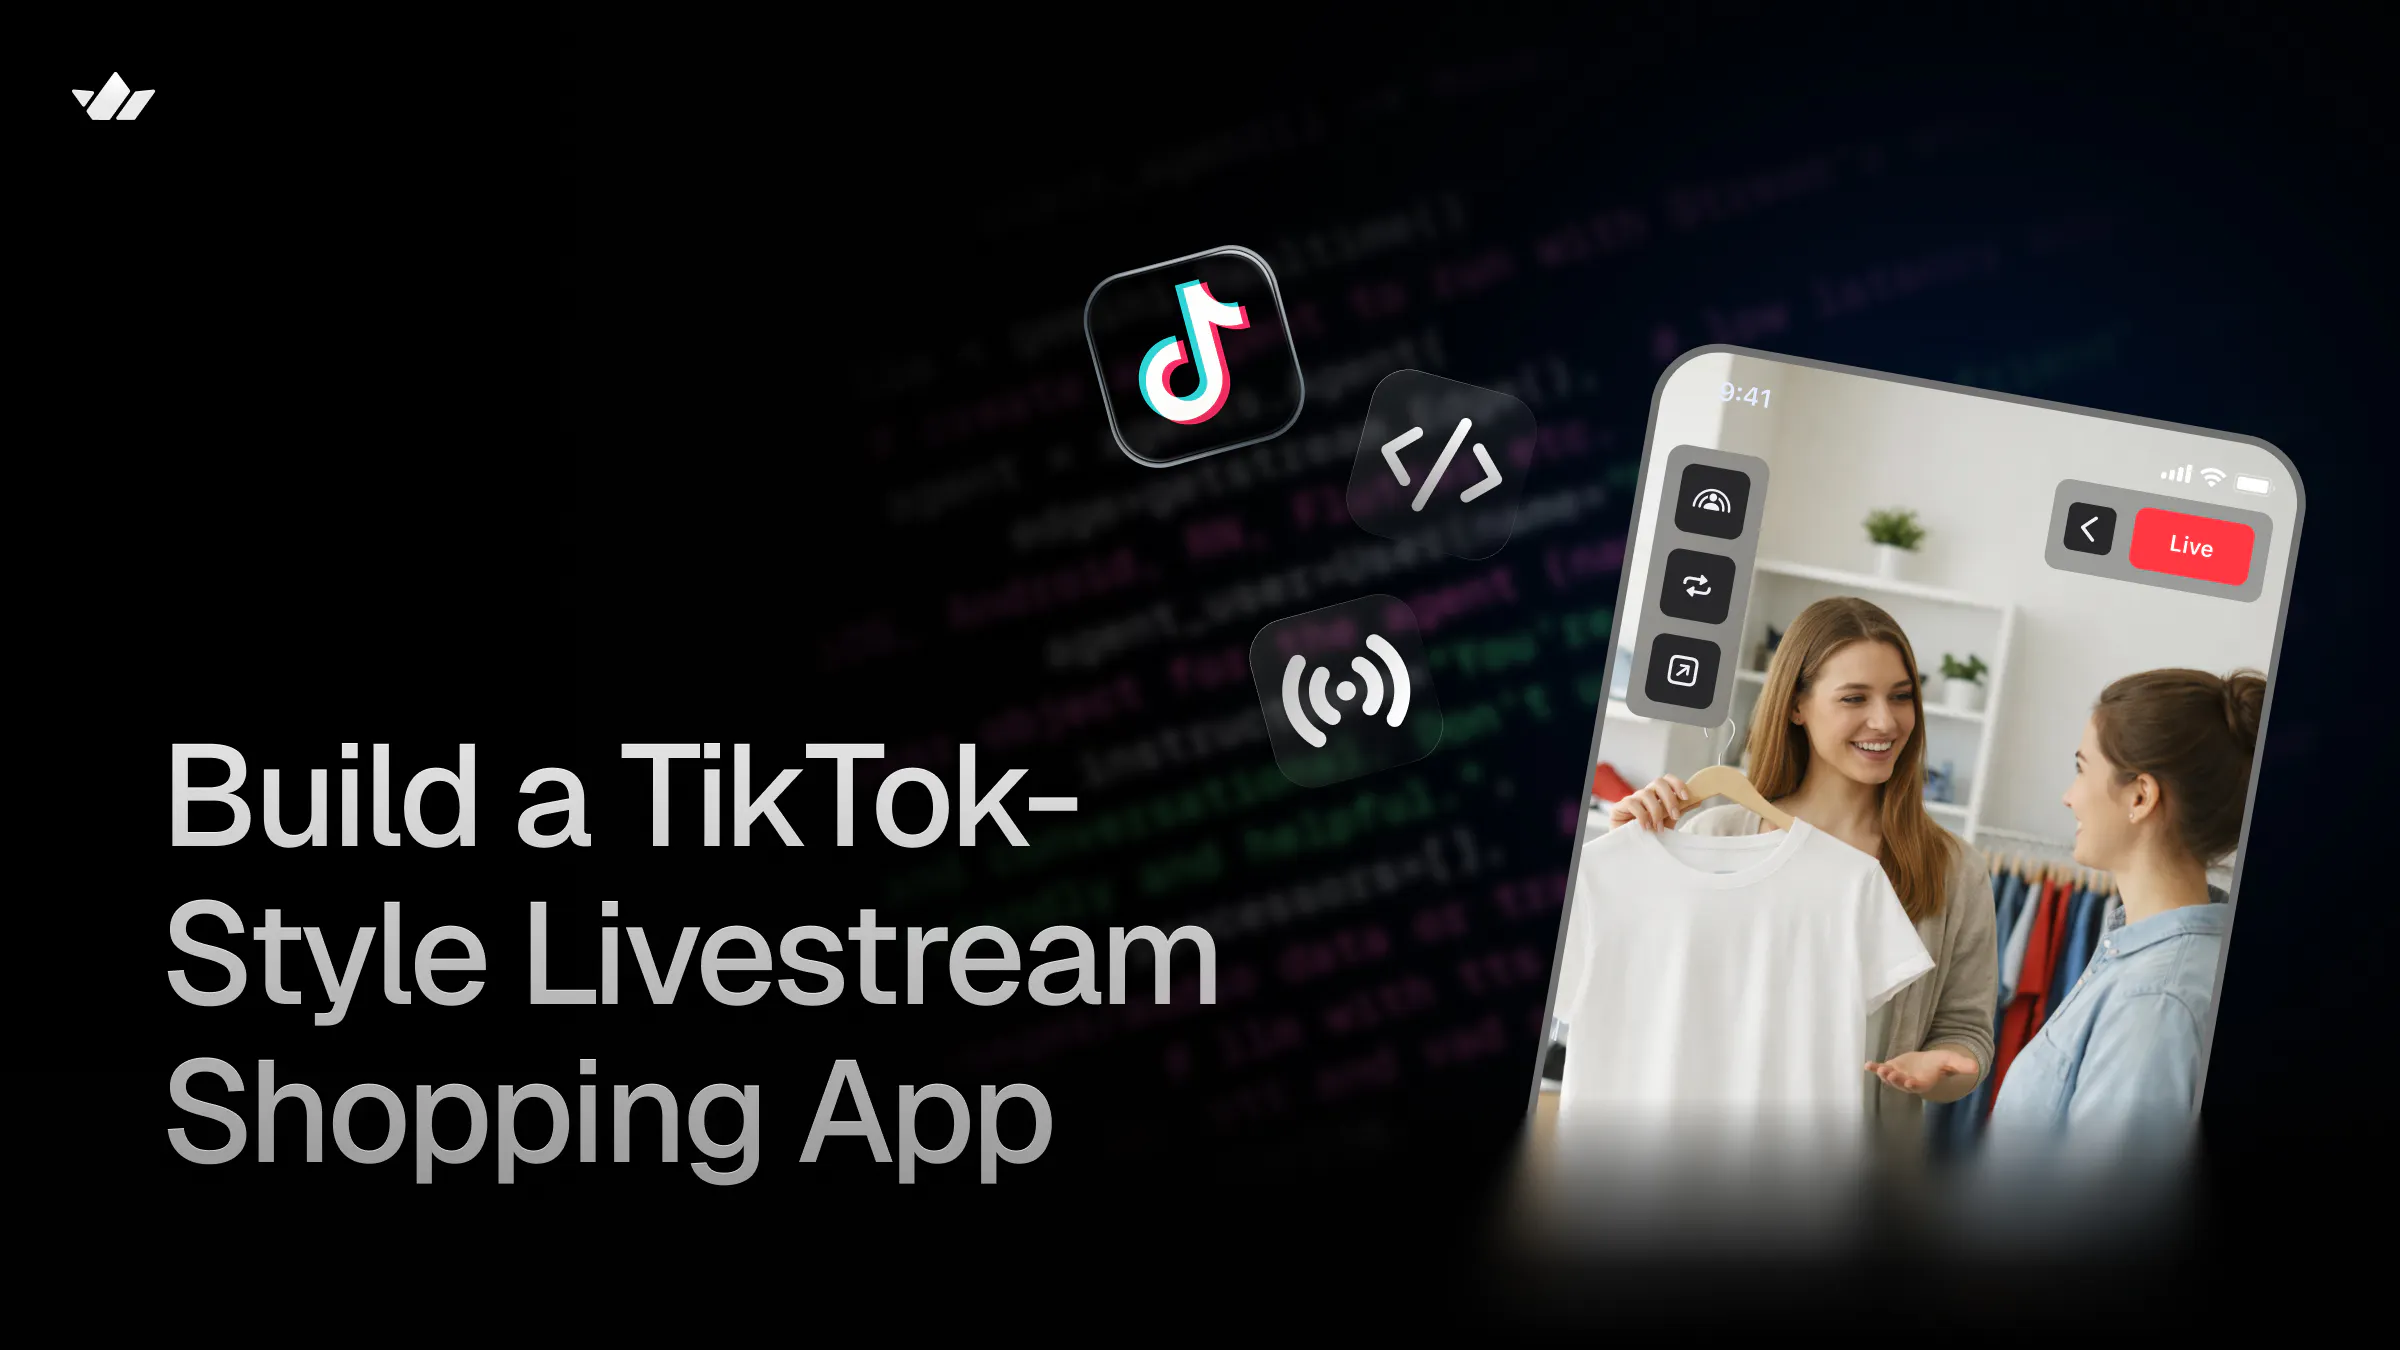
In this tutorial, you’ll learn how to build a TikTok-style livestream shopping application using Next.js. Users will start livestreams, discover ongoing sessions, and set up integrated e-commerce shops.
🛠️ Jump straight to the tutorial.
Before we build, let’s look at why livestreams drive measurable product growth — and what Gen Z expects when they tap “Go Live.”

How Livestreams Expand Engagement
Livestreams combine three high-retention mechanics: video, interaction, and urgency. That combination changes user behavior inside your app.
1. Increase Session Length
Live video is dynamic. Something is always happening.
- Viewers stay longer because content unfolds live
- Limited-time offers create urgency
- Live chat keeps attention anchored to the session
Livestream viewers watch 10 - 20x longer than traditional video-on-demand audiences.
Longer sessions = stronger retention signals.
2. Turn Passive Scrolling Into Participation
Static feeds are consumable, while livestreams are participatory.
- Users ask questions in chat
- Hosts respond in real time
- Viewers influence what gets demoed
- Reactions and comments create feedback loops
That interaction layer makes video a two-way experience, and two-way experiences build habit.
24% of livestream participants say engagement, including chatting with the host or reacting to the feed, influences their decision to buy.
3. Build Community
Livestreams create shared moments. In a recurring stream, you:
- Give users a reason to return
- Strengthen creator-audience relationships
- Establish inside jokes, rituals, and regular viewers
Community increases retention → retention increases customer lifetime value. That’s the flywheel.
What Gen Z Expects from Livestreams
No generation engages with shopping videos more than Gen Z. 83% say they watch them on social platforms, meaning your product needs to cater to this population.
Here’s what that entails:
Real-Time Interaction
- Live chat that actually feels live: Messages should appear instantly and in order, without noticeable lag.
- Fast responses from hosts: Hosts need tooling that lets them spot, highlight, and respond to questions in seconds.
- Visible reactions and engagement: Show likes, reactions, and comment activity so viewers see the momentum building.
Even small delays break the experience.
When livestreams included chat and polls, viewers report significantly higher trust in both the presenter and the product.
Authenticity Over Polish
- Raw, unfiltered content performs better than scripted ads: Prioritize natural demos and real conversations.
- Hosts should feel accessible: Design streams so viewers can ask questions, get acknowledged, and feel directly connected to the person on camera.
- Mistakes are part of the appeal: Don’t over-edit or over-control the experience. Small imperfections make the stream feel human.
Realness is the goal.
Easy In-Stream Purchasing
- Product links pinned inside the stream: Allow hosts to feature and pin products directly in the video interface so viewers can explore items.
- Instant checkout: Reduce purchase friction with saved payment methods and minimal steps so users can buy fast.
- No redirecting to clunky external flows: Every redirect increases drop-off.
If your users have to leave the experience, you’ve lost momentum.

Creator-Led Experiences
Gen Z trusts:
- Individual creators
- Micro-influencers
- Community-focused hosts
Your product should support hosts with:
- Moderation tools: Let hosts filter spam, remove disruptive users, and manage chat.
- Featured product controls: Enable hosts to pin, swap, and highlight products.
- Custom layouts: Give hosts control over how video, chat, and products appear so the stream matches their style and format.
- Clear visibility into audience interaction: Surface live metrics like viewer count, active chat, and reactions.
Build TikTok Shop - Prerequisites
Now that you know what drives engagement, let’s implement the stack that makes it possible.
Here’s a quick look at what you’ll build:
To fully understand this tutorial, you need to have a basic understanding of React or Next.js.
We will use the following tools:
- Stream Video and Audio SDK - Provides real-time video and audio capabilities, including low-latency streaming, screen sharing, call recording, customizable layouts, and picture-in-picture support.
- Stream React Chat SDK - Enables real-time messaging and chat functionality within the application.
- Stream Chat Firebase Extension - Automatically synchronises Firebase Authentication users with Stream Chat.
- Firebase - A backend-as-a-service platform by Google used for authentication, database management, cloud functions, and file storage.
Create a Next.js project by running the following code snippet:
1npx create-next-app livestream-shopping
Install the package dependencies for the project:
1npm install @stream-io/node-sdk @stream-io/video-react-sdk stream-chat stream-chat-react firebase lucide-react
The Stream Node.js and Video SDKs enable real-time livestreaming functionality within the application. The Stream React Chat SDK provides in-stream messaging capabilities, allowing viewers to interact during live sessions. Firebase is used to manage authentication, product listings, and shop data, while the Stream Firebase extension synchronises authenticated users with Stream.
Now, let's start building! 🚀
Configure Stream Video and Chat SDKs in Next.js
In this section, you’ll configure the Stream Chat SDK and the Stream Video SDK within your Next.js application. You’ll also implement the necessary backend logic to support real-time video streaming and in-stream chat functionality.
Create a free Stream account and a new organisation to manage your apps.

Add a new app to the organisation and copy the Stream API and Secret key into the .env.local file. The NEXT_PUBLIC_IMAGE_URL environment variable points to an API that generates random SVG avatars for users by appending a unique seed (e.g., a username or user ID) to the URL.
NEXT_PUBLIC_IMAGE_URL=https://api.dicebear.com/9.x/pixel-art/svg?seed=
NEXT_PUBLIC_STREAM_API_KEY=
STREAM_SECRET_KEY= 
Create an actions folder containing a stream.ts file at the root of the Next.js project.
1cd livestream-shopping && mkdir actions && cd actions && touch stream.ts
Copy the following code snippet into the file to configure Stream Audio & Video SDK:
123456789101112131415161718192021222324252627282930313233343536373839404142434445464748495051525354555657585960616263646566676869707172737475"use server";
import { StreamClient } from "@stream-io/node-sdk";

const STREAM_API_KEY = process.env.NEXT_PUBLIC_STREAM_API_KEY!;
const STREAM_API_SECRET = process.env.STREAM_SECRET_KEY!;

// 👇🏻 -- For Stream Video  --
export const tokenProvider = async (user_id: string) => {
   if (!STREAM_API_KEY) throw new Error("Stream API key secret is missing");
   if (!STREAM_API_SECRET) throw new Error("Stream API secret is missing");

   const streamClient = new StreamClient(STREAM_API_KEY, STREAM_API_SECRET);

   const token = streamClient.generateUserToken({
       user_id,
       validity_in_seconds: 3600,
   });

   return token;
};

The **tokenProvider** function generates a token that authenticates users with Stream Video SDK.

Add the following code snippet to the **`actions/stream.ts`** file to configure Stream Chat SDK:

```ts
import { StreamChat } from "stream-chat";

// 👇🏻 -- For Stream Chat  --
const serverClient = StreamChat.getInstance(STREAM_API_KEY, STREAM_API_SECRET);

/** -- manually creates a Stream user - */
export const createStreamUser = async (
   id: string,
   name: string,
   image: string,
) => {
   const { users } = await serverClient.queryUsers({ id });
   if (users.length > 0) return users[0];

   const user = await serverClient.upsertUser({
       id,
       name,
       image,
   });

   return user;
};

/** -- creates a user token - */
export const createToken = async (id: string) => {
   if (!id) throw new Error("User is not authenticated");
   return serverClient.createToken(id);
};

/** -- creates a Chat channel - */
export const createChannel = async (id: string, name: string, uid: string) => {
   try {
       //👇🏻 declare channel type
       const channel = serverClient.channel("livestream", id, {
           name,
           members: [uid],
           created_by_id: uid,
       });
       //👇🏻 create a channel
       await channel.create();
       return { success: true, error: null, id: channel.id };
   } catch (err) {
       return {
           success: false,
           error: err instanceof Error ? err.message : "Failed to create channel",
           id: null,
       };
   }
};
From the code above:
- createStreamUser creates a new Stream user manually if one does not already exist. This function can be executed when a user signs into the application.
- createToken generates a secure authentication token for a given user ID. This token is required for the client-side Stream Chat SDK to establish an authenticated connection.
- createChannel creates a unique livestream chat channel. It accepts a channel ID, channel name, and the creator’s user ID, then assigns the creator as both the channel owner and an initial member. Each livestream session has its own dedicated chat channel.
Next, create a utils directory within the Next.js app folder and add a useGetStreamClient.ts file within it:
123456789101112131415161718import { useCreateChatClient } from "stream-chat-react";
import { createToken } from "@/actions/stream";
import { useCallback } from "react";

export const useGetStreamClient = (
   user: { id: string; name: string } | null,
) => {
   const tokenProvider = useCallback(async () => {
       return await createToken(user?.id || "");
   }, [user?.id]);

   const client = useCreateChatClient({
       apiKey: process.env.NEXT_PUBLIC_STREAM_API_KEY!,
       tokenOrProvider: tokenProvider,
       userData: {
           id: user?.id || "",
           name: user?.name || "User",
           image:
The useGetStreamClient hook generates a token for the current user and creates a chat client using the user's ID and name. It then returns the chat client for client-side Stream operations.
Add a useGetLiveStreams.ts file within the utils folder and copy the following code snippet into the file.
123456import { useEffect, useState } from "react";
import { Call, useStreamVideoClient } from "@stream-io/video-react-sdk";

export const useGetLiveStreams = () => {
   const client = useStreamVideoClient();
   const [calls, setCalls] = useState
The useGetLiveStreams hook queries and returns a list of active livestream calls using the Stream Video client, sorted by start time and filtered to exclude ended or backstage sessions.
Finally, create a StreamVideoProvider component to wrap the livestream portion of your application. This provider initialises the Stream Video client for the authenticated user and makes it available to all nested Stream Video components.
123456789101112"use client";
import { StreamVideo, StreamVideoClient } from "@stream-io/video-react-sdk";
import { useState, ReactNode, useEffect, useCallback } from "react";
import { tokenProvider } from "../../actions/stream";
import { useAuth } from "./AuthContext";
import { Loader2 } from "lucide-react";

const apiKey = process.env.NEXT_PUBLIC_STREAM_API_KEY!;

export const StreamVideoProvider = ({ children }: { children: ReactNode }) => {
   const { user, loading } = useAuth(); //👉🏻 firebase User object
   const [videoClient, setVideoClient] = useState
Congratulations! You’ve successfully configured the Stream Chat SDK and the Stream Audio & Video SDK in your Next.js application, and added the custom hooks required for livestreaming and real-time chat functionality.
Setting Up Firebase Authentication and Firestore
Firebase is a cloud platform that enables you to build full-stack software applications without worrying about managing your database or server infrastructure. It provides features such as authentication, a real-time database, cloud functions, file storage, and more.
In this section, you'll learn how to install Firebase and configure the Firestore Database and Firebase authentication in your Next.js application.
Open the Firebase Console in your browser and create a new Firebase project.

Within the project dashboard, click the web icon </> to add a Firebase app to the project.

Register the app by entering a nickname, then copy the auto-generated Firebase configuration code.

Create a utils/firebase.ts file within the Next.js app folder and paste the following code snippet into the file:
12345678910111213141516171819202122import { initializeApp, getApps } from "firebase/app";
import { getFirestore } from "firebase/firestore";
import { EmailAuthProvider } from "firebase/auth";
import { getStorage } from "firebase/storage";
import { getAuth } from "firebase/auth";

// Your web app's Firebase configuration
// For Firebase JS SDK v7.20.0 and later, measurementId is optional
const firebaseConfig = {
   // 👉🏻 paste your Firebase config
};

// Initialize Firebase
const app =
   getApps().length === 0 ? initializeApp(firebaseConfig) : getApps()[0];
const provider = new EmailAuthProvider();
const storage = getStorage(app);
const db = getFirestore(app);
const auth = getAuth(app);

export { provider, auth, storage };
export default db;
The code snippet above initialises the Firestore database and configures Firebase's Email/Password authentication provider, enabling your application to interact with the database and handle user authentication.

Next, select Authentication and Firestore Database from the sidebar menu and add them to the project.

You can now start interacting with these Firebase features in your Next.js project.
Installing the Stream Chat Firebase Extension
The Authenticate with Stream Chat extension automatically connects your Firebase users to Stream Chat, making it easy for Stream to access and manage your users.
With this, you don't need to manually add your users to Stream by calling `createStreamUser` when a user logs in to the app.
1234567891011121314151617//Not required
export const createStreamUser = async (
   id: string,
   name: string,
   image: string,
) => {
   const { users } = await serverClient.queryUsers({ id });
   if (users.length > 0) return users[0];

   const user = await serverClient.upsertUser({
       id,
       name,
       image,
   });

   return user;
};
Visit the Stream Chat Firebase Extension page and select the Firebase project where you want to install the extension.
Note: Upgrade your Firebase project to the Blaze (pay-as-you-go) plan before installing the extension.

During installation, enable Artifact Registry, Cloud Functions, and Secret Manager. These permissions allow Stream to access and manage your Firebase users.

Finally, enter your Stream API key and secret in the configuration fields, then click the Install Extension button.

The extension will be installed within a few minutes. Once setup is complete, every new Firebase user will automatically be added to Stream.
User Authentication Functions
In this section, you’ll implement sign-up, login, and logout functions for the application. You’ll also learn how to provide current user details to page components and protect pages from unauthorised access.
Create an auth-functions.ts file in the utils folder and add the following imports:
123456789101112131415161718import {
   createUserWithEmailAndPassword,
   signInWithEmailAndPassword,
   signOut,
   updateProfile,
} from "firebase/auth";
import {
   collection,
   query,
   where,
   getDocs,
   doc,
   setDoc,
   serverTimestamp,
   getDoc,
} from "firebase/firestore";
import db, { auth } from "./firebase";
import { FirebaseError } from "firebase/app";
Add a sign-up function that accepts a user’s email, password, and username, and ensures that the user is unique. It then adds the user to Firebase auth, updates their display name, and stores user data in the users Firestore collection.
1234567891011121314151617181920212223242526272829303132333435363738394041424344454647484950515253545556575859606162636465666768export const signUp = async (form: FormData) => {
   const username = (form.get("username") as string).trim().toLowerCase();
   const email = form.get("email") as string;
   const password = form.get("password") as string;

   try {
       // 1. Check if the username is already taken in Firestore
       // (Firebase Auth handles email uniqueness automatically, but not usernames)
       const usersRef = collection(db, "users");
       const usernameQuery = query(usersRef, where("username", "==", username));
       const querySnapshot = await getDocs(usernameQuery);

       if (!querySnapshot.empty) {
           return {
               code: "auth/username-already-in-use",
               status: 400,
               user: null,
               message: "This username is already taken.",
           };
       }

       // 2. Create the user in Firebase Authentication
       const { user } = await createUserWithEmailAndPassword(
           auth,
           email,
           password,
       );

       // 3. Update the Auth profile displayName
       await updateProfile(user, {
           displayName: username,
       });

       // 4. Create the document in the 'users' collection
       // We use user.uid as the document ID to ensure they match
       await setDoc(doc(db, "users", user.uid), {
           uid: user.uid,
           username: username,
           email: email,
           createdAt: serverTimestamp(),
       });

       return {
           code: "auth/success",
           status: 200,
           user,
           message: "Account created successfully! 🎉",
       };
   } catch (err) {
       const error = err as FirebaseError;
       console.error("Error creating user:", err);

       // Handle specific Firebase Auth errors (like email already exists)
       let message = "Failed to create user";
       if (error.code === "auth/email-already-in-use") {
           message = "This email is already registered.";
       } else if (error.code === "auth/weak-password") {
           message = "The password is too weak.";
       }

       return {
           code: error.code || "auth/failed",
           status: 500,
           user: null,
           message: message,
       };
   }
};
How It Works
- The `users` Firestore collection stores all user data for easy access by the application, separate from Firebase Auth.
- The function first checks if the chosen username already exists, since Firebase Auth only enforces unique email addresses.
- If the username is available, it creates the user in Firebase Auth, updates their display name, and saves a corresponding document in Firestore.
- If any step fails, the function returns a descriptive error code and message.
Create a login function that authenticates users with their email and password, and ensures the user exists in the Firestore users collection before granting application access.
1234567891011121314151617181920212223242526272829303132333435363738394041424344454647484950515253545556575859export const logIn = async (form: FormData) => {
   // 1. Normalise input
   const email = form.get("email") as string;
   const password = form.get("password") as string;

   try {
       // 2. Authenticate with Firebase Auth first
       // This checks if the email exists and the password is correct
       const { user } = await signInWithEmailAndPassword(auth, email, password);

       // 3. Check if the user exists in the Firestore 'users' collection
       // Since we saved the Doc ID as the UID during signup, we look it up directly
       const userDocRef = doc(db, "users", user.uid);
       const userDoc = await getDoc(userDocRef);

       if (!userDoc.exists()) {
           // If the user is authenticated but has no database record,
           // we sign them out to prevent them from accessing protected pages.
           await signOut(auth);

           return {
               code: "auth/user-not-found-in-db",
               status: 404,
               user: null,
               message: "User account exists, but profile data was not found.",
           };
       }

       // 4. Success: User is authenticated and exists in the database
       return {
           code: "auth/success",
           status: 200,
           user,
           message: "Login successful! 👋",
       };
   } catch (err) {
       // 5. Handle Firebase Errors
       const error = err as FirebaseError;
       console.error("Error logging in:", error.code);

       let message = "Failed to login";
       if (
           error.code === "auth/invalid-credential" ||
           error.code === "auth/user-not-found" ||
           error.code === "auth/wrong-password"
       ) {
           message = "Invalid email or password.";
       } else if (error.code === "auth/too-many-requests") {
           message = "Too many failed attempts. Try again later.";
       }

       return {
           code: error.code || "auth/failed",
           status: 500,
           user: null,
           message: message,
       };
   }
};
Next, add a logOut function that signs the user out of the application. It can be invoked via a button click or programmatically when required.
12345678910111213export const logOut = async () => {
   try {
       await auth.signOut();
       return { code: "auth/success", status: 200, message: "Logout successful" };
   } catch (err) {
       return {
           code: "auth/failed",
           status: 500,
           message: "Failed to logout",
           err,
       };
   }
};
After handling user sign-up, login, and logout, you need to protect certain pages from unauthenticated users and provide access to the current user’s details throughout the application. How do we achieve this?
Create an AuthContext.tsx file within the utils folder and copy the following code snippet into the file:
1234567891011"use client";
import { createContext, useContext, useEffect, useState } from "react";
import { onAuthStateChanged, User } from "firebase/auth";
import { useRouter } from "next/navigation";
import { Loader2 } from "lucide-react";
import { auth } from "./firebase";

const AuthContext = createContext({ user: null as User | null, loading: true });

export const AuthProvider = ({ children }: { children: React.ReactNode }) => {
const [user, setUser] = useState
The AuthProvider component supplies the necessary context to provide current user details, and the useAuth custom hook allows components to access the signed-in user object.
Finally, to restrict access to unauthenticated users, create a component that wraps any page that requires protection.
1234567891011121314export const ProtectRoute = ({ children }: { children: React.ReactNode }) => {
   const { user, loading } = useAuth();
   const router = useRouter();

   useEffect(() => {
       // Only redirect if loading is finished AND there is no user
       if (!loading && !user) {
           router.push("/"); // Change this to your login path
       }
   }, [user, loading, router]);

   // 1. While Firebase is initializing, show nothing or a spinner
   if (loading) {
       return (
The ProtectRoute component ensures that only authenticated users can access a page’s content when it wraps that page.
Application Pages
In this section, you’ll learn how to build the key pages of the application:
- Authentication Pages
Sign-Up and Login pages display forms that allow users to enter their username, email, and password.
- Home/Feed Page
This page renders ongoing livestreams and ads, providing a feed experience similar to TikTok.
<iframe width="560" height="315" src="https://stream-blog.s3.amazonaws.com/blog/wp-content/uploads/fcfa62e06204ea249576b0faf5e79693/feed_page.mp4"; title="YouTube video player" frameborder="0" allow="accelerometer; autoplay; clipboard-write; encrypted-media; gyroscope; picture-in-picture; web-share" allowfullscreen></iframe>
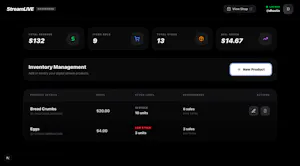
- User Product Dashboard
Located at /shop/[username]/dashboard, this page allows users to create, update, and delete their products. It also enforces an access check to ensure that only the dashboard owner can view it.
1234export function Page() {
return (
 <>
  {user && user.displayName === username ? (
-
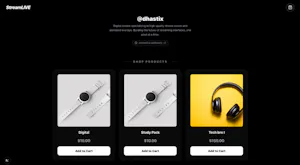
User Product Shop
Found at /shop/[username]/products, this page represents the streamer’s shop, where users can browse and purchase products.
-
Stream Page
Located at /streams/[username]/[id], this page hosts the livestream, allowing viewers to join and chat with the streamer in real time. It is built entirely using Stream Video components, which will be explored in detail later.
<iframe width="560" height="315" src="https://stream-blog.s3.amazonaws.com/blog/wp-content/uploads/ee76afe151d83c24c94ed3b69a9d258c/livestream_page.mp4"; title="YouTube video player" frameborder="0" allow="accelerometer; autoplay; clipboard-write; encrypted-media; gyroscope; picture-in-picture; web-share" allowfullscreen></iframe>
You can access the source code for the pages on GitHub.
Integrating the Shopping Functionality with Firebase
To implement the shopping features, you will perform CRUD operations using Firebase Firestore.
Create a db-functions.ts file to house all functions for creating, updating, deleting, and reading products. Add the following imports to the file:
123456789101112131415import db from "./firebase";
import {
   collection,
   addDoc,
   updateDoc,
   deleteDoc,
   doc,
   onSnapshot,
   query,
   orderBy,
   getDocs,
   where,
   writeBatch,
   increment,
} from "firebase/firestore";
Add this function to the db-functions.ts file to read the products from Firebase Firestore:
123456789101112131415161718192021222324252627282930313233343536373839404142434445464748export const getProductsByUsername = async (username: string) => {
   try {
       // STEP 1: Find the user by username
       const usersRef = collection(db, "users");
       // Ensure username casing matches how you saved it (e.g., lowercase)
       const userQuery = query(usersRef, where("username", "==", username.trim()));
       const userSnapshot = await getDocs(userQuery);

       // If no user is found with that username, return an error state
       if (userSnapshot.empty) {
           return {
               success: false,
               userExists: false,
               products: [],
               message: "User not found",
           };
       }
       const userId = userSnapshot.docs[0].id;

       // STEP 2: Fetch the products using the found userId
       const productsRef = collection(db, "users", userId, "products");

       // Optional: order by name so it looks neat
       const productsQuery = query(productsRef, orderBy("name", "asc"));
       const productsSnapshot = await getDocs(productsQuery);

       const products: FirebaseProduct[] = productsSnapshot.docs.map((doc) => ({
           id: doc.id,
           ...doc.data(),
       })) as FirebaseProduct[];

       return {
           success: true,
           userExists: true,
           sellerID: userId,
           products: products,
       };
   } catch (error) {
       console.error("Error fetching products by username:", error);
       return {
           success: false,
           userExists: false,
           sellerID: null,
           products: [],
           message: "An error occurred while fetching products",
       };
   }
};
The getProductsByUsername function retrieves products from Firebase Firestore for a given user. It first validates that the username exists in the users collection, then fetches all products associated with that user. This function is typically executed when a user visits a streamer’s shop page, using the username in the URL to verify that the user exists before loading the streamer's products.
On the dashboard page, users can add new products to their shop using the function below:
1234567891011121314151617181920export const addProductToDB = async (
   userId: string,
   name: string,
   price: number,
   stock: number,
) => {
   try {
       const productRef = collection(db, "users", userId, "products");
       const docRef = await addDoc(productRef, {
           name,
           price,
           stock,
           number_sold: 0, // Initialized at 0
       });
       return { success: true, id: docRef.id };
   } catch (error) {
       console.error("Error adding product:", error);
       throw error;
   }
};
The addProductToDB function allows users to add new products to their shop. It accepts the user’s ID along with the product’s name, price, and stock quantity, and then saves this information to the user’s products subcollection in Firebase Firestore. Each new product is initialised with number_sold set to 0.
Users can also update a product's details using the function below:
1234export const updateProductInDB = async (
   userId: string,
   productId: string,
   updates: Partial
The updateProductInDB function enables users to modify the existing product details. It accepts the user ID, the product ID, and a set of fields to update, then applies these changes to the corresponding document in the user’s products subcollection in Firebase Firestore.
Finally, you can delete products from the collection using the function below:
12345678910111213export const deleteProductFromDB = async (
   userId: string,
   productId: string,
) => {
   try {
       const docRef = doc(db, "users", userId, "products", productId);
       await deleteDoc(docRef);
       return { success: true };
   } catch (error) {
       console.error("Error deleting product:", error);
       throw error;
   }
};
How to Add the Stream Livestream Component to the Application
In this section, you’ll learn how to build the Livestream page using the UI components provided by Stream.
<iframe width="560" height="315" src="https://stream-blog.s3.amazonaws.com/blog/wp-content/uploads/c689bcdcb34bad84455d3faef0deb925/livestream_page-1.mp4"; title="YouTube video player" frameborder="0" allow="accelerometer; autoplay; clipboard-write; encrypted-media; gyroscope; picture-in-picture; web-share" allowfullscreen></iframe>
Before adding the Stream components, create a layout.tsx file inside streams/[username]/[id] and paste the following code into the file:
123456789import { StreamVideoProvider } from "@/app/utils/StreamVideoProvider";
import { AuthProvider, ProtectRoute } from "../../../utils/AuthContext";

export default function RootLayout({
   children,
}: {
   children: React.ReactNode;
}) {
   return (
The code snippet above enables you to access the current user object and use the Stream Video components with the application.
Add the following imports to the `streams/[username]/[id]` file:
1234567891011121314151617181920212223242526"use client";
import {
   StreamCall,
   StreamTheme,
   CallControls,
   useStreamVideoClient,
   Call,
   LivestreamPlayer,
   useCallStateHooks,
   ParticipantView,
   useCall,
} from "@stream-io/video-react-sdk";
import {
   Channel,
   Chat,
   MessageInput,
   VirtualizedMessageList,
   Window,
} from "stream-chat-react";
import { useGetStreamClient } from "@/app/utils/useGetStreamClient";
import { Loader2, MessageSquare, ShoppingBag } from "lucide-react";
import type { Channel as ChannelType } from "stream-chat";
import { useRouter, useParams } from "next/navigation";
import { useAuth } from "@/app/utils/AuthContext";
import { useEffect, useState } from "react";
import Link from "next/link";
Next, create a Page component that retrieves the current authenticated user using the useAuth hook and passes the user’s ID and name to the StreamPage component:
12345export default function Page() {
const { user } = useAuth();

if (!user) {
 return (
Below the Page component, initialise the StreamPage component as follows:
12const StreamPage = ({ user }: { user: { id: string; name: string } }) => {
const [call, setCall] = useState
From the code snippet above:
- useStreamVideoClient hook – Provides the Stream Video client for handling the livestream call.
- useGetStreamClient hook – Returns the authenticated Stream Chat client for messaging during the livestream.
- StreamCall and StreamTheme components – Wrap the livestream content to provide the video context and apply Stream’s theming.
- Chat & Channel components – Provide real-time chat functionality for viewers and streamers.
- LivestreamContent – Custom component where the video, chat, and e-commerce shopping UI are rendered.
Finally, initialise the LivestreamContent component to render the call UI components. The LivestreamContent component handles the full livestream interface, combining video, chat, and controls for the streamer and viewers.
12345678910111213141516171819const LivestreamContent = () => {
   const { username } = useParams<{ username: string }>();
   const router = useRouter();
   const call = useCall();
   const [isChatOpen, setIsChatOpen] = useState(true);

   const { useIsCallLive, useLocalParticipant } = useCallStateHooks();
   const isLive = useIsCallLive();
   const localParticipant = useLocalParticipant();

   const handleGoLive = async () => {
       try {
           await call?.goLive();
       } catch (e) {
           console.error(e);
       }
   };

   return (
From the code snippet above:
- The Header displays the streamer’s username, controls chat visibility using isChatOpen, and shows a “Go Live” button for the streamer if the call hasn’t started yet.
- The LivestreamPlayer renders the live video when the stream is active and shows a local participant preview in preview mode if the livestream hasn’t started.
- The Chat Section is conditionally rendered based on isChatOpen, includes a virtualised message list and a message input box for real-time chat.
- The Controls Footer provides CallControls for muting, toggling the camera, and leaving the call, and includes an EndCallButton for the streamer to end the livestream.
Congratulations! You’ve built your own app like TikTok Shop.
Here’s the final demo showing your product’s features:
The source code for this tutorial is available on GitHub.
Next Steps
In this tutorial, you learned how to create a TikTok-style livestream shopping app using Stream and Firebase. We covered setting up Firebase for user authentication and CRUD operations, as well as integrating Stream Chat and the Stream Audio and Video SDKs into a Next.js application.
You now have the core infrastructure behind modern live commerce: real-time video, interactive chat, and seamless product integration.
Next up: Explore more resources to recreate the perfect TikTok Live Shopping experience:
Happy shopping! 🛍️ 🎥