Multi-agent services help solve complex problems and get things done across various domains. You can develop AI agents to send emails, search for publications, perform mathematical calculations, or read and write CSV files.
Agents are AI-assisted systems powered by large language models (LLMs) that can complete tasks people encounter in their digital lives daily. A multi-agent AI system encompasses several agents that can make decisions, take action, and do things independently. By their design, some agents can orchestrate and handoff conversations to other agents in a multi-agent system.
Goal and Prerequisites
In this article, we will build a simple AI agent app in Python with two members. We will use the Grok model from xAI to power the agents' task completion and the Agno Python framework to build the functionalities and features. The app's front end will use Agno's Agent UI Playground. The Cursor AI Code Editor will be used to develop the project. You can get the project’s source code from GitHub, follow the step-by-step instructions in this article to install the necessary dependencies to run and test the agentic system.
Multi-Agent AI Overview
A multi-agent system consists of two or more agents and a coordinator that manages interactions and task flow. A multi-agent AI system can be general-purpose and suitable for customer service domains. It can also be designed to solve specific problems, like a recommendation system for buyers, which is the goal of this article. You can, for example, integrate agents in a SaaS app to handle customer issuing, payments, and billing. To build a general-purpose multi-agent AI app, check out Magnetic One from Microsoft. To moderate a team of agents and safeguard users, check out AI Agents Moderation.
Agents can be developed for wider use cases, including:
- A multi-agent system that can use a team messaging app like Slack to send messages to chat channels, list all channels/groups, and get their message history.
- Transcribing of audio files in real-time voice/video calls using MLX Whisper.
- An agent developed to access captions and metadata of real-time video conferencing apps.
xAI: Get Started
The xAI API allows developers to build AI systems, automation, and applications based on its Grok foundation models. When writing this article, the API gives developers free programmatic access. This article will create a sample AI project using the Grok model. Grok is a state-of-the-art model with chat, coding, and thinking abilities.
To follow this tutorial and run the sample project, you will need an xAI account and API key. Follow the instructions below to get a new account if you do not have one yet, and generate and configure your xAI's API key.
- Create a New xAI Account
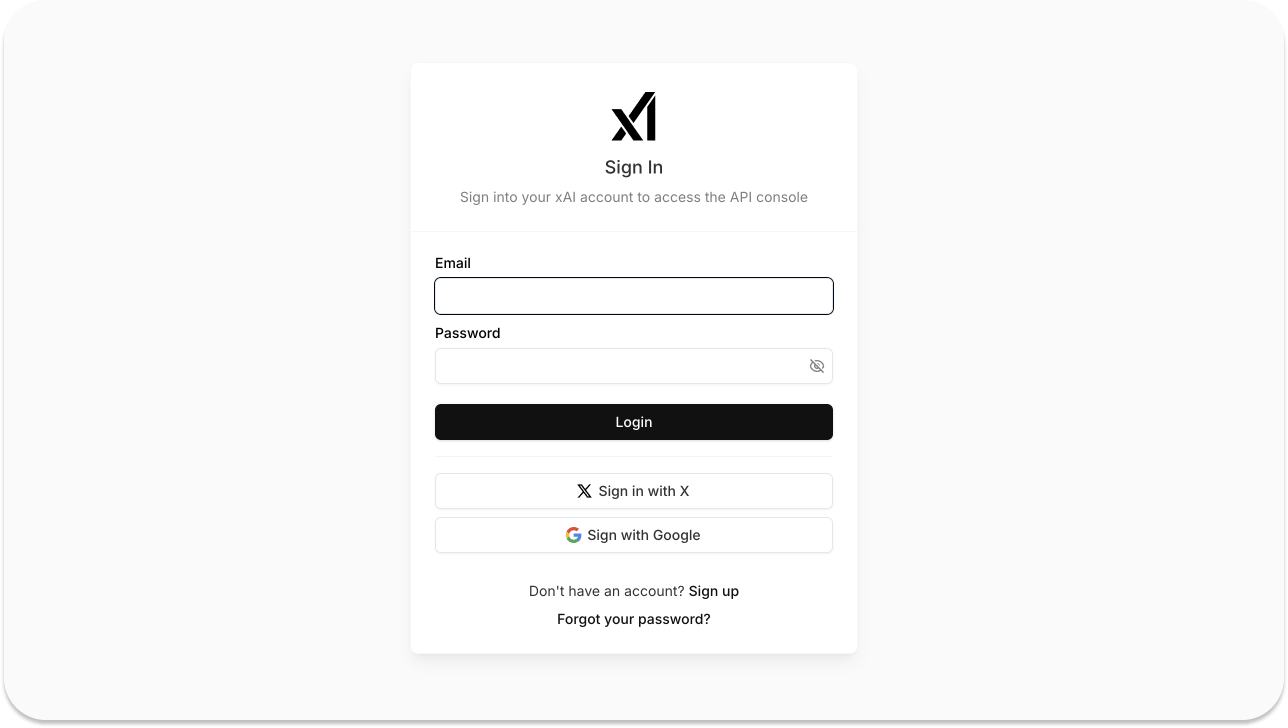
The xAI API is similar to OpenAI. You should have an account and API key to access a language model like Grok. To create a new account, visit the xAI Console. You can also sign in with your X or Google account.
- Generate and Export Your API Key
After creating your account, visit the API Keys page to generate a new one by stating its name. Next, you should export your API key to register it on your device by running this command in the Terminal or using your favorite command line utility.
export XAI_API_KEY="your_api_key_here"
Running the command above will export the API key as an environment variable in your command line tool. If you are working on macOS, an alternative way to store the API key is to save it in your machine's .zshrc file.
Note: The .zshrc file is hidden on the Mac. To reveal it, use the keyboard shortcut shift + cmd + ., a combination of shift, command, and period.
Create a New Python Project and Install Dependencies
Please navigate to a location on your machine, create a new folder, and name it as you like.
mkdir xai_python_multi_agent
Open the newly created project folder in Cursor, create a virtual environment, and install all required dependencies.
- Create a Python Virtual Environment
Run the following commands in the terminal to create and activate a new virtual environment.
12python3 -m venv .venv
source .venv/bin/activate
- Install All Required Dependencies
The following dependencies are required to build and run the project successfully.
12345678# Install OpenAI API package and Agno for agent creation
pip install -U agno openai

# Install DuckDuckGo Search (for web search)
pip install duckduckgo-search

# Install YFinance for financial data tools
pip install yfinance
Although we will use the xAI's grok-beta model to power the agents, we install Agno and OpenAI so that you can easily swap the grok model with any OpenAI model. We also install the DuckDucGo and Yahoo Finance Python packages. After generating an OpenAI API key, ensure to export it on your machine in the same way as the xAI described earlier.
How To Create AI Agents With Agno
Agno is an open-source Python-based AI automation and agent development framework. It provides tools, backend infrastructure, management, and a beautiful UI for interacting with AI agents. Using Agno, you build your AI agents and give them tools to work with, a memory to store chat and conversation history, and a user interface for interacting with the agents. Agno uses FastAPI for an agent-based project in an intuitive web UI playground similar to OpenAI's. You can use Agno to build agents with reasoning memory and more. Building your agents with Phidada does not require an account. However, running and testing agents via web playground requires account creation and API key generation.
Create an Agno Account
If you don't have one, visit Agno Agent Playground and create a new account. Next, generate an API key from your dashboard and export it using the Terminal command.
export AGNO_API_KEY=ag-***
Alternatively, you can run ag setup in the Terminal to authenticate your API key with Agno.
Next, you should install dependencies to run the agent in the Agent Playground.
pip install 'fastapi[standard]' sqlalchemy
Here, we install the fastapi package and the sqlalchemy SQL toolkit.
Create a Team of AI Agents With Grok and Agno
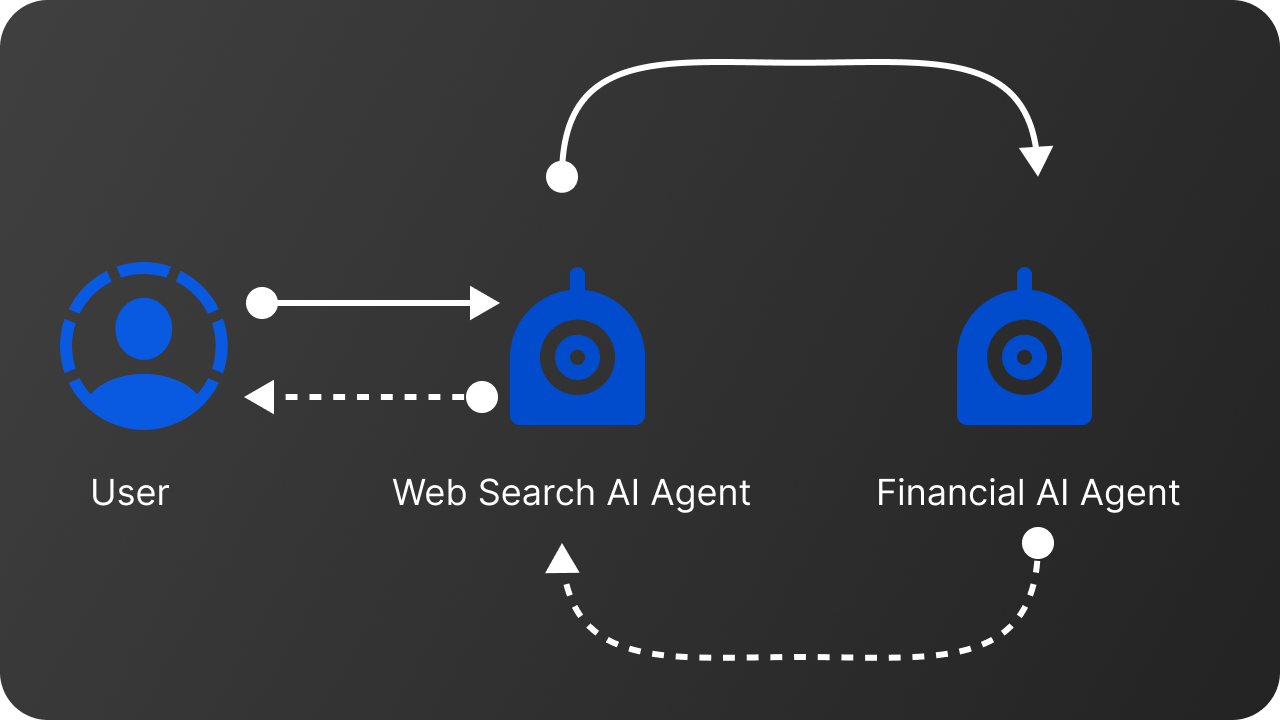
Our agentic system will serve two primary purposes: searching the web for information and presenting it to users in a specific format, as well as displaying companies' financial summaries using the Grok model. We should create each agent by specifying the instructions to complete tasks, tools, and the agent's model.
Step 1: Add Required Imports
In the project's root folder xai_python_multi_agent in Cursor, create a new Python file multi_ai_agent.py, and add the following required imports.
1234567from agno.agent import Agent
from agno.model.openai import OpenAIChat
from agno.tools.duckduckgo import DuckDuckGo
from agno.tools.yfinance import YFinanceTools
from agno.model.xai import xAI
from agno.playground import Playground, serve_playground_app
from fastapi import FastAPI
Step 2: Create the Web Search Agent
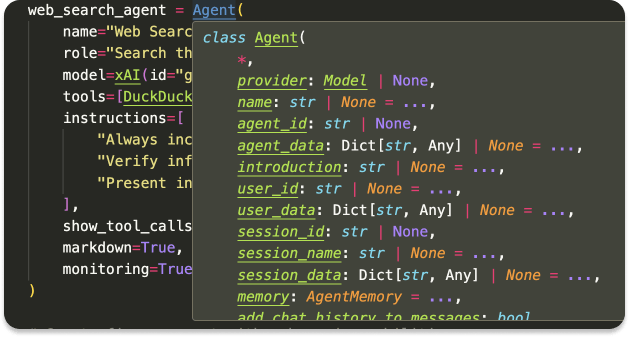
Add the following code snippet below the imports.
123456789101112131415# Create web search agent
web_search_agent = Agent(
    name="Web Search Agent",
    role="Search the web for accurate and up-to-date information",
    model=xAI(id="grok-beta"),
    tools=[DuckDuckGo()],
    instructions=[
        "Always include sources and citations",
        "Verify information from multiple sources when possible",
        "Present information in a clear, structured format",
    ],
    show_tool_calls=True,
    markdown=True,
    monitoring=True,  # Enable monitoring for better debugging
)
The role of the web agent is to search the internet and present users with accurate and up-to-date information. Since we previously exported the xAI API key, we can specify the web agent to use it model=xAI(id="grok-beta") as its language model. We also installed the openai Python package, so replacing the grok-beta model with any model from OpenAI will work out of the box without any further configuration. You have noticed we gave the agent the DuckDuckGo search tool to find information online. Finally, we specify markdown=True to get a well-formatted Markdown response from the selected model. As shown in the image above, the Agent class has several properties you can implement for different agents.
Step 3: Create the Financial Agent
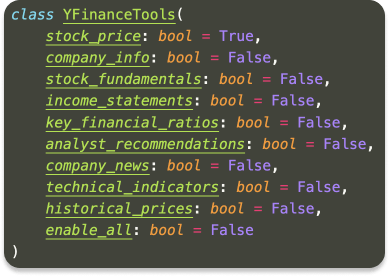
Add this code snippet below the web search agent.
12345678910111213141516171819202122# Create finance agent with enhanced capabilities
finance_agent = Agent(
    name="Finance Agent",
    role="Analyze and present financial data",
    model=xAI(id="grok-beta"),
    tools=[
        YFinanceTools(
            stock_price=True,
            analyst_recommendations=True,
            company_info=True,
            company_news=True,  # Added news capability
        )
    ],
    instructions=[
        "Use tables to display numerical data",
        "Include key financial metrics and trends",
        "Provide context for financial recommendations",
    ],
    show_tool_calls=True,
    markdown=True,
    monitoring=True,
)
The finance agent is similar to the web search agent, except they possess different tools. Here, we use Yahoo Finance tools to choose the type of financial information we want the agent to display as shown in the image above.
Step 4: Create an Agent Orchestrator
In steps 2 and 3, we created our web search and financial agents. We now need an orchestrator to manage and coordinate these agents so they can work together as a team. In summary, the multi-agent orchestrator is responsible for handling the workflows of the member agents, ensuring they operate together seamlessly.
Copy and paste this code snippet below the financial agent.
123456789101112131415# Create multi-agent team with improved coordination
multi_ai_agent = Agent(
    name="Multi AI Team",
    team=[web_search_agent, finance_agent],
    model=xAI(id="grok-beta"),
    instructions=[
        "Always include sources and citations",
        "Use tables to display structured data",
        "Combine financial data with relevant market news",
        "Provide comprehensive analysis using both agents' capabilities",
    ],
    show_tool_calls=True,
    markdown=True,
    monitoring=True,
)
The structure of the agent's team coordinator is similar to the others. However, we assigned it a Python list containing the previous members.
team=[web_search_agent, finance_agent]
Assemble All Together
Let’s combine all the code snippets and run the file afterward.
1234567891011121314151617181920212223242526272829303132333435363738394041424344454647484950515253545556575859606162636465666768#python3 multi_ai_agent.py

from agno.agent import Agent
from agno.model.openai import OpenAIChat
from agno.tools.duckduckgo import DuckDuckGo
from agno.tools.yfinance import YFinanceTools
from agno.model.xai import xAI
from agno.playground import Playground, serve_playground_app
from fastapi import FastAPI

# Create web search agent
web_search_agent = Agent(
    name="Web Search Agent",
    role="Search the web for accurate and up-to-date information",
    model=xAI(id="grok-beta"),
    tools=[DuckDuckGo()],
    instructions=[
        "Always include sources and citations",
        "Verify information from multiple sources when possible",
        "Present information in a clear, structured format",
    ],
    show_tool_calls=True,
    markdown=True,
    monitoring=True,  # Enable monitoring for better debugging
)

# Create finance agent with enhanced capabilities
finance_agent = Agent(
    name="Finance Agent",
    role="Analyze and present financial data",
    model=xAI(id="grok-beta"),
    tools=[
        YFinanceTools(
            stock_price=True,
            analyst_recommendations=True,
            company_info=True,
            company_news=True,  # Added news capability
        )
    ],
    instructions=[
        "Use tables to display numerical data",
        "Include key financial metrics and trends",
        "Provide context for financial recommendations",
    ],
    show_tool_calls=True,
    markdown=True,
    monitoring=True,
)

# Create multi-agent team with improved coordination
multi_ai_agent = Agent(
    name="Multi AI Team",
    team=[web_search_agent, finance_agent],
    model=xAI(id="grok-beta"),
    instructions=[
        "Always include sources and citations",
        "Use tables to display structured data",
        "Combine financial data with relevant market news",
        "Provide comprehensive analysis using both agents' capabilities",
    ],
    show_tool_calls=True,
    markdown=True,
    monitoring=True,
)

multi_ai_agent.print_response(
    "Summarize analyst recommendations and share the latest news for NVDA", stream=True
)
If you now launch your Terminal in Cursor or VS Code with control + `, run the Python file:
python3 multi_ai_agent.py
You should see a response from the Grok model with a well-formatted Markdown output similar to the preview below.
Step 5: How To Create an Agent UI/Playground
Congratulations! 🎉 You have created your first AI app with a team of agents using Grok and Agno. We can successfully run the agents through the command line. However, wouldn't building a more interactive and visually pleasing agent interaction and monitoring experience be nice? Let's implement such an experience with just three lines of code.
First, remove this code snippet from the previous code.
123multi_ai_agent.print_response(
    "Summarize analyst recommendations and share the latest news for NVDA", stream=True
)
Then, add the following to the same location.
12345# Create playground with both agents
app = Playground(agents=[multi_ai_agent]).get_app()

if __name__ == "__main__":
    serve_playground_app("playground:app", reload=True, port=7777)
The code snippet above creates an aesthetically pleasing agent playground in Agno where you can interact with, manipulate, and test your agents. You may have noticed that the app runs on port=7777.
Step 5: Run and Test Your Agents
To run and test the app in the playground, you should authenticate it with:
ag setup
You will now see a prompt to log in to your Agno dashboard.
Next, rerun the Python file with:
python3 multi_ai_agent.py
If you configure everything described in this tutorial, you will see this success information about the server and the port your app is running on.

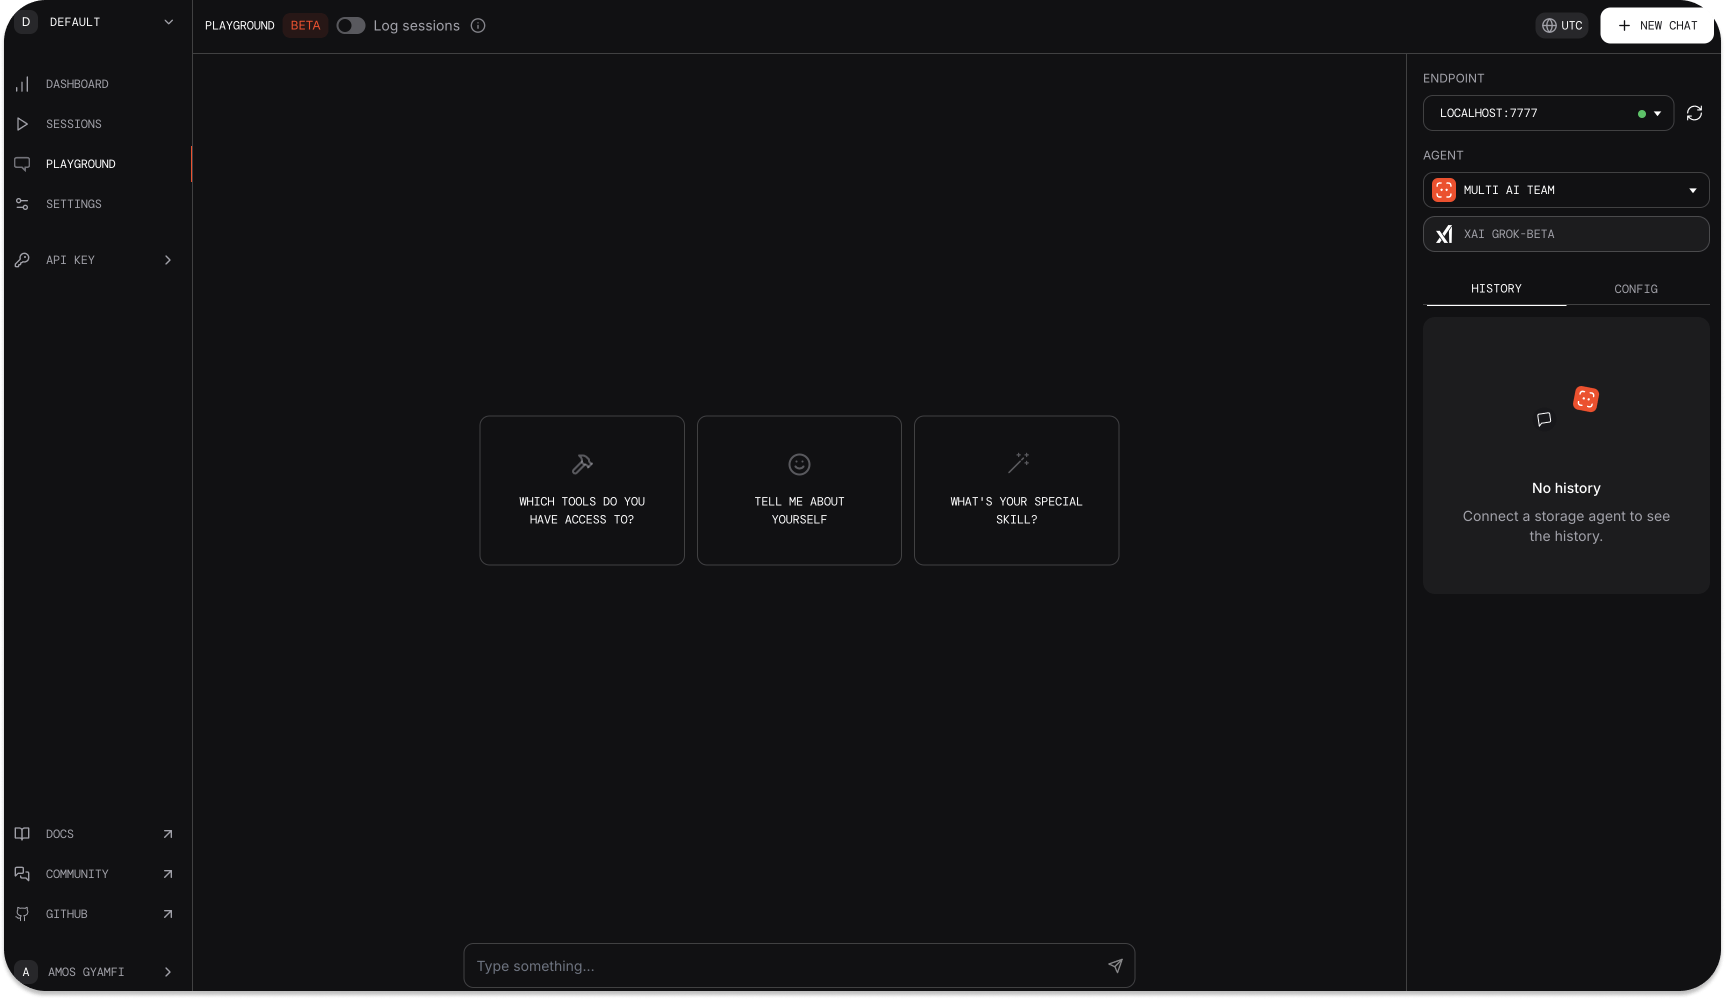
Visit your Agno dashboard again in your browser tab and switch to PLAYGROUND
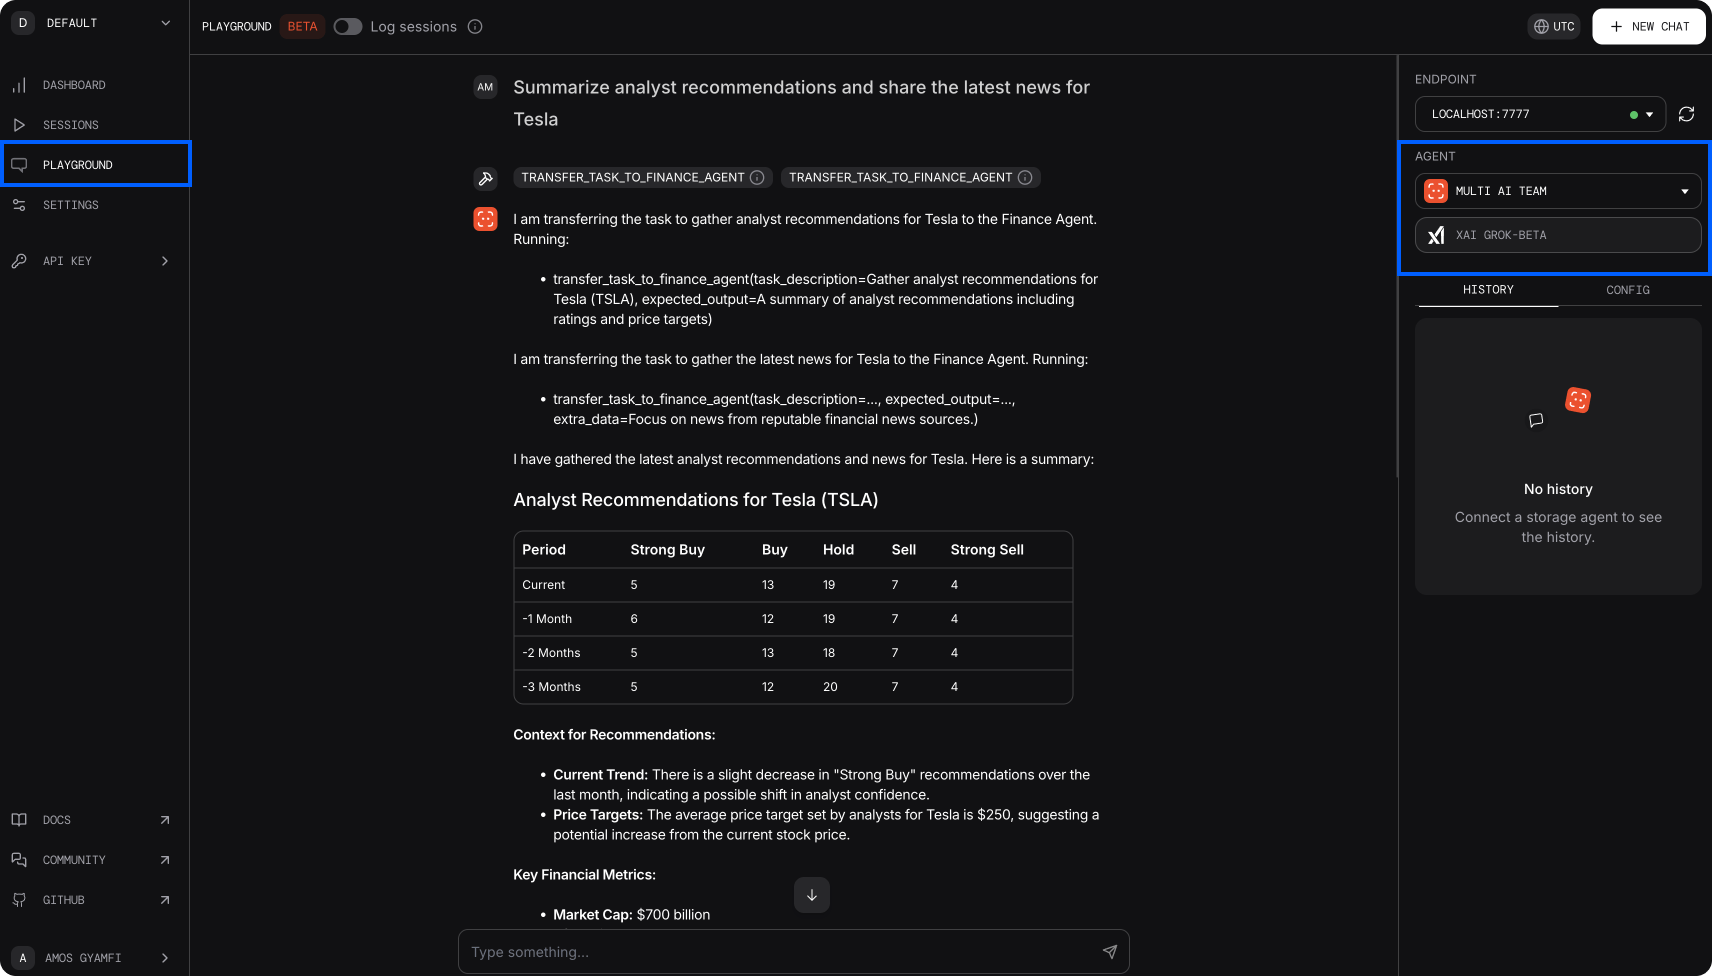
You can now prompt the multi-agent to summarize analyst recommendations for any company and interact with it in a beautiful UI.
Monitor Your Agents
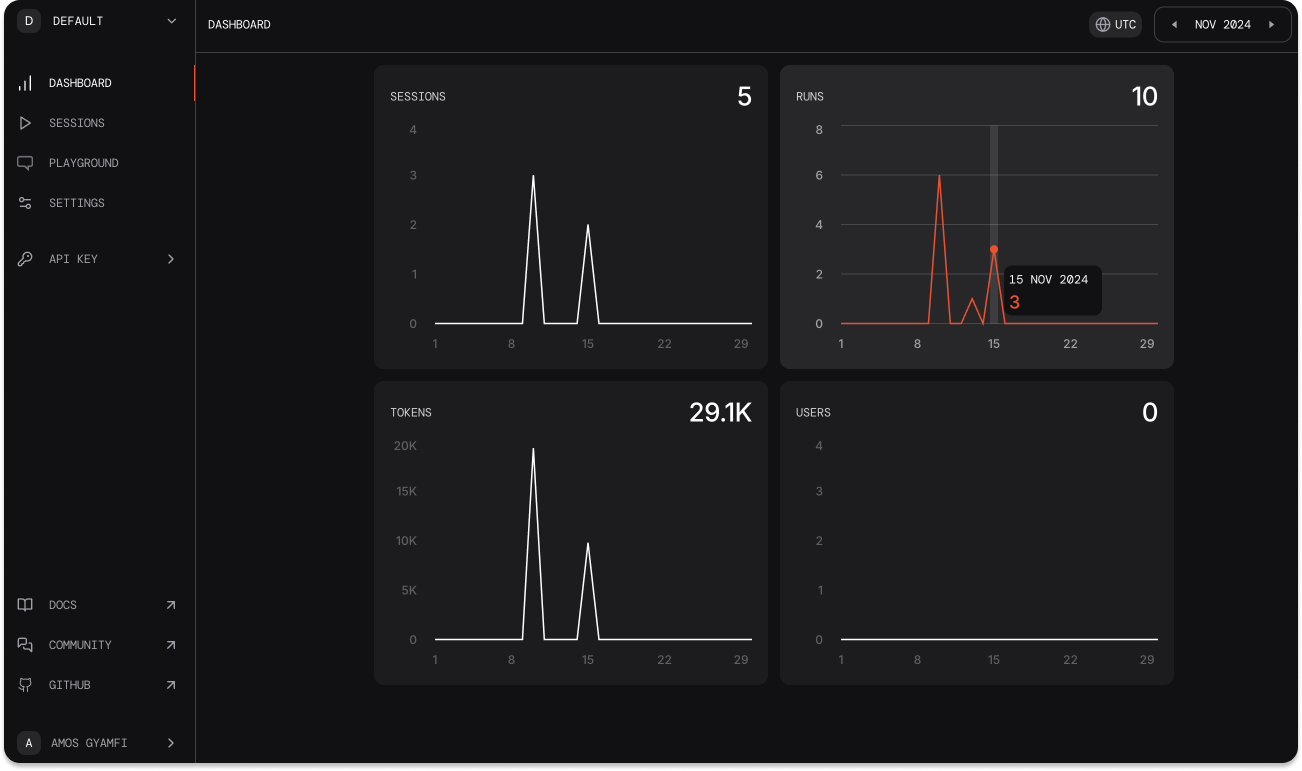
From your Agno dashboard, you can see a breakdown of your model's usage. This information helps optimize the performance of your agents.
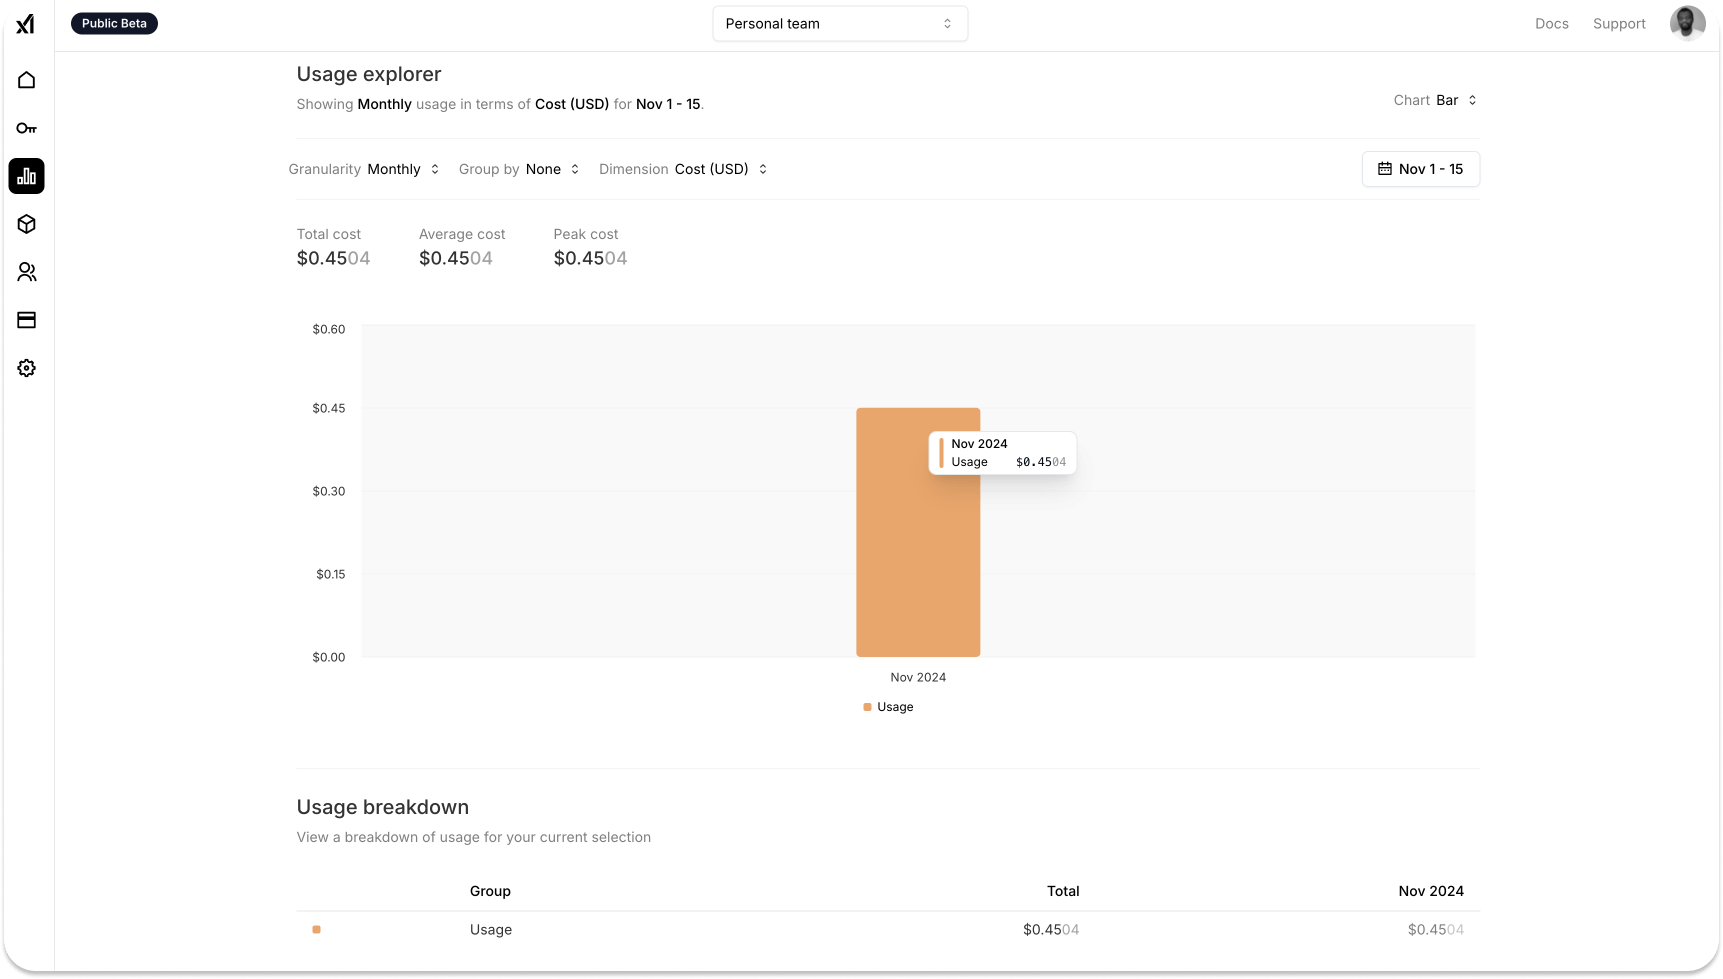
Alternatively, when you visit your xAI API account, you will see a summary of information about the Grok model usage, as shown in the image below.
What’s Next?
In this article, we built a simple agentic team to search the web and give financial recommendations using xAI's Grok model and Agno. You can use these technologies to create a sophisticated team of agents for many use cases, like an agent that transcribes live media streaming in realtime. To extend what we covered in this tutorial, check out our website to build AI Chat Bots and integrate our moderation service to find, monitor, and resolve harmful content in your agentic systems.

