Have you ever wanted to chat with the characters in your favorite book? Talk to Heathcliff about his origins, Harry Potter about his first impressions of Hogwarts, Jane Eyre about Lowood, or Lizzie Bennet about Mr. Darcy's proposal.
Or, maybe, like us, you can’t wait to interrogate WebRTC For The Curious to learn more about packet loss.
AI makes this possible. We’re not talking in a “prompt Claude to mimic Harry Potter” way. We’re talking about uploading an entire book to an AI model and chatting with it. We will do that here with AI, embeddings, and Stream.
First, What Are Embeddings?
Given that we’ve built an app to ask questions of PDFs, perhaps the best way to answer this is to upload a book about embeddings (actually, in this case, just a chapter from a book) and ask that:
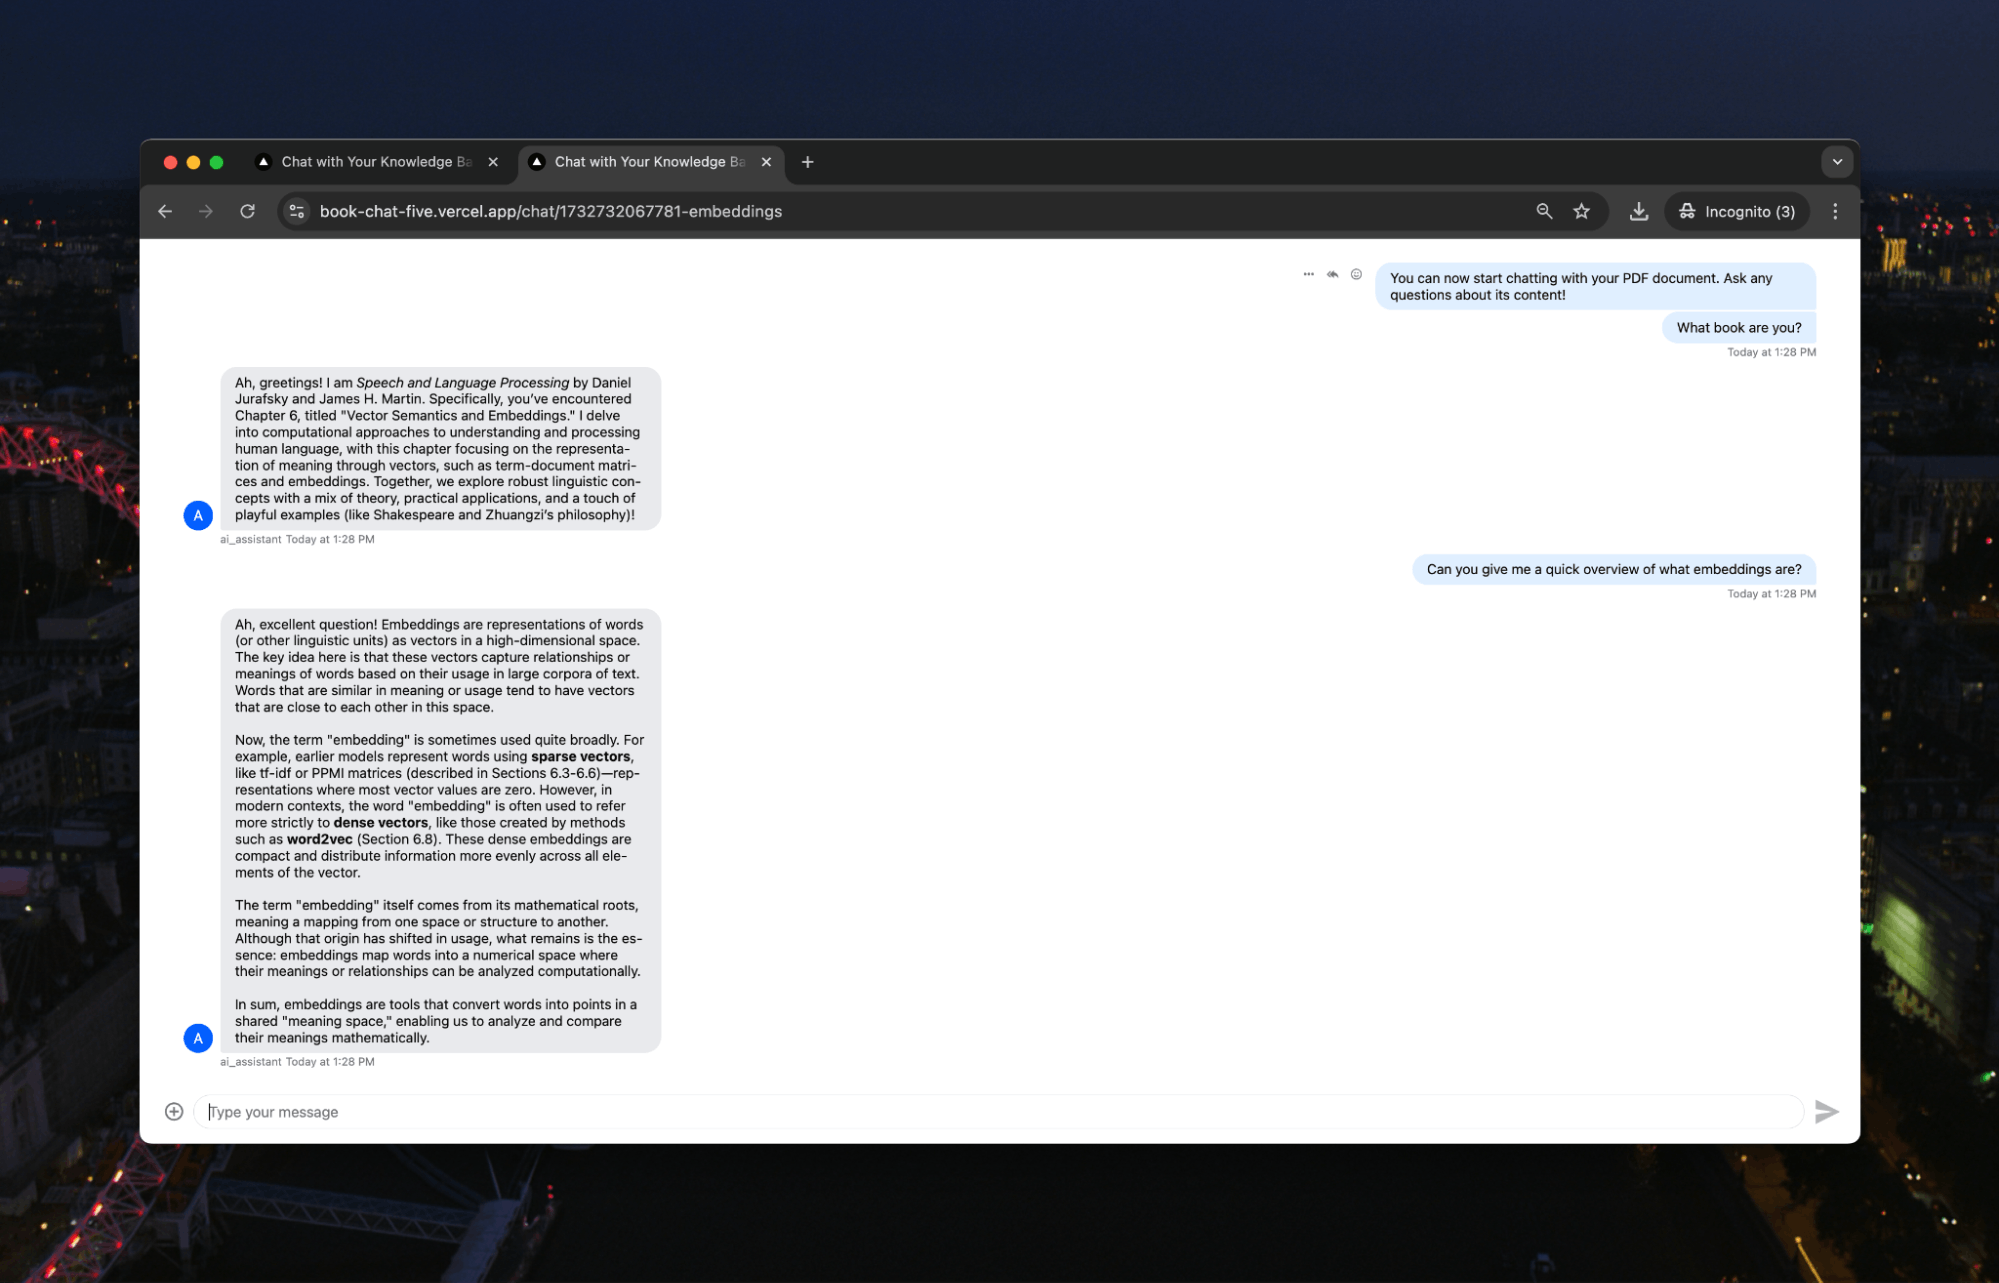
A little difficult to read, so here’s the answer:
Ah, excellent question! Embeddings are representations of words (or other linguistic units) as vectors in a high-dimensional space. The key idea here is that these vectors capture relationships or meanings of words based on their usage in large corpora of text. Words that are similar in meaning or usage tend to have vectors that are close to each other in this space.
Now, the term "embedding" is sometimes used quite broadly. For example, earlier models represent words using sparse vectors, like tf-idf or PPMI matrices (described in Sections 6.3-6.6)—representations where most vector values are zero. However, in modern contexts, the word "embedding" is often used to refer more strictly to dense vectors, like those created by methods such as word2vec (Section 6.8). These dense embeddings are compact and distribute information more evenly across all elements of the vector.
The term "embedding" itself comes from its mathematical roots, meaning a mapping from one space or structure to another. Although that origin has shifted in usage, what remains is the essence: embeddings map words into a numerical space where their meanings or relationships can be analyzed computationally.
In sum, embeddings are tools that convert words into points in a shared "meaning space," enabling us to analyze and compare their meanings mathematically.
Maybe we should have asked for the ELI5 description. As it says, embeddings are how you can represent words as numbers (or lists of numbers called vectors), and similar words will have similar vectors. For example, "happy" and "joyful" would be near each other, while "happy" and "refrigerator" would be far apart. These vector representations allow us to perform mathematical operations on words and analyze their relationships computationally.
This is the basis of retrieval-augmented generation or RAG. In RAG, you use embeddings to add your own context to an AI model. Say you have documentation that you want an AI to access. You first create embeddings for the docs, then save these embeddings in a vector database.
When you send the message to the AI model, you first create an embedding for that message and then see if there are similar embeddings in your vector database. If so, you return the text associated with those embeddings and then sand that text as context to your AI model and the original message. This way, the AI can use that context to give you more detail in its response.
Here, we will create embeddings for all the text in our PDF that we can use with our AI model.
Building Our Book Chat App
Our app is going to be built using Next.js. To create the app, you can use:
1npx create-next-app@latest
We are then going to need some specific libraries within our app:
- pinecone. Pinecone provides vector database capabilities, storing and querying our document embeddings with high-dimensional similarity search to find relevant content when users ask questions.
- openai. OpenAI's library lets us access their API to generate embeddings from our text and create conversational responses using their language models.
- stream-chat and stream-chat-react. Stream Chat and Stream Chat React work together to provide real-time chat functionality and pre-built React components for chat interfaces, handling message delivery, persistence, and UI elements.
- pdf-parse. PDF-parse extracts raw text content from PDF files, converting the binary PDF format into processable text that we can analyze and embed.
- react-hot-toast. React Hot Toast provides an elegant notification system for our application, displaying success and error messages to users with minimal setup and a clean interface.
We can install each of these with npm:
1npm @pinecone-database/pinecone openai stream-chat stream-chat-react pdf-parse react-hot-toast
You will also need API keys/secrets for Pinecone, OpenAI, and Stream. Each of those will go in a .env file that we’ll call throughout our code:
123456OPENAI_API_KEY=
PINECONE_API_KEY=
PINECONE_ENVIRONMENT=
PINECONE_INDEX=
NEXT_PUBLIC_STREAM_API_KEY=
STREAM_API_SECRET=
With that setup, we’re ready to write our code.
Uploading Our PDF
Let’s start at the start. We need to upload our PDF for processing. We’ll do that straight from our landing page:
123456789101112// app/page.jsx
import UploadForm from './components/UploadForm';
import { Toaster } from 'react-hot-toast';

export default function Home() {
 return (
   <main className="min-h-screen flex items-center justify-center bg-gray-50">
     <Toaster position="top-right" />
     <UploadForm />
   </main>
 );
}
There isn’t much on this page as we’re going to use a component, UploadForm, to upload the document. We’ll call that within our page, along with a Toaster element to give us updates.
This is then the UploadForm component:
123456789101112131415161718192021222324252627282930313233343536373839404142434445464748495051525354555657585960616263646566676869707172737475767778798081828384858687888990919293949596979899100101102103104105106107108109110111112113114115116117118119120121122123124125126127128129130// app/components/UploadForm.jsx
'use client'
import { useState, useEffect } from 'react';
import { useRouter } from 'next/navigation';
import { toast } from 'react-hot-toast';

const MAX_FILE_SIZE = 8 * 1024 * 1024; // 8MB in bytes

export default function UploadForm() {
 const [isProcessing, setIsProcessing] = useState(false);
 const [loadingMessage, setLoadingMessage] = useState(0);
 const loadingMessages = [
   "Reading your PDF... 📚",
   "Processing the contents... 🤔",
   "Teaching AI about your document... 🧠",
   "Almost there... ⚡",
   "Making final preparations... 🎯"
 ];
 const router = useRouter();

 useEffect(() => {
   let interval;
   if (isProcessing) {
     interval = setInterval(() => {
       setLoadingMessage((prev) => (prev + 1) % loadingMessages.length);
     }, 30000);
   }
   return () => clearInterval(interval);
 }, [isProcessing]);

 const handleFileUpload = async (event) => {
   const file = event.target.files[0];
   console.log('file', file)

   if (!file) return;

   // Validate file
   if (file.type !== 'application/pdf') {
     toast.error('Only PDF files are allowed');
     return;
   }

   if (file.size > MAX_FILE_SIZE) {
     toast.error('File size must be less than 8MB');
     return;
   }

   setIsProcessing(true);
   const formData = new FormData();
   formData.append('file', file);

   try {
     const controller = new AbortController();
     const timeoutId = setTimeout(() => controller.abort(), 5 * 60 * 1000); // 5 minute timeout

     const response = await fetch('/api/process', {
       method: 'POST',
       body: formData,
       signal: controller.signal,
       // Prevent automatic timeout
       keepalive: true,
     });

     clearTimeout(timeoutId);

     // Log the raw response for debugging
     console.log('Raw response:', response);

     let data;
     try {
       data = await response.json();
     } catch (parseError) {
       console.error('Response parsing error:', parseError);
       toast.error('Server returned an invalid response');
       return;
     }

     if (!response.ok) {
       throw new Error(data.error || 'Failed to process PDF');
     }

     if (!data.channelId) {
       throw new Error('No channel ID returned from server');
     }

     toast.success('PDF processed successfully!');
     router.push(`/chat/${data.channelId}`);
   } catch (error) {
     console.error('Error processing PDF:', error);
     toast.error(error.message || 'Failed to process PDF');
   } finally {
     setIsProcessing(false);
   }
 };

 return (
   <div className="max-w-md w-full p-6 bg-white rounded-lg shadow-lg">
     <h1 className="text-2xl font-bold text-center mb-6">
       Chat with your PDF
     </h1>

     <div className="space-y-4">
       <label className="block">
         <span className="text-gray-700">Upload a PDF (max 8MB)</span>
         <input
           type="file"
           accept=".pdf"
           onChange={handleFileUpload}
           disabled={isProcessing}
           className="mt-1 block w-full text-sm text-gray-500
             file:mr-4 file:py-2 file:px-4
             file:rounded-full file:border-0
             file:text-sm file:font-semibold
             file:bg-blue-50 file:text-blue-700
             hover:file:bg-blue-100"
         />
       </label>

       {isProcessing && (
         <div className="text-center">
           <div className="inline-block animate-spin rounded-full h-8 w-8 border-b-2 border-gray-900"></div>
           <p className="mt-2 text-sm text-gray-600 animate-fade-in">
             {loadingMessages[loadingMessage]}
           </p>
         </div>
       )}
     </div>
   </div>
 );
}
The component is doing some heavy lifting behind its simple upload interface. It validates PDFs (capped at 8MB), manages state with React hooks, and shows those friendly loading messages on a 30-second rotation. When you hit upload, it wraps your PDF in FormData and shoots it to /api/process with some crucial safeguards–a 5-minute timeout and keepalive flag to handle those chunky uploads.
Once the channelId is returned, the user is routed to a chat interface using Next.js routing. This doesn’t look like much, but it’ll do the job:
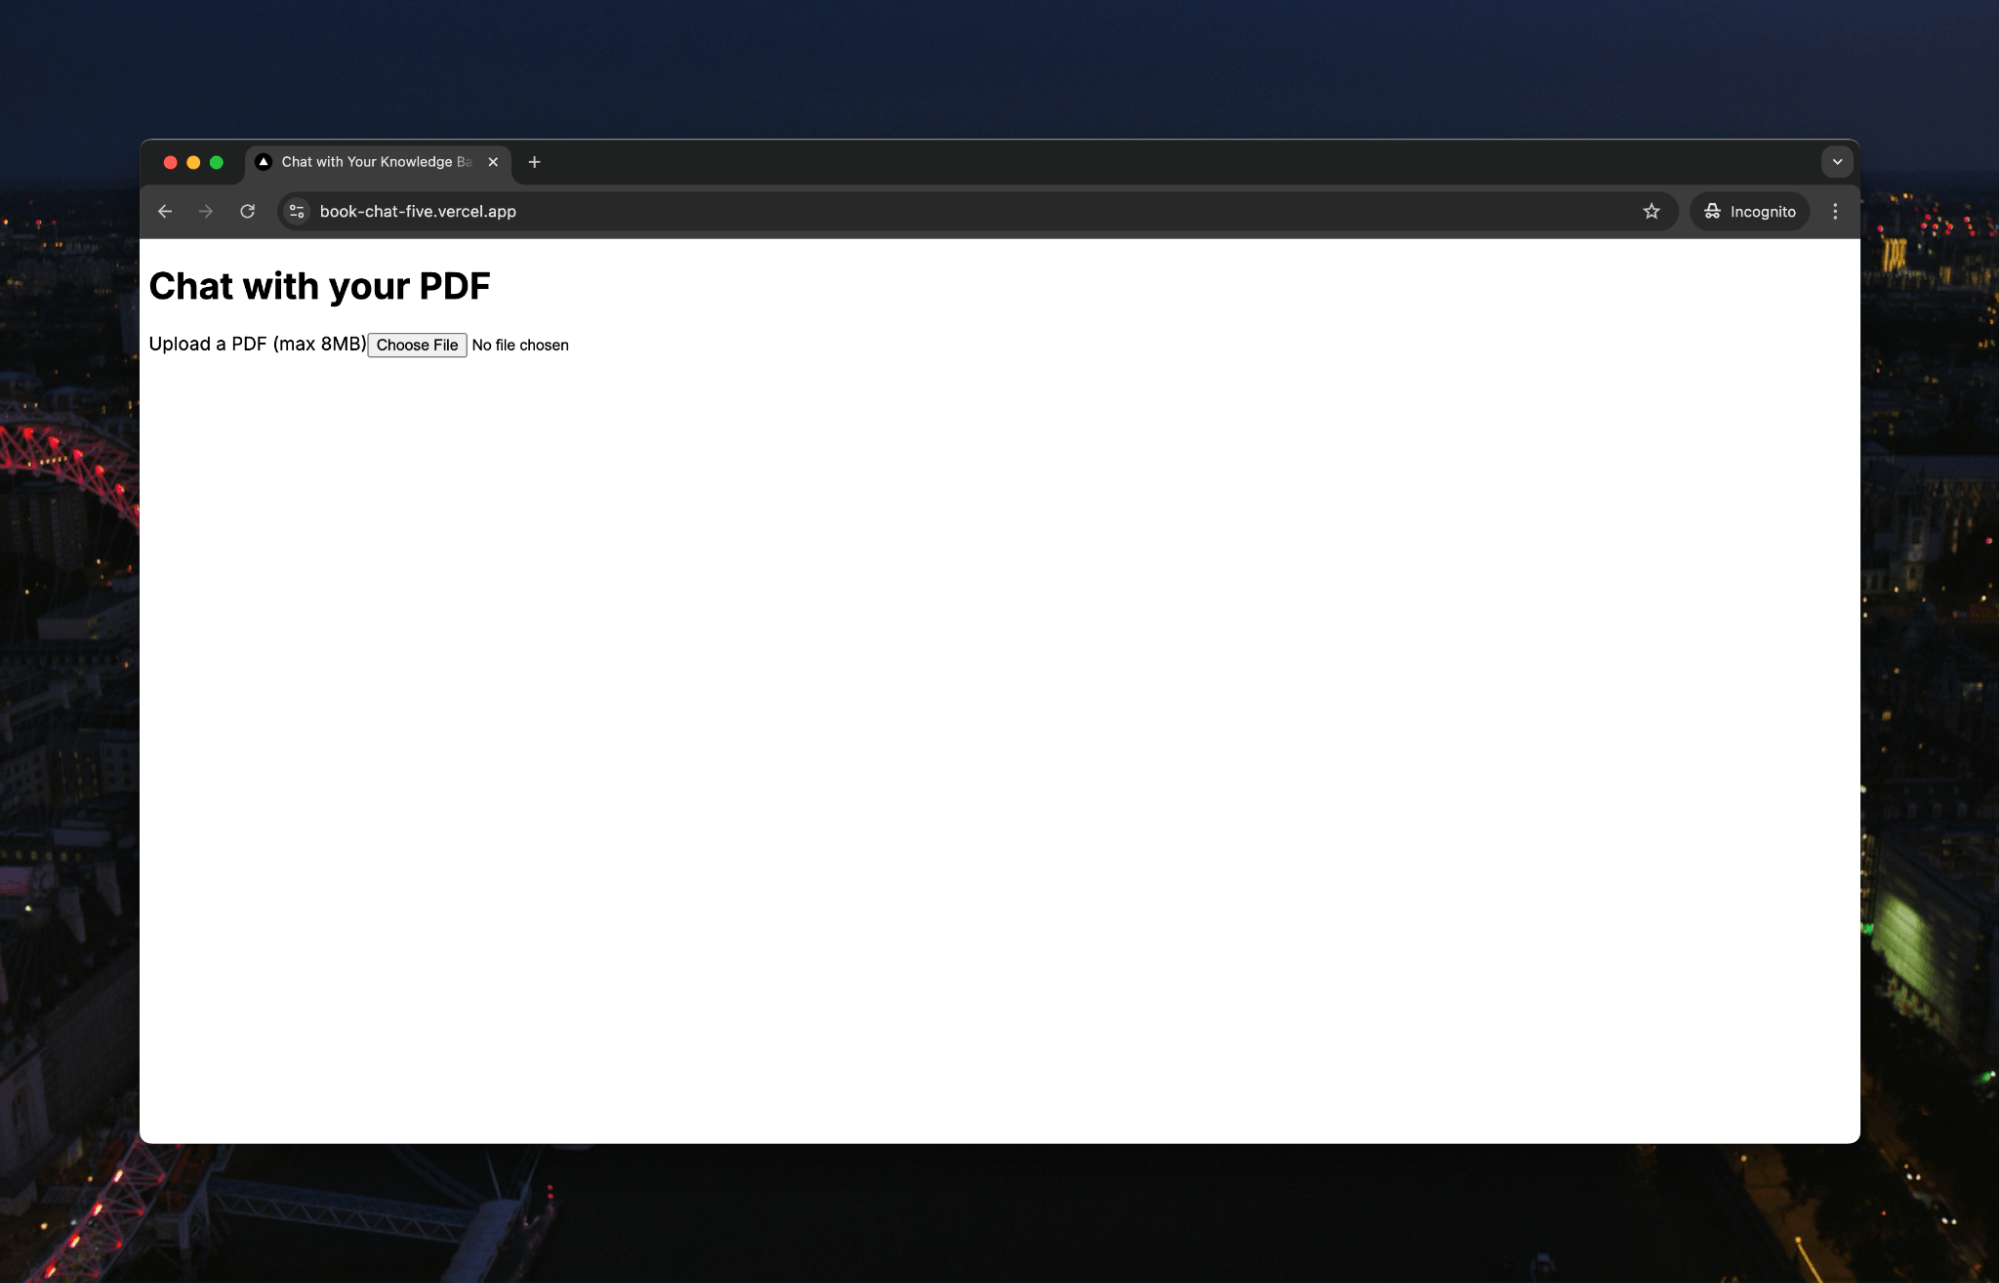
An important note: the PDF processing takes time, so we’ve added max file sizes and timeouts. But, your hosting provider might override the timeouts in your code, so check whether their function handling allows for long-running functions. Vercel tops typically out at 10s, but when we hosted this, we pushed that up to five minutes to give our processing ample time.
Processing the PDF
Time to move on to the critical part of the app, the PDF processing. We will create a PDFEmbeddingSystem class that we’ll call from our api/process route. We’ll break it down as it’s pretty long:
12345678// lib/PDFEmbeddingSystem.js
import { OpenAI } from 'openai';
import { Pinecone } from '@pinecone-database/pinecone';
import * as pdfParse from 'pdf-parse/lib/pdf-parse.js';

export class PDFEmbeddingSystem {
 ...
}
Setting up our core dependencies–OpenAI handles the embeddings generation, Pinecone manages our vector database, and pdf-parse extracts text from PDFs. These form the foundation for our PDF processing pipeline. Everything below is going to go where those three little dots are.
Within the class, we start with the constructor. The constructor initializes our essential services–creating an OpenAI client for embeddings and configuring Pinecone for vector storage with the provided API keys and index name.
1234567891011121314151617// lib/PDFEmbeddingSystem.js
...
 constructor(openaiApiKey, pineconeApiKey, indexName) {
   // Initialize OpenAI client
   this.openai = new OpenAI({
     apiKey: openaiApiKey
   });

   // Initialize Pinecone
   this.pc = new Pinecone({
     apiKey: pineconeApiKey,
   });

   this.indexName = indexName;
   this.index = this.pc.index(indexName);
 }
...
Next, we have some helper functions:
12345678910111213141516171819202122232425262728293031// lib/PDFEmbeddingSystem.js
...
 cleanText(text) {
   // Remove multiple spaces
   text = text.replace(/\s+/g, ' ');
   // Remove multiple newlines
   text = text.replace(/\n+/g, '\n');
   // Remove special characters but keep basic punctuation
   text = text.replace(/[^\w\s.,!?-]/g, '');
   return text.trim();
 }

chunkText(text, chunkSize = 1000) {
   // Split by sentences using regex
   const sentences = text.split(/(?<=[.!?])\s+/);
   const chunks = [];
   let currentChunk = "";

   for (const sentence of sentences) {
     if ((currentChunk + " " + sentence).length < chunkSize) {
       currentChunk += (currentChunk ? " " : "") + sentence;
     } else {
       if (currentChunk) chunks.push(currentChunk.trim());
       currentChunk = sentence;
     }
   }

   if (currentChunk) chunks.push(currentChunk.trim());
   return chunks;
 }
...
Two critical text processing functions handle different aspects of preparation:
cleanTextremoves extraneous spaces, newlines, and special characters while preserving essential punctuation.chunkTextsegments the text into smaller pieces (default 1000 characters), maintaining sentence boundaries to preserve context. This chunking is essential due to embedding model token limitations and helps maintain semantic coherence.
We then want to extract the text from the PDF:
1234567891011121314151617181920212223242526272829// lib/PDFEmbeddingSystem.js

...
 async extractTextFromPDF(pdfBuffer) {
   try {
     const data = await pdfParse.default(pdfBuffer);
     const text = this.cleanText(data.text);

     // Split text into pages based on length (since pdf-parse doesn't maintain page structure)
     const approximatePageLength = Math.ceil(text.length / data.numpages);
     const pdfText = {};

     for (let i = 0; i < data.numpages; i++) {
       const start = i * approximatePageLength;
       const end = start + approximatePageLength;
       const pageText = text.slice(start, end);

       if (pageText.trim()) {
         pdfText[i + 1] = pageText;
       }
     }

     return pdfText;
   } catch (error) {
     console.error('PDF extraction error:', error);
     throw new Error(`Error extracting text from PDF: ${error.message}`);
   }
 }
...
The extraction function processes PDFs into manageable text sections. Since pdf-parse doesn't preserve page structure, we implement page division through length-based calculations, distributing the text across the known number of pages to maintain approximate page relationships.
Then, we create the embedding using OpenAI:
1234567891011// lib/PDFEmbeddingSystem.js

...
 async createEmbedding(text) {
   const response = await this.openai.embeddings.create({
     input: text,
     model: "text-embedding-ada-002"
   });
   return response.data[0].embedding;
 }
...
This uses OpenAI's text-embedding-ada-002 model to convert text segments into vector representations. Each text chunk is transformed into a numerical vector that encodes its semantic content.
Now, here is the primary function that is calling all of the above to process the PDF:
12345678910111213141516171819202122232425262728293031323334353637383940414243444546474849505152535455565758596061626364656667686970// lib/PDFEmbeddingSystem.js

...
 async processPDF(pdfBuffer, pdfName, additionalMetadata = {}) {
   try {
     console.log('Starting PDF processing...');

     // Extract text from PDF
     const pdfText = await this.extractTextFromPDF(pdfBuffer);

     console.log(`Extracted text from ${Object.keys(pdfText).length} pages`);

     const vectors = [];
     let totalChunks = 0;

     // Process each page
     for (const [pageNum, pageText] of Object.entries(pdfText)) {
       const chunks = this.chunkText(pageText);
       totalChunks += chunks.length;

       console.log(`Processing page ${pageNum}: ${chunks.length} chunks`);

       for (let i = 0; i < chunks.length; i++) {
         const chunk = chunks[i];

         // Create embedding
         const embedding = await this.createEmbedding(chunk);

         // Prepare metadata
         const chunkMetadata = {
           text: chunk,
           pdf_name: pdfName,
           page_number: parseInt(pageNum),
           chunk_index: i,
           total_chunks_in_page: chunks.length,
           ...additionalMetadata
         };

         // Add to vectors array
         vectors.push({
           id: `${pdfName}_p${pageNum}_chunk_${i}`,
           values: embedding,
           metadata: chunkMetadata,
         });

         // If we have 100 vectors, upsert them in batch
         if (vectors.length >= 100) {
           await this.index.namespace(pdfName).upsert(vectors);
           console.log(`Upserted batch of ${vectors.length} vectors`);
           vectors.length = 0;
           // Add a small delay to avoid rate limits
           await new Promise(resolve => setTimeout(resolve, 500));
         }
       }
     }

     // Upsert any remaining vectors
     if (vectors.length > 0) {
       await this.index.namespace(pdfName).upsert(vectors);
       console.log(`Upserted final batch of ${vectors.length} vectors`);
     }

     console.log(`Completed processing PDF. Total chunks: ${totalChunks}`);
     return true;
   } catch (error) {
     console.error('Error in processPDF:', error);
     throw new Error(`Error processing PDF: ${error.message}`);
   }
 }
...
The main processing pipeline combines all our components into a streamlined workflow. It extracts text, segments it by page, generates embeddings for each chunk, and stores them in Pinecone with comprehensive metadata. The implementation includes batch processing in groups of 100 and rate limit management through controlled delays. Each vector stores detailed metadata, including source PDF, page number, and chunk sequence information.
Finally, we have a small function that allows us to check the results quickly:
1234567891011121314151617181920// lib/PDFEmbeddingSystem.js

...
 async querySimilar(query, topK = 3, filterDict = null, pdfName) {
   try {
     const queryEmbedding = await this.createEmbedding(query);

     const results = await this.index.namespace(pdfName).query({
       vector: queryEmbedding,
       topK,
       includeMetadata: true,
       filter: filterDict
     });

     return results.matches;
   } catch (error) {
     throw new Error(`Error querying similar texts: ${error.message}`);
   }
 }
}
This is our first opportunity to use our vector database. It generates an embedding for the input query and uses Pinecone's similarity search to identify relevant text chunks from our processed PDFs. The function returns the top matches based on vector similarity, enabling semantic understanding for our chat interface.
All this just creates the PDFEmbeddingSystem class. We’re actually going to use it within the api/process route called by our PDF upload route. Again, let’s break this down to go through the flow:
123456789101112131415161718192021// app/api/process/route.js

import { NextResponse } from 'next/server';
import { randomUUID } from 'crypto';

// Make sure to export the HTTP method handlers
export async function POST(req) {
 try {

...
 } catch (error) {
   console.error('Error handling request:', error);
   return NextResponse.json(
     {
       success: false,
       error: 'Failed to handle request: ' + error.message
     },
     { status: 500 }
   );
 }
}
We must import NextResponse for standardized API responses and crypto's randomUUID for unique identifier generation. Then, we just set up the route handler that implements our POST endpoint. The code below will be wrapped in this try/catch error handling wrapper.
123456789101112131415161718192021222324// app/api/process/route.js

...
   // Dynamic imports to avoid initialization issues
   const { StreamChat } = await import('stream-chat');
   const { PDFEmbeddingSystem } = await import('@/lib/PDFEmbeddingSystem');

   const formData = await req.formData();
   const file = formData.get('file');

   if (!file) {
     return NextResponse.json(
       { success: false, error: 'No file received' },
       { status: 400 }
     );
   }

   // Validate file type
   if (file.type !== 'application/pdf') {
     return NextResponse.json(
       { success: false, error: 'Only PDF files are allowed' },
       { status: 400 }
     );
   }
The next part performs dynamic imports of StreamChat and PDFEmbeddingSystem to prevent initialization issues during build time. Then, we extract and validate the uploaded file from FormData, implementing strict type-checking to ensure only PDFs are processed.
123456789101112// app/api/process/route.js

...

   // Process file
   const buffer = await file.arrayBuffer();
   const pdfId = randomUUID();
   const timestamp = Date.now();
   const nameWithoutExtension = file.name.replace(/\.pdf$/i, '');
   const cleanFileName = `${timestamp}-${nameWithoutExtension.replace(/[^a-zA-Z0-9-]/g, '_')}`;

...
We then need to convert the uploaded file to an ArrayBuffer for binary processing, generate a unique identifier, and create a sanitized filename by combining a timestamp with the original name. The filename sanitization removes special characters to ensure compatibility with Pinecone downstream.
123456789101112131415161718192021222324252627// app/api/process/route.js

...

   try {
     console.log('Initializing embedding system...');

     // Initialize embedding system
     const embedder = new PDFEmbeddingSystem(
       process.env.OPENAI_API_KEY,
       process.env.PINECONE_API_KEY,
       process.env.PINECONE_INDEX
     );

     console.log('Processing PDF...');

     // Process PDF and create embeddings
     await embedder.processPDF(
       buffer,
       cleanFileName,
       {
         pdfId,
         originalName: file.name,
         uploadedAt: timestamp
       }
     );
...
Now, we get to the point where we initialize our PDFEmbeddingSystem using our API keys and index name. Then, we call the processPDF function we showed above by passing the binary buffer and metadata. This part is creating embeddings and storing them in our Pinecone vector database.
12345678910111213141516171819202122232425262728293031323334353637383940414243// app/api/process/route.js

...

     console.log('Creating Stream channel...');

     // Create a new Stream channel for this PDF
     const serverClient = StreamChat.getInstance(
       process.env.NEXT_PUBLIC_STREAM_API_KEY,
       process.env.STREAM_API_SECRET
     );

     const channelId = cleanFileName;

     // Create the channel
     const channel = serverClient.channel('messaging', channelId, {
       name: file.name,
       created_by: { id: 'system' },
       pdfId,
       created_at: timestamp
     });

     await channel.create();

     console.log('Process completed successfully');

     return NextResponse.json({
       success: true,
       channelId,
       cleanFileName
     });

   } catch (processingError) {
     console.error('Error during PDF processing:', processingError);
     return NextResponse.json(
       {
         success: false,
         error: 'Failed to process PDF: ' + processingError.message
       },
       { status: 500 }
     );
   }
...
The last part of this route is establishing our Stream channel using the sanitized filename as the channel ID. We then return the channel ID to set up the Stream channel on the client.
At this point, the PDF has been processed, all embeddings are in Pinecone, and our Stream channel is set up. The next step is to use the Stream channel to talk to those embeddings.
Working With Chat
If we go back to our UploadForm component, we’ll see this line:
1router.push(`/chat/${data.channelId}`);
When the process API endpoint returns in that component, we route the user to the chat page with the channelId as a parameter. The chat page is a dynamic route within our Next project, so each new upload will create a new page for the book chat:
123456789101112131415// app/chat/[channelId]/page.jsx
'use client'
import ChatComponent from '../../components/Chat'
import { Toaster } from 'react-hot-toast';
import { useParams } from 'next/navigation'

export default function ChatPage() {
   const params = useParams()
   return (
   <>
     <Toaster position="top-right" />
     <ChatComponent channelId={params.channelId} />
   </>
 );
}
Again, the real work is done within a component, this time the ChatComponent. Once again, we’ll break this down:
12345678910111213141516171819202122232425// app/components/Chat.jsx

'use client'
import React, { useEffect, useState } from 'react';
import { StreamChat } from 'stream-chat';
import {
 Chat,
 Channel as StreamChannel,
 ChannelHeader,
 MessageInput,
 MessageList,
 Thread,
 Window,
} from 'stream-chat-react';
import { toast } from 'react-hot-toast';
import 'stream-chat-react/dist/css/v2/index.css';

const chatClient = StreamChat.getInstance(process.env.NEXT_PUBLIC_STREAM_API_KEY);
const USER_ID = 'user_id';

export default function ChatComponent({ channelId }) {
 const [channel, setChannel] = useState(null);
 const [isLoading, setIsLoading] = useState(true);
...
}
These are the imports needed:
useEffectanduseStatefrom React for state managementStreamChatfrom Stream for the chat- Multiple components from the Stream React library for UI components
- The toast for updates
- The Stream chat UI CSS library
We initialize a StreamChat instance with our public API key and define a constant user ID. The component accepts a channelId prop and manages both the chat channel state and loading state through React's useState hooks.
The first thing within the function is a useEffect that sets up our chat:
123456789101112131415161718192021222324252627282930313233343536373839404142434445464748495051525354555657// app/components/Chat.jsx

...

 useEffect(() => {
   const setupChat = async () => {
     try {
       // Get user token
       const response = await fetch('/api/token', {
         method: 'POST',
         headers: { 'Content-Type': 'application/json' },
         body: JSON.stringify({ userId: USER_ID })
       });

       if (!response.ok) {
         throw new Error('Failed to get user token');
       }

       const { token } = await response.json();

       // Connect user to Stream Chat
       await chatClient.connectUser(
         {
           id: USER_ID,
           name: 'User Name',
         },
         token
       );

       // Get or create channel
       const channel = chatClient.channel('messaging', channelId);

       // Watch channel for updates
       await channel.watch();

       // Check if channel is empty before sending welcome message
       const state = await channel.query();
       if (state.messages.length === 0) {
         await channel.sendMessage({
           id: `welcome-${channelId}`,
           text: "You can now start chatting with your PDF document. Ask any questions about its content!",
           user_id: 'system',
         });
       }

       setChannel(channel);
     } catch (error) {
       console.error('Error setting up chat:', error);
       toast.error('Failed to connect to chat');
     } finally {
       setIsLoading(false);
     }
   };

   setupChat();

...
This useEffect initializes the chat system by fetching a user token from our API, authenticating the user with Stream, and establishing a channel connection. The implementation handles empty channels by sending an initial welcome message, ensuring users receive immediate feedback. The channel setup includes watchMode activation for real-time updates. Error handling happens through the toast notifications.
We also have a small function for cleanup:
1234567891011121314151617181920// app/components/Chat.jsx

...

   // Cleanup
   return () => {
     const cleanup = async () => {
       try {
         if (channel) {
           await channel.stopWatching();
         }
         await chatClient.disconnectUser();
       } catch (error) {
         console.error('Error during cleanup:', error);
       }
     };
     cleanup();
   };
 }, [channelId]);
...
Systematic cleanup prevents memory leaks and ensures proper resource management when the component unmounts.
Then we have our function to handle our messaging:
123456789101112131415161718192021222324252627282930313233343536373839404142434445464748495051525354// app/components/Chat.jsx

...
 const handleMessage = async (message) => {
   if (!message.text) return;

   try {
     // Get the last 10 messages for context
     const messages = await channel.query({
       messages: {
         limit: 10,
         id_lt: message.id
       }
     });

     // Format conversation history for the AI
     const conversationHistory = [...messages.messages, message]
       .filter(msg => msg.user.id !== 'system') // Exclude system messages
       .map(msg => ({
         role: msg.user.id === USER_ID ? 'user' : 'assistant',
         content: msg.text
       }));

     // Send to AI endpoint
     const response = await fetch('/api/chat', {
       method: 'POST',
       headers: { 'Content-Type': 'application/json' },
       body: JSON.stringify({
         message: message.text,
         userId: USER_ID,
         channelId: channelId,
         conversationHistory
       })
     });

     if (!response.ok) {
       throw new Error('Failed to get AI response');
     }

     // Response handling is done in the API route
     // which sends the message directly to the Stream channel

   } catch (error) {
     console.error('Error processing message:', error);
     toast.error('Failed to process message');

     // Send error message to channel
     await channel.sendMessage({
       text: "I'm sorry, I encountered an error processing your message. Please try again.",
       user_id: 'ai_assistant'
     });
   }
 };
...
The handleMessage function processes new messages by retrieving recent conversation context, formatting the chat history to match our AI's expected structure, and sending this data to our chat endpoint, which we’ll cover in a moment. Then, we have to handle some errors in case anything goes wrong.
After that, we have another useEffect that handles new messages and passes them to the above function:
12345678910111213141516171819202122232425262728293031323334// app/components/Chat.jsx

...
 useEffect(() => {
   if (channel) {
     // Listen for new messages
     channel.on('message.new', event => {
       // Only process messages from the user, not from the AI or system
       if (event.user.id === USER_ID) {
         handleMessage(event.message);
       }
     });

     // Handle connection state changes
     chatClient.on('connection.changed', ({ online }) => {
       if (!online) {
         toast.error('Lost connection. Trying to reconnect...');
       }
     });

     // Handle errors
     channel.on('channel.error', () => {
       toast.error('Error in chat channel');
     });

     return () => {
       channel.off('message.new');
       channel.off('channel.error');
       chatClient.off('connection.changed');
     };
   }
 }, [channel]);

...
This establishes event listeners for new messages, connection state changes, and channel errors. It filters to process only user messages through the handleMessage function. There are also some good practices with connection status monitoring, user feedback, and a cleanup process for all event listeners.
Finally, we render our UI for the user:
12345678910111213141516171819202122232425262728293031323334353637383940414243444546// app/components/Chat.jsx

...

 if (isLoading) {
   return (
     <div className="h-screen flex items-center justify-center">
       <div className="text-center">
         <div className="inline-block animate-spin rounded-full h-8 w-8 border-b-2 border-gray-900"></div>
         <p className="mt-2 text-gray-600">Loading chat...</p>
       </div>
     </div>
   );
 }

 if (!channel) {
   return (
     <div className="h-screen flex items-center justify-center">
       <div className="text-center text-red-600">
         <p>Failed to load chat.</p>
         <button
           onClick={() => window.location.reload()}
           className="mt-4 px-4 py-2 bg-blue-500 text-white rounded hover:bg-blue-600"
         >
           Try Again
         </button>
       </div>
     </div>
   );
 }

 return (
   <div className="h-screen flex flex-col">
     <Chat client={chatClient} theme="messaging light">
       <StreamChannel channel={channel}>
         <Window>
           <ChannelHeader />
           <MessageList />
           <MessageInput />
         </Window>
         <Thread />
       </StreamChannel>
     </Chat>
   </div>
 );
}
We start with conditional rendering based on loading and channel states, providing appropriate loading indicators and error-handling UI. The main chat interface utilizes Stream's UI components in a structured layout, incorporating message lists, input areas, and threading functionality within a responsive container.
Two routes are called from this component. The first is api/token.
1234567891011121314151617181920212223242526272829303132// app/api/token/route.js

import { NextResponse } from 'next/server';
import { StreamChat } from 'stream-chat';

export async function POST(req) {
 try {
   const { userId } = await req.json();

   const serverClient = StreamChat.getInstance(
     process.env.NEXT_PUBLIC_STREAM_API_KEY,
     process.env.STREAM_API_SECRET
   );

   // First, upsert the user with admin role
   await serverClient.upsertUser({
     id: userId,
     role: 'admin',
   });

   // Generate token for the admin user
   const token = serverClient.createToken(userId);

   return NextResponse.json({ token });
 } catch (error) {
   console.error('Error generating token:', error);
   return NextResponse.json(
     { error: 'Failed to generate token' },
     { status: 500 }
   );
 }
}
The function of this endpoint is mainly to generate the token for the user. This can’t be done on the client when the user is created, so we call the server. Here, we also upgrade the user to an admin so they can create and manage channels.
Finally, we get to the chat endpoint. This is where we will call both Pinecone and OpenAI to generate an AI response from our embeddings. Let’s break it down:
123456789101112131415// app/api/chat/route.js

import { StreamChat } from 'stream-chat';
import { OpenAI } from 'openai';
import { PDFEmbeddingSystem } from '@/lib/PDFEmbeddingSystem';

const openai = new OpenAI({
 apiKey: process.env.OPENAI_API_KEY
});

const streamClient = StreamChat.getInstance(
 process.env.NEXT_PUBLIC_STREAM_API_KEY,
 process.env.STREAM_API_SECRET
);
...
StreamChat is configured with public and secret API keys for full server-side functionality, while OpenAI is initialized with its API key. These clients are created at the module level to enable connection reuse across requests.
Then, we have our actual route handler and the instantiation of our embedder again:
12345678910111213141516171819202122232425262728293031// app/api/chat/route.js

...

export async function POST(req) {
 try {
   const { message, userId, channelId, conversationHistory } = await req.json();

   // Get channel to retrieve PDF information
   const channel = streamClient.channel('messaging', channelId);
   const channelData = await channel.query();
   const pdfId = channelData.channel.pdfId;

   // Initialize embedding system
   const embedder = new PDFEmbeddingSystem(
     process.env.OPENAI_API_KEY,
     process.env.PINECONE_API_KEY,
     process.env.PINECONE_INDEX
   );
   // Query similar content
   const similarContent = await embedder.querySimilar(
       message,
       3,
       null,
       channelId
     );
   // Construct context from relevant passages
   const context = similarContent
     .map(match => match.metadata.text)
     .join('\n');
...
We extract message data and conversation history from the request body, then query the Stream channel to retrieve PDF metadata. We then instantiate our PDFEmbeddingSystem with the necessary credentials and perform a semantic search for relevant content. The similar content query returns the top three most semantically similar passages from our vector database.
Now, this is where everything comes together! This is the most critical section of the entire app. We are going to call our OpenAI LLM with a specific prompt and the additional context received from the embedding model:
12345678910111213141516171819202122232425262728293031323334// app/api/chat/route.js

...

   // Generate response using OpenAI
   const completion = await openai.chat.completions.create({
     model: "gpt-4o-2024-11-20",
     messages: [
       {
         role: "system",
         content: `You are an AI that embodies the knowledge and personality of the book being discussed. Respond as if you are the book itself sharing your knowledge.

   Key behaviors:
   - Draw exclusively from the provided context when answering
   - Maintain the book's tone, style and terminology
   - Express uncertainty when information isn't in the context
   - Use direct quotes when relevant, citing page numbers if available
   - Break complex topics into digestible explanations
   - If asked about topics outside the book's scope, explain that this wasn't covered

   Important: Base all responses solely on the provided context. Do not introduce external knowledge even if related.

   Format responses conversationally, as if the book itself is explaining its contents to the reader.`
       },
       ...conversationHistory,
       {
         role: "user",
         content: `Context: ${context}\n\nQuestion: ${message}`
       }
     ]
   });

   const aiResponse = completion.choices[0].message.content;
...
The system prompt explicitly instructs the model to embody the book's knowledge and personality while maintaining contextual boundaries. The prompt engineering ensures responses are grounded in the document's content while maintaining a natural conversational flow.
Finally, that response is sent to our Stream channel:
1234567891011121314151617181920212223242526272829303132333435363738// app/api/chat/route.js

...

   // Send message to Stream Chat channel
   await channel.sendMessage({
     text: aiResponse,
     user_id: 'ai_assistant'
   });

   return new Response(
     JSON.stringify({
       success: true,
       response: aiResponse
     }),
     {
       status: 200,
       headers: {
         'Content-Type': 'application/json',
       },
     }
   );
 } catch (error) {
   console.error('Error in chat endpoint:', error);
   return new Response(
     JSON.stringify({
       success: false,
       error: 'Failed to process message'
     }),
     {
       status: 500,
       headers: {
         'Content-Type': 'application/json',
       },
     }
   );
 }
}
That’s it! Quite a lot of code, but the concept is straightforward:
- Upload a PDF
- Create embeddings from the text
- Create a channel to chat
- Add messages to the chat
- Run the message through the vector search first to find the proper context, then send the context and the message to the LLM
- Send the AI response back to the user.
Let’s run through it. First, we’ll upload our PDF:
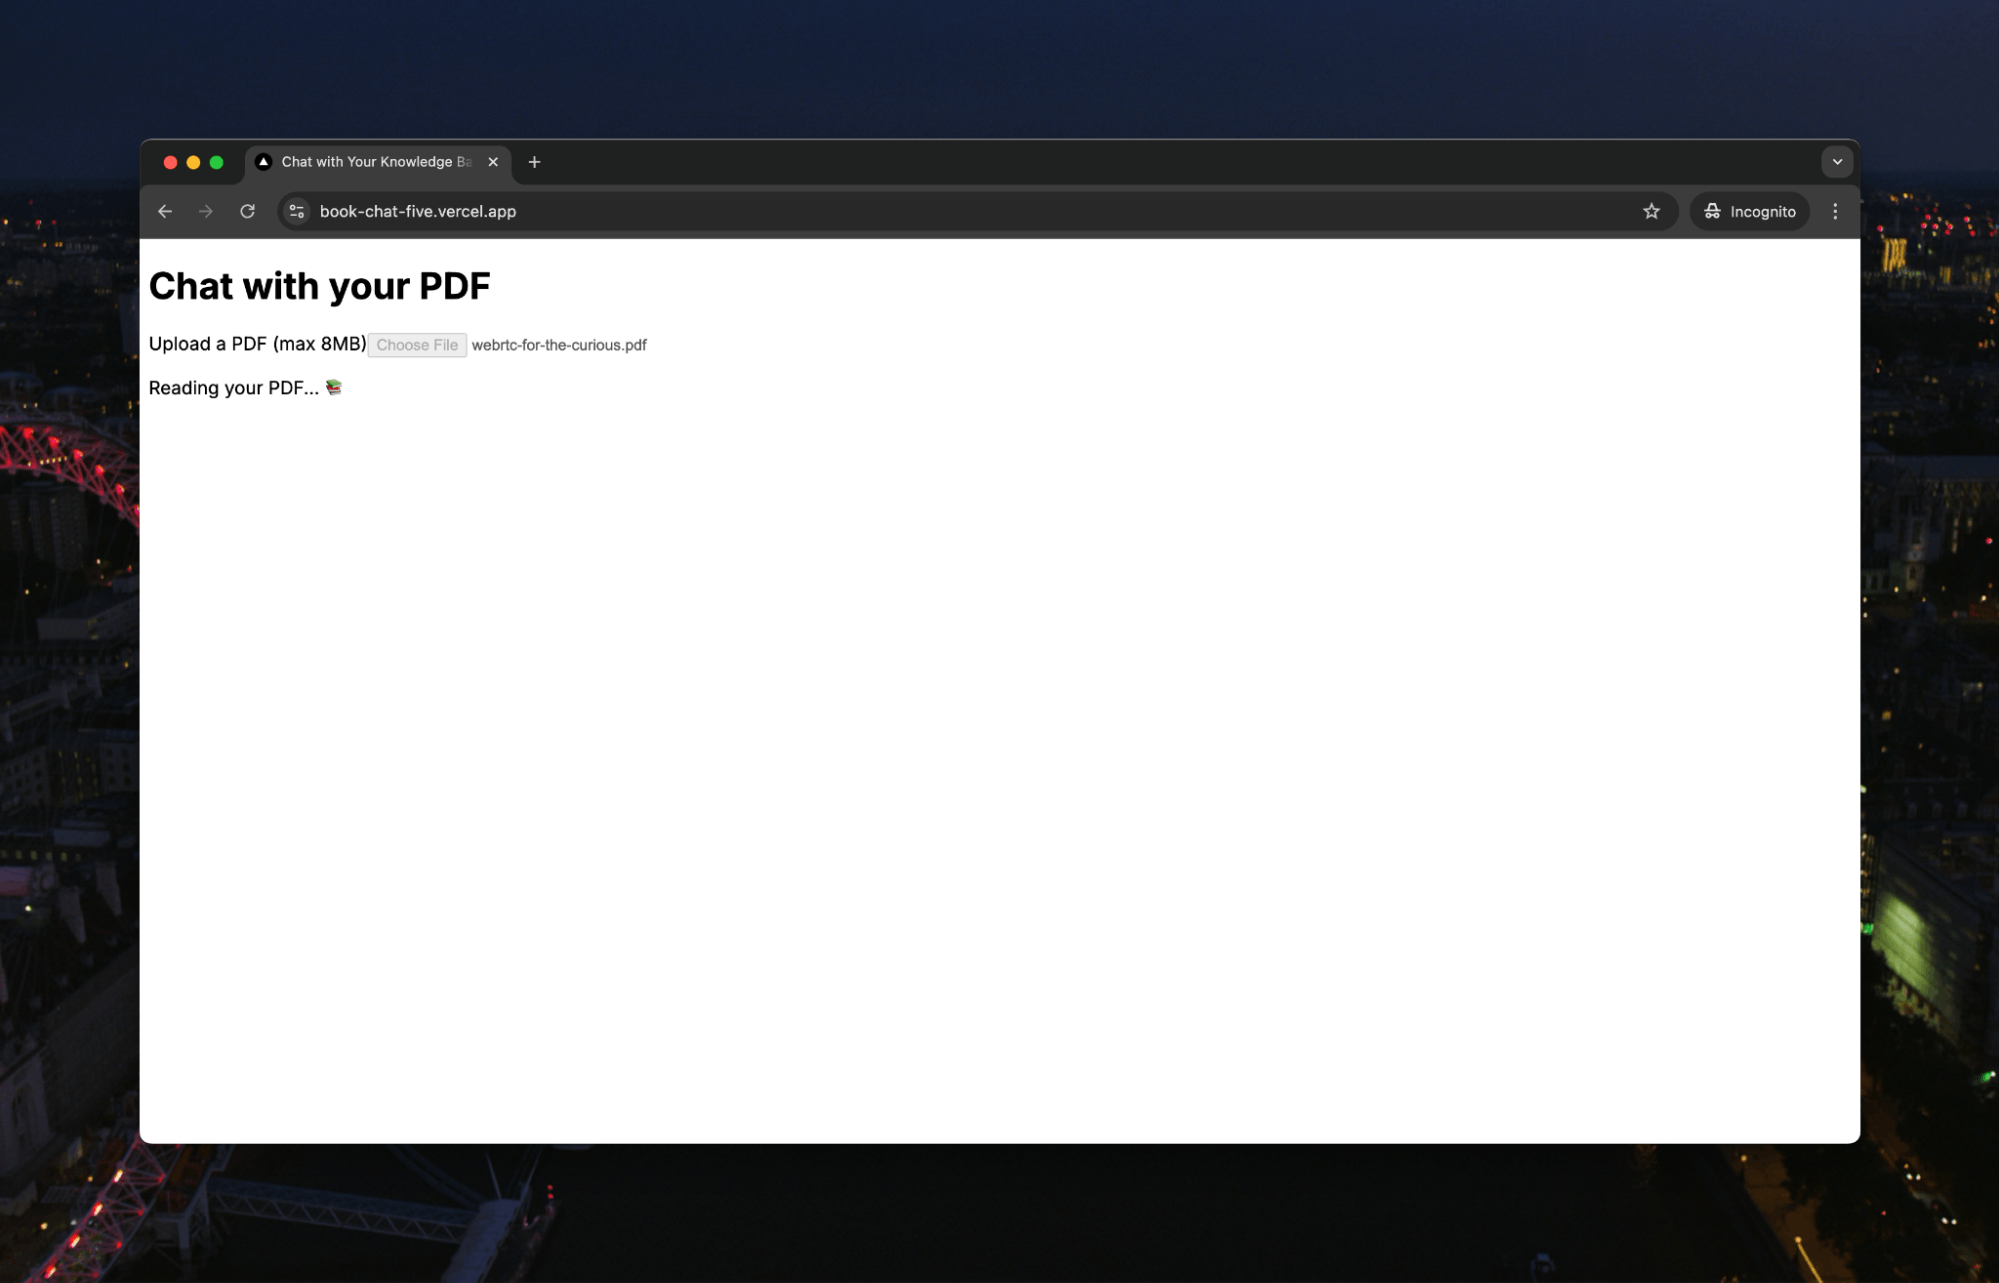
This will take a few seconds, depending on the size of the book (we didn’t try it with War & Peace yet).
Once the embedding is complete, our channel appears:
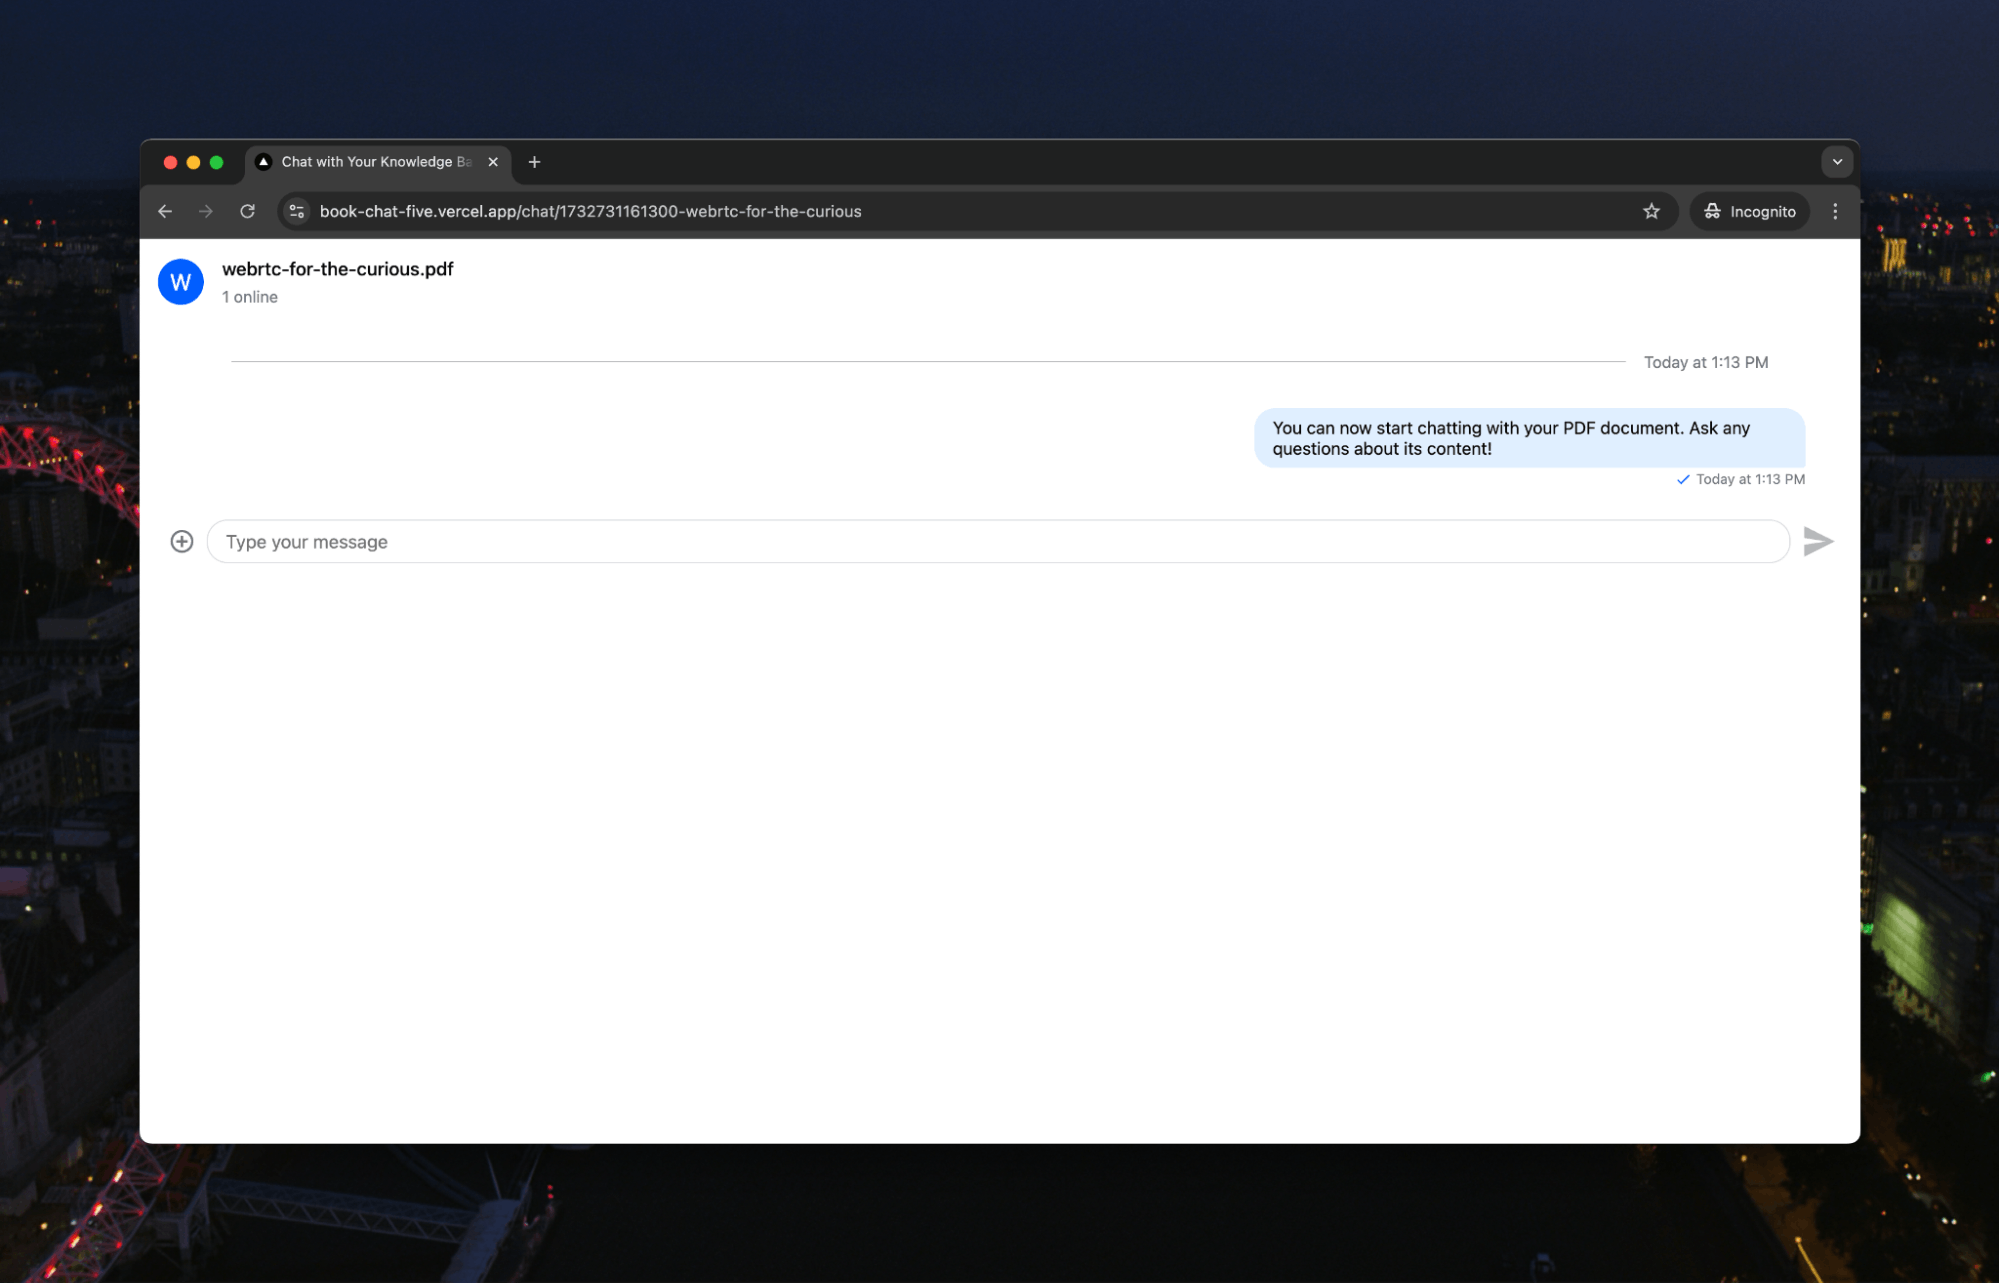
We can then start chatting:
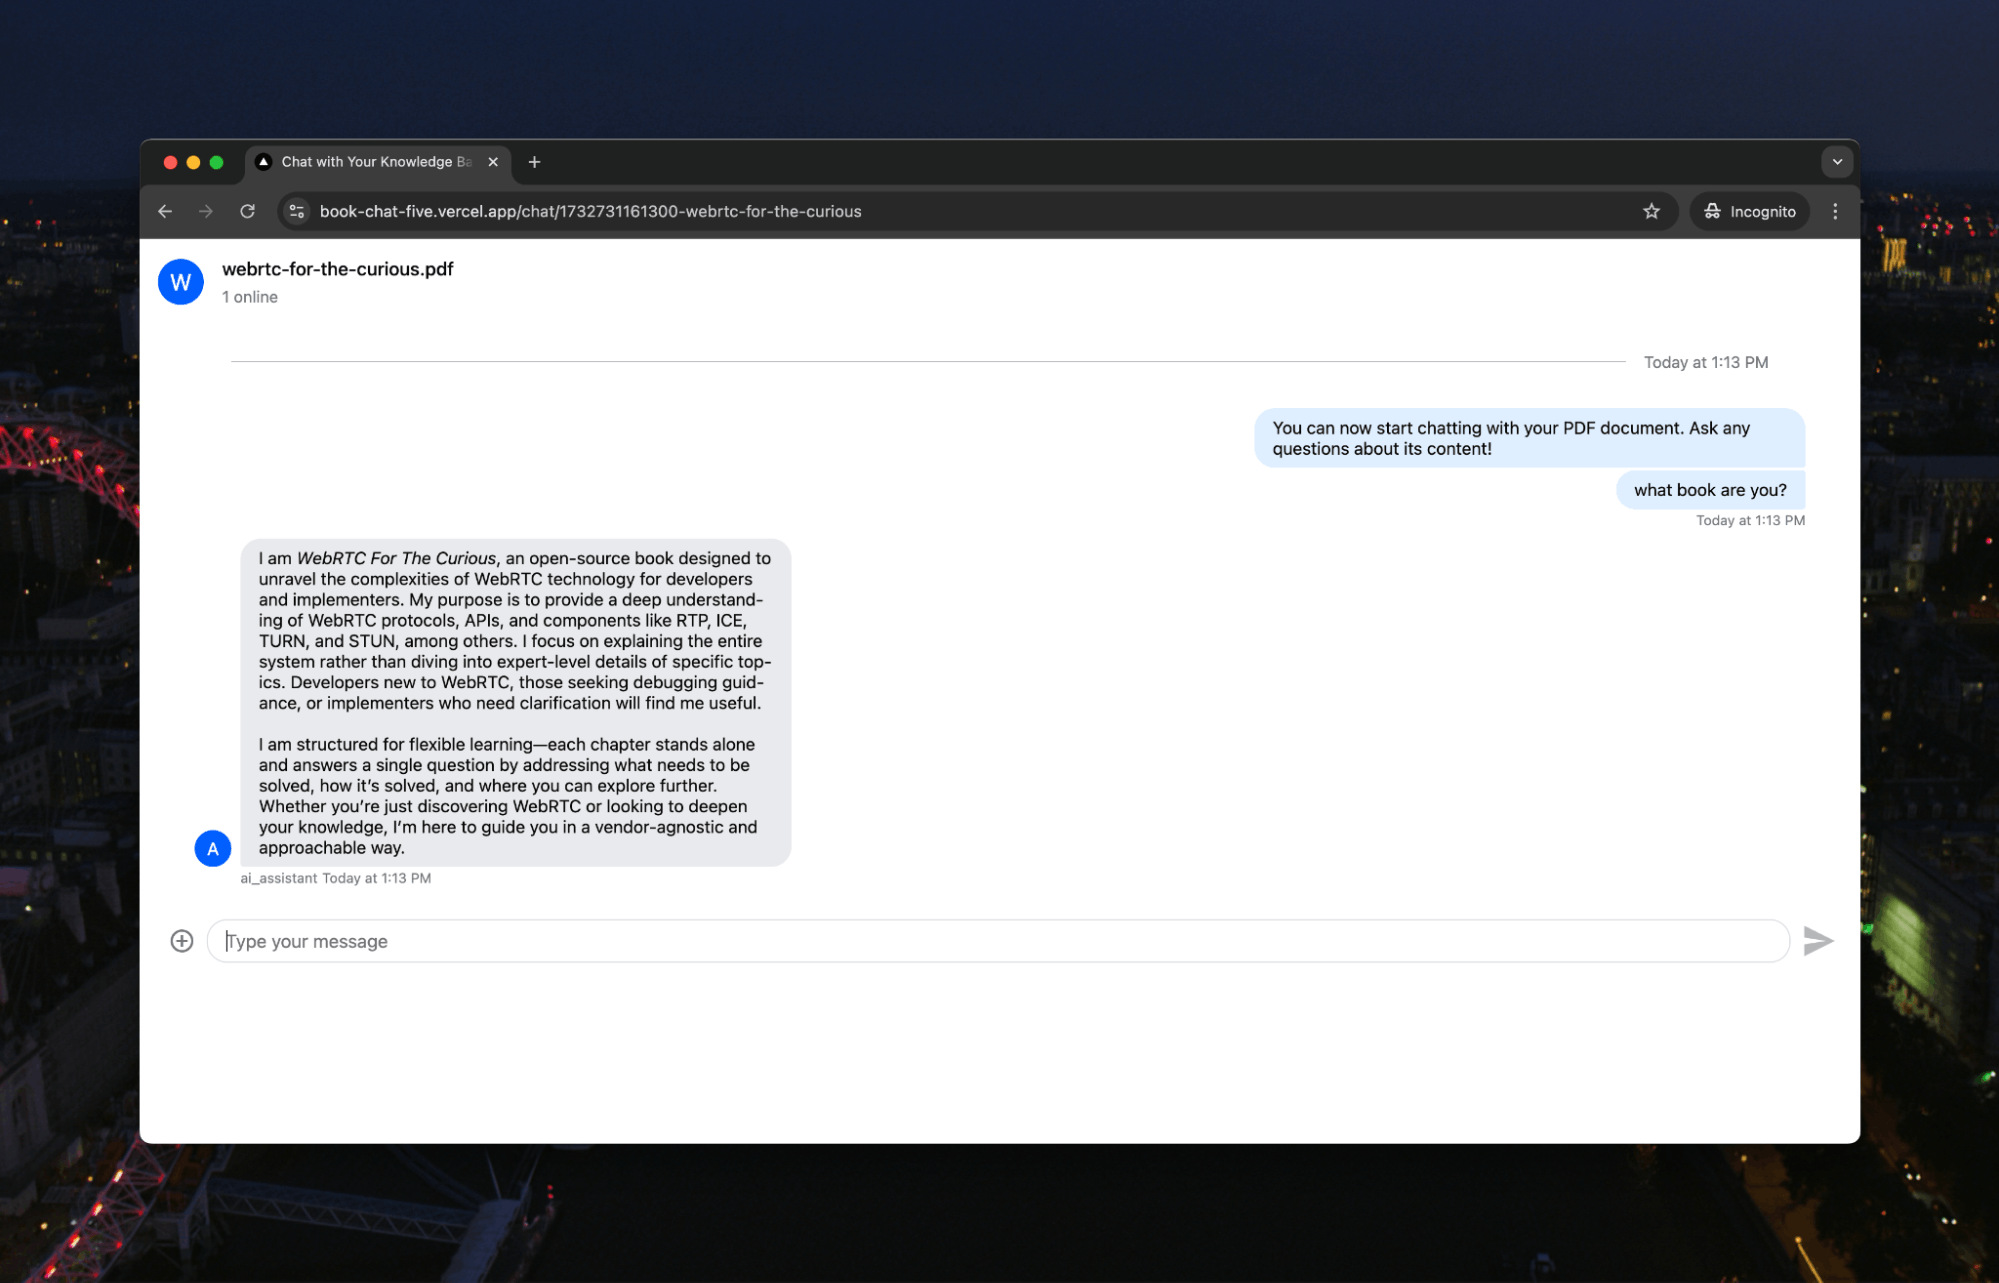
Let’s ask a question that only the book would know:

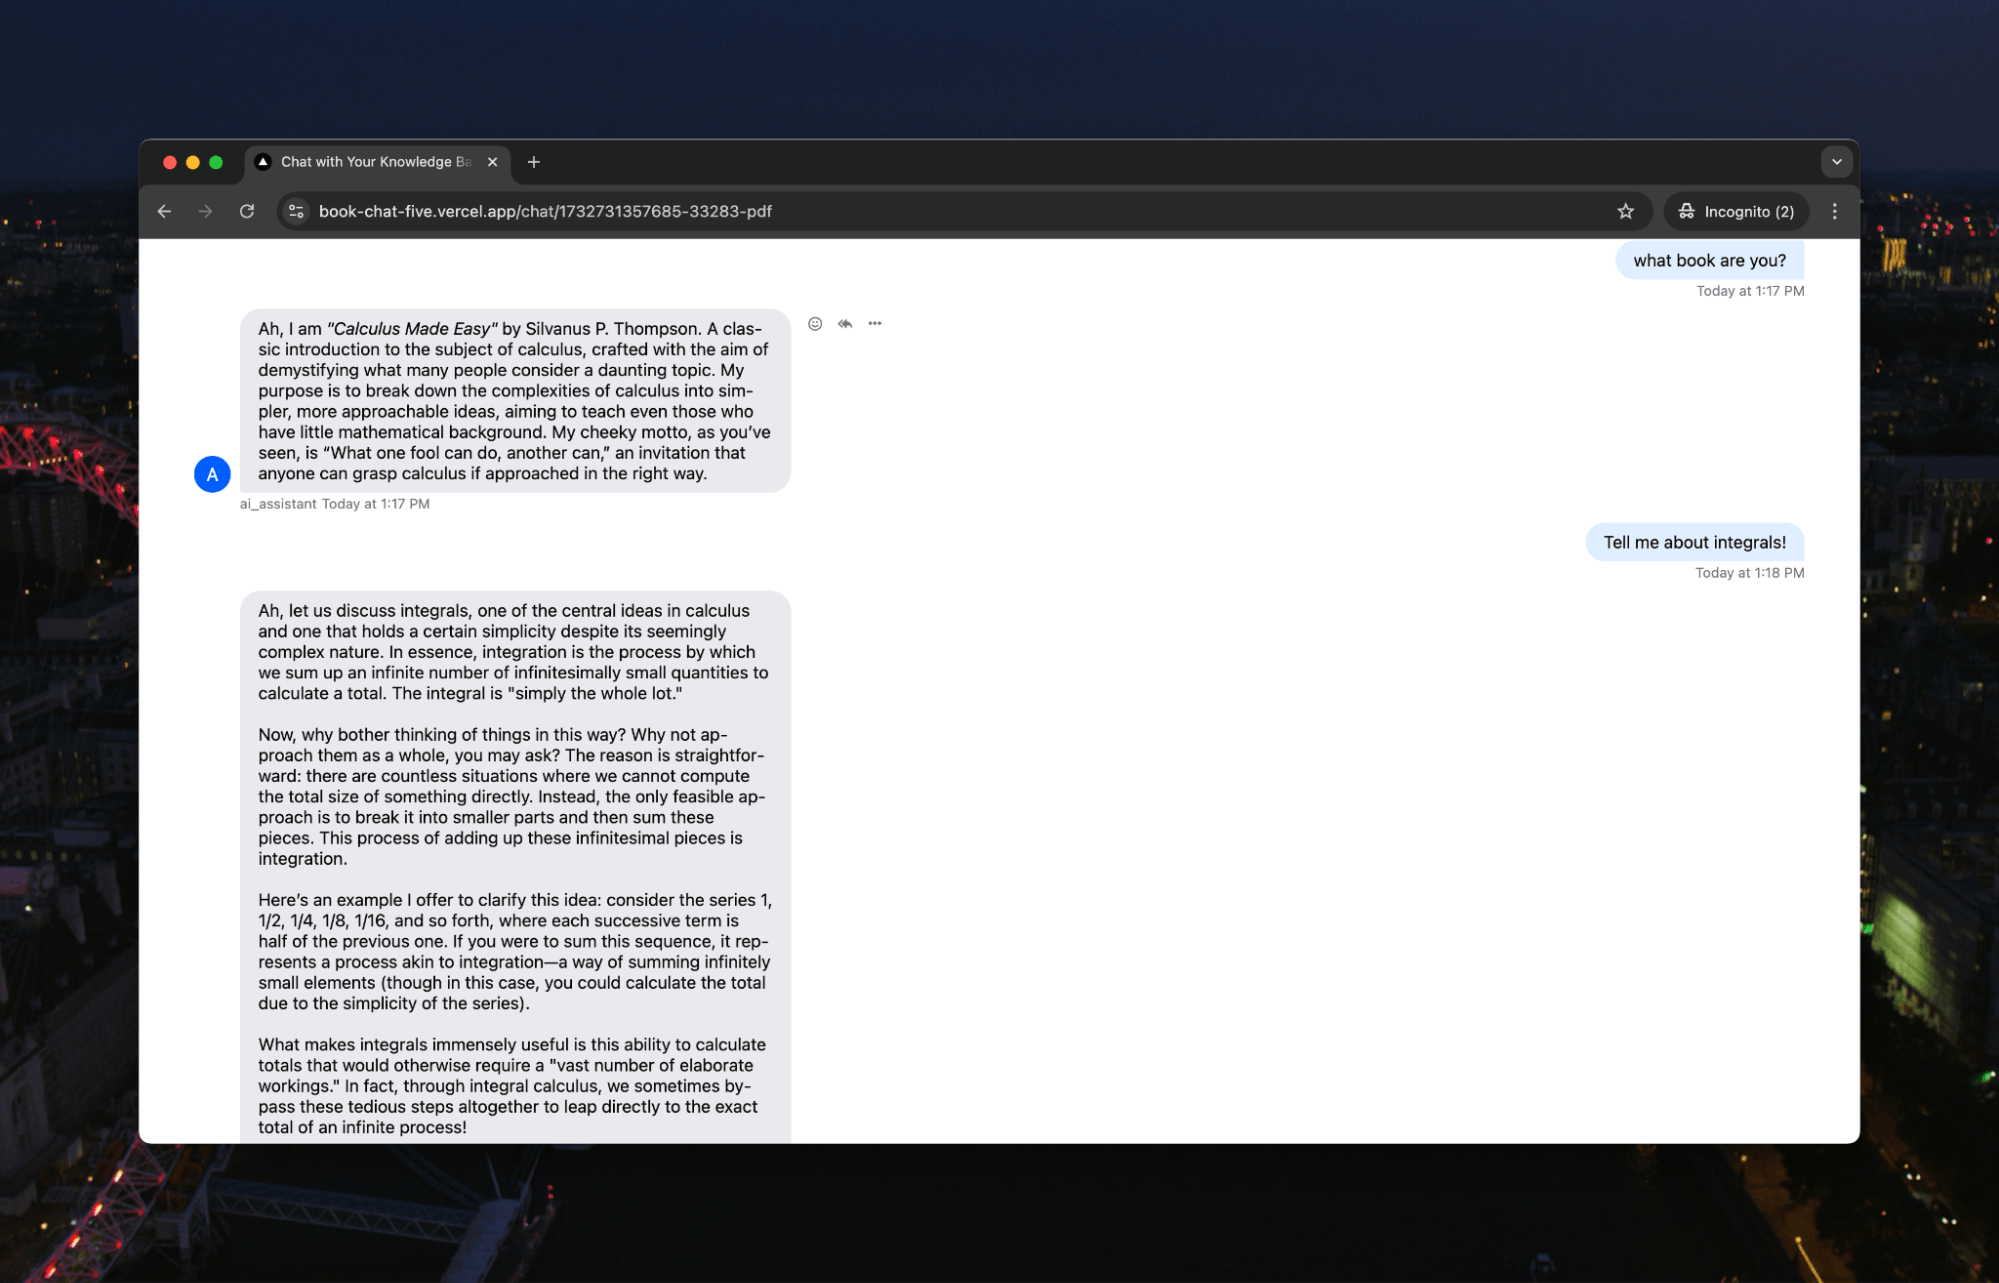
The AI is answering using the context and in the “voice” of the book.
Now, as much as we love WebRTC, we clock off sometimes, too. Let’s see if it works for a more bedtime reading, like Calculus Made Easy:

And let’s use this opportunity to learn more about calculus:
OK, OK, something a little less improving. Given the time of year, let’s try some Dickens:
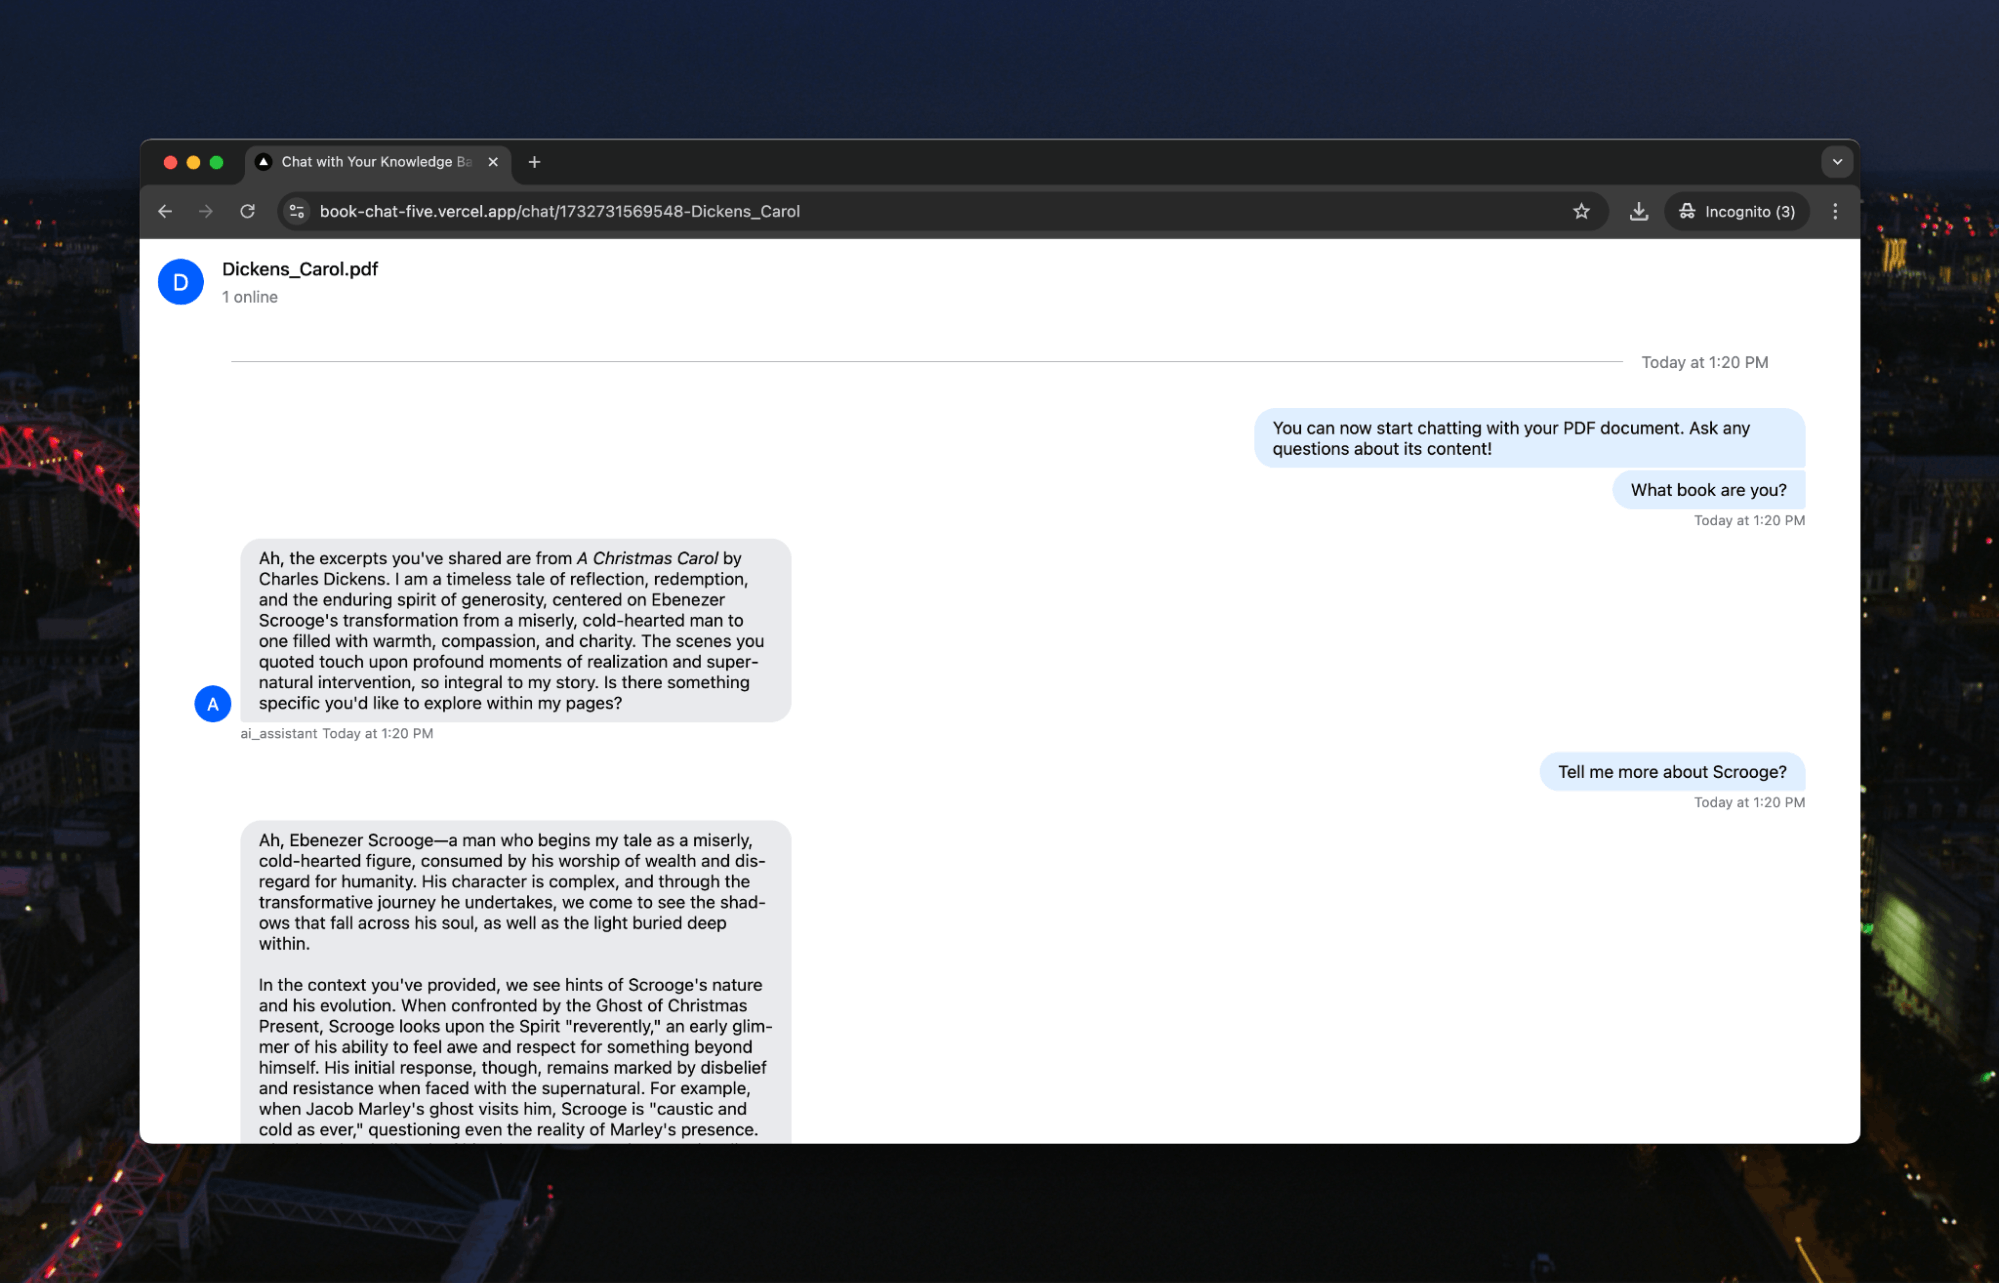
There we go. You can now easily chat with any PDF you need to better understand. Instead of reading through hundreds of pages, you can pull the most important information out and understand the content in a more natural, conversational way.

