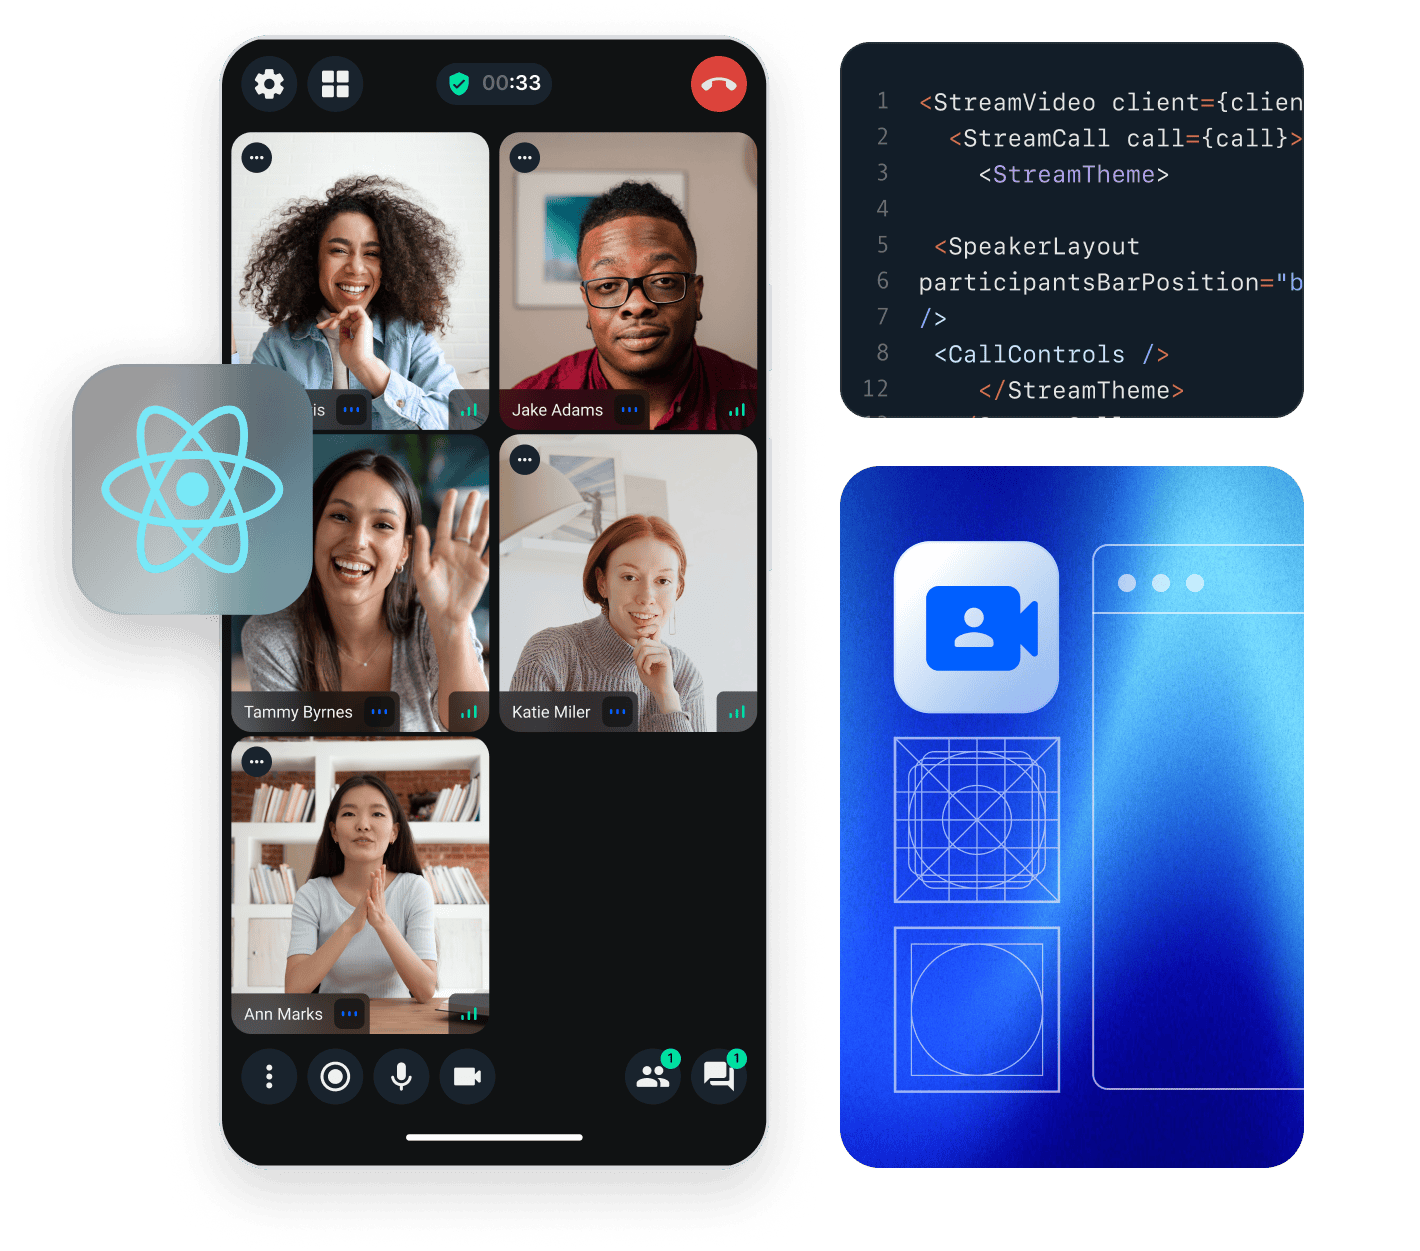
This tutorial teaches you how to build a Zoom/Whatsapp-style video calling app.
- All calls run on Stream's global edge network for optimal latency & reliability.
- Configuring permissions gives you fine-grained control over who can do what.
- Video quality and codecs are automatically optimized.
- The calling support is powered by Stream's Video Calling API.
Step 1 - Create a New React Native App
To create a new React Native app, you'll first need to set up your environment. Once you're set up, continue with the steps below to create an application and start developing.
You can use React Native Community CLI to generate a new project. Let's create a new React Native project called "VideoCallExample":
12npx @react-native-community/cli@latest init VideoCallExample
cd VideoCallExample
If you are having trouble with iOS, try to reinstall the dependencies by running:
cd iosto navigate to theiosfolderbundle installto install Bundlerbundle exec pod installto install the iOS dependencies managed by CocoaPods
Step 2 - Install the SDK and Declare Permissions
To install the Stream Video React Native SDK, run the following command in your terminal of choice:
1yarn add @stream-io/video-react-native-sdk @stream-io/react-native-webrtc
The SDK requires installing some peer dependencies. You can run the following command to install them:
123456yarn add react-native-svg
yarn add @react-native-community/netinfo
yarn add @notifee/react-native

# Install pods for iOS
npx pod-install
Declare Permissions
The video calling app we built in this tutorial requires permission to access the users' camera, microphone, and network state.
In AndroidManifest.xml add the following permissions before the application section.
1234567891011121314151617<manifest xmlns:android="http://schemas.android.com/apk/res/android">
  <uses-feature android:name="android.hardware.camera" />
  <uses-feature android:name="android.hardware.camera.autofocus" />
  <uses-feature android:name="android.hardware.audio.output" />
  <uses-feature android:name="android.hardware.microphone" />

  <uses-permission android:name="android.permission.CAMERA" />
  <uses-permission android:name="android.permission.RECORD_AUDIO" />
  <uses-permission android:name="android.permission.ACCESS_NETWORK_STATE" />
  <uses-permission android:name="android.permission.CHANGE_NETWORK_STATE" />
  <uses-permission android:name="android.permission.MODIFY_AUDIO_SETTINGS" />
  <uses-permission android:name="android.permission.INTERNET" />
  <!-- ... -->
  <application>
    <!-- ... -->
  </application>
</manifest>
In android/build.gradle add the following inside the buildscript section:
1234567buildscript {
    ext {
        // ...
        minSdkVersion = 24
    }
    // ...
}
Add the following keys and values to the Info.plist file, under the dict tag.
123456789101112<plist version="1.0">
<dict>
  ...
  <key>CFBundleName</key>
  <string>$(PRODUCT_NAME)</string>
  <key>NSCameraUsageDescription</key>
  <string>$(PRODUCT_NAME) would like to use your camera</string>
  <key>NSMicrophoneUsageDescription</key>
  <string>$(PRODUCT_NAME) would like to use your microphone</string>
  ...
</dict>
</plist>
Run the App
Due to the emulator's limitations in audio and video support, we highly recommend running the app on a physical device to ensure the best possible experience. For guidance on running the app on a physical device, refer to the React Native documentation.
Step 3 - Understand the Basics
Before we write code, you should be familiar with two concepts: StreamVideoClient and Call.
StreamVideoClientis the SDK's low-level JavaScript client communicating with the Stream Video service. It provides all the necessary methods to connect the user Stream service, query calls, create calls, etc.callrefers to an instance of theCallclass and is used for performing call-specific actions, such as joining a call, muting participants, leaving a call, and more.
12345678910111213141516171819202122232425262728293031import { StreamVideoClient } from '@stream-io/video-react-native-sdk';

const apiKey = 'REPLACE_WITH_API_KEY';
const user = {
  id: 'REPLACE_WITH_USER_ID',
  name: 'REPLACE_WITH_USER_NAME',
  image: 'REPLACE_WITH_USER_IMAGE',
};
const token = 'REPLACE_WITH_USER_TOKEN';
const callId = 'REPLACE_WITH_CALL_ID';

// create a client instance
const client = new StreamVideoClient({ apiKey, user, token });

// Alternatively, you can also choose to separate client creation and user connection:
// const client = new StreamVideoClient({ apiKey });
// await client.connectUser(user, token);

// create a call instance
const call = client.call('default', callId);
call.join({
  create: true, // create the call if it doesn't exist
  data: {
    members: [{ user_id: 'john_smith' }, { user_id: 'jane_doe' }],
    custom: {
      // custom data set on call
      title: 'React Native test',
      description: 'Conducting a test of React Native video calls',
    },
  },
});
In this example
apiKeyis the API key of your Stream Video application available on your dashboarduseris the user object, e.g.:{ id: "john_smith", "name": "John Smith" }tokenis the user token generated by your server-side API. You can use the token generated by the Token Generator for development. You can read more information about client authentication on the Client & Authentication guide.
The client and call instances are made accessible to all the video components from the SDK via the StreamVideo and StreamCall components, respectively.
In your app, you must wrap your component tree with the StreamVideo component and provide the client instance as a prop.
The client creation typically occurs during the application's sign-in stage. Similarly, you must wrap your call-specific UI components with the StreamCall component and provide the call instance as a prop.
The StreamVideo and StreamCall components are basically context providers, enabling you to consume hooks provided by the SDK.
These hooks do all the heavy lifting around call management and provide the necessary state and methods to build your UI.
1234567891011import { StreamVideo, StreamCall } from '@stream-io/video-react-native-sdk';

<StreamVideo client={client}>
  ...
  <StreamCall call={call}>
    <View>
      <Text>Video Call UI</Text>
    </View>
  </StreamCall>
  ...
</StreamVideo>
Step 4 - Setup a Starter UI
Let's begin by creating a basic UI for our video calling app. Usually, you would use a navigation library like React Navigation to navigate between screens.
But we'll keep this tutorial simple and mock the navigation using a state variable activeScreen.
Within your tutorial app, create a folder named src and create the following files within it:
src/HomeScreen.tsxsrc/CallScreen.tsx(takescallIdas a prop)
Now copy the following content into the respective files (as mentioned in the header):
1234567891011121314151617181920212223242526272829303132import React, { useState } from 'react';
import { StyleSheet } from 'react-native';
import { SafeAreaView } from 'react-native-safe-area-context';
import { HomeScreen } from './src/HomeScreen';
import { CallScreen } from './src/CallScreen';

const apiKey = 'REPLACE_WITH_API_KEY';
const token = 'REPLACE_WITH_TOKEN';
const userId = 'REPLACE_WITH_USER_ID';
const callId = 'REPLACE_WITH_CALL_ID';

export default function App() {
  const [activeScreen, setActiveScreen] = useState('home');
  const goToCallScreen = () => setActiveScreen('call-screen');
  const goToHomeScreen = () => setActiveScreen('home');

  return (
    <SafeAreaView style={styles.container}>
      {activeScreen === 'call-screen' ? (
        <CallScreen goToHomeScreen={goToHomeScreen} callId={callId} />
      ) : (
        <HomeScreen goToCallScreen={goToCallScreen} />
      )}
    </SafeAreaView>
  );
}

const styles = StyleSheet.create({
  container: {
    flex: 1,
  },
});
12345678910111213141516171819202122232425262728import React from 'react';
import { Button, StyleSheet, Text, View } from 'react-native';

type Props = { goToHomeScreen: () => void; callId: string };

export const CallScreen = ({ goToHomeScreen, callId }: Props) => {
  return (
    <View style={styles.container}>
      <Text style={styles.text}>Here we will add Video Calling UI</Text>
      <Button title='Go back' onPress={goToHomeScreen} />
    </View>
  );
};

const styles = StyleSheet.create({
  container: {
    flex: 1,
    justifyContent: 'center',
    backgroundColor: 'white',
  },
  text: {
    color: 'black',
    fontSize: 20,
    fontWeight: 'bold',
    marginBottom: 20,
    textAlign: 'center',
  },
});
123456789101112131415161718192021222324252627282930import React from 'react';
import {Text, Button, StyleSheet, View} from 'react-native';

type Props = {
  goToCallScreen: () => void;
};

export const HomeScreen = ({goToCallScreen}: Props) => {
  return (
    <View style={styles.container}>
      <Text style={styles.text}>Welcome to Video Calling Tutorial</Text>
      <Button title="Join Video Call" onPress={goToCallScreen} />
    </View>
  );
};

const styles = StyleSheet.create({
  container: {
    flex: 1,
    justifyContent: 'center',
    backgroundColor: 'white',
  },
  text: {
    color: 'black',
    fontSize: 20,
    fontWeight: 'bold',
    marginBottom: 20,
    textAlign: 'center',
  },
});
In App.tsx, we have hard-coded the placeholders of apiKey, userId, token and callId for the sake of simplicity in the tutorial.
To run this sample, we need a valid user token. The user token is typically generated by your server-side API.
When a user logs in to your app, you return the user token that gives them access to the call.
To make this tutorial easier to follow, we'll generate a user token for you.
You should see on your device the following UI.
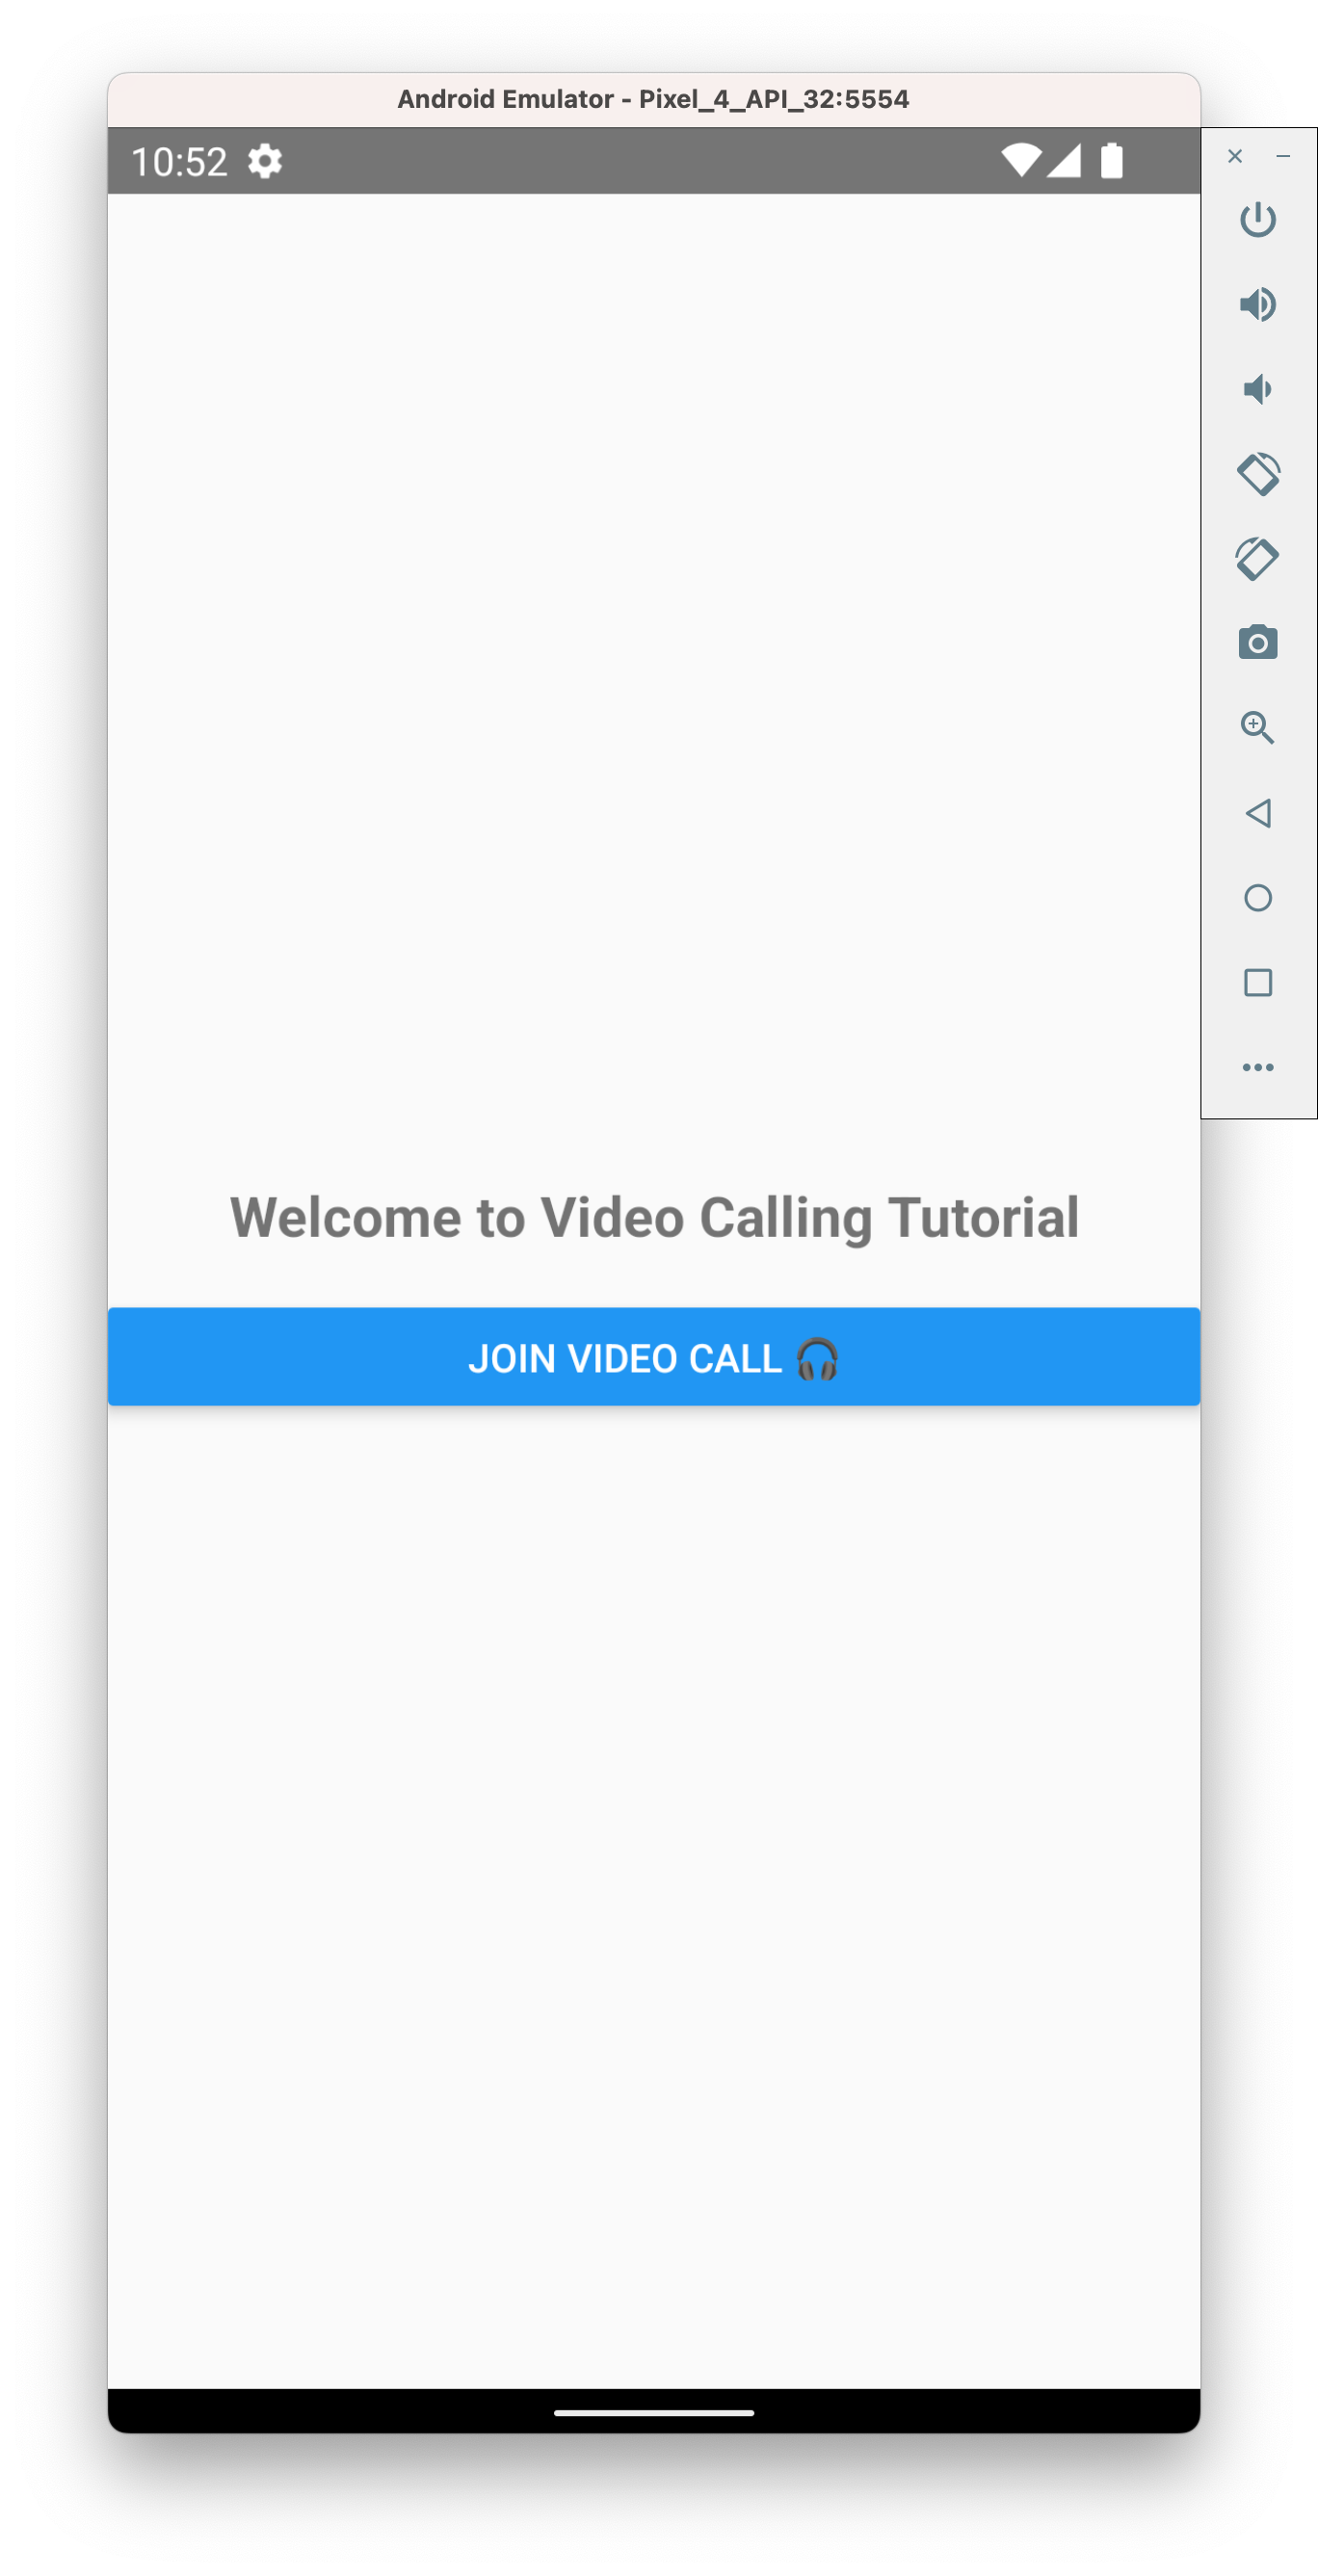 Preview of the Home Screen
![]() Preview of empty video UI
Preview of empty video UI
Step 5 - Setup the Video Client
Within this configuration, we will establish a StreamVideoClient instance and facilitate the user's connection to the Stream Video service.
In real applications, the client creation should be encapsulated within a useEffect hook and at component unmount, you should call client.disconnectUser() to avoid creating multiple websockets.
The client instance needs to be provided to the StreamVideo component, which will then provide the client instance to all the child components using React Context.
It needs to be at the top of the component tree.
1234567891011121314151617181920212223...
import {
  StreamVideo,
  StreamVideoClient,
} from '@stream-io/video-react-native-sdk';
...
const user = {
  id: userId,
  name: 'John Malkovich',
  image: 'https://robohash.org/John',
};
const client = new StreamVideoClient({ apiKey, user, token });

export default function App() {
  ...
  return (
    <StreamVideo client={client}>
      <SafeAreaView style={styles.container}>
        ...
      </SafeAreaView>
    </StreamVideo>
  );
}
You will not see any change in the UI at this point since we have yet to join the call.
Step 6 - Create & Join a Call
In this step, we will create and join a call. The call will be stored in a state variable call, which must be provided to the StreamCall component. As explained earlier, the SDK provides the StreamCall component, which provides all the necessary hooks for configuring the video calling app's UI. We will explore these hooks later in the tutorial.
Open src/CallScreen.tsx and replace its content with this code:
1234567891011121314151617181920212223...
import { Call, StreamCall } from '@stream-io/video-react-native-sdk';
...
export const CallScreen = ({ goToHomeScreen, callId }: Props) => {
  const [call, setCall] = React.useState<Call | null>(null);

  if (!call) {
    return (
      <View style={styles.container}>
        <Text style={styles.text}>Joining call...</Text>
      </View>
    );
  }

  return (
    <StreamCall call={call}>
      <View style={styles.container}>
        <Text style={styles.text}>Here we will add Video Calling UI</Text>
        <Button title="Go back" onPress={goToHomeScreen} />
      </View>
    </StreamCall>
  );
};
Also, as explained earlier in the Understand the Basics section, a call can be created or accessed using the client.call(...) method.
Thus, we need access to the client inside the CallScreen component. We will use the useStreamVideoContext hook to get access to the client instance.
We will put the joining logic inside the useEffect hook, so we automatically join the call when a user goes to the CallScreen.
1234567891011121314151617181920212223242526272829303132333435363738394041424344454647484950515253import React, {useEffect} from 'react';
import {
  ...
  useStreamVideoClient,
  useCallStateHooks,
  CallingState,
} from '@stream-io/video-react-native-sdk';

export const CallScreen = ({goToHomeScreen, callId}: Props) => {
  const [call, setCall] = React.useState<Call | null>(null);
  const client = useStreamVideoClient();

  useEffect(() => {
    const _call = client?.call('default', callId);
    _call?.join({ create: true })
      .then(() => setCall(_call));
  }, [client, callId]);

  useEffect(() => {
    return () => {
      // cleanup the call on unmount if the call was not left already
      if (call?.state.callingState !== CallingState.LEFT) {
        call?.leave();
      }
    };
  }, [call]);

  if (!call) {
    return (
      <View style={styles.container}>
        <Text style={styles.text}>Joining call...</Text>
      </View>
    );
  }

  return (
    <StreamCall call={call}>
      <View style={styles.container}>
        <Text style={styles.text}>Here we will add Video Calling UI</Text>
        <Button title="Go back" onPress={goToHomeScreen} />
        <ParticipantCountText />
      </View>
    </StreamCall>
  );
};

const ParticipantCountText = () => {
  const {useParticipantCount} = useCallStateHooks();
  const participantCount = useParticipantCount();
  return (
    <Text style={styles.text}>Call has {participantCount} participants</Text>
  );
};
The SDK's provided hooks, facilitated by the StreamCall component, allow access to all essential call information. As demonstrated above, the 'useCallStateHooks' hook will enable you to conveniently access a range of hooks related to the call's state. You can confidently depend on the most up-to-date state information by utilizing these hooks.
To enhance the interactivity of this tutorial moving forward, kindly follow these steps:
- Refresh the app, then tap the "Join Video Call" button within your mobile app.
- Access the web version of the video call in your browser by clicking the "Join Call" link to join the call. Please keep in mind that the link, by default, leads to a call corresponding to the call ID from the code snippet we've provided above.
Now after joining in the browser, you'll see the text update to Call has 2 participants in your mobile app.
Let's keep the browser tab open as you go through the tutorial.
Step 7 - Render the Video Calling UI
In this step, we will add the participant's view, which displays the participants' video and audio stream and other related information. It will also add buttons allowing users to control their audio and video streaming settings.
The CallContent adds the following things to the UI automatically:
- Indicators to visualize when someone is speaking.
- The quality of call participants' network.
- Layout support for multiple participants.
- Labels for the participants' names and the media stream's on/off status.
- A floating local video view.
- Buttons to toggle audio/video and to flip the camera.
- A button to end/terminate the call.
Update the CallScreen component as follows:
123456789101112-13-14-15+16+17+181920212223...
import {
  ...
  CallContent,
} from '@stream-io/video-react-native-sdk';

...
export const CallScreen = ({ goToHomeScreen, callId }: Props) => {
  ...
  return (
    <StreamCall call={call}>
      <View style={styles.container}>
        <Text style={styles.text}>Here we will add Video Calling UI</Text>
        <Button title="Go back" onPress={goToHomeScreen} />
        <ParticipantCountText />
        <CallContent
          onHangupCallHandler={goToHomeScreen}
        />
      </View>
    </StreamCall>
  );
};
...
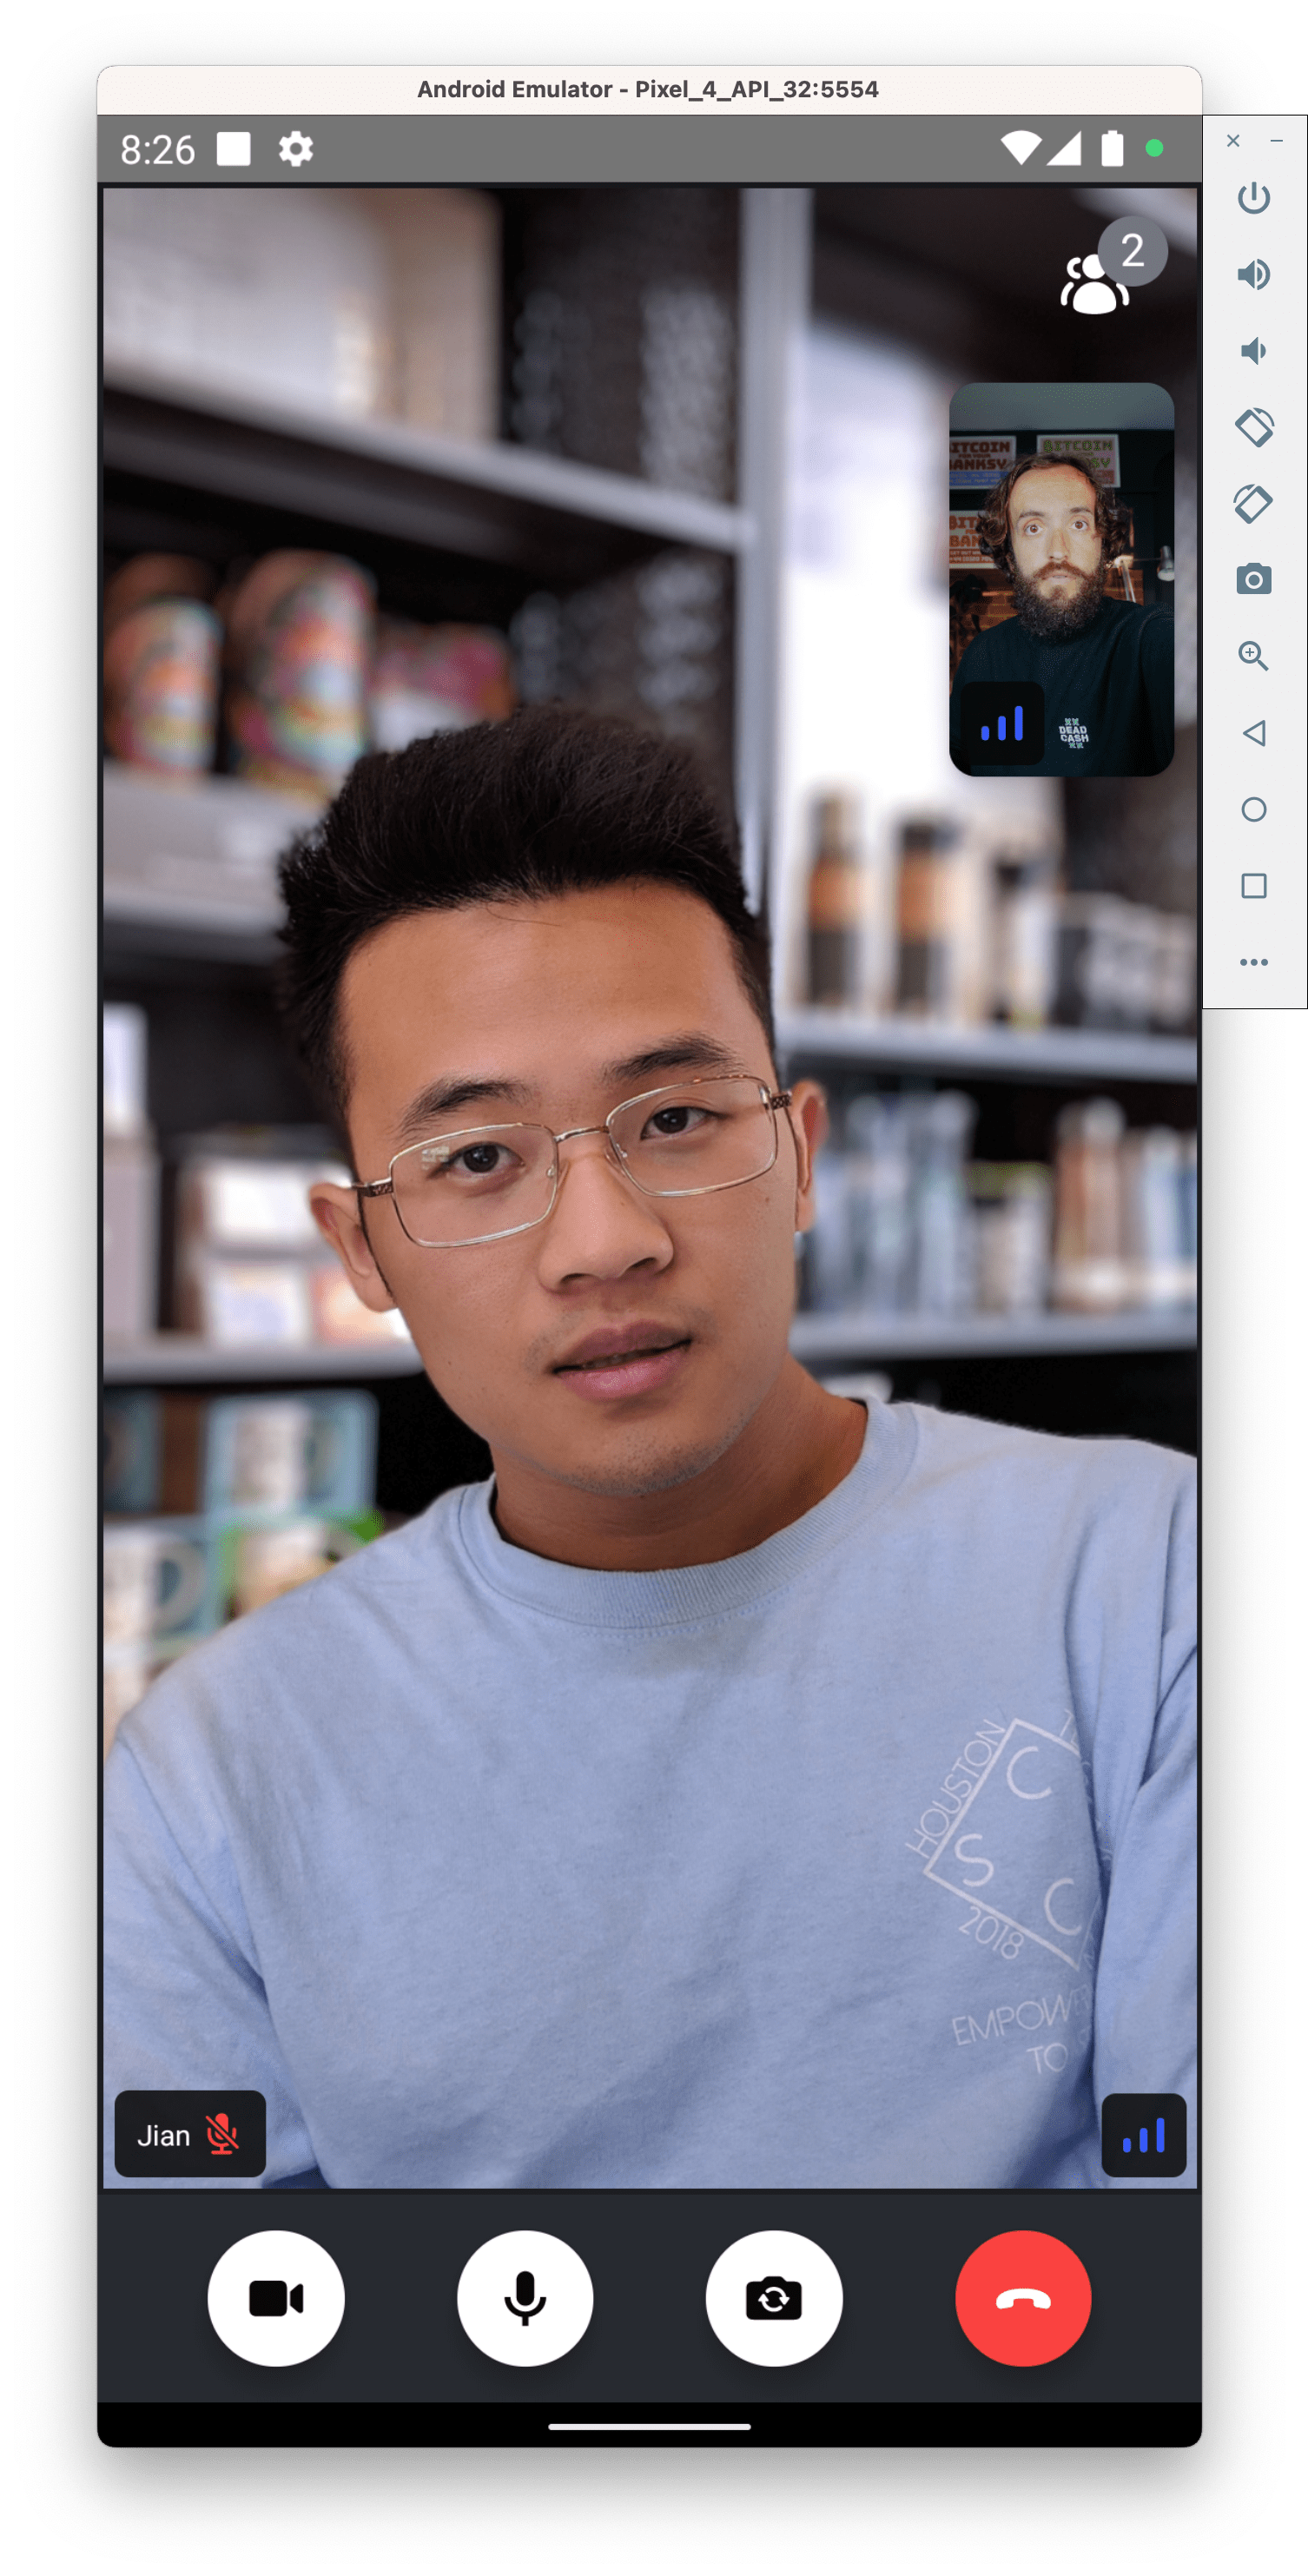
When you run the app, you'll see your local video in a floating video element and the video from your other browser tab. You should also see the buttons to control the streaming settings. The result should look like this:
Step 8 - Customize the Calling UI
You can customize the UI by:
- Building own UI components. This option provides the most flexibility to build any video calling experience you could imagine.
- Mixing and matching with Stream's UI Components. This option speeds you up to build common video UIs.
- Theming. The theming option provides basic customization of colors, fonts, icons, etc.
You can provide a custom component as prop to the CallContent component to customize the UI.
The example below shows how you can customize the UI.
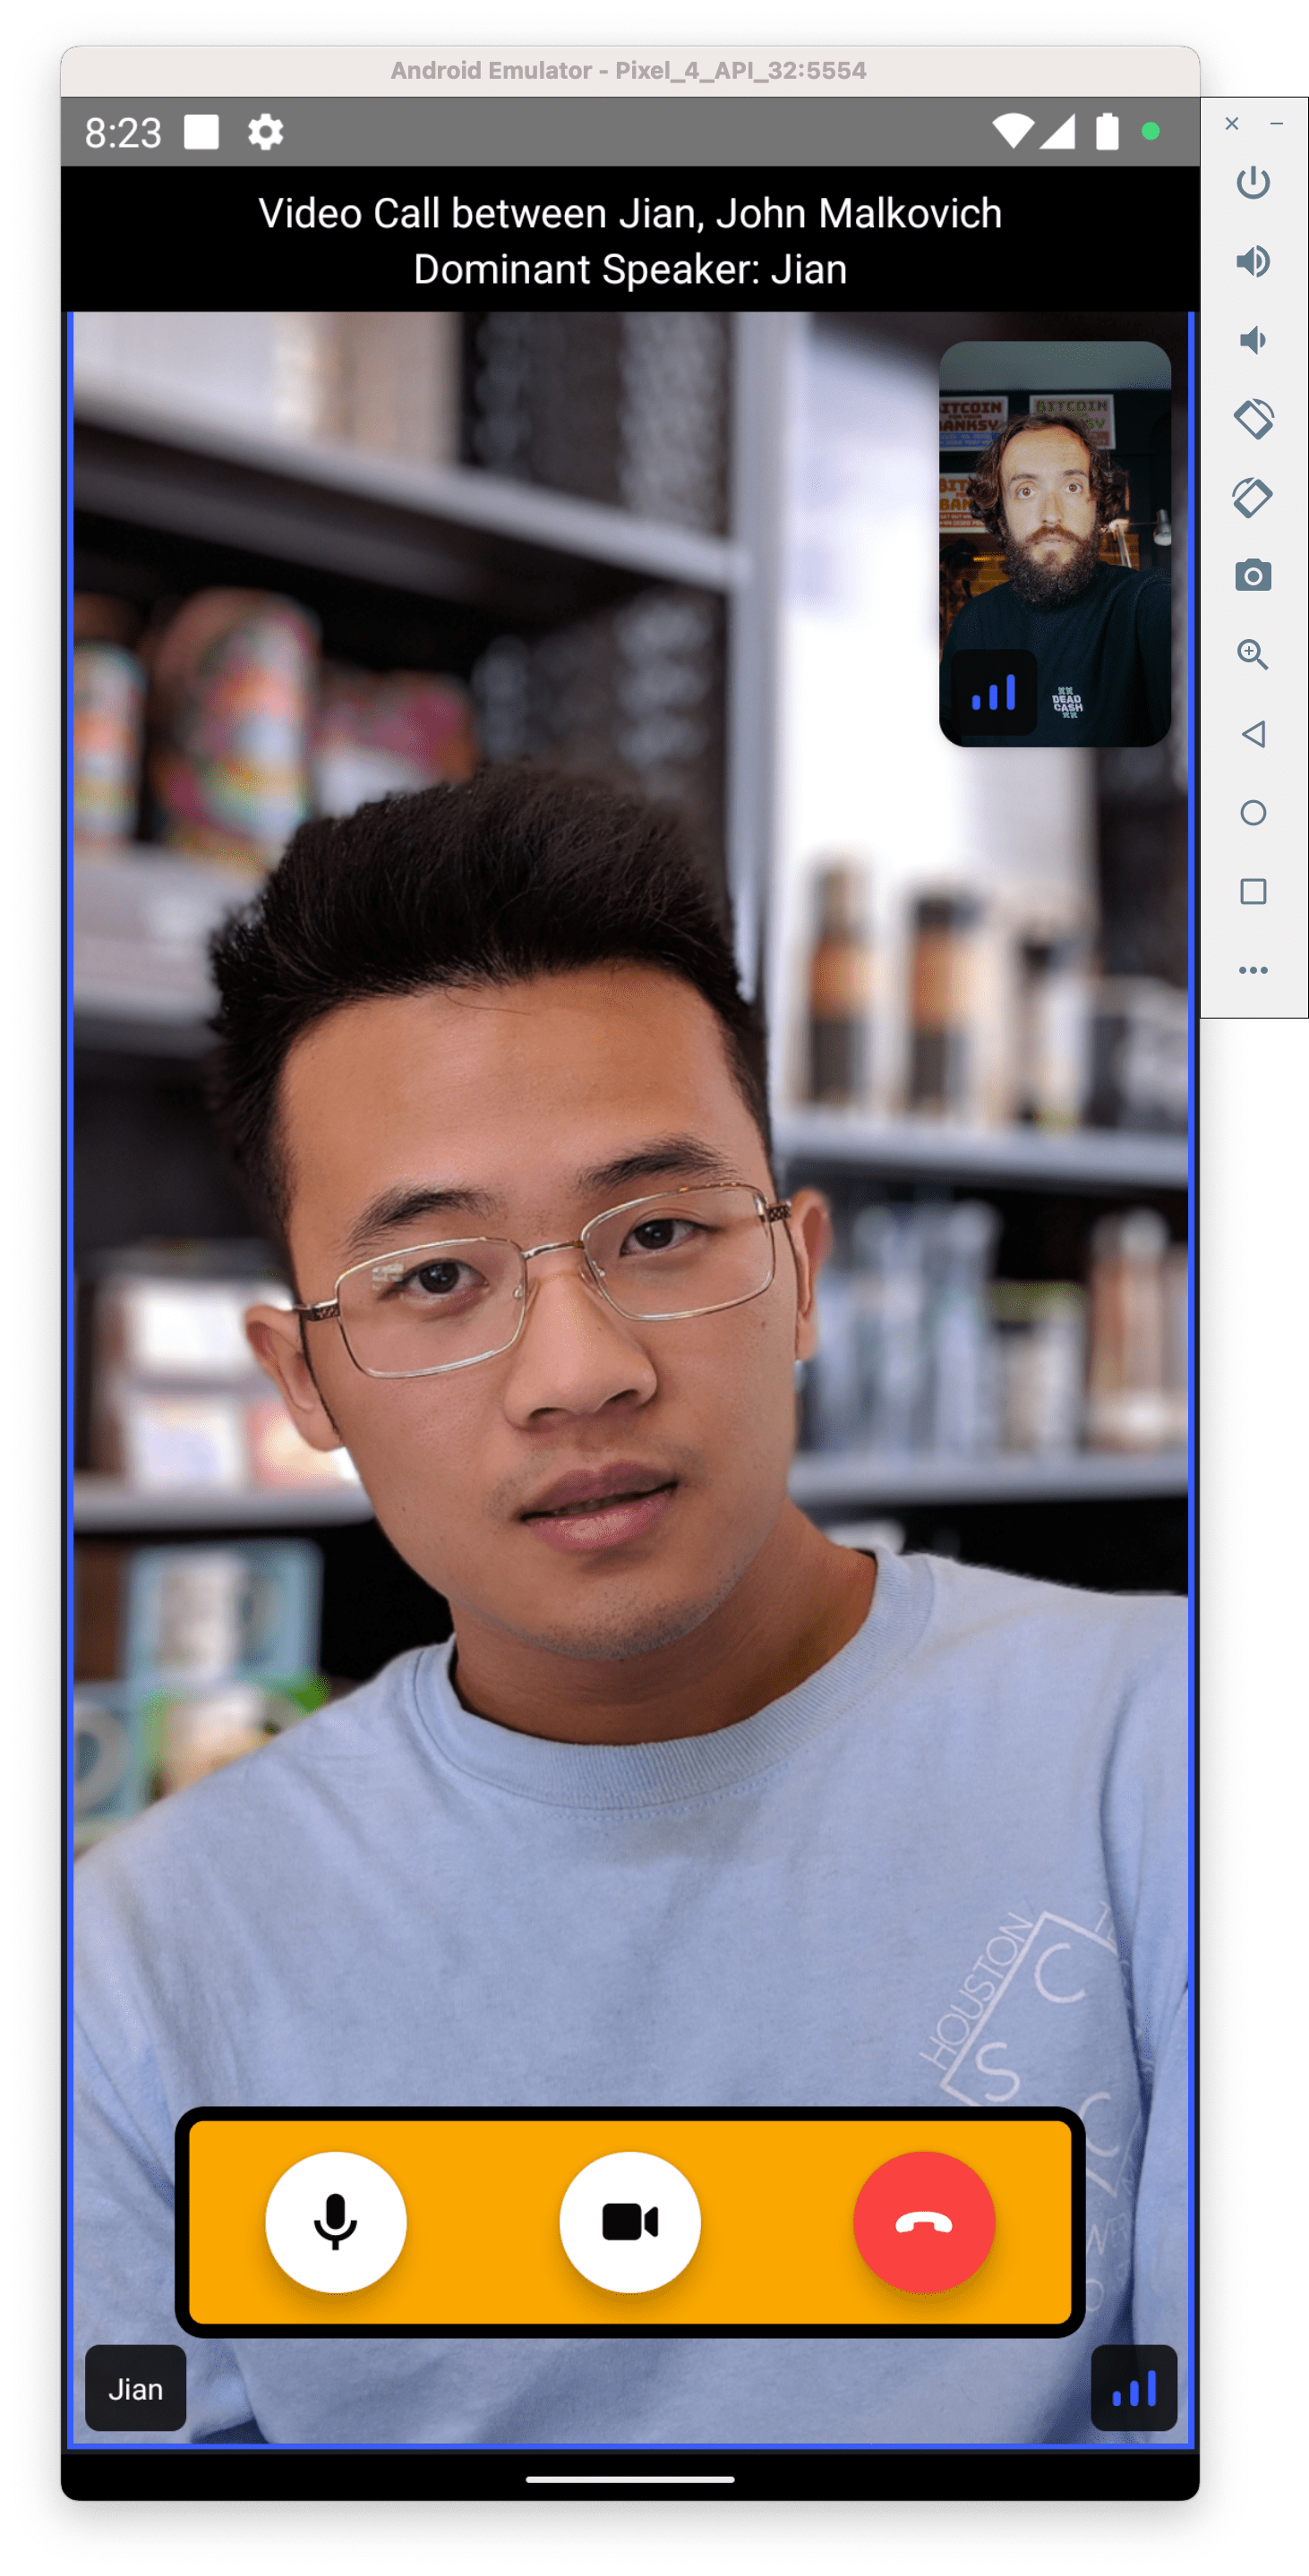
1234567891011121314151617181920212223242526272829303132333435363738394041424344454647484950515253545556...
import {
  ...
  StreamCall,
  CallControlProps,
  HangUpCallButton,
  ToggleAudioPublishingButton as ToggleMic,
  ToggleVideoPublishingButton as ToggleCamera,
  useCall,
  useStreamVideoClient,
} from '@stream-io/video-react-native-sdk';
import {callId} from '../config';

const CustomCallControls = (props: CallControlProps) => {
  const call = useCall();
  return (
    <View style={styles.customCallControlsContainer}>
      <ToggleMic onPressHandler={call?.microphone.toggle} />
      <ToggleCamera onPressHandler={call?.camera.toggle} />
      <HangUpCallButton onHangupCallHandler={props.onHangupCallHandler} />
    </View>
  );
};
...
export const CallScreen = ({goToHomeScreen, callId}: Props) => {
  ...
  return (
    <StreamCall call={call}>
      <View style={styles.container}>
        <CallContent
          onHangupCallHandler={goToHomeScreen}
          CallControls={CustomCallControls}
        />
      </View>
    </StreamCall>
  );
};

const styles = StyleSheet.create({
  ...
  customCallControlsContainer: {
    position: 'absolute',
    bottom: 40,
    paddingVertical: 10,
    width: '80%',
    marginHorizontal: 20,
    flexDirection: 'row',
    alignSelf: 'center',
    justifyContent: 'space-around',
    backgroundColor: 'orange',
    borderRadius: 10,
    borderColor: 'black',
    borderWidth: 5,
    zIndex: 5,
  },
});

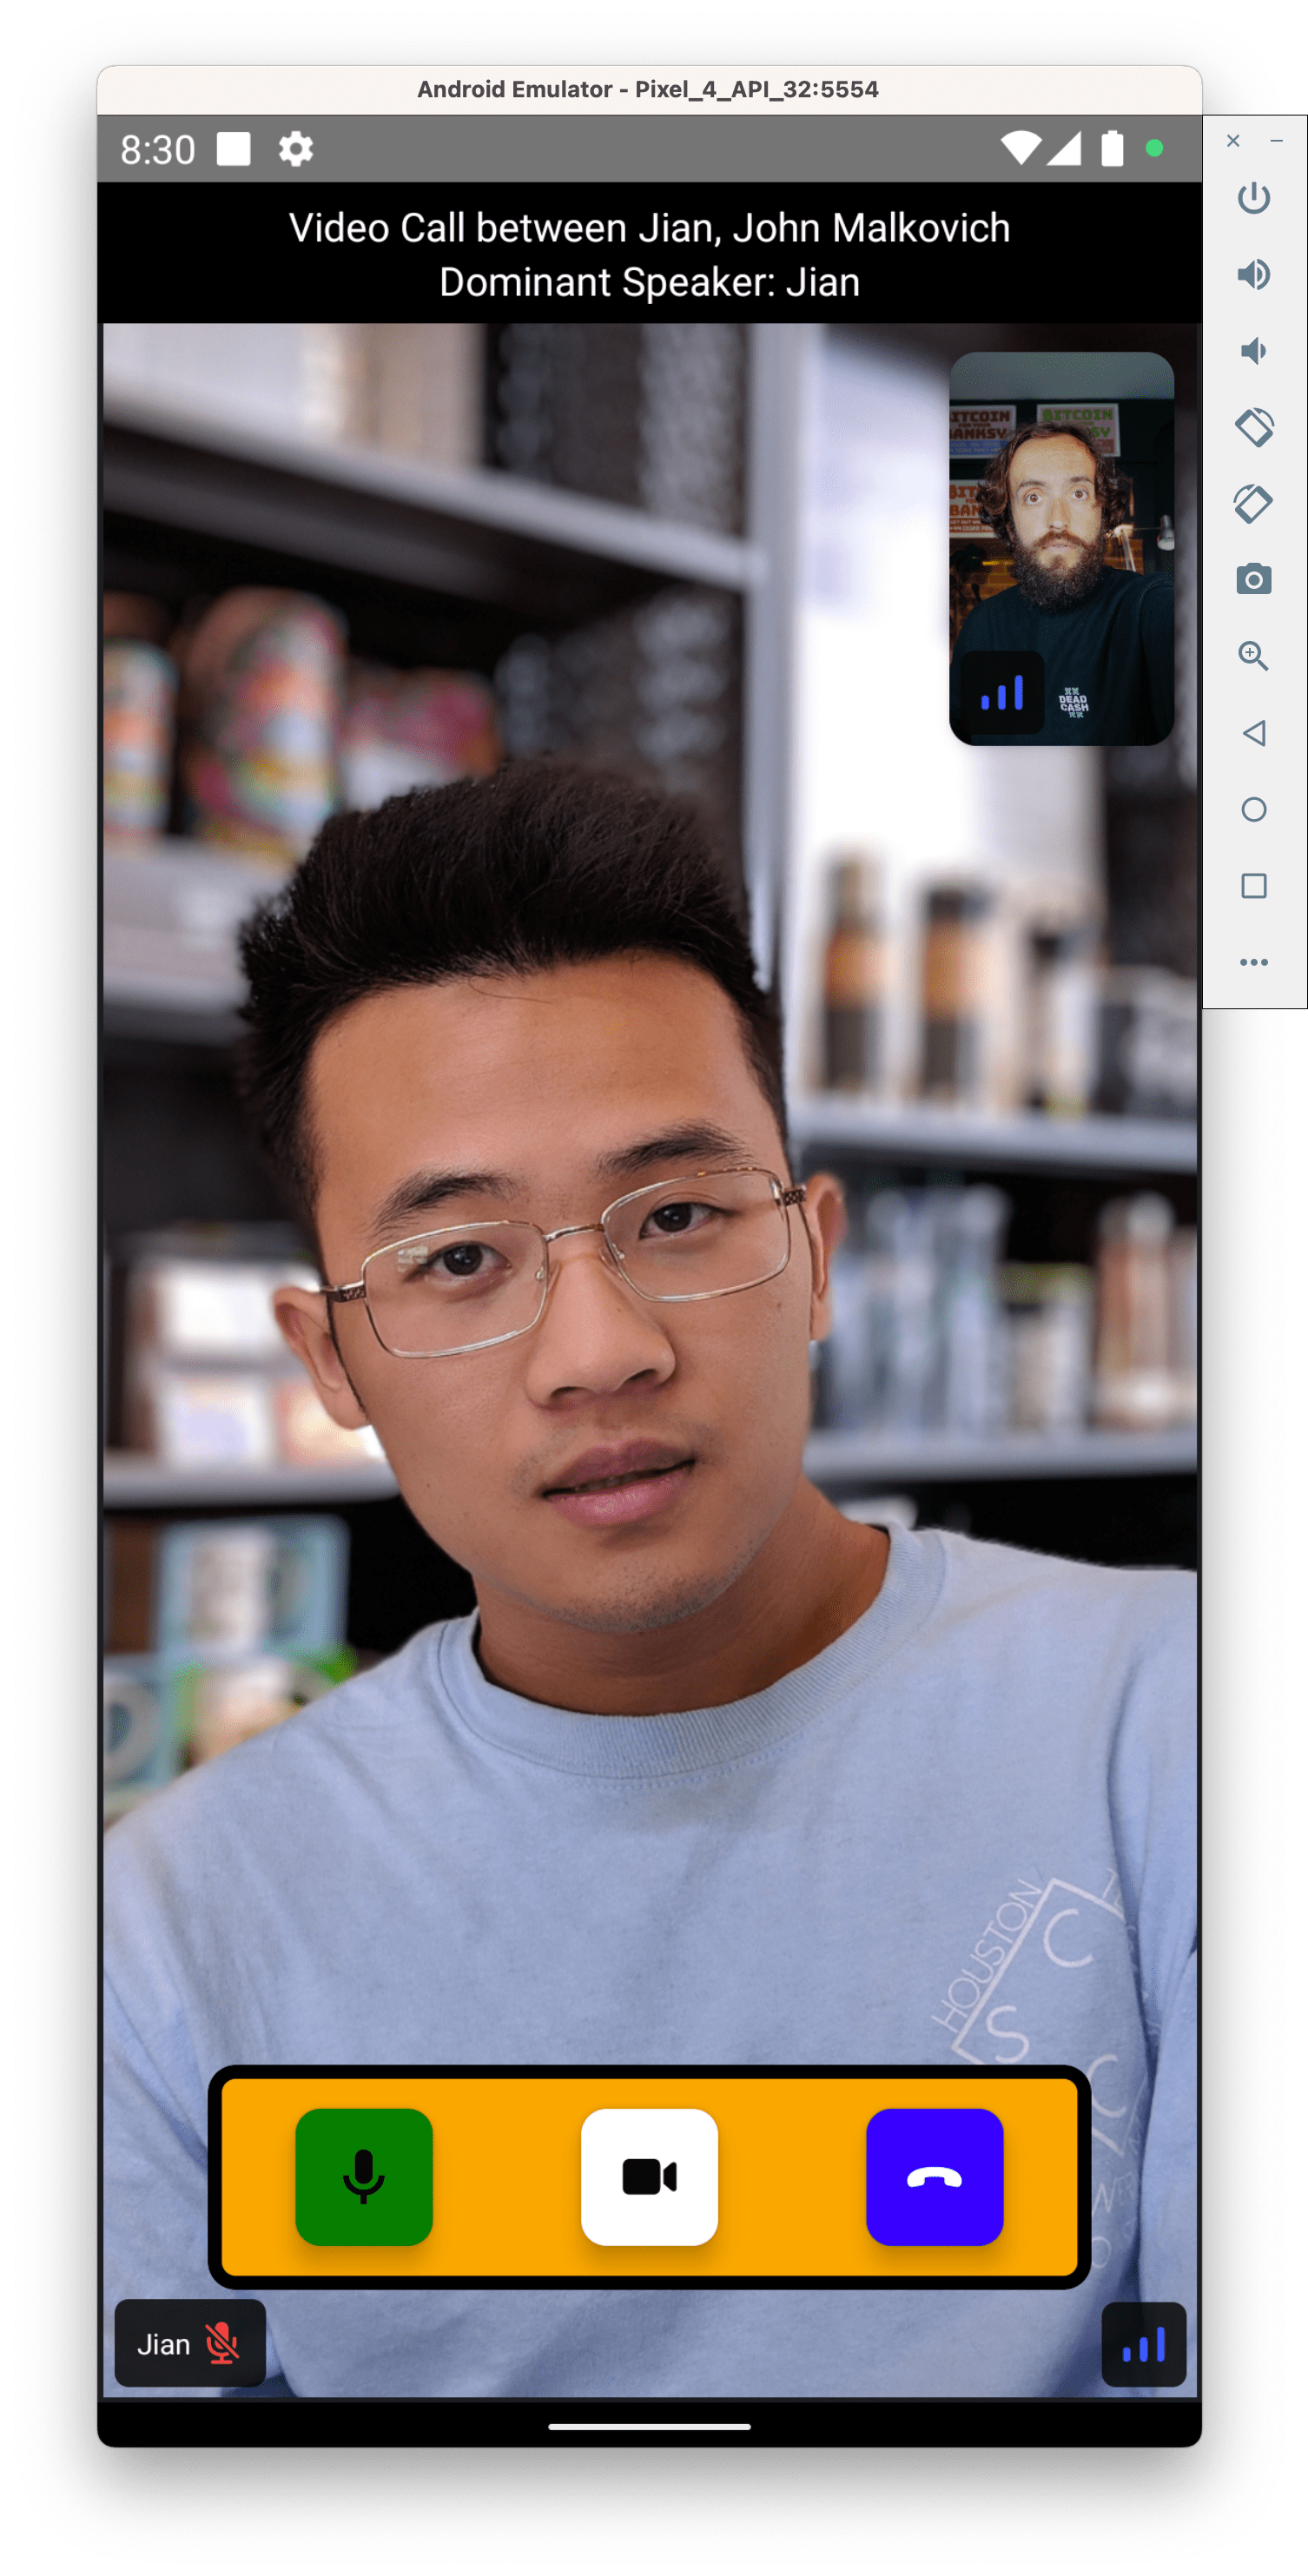
In the following example, we will use call related data provided by call state hooks and combine usage of CallContent component with a custom top bar component for displaying call participants details:
- current participants in the call.
- name of the dominant speaker.
123456789101112131415161718192021222324252627282930313233343536373839404142434445464748495051525354555657import {
  ...
  useStreamVideoClient,
  useCallStateHooks,
} from '@stream-io/video-react-native-sdk';

...

const CustomTopView = () => {
  const {useParticipants, useDominantSpeaker} = useCallStateHooks();
  const participants = useParticipants();
  const dominantSpeaker = useDominantSpeaker();
  return (
    <View style={styles.topContainer}>
      <Text
        ellipsizeMode="tail"
        numberOfLines={1}
        style={styles.topText}>
        Video Call between {participants.map(p => p.name).join(', ')}
      </Text>
      {dominantSpeaker?.name && (
        <Text style={styles.topText}>
          Dominant Speaker: {dominantSpeaker?.name}
        </Text>
      )}
    </View>
  );
};

export const CallScreen = ({goToHomeScreen, callId}: Props) => {
  ...
  return (
    <StreamCall call={call}>
      <View style={styles.container}>
        <CustomTopView/>
        <CallContent
          onHangupCallHandler={goToHomeScreen}
          CallControls={CustomCallControls}
        />
      </View>
    </StreamCall>
  );
};

const styles = StyleSheet.create({
  ...
  topContainer: {
    width: '100%',
    height: 50,
    backgroundColor: 'black',
    justifyContent: 'center',
    alignItems: 'center',
  },
  topText: {
    color: 'white',
  },
});
You can also adjust the style of the underlying UI using the style prop on StreamVideo component.
The complete array of properties that can be themed is available within the theme file.
12345678910111213141516171819202122232425262728293031323334import React, {useMemo, useState} from 'react';
...

export default function App() {
  ...
  // Avoid passing inline styles to the component, as it will cause unnecessary re-renders
  const theme = useMemo(
    () => ({
      callControlsButton: {
        container: {
          borderRadius: 10,
        },
      },
      hangupCallButton: {
        container: {
          backgroundColor: 'blue',
        },
      },
      toggleAudioPublishingButton: {
        container: {
          backgroundColor: 'green',
        },
      },
    }),
    [],
  );
  ...
  return (
    <StreamVideo client={client} style={theme}>
      ...
    </StreamVideo>
  );
...
}
Recap
Please let us know if you encounter issues building a video calling app with our React Native SDK. Our team is also happy to review your UI designs and advise you on how to integrate them with Stream.
To recap what we've learned about Stream's video calling service:
- You set up a call: (
const call = client.call("default", "your-call-id")). - The call type ("default" in the above case) controls which features are enabled and how permissions are set.
- When you join a call, real-time communication is set up for audio & video calling: (
call.join()). - State-related hooks such as
useCallCallingStatemake it easy to build your UIs. - The
CallContentcomponent renders audio and video and adds buttons to control streaming options.
Using the Stream's Video Calling API, all calls run on a global edge network of video servers closer to all users. Being closer to your users improves call latency and reliability. The React Native SDK enables you to build in-app video calling, audio rooms, and live streaming in days.
We hope you've enjoyed this tutorial. Please feel free to reach out if you have any suggestions or questions.
Final Thoughts
In this video calling app tutorial we built a fully functioning React Native video app with our React Native SDK component library. We also showed how easy it is to customize the behavior and the style of the React Native video app components with minimal code changes.
Both the video SDK for React Native and the API have plenty more features available to support more advanced use cases.