
Android Studio makes it easy to push changes to your favorite Open Source, professional, or personal projects on GitHub. In this tutorial, we'll learn how to use GitHub with Android Studio. We'll use an Open Source contribution for context.
Android developers use Open Source projects to speed up development or enable functionality that is otherwise impractical to build. Therefore it's essential to understand how to give back and improve the Open Source projects that we use.
Requirements
- A GitHub account
- Android Studio installed
Selecting project
First of all, to which Open Source project should you contribute? You can contribute to any project, but, ideally, it's one that you know and use.
In this tutorial, I'll use a contribution to Stream Chat's library for Android as an example. It's a popular SDK to ship high-quality chat experiences on Android.
Discover how easy it can be to build chat into your app with our Android In-App Messaging tutorial.
What to contribute
Sometimes, during the usage of an Open Source library, we encounter bugs that we wish were fixed and missing features that we want added. When that happens, it's tempting to request it to the maintainer(s) and hope for the best, or even search for another library. However, it's essential first to consider contributing with that bug fix or feature we want. It's often not as complicated as we may think.
Alternatively, we may want to contribute to the project in general and select a request that's made by the community. In this case, the best way to find an idea is to look through the issues list and select an issue that seems simple enough for a first contribution.
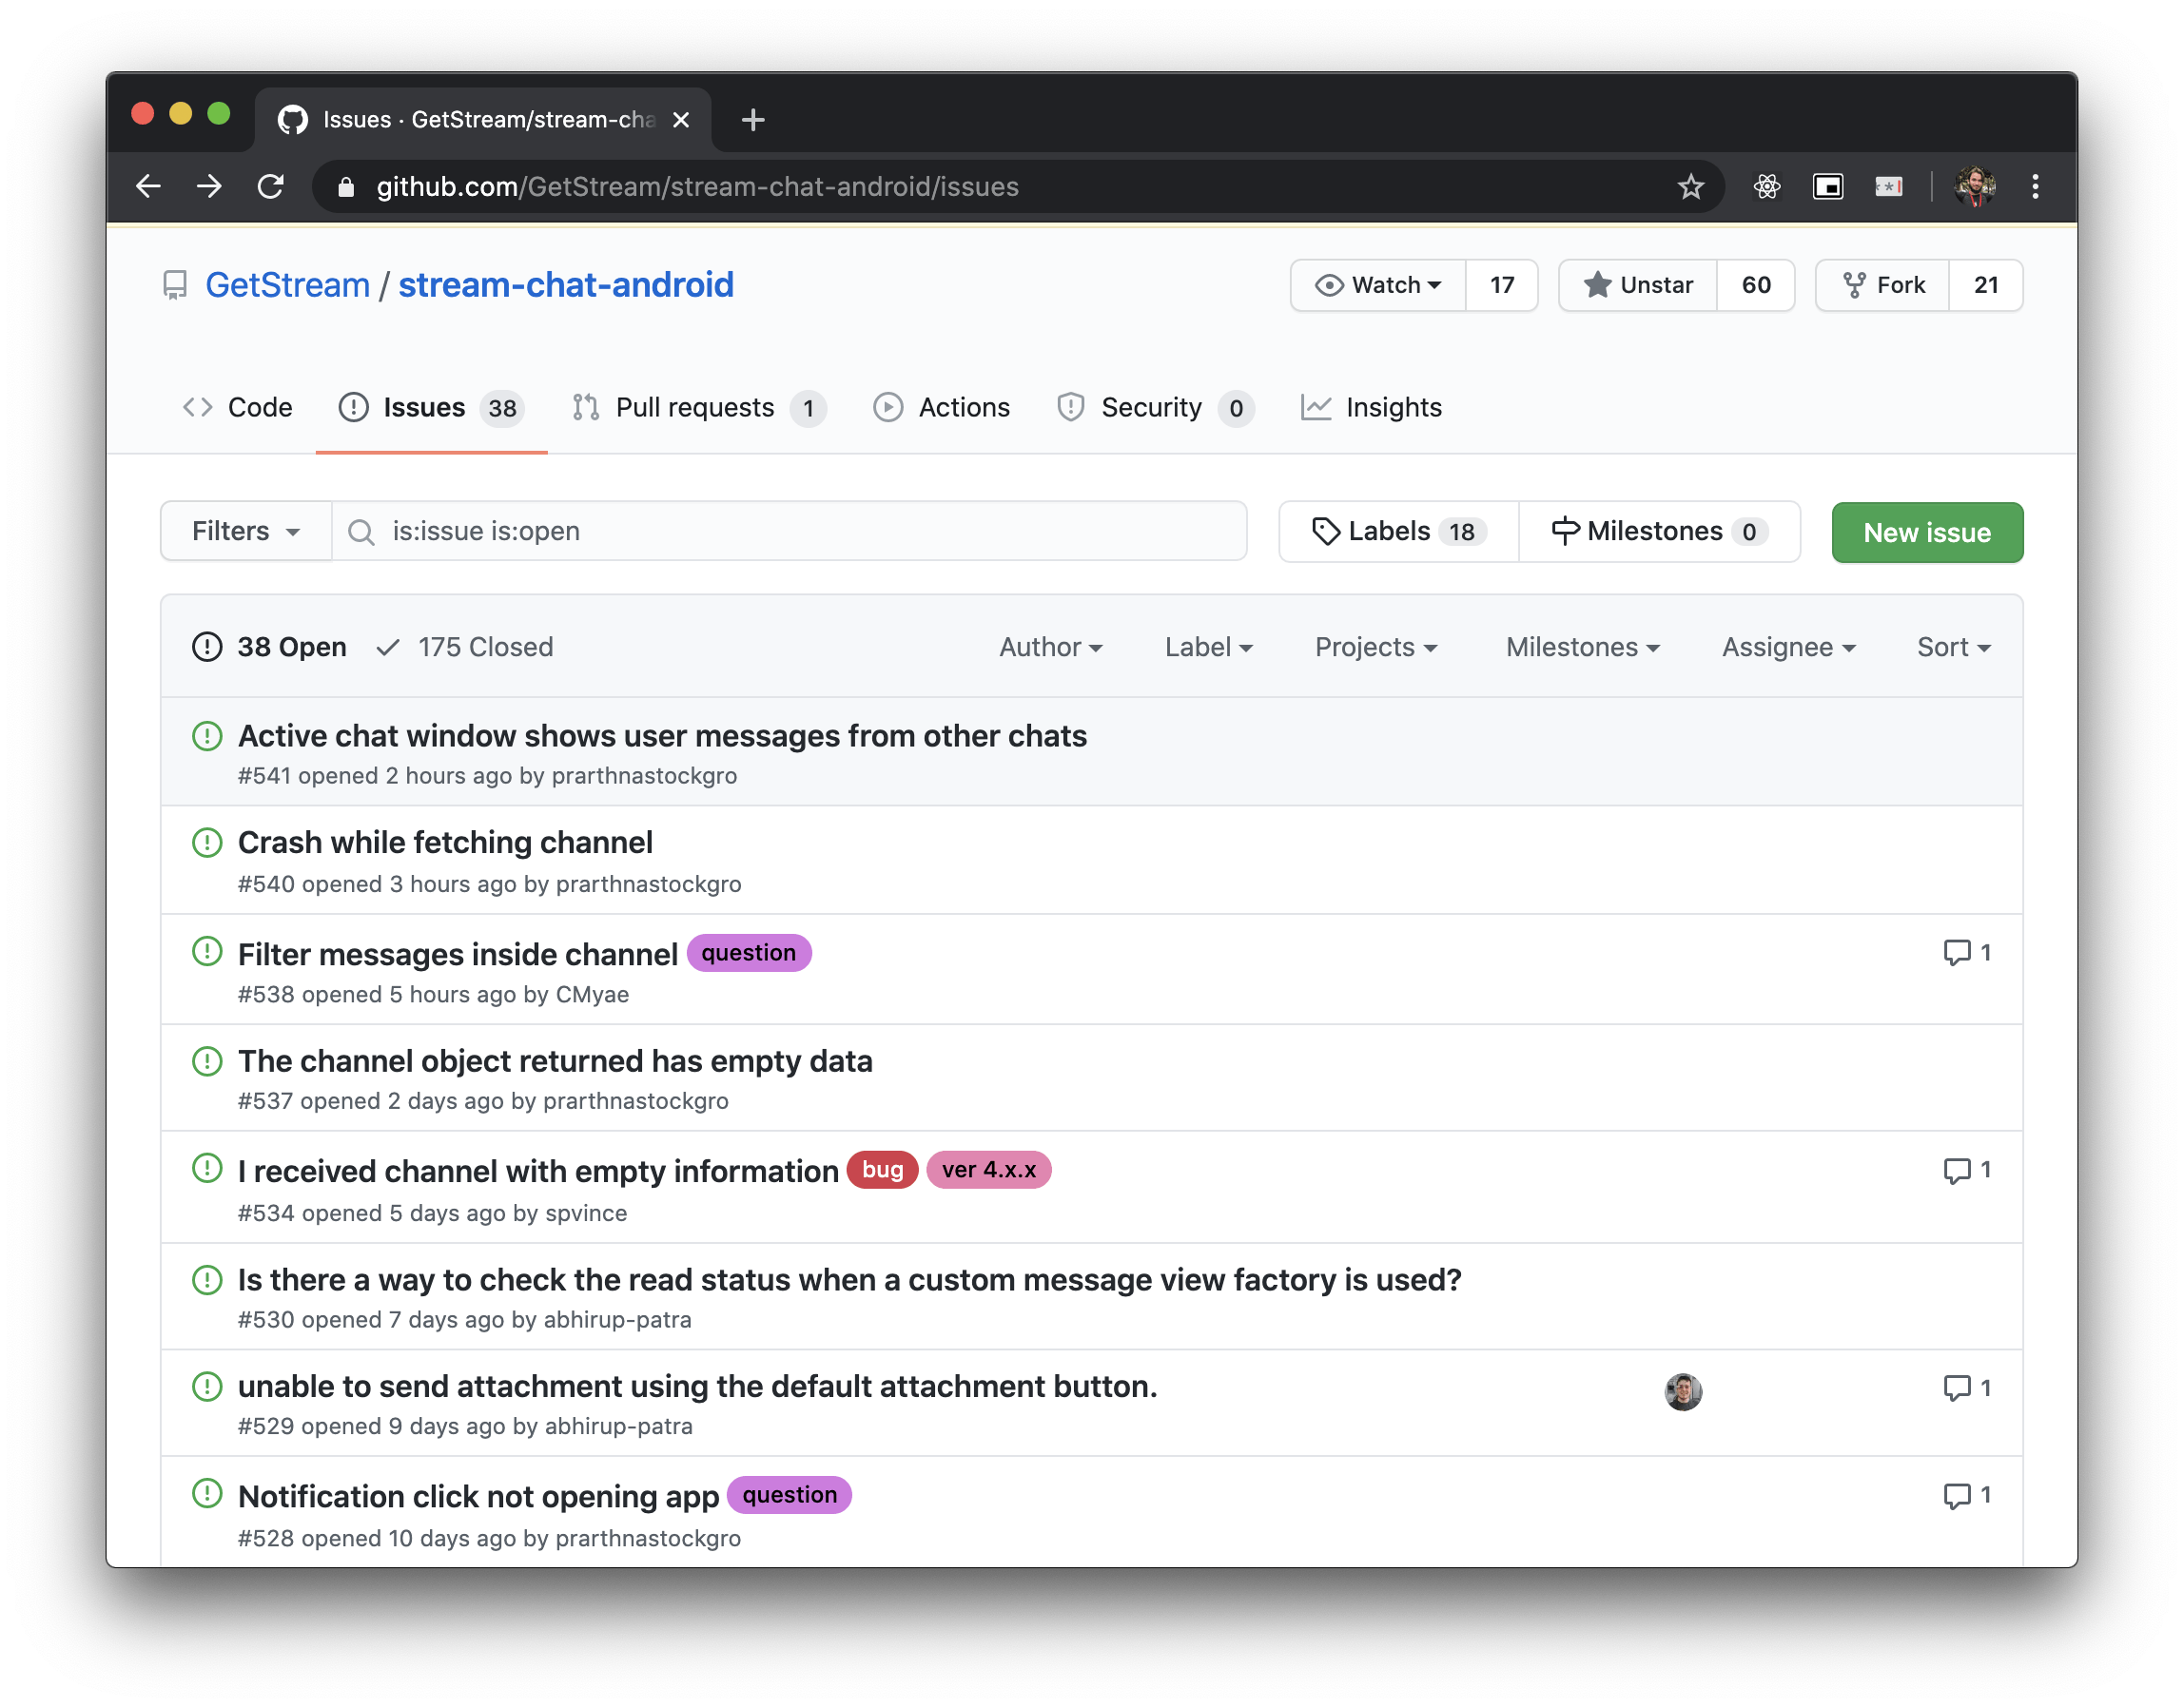
For this tutorial, I'll fix a bug that I encountered while testing the sample app. In this case, the sample app crashed when pressing an image inside the chat, instead of showing it in full screen.
Cloning the repository
With Android Studio, you don't need to use the terminal to contribute to an Android project on GitHub. It has native integration with git and GitHub to allow most actions via the Android Studio UI.
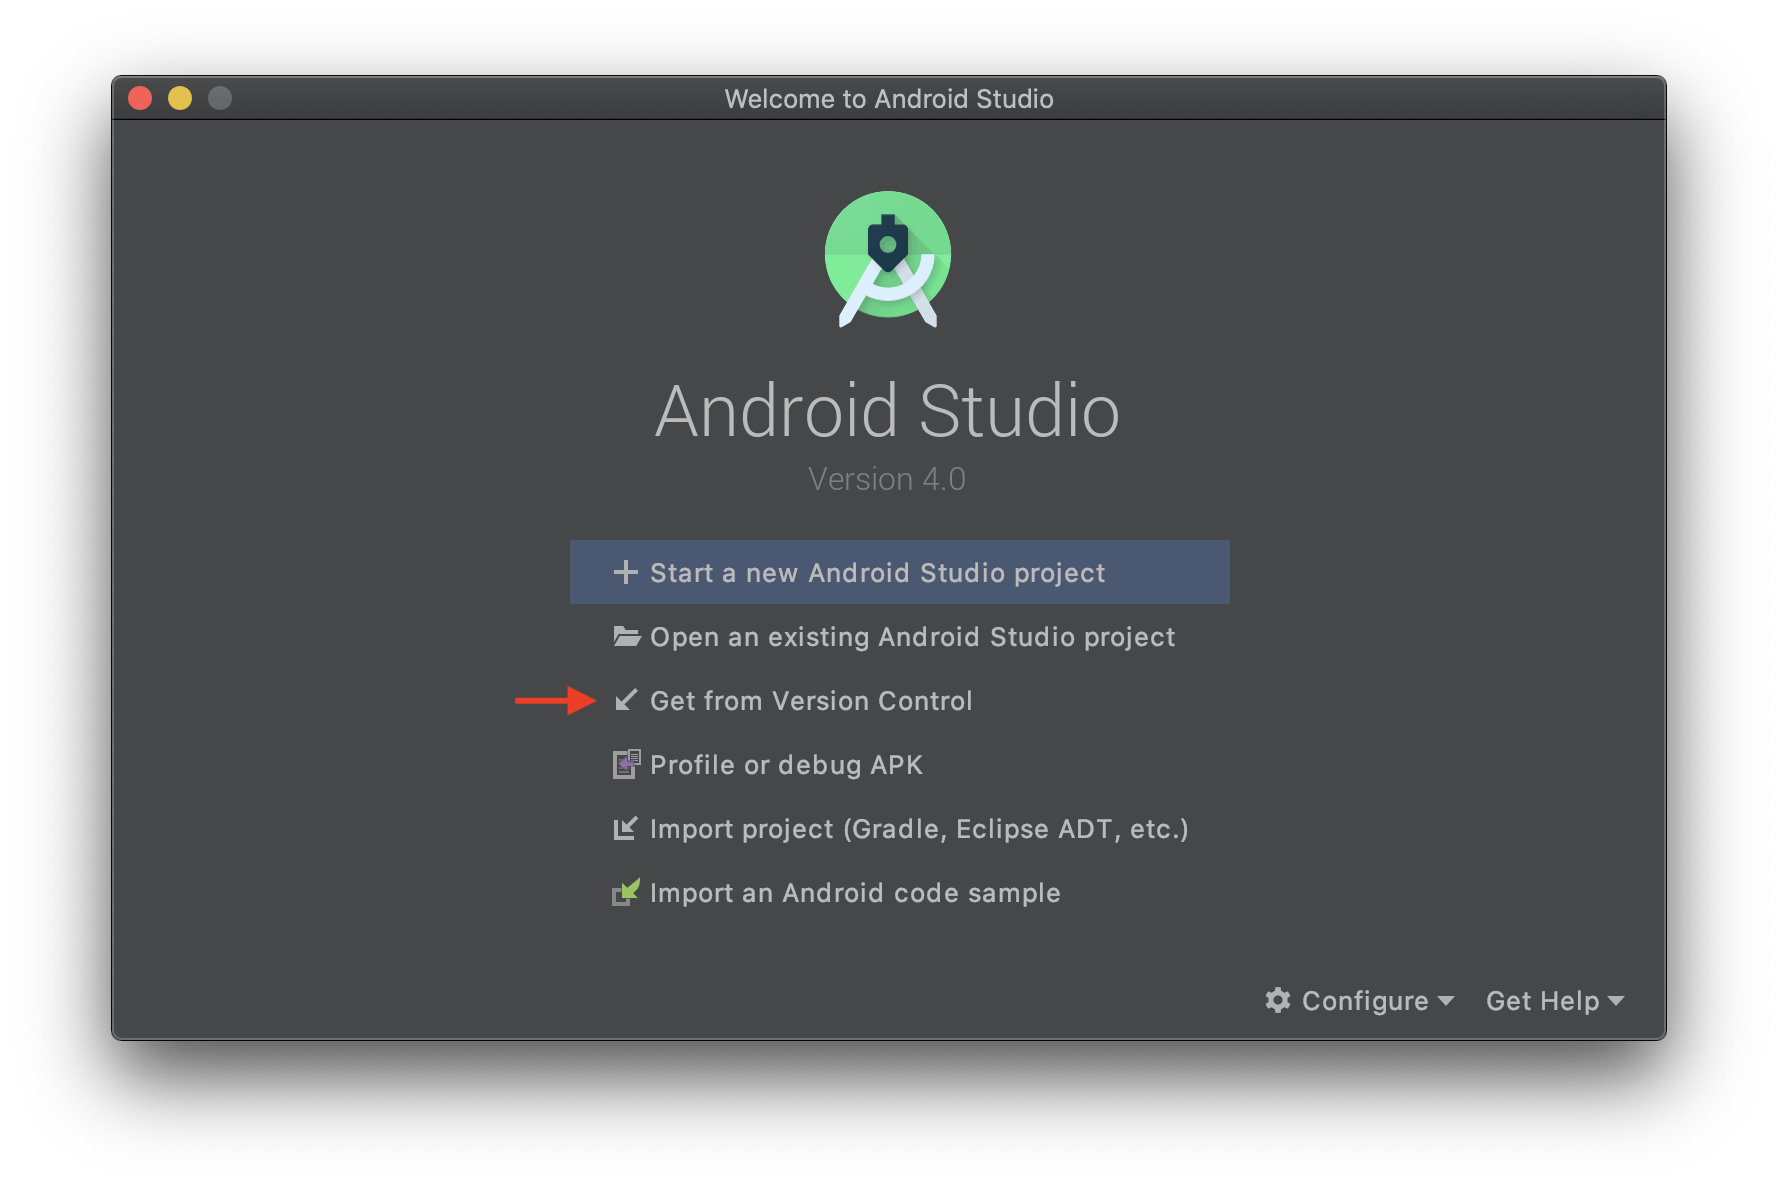
When you open Android Studio, it offers the option to open a project from version control. That's the option we'll use.
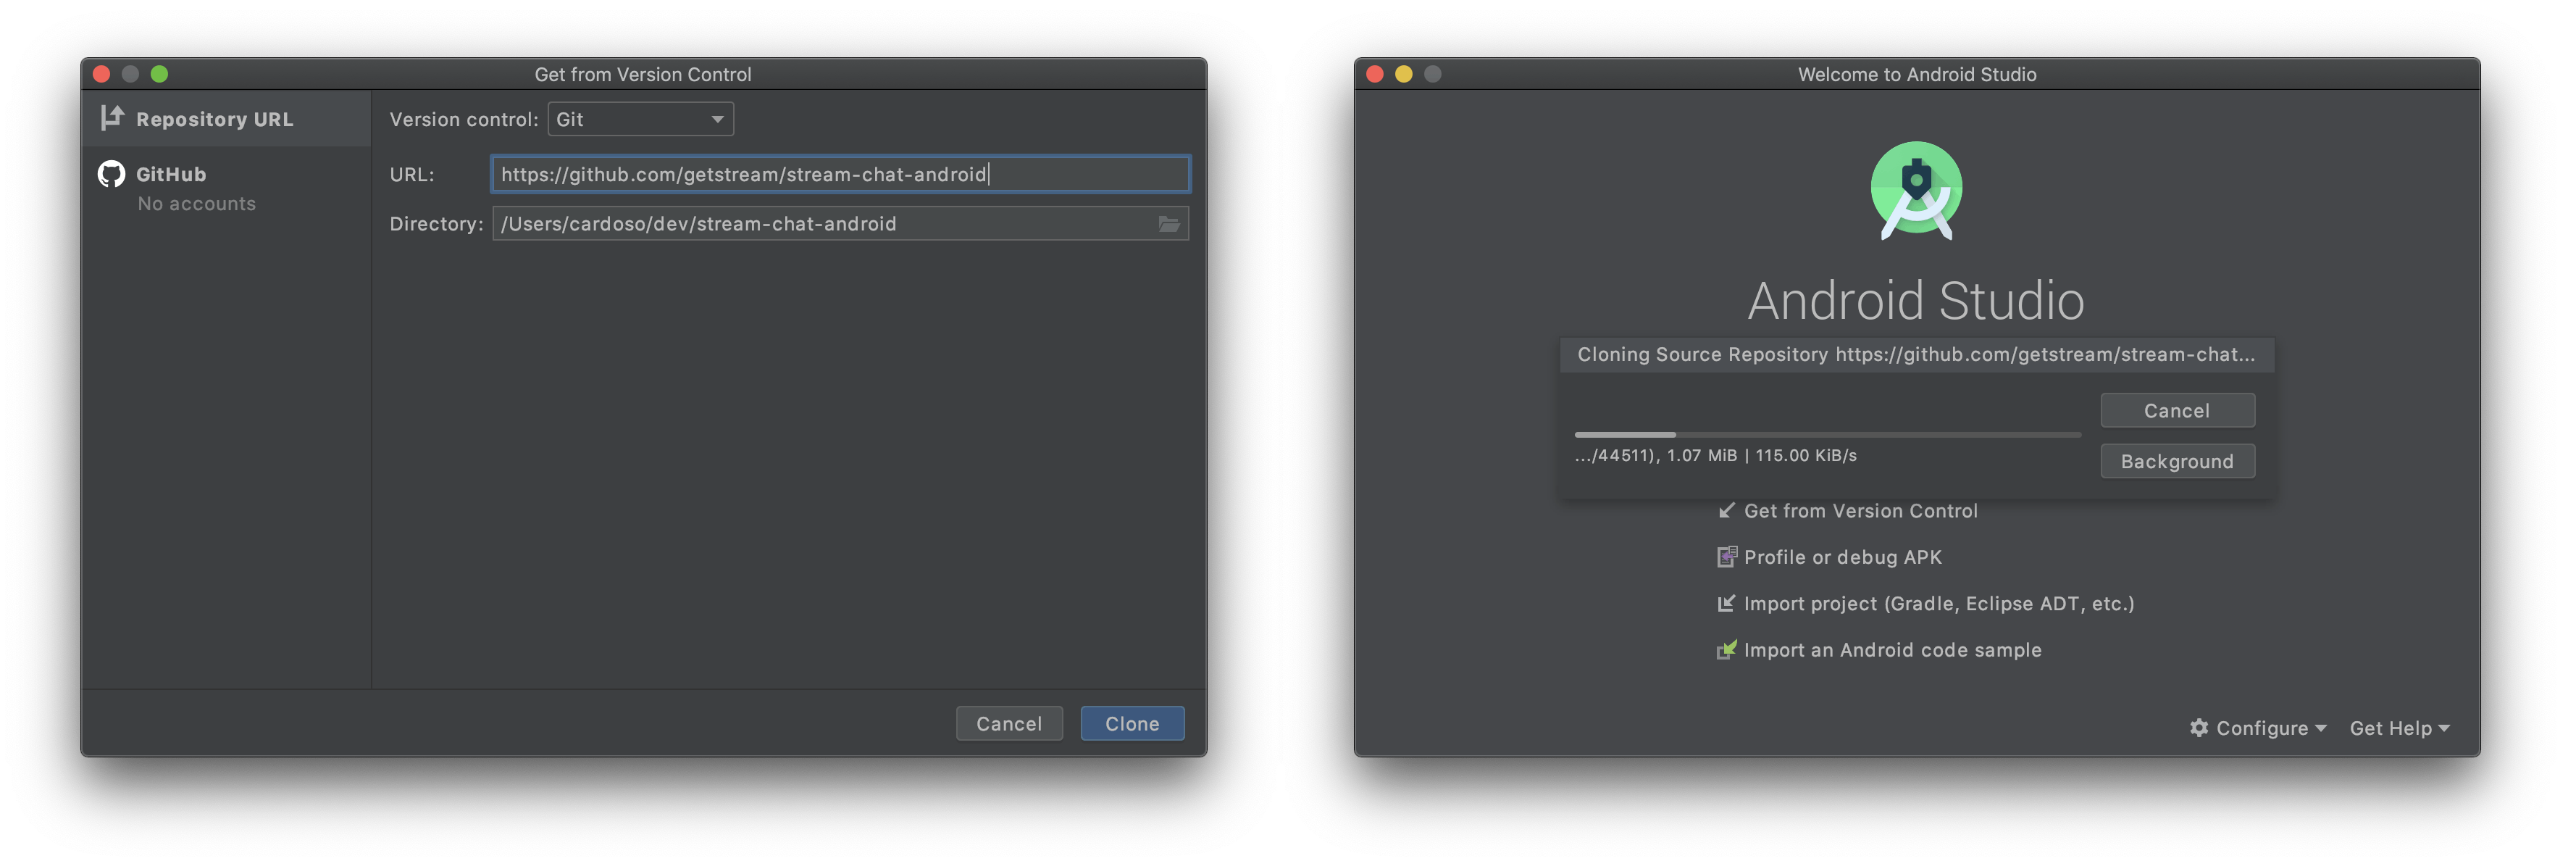
After selecting that option, you can type the URL of the repository, press "Clone", and select a folder. After that, Android Studio will do all the work and open the project ready to go.
Making the change
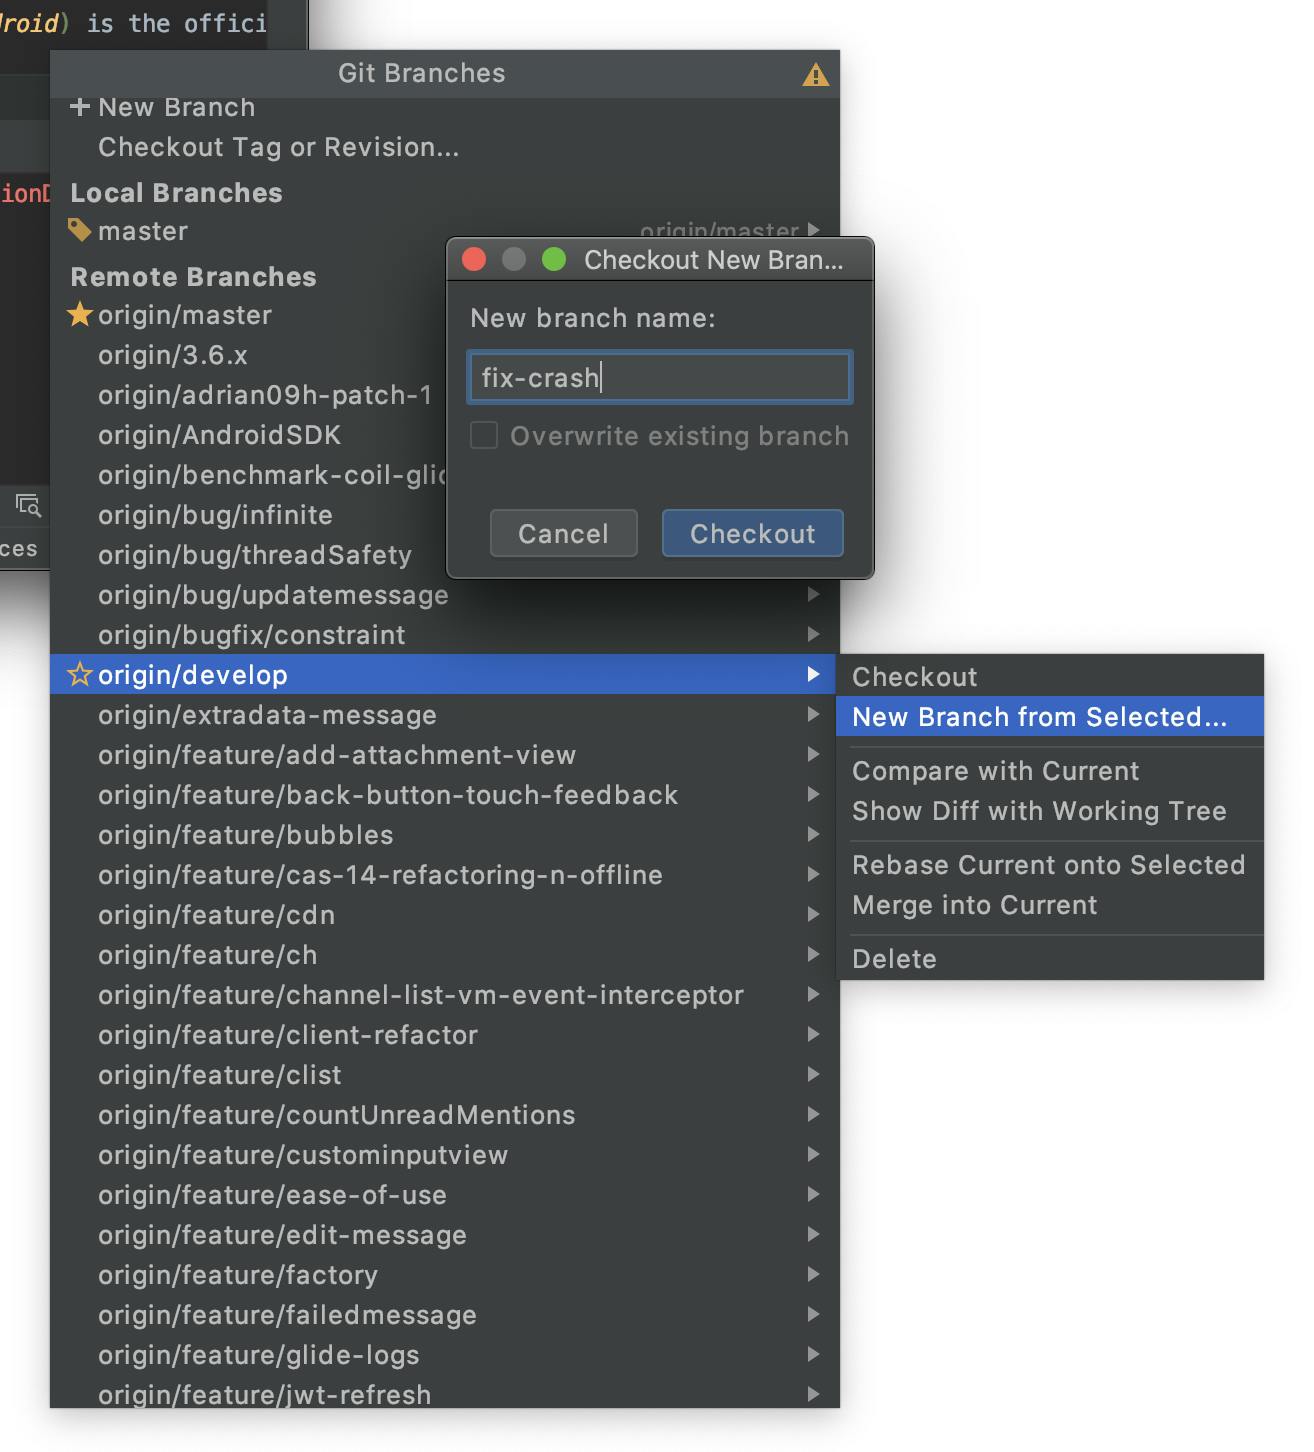
Initially, the default branch will be selected, but often projects have a development branch that receives the changes before merging them to master. Let's create a branch for our change based on that development branch. That is a better practice than using the development branch directly, to not risk polluting it.
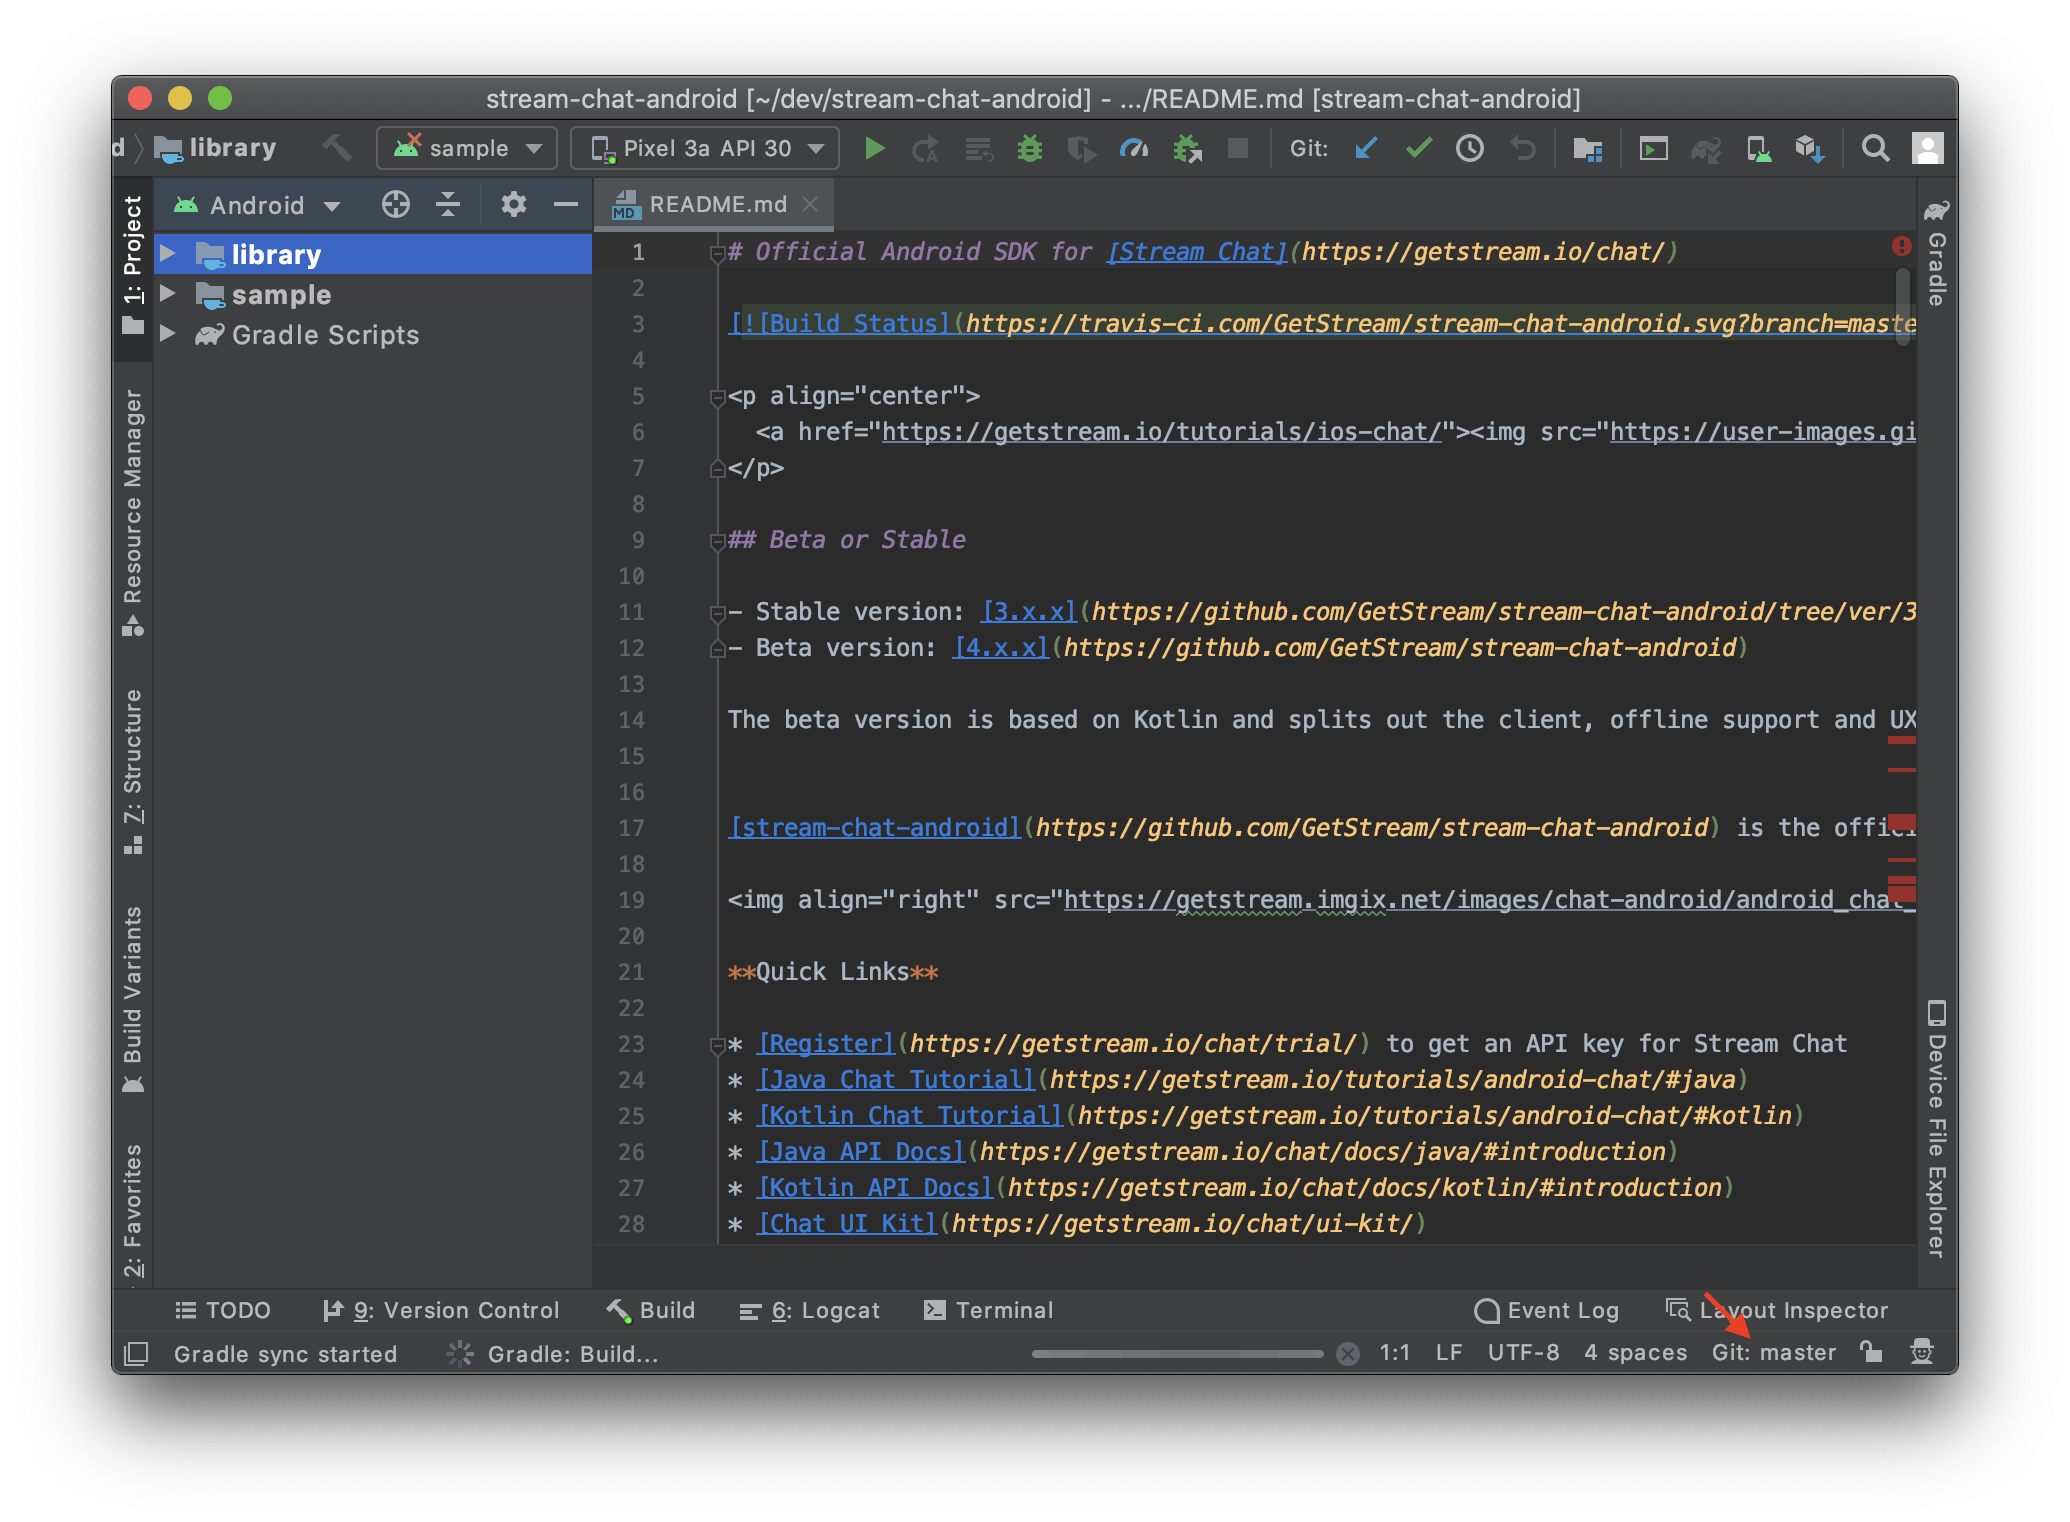
To do that, click where it says "Git: [default branch]", select the development branch, click "New Branch from Selected", and choose a name for your branch.
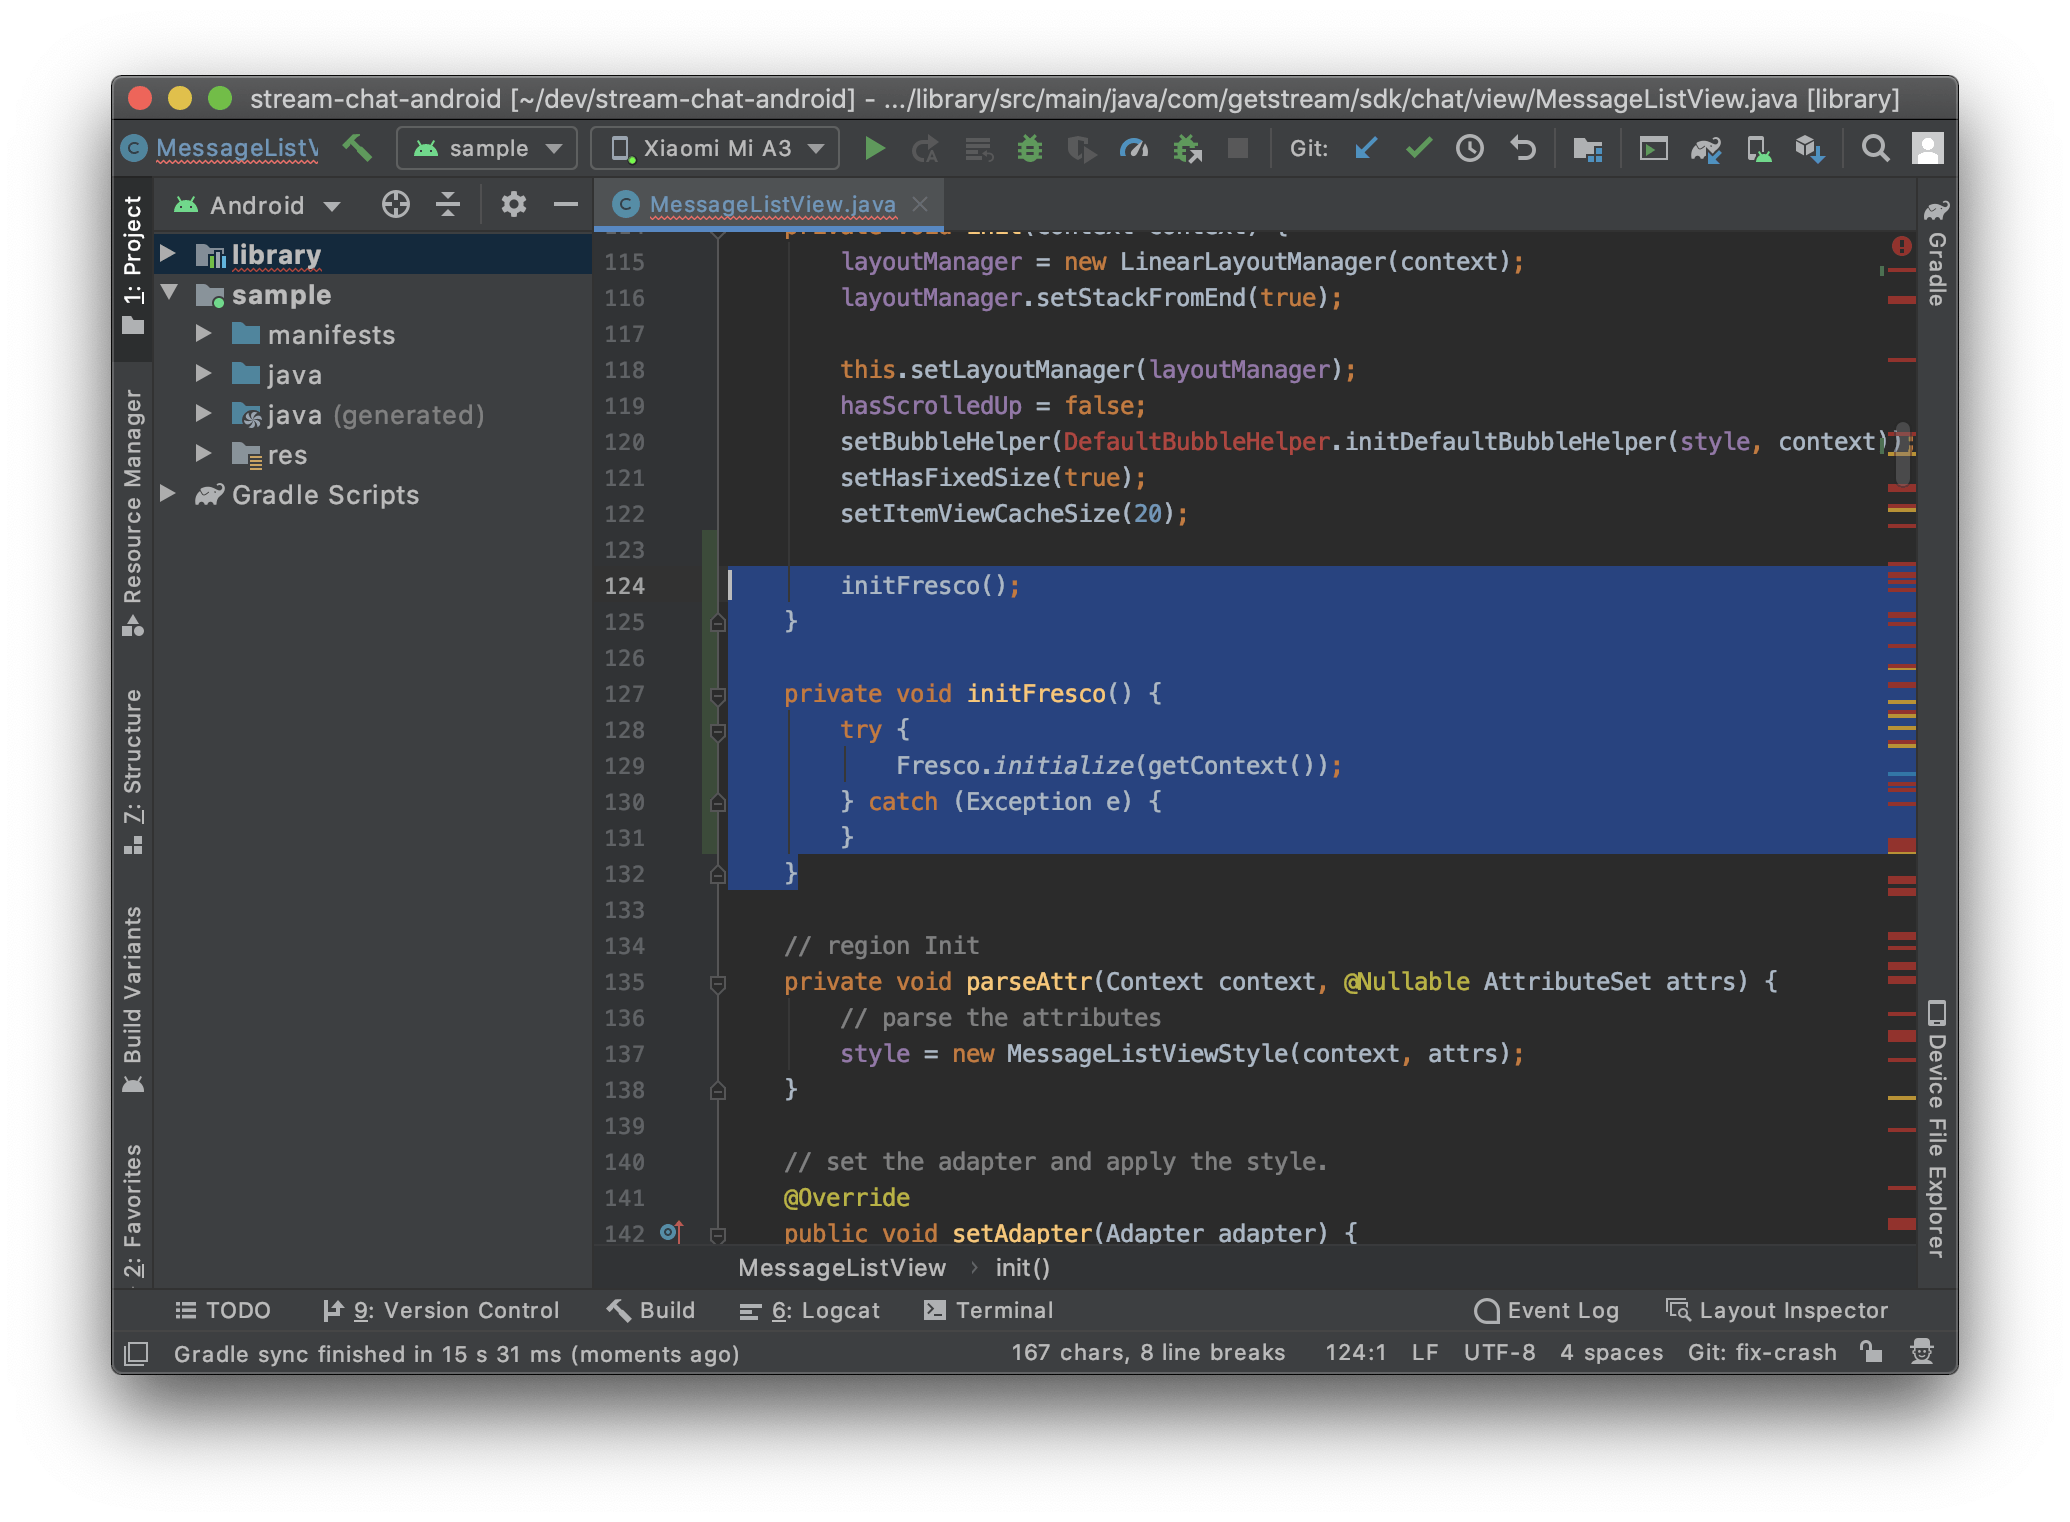
After that, we can proceed with making the change we want. After debugging the project, I've identified that initializing Facebook's Fresco library in the MessageListView class solves the issue.
Now that we fixed the issue, we're ready to commit it and send a Pull Request to the main GitHub repository. The next step will show how to fork the repository, in case you don't have permission to push a branch to the main repository, which is often the case if you're not a maintainer of that project.
Forking the repository
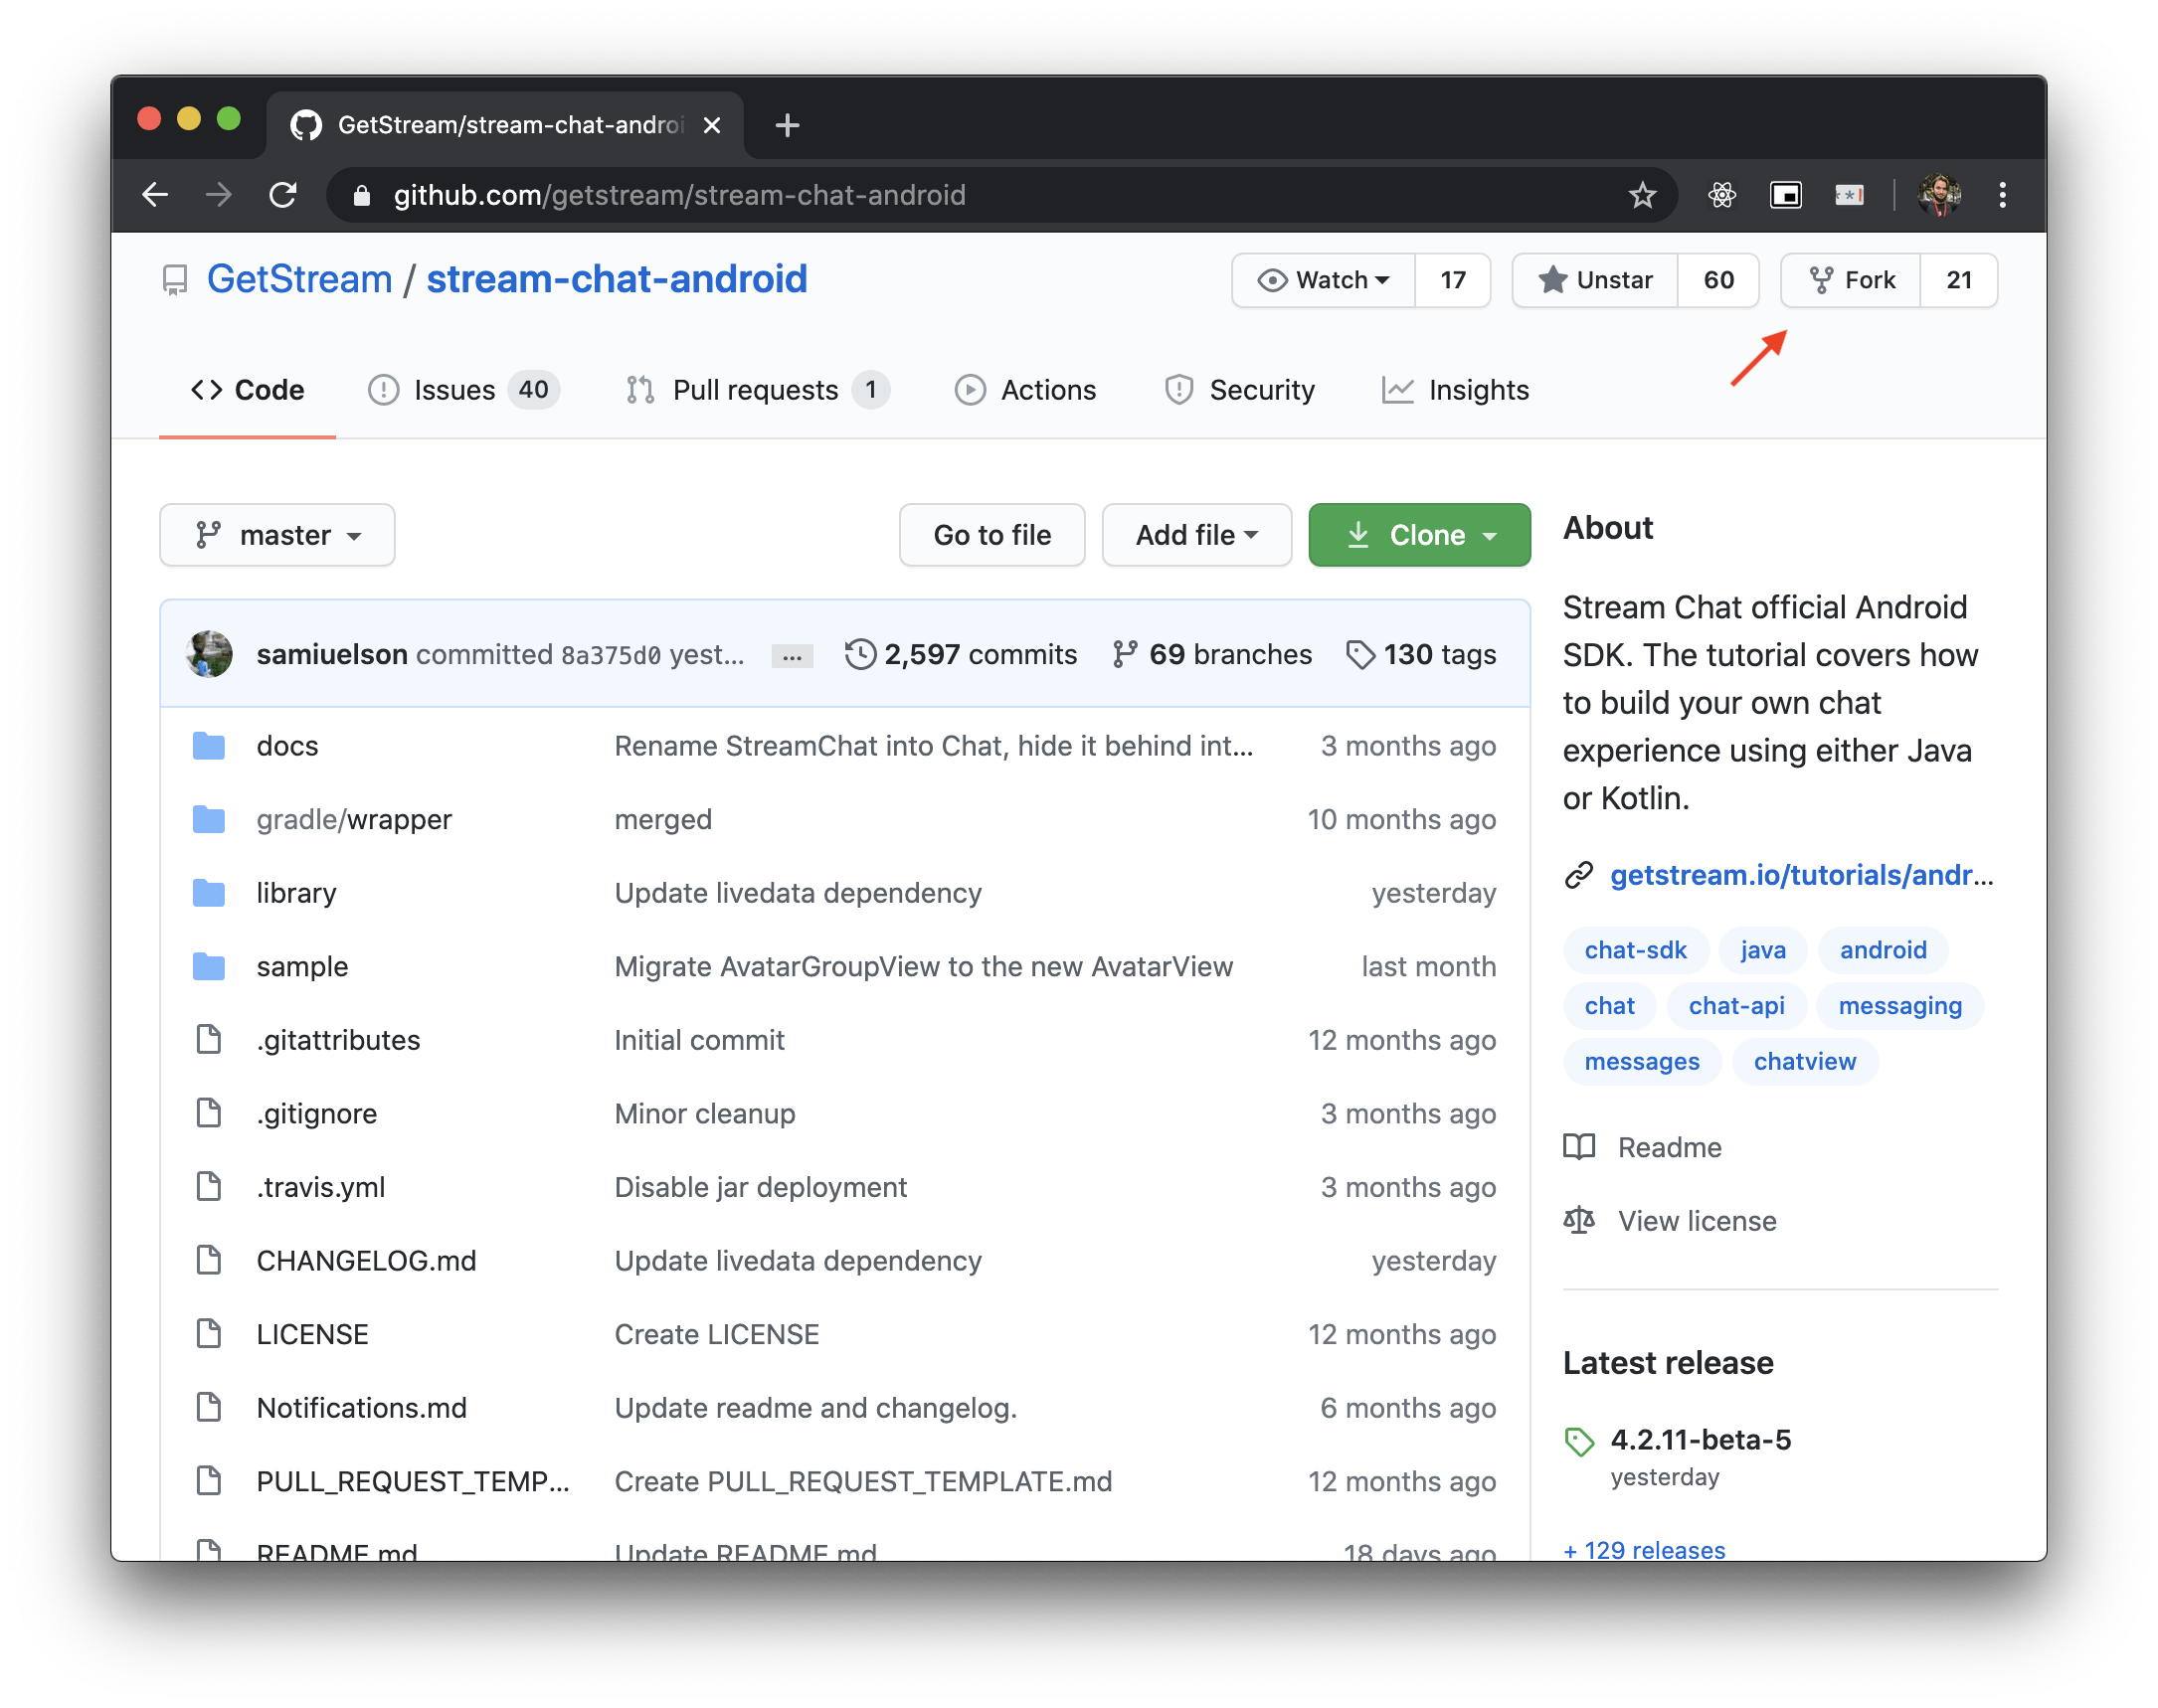
If you're not a maintainer of that repository, you can't push your branch to it. You'll need to fork it first and push the branch to your fork. To do this, go to the GitHub repository and press fork.
You'll need the URL of your repository in the next step, as we'll push the branch to it.
Committing and pushing the change
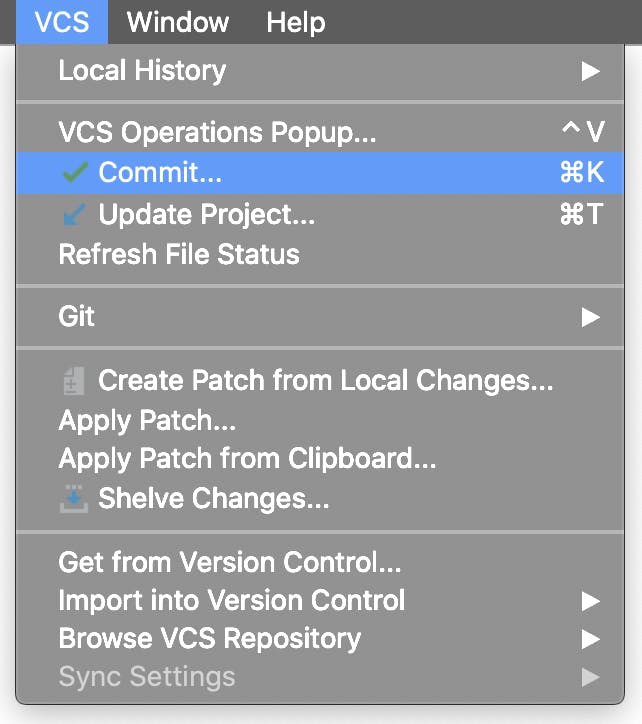
Now, we can commit our change. To do this, either press CMD+K (or CTRL+K on Windows), or navigate to Commit via the menu.
Review your changes in the screen provided, write a descriptive commit message, press the arrow on the "Commit" button, and select "Commit and push". That will take you to the screen where you'll choose which repository the branch will be uploaded. If you're a maintainer of the origin remote, you can press "Push" and skip to "Creating the pull request".
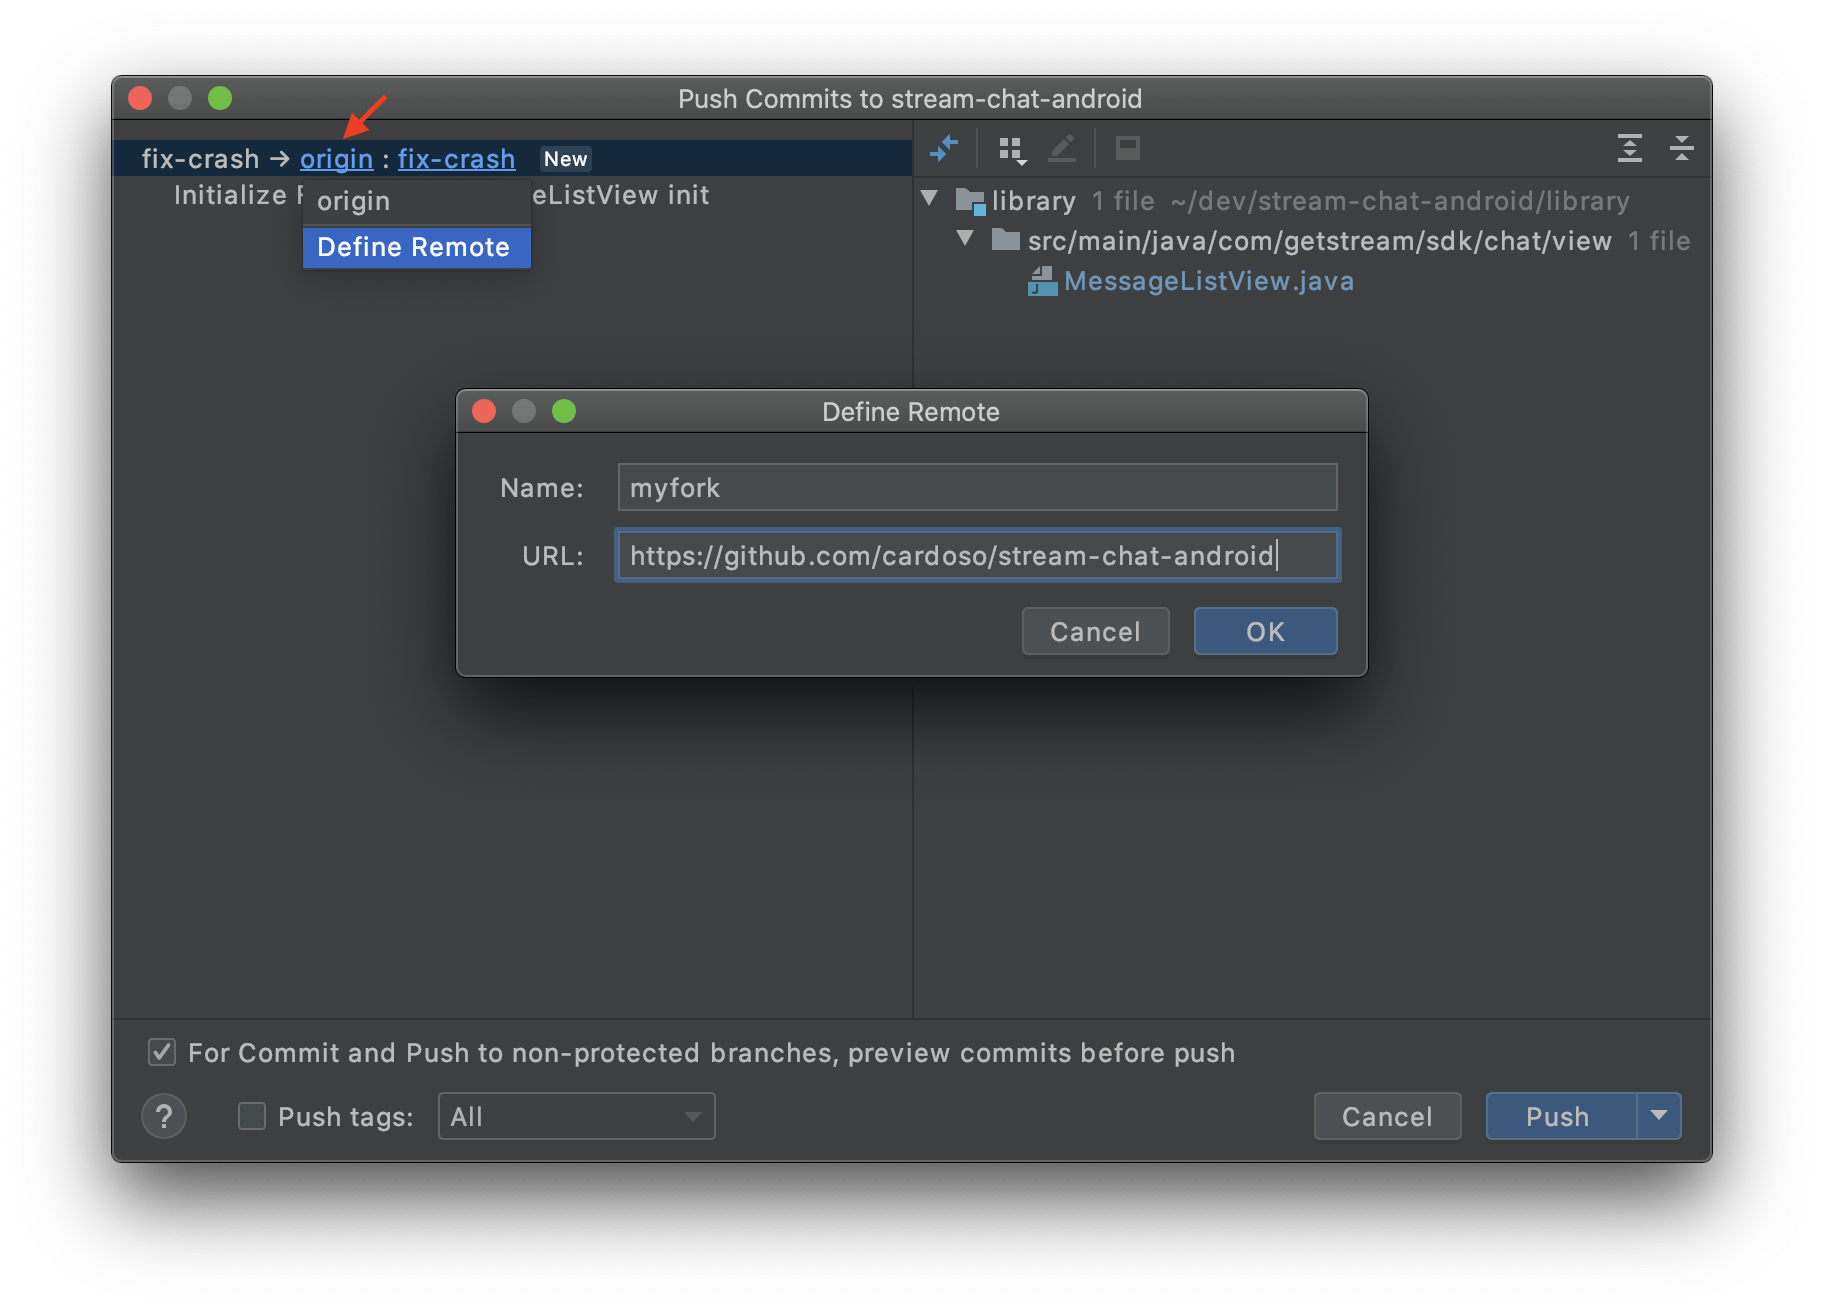
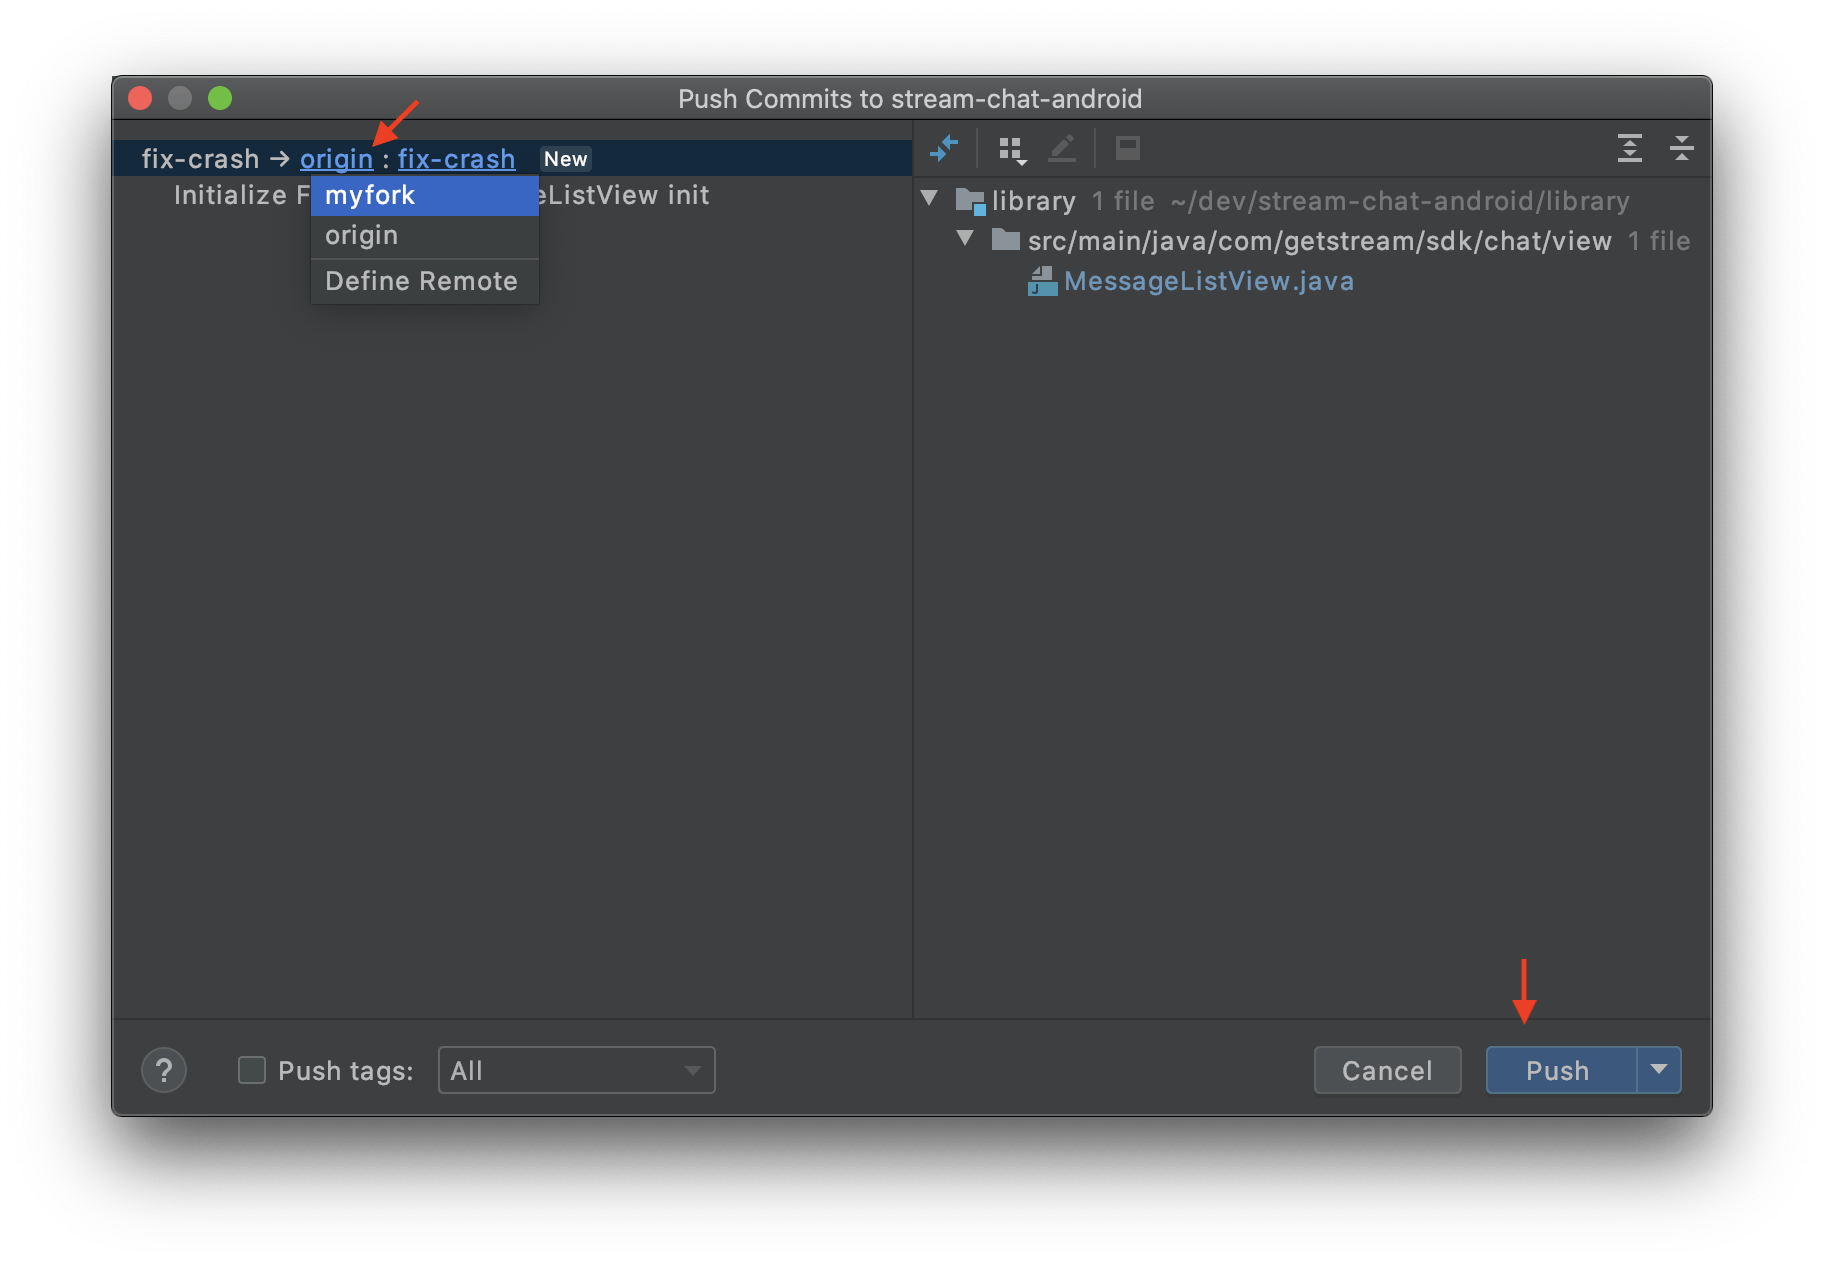
If you're not a maintainer, you should press the "origin" label, which will allow you to define a new remote repository. After that, you still need to select the proper remote and press the "Push" button.
If you're not yet authenticated, Android Studio will ask for your GitHub credentials.
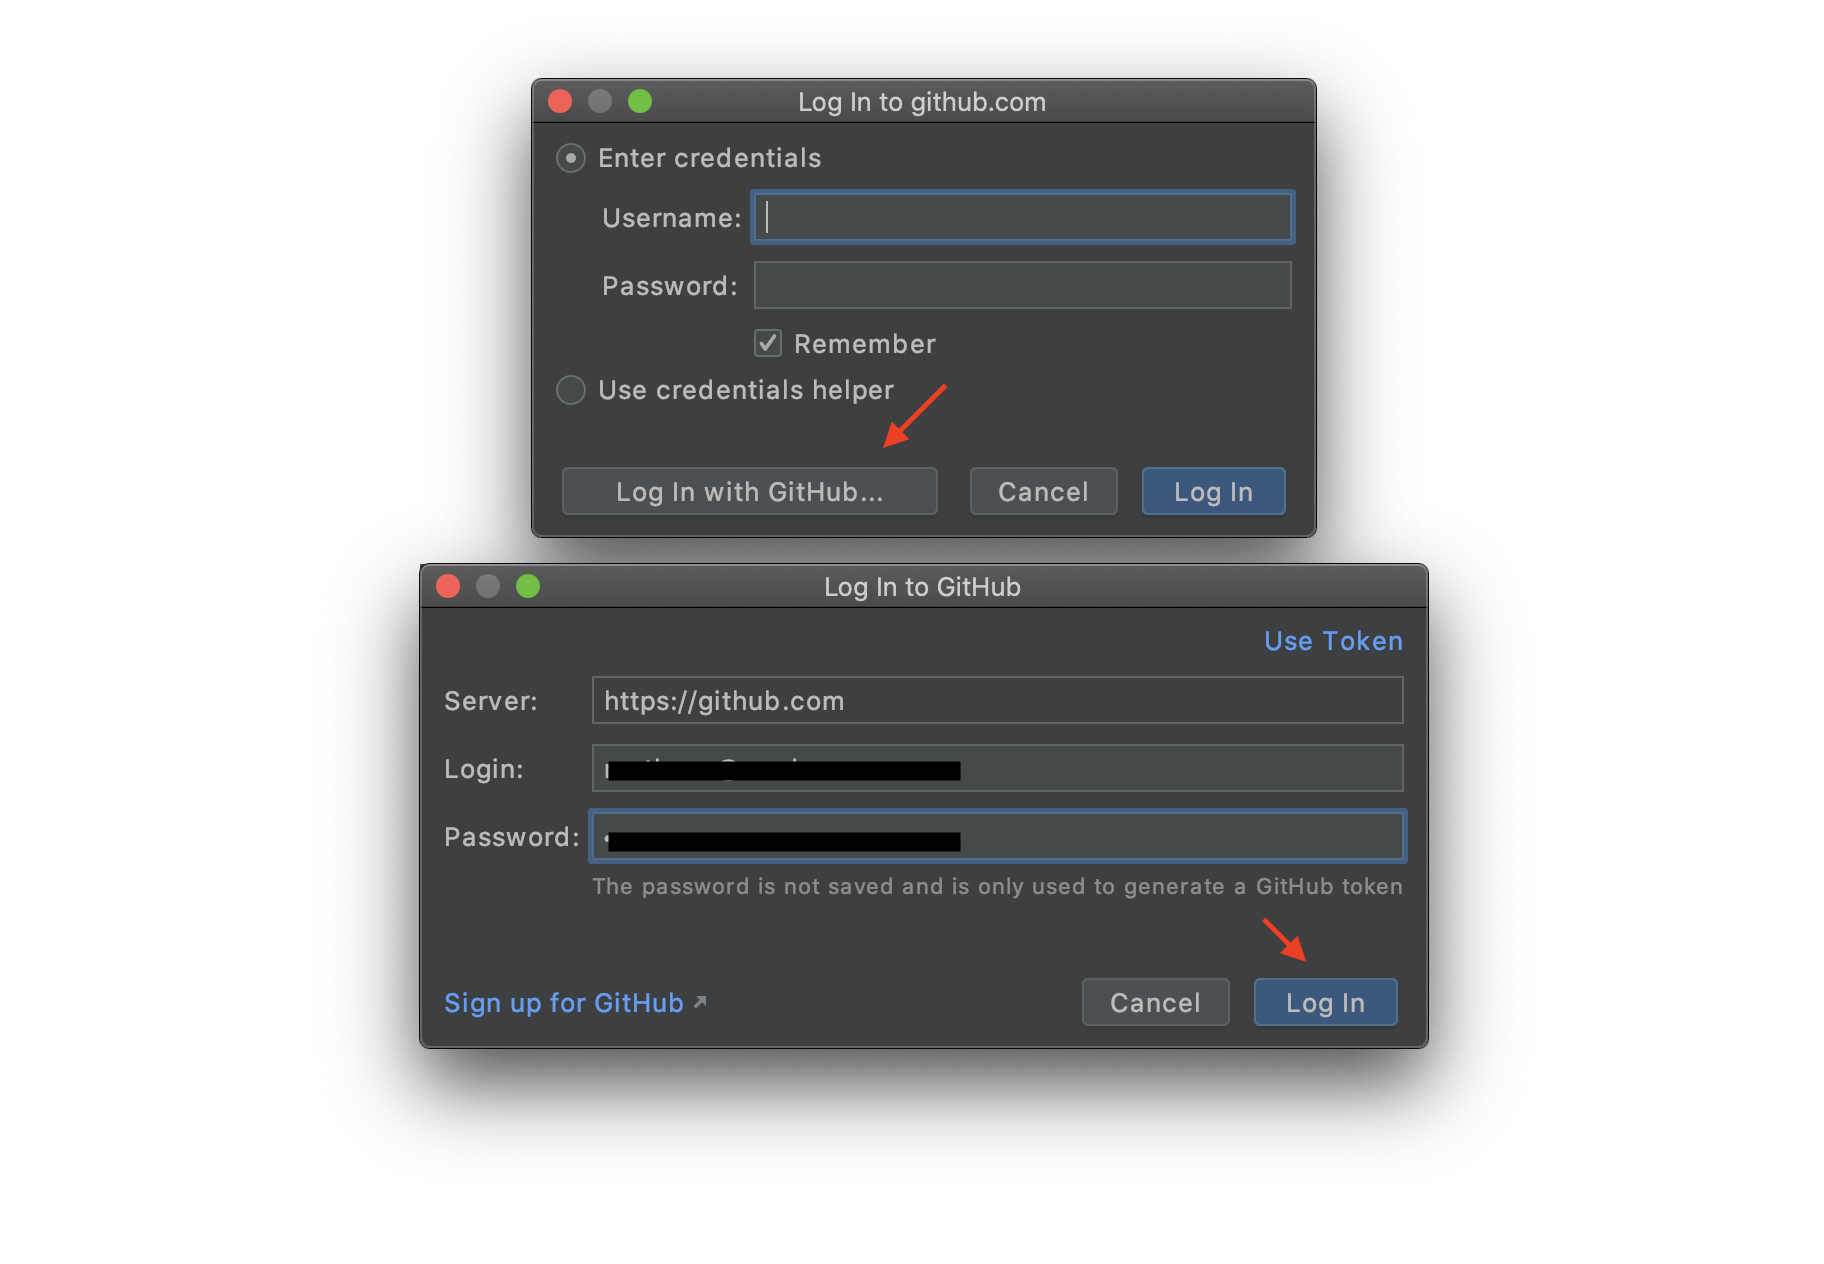
After you authenticate, Android Studio will send the changes to your remote repository.
Creating the pull request
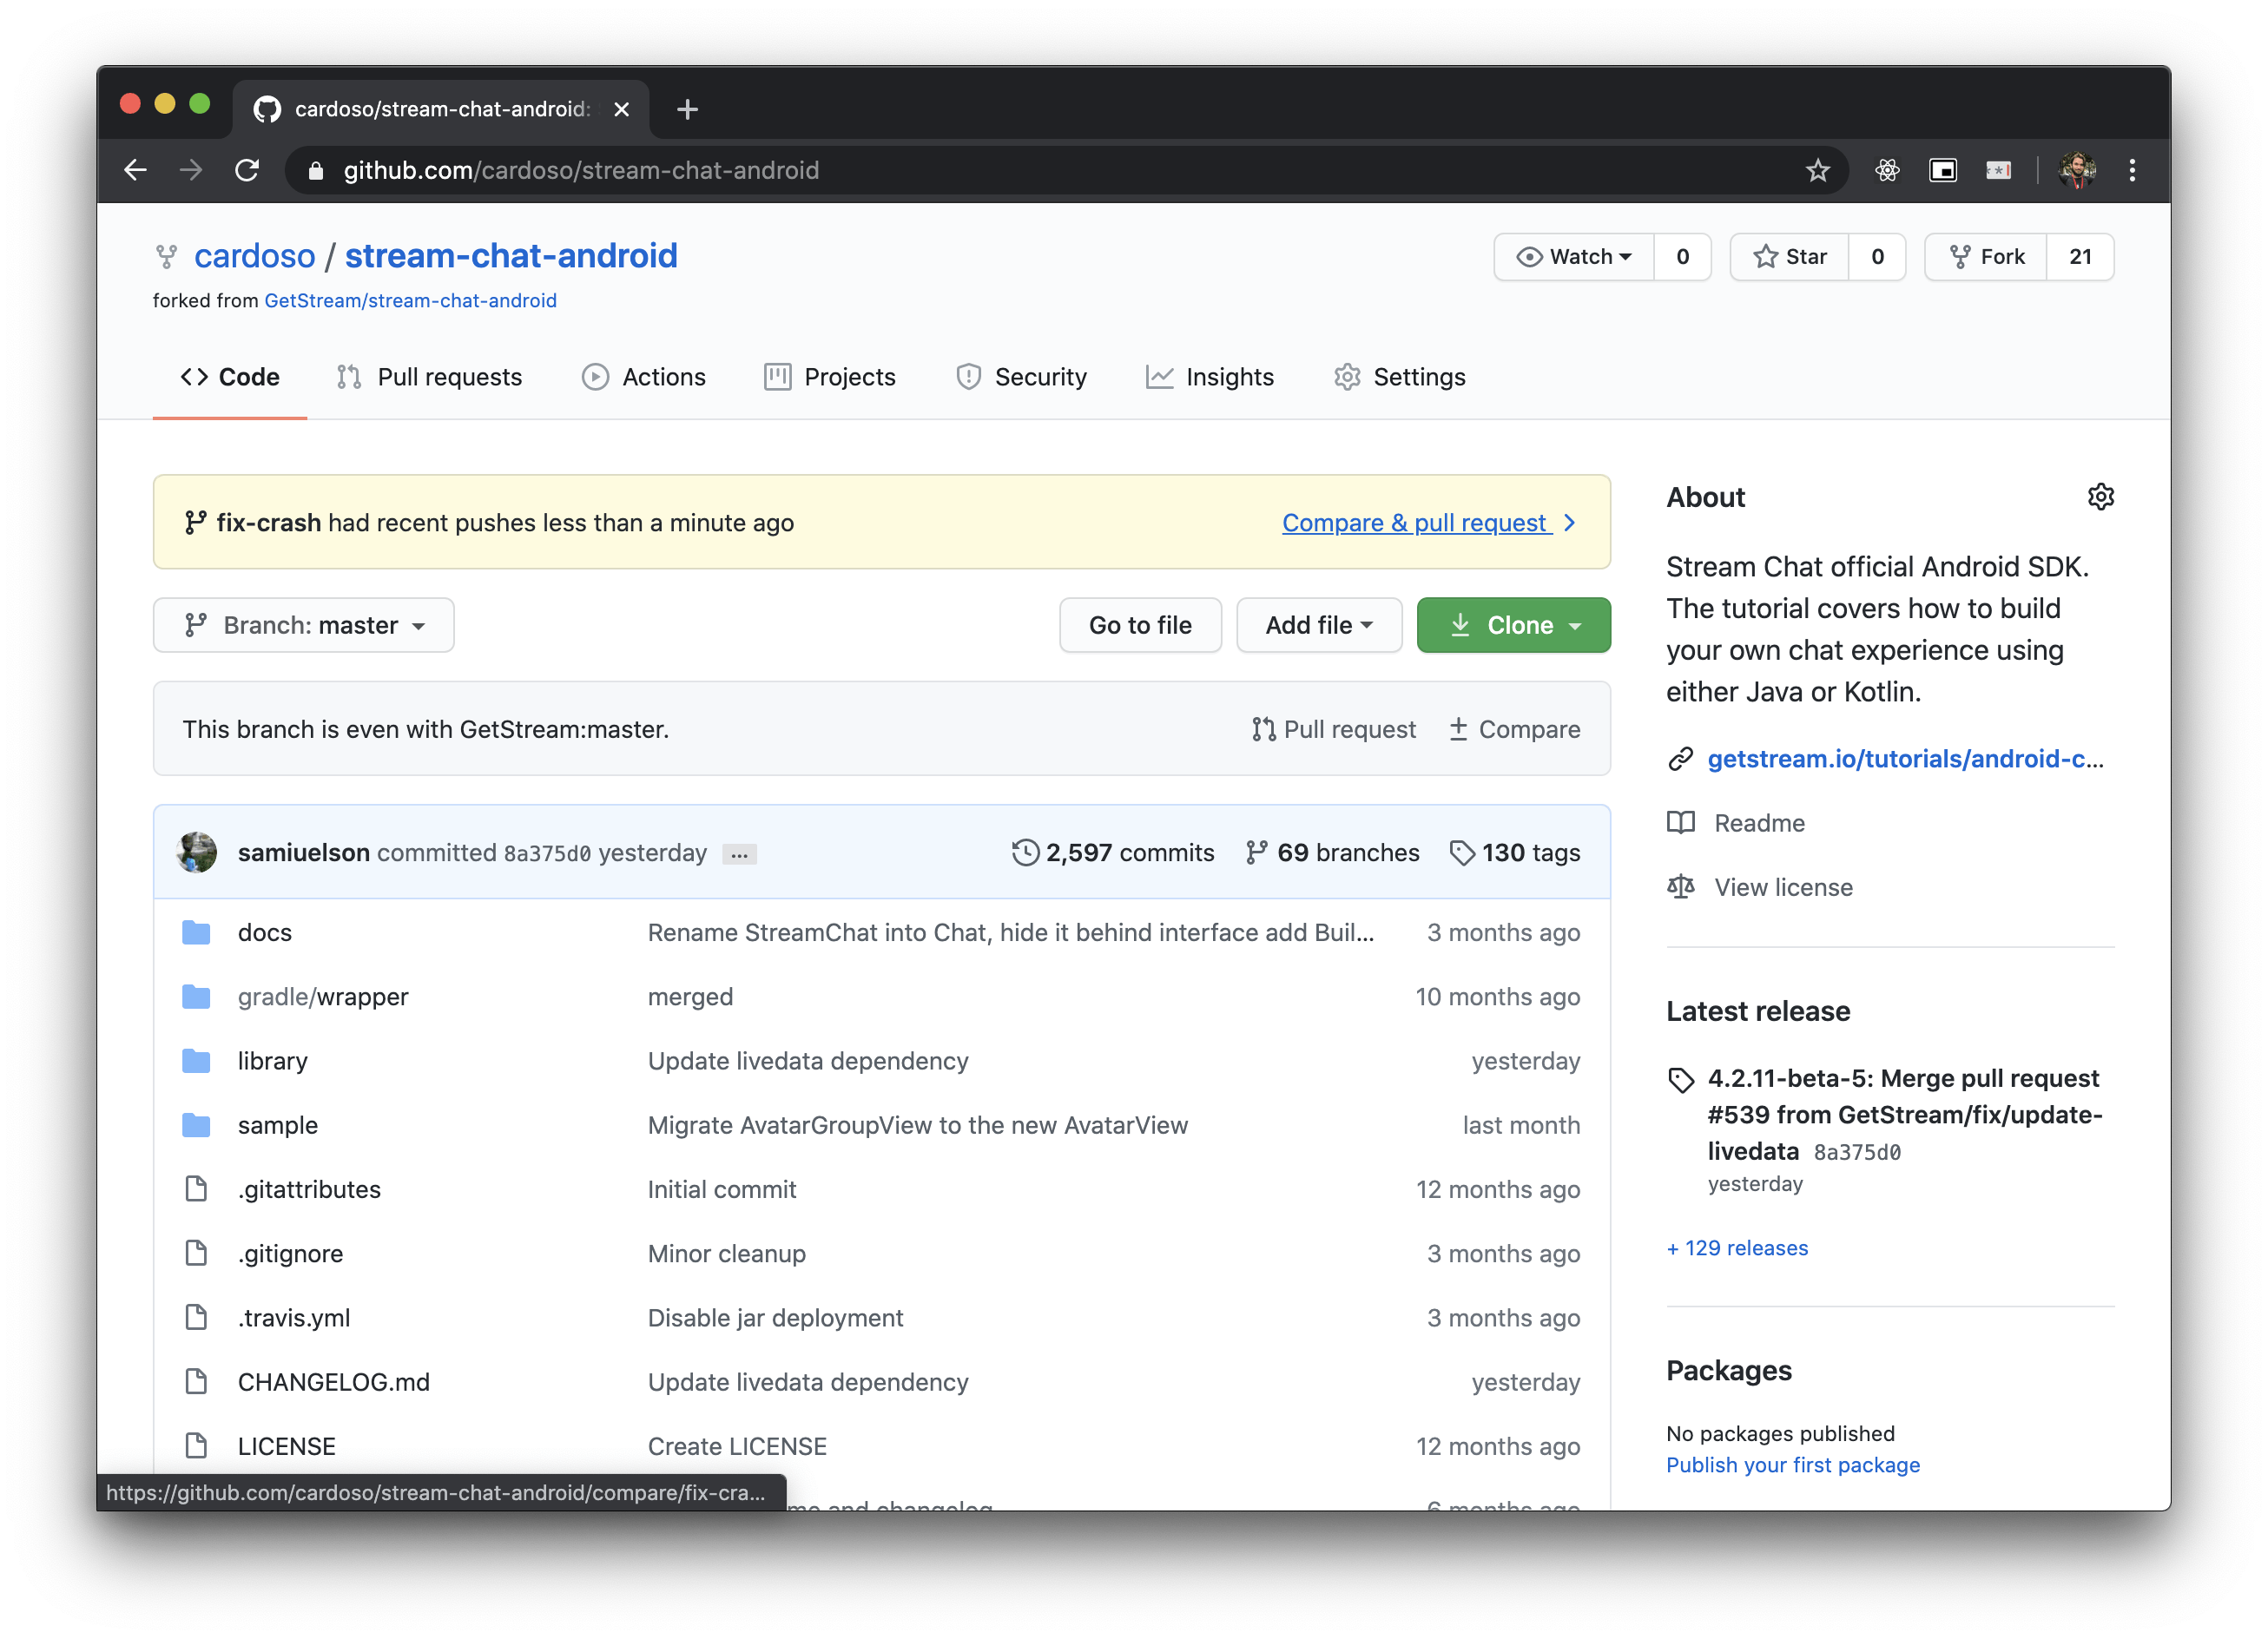
Now, go to your repository page on GitHub, and you'll see a prompt to open a Pull Request with your newly pushed branch.
When you press that, it will take you to a Pull Request composer. Generally, it will already contain a template that you can follow to describe your PR and some instructions that you need to follow. Also, don't forget to check out the contribution guidelines of the project if it has one.
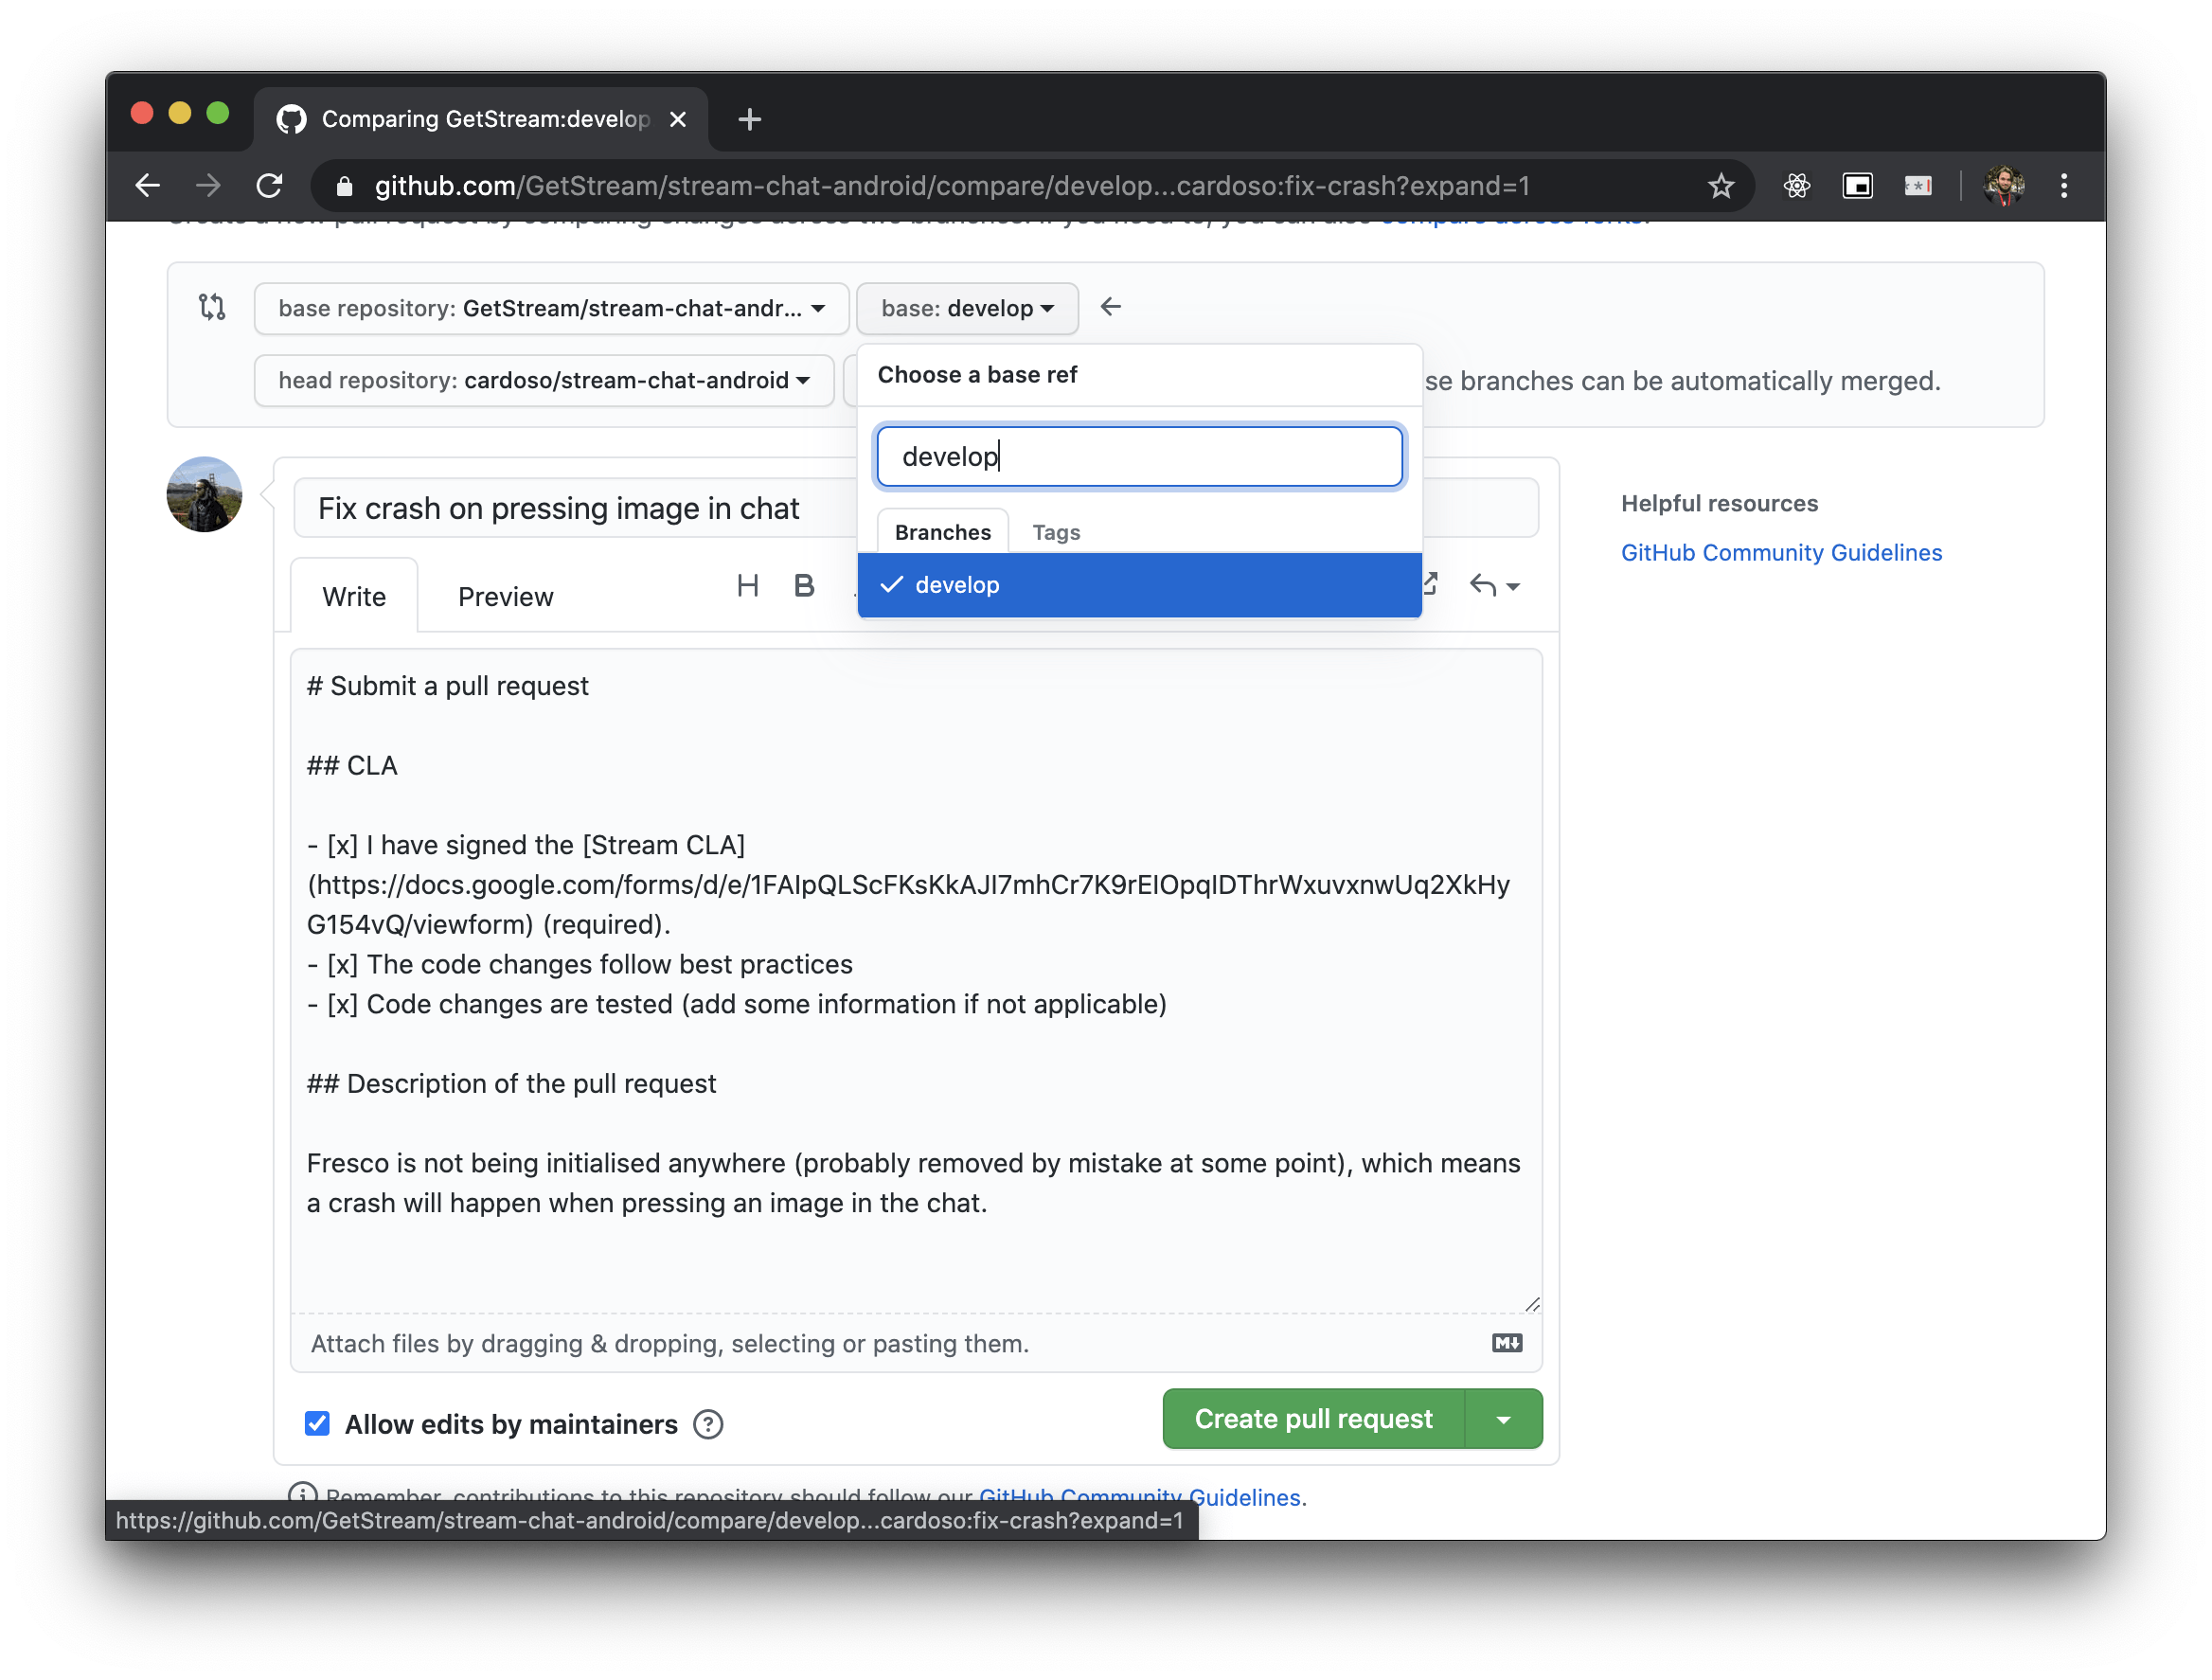
Usually, GitHub will pick the master branch as a base, so don't forget to switch it to the development branch, if it exists, as the image shows.
Wrapping up
Congratulations! You just learned how to contribute to an Open Source project using GitHub and Android Studio, without having to touch the command-line interface. After you've sent your Pull Request, the project's maintainers will review it and ask for changes if needed, in which case you can follow the "Committing and pushing the change" step again.
At Stream, we have many Open Source Android projects in Kotlin and Java, and we're happy to receive and help you with your contributions.