

Social messaging apps like Snapchat have unique ways of keeping users engaged daily while helping friends and loved ones stay connected. Features like real-time messaging and friendship streaks have become key elements of that experience.
In this tutorial, you’ll learn how to build a Snapchat-style app using Next.js, Firebase, and the Stream Chat SDK. We’ll cover user authentication with Firebase, real-time group messaging, and how to implement a custom streak tracking system that rewards users for staying in touch.
Prerequisites
To fully understand this tutorial, you need to have a basic understanding of React or Next.js.
We will use the following tools:
- Stream React Chat SDK - Enables real-time chat communication in your application.
- Stream Chat Firebase Extension - A Firebase extension that automatically connects your Firebase users to Stream.
- Firebase - A backend-as-a-service platform developed by Google to enable us to add authentication, database, real-time communication, file storage, cloud functions, and many others within software applications.
- Date-Fns - A modern JavaScript date utility library for parsing, formatting, and manipulating dates.
- Shadcn UI - A UI component library that provides customizable, beautifully designed, and accessible UI components for your applications.
Create a Next.js project by running the following code snippet:
npx create-next-app snapchat-clone Install the package dependencies for the project:
npm install firebase stream-chat stream-chat-react date-fnsTo install the Shadcn UI library, follow the installation guide and add the Dialog component to the package.
Now, let's start building! 🚀
Configure Stream Chat SDK in Next.js
In this section, you will learn how to set up the Stream Chat SDK, integrate it with your Next.js application, and set up the backend functionality required to create group channels using the Stream Chat SDK.
Create a free Stream account and a new organization to manage your apps.

Add a new app to the organization and copy the Stream API and Secret key into the .env.local file.
NEXT_PUBLIC_STREAM_API_KEY=<paste_from_Stream_app_dashboard>
STREAM_SECRET_KEY=<paste_from_Stream_app_dashboard>

# For generating user images
NEXT_PUBLIC_IMAGE_URL=https://api.dicebear.com/9.x/pixel-art/svg?seed=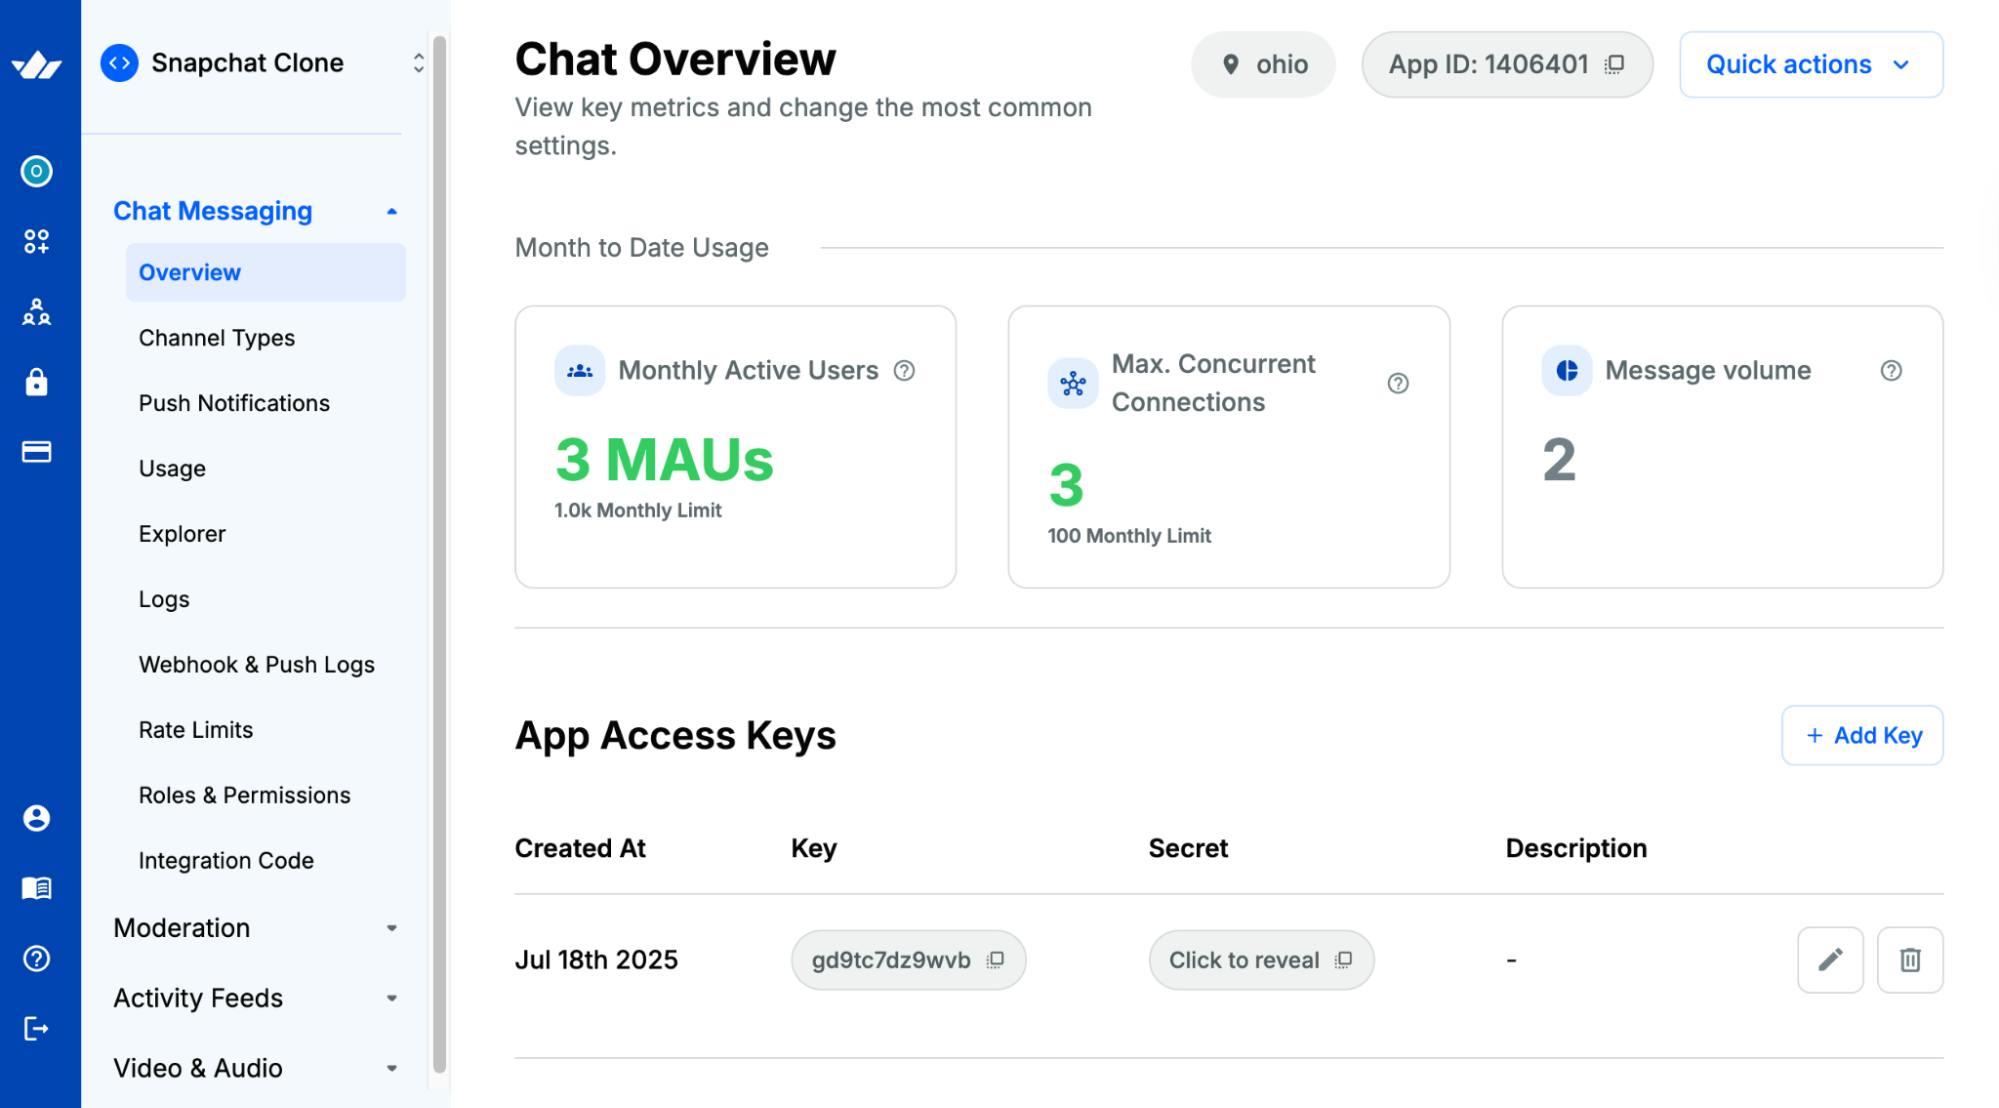
Create an actions folder containing a stream.ts file at the root of the Next.js project.
cd snapchat-clone && mkdir actions && \
cd actions && touch stream.ts
Copy the following code snippet into the stream.ts file:
"use server";\
import { StreamChat } from  "stream-chat";

const STREAM_API_KEY = process.env.NEXT_PUBLIC_STREAM_API_KEY!;\
const STREAM_API_SECRET = process.env.STREAM_SECRET_KEY!;

// 👇🏻 -- For Stream Chat  --\
const serverClient = StreamChat.getInstance(STREAM_API_KEY, STREAM_API_SECRET);

export  async  function  createToken(userID: string): Promise<string> {\
 if (!userID) throw  new  Error("User is not authenticated");\
 return serverClient.createToken(userID);\
}
The code snippet above initializes the Stream Chat server client using your API key and secret. Then, the createToken function is defined to generate a user authentication token for the given user's ID.
Add the following function to the stream.ts file:
//👇🏻 generate channel ID
const generateChannelID = (channelName: string | null): string | null => {
    if (!channelName) return null;

    const sanitized = channelName.toLowerCase().replace(/\s+/g, "-");
    const randomSuffix = Math.random().toString(36).substring(2, 8);

    return `${sanitized}-${randomSuffix}`;
};
Finally, you need to define the function that allows users to create channels within this file.
Copy the following code snippet:
//👇🏻 creates a Stream Channel
export const createStreamChannel = async (data: ChannelArgs) => {
    //👇🏻 accepts channel type, creator's ID, members, and group name
    const { type, userId, members, groupName } = data;

    try {
        if (type === "messaging") {
            const existingChannel = await serverClient.queryChannels(
 { type, created_by_id: userId, members },
 { last_updated: -1 },
 { limit: 1 }
 );

            // If the channel already exists, return an error
            if (existingChannel.length > 0) {
                return { success: false, error: "Channel already exists", id: null };
 }
 }
        //👇🏻 create Stream Chat channel
        const channel = serverClient.channel(
            type,
            generateChannelID(groupName!) ||
                `streak-${userId}-${Math.random().toString(36).substring(2, 8)}`,
 {
                members,
                name: groupName || `Streak with ${userId.slice(0, 6)}`,
                created_by_id: userId,
 }
 );

        await channel.create();
        return { success: true, error: null, id: channel.id };
 } catch (error) {
        return {
            success: false,
            error: error instanceof Error ? error.message : "Error creating channel",
            id: null,
 };
 }
};
- From the code snippet above:
- The generateChannelID function accepts the channel's name as a parameter, formats it accordingly, and merges a random 6-character string to create a unique string that can serve as the channel ID.
- The createStreamChannel function accepts the channel details as parameters. If the channel type is "messaging", the function checks whether a channel with the same creator and members already exists. If it does, it returns an error.
- If not, it creates a new Stream channel with the provided details and returns the channel ID.
- For this tutorial, the channel type "messaging" is used for streak channels with two members only. Therefore, you can not create multiple streak channels with the same person.
- The channel type "livestream" is used for group chats with multiple members.
Building the Application Pages
In this section, we will walk through the Snapchat clone's application pages and UI components.
The main pages include:
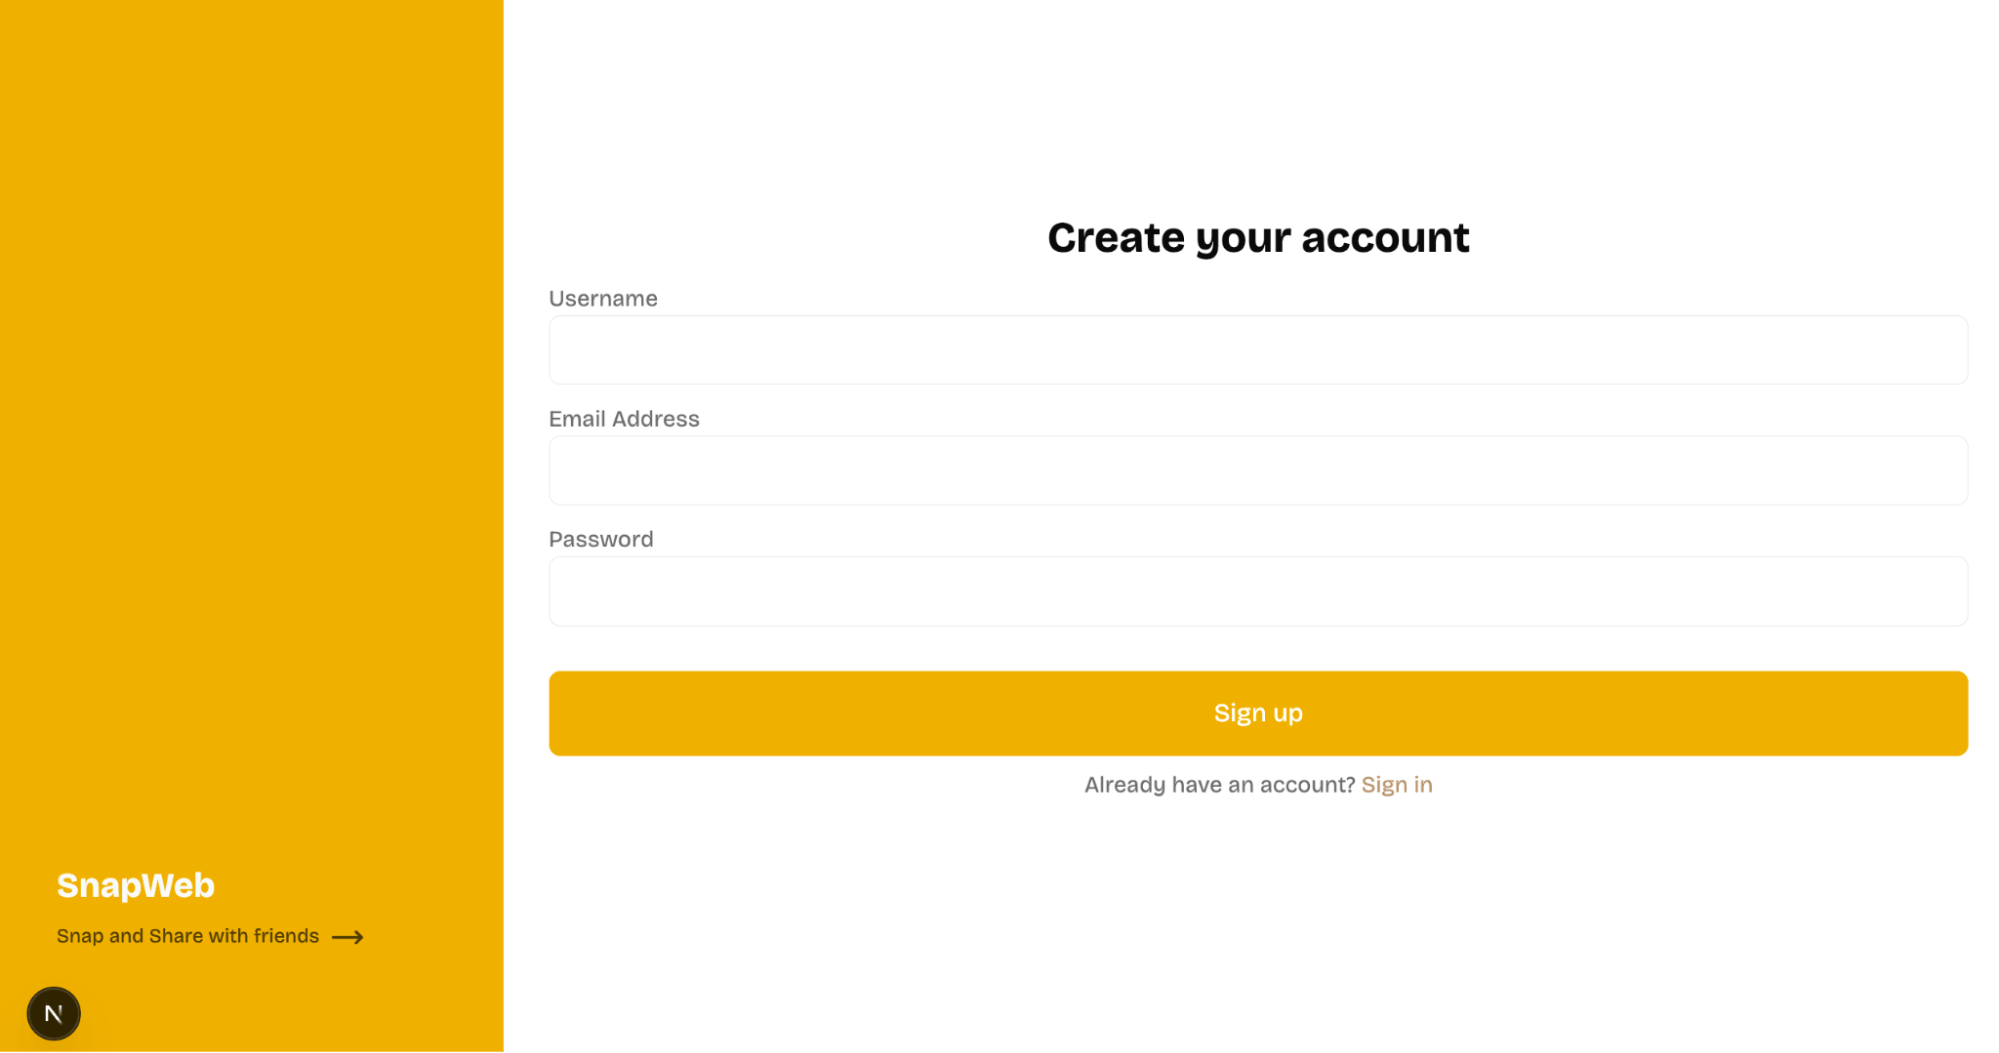
- Register Page: This page displays a form that allows new users to create an account by entering a username, email, and password.
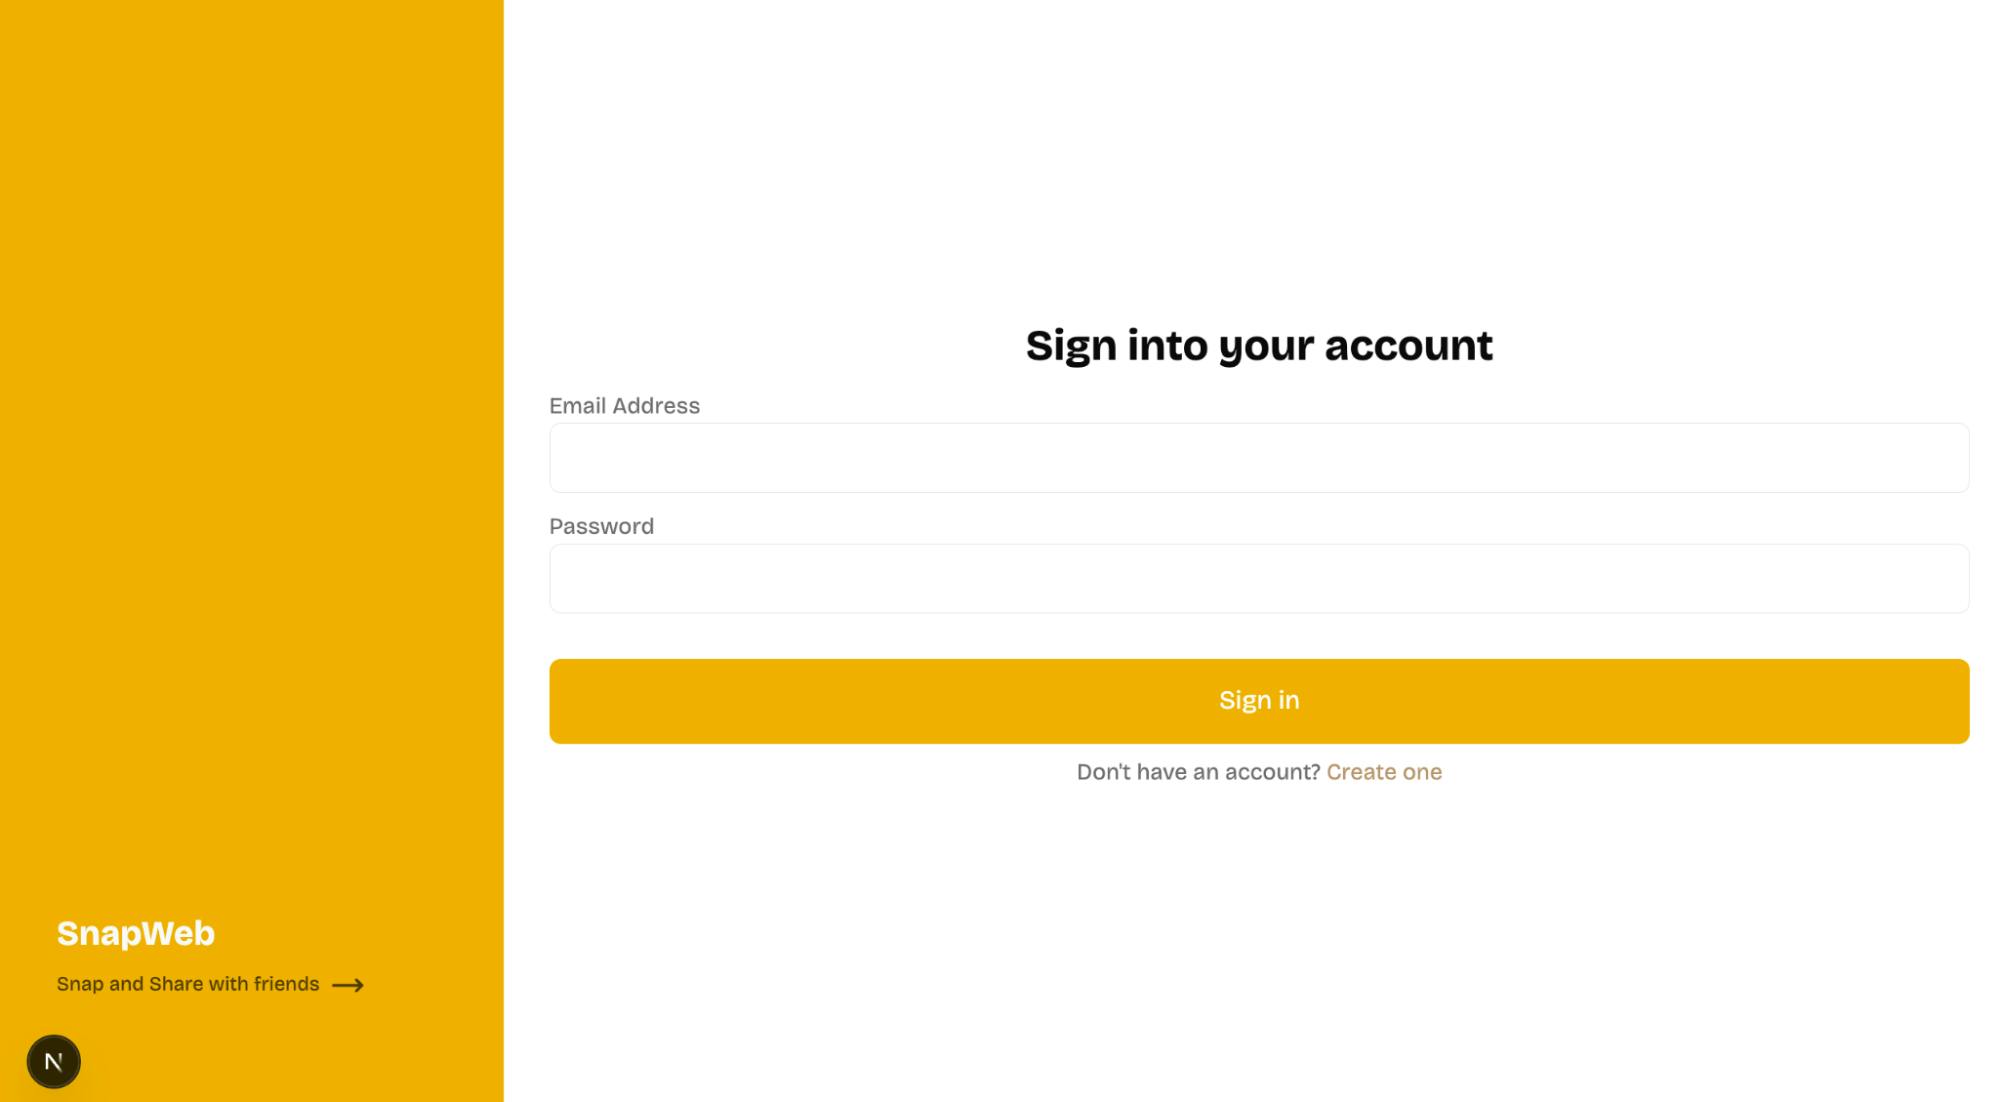
- Login Page: Allows existing users to sign in to their accounts.
- Chat Page: Provides a real-time chat interface where users can message, share images, and send files using the Stream Chat SDK.
The Authentication Pages: Login and Register
Add a (public) folder within the Next.js app directory. The public folder will contain the login and register page routes.
app/
└── (public)/
    ├── layout.tsx
    ├── login/
    │   └── page.tsx
    └── register/
        └── page.tsx
Copy the following code snippet into the login/page.tsx file:
"use client";
import { useRouter } from "next/navigation";
import { useState } from "react";
import Link from "next/link";
export default function Login() {
const [buttonClicked, setButtonClicked] = useState<boolean>(false);
const router = useRouter();
//👇🏻 handle form submission
const handleSubmit = async (e: React.FormEvent<HTMLFormElement>) => {
e.preventDefault();
setButtonClicked(true);
const form = e.currentTarget;
const formData = new FormData(form);
//👇🏻 logs form input to the console
console.log("Form Data:", Object.fromEntries(formData.entries()));
};
return (
<section>
<h2>Sign into your account</h2>
<form className='w-full' onSubmit={handleSubmit}>
<label htmlFor='email'>Email Address</label>
<input required type='email' id='email' name='email' />
<label htmlFor='password'>Password</label>
<input required type='password' id='password' name='password' />
<button type='submit' disabled={buttonClicked}>
{buttonClicked ? "Signing in" : "Sign in"}
</button>
<p>
Don't have an account? <Link href='/register'>Create one</Link>
</p>
</form>
</section>
);
}The Login component renders a form that accepts the user's email address and password and logs them to the console when the user submits the form.
Create a similar component within the register/page.tsx file. It renders a user registration form that accepts the user's name, email address, and password.
"use client";
import { useRouter } from "next/navigation";
import { useState } from "react";
import Link from "next/link";

export default function Register() {
    const router = useRouter();
    const [buttonClicked, setButtonClicked] = useState<boolean>(false);

    //👇🏻 handle form submission
    const handleSubmit = async (e: React.FormEvent<HTMLFormElement>) => {
        e.preventDefault();
        setButtonClicked(true);
        const form = e.currentTarget;
        const formData = new FormData(form);
        //👇🏻 logs form input to the console
        console.log("Form Data:", Object.fromEntries(formData.entries()));
 };

    return (
 <section>
 <h2>Create your account</h2>
 <form className='w-full' onSubmit={handleSubmit}>
 <label htmlFor='username'>Username</label>
 <input required type='text' id='username' name='username' />
 <label htmlFor='email'>Email Address</label>
 <input required type='email' id='email' name='email' />

 <label htmlFor='password'>Password</label>
 <input required type='password' id='password' name='password' />

 <button type='submit' disabled={buttonClicked}>
                    {buttonClicked ? "Registering..." : "Sign up"}
 </button>
 <p>
 Already have an account? <Link href='/login'>Sign in</Link>
 </p>
 </form>
 </section>
 );
}
Lastly, copy the following code snippet into the layout.tsx file:
import type { Metadata } from "next";
import Link from "next/link";
import { MoveRight } from "lucide-react";

export const metadata: Metadata = {
    title: "Authentication | Snapchat Clone",
    description: "Authenticate to access SnapWeb",
};

export default function AuthLayout({
    children,
}: Readonly<{
    children: React.ReactNode;
}>) {
    return (
 <main className='w-full min-h-screen flex items-start justify-between'>
 <nav className='w-1/4 h-screen md:block hidden'>
 <div className='w-1/4 bg-yellow-500 h-screen md:block hidden fixed top-0 z-10 p-8'>
 <section className='absolute bottom-20 px-2 flex flex-col'>
 <Link href='/' className='font-bold text-2xl text-gray-50'>
 SnapWeb
 </Link>
 <p className='opacity-70 mt-2 text-sm'>
 Snap and Share with friends{" "}
 <MoveRight className='inline-block ml-1' />
 </p>
 </section>
 </div>
 </nav>

            {children}
 </main>
 );
}
The layout.tsx file defines page metadata (title and description) and sets up a shared layout for the authentication pages. In this example, it renders the yellow sidebar navigation on the Login and Register routes.
Chat Page Overview
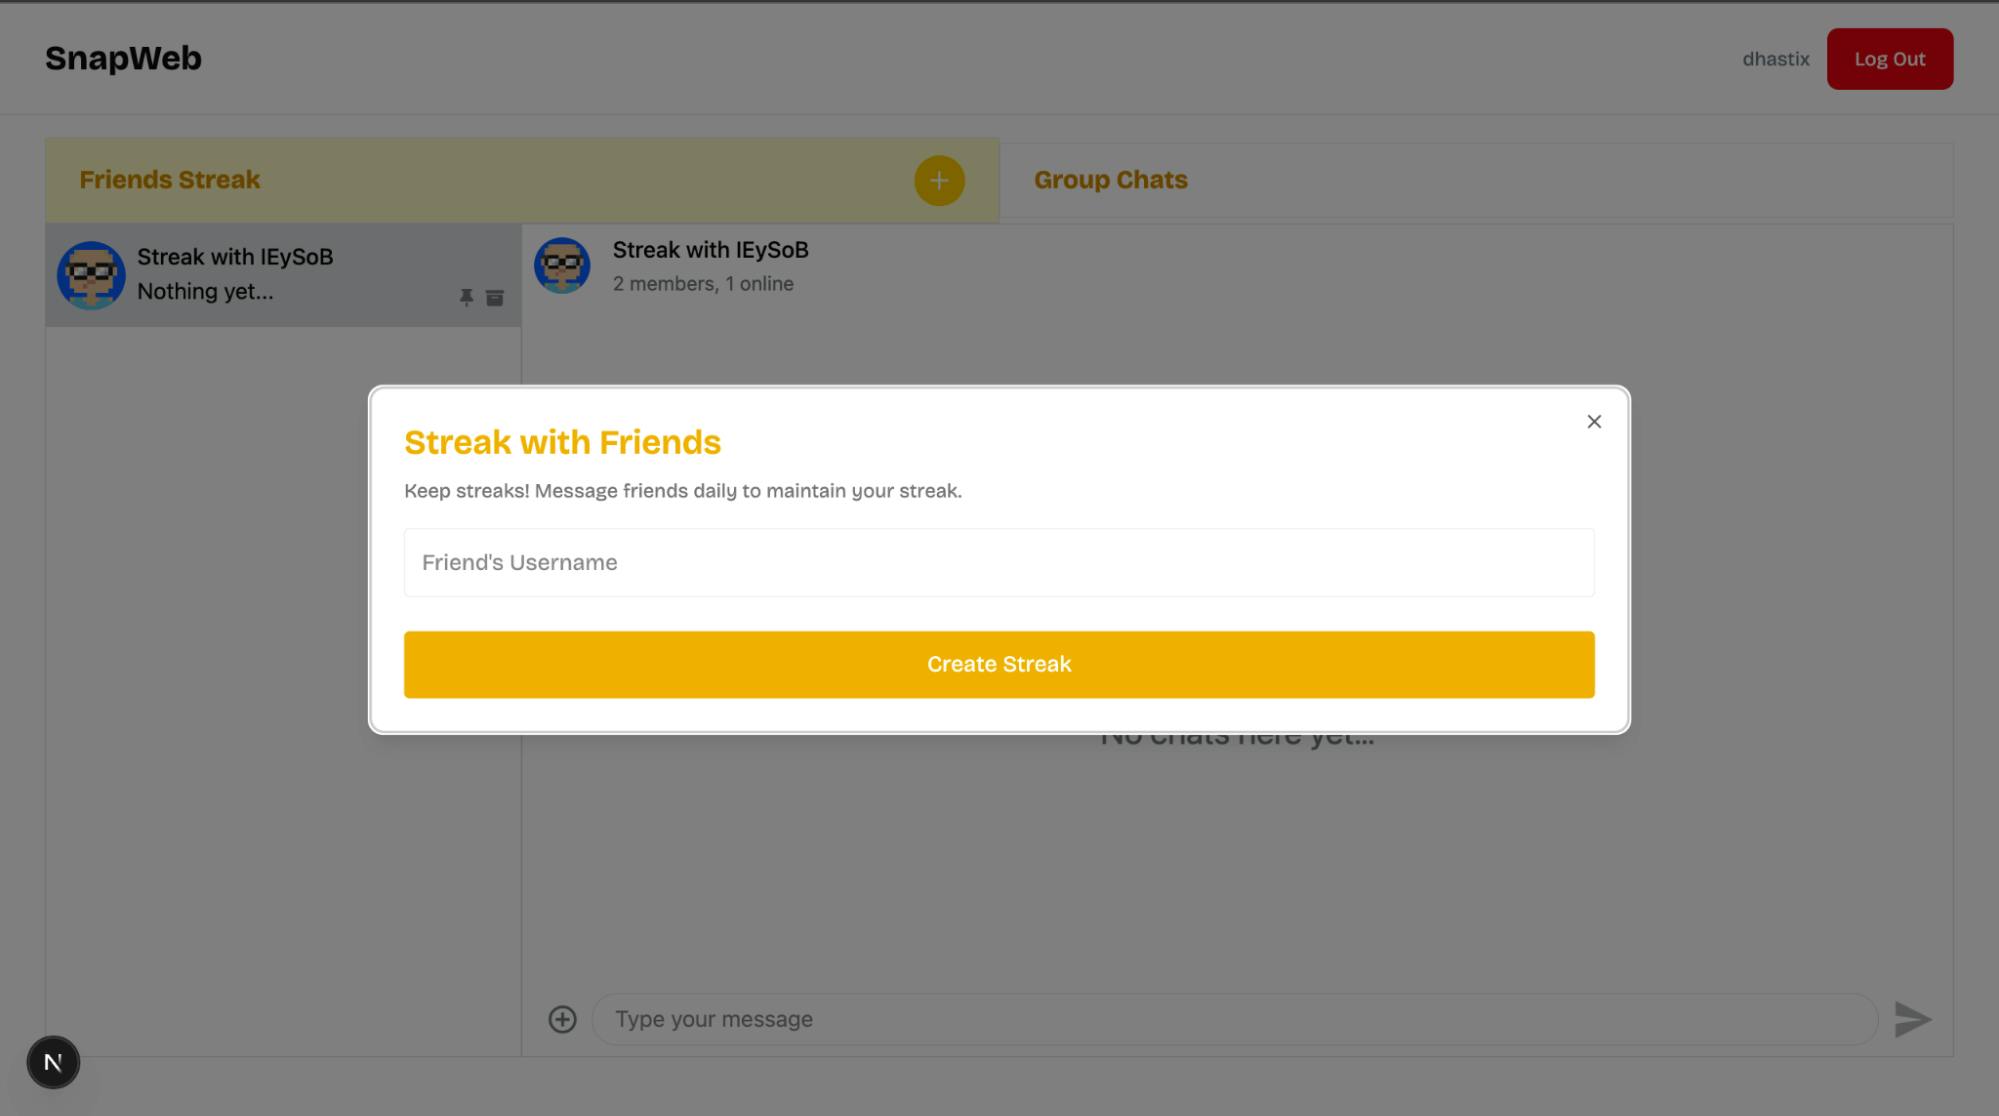
The Chat page combines all the application’s messaging features, including group chats, streak chats with friends, and the ability to create chat channels using the Stream Chat SDK.
These features are displayed in pop-ups built with the Shadcn Dialog component. We’ll implement each of these shortly.
As shown in the video, the page is divided into two sections:
- Streak chat – for one-on-one streaks between two users.
- Group chat – for conversations involving multiple users.
Inside the Next.js app directory, create a components folder containing the following files:
cd app
mkdir components && cd components
touch CreateGroupModal.tsx CreateStreakModal.tsx GroupChatPage.tsx StreakPage.tsx StreakReminderModal.tsx
The CreateGroupModal and CreateStreakModal render the forms that allow users to create a group chat or a streak channel. The GroupChatPage and StreakPage components render the chat UI elements for the group and streak chats.
The StreakReminderModal component notifies users when they need to send a message to maintain their daily streak.

Chat Page Code Walkthrough
Inside the app directory, create a chat folder, then add a page.tsx file inside it.
cd app && \ mkdir chat &&\
cd chat && touch page.tsx
Import the following components into the chat/page.tsx file:
"use client";
//👇🏻 Shadcn UI Dialog components
import { Dialog, DialogTrigger } from "@/components/ui/dialog";

//👇🏻 streak reminder pop-up
import StreakReminderModal from "../components/StreakReminderModal";

//👇🏻 group creation modals/pop-ups
import CreateStreakModal from "@/app/components/CreateStreakModal";
import CreateGroupModal from "@/app/components/CreateGroupModal";

//👇🏻 streaks and group chat UI elements
import GroupChatPage from "@/app/components/GroupChatPage";
import StreakPage from "@/app/components/StreakPage";

//👇🏻 UI elements and navigation bar component
import { Plus } from "lucide-react";
import { useState } from "react";
Add the following code snippets to the file:
export default function ChatPage() {
    //👇🏻 state toggle between streak/group chat UI
    const [showGroupChat, setShowGroupChat] = useState<boolean>(false);
    //👇🏻 state to open/close streak modal
    const [openStreakModal, setOpenStreakModal] = useState<boolean>(false);
    //👇🏻 state to open/close group modal
    const [openGroupModal, setOpenGroupModal] = useState<boolean>(false);
    //👇🏻 state to open/close streak reminder modal
    const [streakReminder, setStreakReminder] = useState<boolean>(false);
    //👇🏻 state for streak reminder message
    const [reminderMessage, setReminderMessage] = useState<string>("");

    return (
 <main>
 <div>
 <section>
                    {/** -- Streak Group section -- **/}
 <div
                        className={` ${!showGroupChat ? "bg-yellow-100" : ""}`}
                        onClick={() => setShowGroupChat(false)}
 >
 <h3>Friends Streak</h3>
 <Dialog open={openStreakModal} onOpenChange={setOpenStreakModal}>
 <DialogTrigger asChild>
                                {!showGroupChat && (
 <span>
 <Plus size={20} />
 </span>
 )}
 </DialogTrigger>
                            {/** -- create Streak modal -- **/}
 <CreateStreakModal setOpen={setOpenStreakModal} />
 </Dialog>
 </div>
                    {/** -- Group Chat section -- **/}
 <div
                        className={`${showGroupChat ? "bg-yellow-100" : ""}`}
                        onClick={() => setShowGroupChat(true)}
 >
 <h3>Group Chats</h3>
 <Dialog open={openGroupModal} onOpenChange={setOpenGroupModal}>
 <DialogTrigger asChild>
                                {showGroupChat && (
 <span>
 <Plus size={20} />
 </span>
 )}
 </DialogTrigger>
                            {/** -- create group chat modal -- **/}
 <CreateGroupModal setOpen={setOpenGroupModal} />
 </Dialog>
 </div>
 </section>

                {/** -- Switch page contents -- **/}
 <section>
                    {showGroupChat ? (
 <GroupChatPage />
 ) : (
 <StreakPage
                            setReminderMessage={setReminderMessage}
                            setStreakReminder={setStreakReminder}
 />
 )}
 </section>
 </div>

            {/** -- Streak Reminder component -- **/}
 <Dialog open={streakReminder} onOpenChange={setStreakReminder}>
 <StreakReminderModal reminderMessage={reminderMessage} />
 </Dialog>
 </main>
 );
}
From the code snippet above:
- setShowGroupChat – Toggles between the streak chat and group chat interfaces.
- setOpenStreakModal and setOpenGroupModal – Control the open/close state of the streak and group channel creation pop-ups.
- reminderMessage – Stores the text displayed in the streak reminder modal.
- setStreakReminder – Opens or closes the streak reminder pop-up.
This setup allows users to switch between group and streak chats, create new channels, and receive streak reminders without leaving the chat page.
Copy the following code snippet into the StreakReminderModal.tsx file:
import {
    DialogHeader,
    DialogContent,
    DialogTitle,
    DialogDescription,
} from "@/components/ui/dialog";

export default function StreakReminderModal({
    reminderMessage,
}: {
    reminderMessage: string;
}) {
    return (
 <DialogContent className='sm:max-w-4xl bg-red-600'>
 <DialogHeader>
 <DialogTitle className='text-2xl text-gray-50 text-center'>
 Streak Reminder 🔥
 </DialogTitle>
 <DialogDescription className='text-red-200 text-center'>
 Keep streaks! Message friends daily to maintain your streak.
 </DialogDescription>
 </DialogHeader>
 <div className='flex flex-col items-center justify-center space-y-4'>
 <p className='font-bold text-gray-50'>{reminderMessage}</p>
 </div>
 </DialogContent>
 );
}
The code snippet accepts the streak reminder message as a prop and displays it to the user when they are missing a streak or haven't exchanged messages for the day.
Next, you can create the CreateGroupModal and CreateStreakModal components.
Copy the following code snippet into the CreateGroupModal.tsx file:
"use client";
import {
DialogContent,
DialogDescription,
DialogHeader,
DialogTitle,
} from "@/components/ui/dialog";
import { Dispatch, useContext, useState } from "react";
export default function CreateGroupModal({
setOpen,
}: {
setOpen: Dispatch<React.SetStateAction<boolean>>;
}) {
const [isLoading, setIsLoading] = useState<boolean>(false);
const handleCreateGroup = async (e: React.FormEvent<HTMLFormElement>) => {
e.preventDefault();
setIsLoading(true);
const formData = new FormData(e.currentTarget);
console.log("Form Data:", Object.fromEntries(formData.entries()));
};
return (
<DialogContent className='sm:max-w-4xl'>
<DialogHeader>
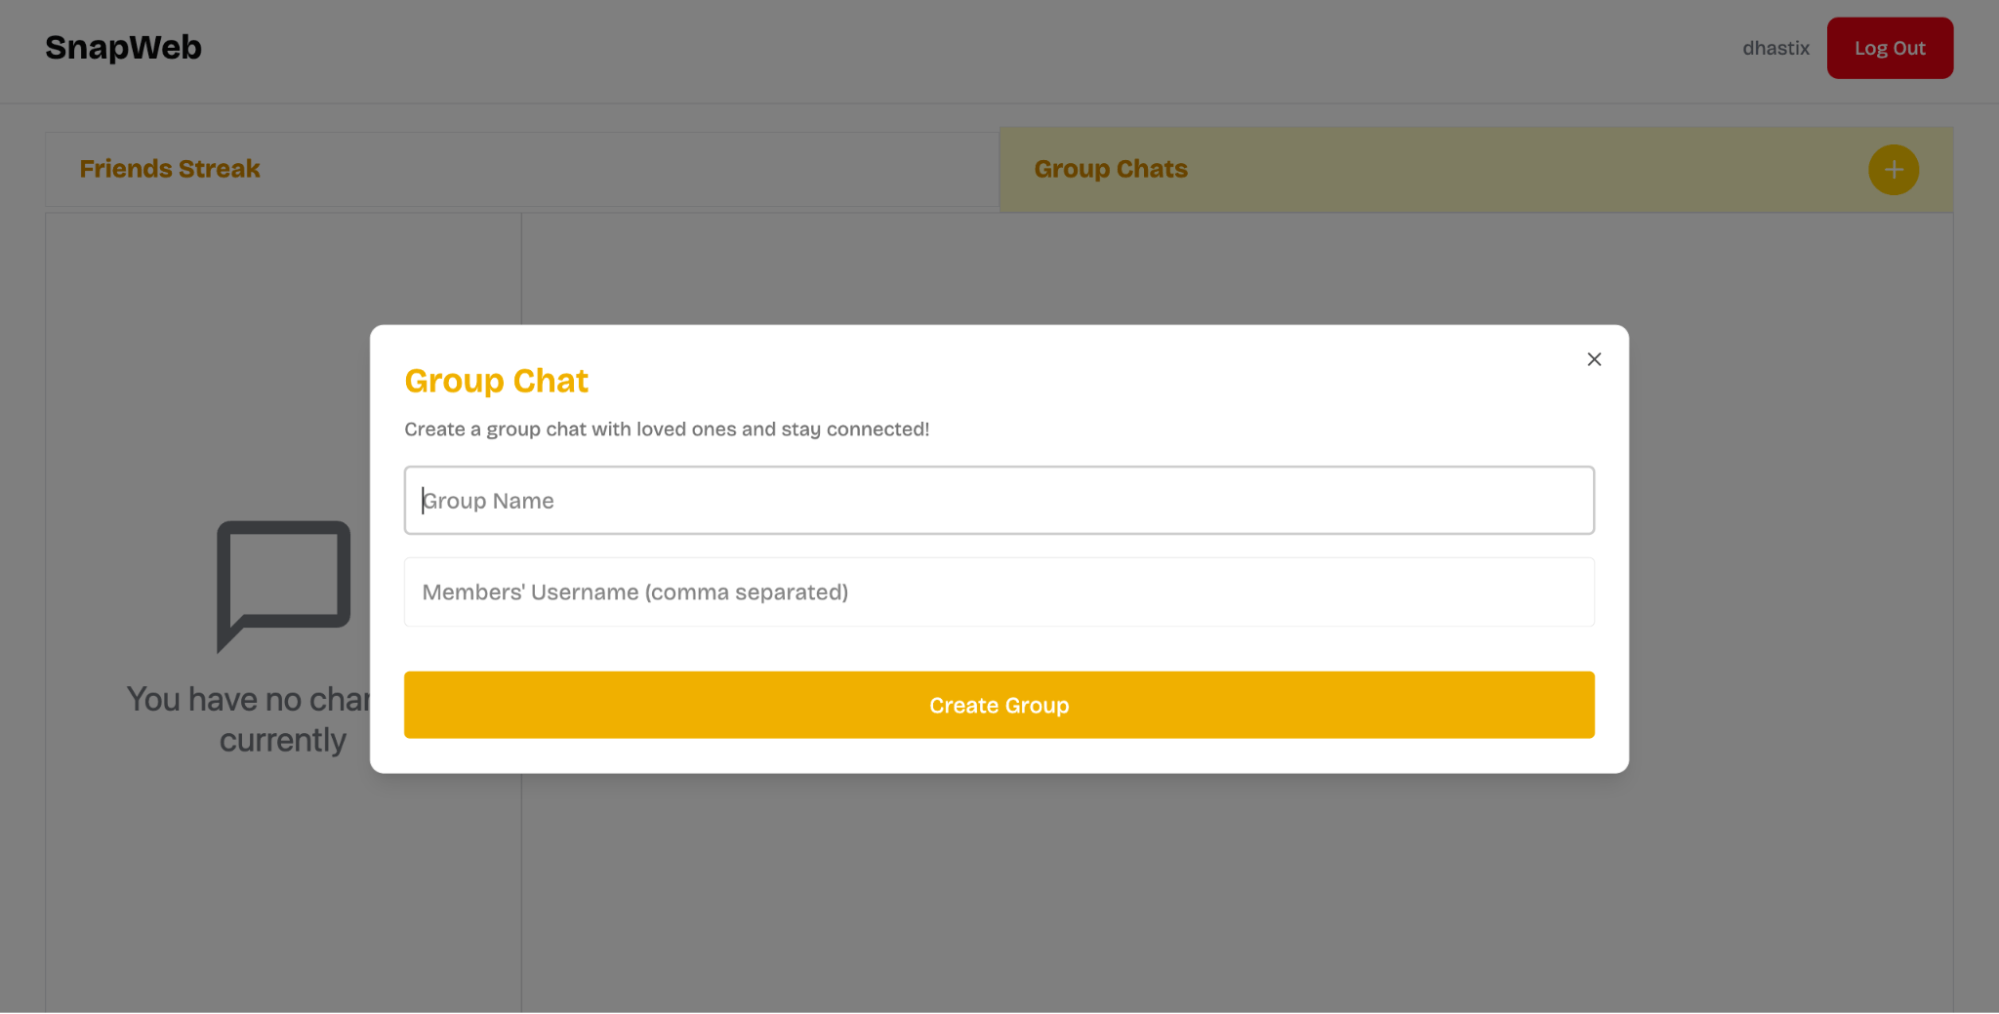
<DialogTitle>Group Chat</DialogTitle>
<DialogDescription>
Create a group chat with loved ones and stay connected!
</DialogDescription>
</DialogHeader>
<form onSubmit={handleCreateGroup}>
<input
type='text'
name='groupName'
placeholder='Group Name'
id='groupName'
required
/>
<input
type='text'
name='members'
placeholder="Members' Username (comma separated)"
id='members'
required
/>
<button type='submit' disabled={isLoading}>
{isLoading ? "Creating..." : "Create Group"}
</button>
</form>
</DialogContent>
);
}The code snippet above renders a form that accepts the name and members for the group chat.
Finally, copy the following code snippet into the CreateStreakModal.tsx file:
"use client";
import {
    DialogContent,
    DialogDescription,
    DialogHeader,
    DialogTitle,
} from "@/components/ui/dialog";
import { Dispatch, useContext, useState } from "react";

export default function CreateStreakModal({
    setOpen,
}: {
    setOpen: Dispatch<React.SetStateAction<boolean>>;
}) {
    const [isLoading, setIsLoading] = useState<boolean>(false);

    const createStreakGroup = async (e: React.FormEvent<HTMLFormElement>) => {
        e.preventDefault();
        if (!user || !user.displayName) return;
        setIsLoading(true);
        const formData = new FormData(e.currentTarget);
        console.log("Form Data:", Object.fromEntries(formData.entries()));
 };

    return (
 <DialogContent>
 <DialogHeader>
 <DialogTitle>Streak with Friends</DialogTitle>
 <DialogDescription>
 Keep streaks! Message friends daily to maintain your streak.
 </DialogDescription>
 </DialogHeader>

 <form onSubmit={createStreakGroup}>
 <input
                    type='text'
                    name='username'
                    placeholder="Friend's Username"
                    id='username'
                    required
 />

 <button type='submit' disabled={isLoading}>
                    {isLoading ? "Creating..." : "Create Streak"}
 </button>
 </form>
 </DialogContent>
 );
}
The CreateStreakModal component also renders the form that accepts the username of the other member of the streak chat group.
Setting Up Firebase Authentication and Firestore
Firebase is a cloud platform that enables you to build full-stack software applications without worrying about managing your database or server infrastructure. It provides features like authentication, real-time database, cloud functions, file storage, and more.
In this section, you'll learn how to install Firebase and configure the Firestore Database and Firebase authentication in your Next.js application.
Install the Firebase Node.js package by running the code snippet below:
npm install firebaseOpen the Firebase Console in your browser and create a new Firebase project.
Within the project dashboard, click the web icon \</> to add a Firebase app to the project.
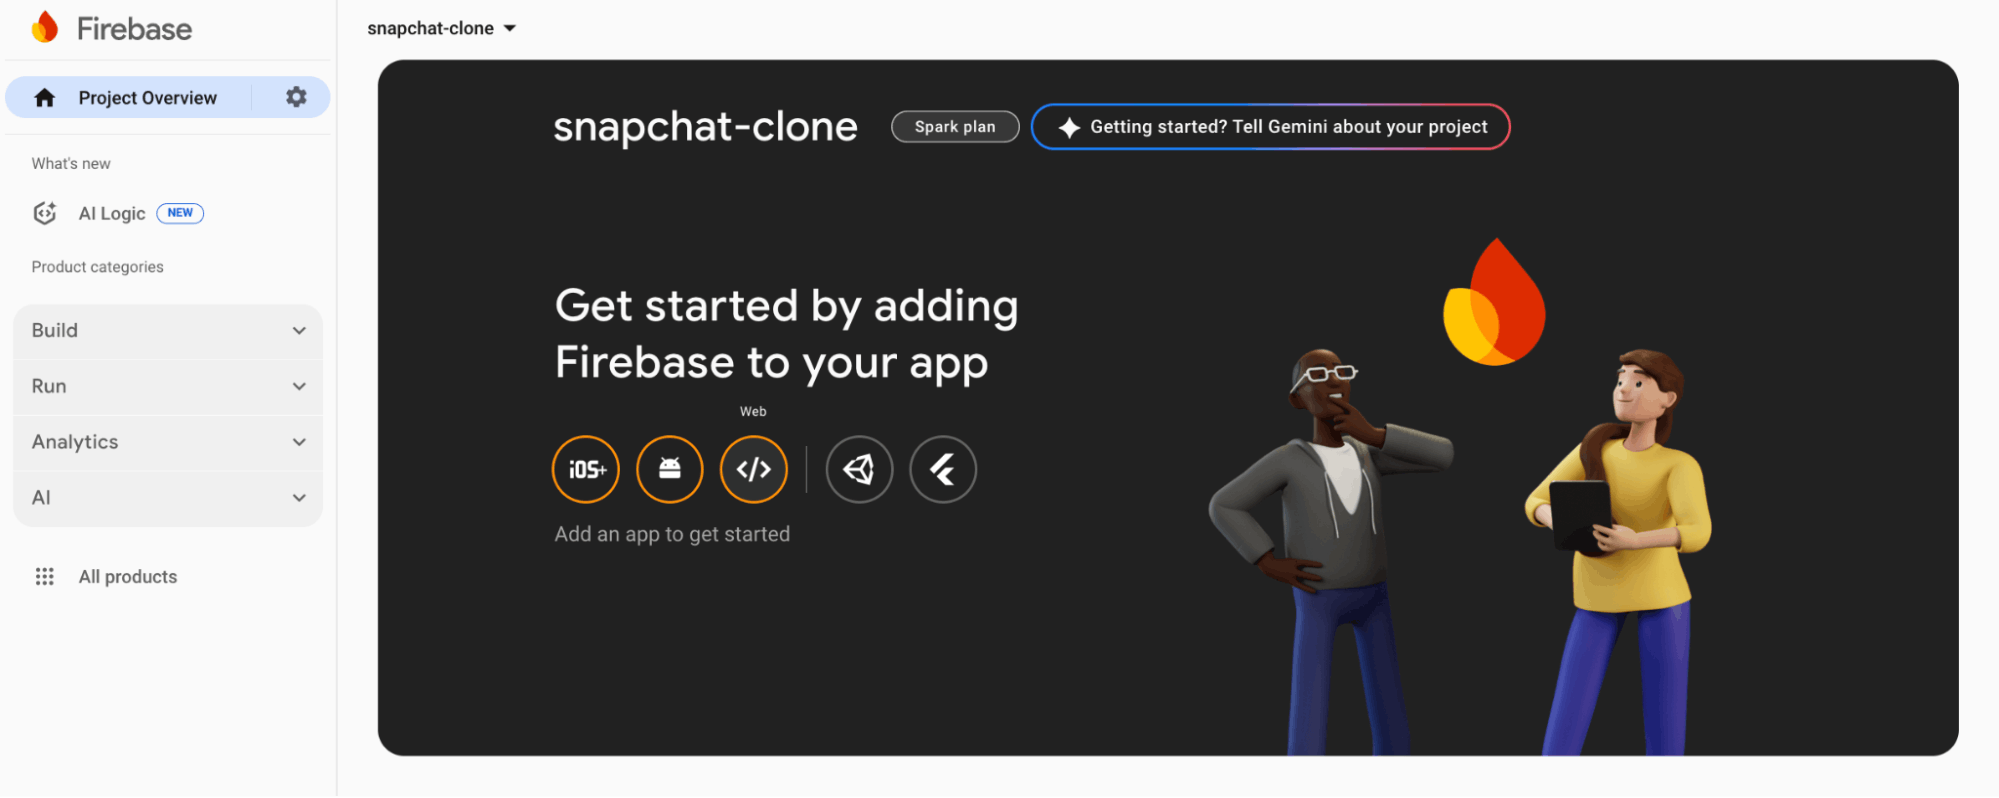
Register the app by entering a nickname, then copy the auto-generated Firebase configuration code.
Create a lib/firebase.ts file within the Next.js src folder and paste the following code snippet into the file:
import { initializeApp, getApps } from "firebase/app";
import { getFirestore } from "firebase/firestore";
import { EmailAuthProvider } from "firebase/auth";
import { getAuth } from "firebase/auth";

const firebaseConfig = {
    // 👉🏻 paste your Firebase config
};

//👇🏻 Initialize Firebase
const app =
    getApps().length === 0 ? initializeApp(firebaseConfig) : getApps()[0];
const provider = new EmailAuthProvider();
const db = getFirestore(app);
const auth = getAuth(app);

//👇🏻 Export modules
export { provider, auth };
export default db;
The code snippet above initializes the Firestore database and sets up Firebase's email/password authentication provider, allowing your application to interact with the database and handle user authentication.
Next, select "Authentication" and "Firestore Database" from the sidebar menu and add them to the project.
Congratulations! You can now start interacting with these Firebase features in your Next.js project.
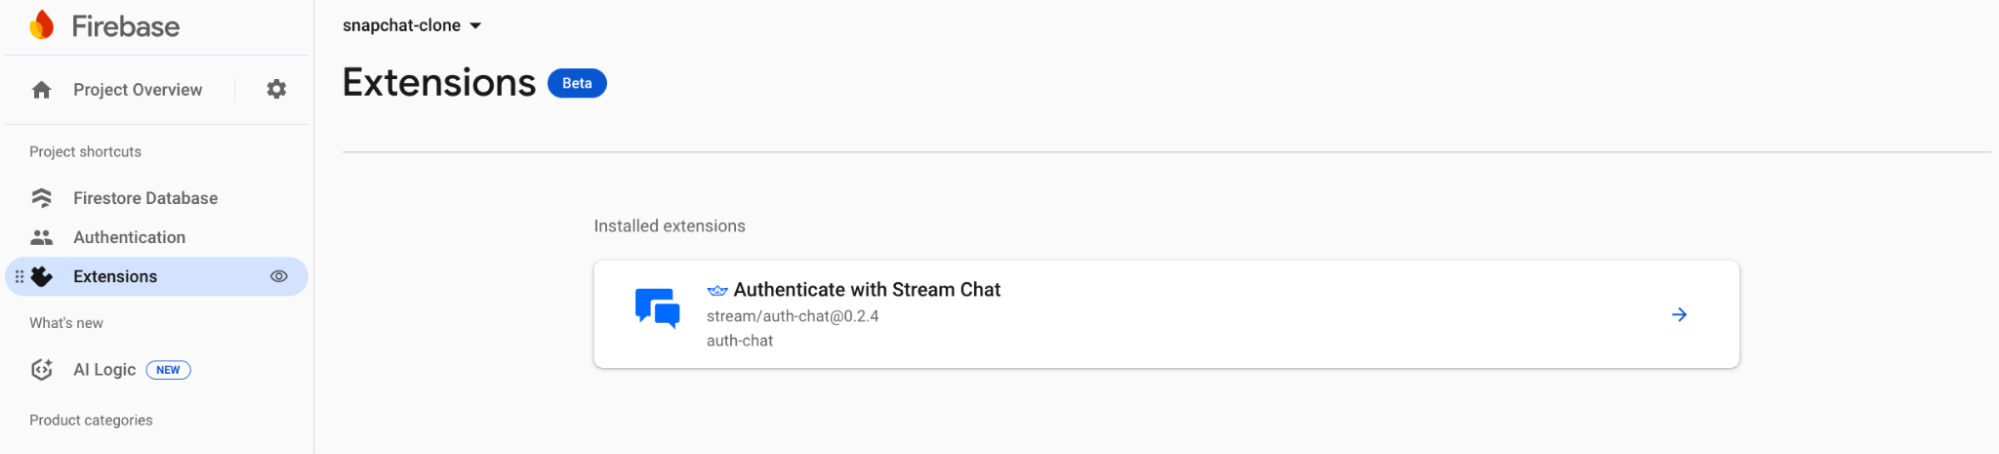
Installing the Stream Chat Firebase Extension
The Authenticate with Stream Chat extension automatically connects your Firebase users to Stream Chat, making it easy for Stream to access and manage your users.
Visit the Stream Chat Firebase Extension page and select the Firebase project where you want to install the extension.
Note: Upgrade your Firebase project to the Blaze (pay-as-you-go) plan before installing the extension.
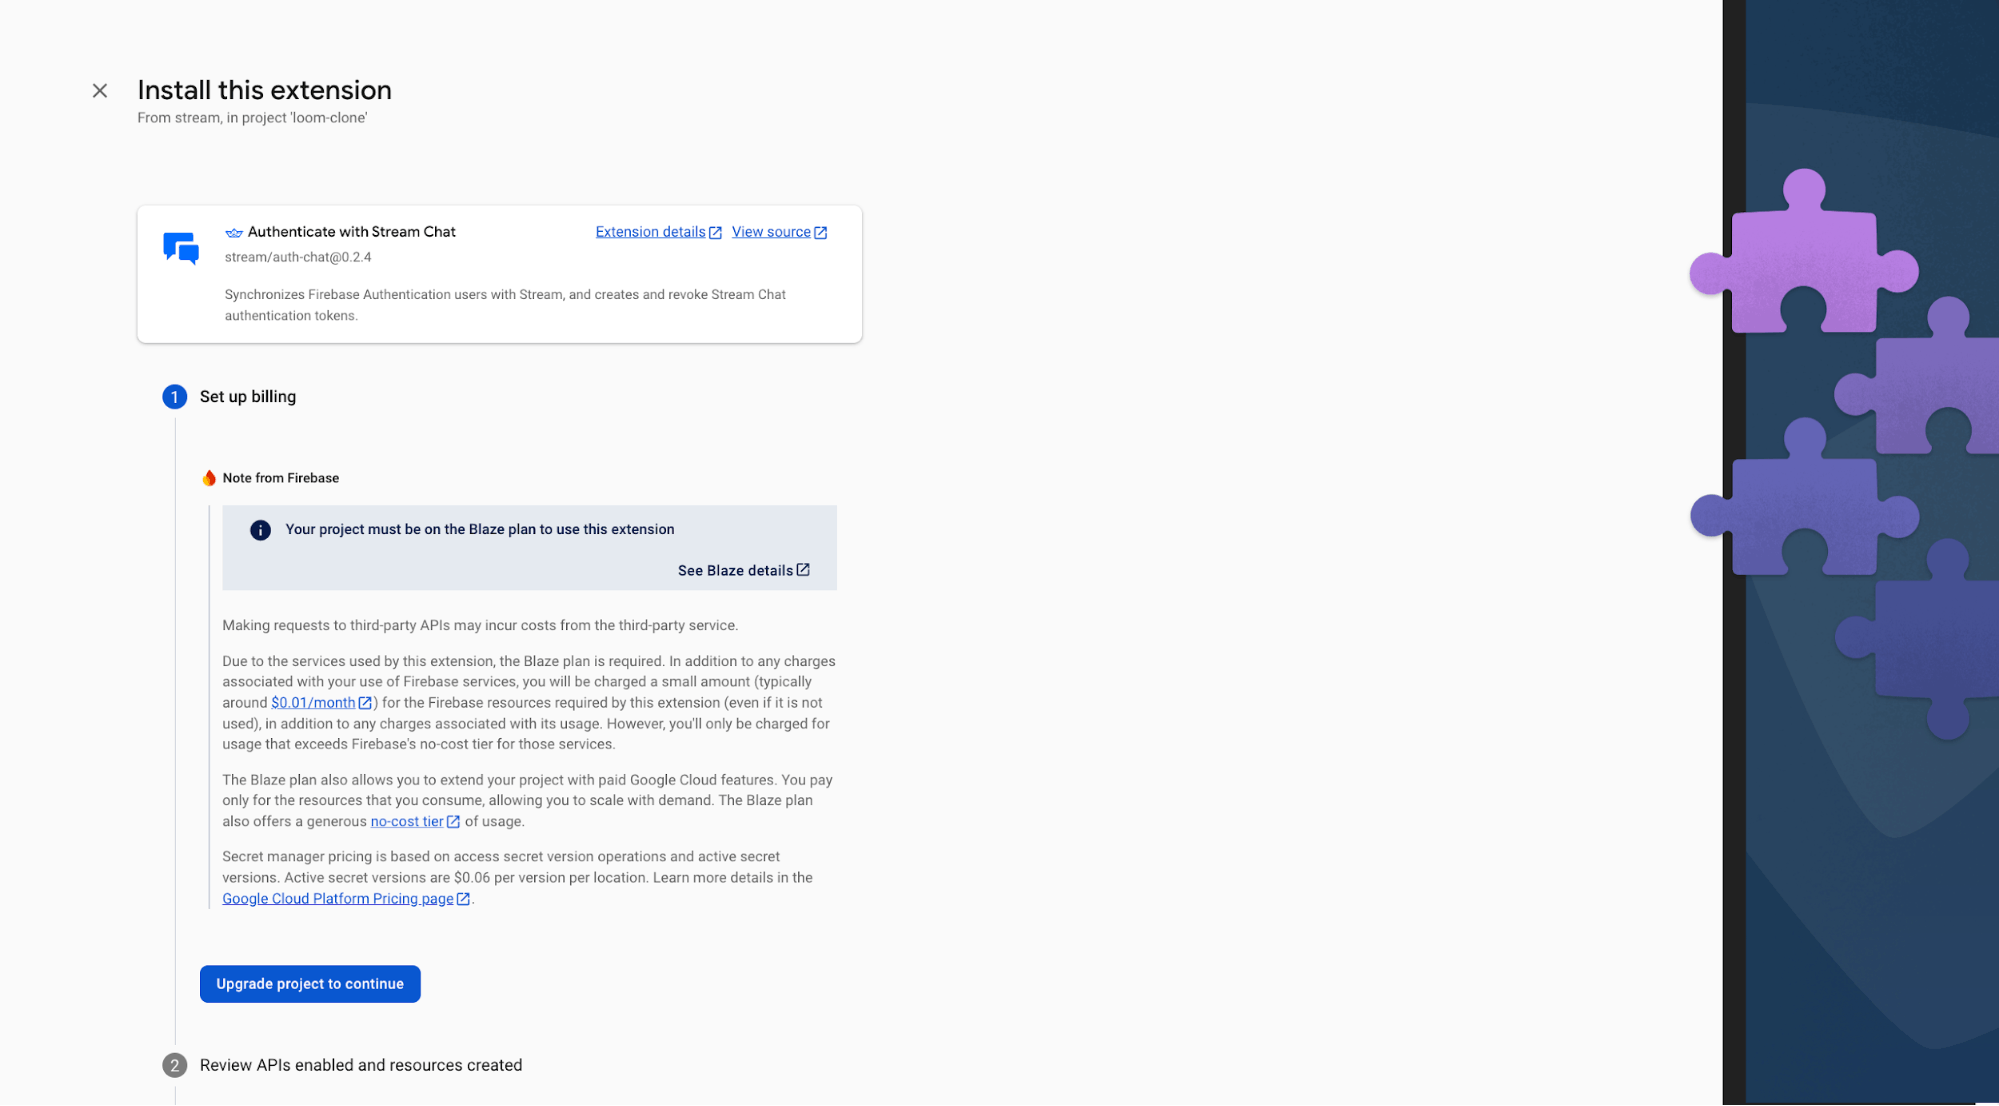
During installation, enable Artifact Registry, Cloud Functions, and Secret Manager. These permissions allow Stream to access and manage your Firebase users.
Finally, enter your Stream API key and secret in the configuration fields, then click the Install Extension button.

The extension will be installed within a few minutes. Once setup is complete, every new Firebase user will automatically be added to Stream.
Implement Authentication and Database Operations in Firebase
In this section, you will learn how to authenticate users with Firebase and create the database function that updates the users' chat streaks.
Create a server.ts within the lib folder and copy the following code snippet into the file:
import {
    createUserWithEmailAndPassword,
    signInWithEmailAndPassword,
    updateProfile,
} from "firebase/auth";

import {
    doc,
    getDoc,
    runTransaction,
    serverTimestamp,
} from "firebase/firestore";
import db, { auth } from "./firebase";
Next, add a registerUser function that accepts the new user's email, password, and username from the form and creates a new account for the user.
export const registerUser = async (form: FormData) => {
    //👇🏻 get form inputs
    const email = form.get("email") as string;
    const password = form.get("password") as string;
    const usernameRaw = form.get("username") as string;
    //👇🏻 make username lowercase
    const username = usernameRaw.trim().toLowerCase();
    //👇🏻 creates a db reference for username
    const userRef = doc(db, "users", username);

    /**
 1.  ensures that no user has the same username
 2.  creates an account using the user details
 3.  update profile details, such as displayName and photoURL
 4.  add the user details to the Firestore users collection
 **/
};
Update the registerUser function as follows:
export const registerUser = async (form: FormData) => {
    const email = form.get("email") as string;
    const password = form.get("password") as string;
    const usernameRaw = form.get("username") as string;
    const username = usernameRaw.trim().toLowerCase();
    const userRef = doc(db, "users", username);

    try {
        //👇🏻 Check if the username already exists
        await runTransaction(db, async (transaction) => {
            const userDoc = await transaction.get(userRef);
            if (userDoc.exists()) {
                throw new Error("Username already exists");
 }

            //👇🏻 Create user in Firebase Auth
            const { user } = await createUserWithEmailAndPassword(
                auth,
                email,
                password
 );

            //👇🏻 Set displayName and photoURL
            await updateProfile(user, {
                displayName: username,
                photoURL: `${process.env.NEXT_PUBLIC_IMAGE_URL}${username}`,
 });
            //👇🏻 Save user profile in Firestore
            transaction.set(userRef, {
                uid: user.uid,
                email: user.email,
                username,
                photoURL: `${process.env.NEXT_PUBLIC_IMAGE_URL}${username}`,
                createdAt: serverTimestamp(),
 });
 });

        return {
            code: "auth/success",
            status: 200,
            user: auth.currentUser,
            message: "Account created successfully! 🎉",
 };
 } catch (err: any) {
        return {
            code: "auth/failed",
            status: 500,
            user: null,
            message: err.message,
            error: err,
 };
 }
};
The registerUser function first checks whether the chosen username already exists in the database. If the username is available, it creates a new account for the user, updates the user’s display name and photo URL, and then saves the user’s details in the Firestore users collection.
Add the user login function to the server.ts file:
export const loginUser = async (form: FormData) => {
    const email = form.get("email") as string;
    const password = form.get("password") as string;
    try {
        const { user } = await signInWithEmailAndPassword(auth, email, password);

        return {
            code: "auth/success",
            status: 200,
            user,
            message: "Logged in successfully! 🎉",
 };
 } catch (err) {
        return {
            code: "auth/failed",
            status: 500,
            user: null,
            message: "Failed to login user",
            error: err,
 };
 }
};
The code snippet above accepts the user's email address and password from the form and signs users into the application.
To log users out of the application, add the following code snippet to the server.ts file:
export const logoutUser = async () => {
    try {
        await auth.signOut();
        return {
            code: "auth/success",
            status: 200,
            user: null,
            message: "Logged out successfully! 🎉",
 };
 } catch (err) {
        return {
            code: "auth/failed",
            status: 500,
            user: null,
            message: "Failed to logout user",
            error: err,
 };
 }
};
To prevent unauthenticated users from accessing the chat page, we’ll wrap an authentication context around it.
Create a new file called AuthContext.tsx and add the following code:
"use client";
import { createContext, useState, useEffect } from "react";
import { onAuthStateChanged, User } from "firebase/auth";
import { useRouter } from "next/navigation";
import { auth } from "@/lib/firebase";
import { Loader2 } from "lucide-react";

const AuthContext = createContext<{
    user: User | null;
    loading: boolean;
}>({
    user: null,
    loading: true,
});

export function AuthProvider({
    children,
}: Readonly<{
    children: React.ReactNode;
}>) {
    const [user, setUser] = useState<User | null>(null);
    const [loading, setLoading] = useState(true);
    const router = useRouter();

    useEffect(() => {
        const unsubscribe = onAuthStateChanged(auth, async (user) => {
            if (user?.uid) {
                setUser(user);
                setLoading(false);
 } else {
                return router.push("/login");
 }
 });

        return () => unsubscribe();
 }, [router]);

    return (
 <>
            {user ? (
 <AuthContext.Provider value={{ loading, user }}>
                    {children}
 </AuthContext.Provider>
 ) : (
 <main className='flex items-center justify-center h-screen'>
 <Loader2 />
 </main>
 )}
 </>
 );
}

export default AuthContext;
The AuthContext provider retrieves the current Firebase user. If a user is authenticated, it returns the user object and sets the loading state to false. If no user is found, it returns null and redirects the user to the login page.
Wrap the chat/layout.tsx file with the \<AuthProvider/> component as shown below:
import { AuthProvider } from "../(components)/AuthContext";
import type { Metadata } from "next";

export const metadata: Metadata = {
    title: "Streaks & Group Chats | Snapchat Clone",
    description:
        "Discover and connect with friends through streaks and group chats.",
};

export default function AuthLayout({
    children,
}: Readonly<{
    children: React.ReactNode;
}>) {
    return (
 <AuthProvider>
 <main>{children}</main>
 </AuthProvider>
 );
}
Finally, add the following utility functions to the file:
//👇🏻 get user IDs via usernames
export const getUserIDsByUsernames = async (
    usernames: string[]
): Promise<string[]> => {
    const memberIDs: string[] = [];

    for (const name of usernames) {
        const userRef = doc(db, "users", name.trim().toLowerCase());
        const userDoc = await getDoc(userRef);

        if (userDoc.exists()) {
            const uid = userDoc.data().uid as string;
            memberIDs.push(uid);
 }
 }

    return memberIDs;
};

//👇🏻 get username by ID
export const getUsernameById = (
    members: Record<string, ChannelMemberResponse>,
    userId: string
): string | null => {
    for (const key in members) {
        const member = members[key];
        if (member.user_id === userId) {
            return member.user?.name ?? null; // adjust to `.displayName` if needed
 }
 }
    return null;
};
The getUserIDsByUsernames function accepts the array of usernames provided when creating a group chat. It then looks up each username in the Firestore users collection, retrieves the corresponding uid and returns an array of all the user IDs.
The getUsernameById function accepts a list of chat members and a specific user ID, loops through the members list, then finds and returns the corresponding username.
Create Chat Channels with the Stream Chat SDK
In this section, you’ll learn how to create new channels and build a chat interface using the customizable UI components provided by the Stream Chat SDK.
Before we proceed, recall that we added a createStreamChannel function to the stream.ts file. This function accepts the channel type, creator’s ID, group members, and group name as parameters and creates a Stream channel.
Inside CreateGroupModal.tsx, execute the function below when a user submits the form containing the group name and list of members:
//👇🏻 gets current user object from the Auth context
const { user } = useContext(AuthContext);

const handleCreateGroup = async (e: React.FormEvent<HTMLFormElement>) => {
    e.preventDefault();
    const formData = new FormData(e.currentTarget);

    //👇🏻 group name and members
    const groupName = formData.get("groupName") as string;
    const rawMembers = formData.get("members") as string;

    //👇🏻 formatting the group members' names
    const members = rawMembers
 .split(",")
 .map((member) => member.trim() && member.trim().toLowerCase())
 .filter(Boolean);

    //👇🏻 retrieves their id
    const memberIDs = await getUserIDsByUsernames(members);

    // 👇🏻 returns an error if usernames are invalid
    if (!memberIDs || memberIDs.length == 0) {
        setIsLoading(false);
        return;
 }

    //👇🏻 creates the group using the data provided
    const { success } = await createStreamChannel({
        type: "livestream",
        userId: user.uid,
        members: [user.uid, ...memberIDs],
        groupName,
 });
    //👇🏻 close modal
    if (success) {
        setOpen(false);
 }
};
From the code snippet above:
- The handleCreateGroup function runs when the user submits the form to create a group channel for multiple participants. It retrieves the group name and list of members.
- The members list is cleaned (trimmed and converted to lowercase) and passed as an argument to the getUserIDsByUsernames function to fetch their corresponding user IDs.
- Finally, the members' IDs, current user IDs, group names, and channel types are provided to the createStreamChannel function, which creates the new group channel.
To create the streak chat group, execute the following function when a user submits the form within the CreateStreakModal component:
const createStreakGroup = async (e: React.FormEvent<HTMLFormElement>) => {
    e.preventDefault();
    const formData = new FormData(e.currentTarget);
    const username = formData.get("username") as string;

    //👇🏻 get user ID
    const memberIDs = await getUserIDsByUsernames([username]);

    //👇🏻 returns an error if username is invalid
    if (!memberIDs || memberIDs.length === 0) {
        setIsLoading(false);
        return;
 }

    //👇🏻 creates a group channel
    const { success } = await createStreamChannel({
        type: "messaging",
        userId: user.uid,
        members: [user.uid, ...memberIDs],
 });

    //👇🏻 returns the corresponding message/result
    if (success) {
        setOpen(false);
 }
};
From the code snippet above:
- The createStreakGroup function is triggered when a user creates a one-on-one streak chat channel with a friend. It retrieves the friend’s username from the form input.
- The friend’s username is passed into the getUserIDsByUsernames function to retrieve their corresponding user ID. If the username is invalid, an error is displayed.
- The channel type (messaging), current user ID, and member IDs array are then passed into the createStreamChannel function to create the streak chat channel.
Stream Chat UI Components
The Stream Chat SDK provides various UI components that simplify the process of building a fully functional and customizable chat interface. These components enable users to send messages, attach files, and view recent messages in a channel.
To begin, create a useGetStreamClient.ts file that returns a Stream Chat client capable of querying channel messages within the app components.
import { useCreateChatClient } from "stream-chat-react";
import { createToken } from "../../../actions/stream";
import { useCallback } from "react";
import { User } from "firebase/auth";

export const useGetStreamClient = (user: User) => {
    const tokenProvider = useCallback(async () => {
        return await createToken(user.uid);
 }, [user]);

    const client = useCreateChatClient({
        apiKey: process.env.NEXT_PUBLIC_STREAM_API_KEY!,
        tokenOrProvider: tokenProvider,
        userData: {
            id: user.uid,
            name: user.displayName!,
            image: user.photoURL || "",
 },
 });

    if (!client) return { client: null };

    return { client };
}
The useGetStreamClient hook generates a token for the current user and creates a chat client using the user's credentials from the user object. It then returns the chat client, which can be used to perform client-side Stream operations.
Update the GroupChatPage component to render the chat UI, enabling users to send messages and also view recent messages.
"use client";
import {
    Chat,
    Channel,
    ChannelList,
    Window,
    ChannelHeader,
    MessageList,
    MessageInput,
} from "stream-chat-react";
import { useContext } from "react";
import { Loader2 } from "lucide-react";
import AuthContext from "./AuthContext";
import { useGetStreamClient } from "../hooks/useGetStreamClient";

export default function GroupChatPage() {
    //👇🏻 current user
    const { user, loading } = useContext(AuthContext);
    //👇🏻 stream client
    const { client } = useGetStreamClient(user!);
    //👇🏻 filters for fetching the messages
    const filters = { members: { $in: [user?.uid] }, type: "livestream" };
    const options = { presence: true, state: true };

    if (!client || loading) {
        return (
 <div>
 <Loader2 className='animate-spin h-6 w-6 text-gray-500' />
 </div>
 );
 }

    return {
        /***
 ---------------
 UI Components
 ---------------
 ***/
 };
}
The code snippet above demonstrates how to set up the necessary Stream Chat UI components to display group chat channels and messages.
- The useGetStreamClient hook initializes the Stream Chat client for the authenticated user.
- The filters object ensures only channels of type livestream where the current user is a member are retrieved.
- The options enable real-time presence and state synchronization.
If the client is not yet ready or the authentication is still loading, a spinner is displayed.
Return the following Stream UI components from GroupChatPage:
return (
 <Chat client={client}>
 <div className='chat-container'>
            {/* -- Channel List -- */}
 <div className='channel-list'>
 <ChannelList
                    sort={{ last_message_at: -1 }}
                    filters={filters}
                    options={options}
 />
 </div>

            {/* -- Messages Panel -- */}
 <div className='chat-panel'>
 <Channel>
 <Window>
 <ChannelHeader />
 <MessageList />
 <MessageInput />
 </Window>
 </Channel>
 </div>
 </div>
 </Chat>
);
From the code snippet above:
- Chat component initializes the Stream Chat client and wraps the entire Chat page.
- ChannelList shows available chat channels.
- Channel sets up an active chat session.
- Window contains the message display and input areas.
- ChannelHeader, MessageList, and MessageInput provide a fully functional chat interface.
Do the same to the StreakPage component since they both render chat messages, but of different channel types (messaging):
"use client";
import { Chat, Channel, ChannelList } from "stream-chat-react";
import { useGetStreamClient } from "../hooks/useGetStreamClient";
import { Dispatch, SetStateAction, useContext } from "react";
import { ChannelContent } from "./ChannelContent";
import AuthContext from "./AuthContext";
import { Loader2 } from "lucide-react";

export default function StreakPage({
    setReminderMessage,
    setStreakReminder,
}: {
    setReminderMessage: Dispatch<SetStateAction<string>>;
    setStreakReminder: Dispatch<SetStateAction<boolean>>;
}) {
    const { user, loading } = useContext(AuthContext);
    const { client } = useGetStreamClient(user!);
    //👇🏻 filter = channel type - messaging
    const filters = { members: { $in: [user?.uid] }, type: "messaging" };
    const options = { presence: true, state: true };

    if (!client || loading || !user) {
        return (
 <div>
 <Loader2 className='animate-spin h-6 w-6 text-gray-500' />
 </div>
 );
 }

    return (
 <Chat client={client}>
 <div className='chat-container'>
                {/* -- Channel List -- */}
 <div className='channel-list'>
 <ChannelList
                        sort={{ last_message_at: -1 }}
                        filters={filters}
                        options={options}
 />
 </div>

                {/* -- Messages Panel -- */}
 <div className='chat-panel'>
 <Channel>
                        {/** --- 👇🏻 Difference from GroupChatPage component 👇🏻 --- **/}
 <ChannelContent
                            user={user}
                            setReminderMessage={setReminderMessage}
                            setStreakReminder={setStreakReminder}
 />
 </Channel>
 </div>
 </div>
 </Chat>
 );
}
From the code snippet above:
- The StreakPage component tracks streaks based on the messages sent within the channel.
- It accepts two state functions, setReminderMessage and setStreakReminder, which update the reminder message to be displayed to the user and control the visibility of the reminder pop-up.
- The filters object retrieves channels where the current user is a member and the channel type is messaging (streak channels).
- Inside the Stream Channel component, a custom ChannelContent component is rendered. This component receives the current user object along with the setReminderMessage and setStreakReminder functions. The next section will cover more details on this custom component.
Implement the Chat Streak Functionality With Stream Chat SDK
In this section, you will learn how to build a Snapchat-style chat streak feature that tracks daily conversations between users, updates their streak count, and sends reminders when a streak is at risk of ending.
To implement chat streaks, we will:
- Fetch recent messages in the channel using useChannelStateContext.
- Compare message dates to determine whether both users have sent messages to each other on the same day.
- Notify the user if no messages have been exchanged today.
- Update the streak count by one if both users have chatted today and the streak continued from the previous day.
- Start a new streak if today is the first day of interaction.
This logic will run each time a new message is sent, ensuring the streak count and reminders are always up to date.
Add the following functions to the lib/server.ts file to handle chat streak updates.
import { MessageListProps } from "stream-chat-react";
import { parseISO, differenceInCalendarDays } from "date-fns";

//👇🏻 compares the message date with the current date
export const isSameUTCDate = (date: Date, today: Date) => {
    return (
        date.getUTCFullYear() === today.getUTCFullYear() &&
        date.getUTCMonth() === today.getUTCMonth() &&
        date.getUTCDate() === today.getUTCDate()
 );
};

//👇🏻 updates the chat streak
export async function updateChatStreak(
    channelId: string,
    today: Date
): Promise<void> {
    const todayString = today.toISOString().split("T")[0];
    const streakRef = doc(db, "channels", channelId);
    const streakSnap = await getDoc(streakRef);

    //👇🏻 gets the current streak and last streak date if available
    const { currentStreak = 0, lastStreakDate = null } = streakSnap.exists()
        ? streakSnap.data()
        : {};
    //👇🏻 declares a new streak number
    let newStreak: number;
    //👇🏻 if there is a last streak date value
    if (lastStreakDate) {
        //👇🏻 gets the days difference
        const dayDiff = differenceInCalendarDays(today, parseISO(lastStreakDate));

        if (dayDiff === 0) return; //👉🏻 Already counted today
        newStreak = dayDiff === 1 ? currentStreak + 1 : 1; //👉🏻 updates the streak or restarts
 } else {
        newStreak = 1; //👉🏻 First streak day
 }
    //👇🏻 updates the Firebase document
    await setDoc(streakRef, {
        currentStreak: newStreak,
        lastStreakDate: todayString,
        updatedAt: new Date().toISOString(),
 });
}
The isSameUTCDate function checks if two dates fall on the same day in UTC, while updateChatStreak accepts the channel ID and today’s date, retrieves the current streak data from Firebase, and:
- Keeps the streak unchanged if today has already been counted
- Increments the streak if the last streak was yesterday
- Resets the streak to 1 if otherwise
- Saves the updated streak and date back to Firebase
Next, implement the updateChatStreak logic inside the ChannelContent UI component.
Begin by adding these imports to the ChannelContent.tsx file:
"use client";
import { Dispatch, SetStateAction, useEffect, useMemo, useState } from "react";

//👇🏻 Firebase methods
import { doc, onSnapshot } from "firebase/firestore";
import { User } from "firebase/auth";
import db from "@/lib/firebase";

//👇🏻 custom functions
import { getUsernameById, isSameUTCDate, updateChatStreak } from "@/lib/server";
import { showToast } from "@/lib/utils";

//👇🏻 Stream chat UI components
import {
    ChannelHeader,
    MessageInput,
    MessageList,
    useChannelStateContext,
    Window,
} from "stream-chat-react";
Copy the following code snippet into the ChannelContent.tsx file:
export const ChannelContent = ({
    user,
    setReminderMessage,
    setStreakReminder,
}: {
    user: User;
    setReminderMessage: Dispatch<SetStateAction<string>>;
    setStreakReminder: Dispatch<SetStateAction<boolean>>;
}) => {
    const { messages, members, channel } = useChannelStateContext();
    const [currentStreak, setCurrentStreak] = useState<number>(0);
    //👇🏻 get membersID from the members array
    const membersID = useMemo(
 () => (members ? Object.keys(members) : []),
 [members]
 );
    //👇🏻 channel ID
    const channelID = channel?.id;

    /***
 ------
 👉🏻 useEffect functions for updating states 👈🏼
 ------
 ***/

    return (
 <Window>
            <ChannelHeader />
            <MessageList />
            <MessageInput />
        </Window>
 );
};
The component above defines the key states and variables used in ChannelContent. It retrieves the messages, members, and channel data from Stream’s useChannelStateContext hook.
The membersID variable stores an array of the members’ IDs, channelID stores the channel’s ID, and currentStreak tracks the user’s current streak count.
Add a useEffect hook to keep the user’s streak count in sync with Firestore.
useEffect(() => {
    if (!channelID) return;
    const streakRef = doc(db, "channels", channelID);
    const unsubscribe = onSnapshot(streakRef, (snapshot) => {
        if (snapshot.exists()) {
            const data = snapshot.data();
            setCurrentStreak(data.currentStreak ?? 0);
 } else {
            setCurrentStreak(0);
 }
 });

    return () => unsubscribe();
}, [channelID]);
It listens to changes on the current channel document in the channels collection and updates currentStreak whenever the value changes. If the document doesn’t exist, the streak count defaults to 0.
Finally, add the useEffect, which notifies users when they haven’t reached their daily chat goal. This useEffect checks whether both users in the streak group have sent messages to each other today. If they have, the updateChatStreak function is called. If not, the StreakReminderModal pop-up appears to remind them to chat.
useEffect(() => {
    if (!channelID || !membersID.length || !messages) return;
    //👇🏻 separates the members into two variables
    const [userA, userB] = membersID;

    //👇🏻 today's date
    const today = new Date();

    //👇🏻 check if both users have sent messages today
    const userAMessagesToday = messages.some(
 (msg) => msg.user?.id === userA && isSameUTCDate(msg.created_at, today)
 );
    const userBMessagesToday = messages.some(
 (msg) => msg.user?.id === userB && isSameUTCDate(msg.created_at, today)
 );

    //👇🏻 gets the members' name
    const memberAName = getUsernameById(members!, userA);
    const memberBName = getUsernameById(members!, userB);

    // declares the notification function
    const checkAndNotify = async () => {
        // ✅ Both sent messages → update streak
        if (userAMessagesToday && userBMessagesToday) {
            await updateChatStreak(channelID, today);
            if (currentStreak > 0) {
                showToast("success", `Streak Updated: ${currentStreak} day(s)! 🔥`);
 }
            return;
 }

        // 🚨 Streak Reminders
        let message: string | null = null;

        if (!userAMessagesToday && !userBMessagesToday) {
            message = `Streak Pending: Both ${memberAName} and ${memberBName} need to send messages today!`;
 } else if (user.uid === userA && !userAMessagesToday) {
            message = `Streak Pending: Send a message to ${memberBName}`;
 } else if (user.uid === userB && !userBMessagesToday) {
            message = `Streak Pending: Send a message to ${memberAName}`;
 } else if (user.uid === userA && !userBMessagesToday) {
            message = `Streak Pending: Waiting for ${memberBName}`;
 } else if (user.uid === userB && !userAMessagesToday) {
            message = `Streak Pending: Waiting for ${memberAName}`;
 }
        //👇🏻 displays the pop-up and sets its corresponding message
        if (message) {
            setStreakReminder(true);
            setReminderMessage(message);
 }
 };
    //👇🏻 executes the function
    checkAndNotify();
}, [
    //👇🏻 dependencies
    channelID,
    membersID,
    messages,
    user,
    currentStreak,
    members,
    setReminderMessage,
    setStreakReminder,
]);
How the useEffect works:
- Identify participants and date: The two members in the streak group are split into separate variables, and today’s date is recorded.
- Check daily activity: It verifies whether each member has sent a message to the channel today.
- Update streak if complete: If both members have messaged today, it calls updateChatStreak to increment the streak.
- Send reminders if pending: If one or both members haven’t sent a message, it determines the appropriate reminder text and triggers the StreakReminderModal pop-up to encourage them to chat and maintain the streak.
Congratulations! You have completed this tutorial. The source code is available on GitHub.
Next Steps
So far, you’ve learned how to integrate Stream into a Next.js application, use Firebase for authentication and database operations, create chat channels, build the chat UI, retrieve channel messages, and implement streak functionality using the Stream Chat SDK.
Whether you’re creating a simple communication tool or a fully featured collaborative platform, Stream gives you the building blocks to launch quickly and scale confidently and easily.
Try building these next:
- Build AI-Generated Chat Summaries in Your React Chat App
- Build a Real-Time Social Feed With Next.js
- Build a Livestream Chat App in Next.js
- Build an AI Assistant with React
Thank you for following along! 🎉