

Large Language Models, although trained on large amounts of data, have limited domain-specific knowledge. This limitation makes them less effective for customer support chatbots or similar apps that require specific data.
Retrieval Augmented Generation (RAG) solves this concern by allowing LLMs access to external knowledge sources for a more accurate response generation. This means that with RAG, you can have an LLM that receives relevant information from your knowledge base as context during the generation process to respond accurately to questions and inquiries from your customers, giving you an automated customer support system.
Don’t get me wrong—RAG is not the only way to enhance an LLM's capabilities. Another way is fine-tuning. However, RAG is more suitable for solutions that require sizeable external knowledge bases or frequently changing data, such as those in customer support systems.
This tutorial will guide you through building a RAG-powered customer support chatbot using Stream, OpenAI’s GPT-4, and Supabase’s pgvector. Stream empowers developers to seamlessly build scalable in-app chat, video, and feeds. Its powerful APIs, SDKs, and AI integrations make building your app faster.
This tutorial will cover:
- Creating and storing vector embeddings from our knowledge base using Supabase’s pgvector feature. pgvector provides an efficient way to store and query vector embeddings.
- Knowledge base refers to the external knowledge source your LLM will depend on as a helpful context.
- Embedding customers’ chat and performing a similarity search on the stored knowledge base embeddings.
- Setting up Stream and building our RAG-powered chatbot.
Prerequisite
To follow along, you need:
- A free Stream account.
- An OpenAI account.
- A Supabase account.
Vector Database Set-Up
We will begin by setting up a vector database using Supabase to store our vector embeddings and perform similarity searches. The Stream React docs will serve as our knowledge base for this tutorial.
Go to your Supabase SQL Editor, and let’s enable pgvector, create a vector table, and write a function that performs a similarity search on our knowledge base.
-- Enable pgvector
create extension if not exists vector;

-- Create documents table
create table if not exists documents (
    id bigserial primary KEY,
    content TEXT,
    embedding vector(1536)
);

-- Create match document function
create or replace function match_documents (
  query_embedding vector(1536),
  match_threshold float,
  match_count int
)
returns table (
  id bigint,
  content text,
  similarity float
)
language plpgsql
as $$
begin
  return query
  select
    documents.id,
    documents.content,
    1 - (documents.embedding <=> query_embedding) as similarity
  from documents
  where 1 - (documents.embedding <=> query_embedding) > match_threshold
  order by similarity desc
  limit match_count;
end;
$$;
Run the code above to execute your query. This creates a table named documents with three (3) columns: id, content, and embedding. The content column will store the actual text content of our knowledge base, while the embedding column will store the vector embedding of the knowledge base. We also created a match_documents function that performs similarity searches on the documents table.
Next, let's create an Express server and write a function to create vector embedding from our knowledge base and store them.
Create and Store Vector Embeddings
Create an Express server and install all the dependencies we need using the following command:
12345mkdir rag-support-bot
cd rag-support-bot
npx express-generator rag-server
cd rag-server
npm install @langchain/community @langchain/core langchain @supabase/supabase-js cheerio dotenv openai stream-chat
I set my server to run on port 8000 (you can use any port you prefer). We will see these dependencies in action shortly.
Create an embed.js route in your server.
A POST request to this route will trigger the creation of vector embeddings from our knowledge base. This is a one-time operation, necessary only when the knowledge base is initially set up or subsequently modified.
routes/embed.js
123456789101112131415161718192021222324252627282930313233343536373839404142434445464748495051525354555657const express = require('express')
const embed = express.Router().use(express.json(), express.urlencoded({ extended: false }));
const { RecursiveCharacterTextSplitter } = require('langchain/text_splitter');
const { CheerioWebBaseLoader } = require('@langchain/community/document_loaders/web/cheerio');

const { supabase, openai } = require("../utils");

async function storeEmbeddings() {
    const loader = new CheerioWebBaseLoader(
      'https://getstream.io/chat/docs/react/'
    );
    const docs = await loader.load();

    const textSplitter = new RecursiveCharacterTextSplitter({
      chunkSize: 1000,
      chunkOverlap: 200,
    });

    const chunks = await textSplitter.splitDocuments(docs);

    const promises = chunks.map(async (chunk) => {
      const cleanChunk = chunk.pageContent.replace(/\n/g, ' ');

      const embeddingResponse = await openai.embeddings.create({
        model: 'text-embedding-3-small',
        input: cleanChunk,
      });

      const [{ embedding }] = embeddingResponse.data;

      const { error } = await supabase.from('documents').insert({
        content: cleanChunk,
        embedding,
      });

      if (error) {
        throw error;
      }
    });

    await Promise.all(promises);
  }

embed.post("/embed", async (req, res) => {

    try {
        await storeEmbeddings();
        res.status(200).json({ message: 'Successfully Embedded' });
    }catch (error) {
        res.status(500).json({
            message: 'Error occurred',
        });
    }

});

module.exports = embed;
The storeEmbeddings function loads the content of our knowledge base using CheerioWebBaseLoader. It then splits the content into smaller chunks with RecursiveCharacterTextSplitter and generates vector embeddings of each chunk using the OpenAI embeddings API. The chunks and their corresponding embeddings are stored inside our Supabase vector database.
The utils.js file initializes Supabase and OpenAI clients:
utils.js
1234567891011121314const OpenAI = require('openai');
const { createClient } = require('@supabase/supabase-js');

const supabase_url = process.env.SUPABASE_URL;
const supabase_key = process.env.SUPABASE_KEY;
const openaisecret = process.env.OPENAI_API_KEY;

const supabase = createClient(supabase_url, supabase_key);

const openai = new OpenAI({
  apiKey: openaisecret,
});

module.exports = {supabase, openai };
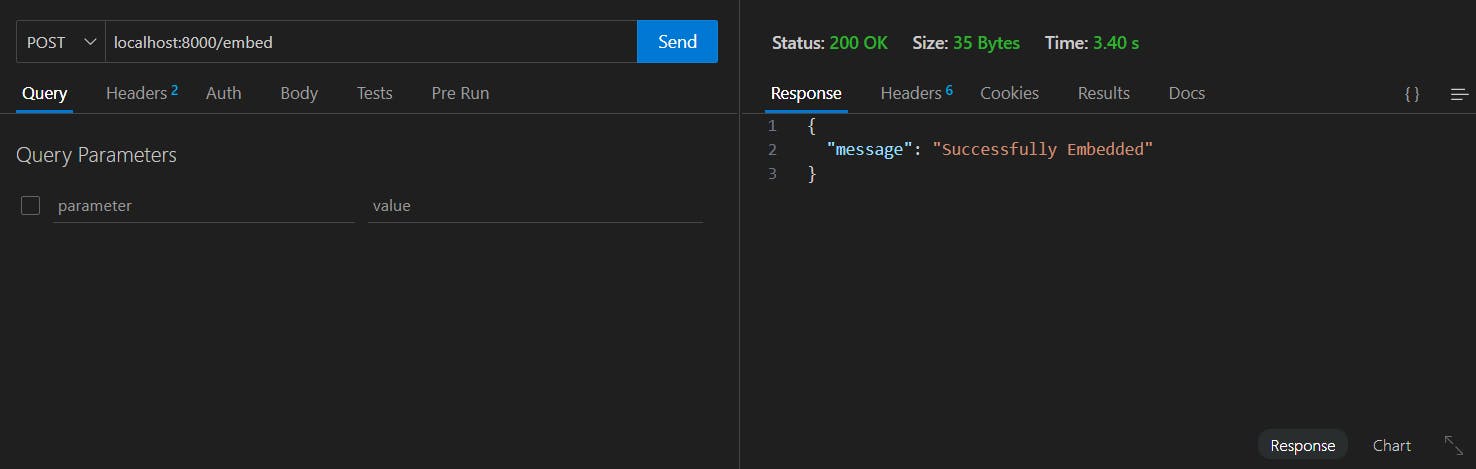
Make a POST request to the /embed endpoint to trigger the embedding process.
Once complete, this is what the embeddings look like inside Supabase:

Next, let’s set up the route to authenticate users in Stream.
Authenticating Customers With Stream.
Create an auth.js route in your Express app.
routes/auth.js
123456789101112131415161718192021222324252627282930313233const express = require('express');
const auth = express.Router().use(express.json(), express.urlencoded({ extended: false }));
const { StreamChat } = require("stream-chat")

const chatServer = StreamChat.getInstance(
  process.env.STREAM_KEY,
  process.env.STREAM_SECRET
)

auth.post('/auth', async (req, res) => {
const { customerId } = await req.body;

await chatServer.upsertUser({
  id: customerId,
  role: 'admin'
});

await chatServer.upsertUser({
  id: 'ai-support-bot',
  name: "AI Support Bot",
  role: 'user'
});

try {
  const token = chatServer.createToken(customerId);
  res.json({ token })
} catch (error) {
  res.status(500).json({error: error})
}

});

module.exports = auth;
This route receives the customerId from the frontend, then creates or updates users in Stream, generates a token for the user/customer, and sends the token to the frontend. This token will be used later to connect the customer to the channel.
We need to create one more route to handle AI responses.
AI Responses
Let’s create a response.js route in our Express app that will receive customers’ questions and generate AI responses based on context from the knowledge base.
routes/response.js
12345678910111213141516171819202122232425262728293031323334353637383940414243444546474849505152535455565758const express = require("express");
const response = express.Router().use(express.json(), express.urlencoded( { extended: false }))
const { supabase, openai } = require("../utils");

const handleQuery = async (query) => {
    const input = query.replace(/\n/g, ' ');

    const embeddingResponse = await openai.embeddings.create({
      model: 'text-embedding-3-small',
      input,
    });

    const [{ embedding }] = embeddingResponse.data;

    const { data: documents, error } = await supabase.rpc('match_documents', {
      query_embedding: embedding,
      match_threshold: 0.5,
      match_count: 10,
    });

    if (error) throw error;

    let contextText = '';

    contextText += documents
      .map((document) => `${document.content.trim()}---\n`)
      .join('');

    const messages = [
      {
        role: 'system',
        content: `You are a customer support bot for Stream, only ever answer
      truthfully and be as helpful as you can!`,
      },
      {
        role: 'user',
        content: `Context sections: "${contextText}" Question: "${query}"`,
      },
    ];

    const completion = await openai.chat.completions.create({
      messages,
      model: 'gpt-4,
      temperature: 0.8,
    });

    return completion.choices[0].message.content;
  }

response.post("/response", async (req, res) => {
    const { message } = req.body;
    const answer = await handleQuery(message);

    res.json({answer})

})

module.exports = response;
Here, the handleQuery function receives the customer’s query and generates an embedding. The embedding is used to perform a similarity search within the vector database. The content retrieved is provided as context to the OpenAI chat completion endpoint alongside the customer’s original query.
The generated response from OpenAI is sent to the front end.
We can now build the chat user interface with our backend development complete.
Building the Chat UI
Let's go ahead and set up React (using Vite) for our front end.
123cd rag-support-bot
npm create vite@latest rag-client -- --template react
npm install
Let’s also install the Stream Client:
1npm install stream-chat-react stream-chat
Let’s create a Chat component.
src/Chat.jsx
123456789101112131415161718192021222324252627282930313233343536373839404142434445464748495051525354555657585960616263646566676869707172737475767778798081828384858687888990919293949596979899100101102103104105106107108109110111112113114115116117118119120121122123124125126127128import React, {useState, useEffect} from 'react';
import {Channel, ChannelHeader, MessageList, MessageInput, Window, useChannelStateContext, Chat } from 'stream-chat-react';
import { StreamChat } from 'stream-chat';

const chatClient = StreamChat.getInstance(import.meta.env.VITE_STREAM_KEY);

const CustomMessageInput = () => {
  const { channel } = useChannelStateContext();

  const submitMessage = async (message) => {
    // send user's message

    try{
      const userText = await channel.sendMessage({
        text: message.text,
      })

      // typing indicator for the AI bot
      await channel.sendEvent({
        type: 'typing.start',
        user: {id: 'ai-support-bot'},
      });

      //send customer chat to the backend.
      const sendTexttoAI = await fetch("http://localhost:8000/response", {
        method: 'POST',
        headers: {
          'Content-Type': 'application/json',
        },
        body: JSON.stringify({message: message.text }),

      })
      const data = await sendTexttoAI.json();

      // stop AI typing indicator
      await channel.sendEvent({
        type: 'typing.stop',
        user: { id: 'ai-support-bot'},
      })

      //send response from AI

      await channel.sendMessage({
        text: data.answer,
        user: {
          id: 'ai-support-bot',
          name: 'AI Support Bot'
        }
      });

    } catch (error) {
      console.error('Error message', error);
      await channel.sendMessage({
        text: "I could not process your query. Please try again shortly.",
        user: {
          id: "ai-support-bot",
          name: "AI Support Bot"
        },
      });
    }

  }

  return (
    <div className='relative'>
      <MessageInput overrideSubmitHandler={submitMessage}  />
    </div>
  )
}

export default function ChatComponent() {
  const [channel, setChannel] = useState(null);
  const customerId = `cus-${Math.random().toString(20).substring(5)}`

  useEffect(() => {
    const initialize = async () => {
      try{

        const getToken = await fetch("http://localhost:8000/auth", {
          method: 'POST',
          headers: {
            'Content-Type': 'application/json',
          },
          body: JSON.stringify({customerId})
        });

        const { token } = await getToken.json()

        await chatClient.connectUser(
          {
            id: customerId,
            name: "Customer"
          },
          token
        )

        //create or join support channel
        const channel = chatClient.channel('messaging', 'support', {
          name: "Customer Support",
          members: [customerId, 'ai-support-bot']
        });
        await channel.watch()
        setChannel(channel);

      } catch (error) {
        console.error("Chat initialization error", error);
      }
    }

    initialize()

  }, [])

  return (
    <div>
      <Chat client={chatClient}>
        <Channel channel={channel}>
          <Window>
            <ChannelHeader />
            <MessageList />
            <CustomMessageInput />
          </Window>
        </Channel>

      </Chat>
    </div>
  )
}
The CustomMessageInput component has a submitMessage function that sends customers’ queries to OpenAI at the backend, receives an answer, and adds it to the channel messages.
ChatComponent initializes the Stream Client and creates a “support” messaging channel where a customer and the AI Support Bot can interact after authenticating the customer.
Let’s add this component to the main page:
src/App.jsx
12345678910import './App.css';
import "stream-chat-react/dist/css/v2/index.css";
import ChatComponent from './Chat';

function App() {

  return <ChatComponent />
}

export default App
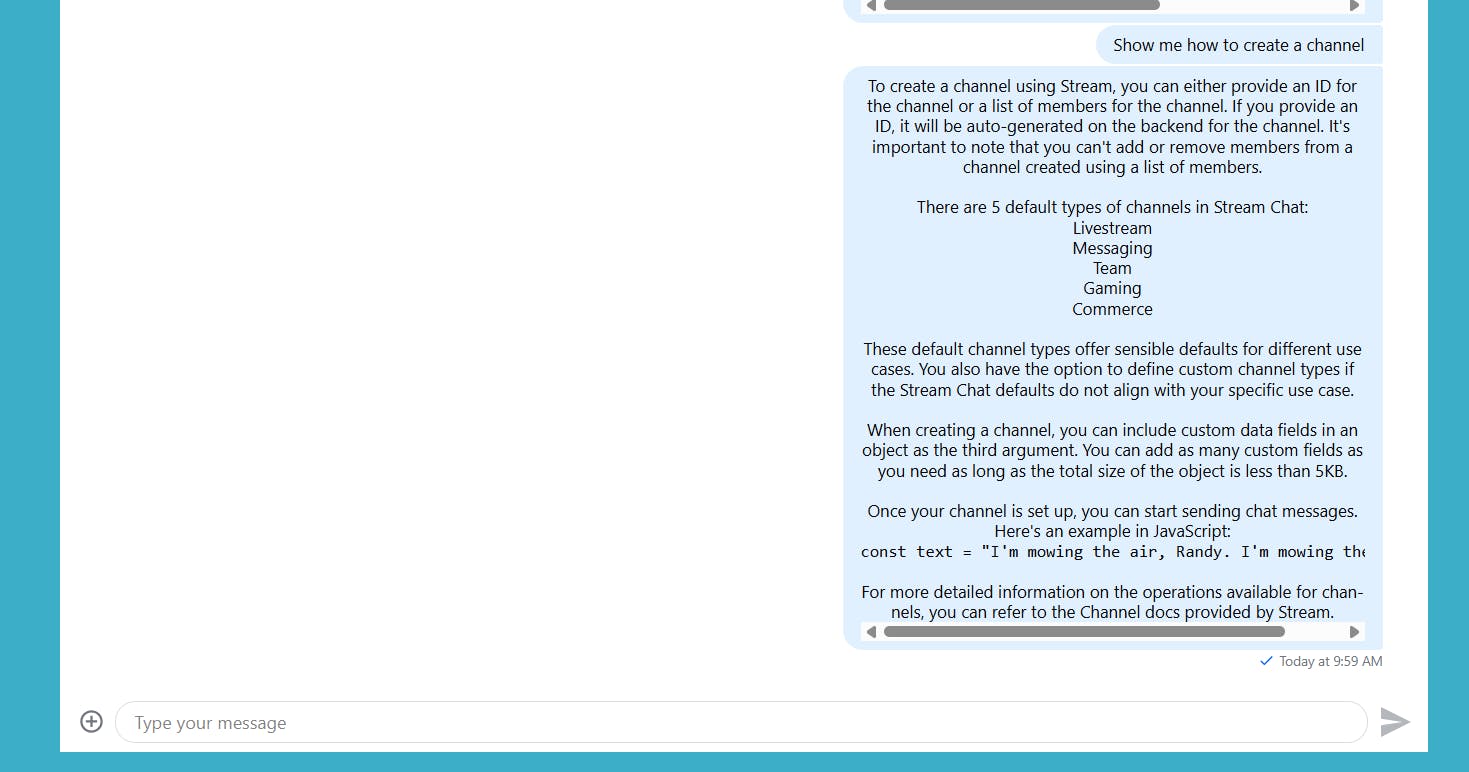
Our Chat app is ready. Let’s ask a few questions and see how the AI responds.

More
Conclusion
The customer support chatbot application we built in this tutorial can be extended with escalation triggers, enabling customers to request human support when necessary. You could also make the app multi-user to support collaboration for teammates.
Remember, there are many ways of building a RAG system using different technologies. While exploring them, it is good to consider the potential of function calling when your application involves predefined operations.
This tutorial demonstrated how Stream empowers you to build scalable chat applications, eliminating development complexities efficiently. Its ready-to-use components enable you to move from development to market quickly.