
The open-source software ecosystem is in a constant state of growth. Every day, new libraries and solutions are introduced on GitHub that are designed to accelerate development speed and make our lives as developers easier.
Nowadays most companies, especially startups, are highly dependent on open-source libraries. They reduce development resources needed and have been a big factor in the success of many companies.
Most developers are already familiar with using open-source libraries, however, far fewer developers are familiar with creating them. Making these libraries easy to use and successful consumes a lot of effort and resources. There are many factors to consider, such as API designing, documentation, release strategy, bug fixes, as well as maintenance and support.
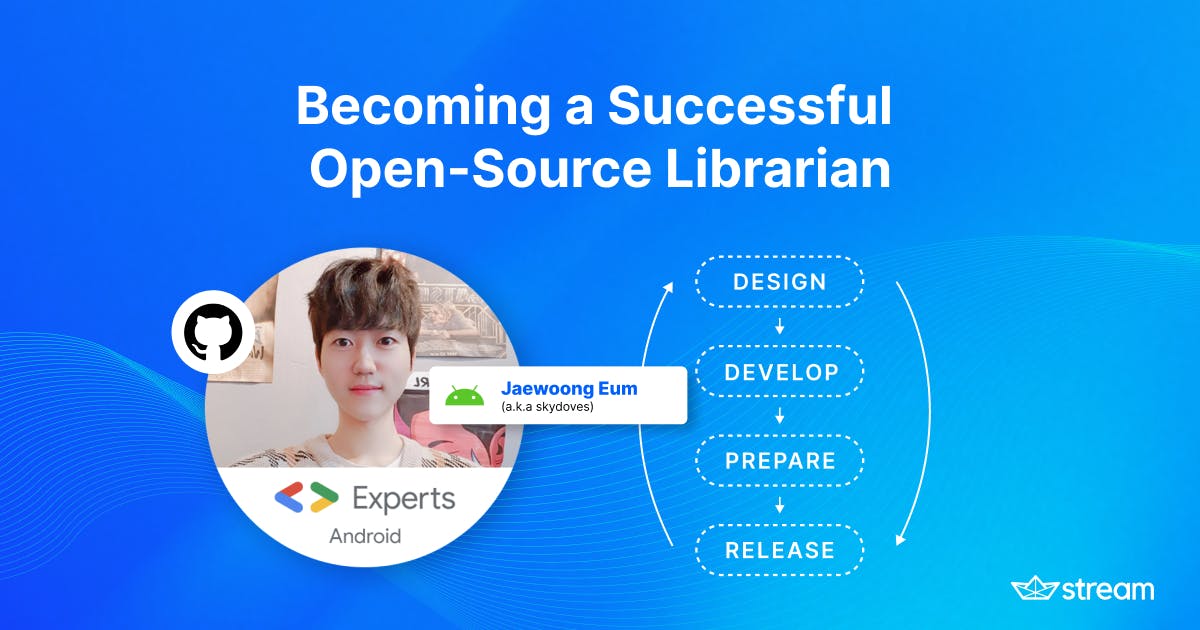
The author of this article Jaewoong (skydoves) has built more than 80 open-source libraries and projects for Android and Kotlin, notably Pokedex, Balloon, Landscapist, ColorPickerView, and Sandwich since 2017 on GitHub.
The author’s open-source libraries have been used by millions of projects, software engineers, and a lot of global companies around the world, such as Twitter, PayPal, Wikipedia, MyJio, and Azar.
This article introduces comprehensive open-source strategies following project life cycles to make open-source software successful, especially for Kotlin/Android. If you want to explore the author's projects, you can check them out on GitHub@skydoves.
At Stream we value open-source projects greatly, and whenever possible we try to support developers in the pursuit of creating great projects.
You can also watch the full video of my presentation about “Becoming an Android Librarian” at Android Worldwide.
Open-Source Life Cycles
Open-source software is a product for developers rather than a toy project or free software. Most successful open-source projects are managed systematically and steadily for a long time.
One of the best ways to make your open-source software successful is to bring your dedicated life cycles from drawing ideas to releasing, and constantly delivering improvements and new features.
Building your own life cycle model is the best choice, but if you’re new to planning a project life cycle, you can adopt the suggested life cycle model below for your open-source projects.

The life cycles above starts from the Design phase to Release phases, and the cycle iterates each phase along the arrow for every new release. Each essential phase has a dedicated purpose:
-
Design: This is the first phase, where you move your ideas into blueprints and investigate the feasibility of your project. This might be the most important phase for any project, because if you design and plan properly you will reduce a lot of resources required for later phases. If you’re familiar with designing API (Application Programming Interface)s before implementing specifications, you can reduce the burden of the Develop phase drastically. If you’re new to designing APIs and architecture, it will be enough to put together your ideas and make sure of the feasibility of each item on the list. Before moving to the next phase, you can get some feedback from the community by sharing your API designs, and this is a great way to design APIs from different perspectives.
-
Develop: Technically, you can separate this phase into Implementation, and Testing. Implementation is responsible for building core features following your Design specifications. In this phase, the API designs or your development approaches might be changed depending on your new ideas. Testing is making sure the core features are working well by writing unit tests or performing integration tests with the previous projects.
-
Prepare: Once your APIs are properly tested, you need to prepare to publish your APIs and content. Open-source is not just sharing your code on GitHub.
People will access your project and they will investigate whether your project is suitable for their project. So you need to communicate with users and provide information about your project as much as possible by writing documentation and a README file for your API. You can also create Issue and Pull Request Templates that guide external contributors, or open GitHub Discussions on your repository to discuss your APIs and get feedback. -
Release: When your API is ready for publishing , you should release your package on public repositories that allow people to easily pull your package down and import it into their project. This is the last phase and you should make sure there are no issues with updates before delivering your product to the market.
API Design Process
Software design is one of the essential parts in most software development, especially in library and SDK (Software Development Kit) development, which decides comprehensive structures of APIs.
This process is similar to the system design and system analysis processes, which require researching the problem and designing interfaces in advance before diving into software development, and typically the scale and design factors depend on your platforms.
By following the design process below step by step, you will be able to concisely describe your ideas and convert them into clear specifications:
-
Define a problem: This is the very first step of the whole life cycle. You need to define a problem and make clear what you want to solve in real-world projects.
-
Research overall ideas: If you already have your own solution for the problem, you can skip this step. If not, you need to research how to solve the problem and make sure your approach makes sense. You can also approximate the cost of the idea, such as API implementation and use cases.
-
Verify the feasibility of your ideas: You need to verify the feasibility of the approaches that you’ve researched. You can also implement lightweight features of the approaches to make sure they are feasible. If you are unsure of the feasibility of implementation at this stage, it may be difficult to move to the next stage.
-
Investigate dependencies: If you check the feasibility, you need to define which dependencies you need to use for implementing the details. You may need to import other libraries or your library’s modules might have complex relationships with each other, so you should make sure which dependencies will eventually be included in your project. You can simply draw your dependency graph to make them concise.
-
Draw blueprints of application interfaces: Now it’s time to convert your approaches into blueprints. You can draw the overall architecture of your library and API structures before designing details. Importantly, you need to define the visibility of your APIs, such as which part of your future APIs should be exposed to the end user.
-
Design the application interfaces: After the steps above, you’re now ready to design specifications for the application interfaces. You can design detailed specifications, such as naming conventions, inheritance between interfaces/classes, and abstract methods, and most importantly, which interfaces should be exposed to users.
If you’ve finalized your design of the application interfaces in advance, you can reduce many resources for thinking about the entire structure. Because you will not lose your overall ideas and designs even if you dive into a very particular feature and get stuck for a while when you face implementation issues.
Now, let’s see open-source development strategies for the Develop phase.
Development Strategies
In the Develop phase of the open-source life cycle, you need to implement the details, such as classes, methods, extensions, and everything that you need to build your library.
There’re many different types of development strategies depending on your platform. In this article, we will focus on the strategies for Kotlin and Android developers but you can still follow up on the overall concepts even if you're working on different platforms.
Minimize API surfaces

One of the most important parts of the Develop phase is minimizing API surfaces. After all, open-source libraries will be used by other developers, and their projects will have dependencies on your library.
By minimizing the API surfaces, library users will be able to reduce distributed dependencies on your APIs, which takes three advantages below:
-
Prevent unexpected behaviors: Reducing exposed APIs by limiting API visibility allows library users to access only the limited APIs. That makes sure that APIs work with expected behaviors by preventing access to internal APIs and that makes it more concise to use on the user side.
-
Easy migration: If library users are dependent on a lot of public APIs, migration might be a huge cost wherever a new release is out. However, if a library exposes only a few API surfaces and handles most of the work internally, people can reduce a lot of resources for migrating to a new release, and the difficulty level of API usage will be decreased.
-
Easy maintenance: If your library exposes very limited APIs, you can refactor without much consideration for the migrations in the new release. This means user projects will not break while migrating to a new release, so you can maintain your library easily by adding a new feature and refactoring internal structures.
You can minimize API surfaces from the start in the Develop phases, but you can also focus on implementation first, then cut out the exposed API surfaces gradually whenever you’re done implementing a new feature.
If you’re interested in learning more about the minimal API surfaces and the story of how React is moving towards a minimal API surface area, check out the talk, Minimal API Surface Area on Youtube by Sebastian Markbage.
Explicit API Mode in Kotlin
In Kotlin projects, if you don’t set visibility modifiers, it will be public by default. So you need to set visibility modifiers explicitly to limit API access to your internal functions.
You can recognize and set the visibility modifiers whenever you create a new API but the Kotlin team suggests API developers to use Explicit API mode, which forces explicit visibility modifiers by enabling Kotlin compiler options like the following:
12345678910// Kotlin project
kotlin {
    // enables explicit API mode
    explicitApi()
}

// Android project
tasks.withType(org.jetbrains.kotlin.gradle.tasks.KotlinCompile).all {
  kotlinOptions.freeCompilerArgs += ["-Xexplicit-api=strict"]
}
If you think it’s too extreme to introduce explicit API visibility mode at once, you can migrate gradually by enabling Explicit API warning mode. You will get a warning within your IDE instead of a compilation error.
For more information, check out the Explicit API mode.
Binary Compatibility Validator in Kotlin
You can manage all of the public APIs manually, but as your API surface increases, it will be more difficult to manage all API visibility. Moreover, in the process of accepting external contributions, contributors/reviewers can miss adding visibility modifiers and expose internal functions by mistake.
For managing public APIs in your Kotlin project, you can utilize Binary Compatibility Validator, which is supported by the Kotlin team.
With this plugin, you can trace changes to your public APIs, and you can make sure whether the API changes are correct like the below:

For more information, check out the Binary Compatibility Validator repository on GitHub.
Minimize Resources in Android
The AAR format, which is the binary distribution of an Android library project, includes mandatory resources by default, such as layouts, colors, strings, drawables, and much more.

Due to Android libraries containing the resources above, it will be transmitted to the user projects, and it will also affect their APK (Android Package) file size. So library developers must make sure that your library doesn’t contain any unused resources and minimize exposed resources.
There is one more problem with the transmitted resources from a library, which is that those resources can also be used in user projects. Library users will be confused about where the resources came from, and they may depend on your library’s resources.
Let’s assume your library contains a color resource in the current version. Then, user projects can access and use the color resource in their project without any restrictions and they can have dependencies comprehensively on your color resource.
What if you don’t need the color resource anymore and remove it in the next release of your library? The users who updated your library to the recent version will face the Unresolved reference IDE error and get confused. This makes debugging much harder on the user's side.

So it would be much better to add a prefix or postfix to the resource name and make it clear to the users that the source of the resource is your library.
You can manage your resource’s naming convention manually. But Android Studio supports a convenient feature to manage resource naming convention by adding the resourcePrefix option to your Gradle file:
1234android {
  resourcePrefix 'libraryName_'
  ...
}
If you click the Sync Now button on your Android studio, you will see the runtime error if your resources are not following the prefix naming convention, as shown below:

Non Transitive R Class in Android
All Android projects generate R class, which is a dynamically generated class, created during the build process to define and identify all resources. This enables developers to access their resources by using the static R class.
What we should note is that the R class is transitive between modules, which means if a module has many dependencies, the final R class can be massive by integrating other modules’ R classes.

You can call this Transitive Dependency, which aggregates all of the transitive modules' resource definitions. So if your library depends on other libraries, such as Material Components and Appcompat, all of their resources will be transmitted to the user project even if the user project doesn’t have dependencies on those libraries directly.
As a result, it will increase the user project’s build time. If you want to disable the transitive dependency option, you can disable it by adding the following Gradle property into your gradle.properties file:
1android.nonTransitiveRClass=true
If you click the Sync Now button on your Android studio, the transitive R class option will be disabled, and won’t pull resources from dependencies anymore, as shown below:

If you want to learn more about this, check out Speed up your build: Non-transitive R files.
Open-Source Licenses
According to Open Source Initiative Open source licenses licenses comply with the Open Source Definition — in brief, they allow software to be freely used, modified, and shared. So the licenses allow end-users and commercial companies to use the open-source libraries without paying.
There are some popular library licenses that are normally used in the open-source ecosystem: Apache License 2.0, MIT License, GNU General Public License (GPL), and GNU Library or "Lesser" General Public License (LGPL).
We will not go into detail for each of these licenses in this article, but you need to understand which license is the best choice for your open-source project. If you’re not building an open-source project for the business product, such as a paid SDK, you can consider using Apache License 2.0 and MIT License.
Apache License 2.0 and MIT License are one of the most widely used licenses in open-source ecosystems. They allow users to use the software for commercial products or any purpose, to distribute and modify the open-source project with license notifications and copyrights.
If you want to learn more about the open-source license, see the Open Source Licenses: Types and Comparison.
Documentation
When you have finalized the previous phases, you’re ready to write documentation. Most developers may feel bored writing documentation, but providing good documentation is important as it will reduce the amount of support requests you receive and integration issues.
Providing good documentation for your APIs is sometimes more important than building your solutions. If users can’t use your APIs properly or misunderstand the APIs, even if you built an amazing solution, then the project is not that valuable.
How to structure documentation is an essential part of an open-source project and it can be different depending on your open-source project. You need to figure out how to describe your project and how to share the API specification.
Now, let’s see how the author of this article normally configures documentation.
README on GitHub
If you’re hosting your open-source projects on GitHub, the README file is likely the first impression of the project for users, and it may affect their decision making. A well-documented open-source project engages more people and facilitates users to make decisions clearly.
First things first, you need to describe what your project is doing and what people can achieve with your open-source project. Even if your project is very well-known in the community, new developers may not know what your open-source project does.

By adding the introduction to the top of your README file, you can make the purpose of your project clear. You can attach badges with Shields IO, which allows you to provide information of your open-source project, such as specifications, build status, or other materials in a very simple way.
If you built a UI-relevant project, you can describe your open-source project by attaching some screenshots like the one below. Sometimes screenshots can communicate the purpose of a package much more clearly than words.

Next, you need to write how to import your open-source project into user projects. This is one of the most important parts because it’s related to the delivery of your solution. In general, it’s highly recommended to position the importing section at the top of your README due to some busy users rushing to the importing section.

Next, you should write the usages of your APIs as detailed as possible. You already know all API usages because you’ve built and designed all of them by yourself. That may make you write ambiguous documentation, which is a blind spot that API developers normally miss. So always keep in mind that you should think about the usage from a beginner’s perspective.
You can also attach code examples with the API descriptions to help people understand more easily, like the example below. But make sure the code examples are simple and clear so that users don't get confused.

Finally, you can add more context or information about your open-source project, such as license, technical content, videos, or anything else depending on your project.
If you want to look at good README samples, check out Balloon and Landscapist, which are created by the author of this article.
API Specification
You can also provide separate API specifications, which include all the public APIs of your open-source project rather than writing all APIs on your README file. So users can find their desired APIs by searching on human-friendly web pages instead of struggling to find relevant codes in an IDE.
In general, you can automatically generate API specifications in different ways depending on your platform. In Kotlin, you can build your own API specification with KDoc and Dokka, which is a documentation engine for Kotlin. If you run the command line, the engine will create HTML pages for your API specifications like the below:

You can deploy the web pages using GitHub Pages on GitHub.
If you want to see an example, check out Dokka for Balloon.
Releasing
Once everything else is finalized and preparations are done, it’s finally time to deliver the first, or newest, version of your open-source library to users. You can also build your own releasing process to deliver your open-source package at the right moment.
In most cases, you can download and deliver open-source libraries via a build automation tool, such as Apache Maven, so you can deliver your packages easily and people can download them faster and it’s easier to manage the third-party libraries’ versions.
Delivering a package is quite dependent on your platform, so you may need to research how to release your open-source library on the central repository and keep delivering smoothly.
In this article, we’ll look around how to release your open-source library for Android, Kotlin, and Java.
Sonatype Nexus and Apache Maven
If you want to deliver your Android/Kotlin/Java packages to your users, you should upload your packages to public repositories, such as Sonatype’s Nexus Repository, which centralizes all consumption of third-party open-source software in public.
You may already have used the Nexus Repository and Google’s Maven Repository to download Android-relevant libraries.

There were a few options to upload and archive your open-source packages but now you can only achieve them with Apache Maven due to Jcenter, Bintray announced getting into the sunset.
If you're new to publishing your libraries on the Nexus repository with Maven, you can feel overwhelmed, so it’s highly recommended to check out Publishing Android libraries to MavenCentral in 2021.
Automate Release with GitHub Actions
In most cases releasing a new package requires resources, such as versioning, wrapping, and uploading the package. So building automation for the release might reduce your future publication resources.
If you host your open-source library on GitHub, you can automate publication Gradle tasks with GitHub Actions. The workflow can be also highly dependent on your platform. For Android, Kotlin, and Java, you can check out the Continuous Integration on Publishing Android libraries to MavenCentral in 2021.
Did you successfully publish your open-source library? Congratulations! 🎉 Now you’re building software for developers. After releasing your open-source library, please grab a cup of coffee and get some rest. You don’t need to rush to the next steps in open-source software life cycles.
Now, let’s see how to manage your open-source products for the long-term.
Open-Source Management
Once you publish your open-source software, it’s time to make a plan for future strategies regarding long-term aspects. You can iterate the entire open-source life cycle by implementing a new feature or polishing the existing APIs.
Open-source management is one of the most essential parts following the open-source life cycle because you need to make sure the project stays alive and to encourage people to use your library and to ensure they’re successful in the long term.
To achieve long-term success, you can leverage the community. Essentially, open-source is based on the community, which allows people to join the open-source project by contributing code, fixing bugs, adding documentation, or improving in some way. This is one of the most powerful features of open-source activities because you can get help, or learn from global developers who may live on the opposite side of the earth.
Let’s see how you can leverage the community to make your open-source projects successful.
GitHub Issues
One of the biggest advantages of open-source activities is that you can solve problems with the community together. You can hear users' voices and what they think about your project, which means you can communicate with them to improve your project.
People also can contribute to your open-source project by reporting issues via GitHub Issues and GitHub Discussions when they face bugs that are happening across various different industries' applications.

By resolving issues and polishing your project, you can experience a lot of different use cases and make your open-source project more stable. Listening to customers’ experiences is a huge part of making your project successful, and you can achieve this easily via the open-source community.
If you’re all ears, you can engage many people to improve your project, because they will think their suggestions can be accepted. Then they are willing to contribute to your project and you can boost your project's stability. Keep in mind that building a successful open-source library is building a project for everyone rather than your independent assets.
Sharing with Communities
To build a successful open-source project, you need to share your project with the community and communicate with users as much as possible. You can also utilize social platforms, such as Medium, Twitter, and LinkedIn.
One of the best strategies to communicate with users is writing a blog post about your open-source project. You can suggest your solution to the commonly faced problems by the community and you can get different opinions from people. Sometimes their opinions are really valuable and they can direct you in the right way.

You may also get a lot of global insights and different perspectives from the community, and that’s the best way to grow your project and yourself as a better developer. Keep in mind that building a successful open-source library is starting with a conversation with the community and accepting their opinion and understanding their pain points.
Conclusion
This concludes how Jaewoong (a.k.a skydoves) builds and maintains successful open-source software based on his strategies. This article is not his own “job secret” 😁, so you can improve his strategies to your taste and contribute to the open-source community in your way.
Keep in mind that an open-source project becomes more valuable as it is shared. By sharing your solutions, not only can you learn from global developers but you may also get recognized by the community and that will derive passion for the open-source contribution and community as well.
Hope you contribute to the open-source ecosystem and let’s make the world a better place to live!
As always, happy coding!
— Jaewoong