

Online multiplayer games bring people together to compete, collaborate, and connect in real-time. In this tutorial, you'll learn how to build a fully functional gaming application that supports two classic games: Tic Tac Toe and Rock Paper Scissors. The app will enable users to invite friends, track scores, and chat with each other.
We will use Firebase for user authentication and recording scores, and implement a real-time chat feature using the Stream Chat SDK.
Prerequisites
To fully understand this tutorial, you need to have a basic understanding of React or Next.js.
We will use the following tools:
- Firebase - a Backend-as-a-service platform developed by Google to enable us to add authentication, database, real-time communication, file storage, cloud functions, and many others within software applications.
- Stream Chat Firebase Extension - a Firebase extension that automatically connects your Firebase users to Stream.
- Stream React Chat - enables real-time chat communication in your application.
- Shadcn UI - a UI component library that provides customizable, beautifully designed, and accessible UI components for your applications.
Create a Next.js project by running the following code snippet:
1npx create-next-app gaming-app
Install the package dependencies for the project:
1npm install firebase stream-chat stream-chat-react react-copy-to-clipboard
To install the Shadcn UI library, follow the installation guide.
Once everything is set up, your Next.js project is ready.
Now, let's start building! 🚀
Building the Application Interface with Next.js
In this section, you'll learn how to build the main pages and components of the application and see how they work together. The app includes six key pages:
- Home Page: Introduces the application with a brief description and provides buttons that direct users to the login and sign-up pages.
- Sign-Up Page: Renders a form where new users can enter their email, username, and password to create an account.
- Login Page: Renders a form for existing users to sign in using their email and password. Once logged in, users are redirected to the Games Channel page.
- Games Channel Page: Acts as the dashboard. It shows group chats for each game and includes a link to create a new game request.
- Game Request Page: Allows users to create a new game session by selecting an opponent and the game type. Once submitted, a unique shareable game link is generated.
- Game Page: This is where the actual gameplay happens. Players can play multiple rounds of Tic Tac Toe or Rock Paper Scissors.
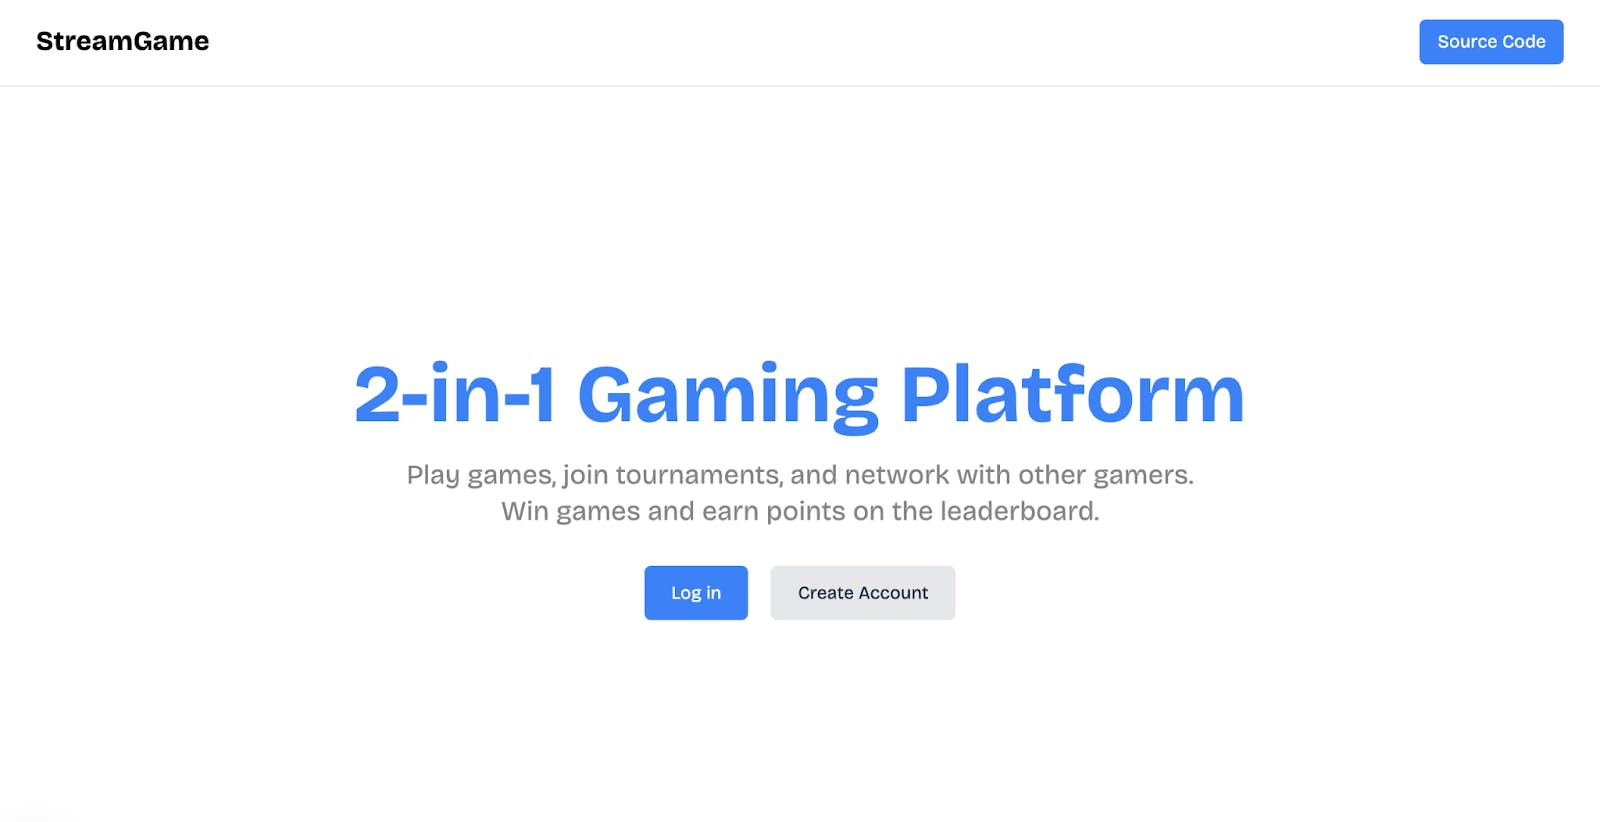
Home Page
The home page renders a description text and two links that direct users to the login and registration pages.
Copy the following code into app/page.tsx to create the Home page:
import Link from "next/link";
1234567891011121314151617181920212223242526272829303132333435363738394041export default function Home() {
    return (
 <div className='w-full h-screen'>
 <nav className='w-full px-8 py-4 flex items-center justify-between h-[10vh] border-b-[1px] border-gray-300'>
 <Link href='/' className='font-bold text-2xl'>
 StreamGame
 </Link>

 <button className='bg-blue-500 text-white px-4 py-2 rounded-md cursor-pointer'>
 Source Code
 </button>
 </nav>
 <section className='h-[90vh] text-center w-full py-8 lg:px-[50px] px-4 flex flex-col items-center justify-center'>
 <h1 className='text-5xl lg:text-7xl font-extrabold text-blue-500 mb-5'>
 2-in-1 Gaming Platform
 </h1>
 <p className='opacity-50 text-lg lg:text-2xl '>
 Play games, join tournaments, and network with other gamers.
 </p>
 <p className='opacity-50 text-lg lg:text-2xl '>
 Win games and earn points on the leaderboard.
 </p>

 <div className='flex items-center justify-center mt-8'>
 <Link
                        href='/login'
                        className='bg-blue-500 text-white px-6 py-3 rounded-md cursor-pointer'
 >
 Log in
 </Link>
 <Link
                        href='/register'
                        className='bg-gray-200 text-gray-800 px-6 py-3 rounded-md cursor-pointer ml-5'
 >
 Create Account
 </Link>
 </div>
 </section>
 </div>
 );
}
Authentication Pages: Log In and Sign Up
Set up the authentication routes by creating an (auth) folder inside the app directory. This folder will contain two subfolders: login and register. Each subfolder represents a separate page for user authentication.
123456app
├── (auth)
│   ├── login
│   │   └── page.tsx
│   └── register
│       └── page.tsx
Add a page.tsx file to each subfolder. The page.tsx file renders the UI elements for the pages.
12cd login && touch page.tsx && \
cd register && touch page.tsx
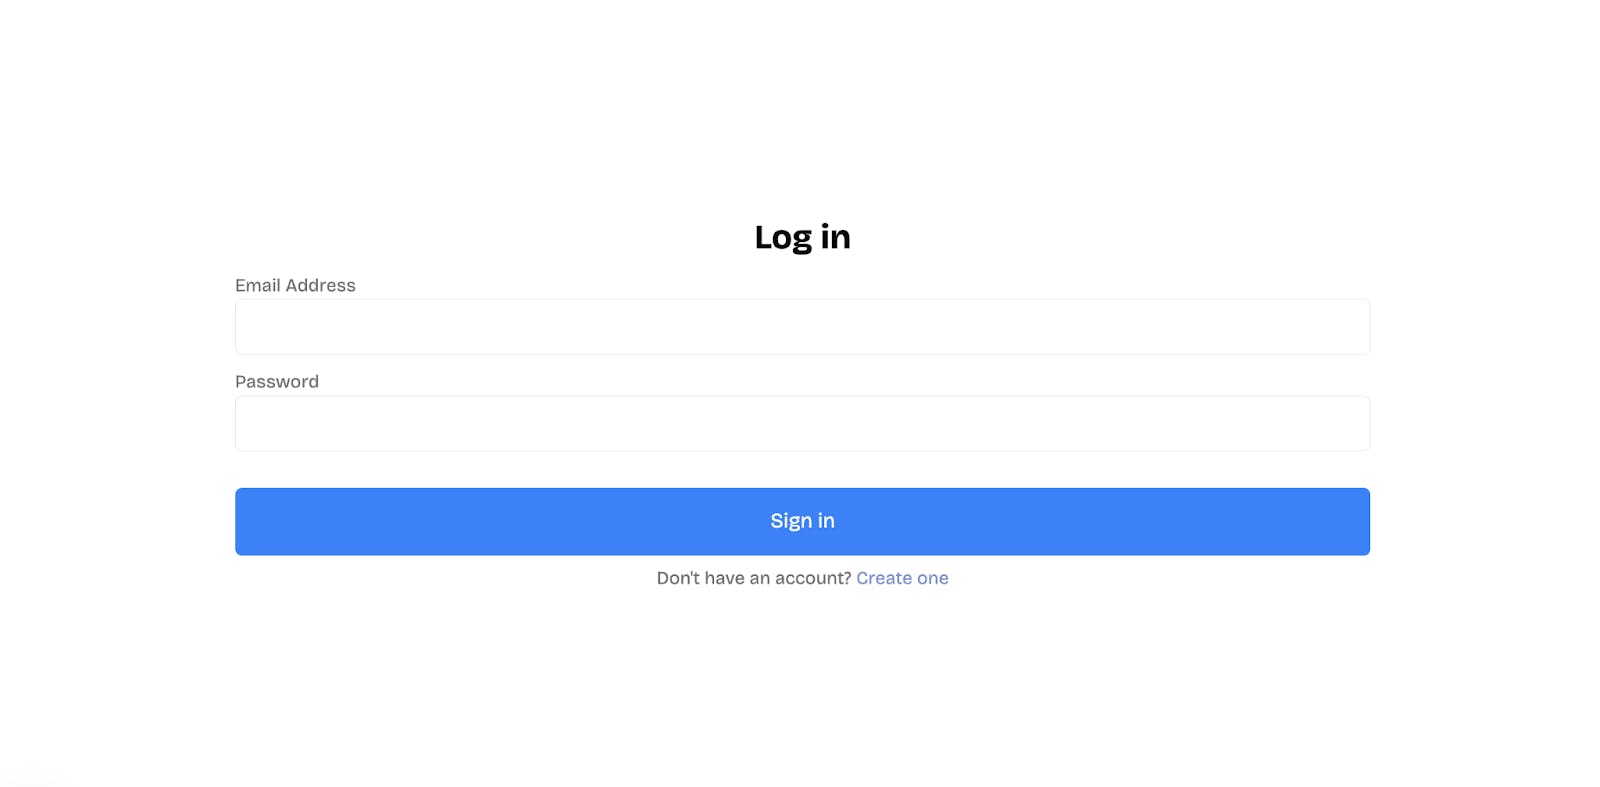
Copy the following code snippet into the login/page.tsx file:
12345678910111213141516171819202122232425262728293031323334353637383940414243444546474849505152535455565758"use client"; import { useState } from "react"; import Link from "next/link"; export default function Login() { const [buttonClicked, setButtonClicked] = useState<boolean>(false); const handleSubmit = async (e: React.FormEvent<HTMLFormElement>) => { e.preventDefault(); setButtonClicked(true); // 👉🏻 authenticate user }; return ( <section className='mx-auto md:w-3/4 w-full h-screen flex flex-col justify-center md:px-8 px-6 items-center'> <h2 className='text-3xl font-bold mb-3 md:text-left text-center'> Log in </h2> <form className='w-full' onSubmit={handleSubmit}> <label htmlFor='email' className='mb-2 opacity-60'> Email Address </label> <input required type='email' id='email' name='email' className='w-full px-4 py-3 border-[1px] rounded-md mb-3' /> <label htmlFor='password' className='mb-2 opacity-60'> Password </label> <input required type='password' id='password' name='password' className='w-full px-4 py-3 border-[1px] rounded-md mb-2' /> <button type='submit' className='mt-6 mb-2 text-lg text-white rounded-md bg-blue-500 w-full px-8 py-4 cursor-pointer hover:bg-blue-600' disabled={buttonClicked} > {buttonClicked ? "Signing in" : "Sign in"} </button> <p className=' opacity-60 text-center'> Don't have an account?{" "} <Link href='/register' className='text-blue-800'> Create one </Link> </p> </form> </section> ); }
The code snippet above renders a form that collects the user's email and password. Once submitted, the credentials are authenticated before granting the user access to the application.
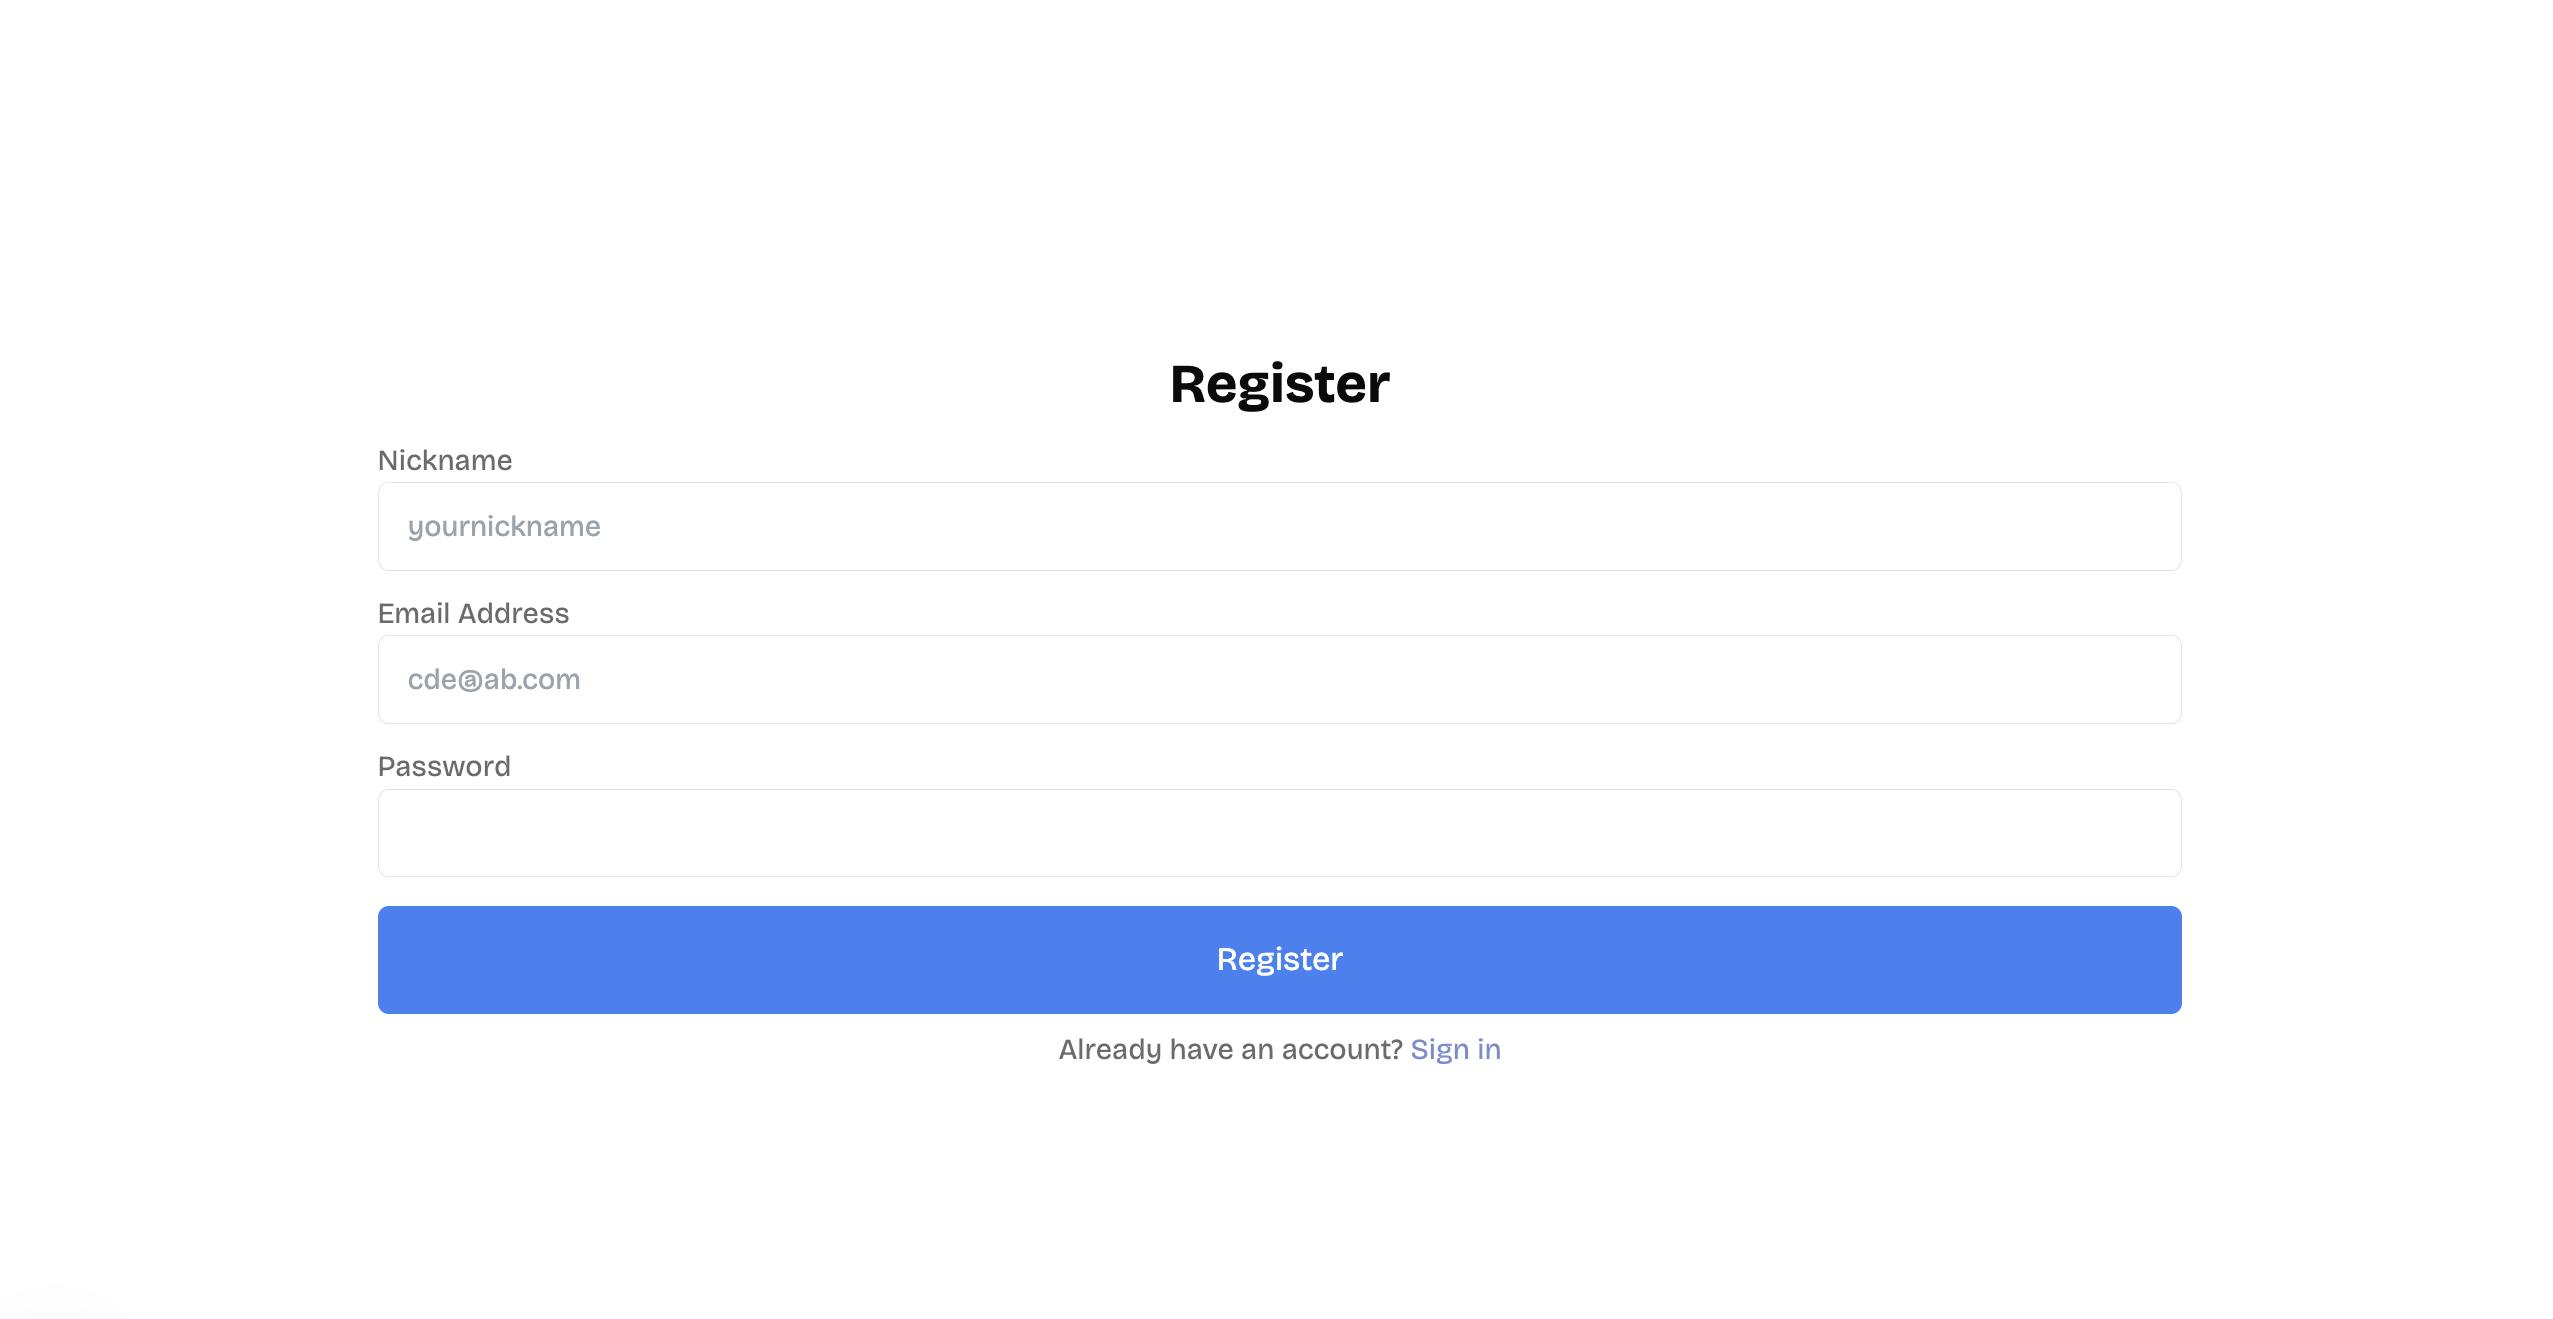
Finally, update the register/page.tsx file as shown below:
1234567891011121314151617181920212223242526272829303132333435363738394041424344454647484950515253545556575859606162636465666768"use client";
import { useState } from "react";
import Link from "next/link";

export default function Register() {
    const [buttonClicked, setButtonClicked] = useState<boolean>(false);

    const handleSubmit = async (e: React.FormEvent<HTMLFormElement>) => {
        e.preventDefault();
        setButtonClicked(true);
        // 👉🏻 create user
 };

    return (
 <section className='mx-auto md:w-3/4 h-screen w-full flex flex-col items-center justify-center md:px-8 px-6 py-8 '>
 <h2 className='text-3xl font-bold mb-3 text-center'>Register</h2>
 <form className='w-full' onSubmit={handleSubmit}>
 <label htmlFor='nickname' className='mb-2 opacity-60  '>
 Nickname
 </label>
 <input
                    required
                    type='text'
                    id='nickname'
                    name='nickname'
                    className='w-full px-4 py-3 border-[1px] rounded-md mb-3'
                    placeholder='yournickname'
 />
 <label htmlFor='email' className='mb-2 opacity-60  '>
 Email Address
 </label>
 <input
                    required
                    type='email'
                    id='email'
                    name='email'
                    className='  w-full px-4 py-3 border-[1px] rounded-md mb-3'
                    placeholder='cde@ab.com'
 />

 <label htmlFor='password' className='mb-2 opacity-60  '>
 Password
 </label>
 <input
                    required
                    type='password'
                    id='password'
                    name='password'
                    minLength={8}
                    className='w-full px-4 py-3 border-[1px] rounded-md mb-2  '
 />

 <button
                    className='mt-2 mb-2 text-lg text-white rounded-md bg-blue-500 w-full px-8 py-4 cursor-pointer hover:bg-blue-600'
                    disabled={buttonClicked}
 >
                    {buttonClicked ? "Registering..." : "Register"}
 </button>
 <p className=' opacity-60 text-center'>
 Already have an account?{" "}
 <Link href='/login' className='text-blue-800'>
 Sign in
 </Link>
 </p>
 </form>
 </section>
 );
}
The code snippet above renders a form that collects the user's nickname, email, and password. These details are used to create an account and are validated before the user can sign in and access the application as a player.
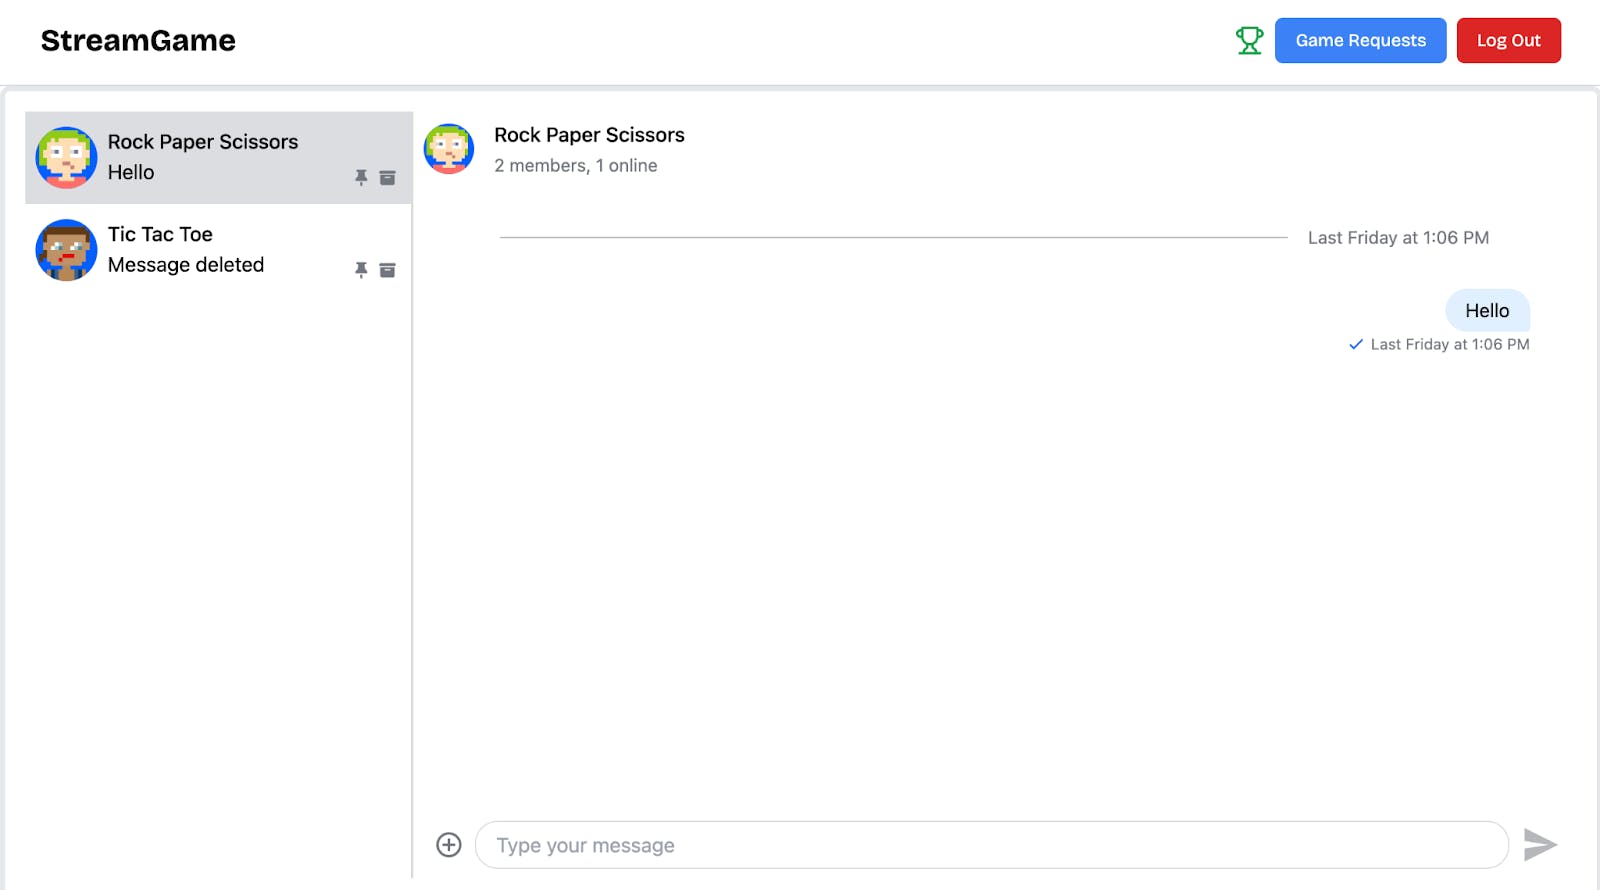
The Games Channel Page
The Games Channel Page displays the group chat interface, an icon that opens the game leaderboard, and a button that directs users to the Game Request page.
Within the Next.js app directory, create a games folder. Inside the games folder, add two subfolders:
- [id]: This will handle dynamic game sessions (e.g., /games/abc123).
- requests: This will serve the Game Request page, where users can initiate new games.
1234567app
├── games
│   ├── page.tsx         // Games Channel Page
│   ├── [id]
│   │   └── page.tsx     // Dynamic Game Page
│   └── requests
│       └── page.tsx     // Game Request Page
Copy the following code snippet into the games/page.tsx file:
12345678910111213141516171819202122232425262728293031"use client";
import { useCallback, useContext, useEffect, useState } from "react";
import { getLeaderboard, logoutUser } from "@/lib/serverfunctions";
import { Dialog, DialogTrigger } from "@/components/ui/dialog";
import ChatComponent from "../(components)/ChatComponent";
import LeaderBoard from "../(components)/Leaderboard";
import AuthContext from "../(context)/AuthContext";
import { Trophy } from "lucide-react";
import Link from "next/link";

interface Leaderboard {
    id: string;
    nickname: string;
    email: string;
    score: number;
}

export default function GamesPage() {
    const [leaderboard, setLeaderboard] = useState<Leaderboard[]>([]);
    const { user } = useContext(AuthContext);

    return (
 <div>
 <Navigation leaderboard={leaderboard} />

 <section className='px-4 py-4 border-[4px] rounded-lg border-gray-200'>
 <ChatComponent user={user!} />
 </section>
 </div>
 );
}
The GamesPage component renders two main parts: the Navigation bar and the ChatComponent. The Navigation serves as the page’s navigation bar, while the ChatComponent includes the group chat components, which you will learn to implement later in this tutorial.
Add the following code snippet below the GamesPage component:
1234567891011121314151617181920212223242526272829303132const Navigation = ({ leaderboard }: { leaderboard: Leaderboard[] }) => {
    return (
 <nav className='w-full md:px-8 px-2 py-4 flex items-center justify-between h-[10vh] border-b-[1px] border-gray-300'>
 <Link href='/' className='font-bold text-2xl'>
 StreamGame
 </Link>

 <div className='flex items-center gap-2'>
 <Dialog>
 <DialogTrigger asChild>
 <Trophy className='bg-white text-sm text-green-600 hover:underline rounded-md cursor-pointer hover:text-blue-500' />
 </DialogTrigger>
 <LeaderBoard leaderboard={leaderboard.slice(0, 7)} />
 </Dialog>

 <Link
                    href='/games/request'
                    className='bg-blue-500 text-sm text-white px-4 py-2 rounded-md cursor-pointer'
 >
 Game Requests
 </Link>

 <button
                    className='bg-red-600 text-sm hover:bg-red-500 text-white px-4 py-2 rounded-md cursor-pointer'
                    onClick={logoutUser}
 >
 Log Out
 </button>
 </div>
 </nav>
 );
};
The Navigation component renders an icon button that displays the leaderboard modal, the Games request page link, and the logout button.
Games Request Page
Copy the following code snippet into the file requests/pages.tsx file:
123456789101112131415161718192021222324252627282930313233343536373839404142434445464748495051525354555657585960616263646566676869707172737475767778798081828384858687"use client";
import { useRouter } from "next/navigation";

export default function CreateGame() {
    const [copied, setCopied] = useState<boolean>(false);
    const [selectedGame, setSelectedGame] = useState<string>("");
    const [gameId, setGameId] = useState<string>(generateGameUrl());
    const [buttonClicked, setButtonClicked] = useState<boolean>(false);
    const [selectedPlayer, setSelectedPlayer] = useState<string>("");
    const [error, setError] = useState<boolean>(true);
    const router = useRouter();
    const handleCopy = () => setCopied(true);

    const handleSubmit = async (e: React.FormEvent<HTMLFormElement>) => {
        e.preventDefault();
        setButtonClicked(true);
        // 👉🏻 create game request
 };

    return (
 <>
 <main>
 <h3>Create Game</h3>
 <p>Create a game request and play with your friends.</p>

 <form onSubmit={handleSubmit}>
 <label htmlFor='player'>Opponent Email</label>
 <input
                        type='email'
                        placeholder='Enter player email'
                        value={selectedPlayer}
                        onChange={(e) => {
                            setSelectedPlayer(e.target.value);
                            setError(!error);
 }}
                        required
                        name='player'
                        id='player'
 />
                    {!error ? (
 <p>
 Player found:{" "}
                            {users.find((user) => user.email === selectedPlayer)?.nickname}
 </p>
 ) : (
 <p>Player not found. Please enter a valid email.</p>
 )}

 <select
                        name='game'
                        id='game'
                        required
                        value={selectedGame}
                        onChange={(e) => setSelectedGame(e.target.value)}
 >
 <option value=''>Select a game</option>
                        {games.map((game) => (
 <option key={game.id} value={game.id}>
                                {game.name}
 </option>
 ))}
 </select>

                    {selectedGame && (
 <>
 <CopyToClipboard
                                onCopy={handleCopy}
                                text={`${process.env.NEXT_PUBLIC_URL}/games/${gameId}`}
 >
 <div>
 <p>{`${process.env.NEXT_PUBLIC_URL}/games/${gameId}`}</p>

 <p>{copied ? "Copied!" : <Copy />}</p>
 </div>
 </CopyToClipboard>
 <p>Ensure you copy the link before starting the game.</p>
 </>
 )}

 <button type='submit' disabled={!copied || buttonClicked || error}>
                        {buttonClicked ? "Creating..." : "Create Game"}
 </button>
 </form>
 </main>
 </>
 );
}
The form allows game hosts to enter their opponent’s email and select the type of game. It then automatically generates a game link to be shared to start playing.
Setting Up Stream Chat SDK for Group Messaging in Next.js
In this section, you will learn how to create group chat channels within the application using the Stream Chat SDK.
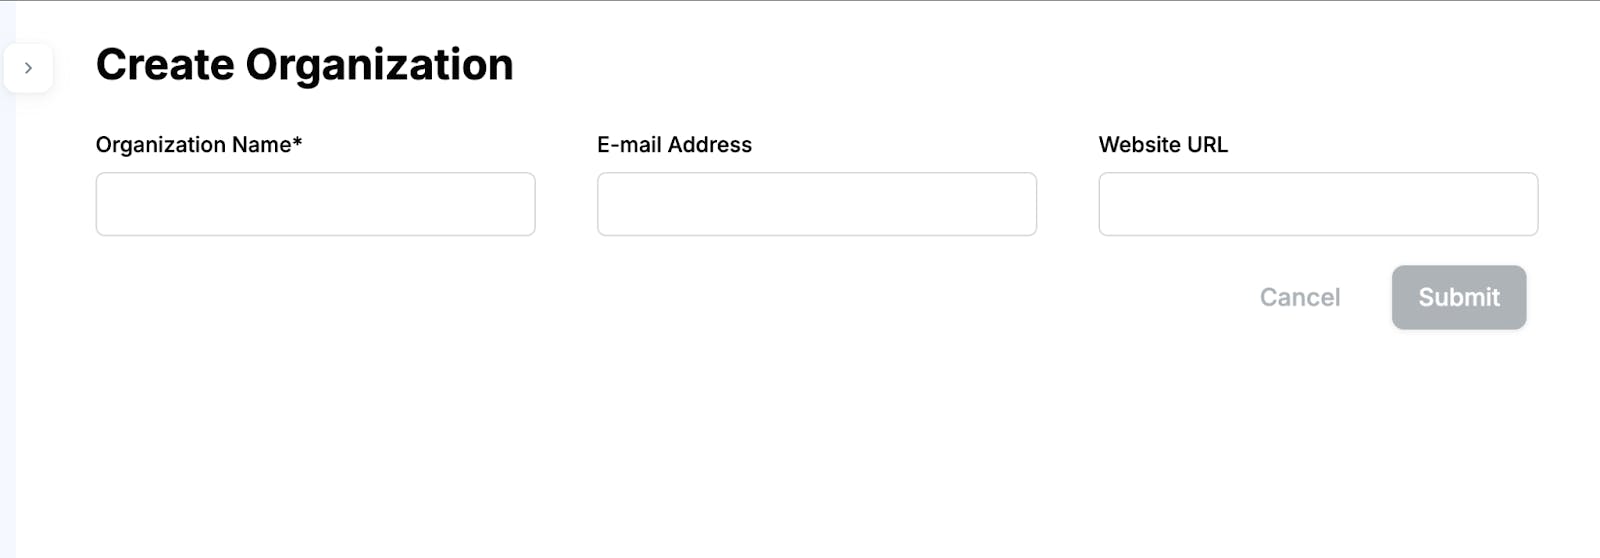
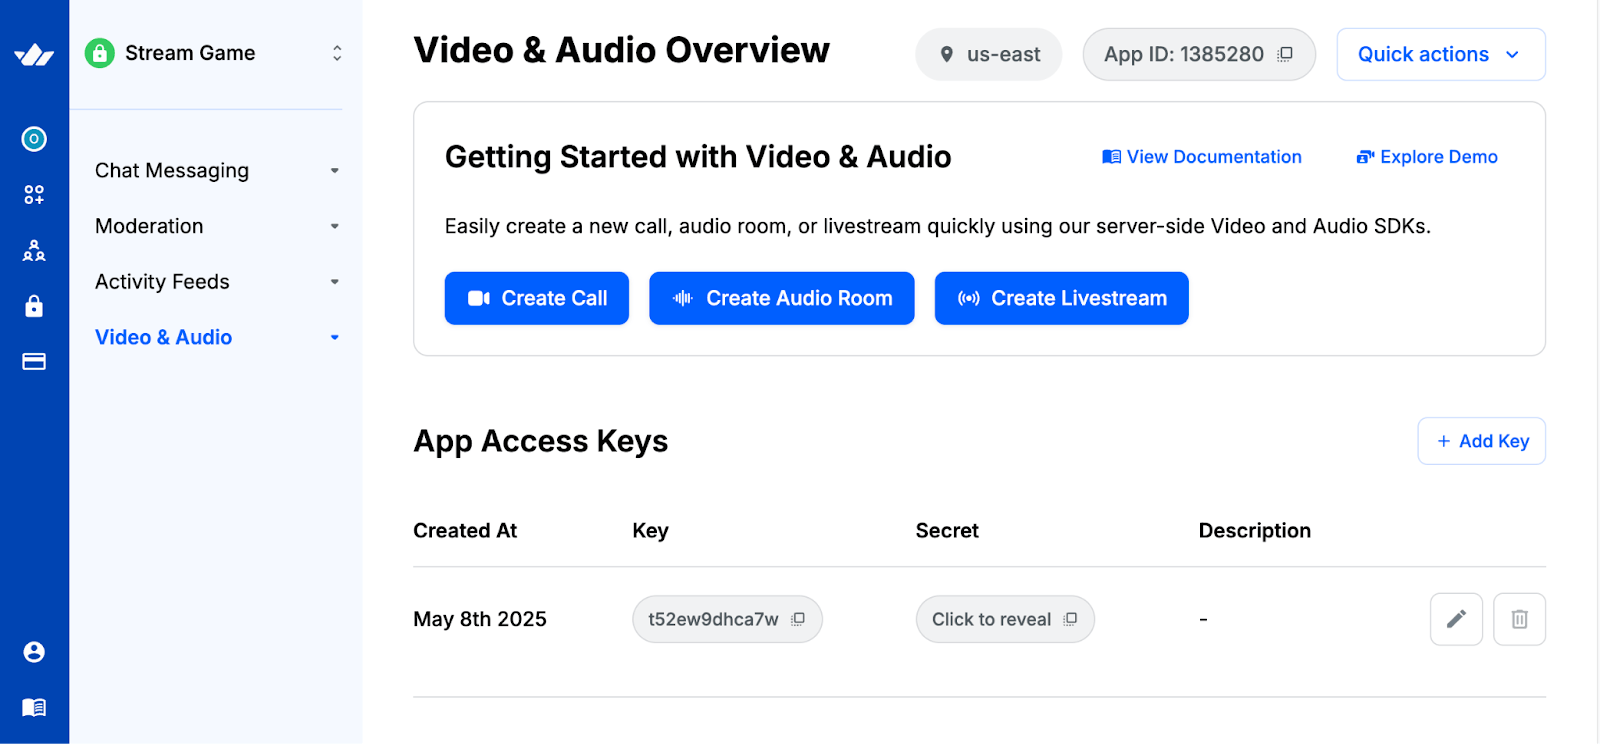
First, create a Stream account and a new organization to manage your apps.
Add a new app to the organization and copy the Stream API and Secret key into the .env.local file.
12NEXT_PUBLIC_STREAM_API_KEY=<paste_from_Stream_app_dashboard>
STREAM_SECRET_KEY=<paste_from_Stream_app_dashboard>
Before we proceed, here is a brief overview of how we will configure the application:
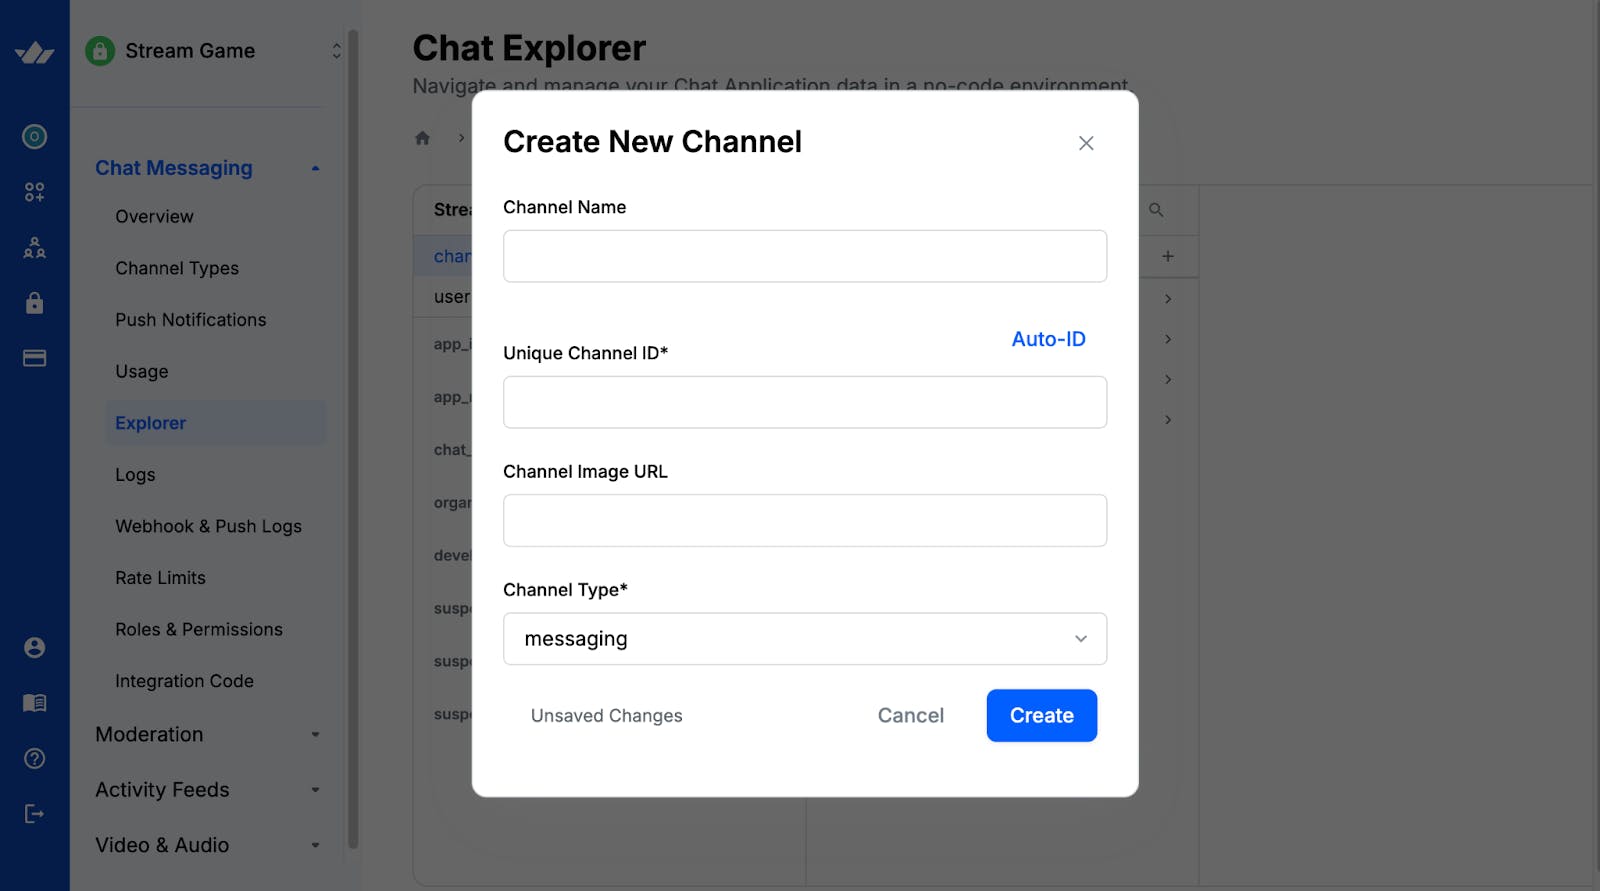
When users sign in, they are automatically added to two existing game channels, Tic Tac Toe and Rock Paper Scissors, where they can interact with other players. To enable this, you need to create these channels and implement a function that adds new users to the channels upon sign-in.
Select Explorer from the Chat Messaging dropdown to create the new channels.
Create an actions folder containing a stream.action.ts within your Next.js project.
12cd gaming-app && mkdir actions && \
cd actions && touch stream.action.ts
Copy the following code snippet into the stream.action.ts file:
123456789"use server";
import { StreamChat } from "stream-chat";

const STREAM_API_KEY = process.env.NEXT_PUBLIC_STREAM_API_KEY!;
const STREAM_API_SECRET = process.env.STREAM_SECRET_KEY!;
const CREATOR_ID = process.env.CHANNELS_CREATOR_ID!;

// 👇🏻 -- For Stream Chat  --
const serverClient = StreamChat.getInstance(STREAM_API_KEY, STREAM_API_SECRET);
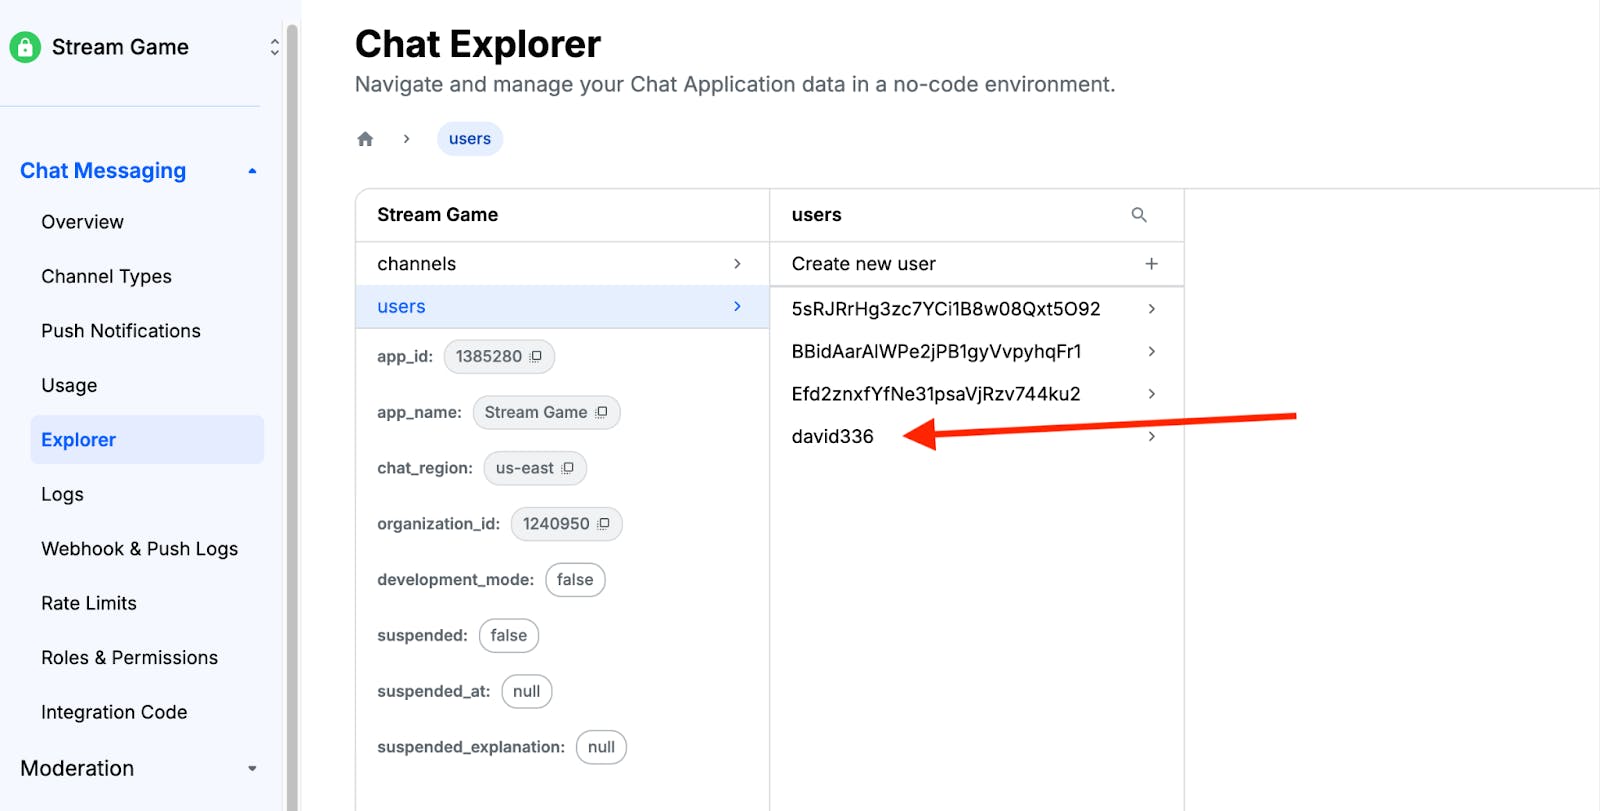
You can find your creator ID under the Users menu in the Stream app Explorer dashboard.
Modify the stream.action.ts file by adding the following functions to the file:
1234567891011121314151617181920212223242526272829//👇🏻 creates a token for each user
export async function createToken(user: Leaderboard): Promise<string> {
    if (!user) throw new Error("User is not authenticated");
    return serverClient.createToken(user.id);
}

//👇🏻 retrieves the existing chat channels
export const getGameChannels = async (userId: string) => {
    try {
        const filter = { created_by_id: CREATOR_ID, type: "messaging" };
        const sort = [{ last_message_at: -1 }];

        const channels = await serverClient.queryChannels(filter, sort);
        const channelIds = channels.map((channel) => channel.id);

        if (!channelIds || channelIds.length === 0) {
            return {
                success: false,
                message: "No channels found",
                error: null,
 };
 }
        const result = await addUserToChannels(channelIds as string[], userId);
        return result;
 } catch (error) {
        console.error("Error fetching channels:", error);
        throw new Error("Failed to fetch channels");
 }
};
The createToken function generates a token for each user based on their ID. The getGameChannels function runs when the user signs into the application.
The getGameChannels function takes the user ID as a parameter, retrieves all existing channels created by you (the app creator), and then calls addUserToChannels to add the current user to those channels.
Finally, add the addUserToChannels function to the stream.action.ts file:
123456789101112131415161718192021222324252627282930313233343536373839404142434445//👇🏻 gets the channels and add the user to each one of them
export async function addUserToChannels(channelIds: string[], userId: string) {
    try {
        // Step 1: Query all channels by IDs
        const filter = {
            id: { $in: channelIds },
            type: "messaging",
 };
        const sort = { last_message_at: -1 };
        const channels = await serverClient.queryChannels(filter, sort);

        // Step 2: Determine which channels the user is already a member of
        const alreadyMemberChannelIds = channels
 .filter((channel) => channel.state.members[userId])
 .map((channel) => channel.id);

        // Step 3: Identify channels where the user is not a member
        const channelsToAdd = channelIds.filter(
 (id) => !alreadyMemberChannelIds.includes(id)
 );
        console.log({ alreadyMemberChannelIds, channelsToAdd, userId });

        // Step 4: Add the user to the channels they're not a member of
        for (const channelId of channelsToAdd) {
            const channel = serverClient.channel("messaging", channelId);
            await channel.addMembers([userId]);
 }
        return {
            success: true,
            message: "User added to channels successfully",
            addedChannels: channelsToAdd,
            alreadyMemberChannels: alreadyMemberChannelIds,
            error: null,
 };
 } catch (error) {
        console.error("Error adding user to channels:", error);
        return {
            success: false,
            error: "Failed to add user to channels",
            addedChannels: [],
            alreadyMemberChannels: [],
            message: null,
 };
 }
}
The function first checks whether the user is already a member of the existing channels; if not, it adds the user to those channels.
How to Integrate Firebase Authentication and Firestore in Next.js
Firebase is a cloud platform that helps you build full-stack applications without managing servers or databases. It offers powerful features such as authentication, real-time database, cloud functions, file storage, and more.
In this section, you will learn how to set up Firebase Authentication and Firestore Database to enable you to authenticate users and interact with the database.
Install the Firebase Node.js package by running the code snippet below:
1npm install firebase
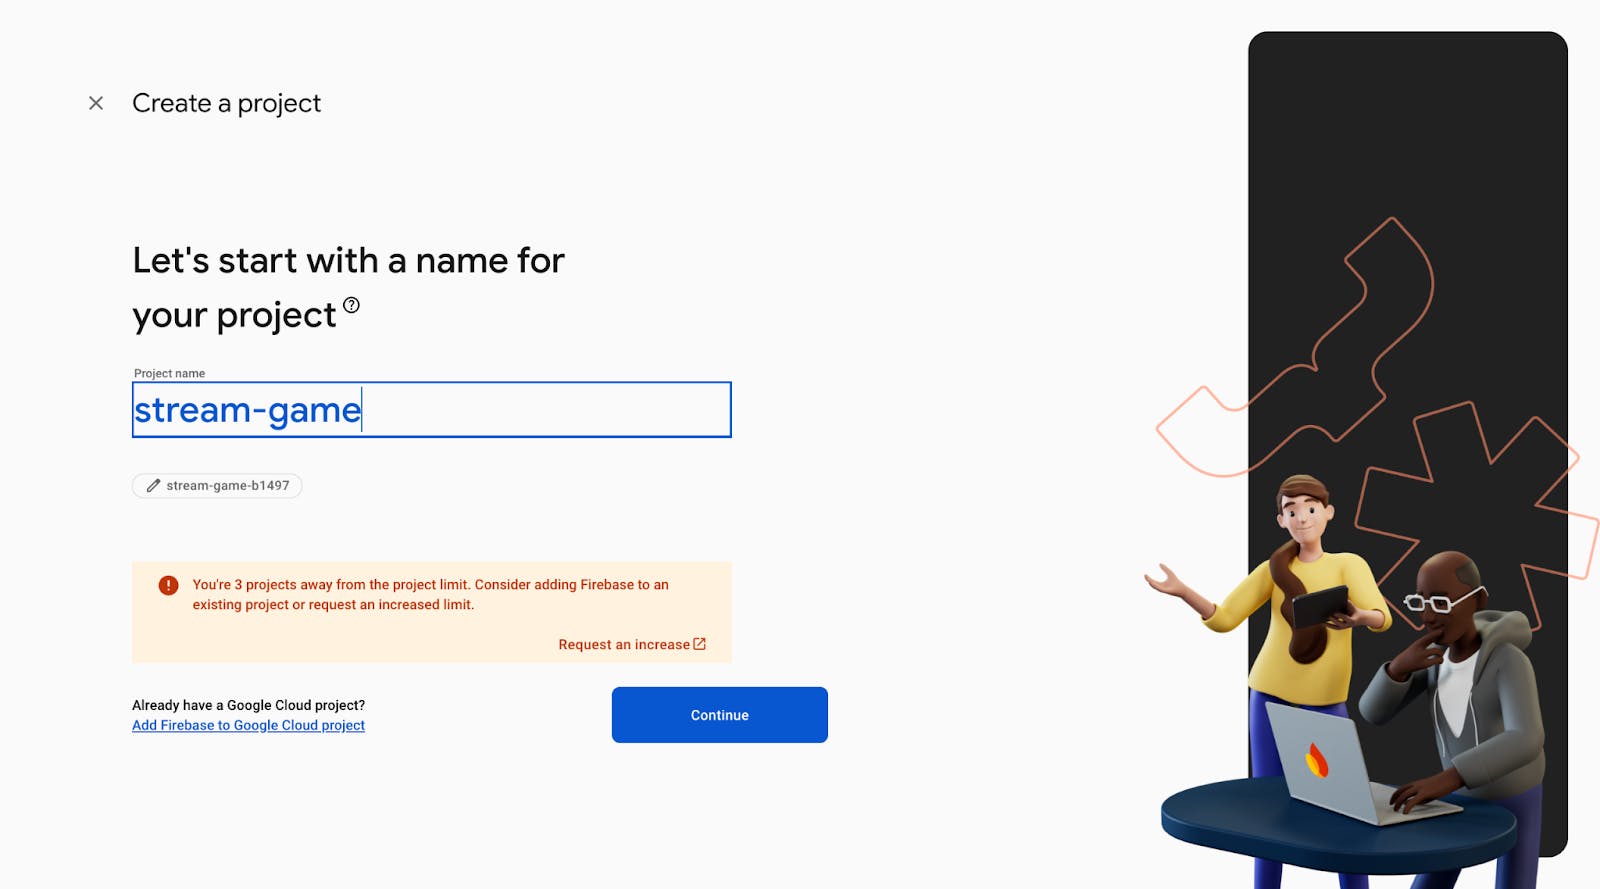
Open the Firebase Console in your browser and create a new Firebase project.
Within the project dashboard, click the web icon \</> to add a Firebase app to the project.
Register the app by entering a nickname, then copy the auto-generated Firebase configuration code.
Next, create a lib/firebase.ts file within the Next.js src folder and paste the following code snippet into the file:
12345678910111213141516171819import { initializeApp, getApps } from "firebase/app";
import { getFirestore } from "firebase/firestore";
import { EmailAuthProvider } from "firebase/auth";
import { getAuth } from "firebase/auth";

// Your web app's Firebase configuration
const firebaseConfig = {
    // -- 👉🏻 your auto-generated config code 👈🏼 --
};

// Initialize Firebase
const app =
    getApps().length === 0 ? initializeApp(firebaseConfig) : getApps()[0];
const provider = new EmailAuthProvider();
const db = getFirestore(app);
const auth = getAuth(app);

export { provider, auth };
export default db;
The code snippet above initializes the Firestore database and the email authentication provider. This setup allows you to interact with a database and implement email/password authentication within the application.
Before interacting with Firebase features, you must set them up in your project dashboard.
Click Build in your dashboard's sidebar navigation. This will open a dropdown menu with various features you can enable for your project.
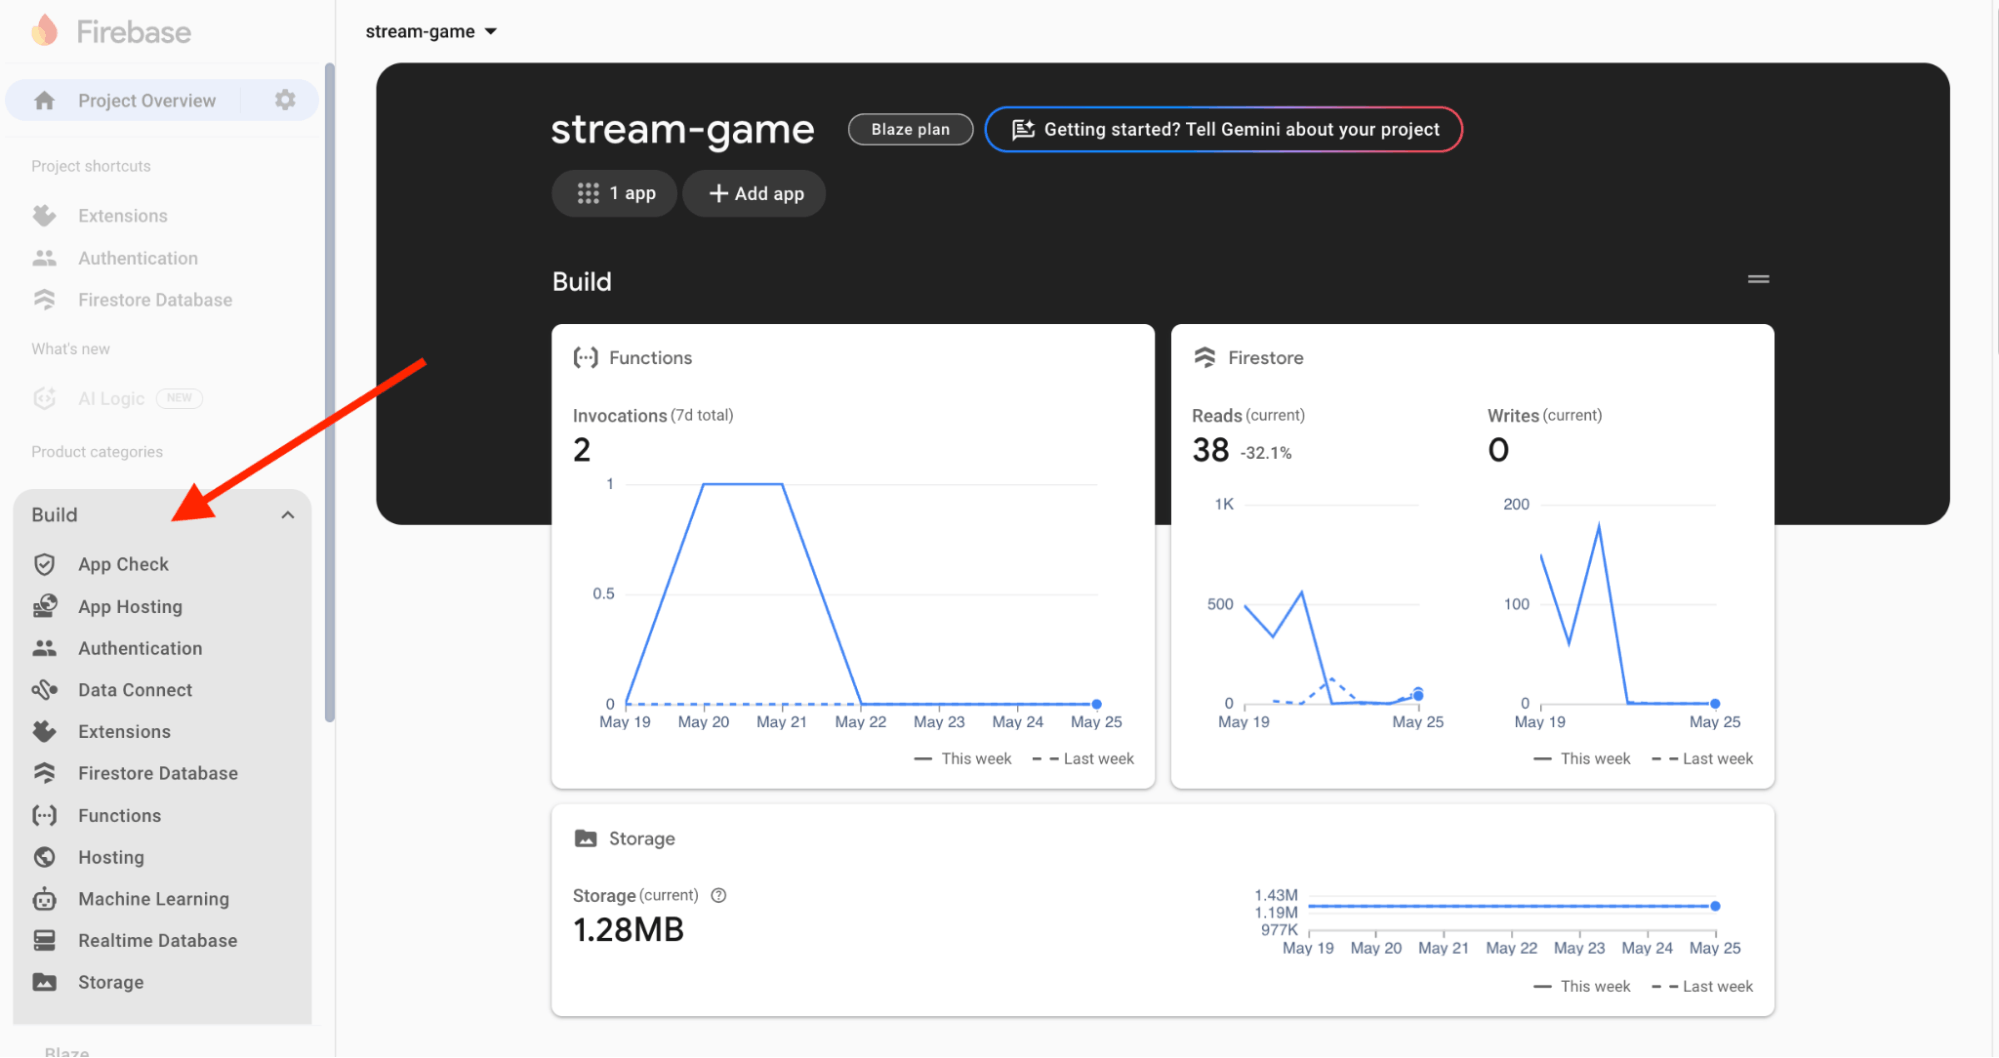
Select Authentication and Firestore Database from the drop-down and add them to the project.
Congratulations! You can now start interacting with these Firebase features in your Next.js project.
Stream Firebase Chat SDK Extension
The Authenticate with Stream Chat extension automatically connects your Firebase users to Stream Chat, making it easy for Stream to access and manage your users.
Visit the Stream Chat Firebase Extension page and select the Firebase project where you want to install the extension.
Note: Upgrade your Firebase project to the Blaze (pay-as-you-go) plan before installing the extension.
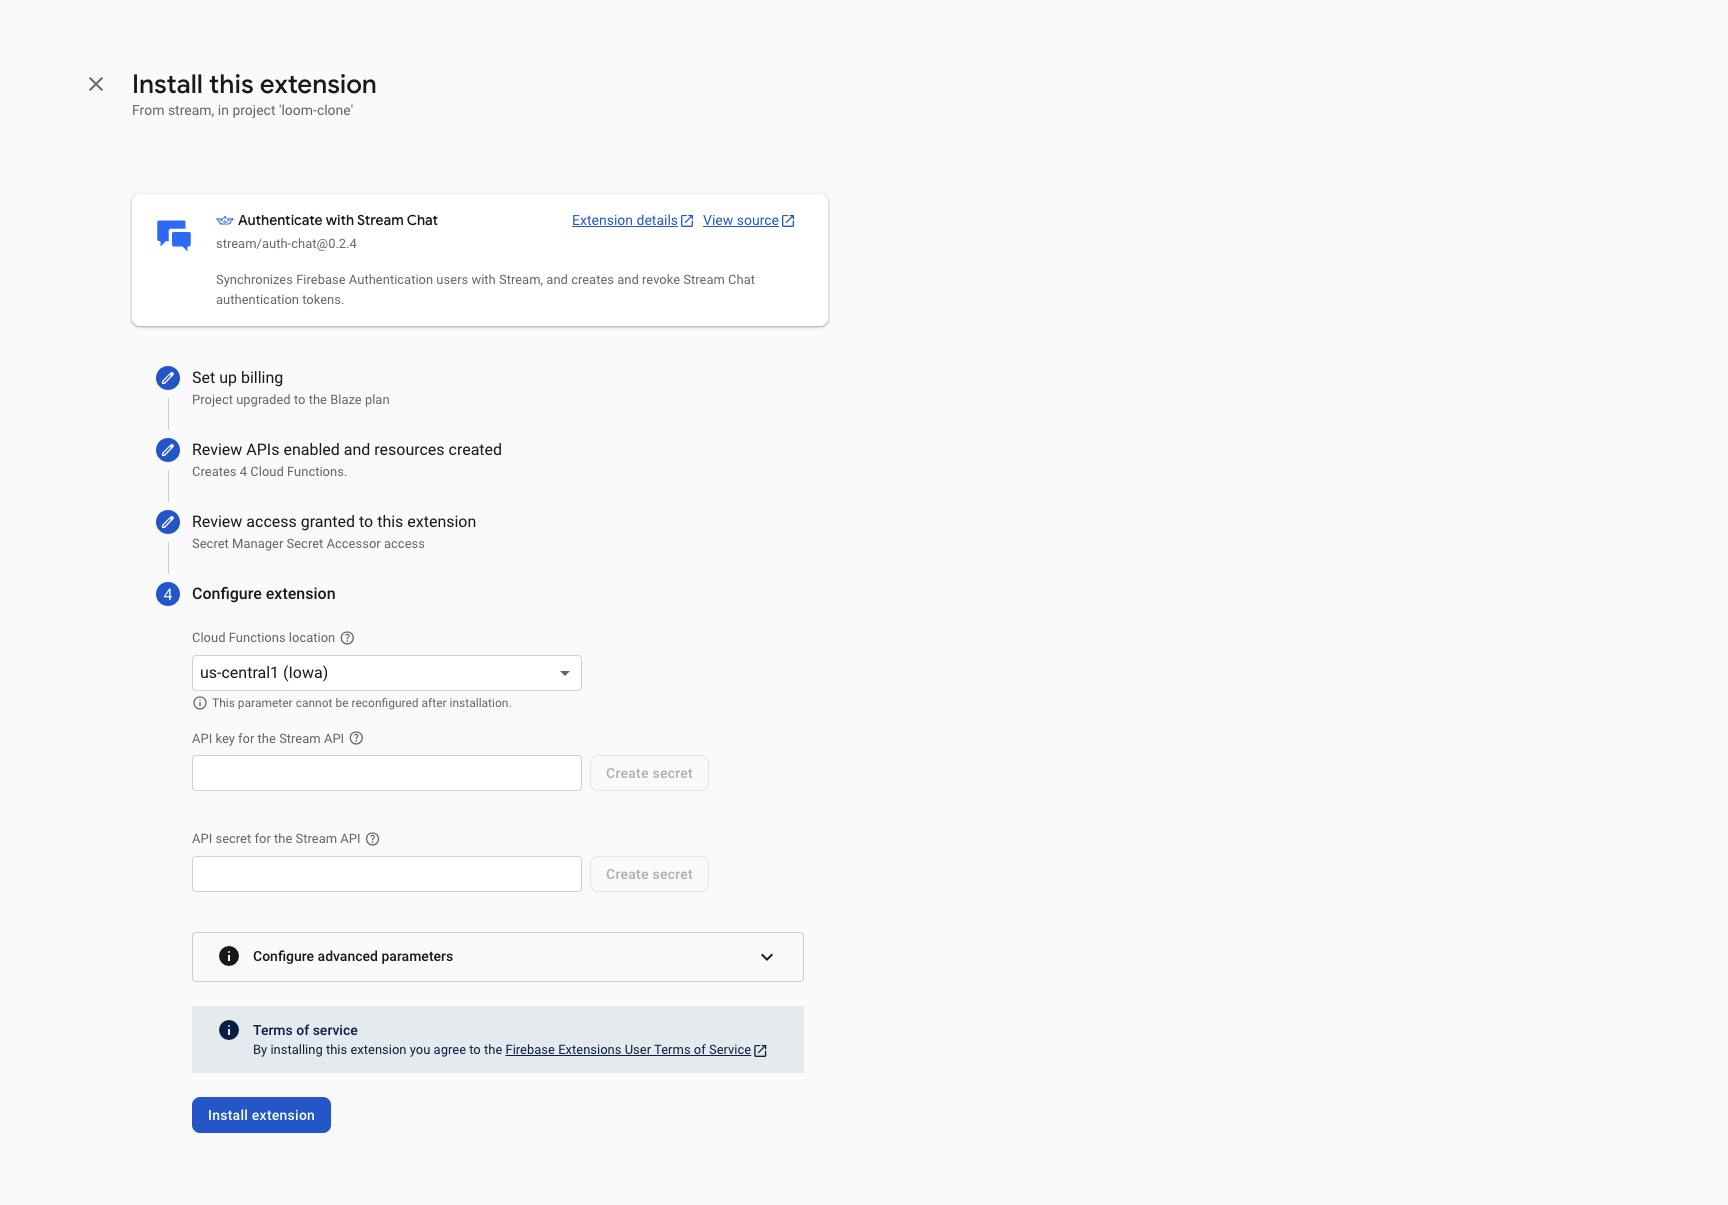
During installation, enable Artifact Registry, Cloud Functions, and Secret Manager. These permissions allow Stream to access and manage your Firebase users.
Finally, enter your Stream API key and secret in the configuration fields, then click the Install Extension button.
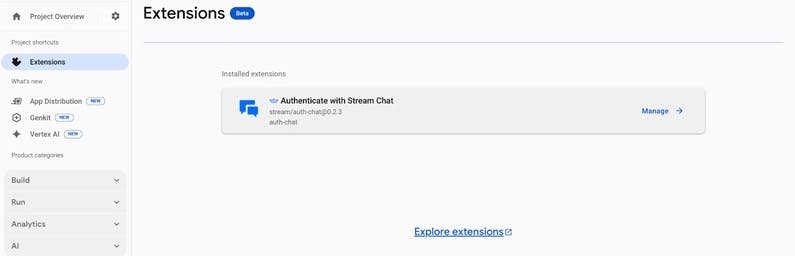
The extension will be installed within a few minutes. Once setup is complete, every new Firebase user will automatically be added to Stream.
Authenticating Users with Firebase
Here you will learn how to create functions that enable users to sign up, sign in, and log out of the application.
First, create a serverfunctions.ts file within the lib folder that contains all the Firebase authentication and database functions.
1cd lib && touch serverfunctions.ts
To enable users to create an account, copy the following code snippet into the serverfunctions.ts file:
12345678910111213141516171819202122232425262728293031323334353637383940414243444546474849import { createUserWithEmailAndPassword } from "firebase/auth";
import { auth } from "./firebase";

export const registerUser = async (form: FormData) => {
    //👇🏻 form inputs
    const email = form.get("email") as string;
    const password = form.get("password") as string;
    const nickname = form.get("nickname") as string;

    try {
        const { user } = await createUserWithEmailAndPassword(
            auth,
            email,
            password
 );
        if (!user) {
            return {
                code: "auth/failed",
                status: 500,
                user: null,
                message: "Failed to create user",
 };
 }
        //👇🏻 save to leaderboard collection
        const docRef = doc(db, "leaderboard", user.uid);
        //👇🏻 add document to collection
        await setDoc(docRef, {
            email,
            nickname,
            score: 0,
 });

        return {
            code: "auth/success",
            status: 200,
            user,
            message: "Account created successfully! 🎉",
            streamUser,
 };
 } catch (err) {
        return {
            code: "auth/failed",
            status: 500,
            user: null,
            message: "Failed to create user",
            error: err,
 };
 }
};
The registerUser function accepts the form inputs, creates a new user in Firebase Authentication using the provided credentials, and stores the user's email, nickname, and an initial score of 0 in the Firestore leaderboard collection. This collection helps track player scores and enables real-time updates when players win games and earn points.
Execute the function below to log users into the application.
1234567891011121314151617181920212223242526272829303132333435import { signInWithEmailAndPassword } from "firebase/auth";
import { auth } from "./firebase";

export const loginUser = async (form: FormData) => {
    const email = form.get("email") as string;
    const password = form.get("password") as string;
    try {
        const { user } = await signInWithEmailAndPassword(auth, email, password);
        if (!user) {
            return {
                code: "auth/failed",
                status: 500,
                user: null,
                message: "Failed to login user",
 };
 }
        //👇🏻 add users to existing channels
        await getGameChannels(user.uid);

        return {
            code: "auth/success",
            status: 200,
            user,
            message: "Logged in successfully! 🎉",
 };
 } catch (err) {
        return {
            code: "auth/failed",
            status: 500,
            user: null,
            message: "Failed to login user",
            error: err,
 };
 }
};
The loginUser function takes the user's email and password, authenticates them using Firebase, and then calls the getGameChannels function. This ensures the user is added to the existing game channels (such as Tic Tac Toe and Rock Paper Scissors) before granting access to the main application pages.
Users can log out of the application using the function below:
123456789101112131415161718192021import { auth } from "./firebase";

export const logoutUser = async () => {
    try {
        await auth.signOut();
        return {
            code: "auth/success",
            status: 200,
            user: null,
            message: "Logged out successfully! 🎉",
 };
 } catch (err) {
        return {
            code: "auth/failed",
            status: 500,
            user: null,
            message: "Failed to logout user",
            error: err,
 };
 }
};
The logoutUser function signs the user out of the application and redirects them to the home page.
You must protect those pages to ensure that only authenticated users can access specific application parts. This is done by creating an authentication context that wraps around your application and checks if a user is logged in before granting access to protected data or routes.
To get started, create an AuthContext.tsx file and add the following imports at the top of the file:
1234567891011121314151617"use client";
import { createContext, useState, useEffect, useCallback } from "react";
import { onAuthStateChanged, User } from "firebase/auth";
import type { Leaderboard } from "../../../types";
import { doc, getDoc } from "firebase/firestore";
import { useRouter } from "next/navigation";
import db, { auth } from "@/lib/firebase";
import { Loader2 } from "lucide-react";

//👇🏻 the auth context
const AuthContext = createContext<{
    user: Leaderboard | null;
    loading: boolean;
}>({
    user: null,
    loading: true,
});
Add the following code snippet to the file.
1234567891011121314151617181920212223242526272829303132333435363738394041424344454647484950515253545556export function AuthProvider({
    children,
}: Readonly<{
    children: React.ReactNode;
}>) {
    //👇🏻 Auth states
    const [user, setUser] = useState<User | null>(null);
    const [loading, setLoading] = useState(true);
    const [userData, setUserData] = useState<Leaderboard | null>(null);
    const router = useRouter();

    //👇🏻 getting the current user
    useEffect(() => {
        const unsubscribe = onAuthStateChanged(auth, async (user) => {
            if (user?.uid) {
                setUser(user);
                setLoading(false);
 } else {
                return router.push("/login");
 }
 });

        return () => unsubscribe();
 }, [router]);

    //👇🏻 getting the user leaderboard data
    const getUser = useCallback(async () => {
        if (!user) return null;
        const docSnap = await getDoc(doc(db, "leaderboard", user.uid));
        if (docSnap.exists()) {
            setUserData({ id: user.uid, ...docSnap.data() } as Leaderboard);
 } else {
            return null;
 }
 }, [user]);

    useEffect(() => {
        getUser();
 }, [getUser]);

    return (
 <>
            {userData ? (
 <AuthContext.Provider value={{ loading, user: userData }}>
                    {children}
 </AuthContext.Provider>
 ) : (
 <main className='flex items-center justify-center h-screen'>
 <Loader2 className='animate-spin text-4xl font-bold text-blue-500 text-center' />
 </main>
 )}
 </>
 );
}

export default AuthContext;:
The AuthProvider component retrieves the currently signed-in user and the leaderboard data from the Firestore collection. It then makes this data available to your application through the context provider. Wrap the AuthProvider around any page that requires restricted access.
Creating and Updating the Games Collection
Before we dive into real-time gameplay and tracking players' moves, let's first set up the Firebase games collection. This collection will store players' scores and enable us to update the leaderboard based on game results.
Use the function below to retrieve the top ten players based on their total score across all games:
1234567891011121314151617export const getLeaderboard = async () => {
    try {
        const leaderboardRef = collection(db, "leaderboard");
        const q = query(leaderboardRef, orderBy("score", "desc"), limit(10));
        const querySnapshot = await getDocs(q);

        const allLeaders = querySnapshot.docs.map((doc) => ({
            id: doc.id,
 ...doc.data(),
 }));

        return allLeaders;
 } catch (error) {
        console.error("Error fetching leaderboard:", error);
        return [];
 }
};
The getLeaderboard function returns all the top ten players using the Firestore query methods.
Players can create game sessions when they navigate to the /games/request page. After submitting the form containing their opponent and the game type, execute the following function.
1234567891011121314151617181920212223242526export const createGame = async (game: Game) => {
    const { id, type, players } = game;

    try {
        const docRef = doc(db, "games", id);
        await setDoc(docRef, {
            id,
            type,
            players,
 });
        return {
            code: "game/success",
            status: 200,
            game: { id, type, players },
            message: "Game created successfully! 🎉",
 };
 } catch (error) {
        return {
            code: "game/failed",
            status: 500,
            game: null,
            message: "Failed to create game",
            error,
 };
 }
};
The createGame function accepts the selected opponent, game type, and an auto-generated game ID and adds these parameters to the games collection in Firestore.
When players visit a specific game session page, you can retrieve the game data by its ID using the function below:
1234567891011121314151617181920212223242526272829export const getGameById = async (id: string) => {
    try {
        const docSnap = await getDoc(doc(db, "games", id));

        if (docSnap.exists()) {
            return {
                code: "game/success",
                status: 200,
                game: docSnap.data(),
                message: "Game fetched successfully! 🎉",
 };
 } else {
            return {
                code: "game/failed",
                status: 404,
                game: null,
                message: "Game not found",
 };
 }
 } catch (error) {
        return {
            code: "game/failed",
            status: 500,
            game: null,
            message: "Failed to fetch game",
            error,
 };
 }
};
The getGameById function retrieves game data based on the provided ID. If a game with the specified ID exists, the function returns its full details. Otherwise, it returns an error object to the client.
After each game is completed, you’ll need to update the game’s score and reflect the results on the leaderboard. You can achieve this using the function below:
12345export const updatePlayerScore = async (userId: string, gameId: string) => {
    // Step 1: Get the current leaderboard score
    // Step 2: Read game doc to update the score in the players array
    // Step 3: Update the player's score
};
Modify the updatePlayerScore to get and update the current leaderboard score.
1234567891011121314151617181920212223242526272829303132export const updatePlayerScore = async (userId: string, gameId: string) => {
    try {
        //👇🏻 get the current user data
        const userDocRef = doc(db, "leaderboard", userId);
        //👇🏻 get the game data
        const gameDocRef = doc(db, "games", gameId);

        // get the current and add 1 to its value
        const userSnap = await getDoc(userDocRef);
        if (!userSnap.exists()) {
            throw new Error("User not found");
 }
        const userData = userSnap.data();
        const currentScore =
            typeof userData.score === "number" ? userData.score : 0;

        const leaderboardUpdate = updateDoc(userDocRef, {
            score: currentScore + 1,
 });

        // Step 2: Read game doc to update the score in the players array
        // Step 3: Update the player's score
 } catch (error) {
        console.error("Error updating player score:", error);
        return {
            code: "user/failed",
            status: 500,
            message: "Failed to update user score",
            error,
 };
 }
};
Finally, add the following code snippet within the placeholder for step 2 and 3.
123456789101112131415161718192021222324252627282930313233// Step 2: Read game doc to update the score in the players array
const gameSnap = await getDoc(gameDocRef);
if (!gameSnap.exists()) {
    throw new Error("Game not found");
}

const gameData = gameSnap.data();
if (!Array.isArray(gameData.players)) {
    throw new Error("Players field is invalid");
}

// Step 3: Efficiently update the matching player's score
const updatedPlayers = gameData.players.map((player: any) => {
    if (player.id === userId) {
        return {
 ...player,
            score: (player.score ?? 0) + 1,
 };
 }
    return player;
});

const gameUpdate = updateDoc(gameDocRef, {
    players: updatedPlayers,
});

await Promise.all([leaderboardUpdate, gameUpdate]);

return {
    code: "user/success",
    status: 200,
    message: "User score updated successfully! 🎉",
};
The code snippet above retrieves the user's current score and updates it to reflect the latest result. It ensures that both the game's score and the leaderboard are updated accordingly.
How to Implement Group Chat Messaging with Stream Chat
In this section, you'll learn how to create a group chat interface using Stream components and send and listen to events using the Stream Chat SDK.
First, create a hooks folder containing a useGetStreamClient.ts file, then copy the following code snippet into the file:
123456789101112131415161718192021222324import { createToken } from "../../../actions/stream.action";
import { useCreateChatClient } from "stream-chat-react";
import type { Leaderboard } from "../../../types";
import { useCallback } from "react";

export const useGetStreamClient = (user: Leaderboard) => {
    const tokenProvider = useCallback(async () => {
        return await createToken(user);
 }, [user]);

    const client = useCreateChatClient({
        apiKey: process.env.NEXT_PUBLIC_STREAM_API_KEY!,
        tokenOrProvider: tokenProvider,
        userData: {
            id: user.id,
            name: user.nickname,
            image: `https://api.dicebear.com/9.x/pixel-art/svg?seed=${user.nickname}`,
 },
 });

    if (!client) return { client: null };

    return { client };
};
The useGetStreamClient hook creates a Stream client using the Stream API key, the current user’s ID and name, and an auto-generated user image. This Stream client uniquely identifies each user and allows us to perform various chat operations.
Next, update the ChatComponent inside the games/page.tsx file by copying the following code snippet:
12345678910111213141516171819202122232425262728293031323334353637383940414243444546474849505152535455565758"use client";
import {
    Channel,
    ChannelList,
    Window,
    ChannelHeader,
    MessageList,
    MessageInput,
} from "stream-chat-react";
import { Loader2 } from "lucide-react";
import { Chat } from "stream-chat-react";
import type { Leaderboard } from "../../../types";
import { useGetStreamClient } from "../hooks/useGetStreamClient";

export default function ChatComponent({ user }: { user: Leaderboard }) {
    //👇🏻 get the Stream client
    const { client } = useGetStreamClient(user!);
    const filters = {
        type: "messaging",
        id: { $in: ["tic-tac-toe", "rock-paper-scissors"] },
        members: { $in: [user.id] },
 };

    const options = { presence: true, state: true };

    if (!client)
        return (
 <div className='flex items-center justify-center h-screen'>
 <Loader2 className='animate-spin text-blue-500' />
 </div>
 );

    return (
 <Chat client={client}>
 <div className='chat-container'>
                {/* -- Channel List -- */}
 <div className='channel-list'>
 <ChannelList
                        sort={{ last_message_at: -1 }}
                        filters={filters}
                        options={options}
 />
 </div>

                {/* -- Messages Panel -- */}
 <div className='chat-panel'>
 <Channel>
 <Window>
 <ChannelHeader />
 <MessageList />
 <MessageInput />
 </Window>
 </Channel>
 </div>
 </div>
 </Chat>
 );
}
- From the code snippet above:
- The useGetStreamClient custom hook returns the Stream Chat client for the current user.
- Chat component initializes the Stream Chat client and wraps the entire Chat page.
- ChannelList shows available chat channels.
- Channel sets up an active chat session.
- The Window component contains the message display and input areas.
- ChannelHeader, MessageList, and MessageInput provide a fully functional chat interface.
Sending and Receiving Real-Time Events with Stream
Stream allows you to send and listen to events within a channel. In this section, you will learn how to handle custom events using the Stream Chat SDK.
When a user creates a game using the createGame function, run the following code snippet to create a Stream channel for that game session.
123456789const handleSubmit = async (e: React.FormEvent<HTMLFormElement>) => {
    //👉🏻 execute createGame function
    const newChannel: ChannelType = await client.channel("messaging", gameId, {
        members: [user.id, selectedPlayerObject.id],
 });
    await newChannel.watch();
    setChannel(newChannel);
    router.push(`/games/${newChannel.id}`);
};
Every game session is a Stream channel that allows us to track the members' activities and create custom events for that channel.
The handleSubmit function adds the game details to Firebase, creates a new game channel using the generated ID, and adds both the host's ID and the opponent's ID as members to the channels.
Next, add the following imports to the [id]/page.tsx file:
12345678910111213141516171819202122"use client";
//👇🏻 React imports
import { useContext, useEffect, useCallback, useState, useMemo } from "react";
import { useGetStreamClient } from "@/app/hooks/useGetStreamClient";
import { useParams, useRouter } from "next/navigation";

//👇🏻 Stream chat imports
import type { Channel as ChannelType } from "stream-chat";
import { Chat, Channel } from "stream-chat-react";

//👇🏻 Firebase imports
import { doc, onSnapshot } from "firebase/firestore";
import { getGameById } from "@/lib/serverfunctions";
import db from "@/lib/firebase";

//👇🏻 React components import
import WinnerModal from "@/app/(components)/WinnerModal";
import AuthContext from "@/app/(context)/AuthContext";
import RockPaper from "@/app/(components)/RockPaper";
import TicTacToe from "@/app/(components)/TicTacToe";
import GamesNav from "@/app/(components)/GamesNav";
import { Loader2 } from "lucide-react";
Modify the [id]/page.tsx file as shown below:
123456789101112131415161718192021222324252627282930313233343536export default function GamePlay() {
    const [channel, setChannel] = useState<ChannelType | null>(null);
    const [game, setGame] = useState<Game | null>(null);
    const router = useRouter();
    //👇🏻 game ID from page URL
    const { id } = useParams<{ id: string }>();
    //👇🏻 current user
    const { user } = useContext(AuthContext);
    //👇🏻 Stream client
    const { client } = useGetStreamClient(user!);

    const getChannel = useCallback(async () => {
        if (!client || !id) return;
        const [channel, { game }] = await Promise.all([
            client.queryChannels({
                id: id,
 }),
            getGameById(id),
 ]);
        if (!channel || !game || !user) return router.back();
        //👇🏻 if user is not a member of the channel
        if (!channel[0].state.members[user.id as string]) {
            return router.back();
 }
        setGame(game as Game);
        setChannel(channel[0]);
 }, [client, setChannel, id, router, user]);

    useEffect(() => {
        getChannel();
 }, [getChannel]);

    return {
        /** -- UI components -- */
 };
}
From the code snippet above:
- The useParams function retrieves the game ID from the page URL.
- The getChannel function fetches the Stream channel data using the game ID, which doubles as the channel ID, and also retrieves the corresponding game data by its ID.
- The function checks that the user is a channel member before granting access to the game page. This ensures that only the game host and their opponent can access the game session.
Update the GamePlay component to listen for real-time updates on the game document. This way, whenever something changes, like when a player wins, the latest scores and game status are shown immediately on the screen for everyone.
123456789101112131415161718useEffect(() => {
    const unsubscribe = onSnapshot(doc(db, "games", id), (docSnap) => {
        if (docSnap.exists()) {
            setGame({ id: docSnap.id, ...docSnap.data() } as Game);
 }
 });

    return () => unsubscribe();
}, [id]);

//👇🏻 none exists - show a loader
if (!client || !user || !channel) {
    return (
 <div className='flex items-center justify-center h-screen'>
 <Loader2 className='animate-spin text-blue-500' />
 </div>
 );
}
Return the page component wrapped with the Stream Chat and Channel components.
1234567return (
 <Chat client={client}>
 <Channel channel={channel}>
 <Page channel={channel} game={game} />
 </Channel>
 </Chat>
);
The Stream Channel component must be nested inside the Stream Chat component. The Channel component lets us send and listen to events within the channel, enabling real-time tracking of each player's moves. It also supports custom events that help determine the winner and track the player's online status.
You can monitor the channel's watcher count to see how many users are currently in it. When both the host and opponent are active and ready, the playersCompleted state is set to true, indicating the game can start.
123456789101112131415161718192021const [playersCompleted, setPlayersCompleted] = useState<boolean>(() =>
    Boolean(channel.state.watcher_count === 2)
);

useEffect(() => {
    if (!channel) return;
    //👇🏻 updates the state
    const handleWatchChange = (event: { watcher_count: number }) => {
        setPlayersCompleted(event.watcher_count === 2);
 };

    // Listen for changes in the users' online activity
    channel.on("user.watching.start", handleWatchChange);
    channel.on("user.watching.stop", handleWatchChange);

    // Cleanup on channel change or unmount
    return () => {
        channel.off("user.watching.start", handleWatchChange);
        channel.off("user.watching.stop", handleWatchChange);
 };
}, [channel]);
The useEffect hook subscribes to the players’ online status and updates the playersCompleted state whenever there’s a change. If both players are active, playersCompleted is set to true; otherwise, it’s set to false. You can use this state to show a loader while waiting for a player.
Additionally, you can create and listen for custom events to handle game actions like player moves and declaring a winner. For example, when a player makes a move in Tic Tac Toe, you must notify the opponent about the move and its position. You can do this using the following function:
123456789101112channel.sendEvent({
    type: "custom-event-name",
    data: {
        /* -- values to be sent to the opponent*/
 },
});

//👇🏻 TicTacToe Game
await channel.sendEvent({
    type: "game-move",
    data: { index, sign: currentPlayer.sign },
});
You can listen to events using the useEffect function as shown below:
123456789101112131415161718192021useEffect(() => {
    if (!channel) return;
    const handleMoveEvent = (event: any) => {
        const { index, sign } = event.data;
        setCells((prev) => {
            const updated = [...prev];
            updated[index] = sign;
            return updated;
 });
        // Update turn based on sign
        setXIsNext(sign === "O");
 };

    // Listen for custom 'game-move' events
    channel.on("game-move", handleMoveEvent);

    // Cleanup listener on unmount
    return () => {
        channel.off("game-move", handleMoveEvent);
 };
}, [channel]);
The handleMoveEvent function receives the player’s sign and the index of the selected cell, then updates the board to reflect the move on the opponent’s screen. You can see how to implement this in the Tic Tac Toe and Rock Paper Scissors game components.
Check out the video walkthrough on YouTube: https://www.youtube.com/watch?v=n9Owt2wXHp0
You can also try out the live version of the app.
If you're interested in the source code, it is available on GitHub.
Next Steps
So far, you’ve learned how to build a gaming application that integrates group chat channels using the Stream Chat SDK and Firebase. This app enables gamers to connect through chat and compete to become the top players on the leaderboard.
Stream also offers various other powerful features to help you build engaging, scalable applications. These include performant and flexible Chat, Video, Audio, Feeds, and Moderation APIs and SDKs.
What's next? Keep building with these recommended tutorials:
- How to Build and Deploy an AI-Powered Chat App
- Build a Real-Time Therapy Marketplace Using Next.js and Firebase
- How to Implement Context-Aware AI Responses in Your Chat App
- How to Implement Real-Time Language Translation in Chat with LLMs
- Building a Modern Chat Experience with Stream
Thank you for reading. 🎉