
Building a safe and respectful group chat experience is more important than ever, especially in online gaming communities where conversations can scale quickly. A dedicated group moderator can make this easier by enforcing community standards, reducing toxic behavior, and keeping discussions welcoming for everyone.
With Stream’s AI Moderation built into the Chat API, moderation becomes even more seamless by automatically detecting harmful messages, filtering profanity, and supporting moderators in creating a positive environment for players.
In this guide, you’ll learn how to combat a toxic community by building a group chat with an AI chat moderator. You’ll implement it using Stream’s AI Moderation Service, Chat API, and React Native SDK to review user messages and actively monitor them for harmful content. The goal isn’t to police users but to create a space where they can engage freely without worrying about spam, hate speech, or toxic behavior.
Prerequisites
For this tutorial, you will need:
- Node.js and npm installed.
- React Native CLI installed.
- A free Stream account to get your API key and secret.
- A Ngrok account to expose your local server to Stream webhooks.
Building the Group Chat
Once you’ve completed all the prerequisites, you’ll set up a basic group chat app using React Native and Stream. This app will include the essential components for a chat experience: a channel list, a message list, a message composer, and a new group creation flow.
Start by creating a new folder to store all your project files. A good place for this is your desktop, as it's easy to access. Inside this folder, create a new file named \.env\.
Next, copy and paste the following code into your newly created \.env\ file. This file will hold important configuration details for your app and token server.
123STREAM\_KEY=YOUR\_STREAM\_KEY
STREAM\_SECRET=YOUR\_STREAM\_SECRET
PORT=5050
The \.env\ file is where you save your Stream credentials, which consists of your Stream key and your Stream secret key found on your account dashboard, as seen in the image below.

Create a new file called \server.js\ in the main project folder. Then, copy and paste the following code into it.
12345678910111213141516171819202122232425262728293031323334353637383940414243444546import 'dotenv/config';
import express from 'express';
import cors from 'cors';
import { StreamChat } from 'stream-chat';

const app = express();

app.use(cors());
app.use(express.json());

const STREAM_KEY = process.env.STREAM_KEY;
const STREAM_SECRET = process.env.STREAM_SECRET;
const PORT = process.env.PORT || 5050;

if (!STREAM_KEY || !STREAM_SECRET) {
  console.error('Missing STREAM_KEY or STREAM_SECRET in .env');
  process.exit(1);
}

const serverClient = StreamChat.getInstance(STREAM_KEY, STREAM_SECRET);

app.post('/token', async (req, res) => {
  try {
    const { user_id } = req.body || {};

    if (!user_id) {
      return res.status(400).json({ error: 'user_id required' });
    }

    const token = serverClient.createToken(user_id);
    await serverClient.upsertUser({ id: user_id, name: user_id });

    res.json({
      token,
      user: { id: user_id, name: user_id },
      api_key: STREAM_KEY
    });
  } catch (err) {
    console.error(err);
    res.status(500).json({ error: 'failed_to_issue_token' });
  }
});

app.listen(PORT, () => {
  console.log(`Token server running at http://localhost:${PORT}`);
});
Create another file called \package.json\ in the main project folder. Then, copy and paste the following code into it.
123456789101112131415161718192021222324252627{

  "name": "chat-token-server",

  "private": true,

  "type": "module",

  "dependencies": {

    "cors": "^2.8.5",

    "dotenv": "^16.4.5",

    "express": "^4.19.2",

    "stream-chat": "^9.18.1"

  },

  "scripts": {

    "start": "node index.js"

  }

}
Creating a New React Native Project
After setting up your \server.js\ and \.env\ files, you’ll need to create the group chat's user interface.
To build the UI, go to your main project folder and create a new React Native project. You can do this by running the following commands in your terminal from the project's root folder.
1npx create-expo-app rn-stream-chat
Installing Necessary Dependencies
Next, you’ll install the Stream Chat React Native SDK and its dependencies.
123cd rn-stream-chat

npm i stream-chat stream-chat-react-native react-native-gesture-handler react-native-reanimated react-native-safe-area-context react-native-svg
Note that the RN SDK wraps the JS client and keeps versions compatible. The Stream Docs warn against manually installing stream-chat to avoid version skew, but if you do, pin to a compatible version and don’t duplicate it. If you hit weird client issues, remove your explicit stream-chat dep and let the RN SDK supply it.
Create a file, name it babel.config.js, and paste in the code below.
12345678910111213module.exports \= function(api) {

  api.cache(true);

  return {

    presets: \['babel-preset-expo'\],

    plugins: \['react-native-reanimated/plugin'\],

  };

};
Create a new folder called src to store your project files. Inside src, add a subfolder named stream, then create a file called client.ts and paste the following code into it.
1234567891011import { StreamChat } from 'stream-chat';

let client: StreamChat | null \= null;

export function getStreamClient(apiKey: string) {

  if (\!client) client \= StreamChat.getInstance(apiKey);

  return client;

}
Next, you will create a new folder inside the \src\ folder named \screens\, then create a file \/LoginScreen.tsx\, and paste the code below inside.
123456789101112131415161718192021222324252627282930313233343536373839404142434445464748495051525354555657585960616263646566676869707172737475767778798081828384858687888990919293import React, { useState } from 'react';

import { View, Text, TextInput, Button, Alert, Platform } from 'react-native';

type Props \= {

  onLoggedIn: (args: { userId: string, token: string, apiKey: string }) \=\> void;

};

export default function LoginScreen({ onLoggedIn }: Props) {

  const \[userId, setUserId\] \= useState('joel');

  const \[serverUrl, setServerUrl\] \= useState(

    Platform.select({ ios: 'http://127.0.0.1:5050', default: 'http://10.0.2.2:5050' })\!

  );

  const login \= async () \=\> {

    try {

      const res \= await fetch(\`${serverUrl}/token\`, {

        method: 'POST',

        headers: { 'Content-Type': 'application/json' },

        body: JSON.stringify({ user\_id: userId })

      });

      const data \= await res.json();

      if (\!res.ok) throw new Error(data?.error || 'Failed');

      onLoggedIn({ userId, token: data.token, apiKey: data.api\_key });

    } catch (e:any) {

      Alert.alert('Login failed', e.message);

    }

  };

  return (

    \<View style={{ flex: 1, padding: 20, gap: 12, justifyContent: 'center' }}\>

      \<Text style={{ fontSize: 22, fontWeight: '600' }}\>Sign in\</Text\>

      \<Text\>Pick a username (must match a seeded user or any string):\</Text\>

      \<TextInput

        value={userId}

        onChangeText={setUserId}

        placeholder="e.g. joel"

        style={{ borderWidth: 1, borderColor: '\#ccc', borderRadius: 8, padding: 12 }}

        autoCapitalize="none"

      /\>

      \<Text\>Token server URL\</Text\>

      \<TextInput

        value={serverUrl}

        onChangeText={setServerUrl}

        placeholder="http://10.0.2.2:5050 (Android Emulator)"

        style={{ borderWidth: 1, borderColor: '\#ccc', borderRadius: 8, padding: 12 }}

        autoCapitalize="none"

      /\>

      \<Button title="Continue" onPress={login} /\>

    \</View\>

  );

}
The next step is to create a new file named \ChannelScreen.tsx\ inside the \src/screens\ folder and paste the code below.
1234567891011121314151617181920212223242526272829303132333435363738394041424344454647484950515253545556575859import React, { useEffect, useState } from 'react';

import { ActivityIndicator, View } from 'react-native';

import { Channel, MessageList, MessageInput, useChatContext } from 'stream-chat-expo';

import type { StackScreenProps } from '@react-navigation/native-stack';

type RootStackParamList \= {

  ChannelList: undefined;

  Channel: { channelId: string };

  NewGroup: undefined;

};

type Props \= StackScreenProps\<RootStackParamList, 'Channel'\>;

export default function ChannelScreen({ route }: Props) {

  const { client } \= useChatContext();

  const \[chan, setChan\] \= useState\<any\>(null);

  useEffect(() \=\> {

    let mounted \= true;

    (async () \=\> {

      const c \= client.channel('messaging', route.params.channelId);

      await c.watch();

      if (mounted) setChan(c);

    })();

    return () \=\> { mounted \= false; };

  }, \[client, route.params.channelId\]);

  if (\!chan) return \<View style={{ flex:1, justifyContent:'center', alignItems:'center' }}\>\<ActivityIndicator /\>\</View\>;

  return (

    \<Channel channel={chan}\>

      \<MessageList /\>

      \<MessageInput /\>

    \</Channel\>

  );

}
Finally, you’ll create a file named \app.tsx\ in the chat-group folder and paste in the code below. This code writes everything about the login and connects the Stream to the screens.
123456789101112131415161718192021222324252627282930313233343536373839404142434445464748495051525354555657585960616263646566676869707172737475767778798081828384858687888990919293949596979899100101102103104105106107108109110111112113114115116117118119120121122123124125import React, { useEffect, useState } from 'react';

import { SafeAreaView, StatusBar, View, ActivityIndicator } from 'react-native';

import { NavigationContainer } from '@react-navigation/native';

import { createNativeStackNavigator } from '@react-navigation/native-stack';

import { OverlayProvider, Chat, useChatContext } from 'stream-chat-expo';

import { getStreamClient } from './src/stream/client';

import LoginScreen from './src/screens/LoginScreen';

import ChannelListScreen from './src/screens/ChannelListScreen';

import ChannelScreen from './src/screens/ChannelScreen';

import NewGroupScreen from './src/screens/NewGroupScreen';

type RootStackParamList \= {

  ChannelList: undefined;

  Channel: { channelId: string };

  NewGroup: undefined;

};

const Stack \= createNativeStackNavigator\<RootStackParamList\>();

function ChatStack() {

  return (

    \<Stack.Navigator\>

      \<Stack.Screen name="ChannelList" component={ChannelListScreen} options={{ title: 'Groups' }} /\>

      \<Stack.Screen name="NewGroup" component={NewGroupScreen} options={{ title: 'New Group' }} /\>

      \<Stack.Screen name="Channel" component={ChannelScreen} options={{ title: 'Chat' }} /\>

    \</Stack.Navigator\>

  );

}

function ConnectedChat({ apiKey, userId, token }: { apiKey: string; userId: string; token: string }) {

  const \[ready, setReady\] \= useState(false);

  const client \= getStreamClient(apiKey);

  useEffect(() \=\> {

    let mounted \= true;

    (async () \=\> {

      await client.connectUser({ id: userId, name: userId }, token);

      if (mounted) setReady(true);

    })();

    return () \=\> {

      mounted \= false;

      client.disconnectUser();

    };

  }, \[apiKey, userId, token\]);

  if (\!ready) return \<View style={{ flex:1, justifyContent:'center', alignItems:'center' }}\>\<ActivityIndicator /\>\</View\>;

  return (

    \<OverlayProvider\>

      \<Chat client={client}\>

        \<ChatStack /\>

      \</Chat\>

    \</OverlayProvider\>

  );

}

export default function App() {

  const \[session, setSession\] \= useState\<{ apiKey: string; userId: string; token: string } | null\>(null);

  return (

    \<SafeAreaView style={{ flex: 1 }}\>

      \<StatusBar /\>

      \<NavigationContainer\>

        {session ? (

          \<ConnectedChat apiKey={session.apiKey} userId={session.userId} token={session.token} /\>

        ) : (

          \<LoginScreen onLoggedIn={setSession} /\>

        )}

      \</NavigationContainer\>

    \</SafeAreaView\>

  );

}
Test the Application
Now that you’ve built the group chat, the next step is to run the application. To do so, you’ll start the token server following the steps below.
Navigate to the root folder where the \server.s\ is located and run the command below.
1npm start
After running the command, your terminal should display something related to the screenshot below.
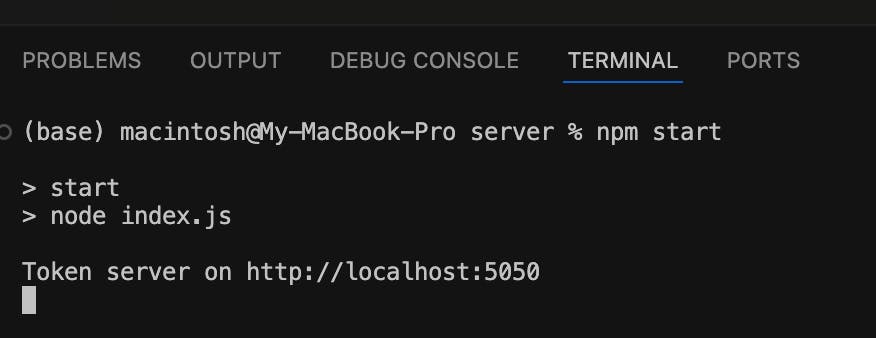
Finally, open a separate terminal, navigate to the \chat-group\ folder, and run the command below to start the iOS simulator.
1npm start
To run the app, launch it on either an iOS Simulator by pressing “i” or an Android Emulator by pressing “a”. The token server URL is already set by default for both: http://10.0.2.2:5050 for Android and http://127.0.0.1:5050 for iOS.
Once in the app, log in as Alice or any of the other seeded users. To start a new chat, tap on a new group, select at least two users from the list, and then tap create. You can now begin chatting within the new group.
Below is a screenshot from the group chat before implementing the Stream AI moderator.
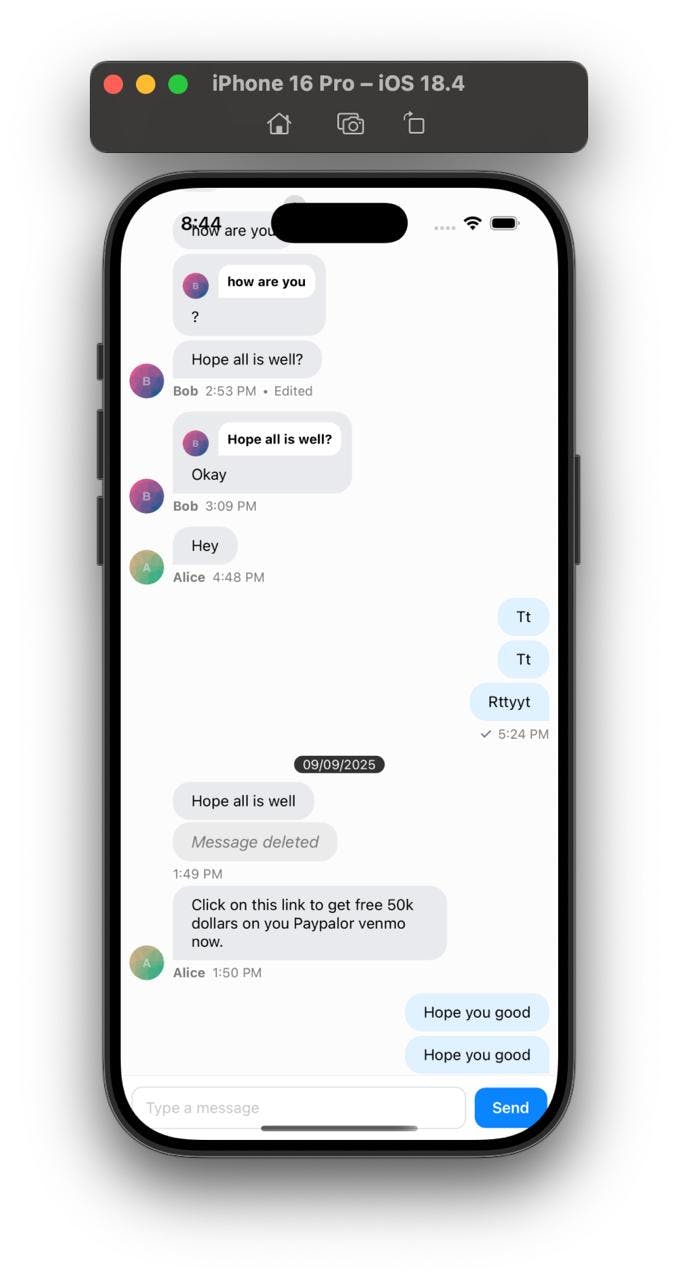
From the screenshot above, you can see several abusive slurs and profanity words being used, but none are flagged or blocked. That's because you have not introduced the moderator yet.
Introduction to Group Chat Moderation with Stream
Stream’s AI-powered moderation API works natively with Stream’s Chat, Video, and Activity Feeds APIs, and it also works with inhouse experiences to automatically detect and act on a wide range of harmful content across text, images, live video, and audio.
Here’s a condensed list of some supported harms and categories:
- Spam: unsolicited or repetitive messages.
- Hatred: abusive or threatening language.
- Racism: discriminatory or prejudiced comments based on race or ethnicity.
- LGBTQIA+ phobia: negative or hostile comments towards LGBTQIA+ individuals.
- Misogyny: comments that express hatred or prejudice against women.
- Ableism: discriminatory or prejudiced comments based on physical or mental disabilities.
- Threat: statements expressing an intention to cause harm or violence to someone.
- Terrorism & violent extremism: support or promotion of terrorist activities or ideologies.
- Pedophilia: comments that express sexual interest in minors.
- Scam: fraudulent schemes or deceptive practices.
- Flood: excessive or repetitive posting of messages.
- Forbidden link: sharing links to prohibited or harmful websites.
Stream's moderation system works by analyzing messages in real-time and taking action based on configurable policies. You can choose to:
- Flag messages: Mark messages for review by a human moderator.
- Block messages: Prevent other users from seeing your messages.
- Ban users: Temporarily or permanently block users from sending messages.
- Shadow block.
- Bounce and block.
- Bounce and flag.
Using Advanced AI Moderation Engines
While flagging, blocking, and banning are foundational tools in moderating group chat, they lack the nuance and adaptability needed for large and dynamic communities. Stream’s AI-powered moderation goes beyond these simple actions, offering sophisticated engines that understand intent, context, and subtlety.
Here’s what you gain:
AI Text Harm Detection (LLM)
The AI text harm detection uses Large Language Models to understand context and user intent, instead of only looking for profane words. It can catch subtle or indirect harmful content, like passive-aggressive remarks or harassment, that keyword filters often miss.
Here’s how it works:
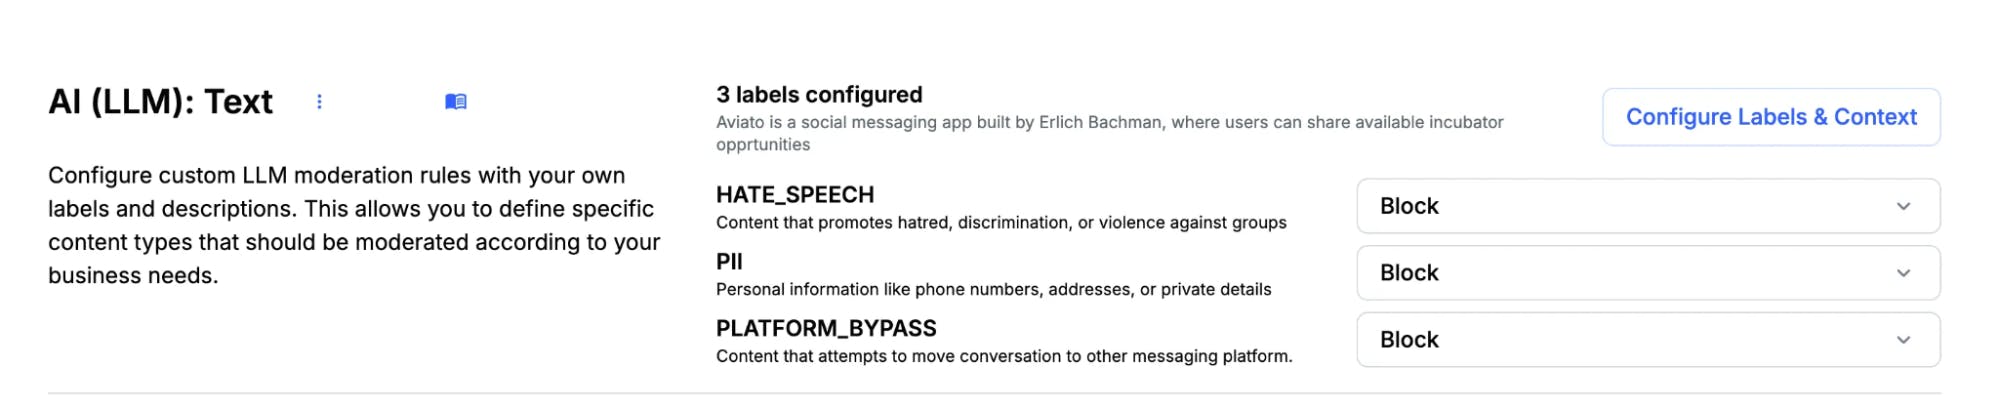
As a developer, you can set up a few key parameters. First is the app context, which explains what your application is about. This helps the AI understand the background of the conversations. Next are the LLM rules, where you define harm labels and what they mean in your app. For example, you can explain what counts as “scam” or “hate speech” for your community. Stream then combines your app context, your rules, and the last few messages in a conversation.
With a bit of prompt engineering, it sends this to the LLM and asks it to classify the message based on the rules you provided.
Configuration:
You can set up the LLM moderation engine directly in the Stream dashboard. Follow these steps:
- Log in to your Stream dashboard.
- Go to Moderation in the sidebar.
- Open Policies.
- Select the policy you want to update.
- Click on AI (LLM) Text.
From here, you can choose harm categories, set actions like bounce and flag, bounce and block, and adjust sensitivity levels.
See the screenshot below for guidance on what it looks like.
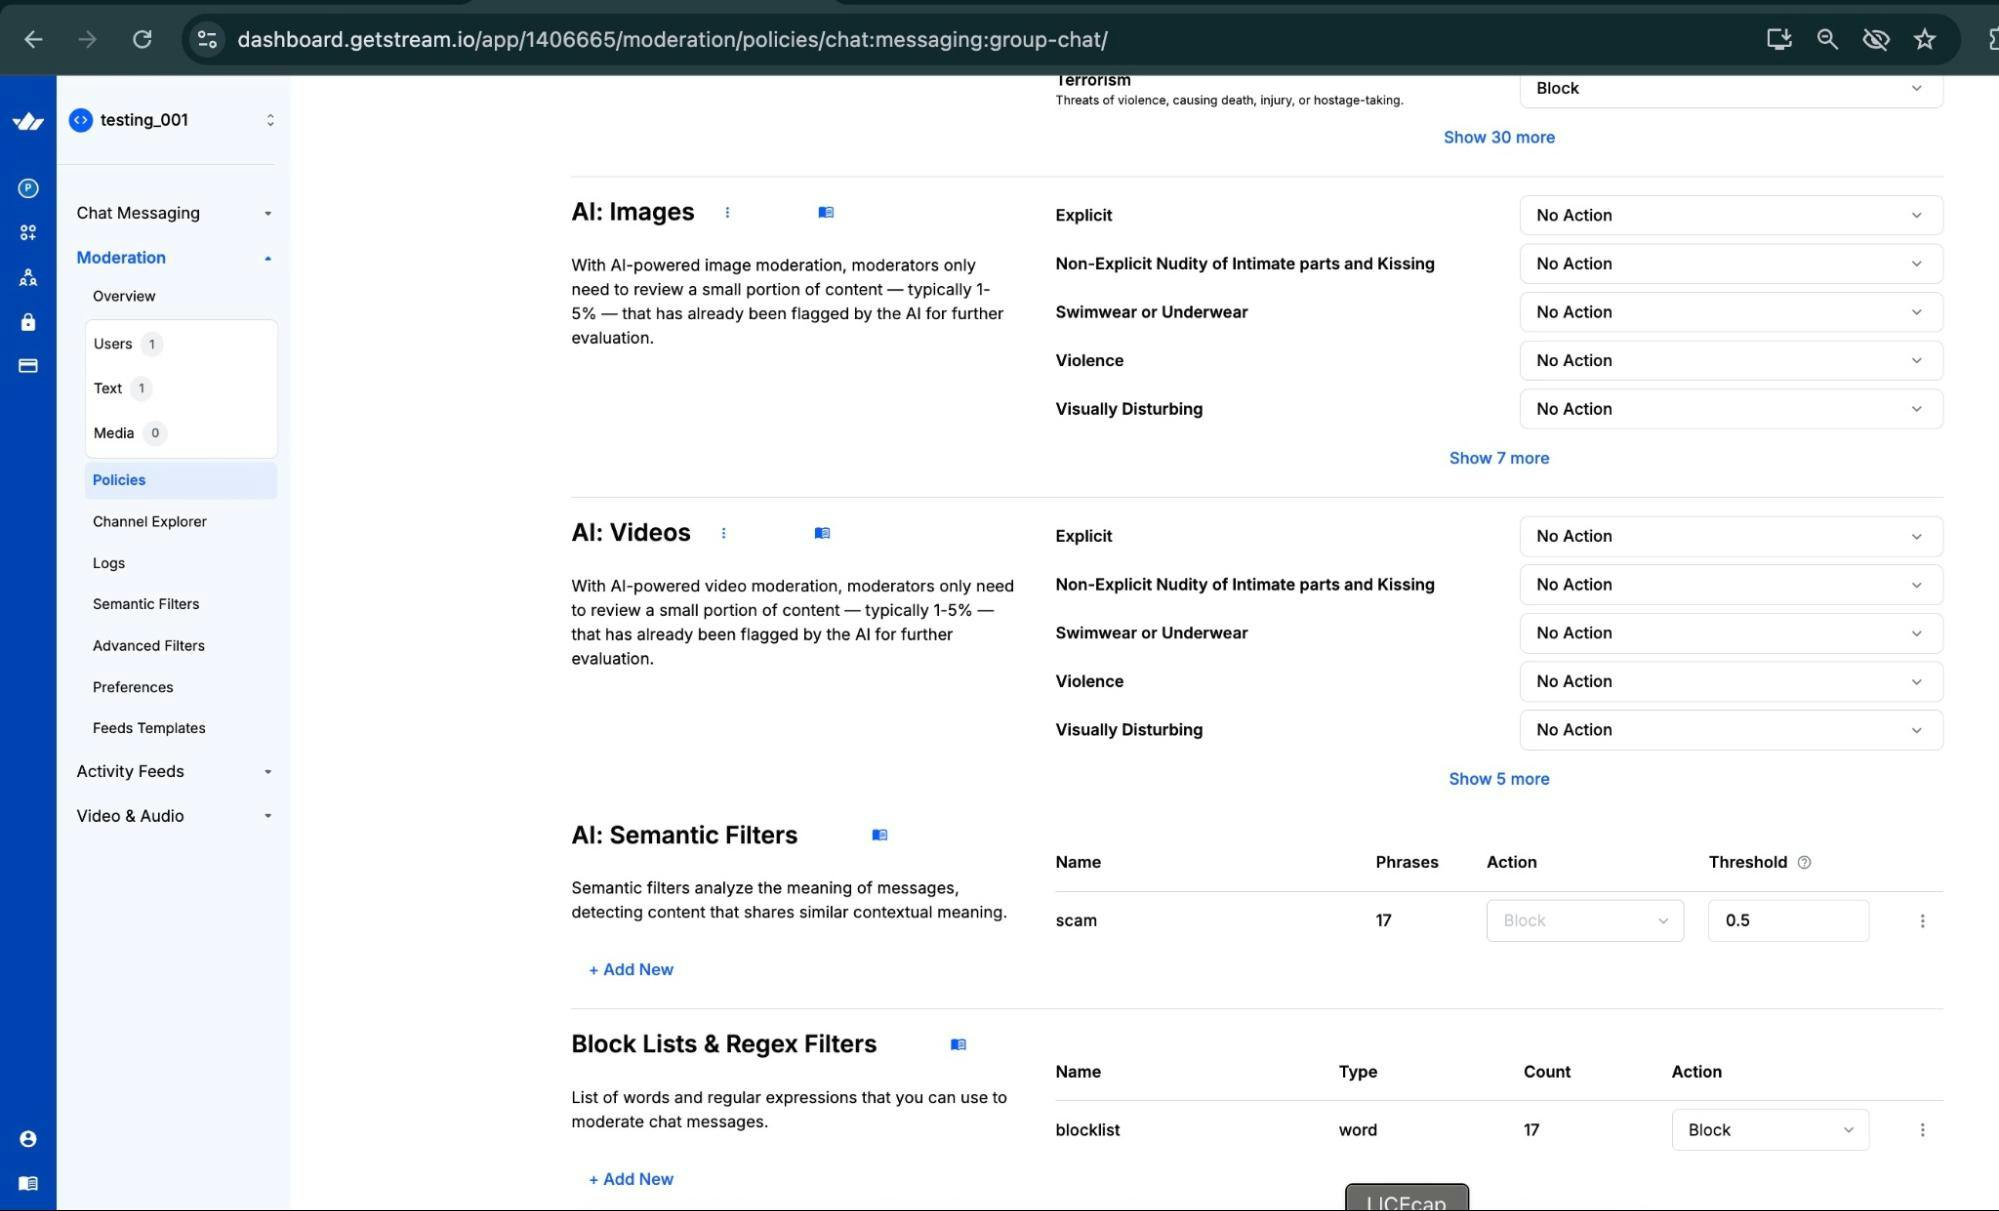
AI Text Harm Detection (NLP) with Blocklists and Regex Filtering
A layered approach works best. Blocklists such as
profanity_en_2020_v1and regex rules give you fast and predictable filtering, while the NLP engine adds extra understanding of meaning. This makes it easier to tell the difference between harmless mentions and real violations.
Configuration:
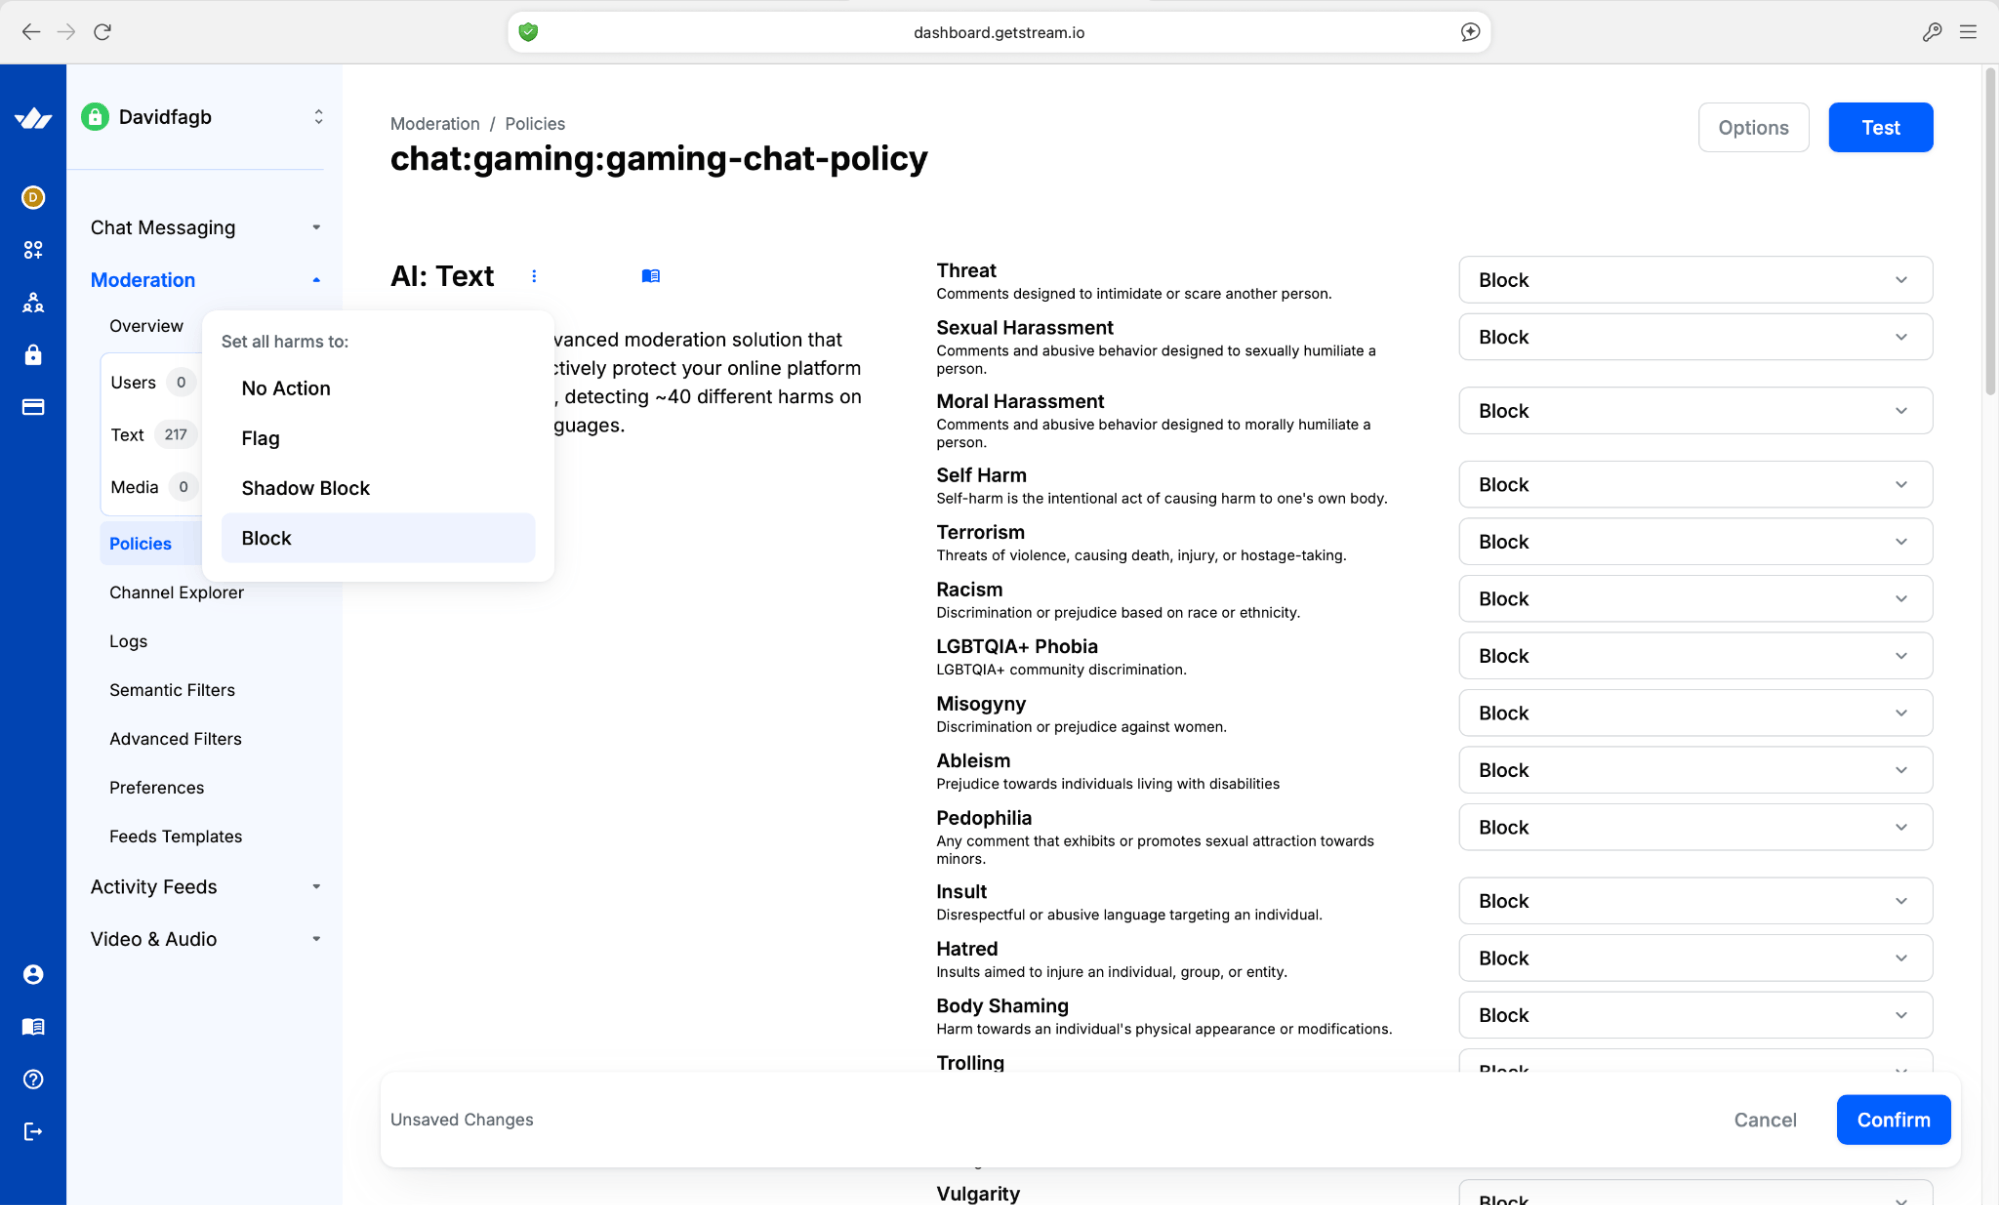
To set up the AI Harm Engine, go to the AI Text section in your moderation policy. You will see a list of harm categories that the AI can detect, such as harassment, hate speech, spam, and explicit content.
For each category, you can choose what should happen: flag the message, block it, or shadow block it. You can also change the sensitivity level for different types of harmful content. This helps you fine-tune moderation to match your community.
It is usually best to start with lighter settings and then adjust as you learn more about how people in your community interact.
Severity Levels
The AI Text moderation engine can label harmful content as Low, Medium, High, or Critical. These levels are mainly used for toxic categories like hate speech or sexual harassment.
For each severity level, you can choose what action should happen. For example, flag, block, or shadow block.
See the screenshot below for how this looks in the dashboard.
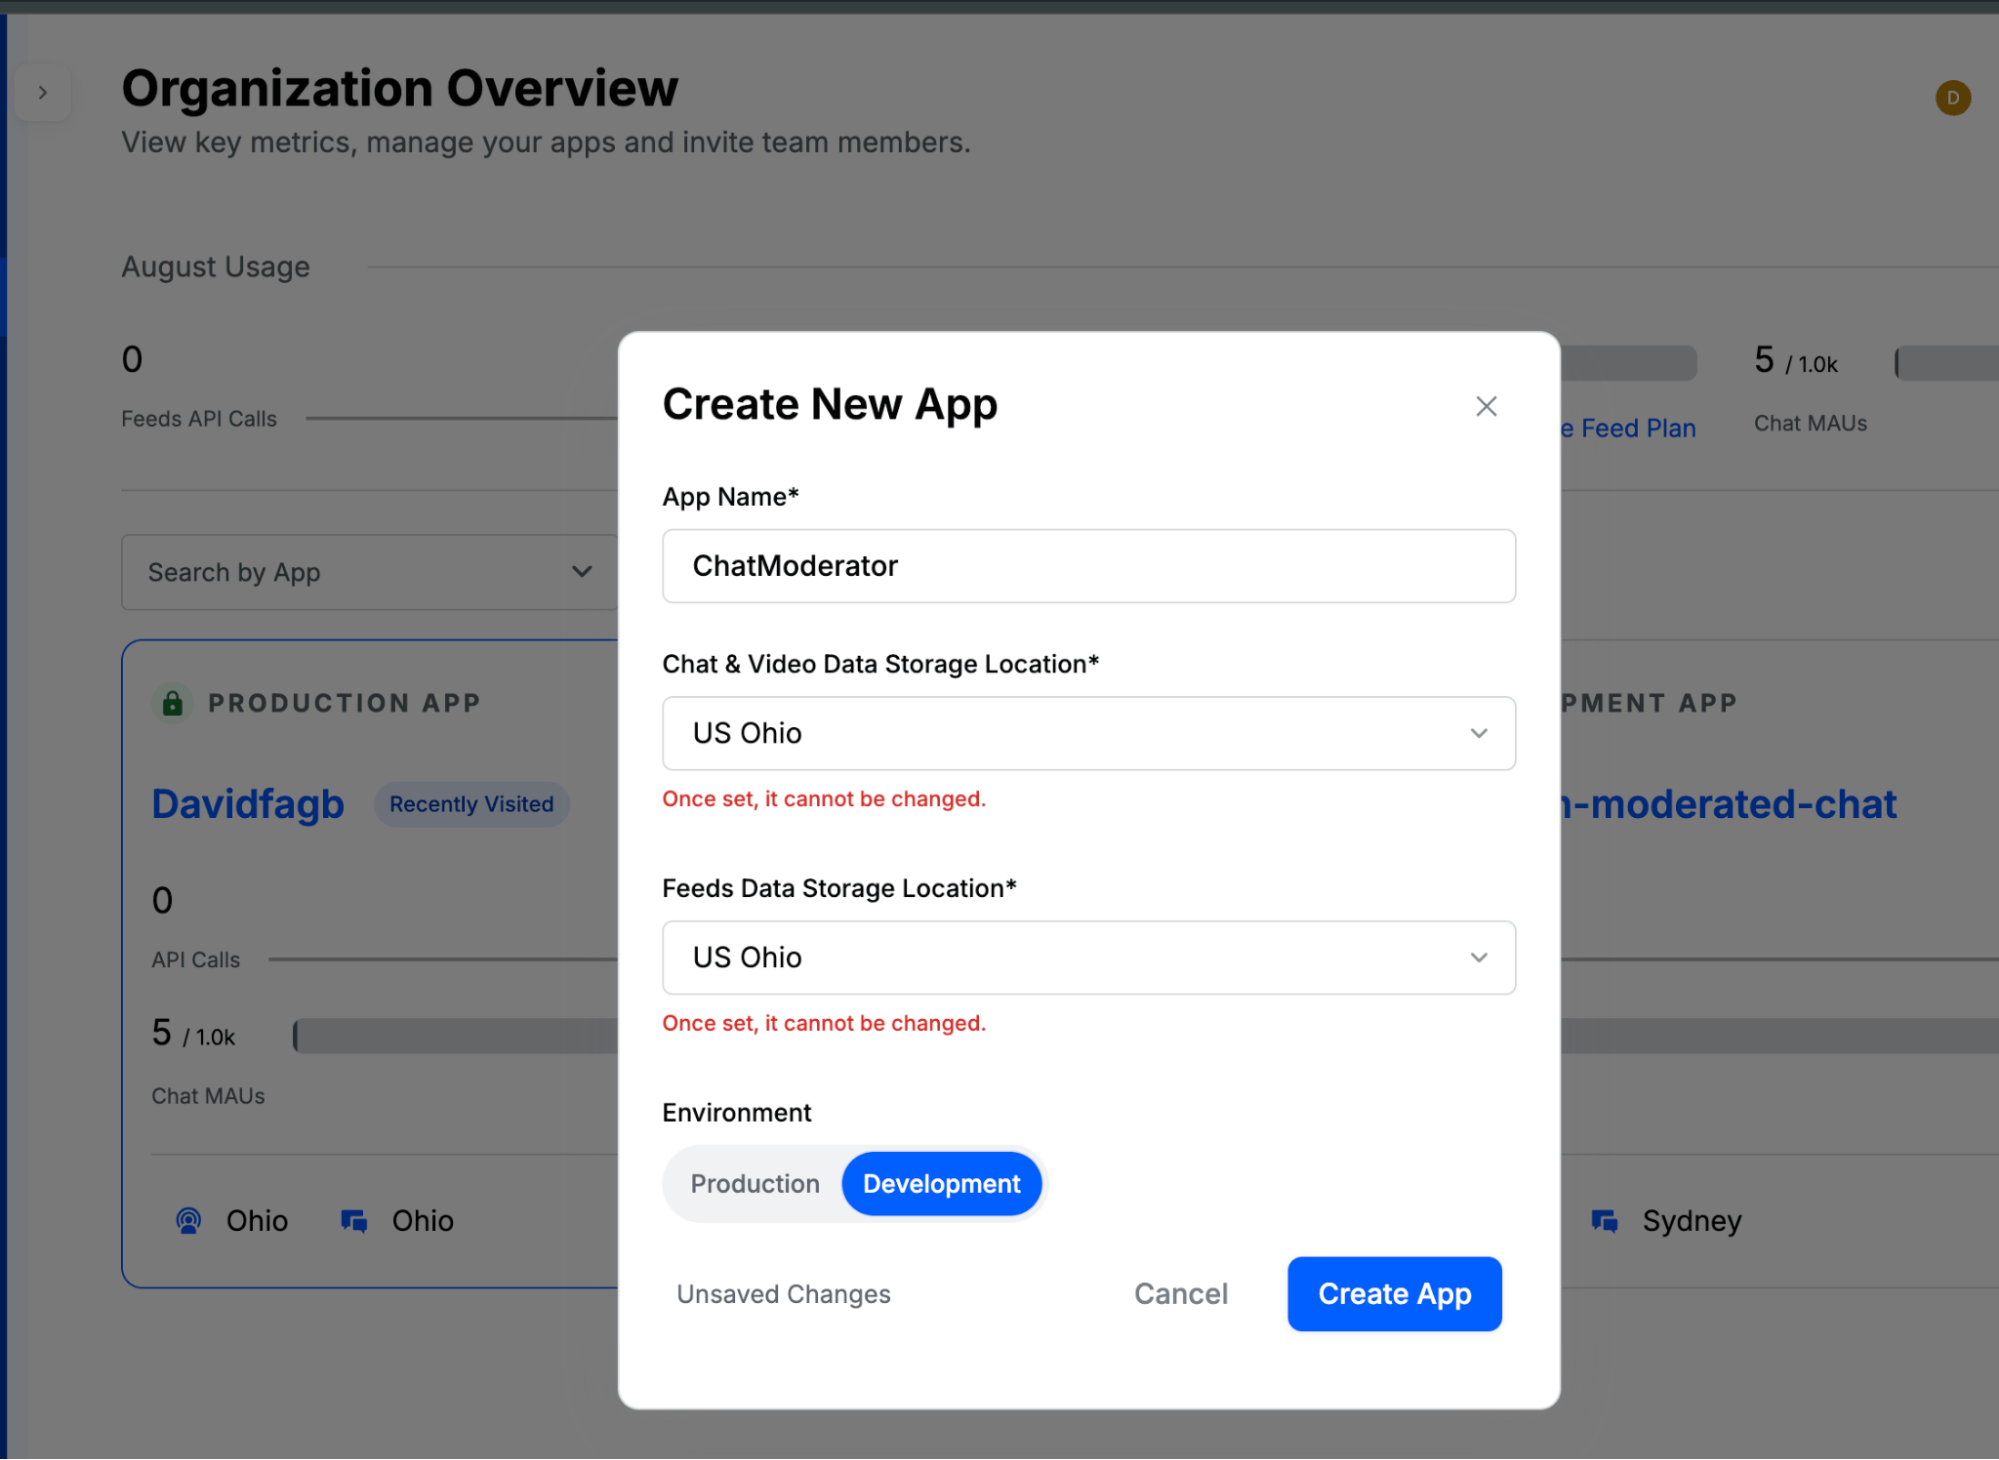
Setting up Stream and Enabling Moderation
Now that your project is set up, the next step is configuring Stream and enabling the AI moderation features. Create your free account to log in to your Stream dashboard and create a new application. You'll find your API key and secret in the app's settings.
You can manage policies entirely in the dashboard with the lowest friction. Set rules (AI text/image engines, blocklists) and apply them to chat via config keys like \chat:messaging\, all messaging channels, and Stream. The dashboard lets you monitor the content flagged by your configured policies and provides tools to fine-tune those policies based on real data.

Setting up Moderation Policy
Within your Stream dashboard, you can configure your chat moderation settings. Begin by selecting the Chat section, then open the Moderation tab. From this screen, you'll be able to enable Stream's built-in moderation tools and apply the profanity_en_2020_v1 blocklist to filter out profanity.
For this tutorial, you will enable all the moderation categories and set the action to flag. This will automatically flag any harmful messages sent to the group chat.
Later, you can switch to the 'block' option by changing your Stream dashboard.
Implementing Moderation in the Group Chat
To add moderation to your group chat, you need to set up rules in your Stream dashboard. This allows you to take action against harmful content such as threats, self-harm, harassment, etc from the moderation/policies section.AI moderation policy and set the AI: Text to block
The Main App Component (Updated App.tsx)
The main \*App.tsx\* file will handle the initialization of the Stream client and the navigation between the channel list and the chat screen.
When you switch users, connecting and disconnecting should be clean. The server's webhook will post a single notice so you won't see duplicate messages. For a smooth user experience, you can use \additionalFlatListProps\ to help users scroll to older messages easily.
123456789101112131415161718192021222324252627282930313233343536373839404142434445464748495051525354555657585960616263646566676869707172737475767778798081828384858687888990919293949596979899100101102103104105106107108109110111112113114115116117118119120121122123124125126127128129130131132133134135136137138139140141import React, { useEffect, useState, useCallback } from 'react';

import { SafeAreaView } from 'react-native';

import {

  Chat,

  ChannelList,

  Channel,

  MessageList,

  MessageInput,

  OverlayProvider,

} from 'stream-chat-react-native';

import { StreamChat } from 'stream-chat';

const backend \= 'http://localhost:5050';

const chatClient \= StreamChat.getInstance('dummy');

export default function App() {

  const \[ready, setReady\] \= useState(false);

  const \[activeChannel, setActiveChannel\] \= useState\<any\>(null);

  const userId \= 'alice';

  useEffect(() \=\> {

    (async () \=\> {

      const resp \= await fetch(\`${backend}/token?user\_id=${userId}\`).then(r \=\> r.json());

      const client \= StreamChat.getInstance(resp.apiKey);

      await client.connectUser(

        {

          id: userId,

          name: 'Alice',

          image: 'https://getstream.io/random\_png/?id=alice\&name=Alice',

        },

        resp.token

      );

      await fetch(\`${backend}/channel\`, {

        method: 'POST',

        headers: { 'Content-Type': 'application/json' },

        body: JSON.stringify({ channelId: 'demo-general', members: \['alice', 'bob'\] }),

      });

      (global as any).chatClient \= client;

      setReady(true);

    })();

    return () \=\> {

      const c \= (global as any).chatClient;

      if (c) c.disconnectUser();

    };

  }, \[\]);

  const onSend \= useCallback(async (message: any) \=\> {

    try {

      await activeChannel.sendMessage(message);

    } catch (e: any) {

      alert(e?.message ?? 'Message rejected by moderation rules.');

    }

  }, \[activeChannel\]);

  if (\!ready) return null;

  return (

    \<OverlayProvider\>

      \<SafeAreaView style={{ flex: 1 }}\>

        \<Chat client={(global as any).chatClient}\>

          {activeChannel ? (

            \<Channel channel={activeChannel}\>

              \<MessageList /\>

              \<MessageInput onSend={onSend} /\>

            \</Channel\>

          ) : (

            \<ChannelList

              filters={{ type: 'messaging', members: { $in: \['alice'\] } }}

              sort={{ last\_message\_at: \-1 }}

              onSelect={(ch) \=\> setActiveChannel(ch)}

            /\>

          )}

        \</Chat\>

      \</SafeAreaView\>

    \</OverlayProvider\>

  );

}
Test the Application
To test the application, you’ll first navigate to the root folder or the backend folder where the \server.js\ is located, then open the terminal and paste the command below:
1node server.js
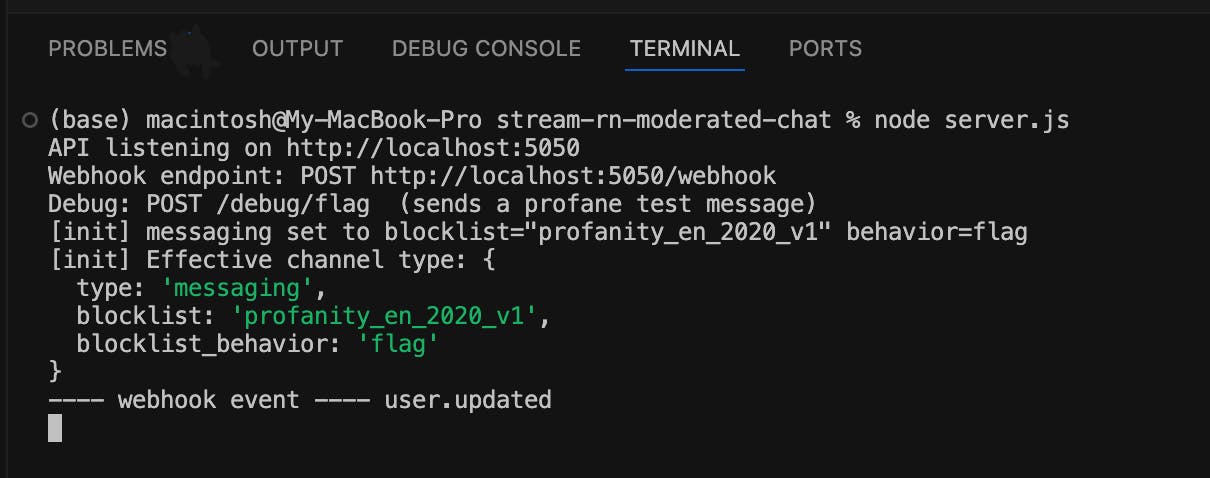
After running the command below, you should see something related to the screenshot below:
Second, you have to open a new terminal different from the above to start Ngrok. Before you continue to run the application, you can copy the commands below to run the server.
1ngrok http 5050
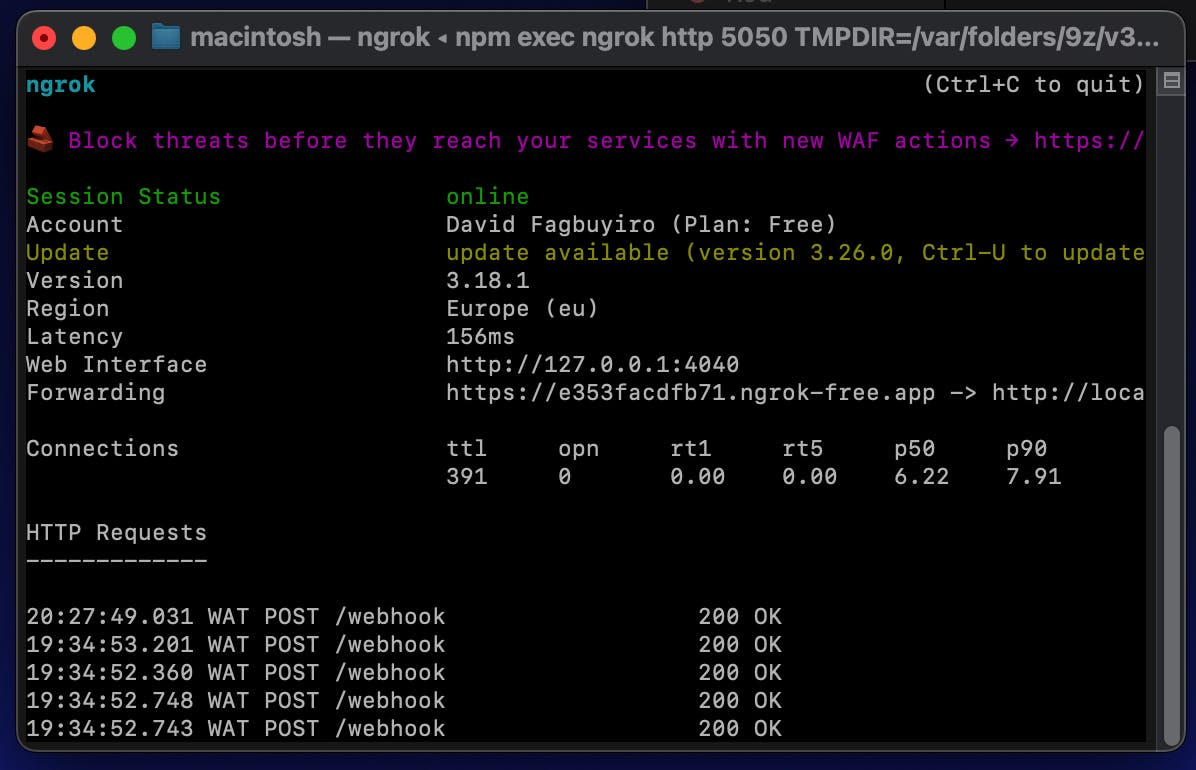
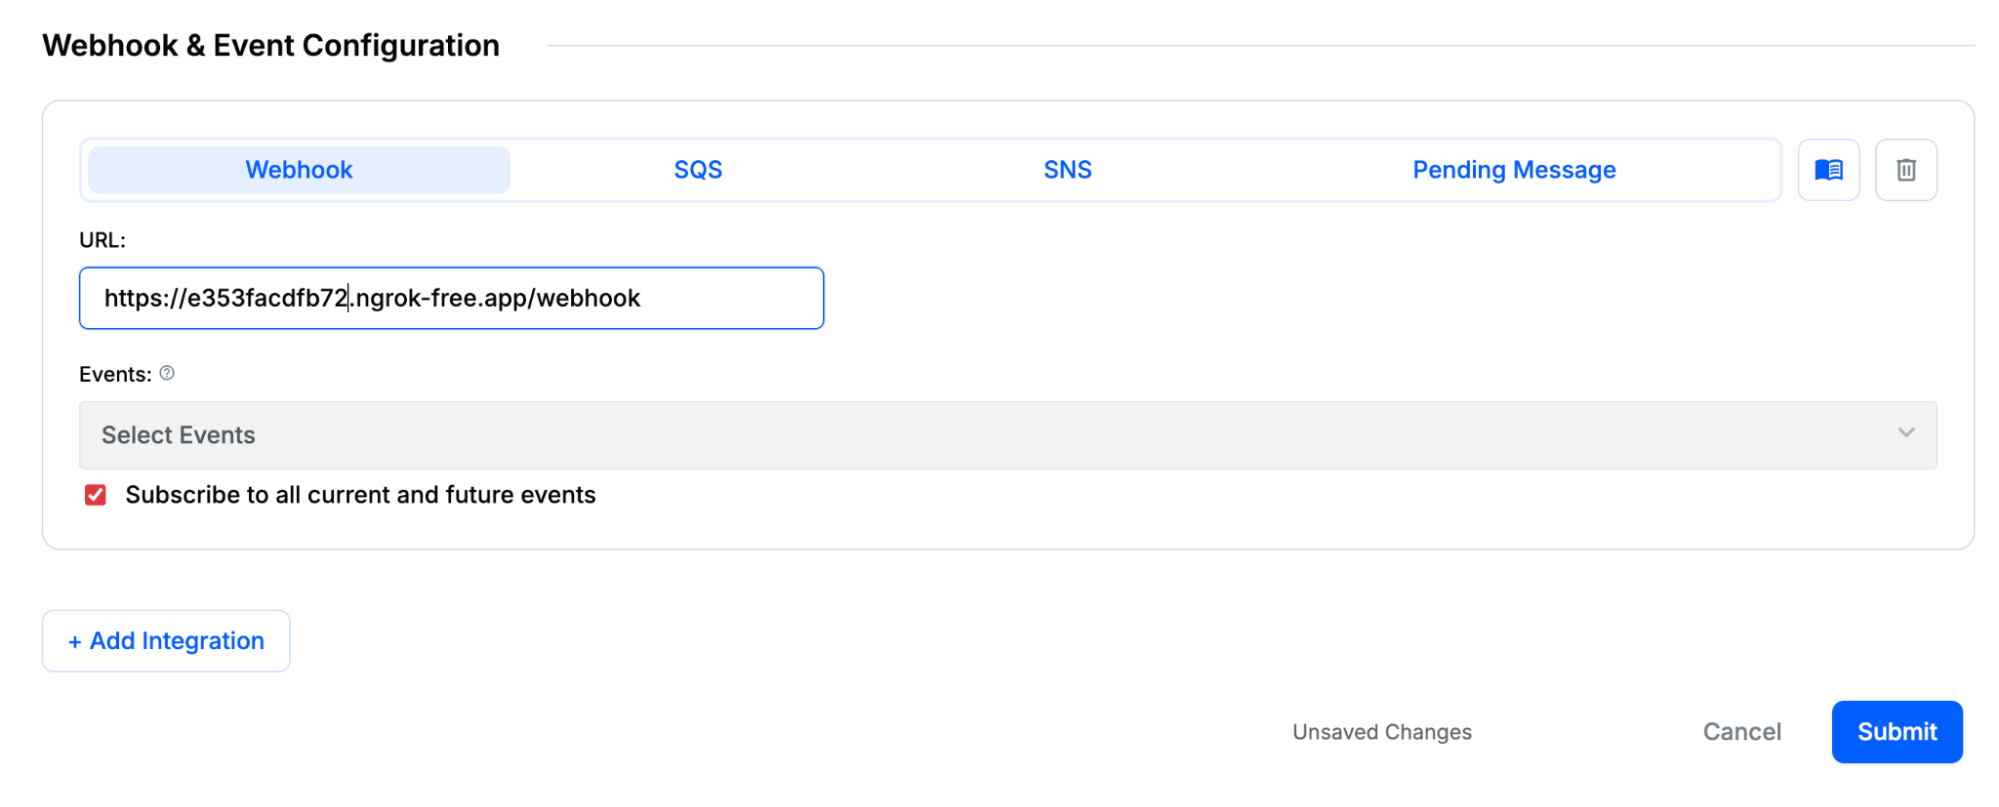
Copy the \https://e353facdfb71.ngrok-free.app/webhook\ URL and paste it in your Stream webhook event and configuration. Make sure you tick the box that says “subscribe to all current and future events” and click submit to save the webhook, as seen in the screenshot below.
Then open another terminal and navigate to the Stream Chat folder from the root folder by pasting the command below:
1Cd rn-stream-chat
Copy the command below to start the emulator:
1npx expo start \-c

After running the command above, you will get a list of commands. Just reply with the letter ‘I’, and it will open the emulator window, where you will see the group chat members list.
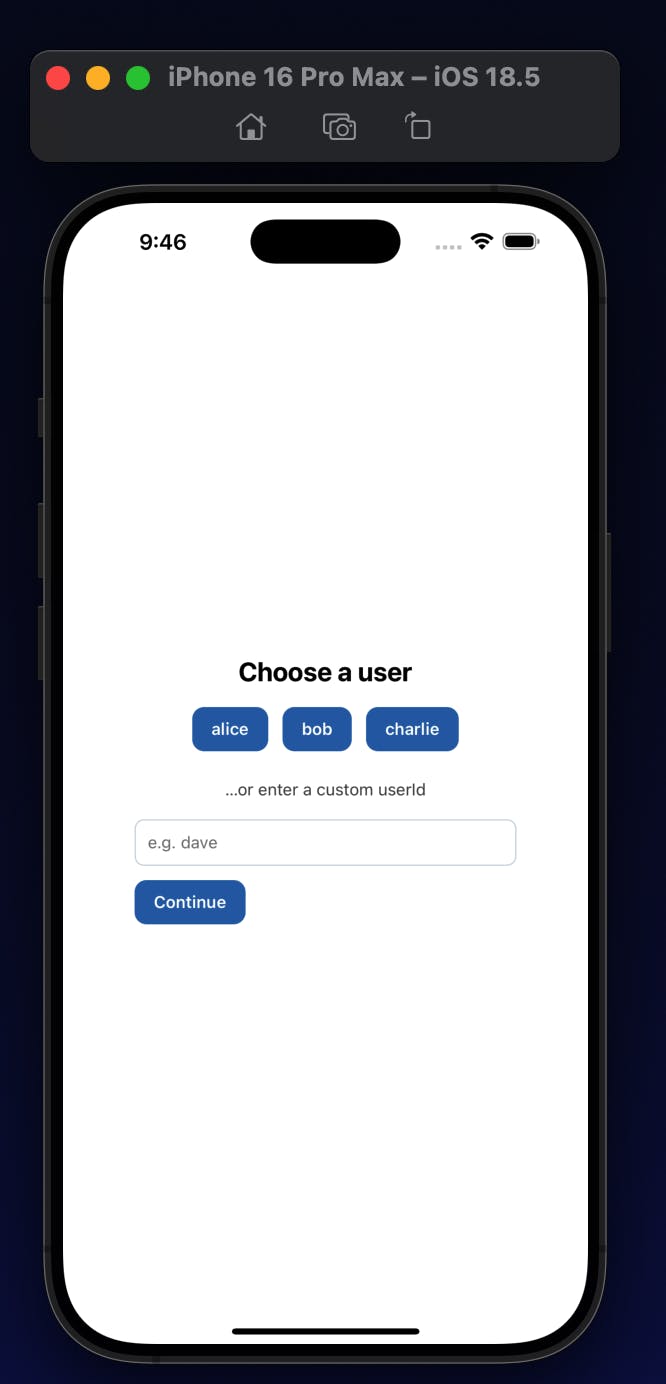
The Chat List Screen
The chat list screen will display a list of available members. You can select a chat name or create a custom name to join the conversation in the group chat.
The Chat Screen
The chat screen is where the magic happens. This is where users can send and receive messages. Our AI moderator will be at work, removing spam messages before they’re delivered—as seen in the screenshot below.
Testing the AI Moderator
Once you have the application running, you can test the AI moderator by sending messages that violate the rules you've configured in your Stream dashboard. For example, you can try sending words from the \profanity\_2020\ list.
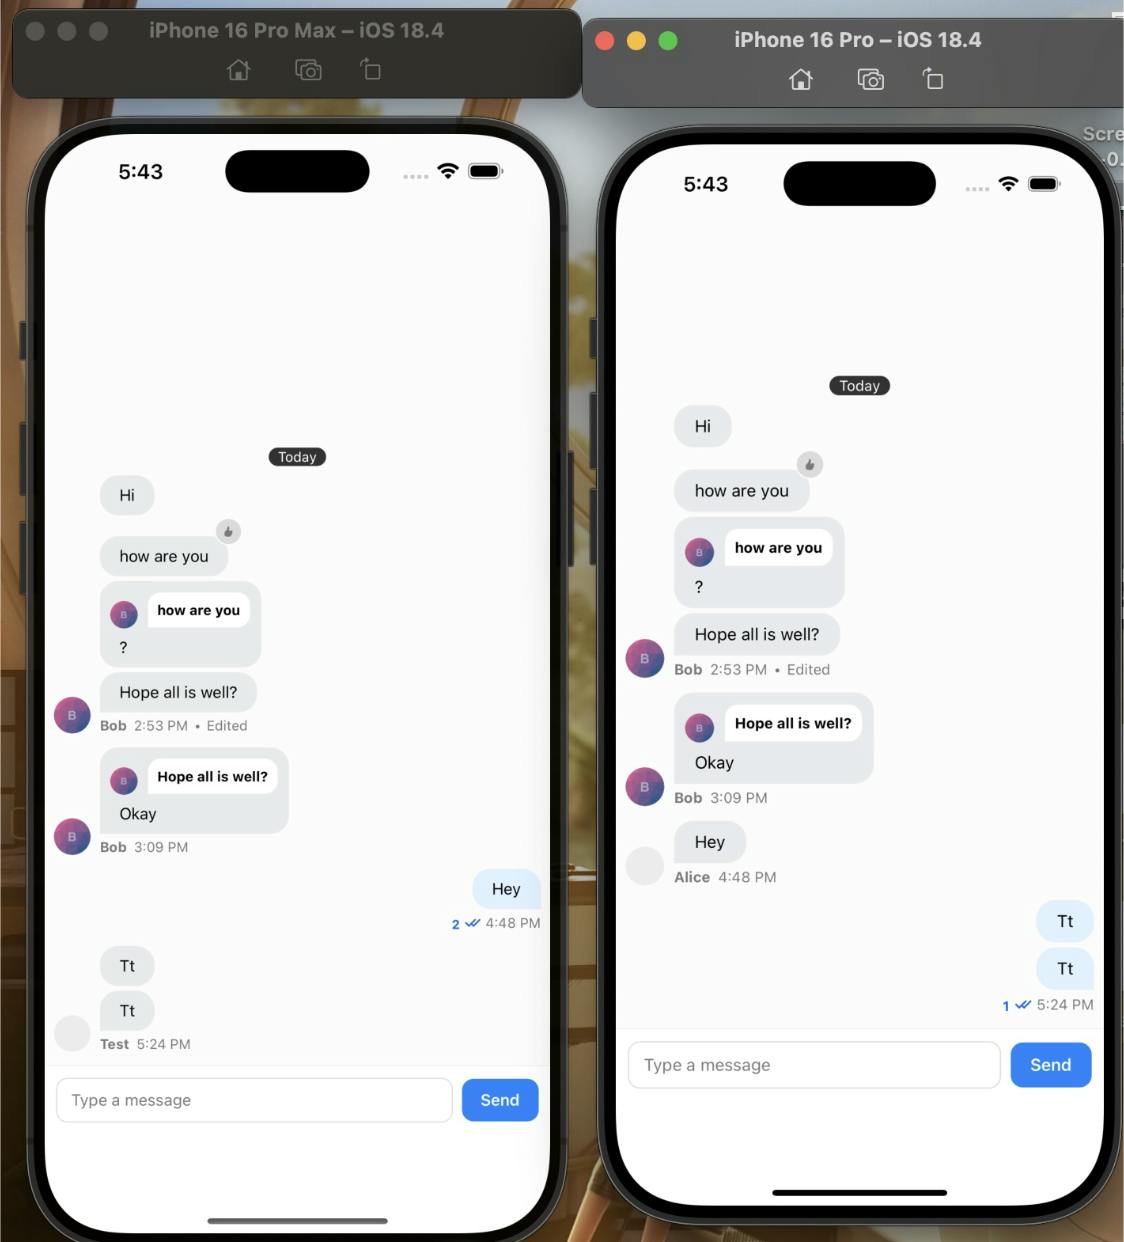
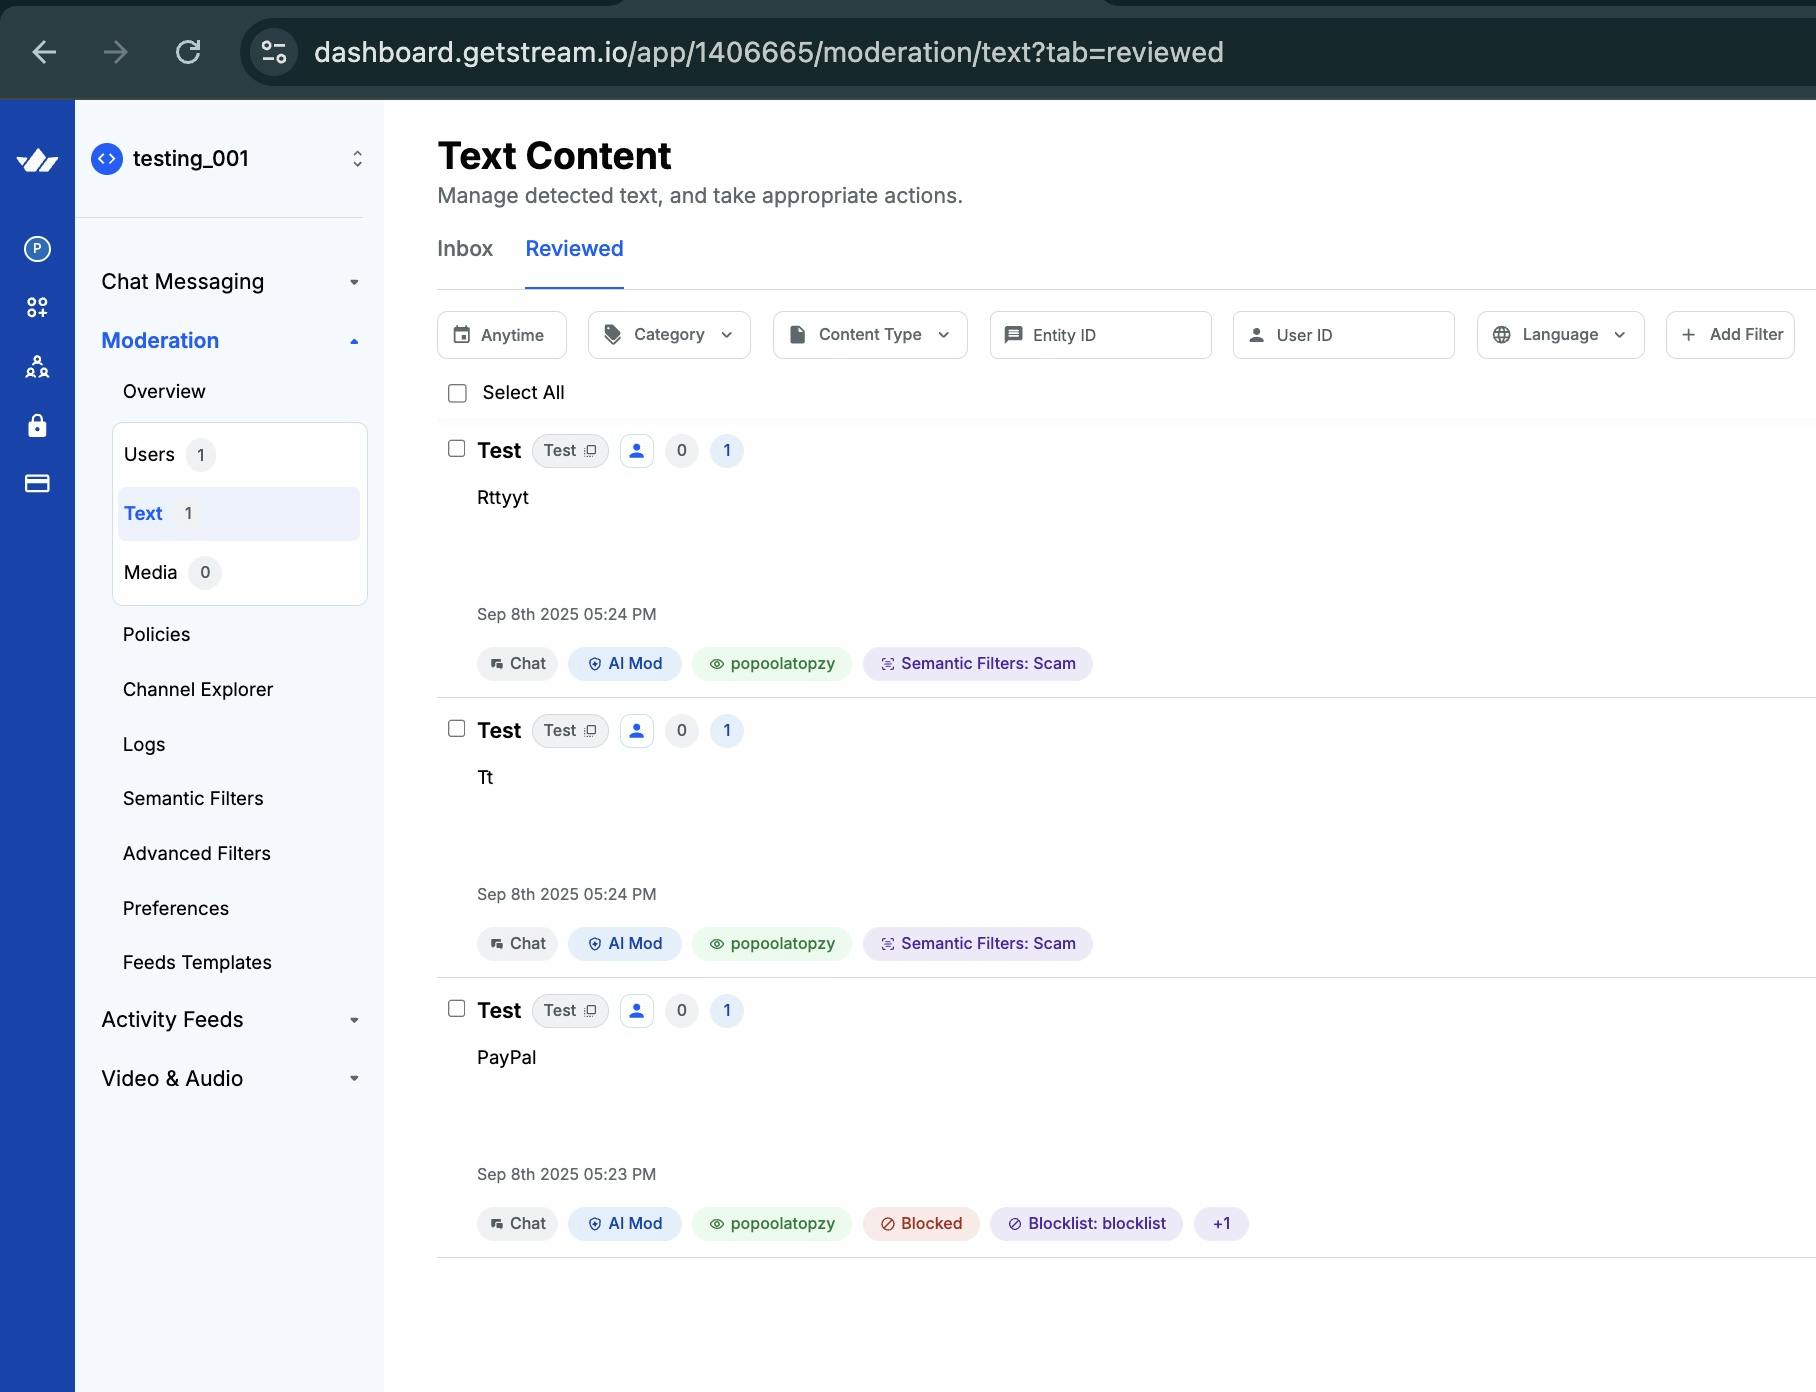
You should see that these messages are automatically blocked and not visible to other users in the chat, as shown in the short video below and in the Stream Moderation dashboard screenshot.
Below is a new test with two different iOS emulators.

Below is a screenshot from the chat explorer dashboard showing the allowed and blocked messages.
What’s Next?
You now have a fully functioning React Native group chat that uses Stream to catch harmful or inappropriate messages in real time. The app securely connects users, allows seamless user switching without crashes, and loads older conversations smoothly as you scroll.
When building a chat app, it’s your responsibility to create a safe and respectful environment where your community can thrive. Without proper moderation, toxicity, spam, and harassment can quickly overwhelm online spaces, driving users away.
Stream’s AI Moderation API makes it easier for developers to scale communities responsibly by automatically detecting and filtering harmful content, reducing the burden on human moderators, and helping maintain a positive experience for all participants.
Check out the GitHub repository for the complete code.