

Many software platforms connect service providers with clients. For example, Upwork links freelancers with businesses, Uber connects drivers with passengers, and marketplace platforms bring together sellers and buyers.
In this tutorial, you will learn how to build a therapy marketplace app using Next.js, Stream, and Firebase. The app will allow clients to find therapists, chat, and book virtual therapy sessions. Firebase will handle the backend operation, while Stream will handle in-app chat and video calls.
Application Overview
The application supports two types of users: therapists and clients.
Therapists can:
- Create an account based on their area of specialization and set an hourly rate.
- Manage and confirm booking payments.
- Initiate chats with clients and schedule virtual video sessions.
- Receive reviews from clients after each session.
Clients can:
- Browse and book therapists based on their specialization and specific needs.
- Chat with therapists once a booking is confirmed.
- Attend 1-on-1 virtual sessions with therapists.
- Leave reviews on therapists’ profiles.

Prerequisites
To fully understand this tutorial, you need to have a basic understanding of React or Next.js.
We will use the following tools:
- Firebase - a Backend-as-a-service platform developed by Google to enable us to add authentication, database, real-time communication, file storage, cloud functions, and many others within software applications.
- Stream Chat Firebase Extension - a Firebase extension that automatically connects your Firebase users to Stream.
- Stream React Chat and React Video SDK - enables real-time chat and video/audio communication in your application.
- Shadcn UI - a UI component library that provides customizable, beautifully designed, and accessible UI components for your applications.
Create a Next.js project by running the following code snippet:
1npx create-next-app therapy-app
Install the package dependencies for the project:
1npm install firebase @stream-io/node-sdk @stream-io/video-react-sdk stream-chat stream-chat-react
To install the Shadcn UI library, follow the installation guide.
Once everything is set up, your Next.js project is ready. Now, let's start building! 🚀
How To Set Up Firebase in a Next.js Application
Firebase is a cloud platform that enables you to build full-stack software applications without worrying about managing your database or server infrastructure. It provides features like authentication, real-time database, cloud functions, file storage, and more.
In this section, you'll learn how to install Firebase in a Next.js application and configure the Firestore Database, Firebase storage, and authentication within your Next.js application.
Setting Up Firebase in a Next.js Application
Install the Firebase Node.js package by running the code snippet below:
1npm install firebase
Open the Firebase Console in your browser and create a new Firebase project.
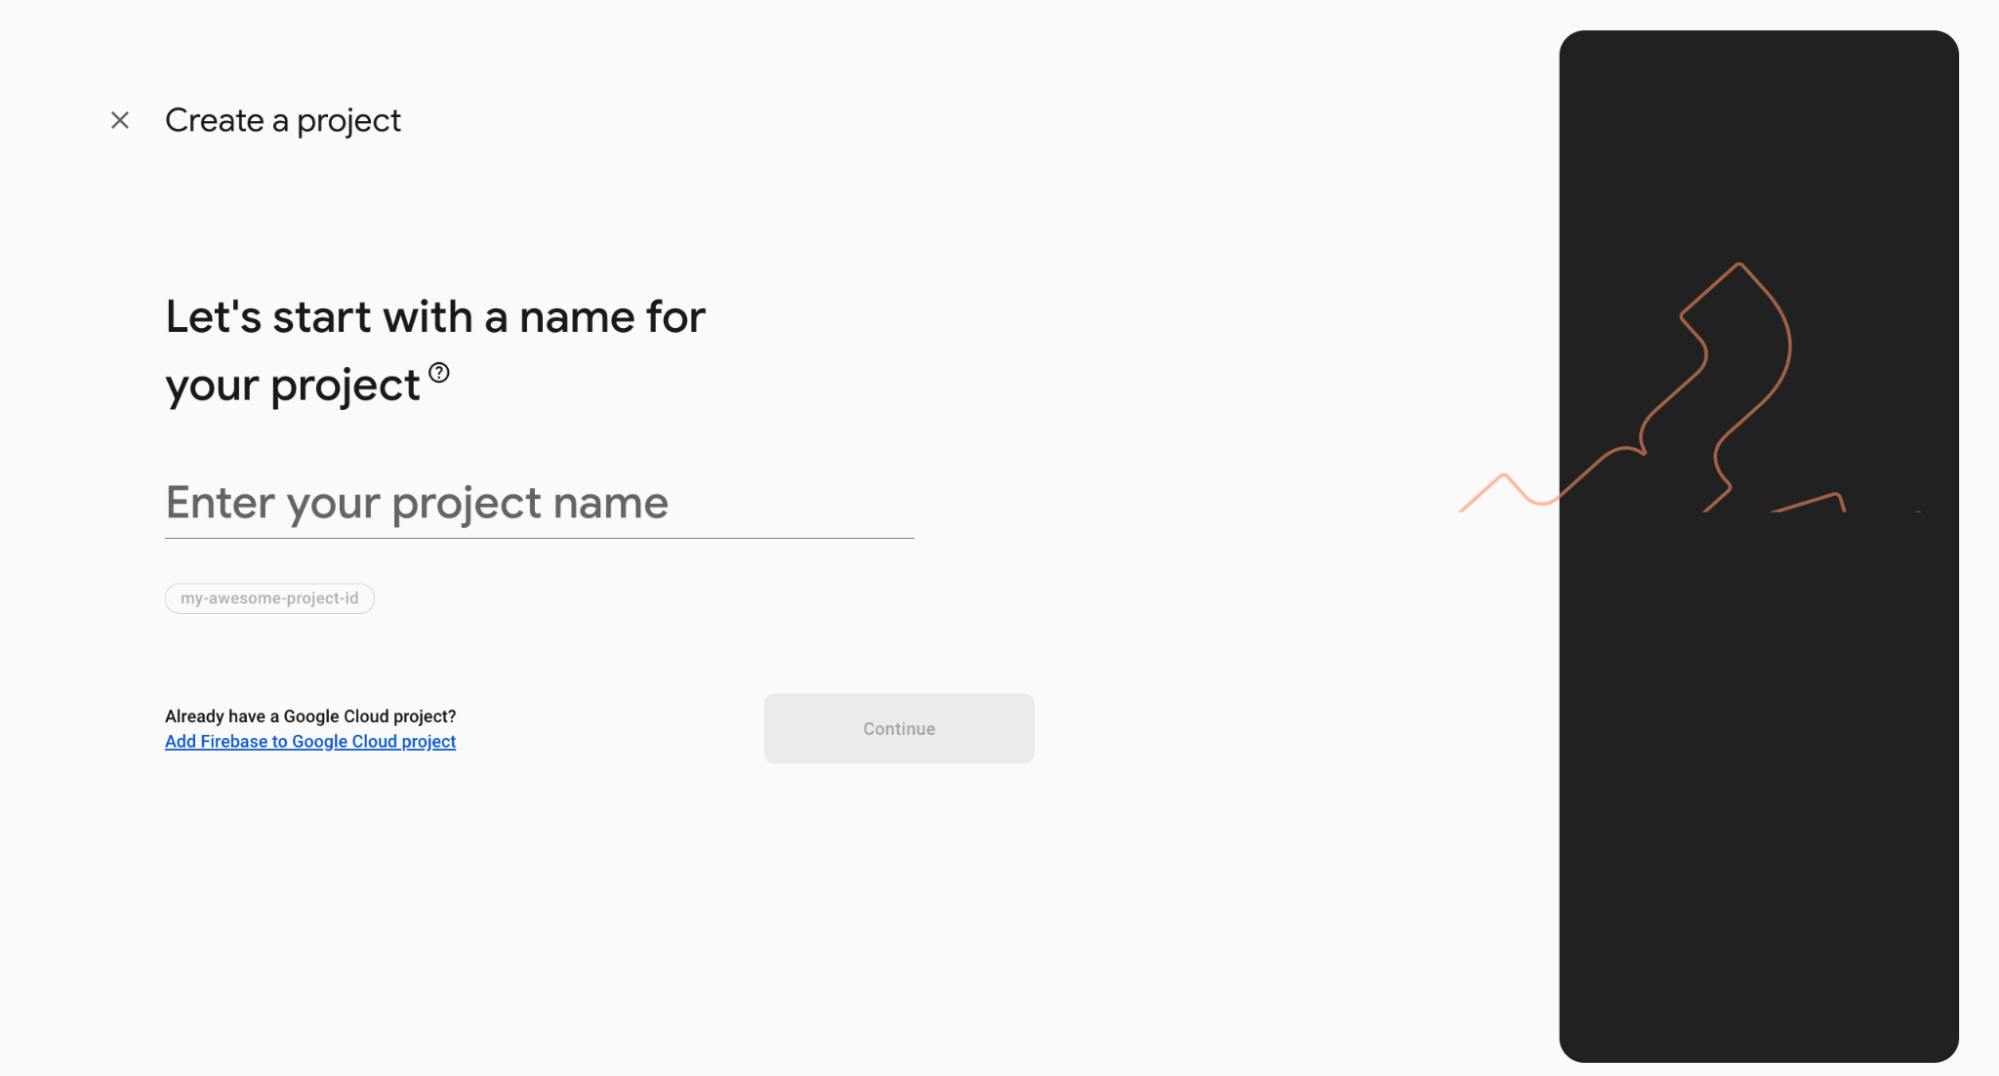
Within the project dashboard, click the web icon </> to add a Firebase app to the project.
Register the app by entering a nickname, then copy the auto-generated Firebase configuration code. You will need this code to connect your application to the Firebase backend.
Create a lib/firebase.ts file within the Next.js src folder and paste the following code snippet into the file:
123456789101112131415161718192021import { initializeApp, getApps } from "firebase/app";
import { getFirestore } from "firebase/firestore";
import { EmailAuthProvider } from "firebase/auth";
import { getAuth } from "firebase/auth";
import { getStorage } from "firebase/storage";

const firebaseConfig = {
    // 👉🏻 your Firebase app configuration code
};

//👇🏻 Initialize Firebase
const app =
    getApps().length === 0 ? initializeApp(firebaseConfig) : getApps()[0];
const provider = new EmailAuthProvider();
const storage = getStorage(app);
const db = getFirestore(app);
const auth = getAuth(app);

//👇🏻 exports each variable for use within the application
export { provider, auth, storage };
export default db;
The code snippet above initializes Firebase Storage, Firestore, and the Email Authentication provider. This setup allows you to add file storage, interact with a database, and implement email/password authentication within the application.
Before interacting with Firebase features, you must set them up in your project dashboard.
Click Build in your dashboard's sidebar navigation. This will open a dropdown menu with various features you can enable for your project.
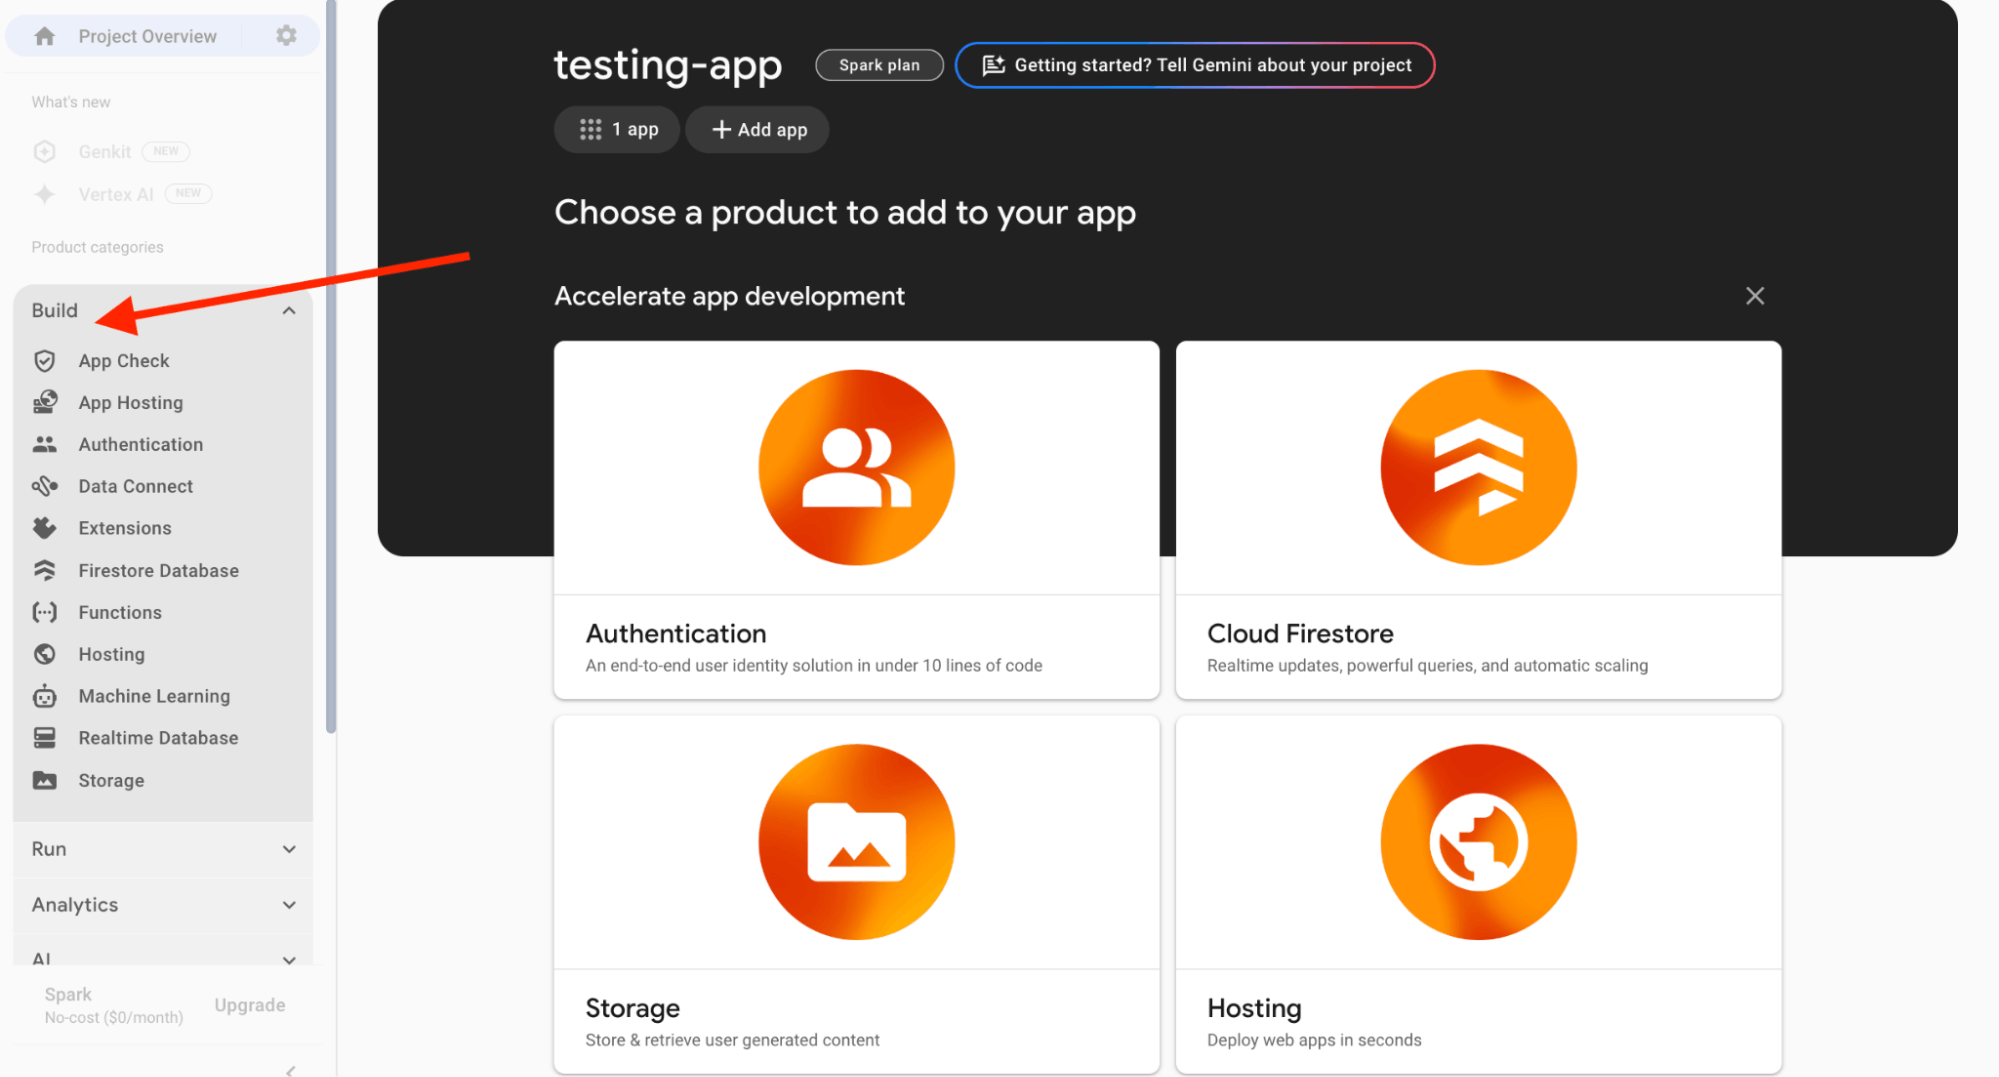
Select Authentication, Firestore Database, and Storage from the drop-down and add them to the project.
Congratulations. You can now start interacting with these Firebase features in your Next.js project.
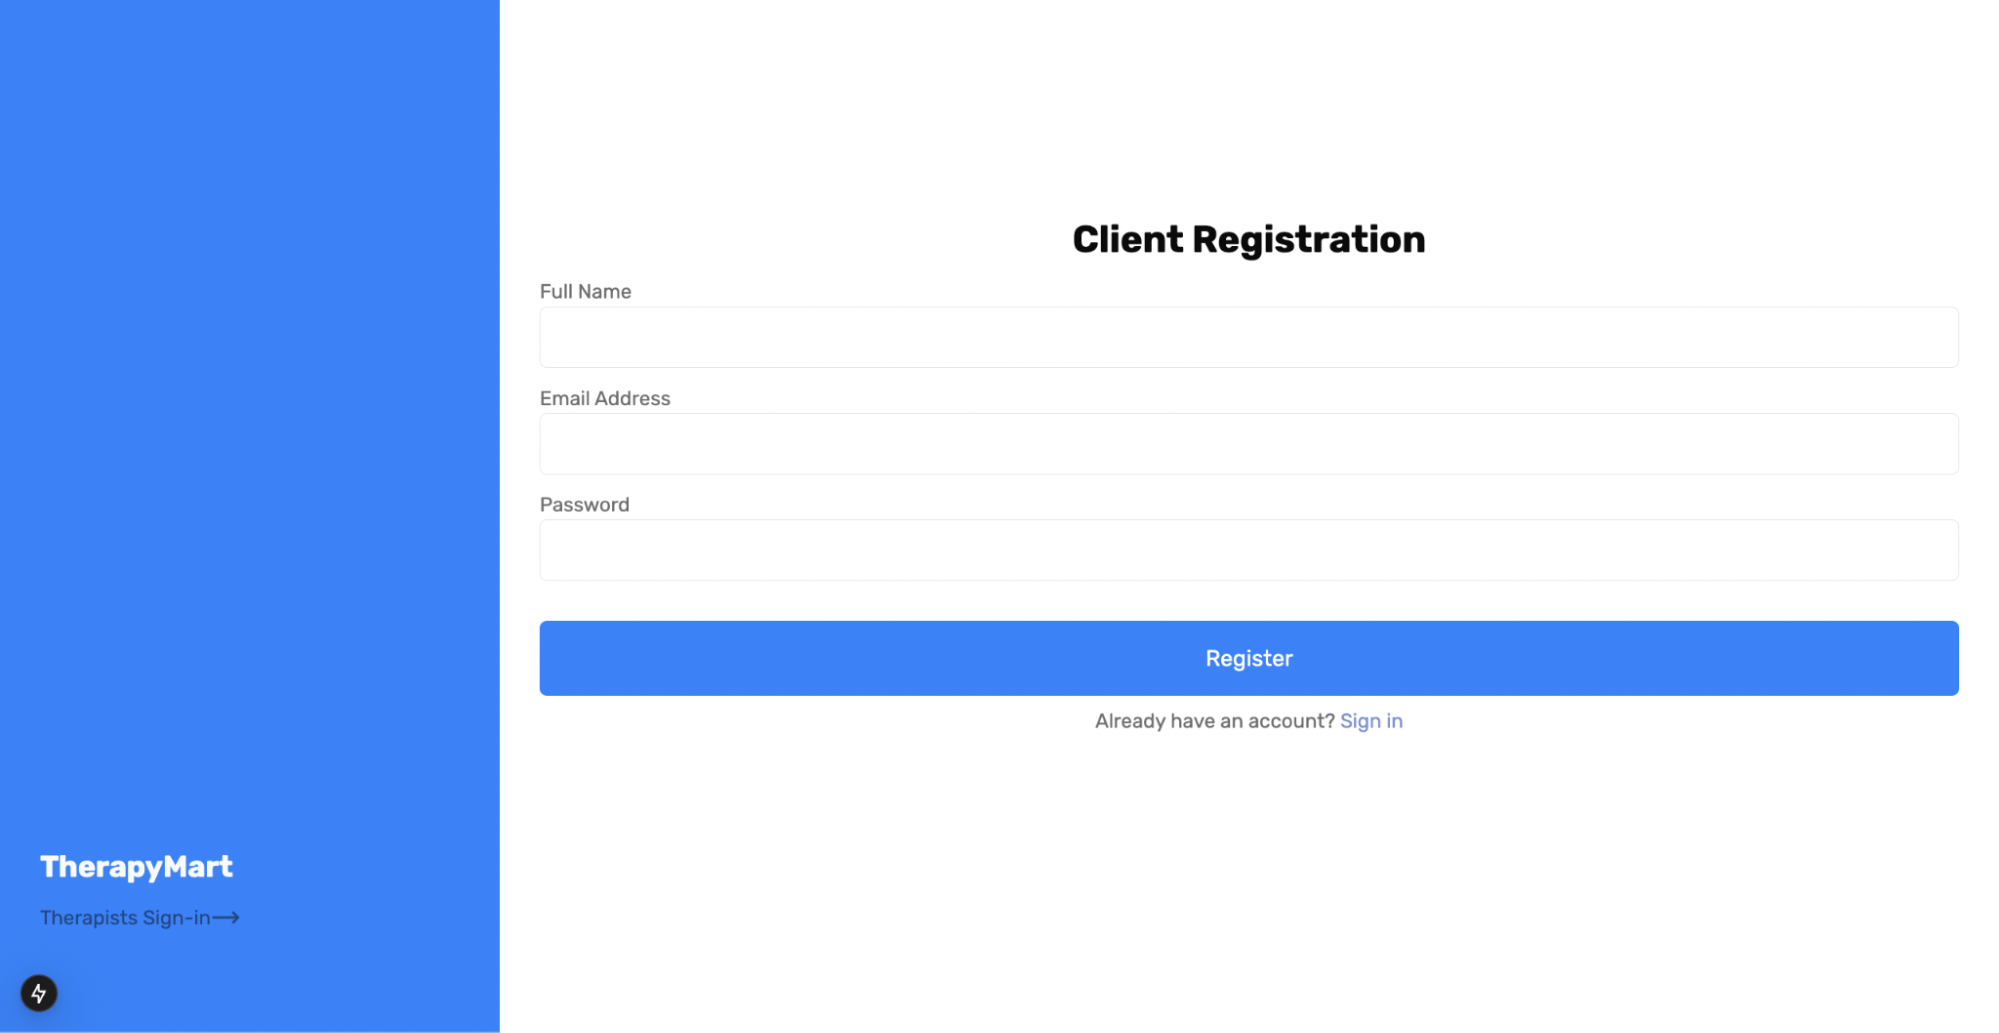
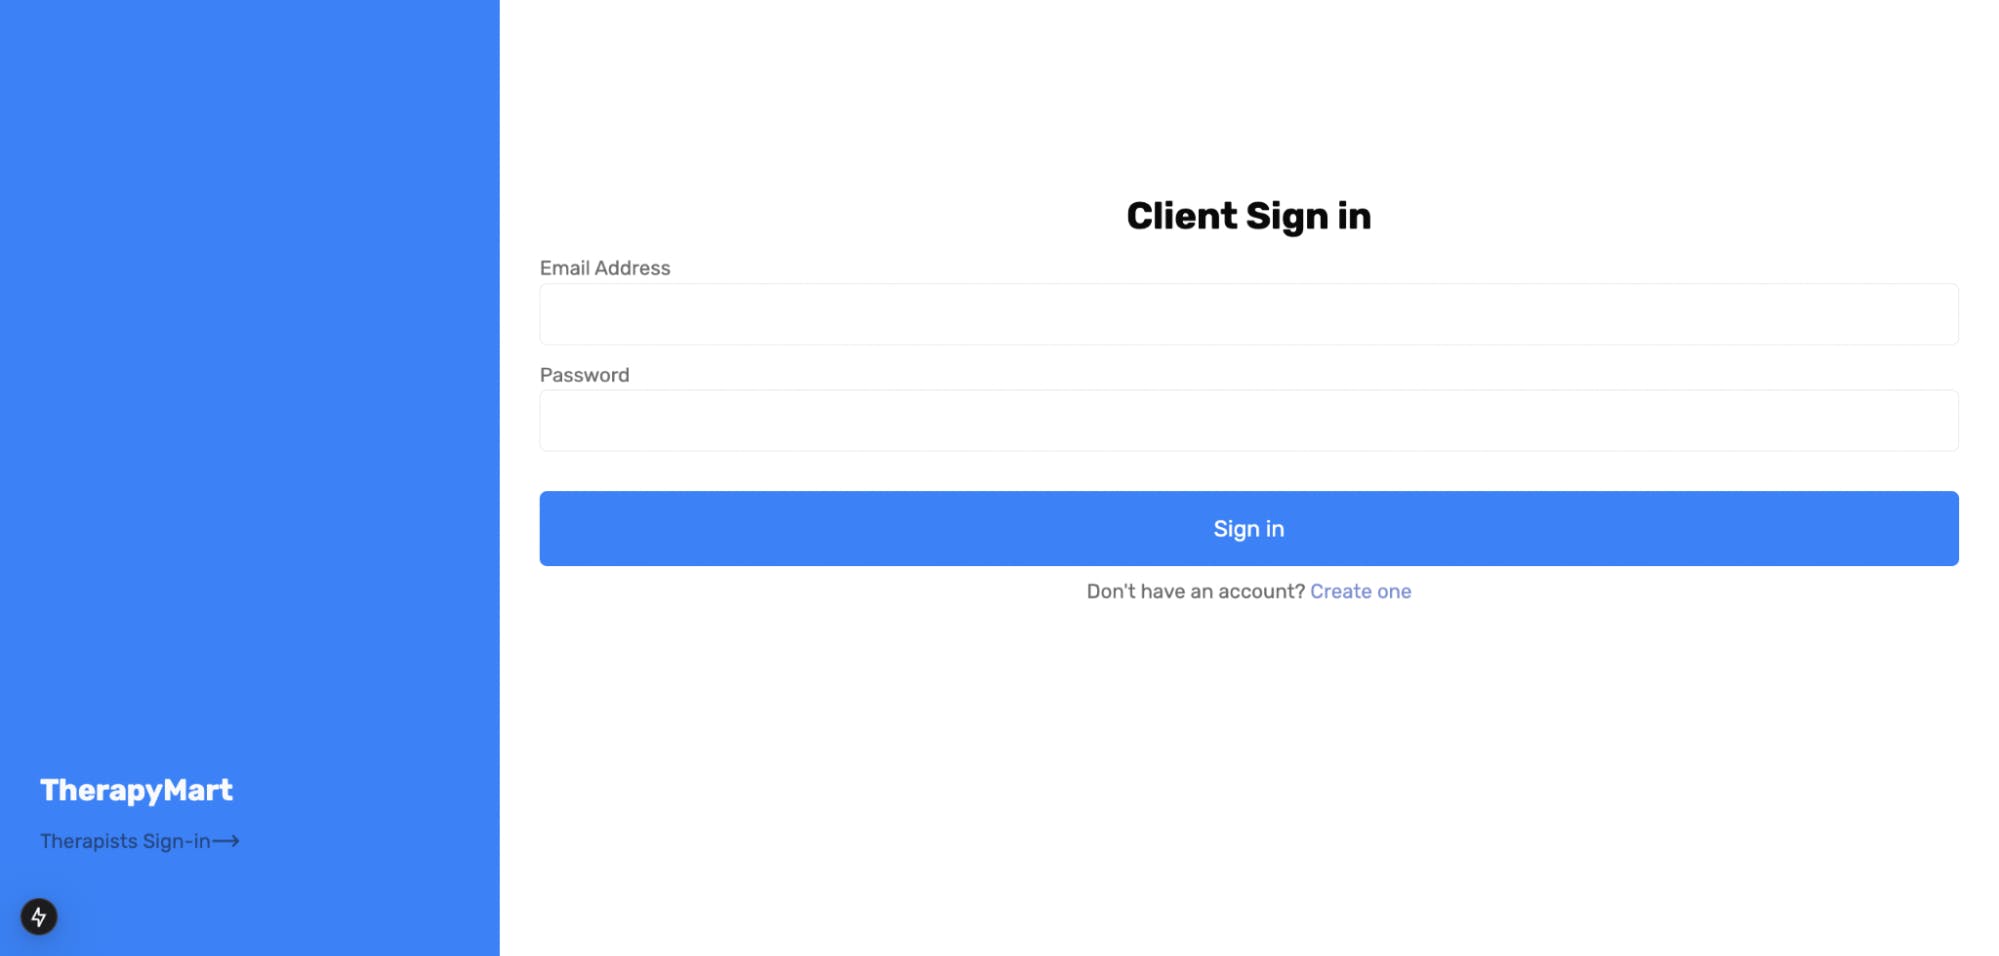
Authenticating Client Users
In this section, you will learn how to handle the authentication process for client users using Firebase.
Add a lib/auth-functions.ts` file to the Next.js project and copy the following code snippet into the file:
12345678910111213141516171819202122232425262728293031323334353637383940414243444546474849505152535455import {
    createUserWithEmailAndPassword,
    signInWithEmailAndPassword,
} from "firebase/auth";
import { getDownloadURL, ref, uploadBytes } from "@firebase/storage";
import db, { auth, storage } from "./firebase";
import { doc, setDoc, getDoc } from "firebase/firestore";

export const clientSignUp = async (form: FormData) => {
    //👇🏻 Get form data
    const { name, email, password } = {
        name: form.get("name") as string,
        email: form.get("email") as string,
        password: form.get("password") as string,
 };

    try {
        //👇🏻 Create user using the email and password
        const { user } = await createUserWithEmailAndPassword(
            auth,
            email,
            password
 );
        // 👇🏻 Check if user has been created
        if (!user) {
            return {
                code: "auth/failed",
                status: 500,
                user: null,
                message: "Failed to create user",
 };
 }
        // 👇🏻 Create a document in the Firebase Firestore
        const docRef = doc(db, "clients", user.uid);
        await setDoc(docRef, {
            name,
            email,
 });
        // 👇🏻 Return user data
        return {
            code: "auth/success",
            status: 201,
            user,
            message: "Acount created successfully! 🎉",
 };
 } catch (err) {
        return {
            code: "auth/failed",
            status: 500,
            user: null,
            err,
            message: "Failed to create user",
 };
 }
};
The clientSignUp function accepts the form data, creates an account using the email and password, and adds a document containing the user's email, ID, and name to Firebase Firestore. Execute the function when the user submits the sign-up form.
Add the following code snippet to the auth-functions.ts file to sign client users into the application.
12345678910111213141516171819202122232425262728293031323334353637383940414243444546export const clientLogin = async (form: FormData) => {
    // 👇🏻 Get form data
    const email = form.get("email") as string;
    const password = form.get("password") as string;

    try {
        // 👇🏻 Sign in using the email and password
        const { user } = await signInWithEmailAndPassword(auth, email, password);
        // 👇🏻 Return error if credentials are incorrect
        if (!user) {
            return {
                code: "auth/failed",
                status: 500,
                user: null,
                message: "Failed to login",
 };
 }
        // 👇🏻 Retrieve user data from Firebase Firestore
        const docSnap = await getDoc(doc(db, "clients", user.uid));

        // 👇🏻 Return error if document doesn't exist
        if (!docSnap.exists()) {
            return {
                code: "auth/failed",
                status: 500,
                user: null,
                message: "User is Not a Client",
 };
 }
        // 👇🏻 Return data
        return {
            code: "auth/success",
            status: 200,
            user,
            message: "Login successful",
 };
 } catch (err) {
        return {
            code: "auth/failed",
            status: 500,
            user: null,
            err,
            message: "Failed to login",
 };
 }
};
The clientLogin function takes the user's email and password from the form and signs them into the application. It then checks if the user has a document in the Firebase clients collection to confirm that they are a client user and not a therapist before allowing access to client-only pages.
Finally, add a sign out function to the file to allow users to log out of the application when needed.
12345678910111213export const authLogout = async () => {
    try {
        await auth.signOut();
        return { code: "auth/success", status: 200, message: "Logout successful" };
 } catch (err) {
        return {
            code: "auth/failed",
            status: 500,
            message: "Failed to logout",
            err,
 };
 }
};
Authenticating Therapists
Here, you’ll learn about the necessary attributes for the therapists and how they can create an account and sign in to the application.
Add the code snippet below to the auth-functions.ts file:
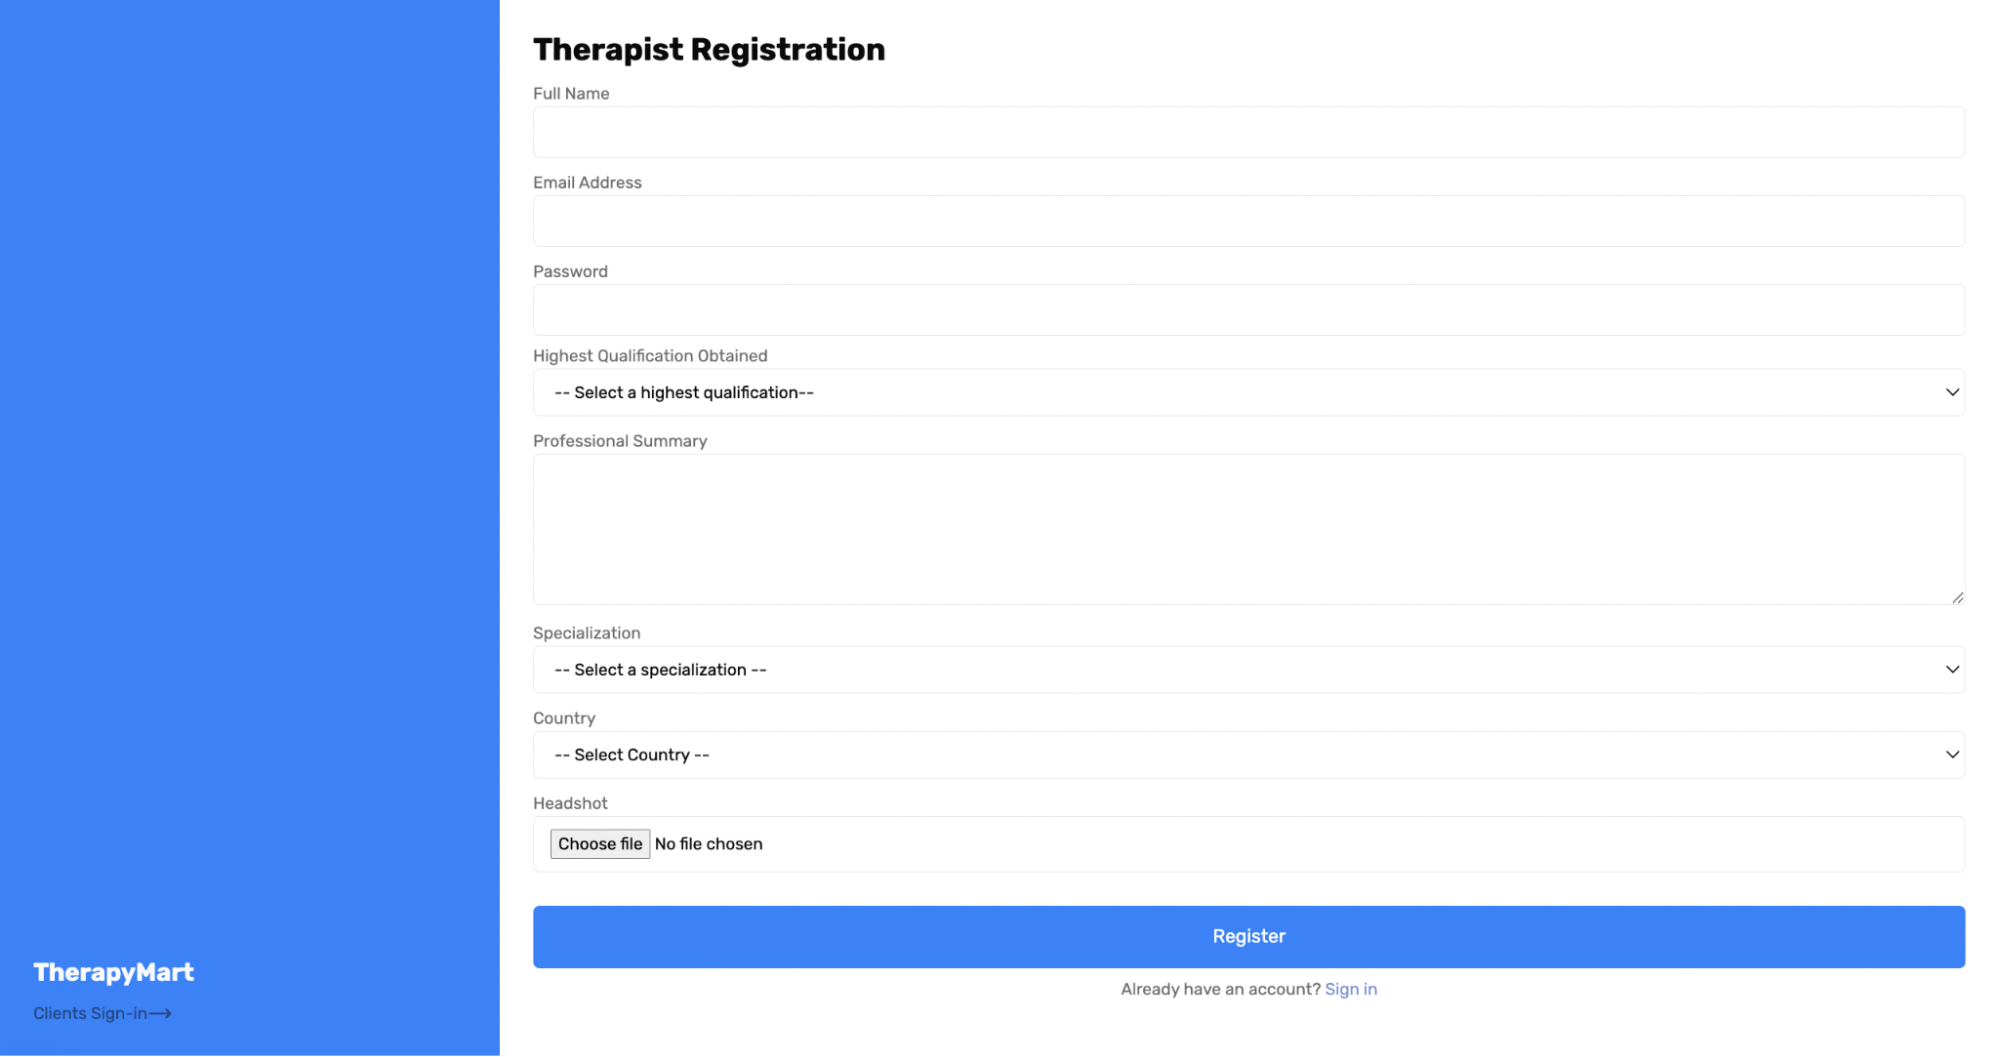
123456789101112131415161718export const therapistSignUp = async (form: FormData) => {
    const userData = {
        name: form.get("name") as string,
        email: form.get("email") as string,
        password: form.get("password") as string,
        qualification: form.get("qualification") as string,
        summary: form.get("summary") as string,
        specialization: form.get("specialization") as string,
        country: form.get("country") as string,
        image: form.get("image") as File,
 };

    //👇🏻 -- Next steps --
    // 1. create an account using the email and password.
    // 2. upload the image to Firebase storage.
    // 3. retrieve the image download URL.
    // 4. create a Firebase document with all the attributes.
};
Modify the therapistSignUp function to create a user using the email and password, upload the therapist's image, and save all the form data to the Firebase therapists collection.
1234567891011121314151617181920212223242526272829303132333435363738394041424344454647484950515253545556575859606162export const therapistSignUp = async (form: FormData) => {
    //  ..👉🏻 form data placeholder

    try {
        // 👇🏻 create an account
        const { user } = await createUserWithEmailAndPassword(
            auth,
            userData.email,
            userData.password
 );
        // 👇🏻 if error return
        if (!user) {
            return {
                code: "auth/failed",
                status: 500,
                user: null,
                message: "Failed to create user",
 };
 }
        // 👇🏻 upload image
        const imageRef = ref(storage, `therapists/${user.uid}/image`);
        await uploadBytes(imageRef, userData.image).then(async () => {
            // 👇🏻 get image download URL
            const downloadURL = await getDownloadURL(imageRef);
            if (!downloadURL) {
                return {
                    code: "auth/failed",
                    status: 500,
                    user: null,
                    message: "Failed to upload image",
 };
 }
            // 👇🏻 create a Firebase document using the user attributes
            const docRef = doc(db, "therapists", user.uid);

            await setDoc(docRef, {
                name: userData.name,
                email: userData.email,
                specialization: userData.specialization,
                qualification: userData.qualification,
                summary: userData.summary,
                country: userData.country,
                image: downloadURL,
 });
 });
        // 👇🏻 return success message
        return {
            code: "auth/success",
            status: 201,
            user: userData,
            message: "Acount created successfully! 🎉",
 };
 } catch (err) {
        return {
            code: "auth/failed",
            status: 500,
            user: null,
            err,
            message: "Failed to create user",
 };
 }
};
Finally, add a therapistsLogin function to the file that takes the user's email and password from the form and signs them into the application. It also checks if the user has a document in the Firebase therapists collection before granting access to the dashboard page.
12345678910111213141516171819202122232425262728293031323334353637383940414243export const therapistLogin = async (form: FormData) => {
    const email = form.get("email") as string;
    const password = form.get("password") as string;

    try {
        const { user } = await signInWithEmailAndPassword(auth, email, password);

        if (!user) {
            return {
                code: "auth/failed",
                status: 500,
                user: null,
                message: "Failed to login",
 };
 }

        const docSnap = await getDoc(doc(db, "therapists", user.uid));

        if (!docSnap.exists()) {
            return {
                code: "auth/failed",
                status: 500,
                user: null,
                message: "User is Not a Therapist",
 };
 }

        return {
            code: "auth/success",
            status: 200,
            user,
            message: "Login successful",
 };
 } catch (err) {
        return {
            code: "auth/failed",
            status: 500,
            user: null,
            err,
            message: "Failed to login",
 };
 }
};
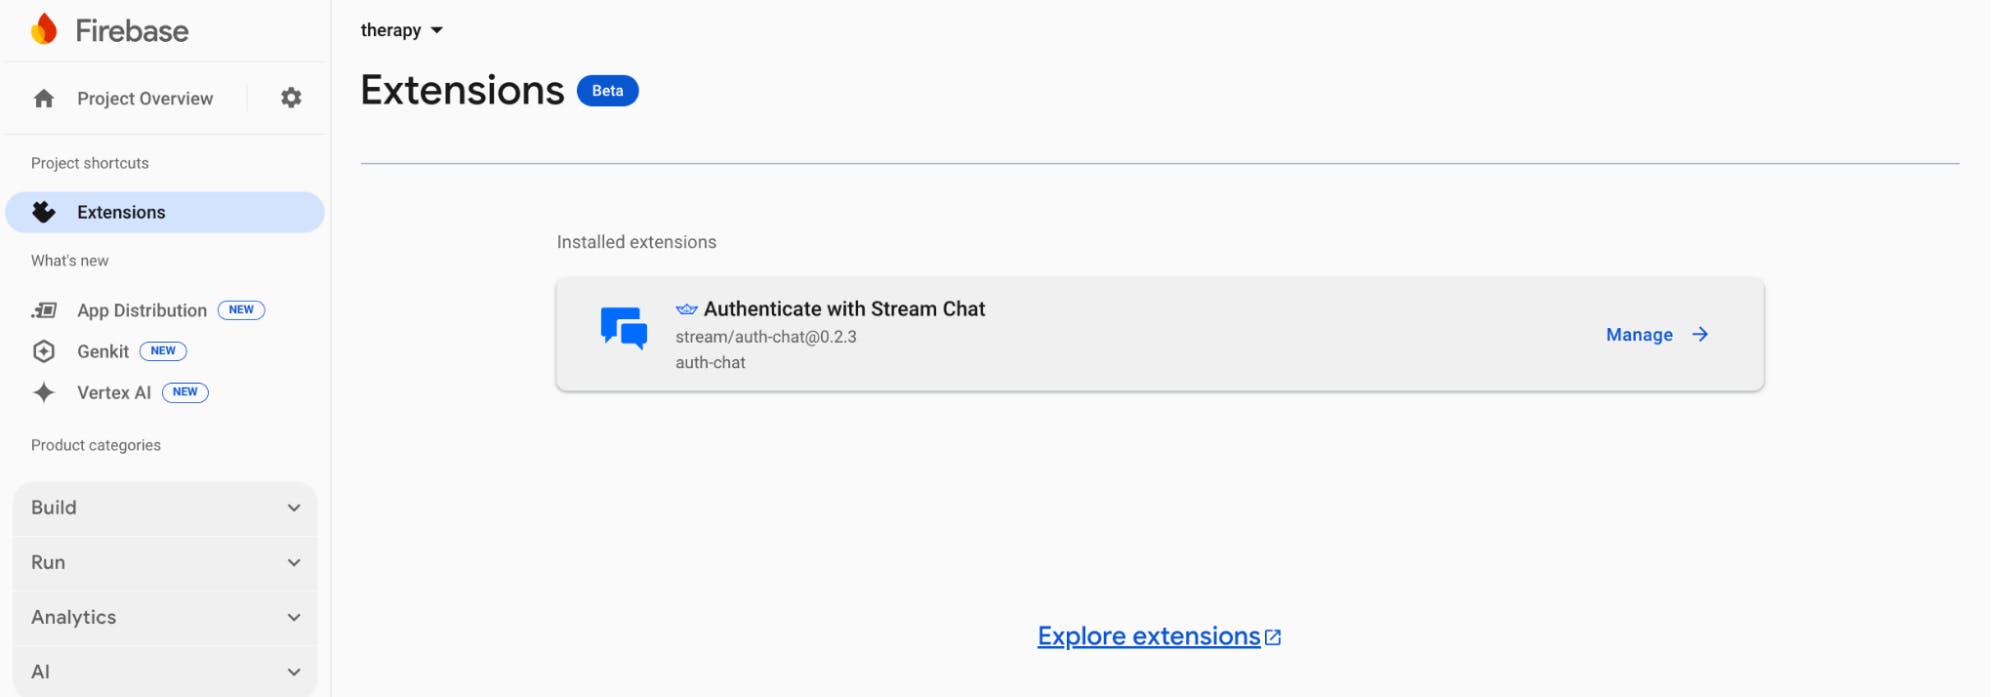
Installing the Stream Chat Firebase Extension
The Authenticate with Stream Chat extension automatically connects your Firebase users to Stream Chat, making it easy for Stream to access and manage your users.
Before we proceed, create a Stream account and a new organization that holds all your apps.
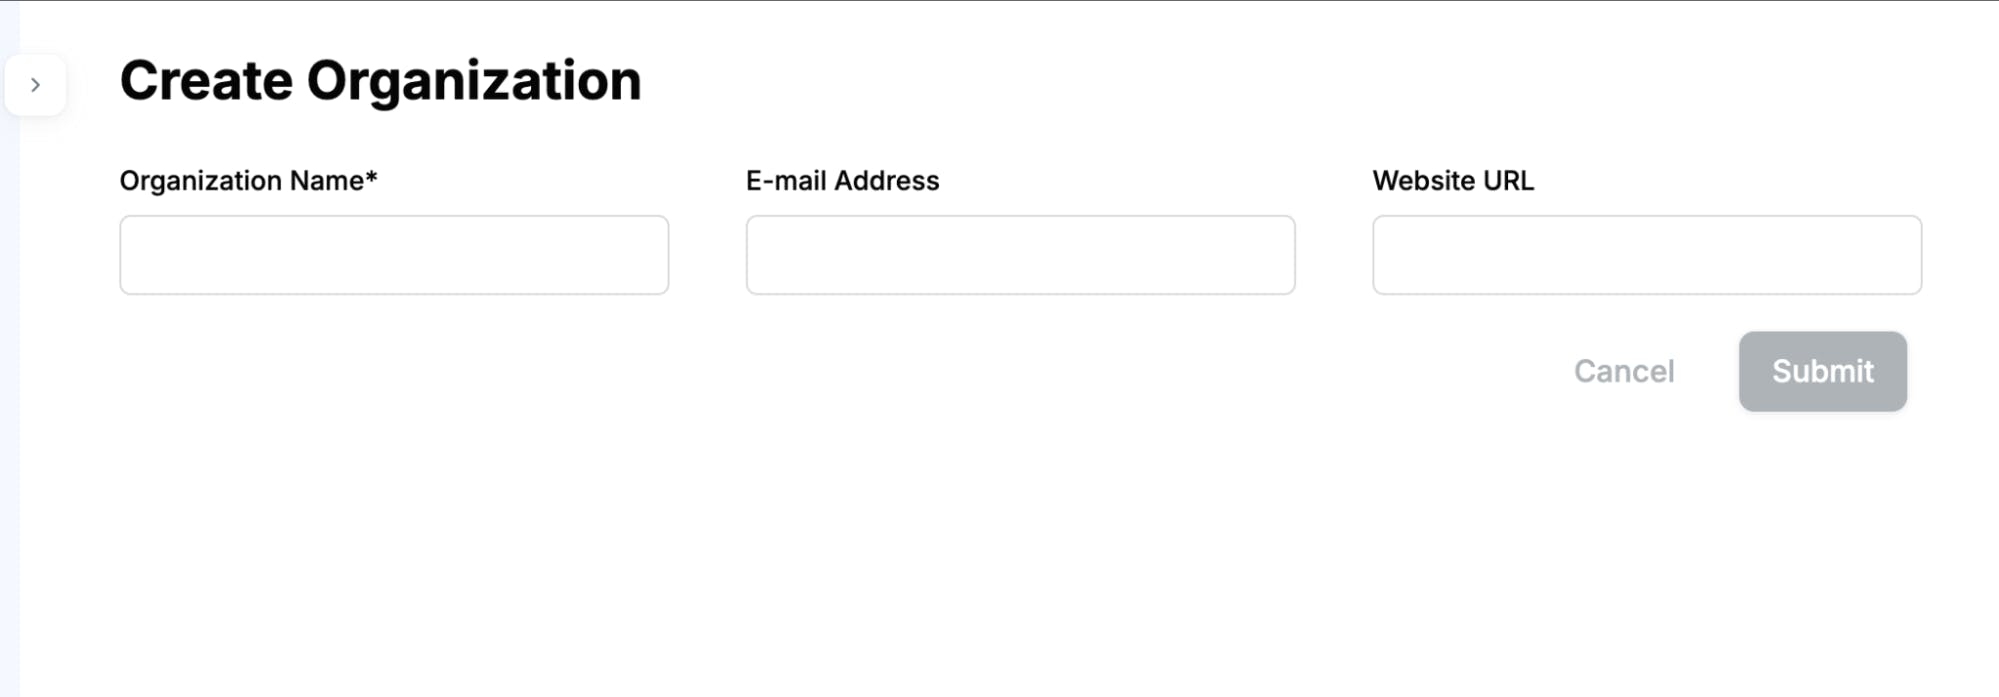
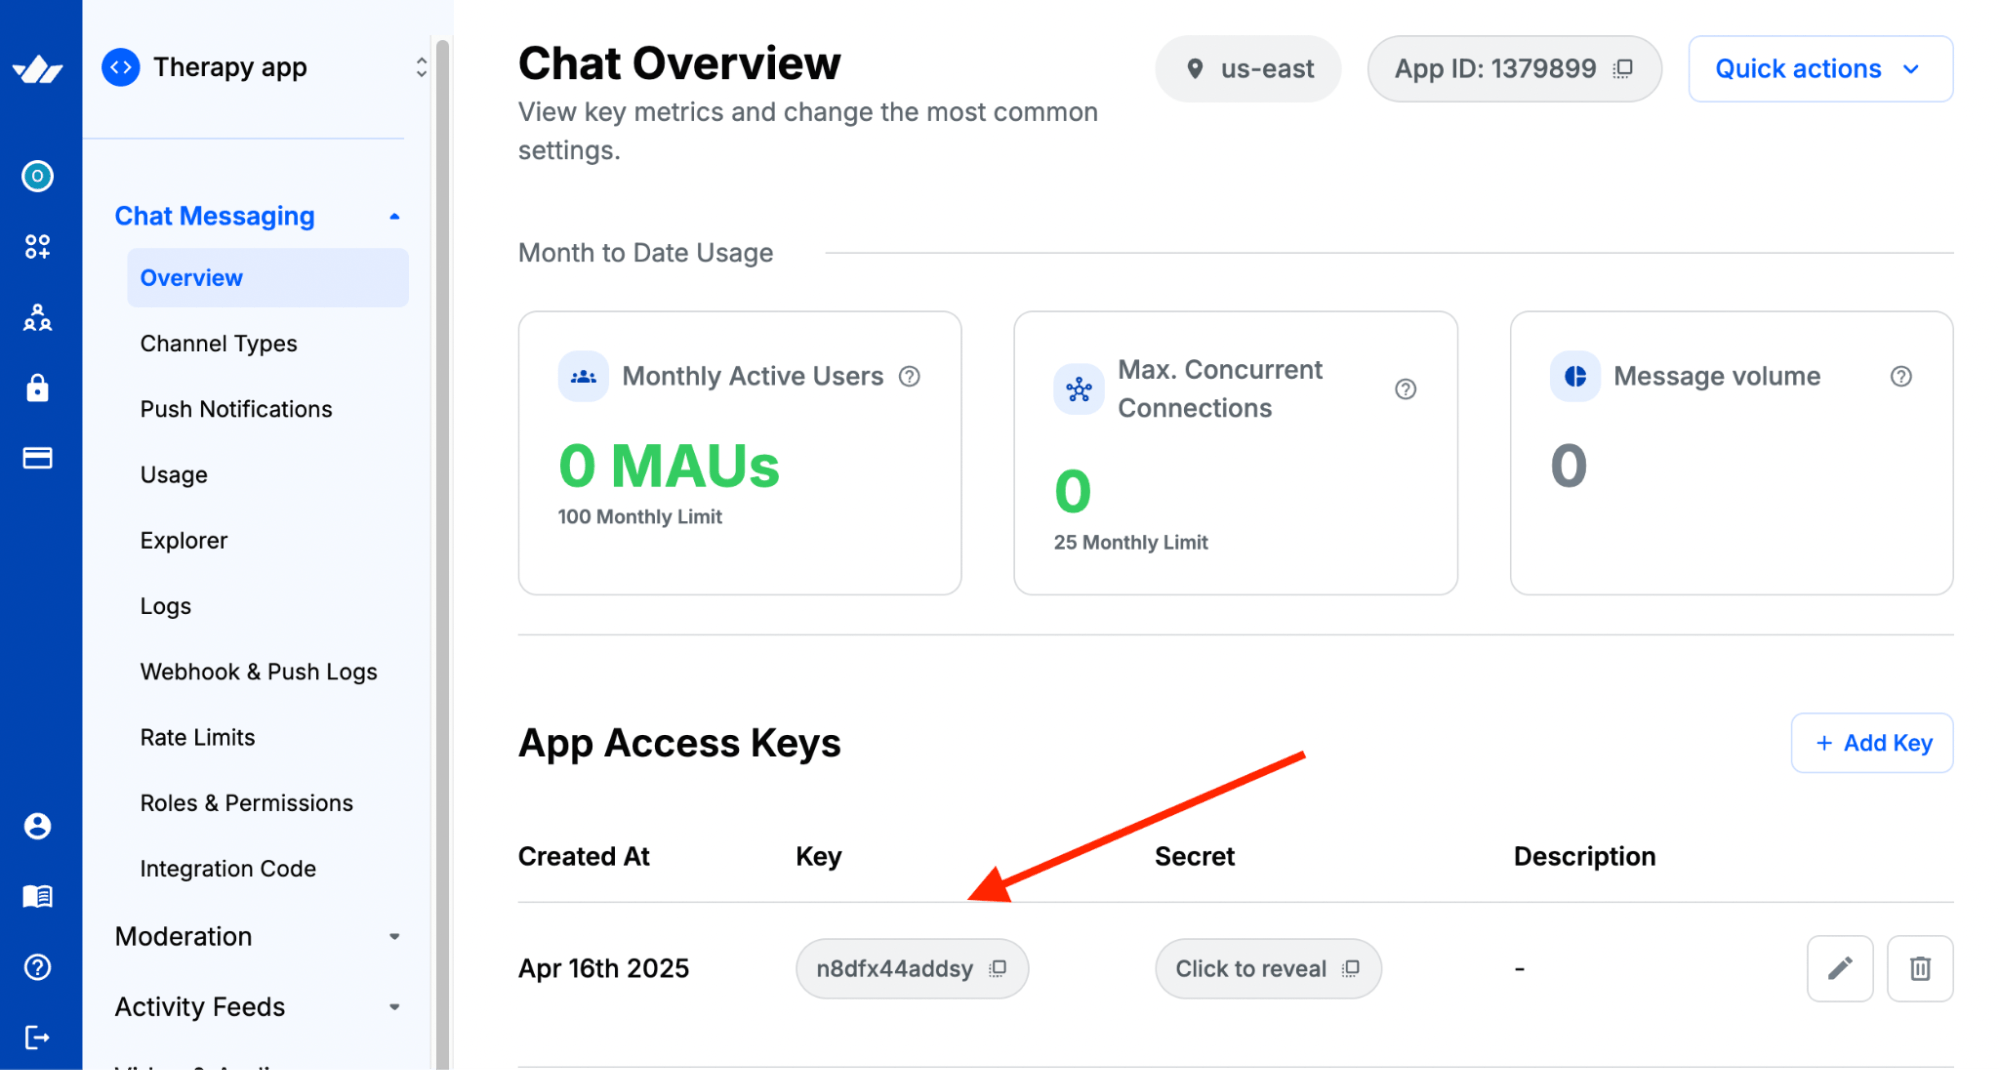
Add a new app to the organization and copy the Stream API and Secret key into the .env.local file.
12NEXT_PUBLIC_STREAM_API_KEY=<paste_from_Stream_app_dashboard>
STREAM_SECRET_KEY=<paste_from_Stream_app_dashboard>
Next, visit the Stream Chat Firebase Extension page and select the Firebase project where you want to install the extension.
Note: Before installing the extension, you must upgrade your Firebase project to the Blaze (pay-as-you-go) plan.
During installation, enable Artifact Registry, Cloud Functions, and Secret Manager. These permissions allow Stream to access and manage your Firebase users.
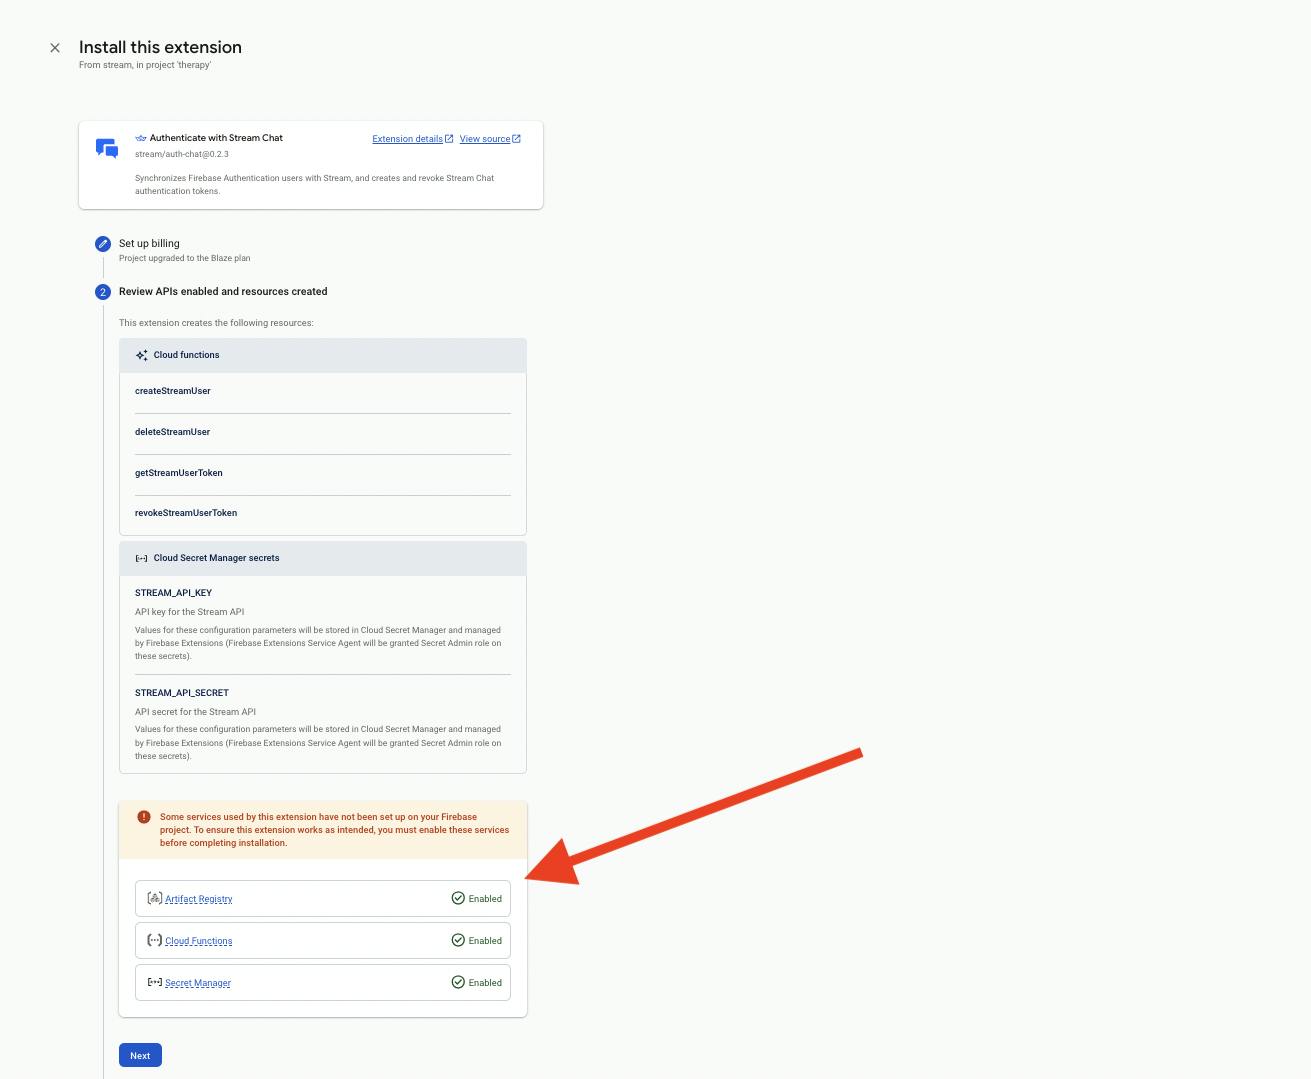
Finally, enter your Stream API key and secret in the configuration fields, then click the Install Extension button.
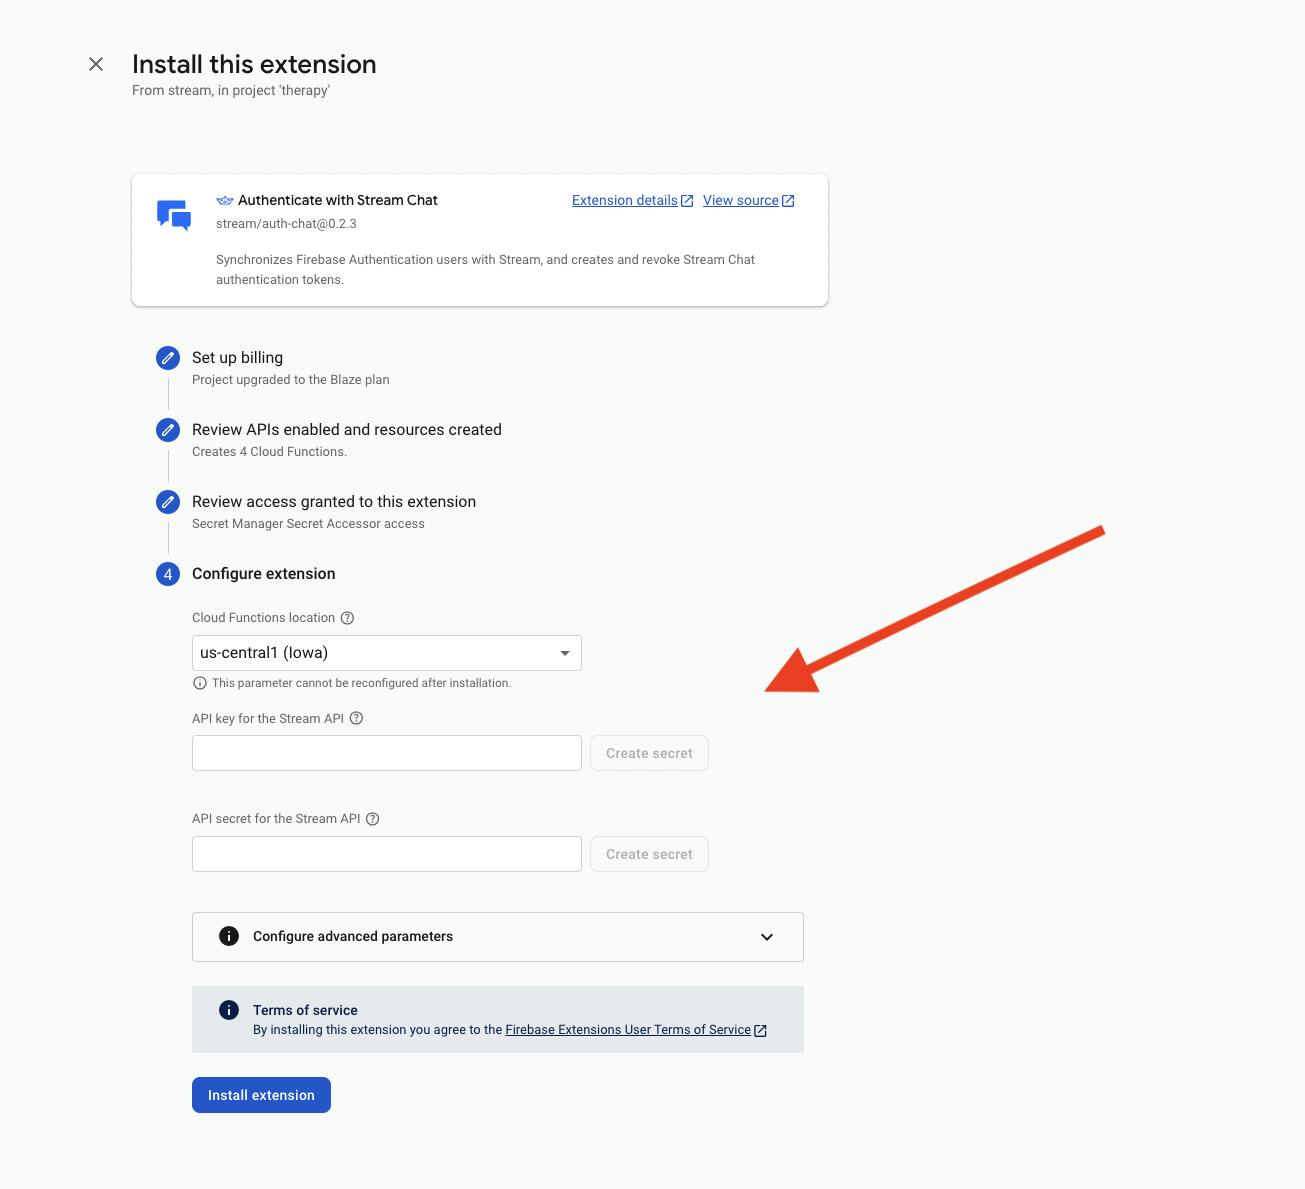
The extension will be installed within a few minutes. Once setup is complete, every new Firebase user will automatically be added to Stream.
The Application Database Design
In this section, you'll learn how to create the required Firestore collections and perform CRUD operations within the application.
Beyond the authentication pages, the app has four key pages:
- /clients/dashboard – displays pending payment confirmations, open chats with therapists, and upcoming video call sessions.
- /therapists – lists all available therapists and allows clients to filter them based on specialization.
- /therapists/dashboard – shows pending payments, lets therapists approve or reject them, and displays open chats and upcoming video sessions.
- /therapists/profile/[id] – renders the therapist details using their ID and allows clients to book a session and leave a review.
The table below outlines the attributes of the Firestore collections:
| clients | therapists | pending_payments | reviews |
|---|---|---|---|
| user_id | user_id | id | client_id |
| client_id | client_name | ||
| name | name | client_name | review |
| country | therapist_id | therapist_id | |
| image | payment_id | rating : (integer) | |
| payPerHour | payment_date | ||
| paymentLink | |||
| qualification | |||
| specialization | |||
| summary |
From the table above:
- The clients collection stores each user's full name, email address, and ID, all obtained from Firebase Authentication.
- The therapists collection holds all attributes related to each therapist. Therapists must set their hourly rate and payment URL from the dashboard to allow clients to make payments and book sessions. The remaining details are displayed on the profile page.
- The pending_payments collection records all payments that are yet to be approved by the therapist. Once a therapist approves a booking payment, a Stream channel is automatically created, allowing both the client and therapist to chat and schedule a virtual session.
- The reviews collection stores the client's feedback and ratings submitted after a virtual session. The rating value is used to calculate the therapist’s average score.
Database Operations for the Therapists Collection
In this section, you'll learn how to fetch all therapists from the database, retrieve a specific therapist by their ID, and implement a search functionality to filter therapists by specialization.
First, create a lib/db-functions.ts file and add the following imports to the file:
123456789101112131415161718import db from "./firebase";
import {
    collection,
    getDocs,
    getDoc,
    where,
    query,
    doc,
    updateDoc,
    addDoc,
    deleteDoc,
} from "firebase/firestore";

interface UpdateTherapistProps {
    payPerHr: number;
    paymentLink: string;
    userId: string;
}
Run the following function to fetch all therapists from the database:
123456789101112131415161718192021222324252627export const getTherapistsList = async () => {
    try {
        //👇🏻 Query the therapists collection
        const q = query(collection(db, "therapists"));
        const querySnapshot = await getDocs(q);
        //👇🏻 Save all the therapists into the variable
        const therapists: TherapistData[] = querySnapshot.docs.map((doc) => ({
            id: doc.id,
 ...doc.data(),
 })) as TherapistData[];
        //👇🏻 Return the array of therapists
        return {
            code: "doc/success",
            status: 200,
            therapists,
            message: "Therapists fetched successfully",
 };
 } catch (err) {
        return {
            code: "doc/failed",
            status: 500,
            err,
            therapists: null,
            message: "Failed to fetch therapists",
 };
 }
};
Add the following code snippet to the db-functions.ts file:
1234567891011121314151617181920212223242526272829export const getTherapistProfile = async (uid: string) => {
    try {
        const docSnap = await getDoc(doc(db, "therapists", uid));

        if (!docSnap.exists()) {
            return {
                code: "auth/failed",
                status: 500,
                user: null,
                message: "Invalid ID",
 };
 }

        return {
            code: "auth/success",
            status: 200,
            user: docSnap.data(),
            message: "User found",
 };
 } catch (err) {
        return {
            code: "auth/failed",
            status: 404,
            user: null,
            err,
            message: "User Not Found",
 };
 }
};
The getTherapistProfile function accepts a therapist's ID as a parameter and retrieves all their attributes from the database.
Next, use the function below to retrieve therapists based on their specialization:
12345678910111213141516171819202122232425262728export const getTherapistBySpecialization = async (specialization: string) => {
    try {
        const q = query(
            collection(db, "therapists"),
            where("specialization", "==", specialization)
 );
        const querySnapshot = await getDocs(q);
        const therapists: TherapistData[] = querySnapshot.docs.map((doc) => ({
            id: doc.id,
 ...doc.data(),
 })) as TherapistData[];

        return {
            code: "doc/success",
            status: 200,
            therapists,
            message: "Therapists fetched successfully",
 };
 } catch (err) {
        return {
            code: "doc/failed",
            status: 500,
            err,
            therapists: null,
            message: "Failed to fetch therapists",
 };
 }
};
Finally, therapists can update their hourly pay and payment link on their dashboard, enabling clients to make payments and book a therapy session.
12345678910111213141516171819202122232425export const updateTherapist = async ({
    payPerHr,
    paymentLink,
    userId,
}: UpdateTherapistProps) => {
    try {
        const therapistRef = doc(db, "therapists", userId);
        await updateDoc(therapistRef, {
            payPerHr,
            paymentLink,
 });
        return {
            code: "doc/success",
            status: 200,
            message: "Therapist updated successfully",
 };
 } catch (err) {
        return {
            code: "doc/failed",
            status: 500,
            err,
            message: "Failed to update therapist",
 };
 }
};
Database Operations for the Reviews Collection
In this section, you'll learn how to fetch reviews from the database and enable clients to give reviews.
Use the function below to retrieve all reviews associated with a specific therapist:
1234567891011121314151617181920212223242526272829export const getReviews = async (therapistId: string) => {
    try {
        const q = query(
            collection(db, "reviews"),
            where("therapist_id", "==", therapistId)
 );

        const querySnapshot = await getDocs(q);
        const reviews: Reviews[] = querySnapshot.docs.map((doc) => ({
            id: doc.id,
 ...doc.data(),
 })) as Reviews[];

        return {
            code: "doc/success",
            status: 200,
            reviews,
            message: "Reviews fetched successfully",
 };
 } catch (err) {
        return {
            code: "doc/failed",
            status: 500,
            err,
            reviews: null,
            message: "Failed to fetch reviews",
 };
 }
};
The getReviews function accepts a therapist's ID as a parameter, queries the reviews collection, and returns all the reviews submitted for that therapist.
To allow clients to submit a review for therapists, add the following code snippet to the db-functions file:
123456789101112131415161718192021export const createReview = async (
    formData: FormData,
    therapistId: string,
    userId: string
) => {
    //👇🏻 accepts form data
    const rating = formData.get("rating") as string;
    const review = formData.get("review") as string;

    //👇🏻 verifies the rating
    if (isNaN(Number(rating)) || Number(rating) < 1 || Number(rating) > 5) {
        return {
            code: "doc/failed",
            status: 500,
            message: "Invalid rating",
 };
 }
    // 1. Retrieve user object using the userId
    // 2. Query the reviews collection to ensure the user hasn't left a review earlier.
    // 3. Add the client's review to the collection
};
Modify the createReview function as follows:
12345678910111213141516171819202122232425262728293031323334353637383940414243444546export const createReview = async (
    formData: FormData,
    therapistId: string,
    userId: string
) => {
    //...form data and its verification

    // Retrieve user object using the userId
    const clientSnap = await getDoc(doc(db, "clients", userId));
    if (!clientSnap.exists()) {
        return {
            code: "doc/failed",
            status: 500,
            message: "User client not found",
 };
 }
    // Query the reviews collection
    const reviewsRef = query(
        collection(db, "reviews"),
        where("client_id", "==", userId),
        where("therapist_id", "==", therapistId)
 );
    const querySnapshot = await getDocs(reviewsRef);
    // Review already exist
    if (!querySnapshot.empty) {
        return {
            code: "doc/failed",
            status: 500,
            message: "You have already submitted a review for this therapist",
 };
 }
    // Add review to the collection
    await addDoc(collection(db, "reviews"), {
        client_name: clientSnap.data()?.name,
        client_id: userId,
        therapist_id: therapistId,
        rating: Number(rating),
        review,
 });

    return {
        code: "doc/success",
        status: 200,
        message: "Review submitted successfully",
 };
};
The createReview function accepts the form data, including the rating, review text, therapist ID, and client ID (since only clients can leave reviews). The function does the following:
- Retrieves the client object using the client ID to get the full name.
- Checks if the client has already left a review for the therapist.
- If the client has previously submitted a review, it returns an error.
- If not, it adds the new review to the reviews collection.
Database Operations for the Pending Payments Collection
In this section, you'll learn how to retrieve the pending payments collection, allow clients to add new payments, and enable therapists to approve or cancel payments.
Copy the following code snippet into the db-functions.ts file:
1234567891011121314151617181920212223242526272829303132interface PaymentProps {
    uid: string;
    user: "client_id" | "therapist_id";
}

export const getPendingPayments = async ({ uid, user }: PaymentProps) => {
    try {
        const q = query(collection(db, "pending_payments"), where(user, "==", uid));
        const querySnapshot = await getDocs(q);
        const pendingPayments: PendingPayments[] = querySnapshot.docs.map(
 (doc) =>
 ({
                    id: doc.id,
 ...doc.data(),
 } as PendingPayments)
 );
        return {
            code: "doc/success",
            status: 200,
            pendingPayments,
            message: "Pending payments fetched successfully",
 };
 } catch (err) {
        return {
            code: "doc/failed",
            status: 500,
            pendingPayments: null,
            err,
            message: "Failed to fetch pending payments",
 };
 }
};
The code snippet above retrieves the pending payments for both therapist and client users.
Clients can also submit their payment details after successfully making a payment, allowing therapists to approve it.
12345678910111213141516171819202122232425262728293031323334export const submitPayment = async (
    formData: FormData,
    userId: string,
    therapistId: string
) => {
    const paymentId = formData.get("paymentId") as string;
    const payeeName = formData.get("payeeName") as string;
    const paymentDate = formatPaymentDate(formData.get("paymentDate") as string);

    if (therapistId === userId) {
        return {
            code: "doc/failed",
            status: 500,
            message: "You cannot confirm your own payment",
 };
 }

    try {
        await addDoc(collection(db, "pending_payments"), {
            client_name: payeeName,
            client_id: userId,
            therapist_id: therapistId,
            payment_id: paymentId,
            payment_date: paymentDate,
 });
 } catch (err) {
        return {
            code: "doc/failed",
            status: 500,
            message: "Failed to submit details",
            err,
 };
 }
};
The submitPayment function accepts the payee's name, payment date, and reference ID and adds the payment information to the pending_payments collection.
Therapists can then approve or decline the payment. If a therapist declines the payment, the payment data is deleted immediately from the collection. If the therapist approves the payment, a new chat channel is created with the client before the pending_payments collection is updated.
1234567891011121314151617export const cancelPayment = async (payment: PendingPayments) => {
  try {
    await deleteDoc(doc(db, "pending_payments", payment.id));
    return {
      code: "doc/success",
      status: 200,
      message: "Payment cancelled successfully",
    };
  } catch (err) {
    return {
      code: "doc/failed",
      status: 500,
      err,
      message: "Failed to cancel payment",
    };
  }
};
The cancelPayment function accepts the payment ID and deletes its document from the collection. In the next section, you will learn how to approve a payment by creating a new chat channel with the therapist.
How to Integrate 1:1 Chat with Stream
In this section, you'll learn how to create private channels and send messages to users within the application. This enables therapists to chat with clients before scheduling a call.
Before we proceed, install the following Stream packages to integrate chat and video call features into the application.
12345# 👇🏻 for Stream Chat SDK
npm install stream-chat stream-chat-react

# 👇🏻 for Stream Video & Audio SDK
npm install @stream-io/node-sdk @stream-io/video-react-sdk
Import the Stream Chat and Audio & Video CSS files into your layout.tsx file:
1234567891011121314151617181920212223242526272829import type { Metadata } from "next";
import { Rubik } from "next/font/google";
import "@stream-io/video-react-sdk/dist/css/styles.css";
import "stream-chat-react/dist/css/v2/index.css";
import "./globals.css";

const inter = Rubik({
  weight: ["300", "400", "500", "600", "700"],
  subsets: ["latin"],
});

export const metadata: Metadata = {
  title: "TherapyMart",
  description: "Generated by create next app",
};

export default function RootLayout({
  children,
}: Readonly<{
  children: React.ReactNode;
}>) {
  return (
    <html lang="en">
      <body className={inter.className}>
        <main>{children}</main>
      </body>
    </html>
  );
}
Create an actions/stream.action.ts file and copy the following code snippet into the file:
123456789101112131415"use server";
import { StreamChat } from "stream-chat";
import { StreamClient } from "@stream-io/node-sdk";

const STREAM_API_KEY = process.env.NEXT_PUBLIC_STREAM_API_KEY!;
const STREAM_API_SECRET = process.env.STREAM_SECRET_KEY!;

// 👇🏻 -- Stream server client  --
const serverClient = StreamChat.getInstance(STREAM_API_KEY, STREAM_API_SECRET);

//👇🏻 -- create auth token function --
export async function createToken(userId: string): Promise<string> {
    if (!userId) throw new Error("User is not authenticated");
    return serverClient.createToken(userId);
}
The code snippet above initializes the Stream Chat server client, allowing us to perform various Stream actions on the server side. The createToken function accepts a user object and creates an authentication token using the user's ID.
Since Firebase works on the client side, we also need a Stream client to perform actions such as fetching calls and existing channels, and creating and joining them.
To achieve this, create a hooks folder in your project and add a useGetStreamClient.ts custom hook within a (stream) folder in your Next.js app. This hook will manage the client-side Stream functionality.
1234cd app && \
mkdir (stream) && cd (stream) && \
mkdir hooks && cd hooks && \
touch useGetStreamClient.ts
Copy the following code snippet into the useGetStreamClient.ts:
123456789101112131415161718192021222324import { useCreateChatClient } from "stream-chat-react";
import { createToken } from "../../../../actions/stream.action";
import { useCallback } from "react";

export const useGetStreamClient = (
    user: TherapistData | ClientData
) => {
    //👇🏻 executes the createToken function from the server
    const tokenProvider = useCallback(async () => {
        return await createToken(user);
    }, [user]);

    //👇🏻 creates the chat client
    const client = useCreateChatClient({
        apiKey: process.env.NEXT_PUBLIC_STREAM_API_KEY!,
        tokenOrProvider: tokenProvider,
        userData: { id: user.id, name: user.name, image: user.image },
    });

    //👇🏻 returns the chat client
    if (!client) return { client: null };

    return { client };
};
The useGetStreamClient hook generates a token for the current user and creates a chat client using the user's credentials from the user object. It then returns the chat client, which can be used to perform client-side Stream operations.
Next, add a createChannel function within the stream.action.ts file:
1234567891011121314151617181920212223242526272829303132333435363738394041424344export async function createChannel({
    therapist,
    clientName,
    clientId,
}: {
    therapist: TherapistData;
    clientName: string;
    clientId: string;
}) {
    try {
        //👇🏻 check if channel already exists
        const filter = {
            type: "messaging",
            members: { $in: [therapist.id, clientId] },
        };
        const sort = [{ last_message_at: -1 }];

        const channels = await serverClient.queryChannels(filter, sort, {
            watch: true,
            state: true,
        });

        //👇🏻 channel already exists? return its ID
        if (channels.length > 0) {
            return { success: true, error: null, id: channels[0].id };
        }

        //👇🏻 channel configuration
        const channel = serverClient.channel("messaging", `therapist-${clientId}`, {
            name: `${clientName} with ${therapist.name}`,
            members: [therapist.id, clientId],
            created_by_id: therapist.id,
        });

        //👇🏻 create channel
        await channel.create();

        //👇🏻 return its ID
        return { success: true, error: null, id: channel.id };
    } catch (err) {
        console.log("Error creating channel:", err);
        return { success: false, error: "Failed to create channel", id: null };
    }
}
The createChannel function takes the therapist's data, client ID, and name as parameters. Then, it checks if the therapist and the client already have a chat channel. If so, it returns the existing channel's ID; otherwise, it creates a new one.
When a therapist approves the payment, call the createChannel function to set up a private messaging channel between the therapist and client.
12345678910111213141516171819202122232425262728293031323334353637export const approvePayment = async (
    payment: PendingPayments,
    therapist: TherapistData
) => {
    try {
        //👇🏻 create chat channel
        const createChat = await createChannel({
            therapist,
            clientName: payment.client_name,
            clientId: payment.client_id,
        });

        if (!createChat.success) {
            return {
                code: "doc/failed",
                status: 500,
                message: createChat.error,
            };
        }

        //👇🏻 delete data after creating a chat
        await deleteDoc(doc(db, "pending_payments", payment.id));

        return {
            code: "doc/success",
            status: 200,
            message: "Payment approved successfully",
        };
    } catch (err) {
        return {
            code: "doc/failed",
            status: 500,
            err,
            message: "Failed to approve payment",
        };
    }
};
The approvePayment function accepts the therapist's data and the client's payment details. It executes the createChannel function, and once the channel is successfully created, it removes the payment details from the pending_payments collection.
You can retrieve all user’s chat channels using the function below:
123456789101112131415161718192021222324import { Channel } from "stream-chat";

export default function Page() {
    const [channels, setChannels] = useState<Channel[] | null>(null);
    const { client: chatClient } = useGetStreamClient(user);

    const getChannels = useCallback(async () => {
        if (!chatClient || !user) return;
        const channelList = await chatClient.queryChannels({
            type: "messaging",
            members: { $in: [user.id] },
        });

        setChannels(channelList);
    }, [user, chatClient]);

    useEffect(() => {
        getChannels();
    }, [getChannels]);

    return (
        {/** -- UI elements  -- */}
    );
}
The code snippet above shows how to retrieve chat channels for a Stream user. The useGetStreamClient hook accepts a user object and returns the Stream Chat client, which is used to fetch all the user channels.
Stream provides multiple UI components to render the chat interface that allow users to send messages and share files. Create a (stream)/chat/[id].tsx file within the Next.js app directory and copy the following code snippet into it:
12345678910111213141516171819202122232425262728293031323334353637383940414243444546474849505152"use client";
import {
    Chat,
    Channel,
    ChannelList,
    Window,
    ChannelHeader,
    MessageList,
    MessageInput,
} from "stream-chat-react";
import { useGetStreamClient } from "@/app/(stream)/hooks/useGetStreamClient";

export default function StreamChatUI({
    user,
}: {
    user: ClientData | TherapistData;
}) {
    const { client } = useGetStreamClient(user!);

    const filters = { members: { $in: [user.id] }, type: "messaging" };
    const options = { presence: true, state: true };

    if (!client) return <div>Loading...</div>;

    return (
        <div className="W-full min-h-screen">
            <Chat client={client}>
                <div className="chat-container">
                    {/* -- Channel List -- */}
                    <div className="channel-list">
                        <ChannelList
                            sort={{ last_message_at: -1 }}
                            filters={filters}
                            options={options}
                        />
                    </div>

                    {/* -- Messages Panel -- */}
                    <div className="chat-panel">
                        <Channel>
                            <Window>
                                <ChannelHeader />
                                <MessageList />
                                <MessageInput />
                            </Window>
                        </Channel>
                    </div>
                </div>
            </Chat>
        </div>
    );
}
From the code snippet above:
- The useGetStreamClient custom hook returns the Stream Chat client for the current user.
- Chat component initializes the Stream Chat client and wraps the entire Chat page.
- ChannelList shows available chat channels.
- Channel sets up an active chat session.
- Window contains the message display and input areas.
- ChannelHeader, MessageList, and MessageInput provide a fully functional chat interface.
How to Book Video Call Sessions with Stream
In this section, you'll learn how to integrate video calling functionality into the Next.js application, allowing therapists to schedule virtual sessions with clients.
Copy the following code snippet into the actions/stream.action.ts file:
1234567891011121314151617export const tokenProvider = async (user_id: string) => {
    if (!STREAM_API_KEY) throw new Error("Stream API key secret is missing");
    if (!STREAM_API_SECRET) throw new Error("Stream API secret is missing");

    const streamClient = new StreamClient(STREAM_API_KEY, STREAM_API_SECRET);

    const expirationTime = Math.floor(Date.now() / 1000) + 3600;
    const issuedAt = Math.floor(Date.now() / 1000) - 60;

    const token = streamClient.generateUserToken({
        user_id,
        exp: expirationTime,
        validity_in_seconds: issuedAt,
    });

    return token;
};
The tokenProvider function generates an authentication token for the user, enabling Stream to identify and manage users during real-time communication.
Within the (stream)/hooks folder, add the following files:
12cd app && cd (stream)/hooks && \
touch useGetCallById.ts useGetCalls.ts
The useGetCallById file defines a React hook that fetches details of a specific Stream call via its ID, while the useGetCalls hook retrieves all the calls created by a particular Stream user.
Let's create these custom React hooks.
Copy the following code snippet into the useGetCallById.ts file:
123456789101112131415161718192021222324252627282930313233import { useEffect, useState } from "react";
import { Call, useStreamVideoClient } from "@stream-io/video-react-sdk";

export const useGetCallById = (id: string | string[]) => {
    const [call, setCall] = useState<Call>();
    const [isCallLoading, setIsCallLoading] = useState(true);

    const client = useStreamVideoClient();

    useEffect(() => {
        if (!client) return;

        const loadCall = async () => {
            try {
                // https://getstream.io/video/docs/react/guides/querying-calls/#filters
                const { calls } = await client.queryCalls({
                    filter_conditions: { id },
                });

                if (calls.length > 0) setCall(calls[0]);

                setIsCallLoading(false);
            } catch (error) {
                console.error(error);
                setIsCallLoading(false);
            }
        };

        loadCall();
    }, [client, id]);

    return { call, isCallLoading };
};
Add the following to the useGetCalls.ts file:
123456789101112131415161718192021222324252627282930313233343536373839404142434445464748495051import { useEffect, useState } from "react";
import { Call, useStreamVideoClient } from "@stream-io/video-react-sdk";

export const useGetCalls = (id: string) => {
    const client = useStreamVideoClient();
    const [calls, setCalls] = useState<Call[]>();
    const [isLoading, setIsLoading] = useState(false);

    useEffect(() => {
        const loadCalls = async () => {
            if (!client || !id) return;

            setIsLoading(true);

            try {
                const { calls } = await client.queryCalls({
                    sort: [{ field: "starts_at", direction: 1 }],
                    filter_conditions: {
                        starts_at: { $exists: true },
                        $or: [
                            { created_by_user_id: id },
                            { members: { $in: [id] } }
                        ],
                    },
                });

                setCalls(calls);
            } catch (error) {
                console.error(error);
            } finally {
                setIsLoading(false);
            }
        };

        loadCalls();
    }, [client, id]);

    const now = new Date();

    const upcomingCalls = calls?.filter(({ state: { startsAt } }: Call) => {
        return startsAt && new Date(startsAt) > now;
    });

    const ongoingCalls = calls?.filter(
        ({ state: { startsAt, endedAt } }: Call) => {
            return startsAt && new Date(startsAt) < now && !endedAt;
        }
    );

    return { upcomingCalls, isLoading, ongoingCalls };
};
The useGetCalls hook retrieves all calls created by the recruiter, including ongoing and upcoming calls. It also provides an isLoading state to indicate when data is being fetched, enabling conditional rendering.
Next, to create, join, and retrieve calls, wrap the pages that require access to the calls with the StreamVideo component.
Add a providers/StreamVideoProvider component inside the (stream) folder. Then, copy the following code snippet into the file:
12345678910111213141516171819202122"use client";
import { tokenProvider } from "../../../../actions/stream.action";
import { StreamVideo, StreamVideoClient } from "@stream-io/video-react-sdk";
import { useState, ReactNode, useEffect, useCallback } from "react";
import { onAuthStateChanged, User } from "firebase/auth";
import { auth } from "@/lib/firebase";
import db from "@/lib/firebase";
import { doc, getDoc } from "firebase/firestore";
import { useRouter } from "next/navigation";
import { Loader2 } from "lucide-react";

const apiKey = process.env.NEXT_PUBLIC_STREAM_API_KEY!;

export const StreamVideoProvider = ({ children }: { children: ReactNode }) => {
    const [videoClient, setVideoClient] = useState<StreamVideoClient | null>(null);
    const [user, setUser] = useState<User | null>(null);
    const router = useRouter();

    // 👉🏻 auth functions placeholder

    return <StreamVideo client={videoClient}>{children}</StreamVideo>;
};
Update the component with the authentication functions:
12345678910111213141516171819202122232425262728293031323334353637383940414243444546474849useEffect(() => {
    const unsubscribe = onAuthStateChanged(auth, async (user) => {
        if (user?.uid) {
            setUser(user);
        } else {
            return router.push("/clients/login");
        }
    });

    return () => unsubscribe();
}, [router]);

const getUser = useCallback(async () => {
    if (!user) return null;

    const [therapistSnap, clientSnap] = await Promise.all([
        getDoc(doc(db, "therapists", user.uid)),
        getDoc(doc(db, "clients", user.uid)),
    ]);

    if (!therapistSnap.exists() && !clientSnap.exists()) {
        console.warn("User data not found in Firestore");
        return null;
    }

    return new StreamVideoClient({
        apiKey,
        user: {
            id: user.uid,
            name: therapistSnap.data()?.name || clientSnap.data()?.name,
            image: therapistSnap.data()?.image || null,
        },
        tokenProvider: () => tokenProvider(user.uid),
    });
}, [user]);

useEffect(() => {
    const result = getUser();
    if (result) {
        result.then((client) => setVideoClient(client));
    }
}, [getUser]);

if (!videoClient)
    return (
        <div className="h-screen flex items-center justify-center">
            <Loader2 size="32" className="mx-auto animate-spin" />
        </div>
    );
The code snippet above does the following:
- retrieves the authenticated Firebase user object and redirects them to the login page if they are not signed in.
- fetches the user's data from the therapists or clients Firestore collection and initializes a StreamVideoClient with their details.
- updates the videoClient state once the user data is retrieved, displaying a loading spinner while waiting for the client to be set.
Finally, therapists need to be able to schedule calls with clients. They can execute this function after submitting a form that accepts the meeting title and a specific date and time for the therapy session.
1234567891011121314151617181920212223242526import { useStreamVideoClient } from "@stream-io/video-react-sdk";
const client = useStreamVideoClient();

const handleScheduleCall = async (e: React.FormEvent<HTMLFormElement>) => {
    e.preventDefault();
    if (!description || !dateTime || !client) return;

    try {
        const id = crypto.randomUUID(); //👉🏻 generates a random id
        const call = client.call("default", id);
        if (!call) throw new Error("Failed to create meeting");

        // 👇🏻 creates a call
        await call.getOrCreate({
            data: {
                starts_at: new Date(dateTime).toISOString(),
                custom: {
                    description,
                },
                members: [{ user_id: clientId }, { user_id: therapistId }],
            },
        });
    } catch (error) {
        console.error(error);
    }
};
The code snippet above creates a Stream video call with a default call type. It assigns the call a unique ID, sets the scheduled date and time, and includes a custom description.
Note: Ensure that the \<StreamVideoProvider> component wraps the recruiter's dashboard where the video call is created. You can achieve this by adding a layout.tsx file to the dashboard page and wrapping all child elements with \<StreamVideoProvider>.
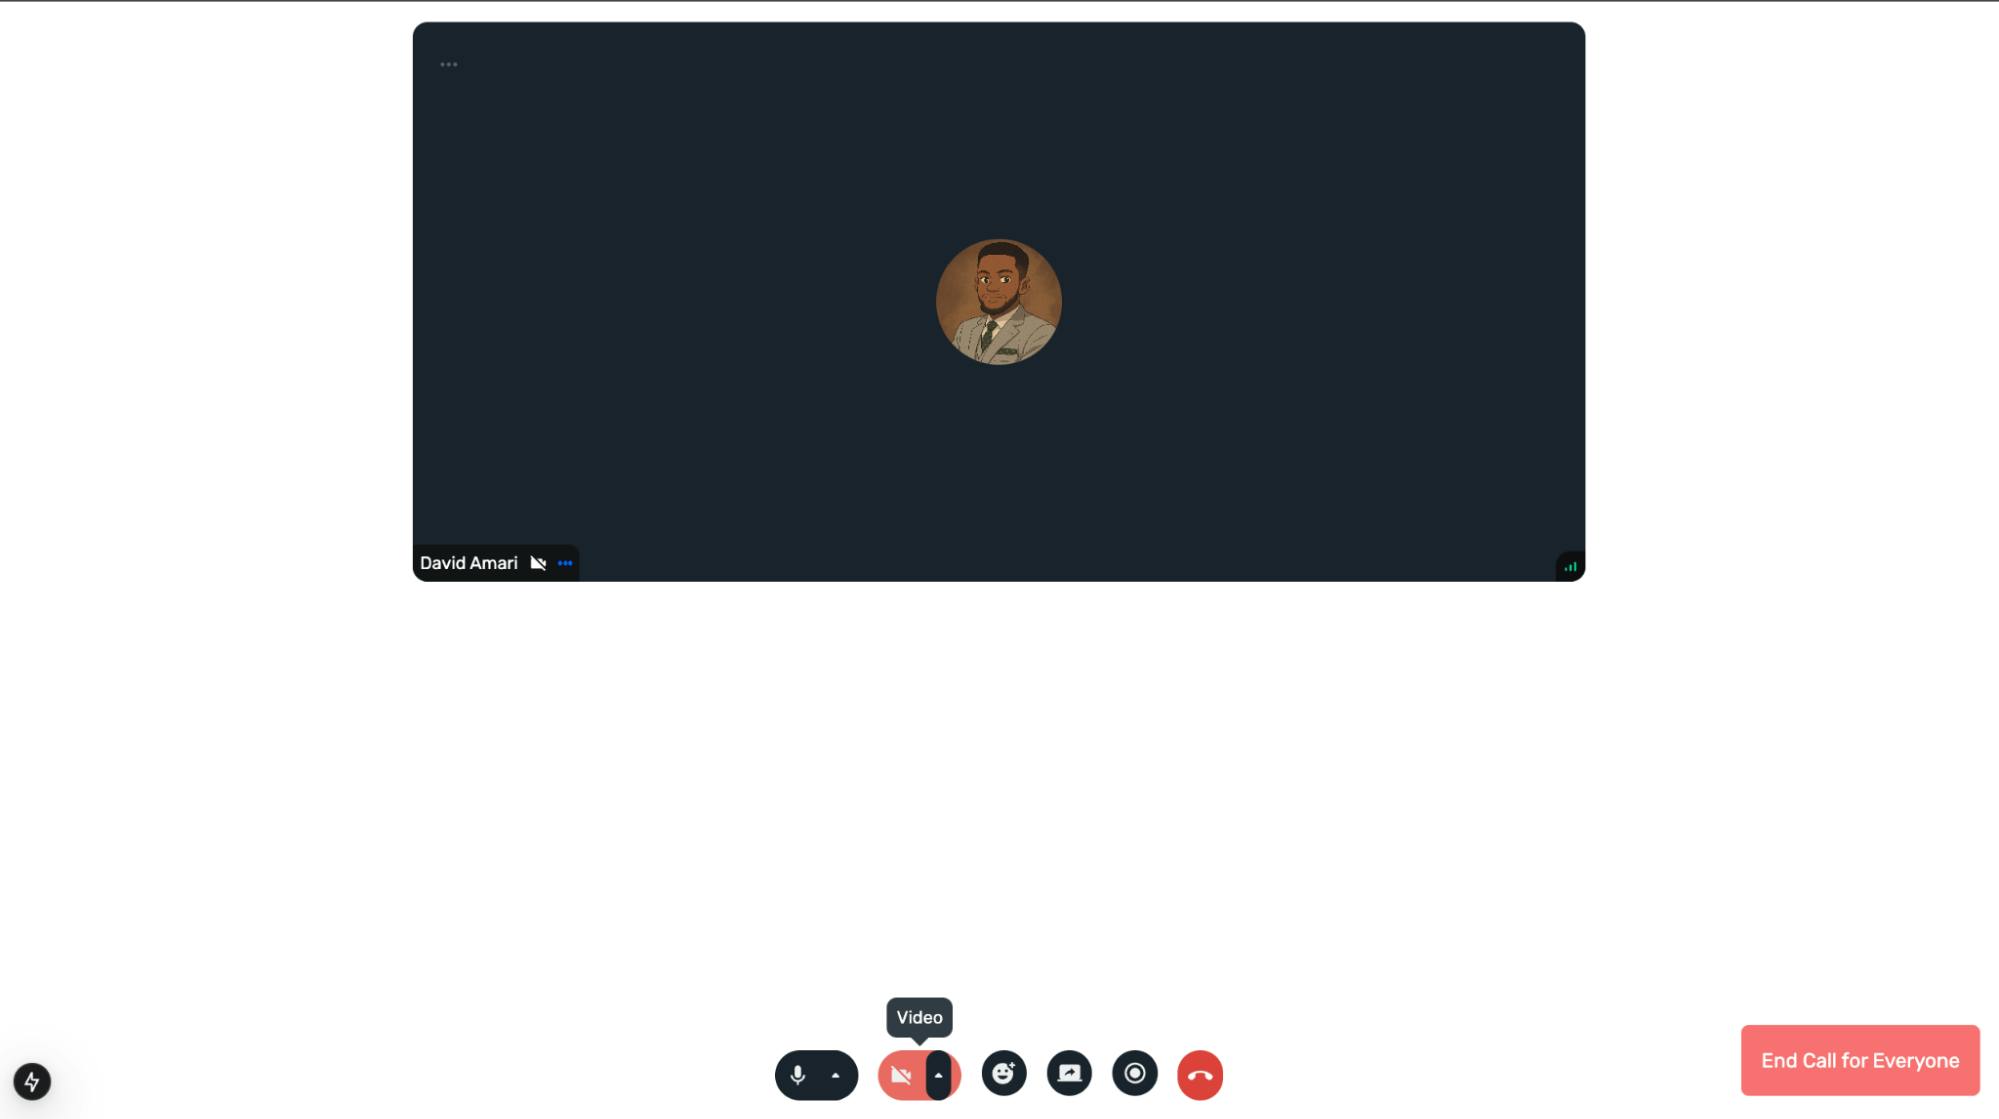
Stream Call UI Components
Here, you will learn how to create the call page, where the therapist and the client can communicate via video call, share screens, and seamlessly meet.
First, create an interview/[id]/page.tsx file within the (stream) folder and add copy the following code snippet into the file:
123456789101112131415161718192021222324252627282930313233343536"use client";
import { useGetCallById } from "@/app/(stream)/hooks/useGetCallById";
import { useParams } from "next/navigation";
import { StreamCall, StreamTheme } from "@stream-io/video-react-sdk";
import { Loader2 } from "lucide-react";
import { useState } from "react";
import SetUp from "../components/SetUp";
import CallRoom from "../components/CallRoom";

export default function CallPage() {
    const { id } = useParams<{ id: string }>();
    const { call, isCallLoading } = useGetCallById(id);
    const [isCallJoined, setIsCallJoined] = useState(false);

    if (!call || isCallLoading) {
        return (
            <main className="min-h-screen w-full items-center justify-center">
                <Loader2 className="animate-spin text-blue-500" />
            </main>
        );
    }

    return (
        <main className="min-h-screen w-full items-center justify-center">
            <StreamCall call={call}>
                <StreamTheme>
                    {isCallJoined ? (
                        <CallRoom call={call} />
                    ) : (
                        <SetUp call={call} setIsCallJoined={setIsCallJoined} />
                    )}
                </StreamTheme>
            </StreamCall>
        </main>
    );
}
In the code snippet above:
- The StreamCall component wraps the entire call interface and enables access to audio and video calling features. It receives the call object as a prop.
- The StreamTheme component provides styling for the call interface and allows theme customization.
- The isCallJoined state is initially set to false, which renders the SetUp component. Once its value is true, the CallRoom component is rendered to display the active call interface.
Add the SetUp component within the components folder and copy the following code snippet into the file:
1234567891011121314151617181920212223242526272829303132333435363738394041424344454647484950"use client";
import { Call } from "@stream-io/video-react-sdk";
import { useState } from "react";
import { Camera, CameraOff, Mic, MicOff } from "lucide-react";
import { toast } from "sonner";
import { VideoPreview, DeviceSettings } from "@stream-io/video-react-sdk";

export default function SetUp({
    call,
    setIsCallJoined,
}: {
    call: Call;
    setIsCallJoined: (value: boolean) => void;
}) {
    const [camEnabled, setCamEnabled] = useState<boolean>(false);
    const [micEnabled, setMicEnabled] = useState<boolean>(false);

    const handleEnableCamera = () => {
        if (!camEnabled) {
            call?.camera.enable();
            setCamEnabled(true);
            toast.success("Camera enabled");
        } else {
            call?.camera.disable();
            setCamEnabled(false);
            toast.error("Camera disabled");
        }
    };

    const handleEnableMic = () => {
        if (!micEnabled) {
            call?.microphone.enable();
            setMicEnabled(true);
            toast.success("Microphone enabled");
        } else {
            call?.microphone.disable();
            setMicEnabled(false);
            toast.error("Microphone disabled");
        }
    };

    const handleJoinCall = () => {
        call.join();
        setIsCallJoined(true);
    };

    return (
        {/** — 👉🏻 Call Set up elements 👈🏼 — */}
    );
}
The SetUp component provides a pre-call interface where users can test and toggle their camera and microphone settings before joining a Stream call. The handleJoinCall function allows call members to join the call.
Return the following UI elements from the component:
12345678910111213141516171819202122232425262728293031323334353637383940return (
    <main>
        <h2>
            {call.state.custom.description}
        </h2>
        <p>
            Please update your microphone and camera settings
        </p>

        <div>
            <VideoPreview className="w-full h-full mt-4" />
        </div>

        <div className="flex gap-4 my-4">
            <button onClick={handleEnableCamera}>
                {camEnabled ? (
                    <CameraOff className="text-blue-500" size={40} />
                ) : (
                    <Camera className="text-blue-500" size={40} />
                )}
            </button>

            <button onClick={handleEnableMic}>
                {micEnabled ? (
                    <MicOff className="text-blue-500" size={40} />
                ) : (
                    <Mic className="text-blue-500" size={40} />
                )}
            </button>

            <button>
                <DeviceSettings />
            </button>
        </div>

        <button onClick={handleJoinCall}>
            Join Call
        </button>
    </main>
);
Create the CallRoom component and copy the following code into the file:
12345678910111213141516171819202122232425262728293031323334353637383940414243444546474849505152"use client";
import { useState } from "react";
import { useRouter } from "next/navigation";
import {
    PaginatedGridLayout,
    SpeakerLayout,
    CallControls,
    Call,
    useCallStateHooks,
} from "@stream-io/video-react-sdk";
import { toast } from "sonner";

type CallLayoutType = "grid" | "speaker-left" | "speaker-right";

export default function CallRoom({ call }: { call: Call }) {
    const [layout, setLayout] = useState<CallLayoutType>("grid");
    const router = useRouter();

    const handleLeave = () => {
        if (confirm("Are you sure you want to leave the call?")) {
            router.push("/");
        }
    };

    const CallLayout = () => {
        switch (layout) {
            case "grid":
                return <PaginatedGridLayout />;
            case "speaker-right":
                return <SpeakerLayout participantsBarPosition="left" />;
            default:
                return <SpeakerLayout participantsBarPosition="right" />;
        }
    };

    return (
        <section className="relative min-h-screen w-full overflow-hidden pt-4">
            <div className="relative flex size-full items-center justify-center">
                <div className="flex size-full max-w-[1000px] items-center">
                    <CallLayout />
                </div>
                <div className="fixed bottom-0 flex w-full items-center justify-center gap-5">
                    <CallControls onLeave={handleLeave} />
                </div>

                <div className="fixed bottom-0 right-0 flex items-center justify-center gap-5 p-5">
                    <EndCallButton call={call} />
                </div>
            </div>
        </section>
    );
}
The CallLayout and CallControls components are rendered on the page, allowing users to communicate, share their screen, turn their camera on or off, and engage in conversations through reactions.
Finally, the EndCallButton component will be created to enable the host (therapist) to end the call for everyone.
1234567891011121314151617181920212223242526272829const EndCallButton = ({ call }: { call: Call }) => {
    const { useLocalParticipant } = useCallStateHooks();
    const localParticipant = useLocalParticipant();
    const router = useRouter();

    const participantIsHost =
        localParticipant &&
        call.state.createdBy &&
        localParticipant.userId === call.state.createdBy.id;

    if (!participantIsHost) return null;

    const handleEndCall = () => {
        call.endCall();
        toast("Call ended for everyone", {
            description: "The call has been ended for everyone",
        });
        router.push("/");
    };

    return (
        <button
            className="bg-red-500 text-white px-4 py-2 rounded-md mt-2"
            onClick={handleEndCall}
        >
            End Call for Everyone
        </button>
    );
};
The code snippet above ensures that only the call host can end the call for all participants. It first checks if the current user is the host before displaying the "End Call for Everyone" button.
How to Deploy a Next.js App with Firebase App Hosting
In this section, you’ll learn how to deploy and host the Next.js application using Firebase App Hosting. Firebase provides built-in support for Next.js and other popular web frameworks, making the deployment process straightforward.
Before we proceed, build the Next.js application using the command below to ensure no errors can prevent it from being packaged for deployment.
1npm run build
Next, install the Firebase CLI tool:
1npm install \-g firebase-tools
Log in to Firebase using your Google account by running the following command:
1firebase login
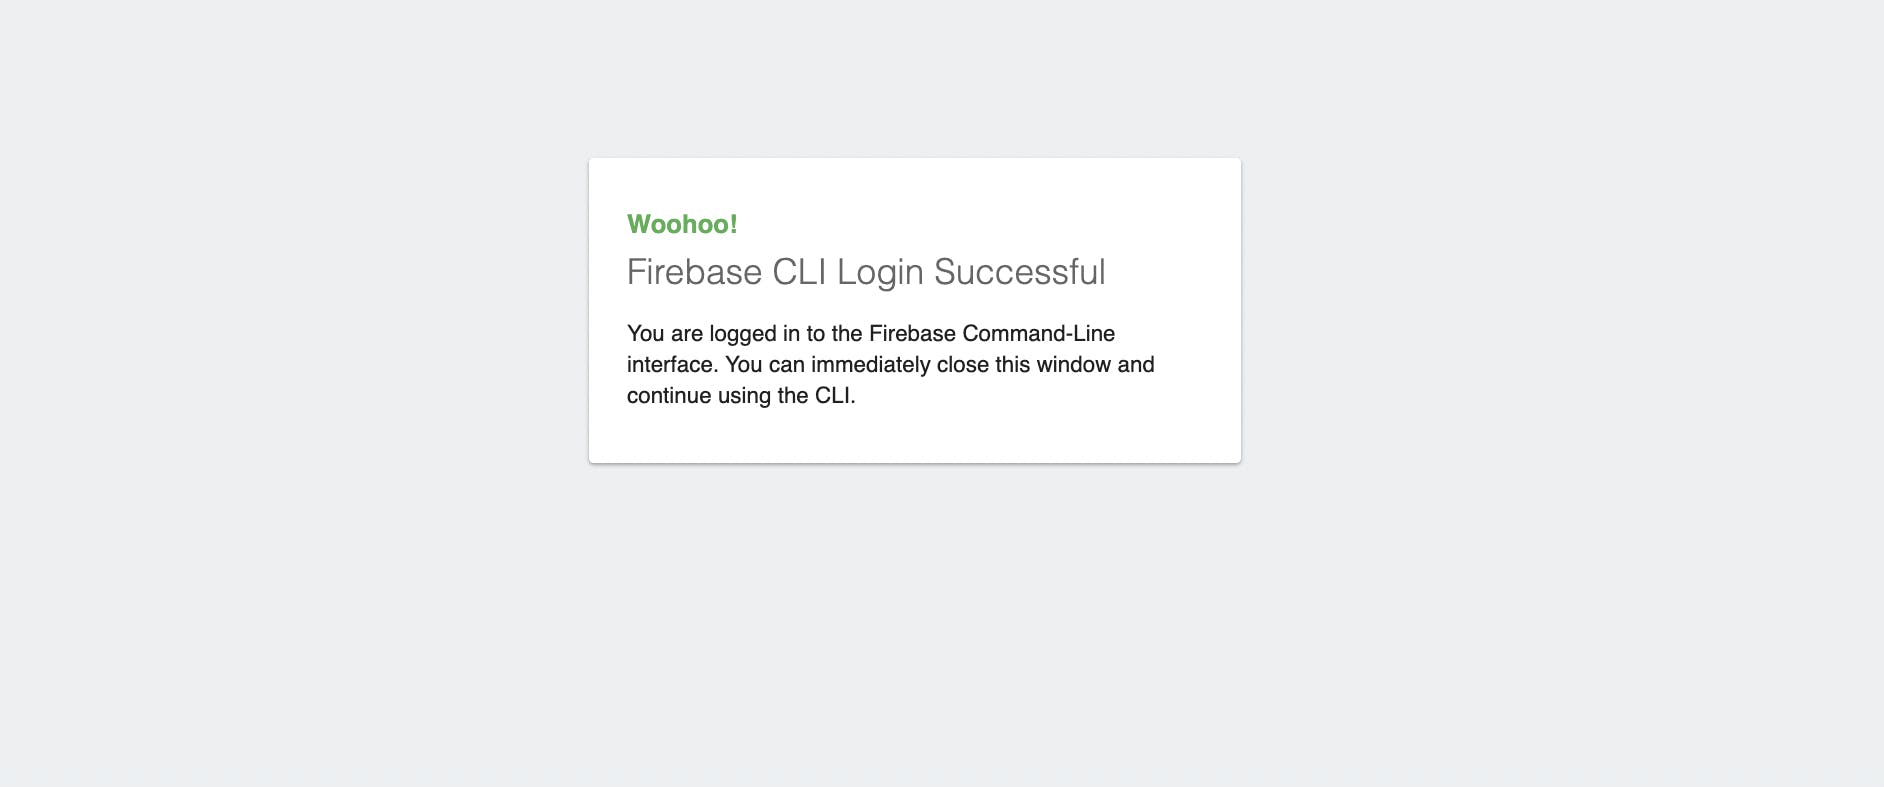
The command above connects your local machine to Firebase and grants you access to your Firebase projects.
After signing into your Firebase account, list your existing projects using the command below:
1firebase projects:list
If you encounter any issues, try logging out and signing back into your account.
1firebase logout
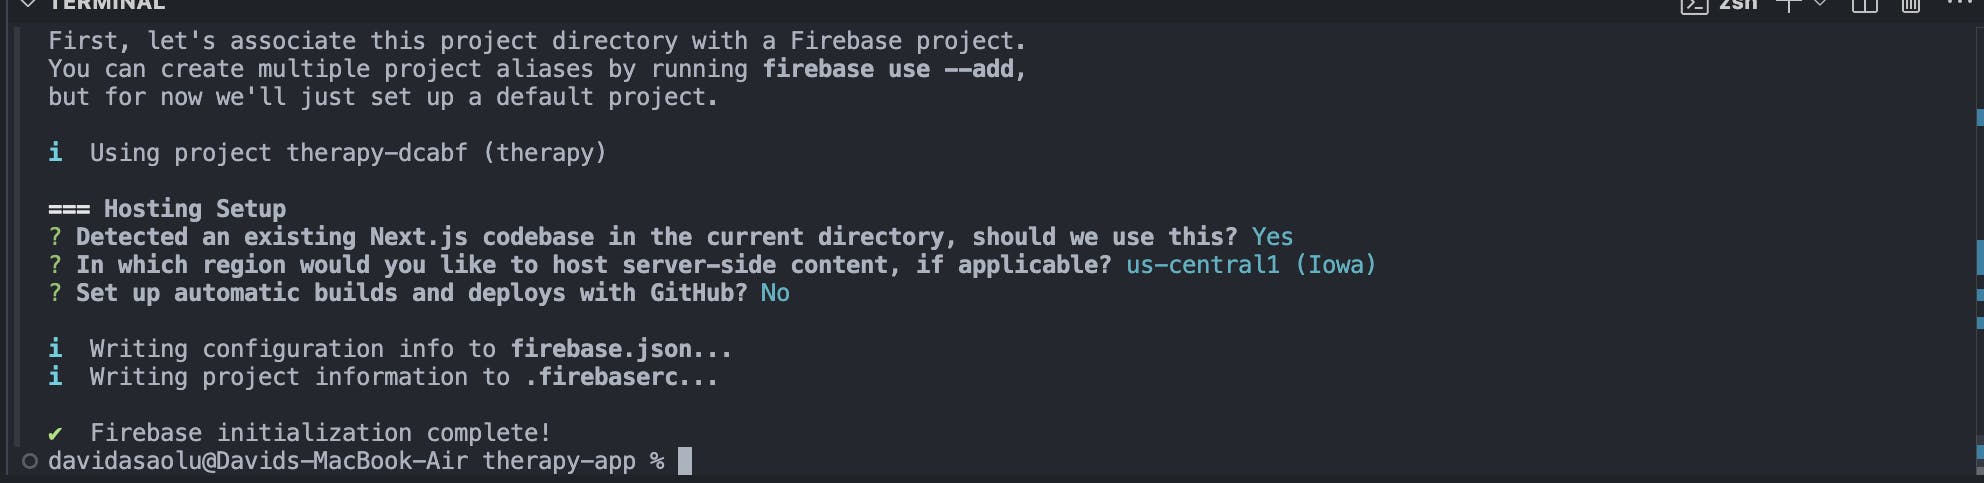
Next, run the following command to initialize Firebase in your Next.js project:
1firebase init
Select App Hosting as the Firebase feature for your project directory, then choose your existing Firebase project from the list.

Firebase automatically adds a firebase.json, apphosting.yaml, and a .firebaserc file to your Next.js project directory. These configuration files are essential for Firebase to effectively manage the deployment and hosting process.
The apphosting.yaml file allows you to pass environment variables declared in the .env.local file, enabling Firebase Hosting to access them during deployment.
Modify the apphosting.yaml file to contain the Stream API and Secret keys.
12345678910111213141516171819202122232425262728# Settings for Backend (on Cloud Run).
# See https://firebase.google.com/docs/app-hosting/configure#cloud-run
runConfig:
  minInstances: 0
  # maxInstances: 100
  # concurrency: 80
  # cpu: 1
  # memoryMiB: 512

# Environment variables and secrets.
env:
  # Configure environment variables.
  # See https://firebase.google.com/docs/app-hosting/configure#user-defined-environment
  - variable: NEXT_PUBLIC_STREAM_API_KEY
    value: <your_Stream_API_Key>
    availability:
      - BUILD
      - RUNTIME
  - variable: STREAM_SECRET_KEY
    value: <your_Stream_Secret_Key>
    availability:
      - BUILD
      - RUNTIME

  # Grant access to secrets in Cloud Secret Manager.
  # See https://firebase.google.com/docs/app-hosting/configure#secret-parameters
  # - variable: MY_SECRET
  #   secret: mySecretRef
Run the code snippet below to enable Firebase Web Frameworks preview.
1firebase experiments:enable webframeworks
Next, initialize Firebase App Hosting and follow the prompts.
1firebase init hosting
After completing the initialization process, deploy your application using the command below:
1firebase deploy

The code snippet above deploys the application using Firebase App Hosting and returns the hosting URL.
Congratulations. You've completed the project for this tutorial. The source code for this article is also available on GitHub.
Next Steps
So far, you've learned how to build a full-stack therapy marketplace app using Stream and Firebase. This platform allows users to connect with professional therapists, schedule virtual sessions, and communicate through real-time chat powered by Stream.
Here are some valuable resources to help you get started:
- How It’s Complicated is Advancing Mental Health Technology with Stream Video
- How to Level Up Your Patient and Provider Telehealth App
- Stream JavaScript Video Calling Tutorial
- Stream Chat Documentation
- Stream Video and Audio Documentation
Thank you for reading.