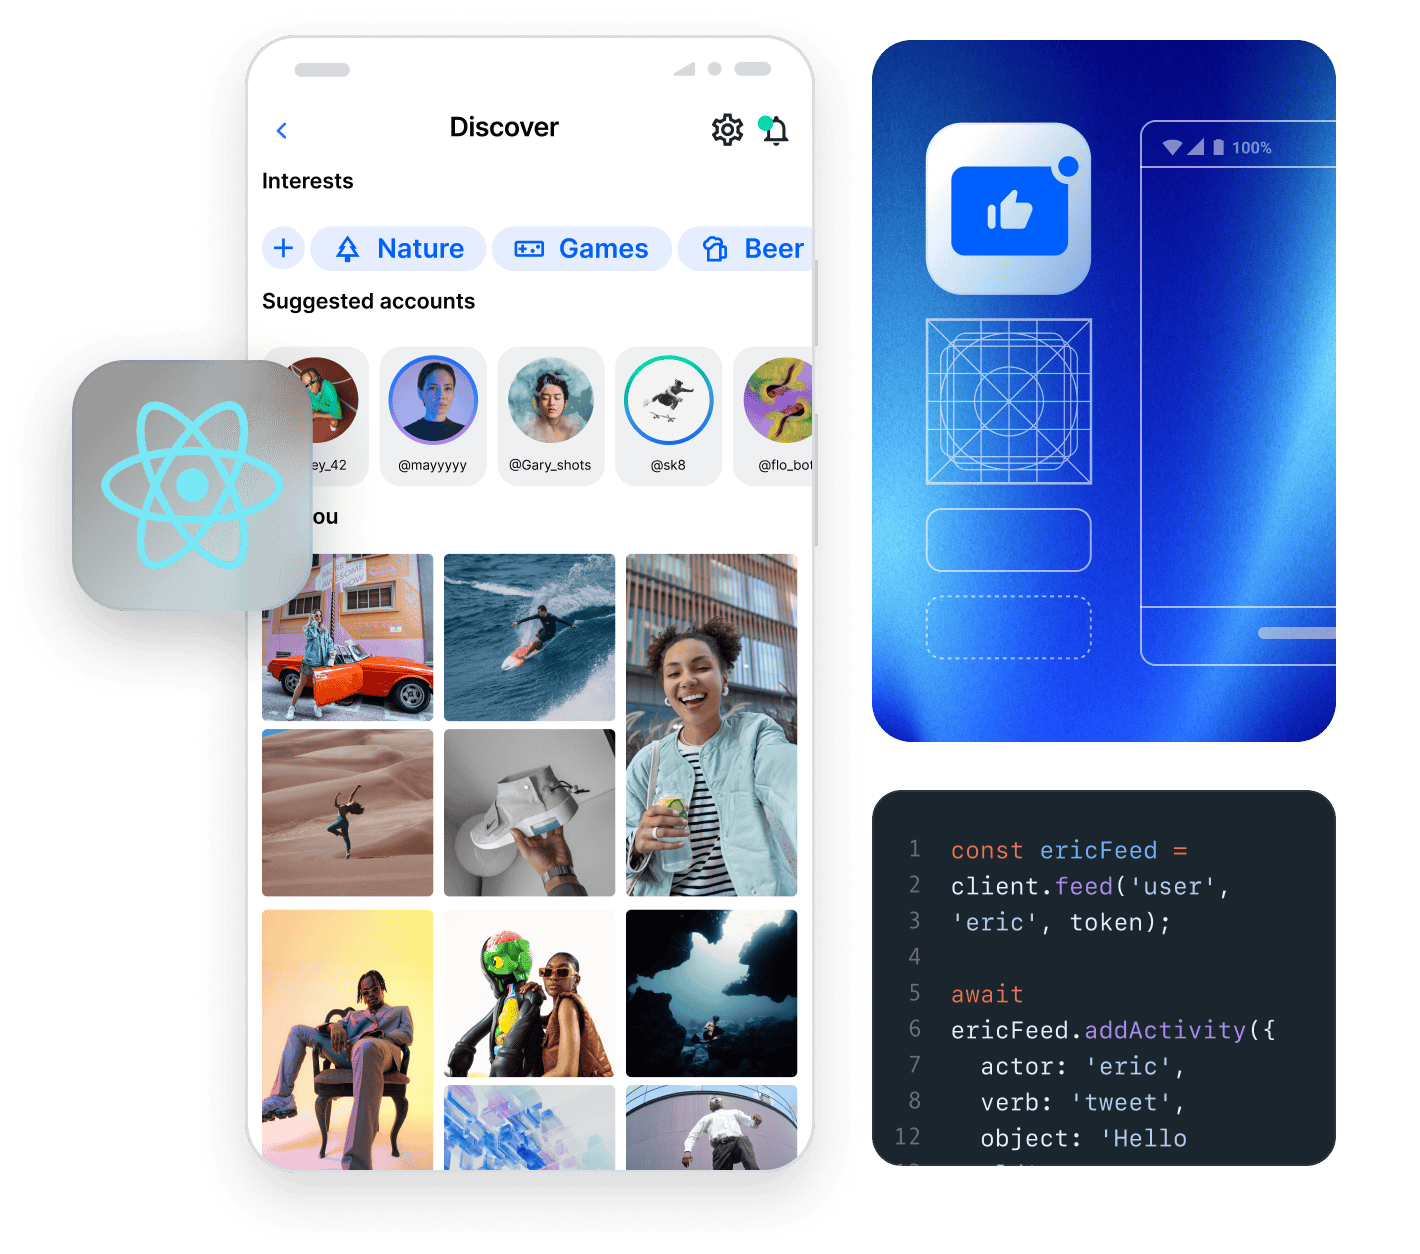
Stream's Activity Feed V3 SDK enables teams of all sizes to build scalable activity feeds. This SDK is designed to enable you to get a feed application up and running quickly and efficiently while supporting customization for complex use cases.
In this tutorial, we will use Stream's Activity Feed V3 SDK for React Native to:
- Set up a simple activity feed application and connect it to Stream's Activity Feed V3 SDK
- Create user and timeline feeds
- Add activities, reactions and comments
- Explore new content with "For you" feed
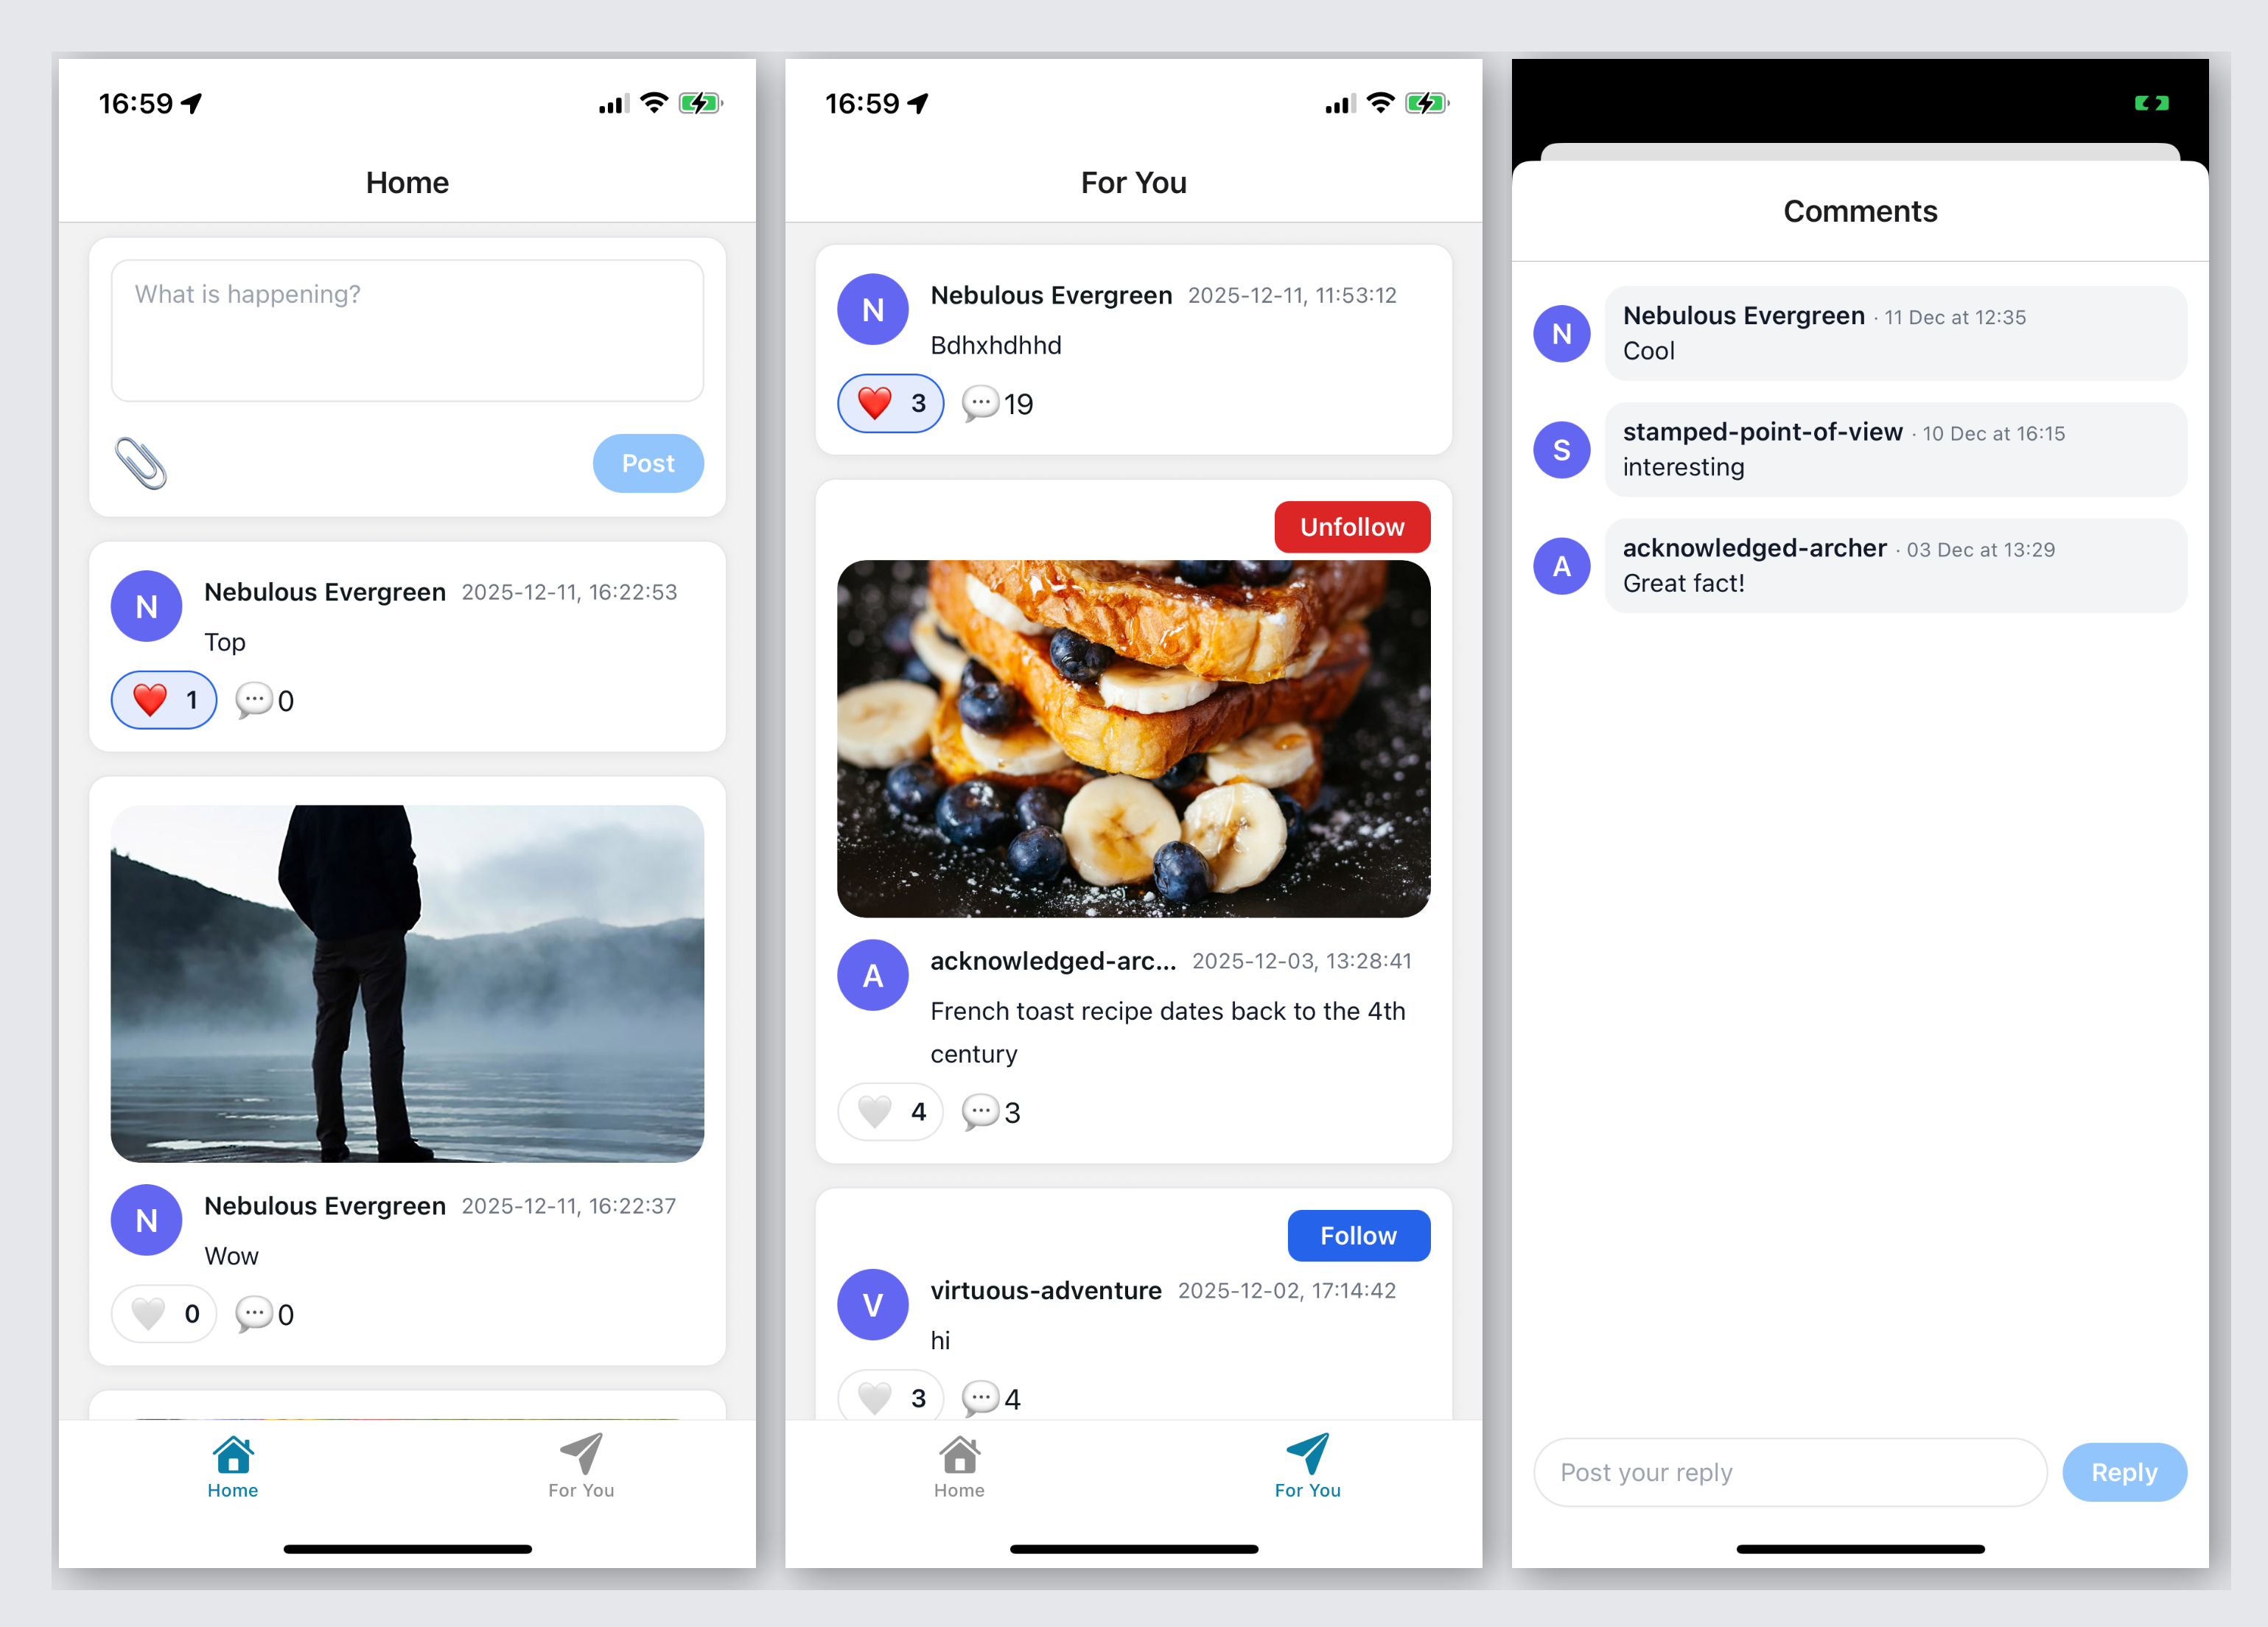
Here is a quick visual overview of the application we're building:
Project Setup and Installation
To follow the tutorial make sure you have installed:
To follow the tutorial you need to clone or download the starter application that has some boilerplate code:
We'll start the tutorial from the initial commit, if you wish to see the finished source code, it's the latest commit in the stream-feeds-react-native-tutorial repository.
123456# or download zip from https://github.com/GetStream/stream-feeds-react-tutorial/releases/tag/initial-commit
git clone git@github.com:GetStream/stream-feeds-react-native-tutorial.git
cd stream-feeds-react-native-tutorial
git checkout initial-commit

yarn install
Install Stream's Feeds v3 React Native SDK:
1yarn add @stream-io/feeds-react-native-sdk
as well as its mandatory dependencies:
1yarn add @react-native-community/netinfo
The tutorial application is built using Expo and uses Expo 54, the SDK's version support can be found in the Installation guide
To make the tutorial as easy as possible, we generated credentials for you to pick up and use. These credentials consist of:
API_KEY- an API key that is used to identify your Stream application by our serversidandtoken- authorization information of the current username- optional, used as a display name of the current user
To start using credentials, replace the contents of the ./user.ts file:
1234567export const API_KEY = 'REPLACE_WITH_API_KEY';

export const CURRENT_USER = {
  id: 'REPLACE_WITH_USER_ID',
  name: 'REPLACE_WITH_USER_NAME',
  token: 'REPLACE_WITH_TOKEN',
};
Security Note: In production applications, never expose your API secret or generate tokens on the client side. Tokens should always be generated on your backend server to ensure security. The credentials in this tutorial are for development purposes only.
Finally, we can run the application with:
1234# ios
yarn run ios
# android
yarn run android
For now, the application doesn't do much, but this will change as we complete the tutorial step by step.
Connect to the Stream API
Let's create and connect the demo user to the Stream API.
The starter application you cloned has all necessary files, but they're empty. You can update their content from the code snippets in the tutorial. No need to create any additional files.
To achieve this, we're using the useCreateFeedsClient hook and StreamFeeds context provider to make sure all components have access to the client instance. Let's update app/_layout.tsx:
1234567891011121314151617181920212223242526272829303132333435363738394041424344454647484950import {
  DarkTheme,
  DefaultTheme,
  ThemeProvider,
} from "@react-navigation/native";
import { Stack } from "expo-router";
import { StatusBar } from "expo-status-bar";
import "react-native-reanimated";
import { useColorScheme } from "@/hooks/use-color-scheme";
import {
  StreamFeeds,
  useCreateFeedsClient,
} from "@stream-io/feeds-react-native-sdk";
import { API_KEY, CURRENT_USER } from "@/user";

export const unstable_settings = {
  anchor: "(tabs)",
};

export default function RootLayout() {
  const colorScheme = useColorScheme();

  const client = useCreateFeedsClient({
    apiKey: API_KEY,
    tokenOrProvider: CURRENT_USER.token,
    userData: {
      id: CURRENT_USER.id,
      name: CURRENT_USER.name,
    },
  });

  if (!client) {
    return null;
  }

  return (
    <StreamFeeds client={client}>
      <ThemeProvider value={colorScheme === "dark" ? DarkTheme : DefaultTheme}>
        <Stack>
          <Stack.Screen name="(tabs)" options={{ headerShown: false }} />
          <Stack.Screen
            name="comments-modal"
            options={{ presentation: "modal", title: "Comments" }}
          />
        </Stack>
        <StatusBar style="auto" />
      </ThemeProvider>
    </StreamFeeds>
  );
}
For simplicity, the tutorial doesn't handle errors. In a real application, you should always make sure to handle errors from API requests. The Error handling guide provides more information on this topic.
Creating Feeds
In this step we're creating a few feeds using built-in feed groups. Before we dive into the code, let's understand the core concepts:
- User Feed: A feed that contains all activities (posts) created by a specific user. Each user has their own user feed (e.g.,
user:alice). - Timeline Feed: A feed that contains activities from all the feeds that you follow. When you follow someone's user feed, their activities automatically appear in your timeline feed (this concept is called fan-out).
- Follow Relationship: When you follow a user's feed, your timeline feed subscribes to their user feed. This means new activities from followed users automatically appear in your timeline.
Let's see what the concept looks like in code (no need to add this to your app yet):
12345678910111213// SDK hooks for accessing client and connected user
const client = useFeedsClient();
const connectedUser = useClientConnectedUser();

// Using user id for the feed id, but you can use any id you want to
const ownFeed = client.feed('user', connectedUser.id);
await ownFeed.getOrCreate({
  // Turns on real-time updates
  watch: true
});

const ownTimeline = client.feed('timeline', connectedUser.id);
await ownTimeline.getOrCreate({watch: true});
To ensure our own posts are part of our timeline, we need to set up the follow relationship:
1234567// You typically create these relationships on your server-side, we do this here for simplicity
const alreadyFollows = ownFeed.currentState.own_follows?.find(
  (follow) => follow.source_feed.feed === ownTimeline.feed,
);
if (!alreadyFollows) {
  ownTimeline.follow(ownFeed);
}
To make sure the user's feeds are easily accessible throughout the application, we create a React context provider for initializing feeds (contexts/own-feeds-context.tsx) and add this to app/_layout.tsx. The full code containing the React boilerplate can be added like so:
123456789101112131415161718192021222324252627282930313233343536373839404142434445464748495051525354555657585960616263646566import {
  Feed,
  useClientConnectedUser,
  useFeedsClient,
} from "@stream-io/feeds-react-native-sdk";

import {
  createContext,
  PropsWithChildren,
  useContext,
  useEffect,
  useState,
} from "react";

type OwnFeedsContextValue = {
  ownFeed: Feed | undefined;
  ownTimeline: Feed | undefined;
};

const OwnFeedsContext = createContext<OwnFeedsContextValue>({
  ownFeed: undefined,
  ownTimeline: undefined,
});

export const OwnFeedsContextProvider = ({ children }: PropsWithChildren) => {
  const [ownFeed, setOwnFeed] = useState<Feed>();
  const [ownTimeline, setOwnTimeline] = useState<Feed>();
  const client = useFeedsClient();
  const connectedUser = useClientConnectedUser();

  useEffect(() => {
    if (!connectedUser || !client) return;

    const feed = client.feed("user", connectedUser.id);

    setOwnFeed(feed);

    const timeline = client.feed("timeline", connectedUser.id);

    setOwnTimeline(timeline);

    Promise.all([
      feed.getOrCreate({ watch: true }),
      timeline.getOrCreate({ watch: true }),
    ]).then(() => {
      // You typically create these relationships on your server-side, we do this here for simplicity
      const alreadyFollows = feed.currentState.own_follows?.find(
        (follow) => follow.source_feed.feed === timeline.feed,
      );
      if (!alreadyFollows) timeline.follow(feed);
    });

    return () => {
      setOwnFeed(undefined);
      setOwnTimeline(undefined);
    };
  }, [connectedUser, client]);

  return (
    <OwnFeedsContext.Provider value={{ ownFeed, ownTimeline }}>
      {children}
    </OwnFeedsContext.Provider>
  );
};

export const useOwnFeedsContext = () => useContext(OwnFeedsContext);
12345678910111213141516171819202122232425262728293031323334353637383940414243444546474849505152535455import {
  DarkTheme,
  DefaultTheme,
  ThemeProvider,
} from "@react-navigation/native";
import { Stack } from "expo-router";
import { StatusBar } from "expo-status-bar";
import "react-native-reanimated";
import { useColorScheme } from "@/hooks/use-color-scheme";
import {
  StreamFeeds,
  useCreateFeedsClient,
} from "@stream-io/feeds-react-native-sdk";
import { API_KEY, CURRENT_USER } from "@/user";
import { OwnFeedsContextProvider } from "@/contexts/own-feeds-context";

export const unstable_settings = {
  anchor: "(tabs)",
};

export default function RootLayout() {
  const colorScheme = useColorScheme();

  const client = useCreateFeedsClient({
    apiKey: API_KEY,
    tokenOrProvider: CURRENT_USER.token,
    userData: {
      id: CURRENT_USER.id,
      name: CURRENT_USER.name,
    },
  });

  if (!client) {
    return null;
  }

  return (
    <StreamFeeds client={client}>
      <OwnFeedsContextProvider>
        <ThemeProvider
          value={colorScheme === "dark" ? DarkTheme : DefaultTheme}
        >
          <Stack>
            <Stack.Screen name="(tabs)" options={{ headerShown: false }} />
            <Stack.Screen
              name="comments-modal"
              options={{ presentation: "modal", title: "Comments" }}
            />
          </Stack>
          <StatusBar style="auto" />
        </ThemeProvider>
      </OwnFeedsContextProvider>
    </StreamFeeds>
  );
}
Activity List
Activity Feeds SDKs don't have UI components.
Now that we created feeds, we can create UI components to display the activities. To achieve this we're creating the following components:
Activitycomponent - this will be very simple for now, and we'll extend it during the tutorialActivityListcomponent to display activities, and paginate- We display the user's
timelinefeed on theHomepage
The
Activitycomponent for now contains the most basic activity information (for exampleactivity.text) and some HTML code to create a layout we can extend with new features.
123456789101112131415161718192021222324252627282930313233343536373839404142434445464748495051525354555657585960616263646566676869707172737475767778798081828384858687888990919293949596979899100101102103104105106107import React from "react";
import { StyleSheet } from "react-native";
import { ThemedView } from "@/components/themed-view";
import { ThemedText } from "@/components/themed-text";
import type { ActivityResponse } from "@stream-io/feeds-react-native-sdk";

type ActivityProps = {
  activity: ActivityResponse;
};

export const Activity = ({ activity }: ActivityProps) => {
  const name = activity.user?.name || activity.user?.id || "Unknown";
  const initial = name.charAt(0).toUpperCase();

  const createdAt =
    activity.created_at instanceof Date
      ? activity.created_at
      : new Date(activity.created_at);

  const createdAtLabel = createdAt.toLocaleString();

  return (
    <ThemedView style={styles.card}>
      <ThemedView style={styles.row}>
        <ThemedView style={styles.avatarWrapper}>
          <ThemedView style={styles.avatar}>
            <ThemedText style={styles.avatarText}>{initial}</ThemedText>
          </ThemedView>
        </ThemedView>

        <ThemedView style={styles.content}>
          <ThemedView style={styles.headerRow}>
            <ThemedText style={styles.name} numberOfLines={1}>
              {name}
            </ThemedText>
            <ThemedText style={styles.timestamp} numberOfLines={1}>
              {createdAtLabel}
            </ThemedText>
          </ThemedView>

          {activity.text ? (
            <ThemedText style={styles.text}>{activity.text}</ThemedText>
          ) : null}
        </ThemedView>
      </ThemedView>
    </ThemedView>
  );
};

const styles = StyleSheet.create({
  card: {
    width: "100%",
    padding: 12,
    borderRadius: 12,
    backgroundColor: "#FFFFFF",
    borderWidth: 1,
    borderColor: "#E5E7EB",
    shadowColor: "#000",
    shadowOffset: { width: 0, height: 1 },
    shadowOpacity: 0.05,
    shadowRadius: 3,
    elevation: 2,
  },
  row: {
    flexDirection: "row",
    alignItems: "flex-start",
  },
  avatarWrapper: {
    marginRight: 12,
  },
  avatar: {
    width: 40,
    height: 40,
    borderRadius: 20,
    backgroundColor: "#6366F1",
    alignItems: "center",
    justifyContent: "center",
  },
  avatarText: {
    color: "#FFFFFF",
    fontSize: 18,
    fontWeight: "600",
  },
  content: {
    flex: 1,
  },
  headerRow: {
    flexDirection: "row",
    alignItems: "center",
    marginBottom: 4,
  },
  name: {
    fontSize: 14,
    fontWeight: "600",
    marginRight: 8,
    maxWidth: "50%",
  },
  timestamp: {
    fontSize: 12,
    color: "#6B7280",
    flexShrink: 1,
  },
  text: {
    fontSize: 14,
    color: "#111827",
  },
});
123456789101112131415161718192021222324252627282930313233343536373839404142434445464748495051525354555657585960616263646566676869707172737475767778798081828384858687888990919293949596979899100101102103import React, { useCallback, useState } from "react";
import {
  View,
  Text,
  FlatList,
  Pressable,
  StyleSheet,
  ActivityIndicator,
} from "react-native";
import type { ActivityResponse } from "@stream-io/feeds-react-native-sdk";
import { useFeedActivities } from "@stream-io/feeds-react-native-sdk";
import { Activity } from "@/components/activity/Activity";

const renderItem = ({ item }: { item: ActivityResponse }) => {
  return <Activity activity={item} />;
};

const keyExtractor = (item: ActivityResponse) => item.id;

const Separator = () => <View style={styles.separator} />;

export const ActivityList = () => {
  const { activities, loadNextPage, has_next_page, is_loading } =
    useFeedActivities();
  const hasActivities = activities?.length && activities.length > 0;

  const ListFooterComponent = useCallback(
    () =>
      is_loading && hasActivities && has_next_page ? (
        <ActivityIndicator />
      ) : null,
    [is_loading, has_next_page, hasActivities],
  );

  if (is_loading && (!activities || activities?.length === 0)) {
    return (
      <View style={styles.emptyContainer}>
        <ActivityIndicator />
      </View>
    );
  }

  if (!activities || activities.length === 0) {
    return (
      <View style={styles.emptyContainer}>
        <Text style={styles.emptyText}>No posts yet</Text>
      </View>
    );
  }

  return (
    <FlatList
      data={activities}
      keyExtractor={keyExtractor}
      renderItem={renderItem}
      contentContainerStyle={styles.listContent}
      onEndReachedThreshold={0.2}
      onEndReached={loadNextPage}
      ItemSeparatorComponent={Separator}
      ListFooterComponent={ListFooterComponent}
    />
  );
};

const styles = StyleSheet.create({
  listContent: {
    flexGrow: 1,
    paddingHorizontal: 16,
    paddingVertical: 12,
  },
  separator: {
    height: 12,
  },
  footer: {
    marginTop: 12,
    alignItems: "center",
    justifyContent: "center",
  },
  loadMoreButton: {
    paddingHorizontal: 16,
    paddingVertical: 10,
    borderRadius: 999,
    backgroundColor: "#2563EB",
  },
  loadMoreButtonPressed: {
    opacity: 0.7,
  },
  loadMoreText: {
    color: "#FFFFFF",
    fontWeight: "600",
    fontSize: 14,
  },
  emptyContainer: {
    flex: 1,
    paddingVertical: 32,
    alignItems: "center",
    justifyContent: "center",
  },
  emptyText: {
    fontSize: 14,
    color: "#6B7280",
  },
});
1234567891011121314151617181920212223242526272829import React from "react";
import { View, StyleSheet } from "react-native";
import { StreamFeed } from "@stream-io/feeds-react-native-sdk";
import { useOwnFeedsContext } from "@/contexts/own-feeds-context";
import { ActivityList } from "@/components/activity/ActivityList";

export default () => {
  const { ownTimeline } = useOwnFeedsContext();

  if (!ownTimeline) {
    return null;
  }

  return (
    <View style={styles.container}>
      <StreamFeed feed={ownTimeline}>
        <ActivityList />
      </StreamFeed>
    </View>
  );
};

const styles = StyleSheet.create({
  container: {
    flex: 1,
    alignItems: "stretch",
    justifyContent: "flex-start",
  },
});
The activity list is currently empty. We'll change that in the next step. Before doing that, let's recap the important parts from this step:
- We're using the
StreamFeedcontext to makeownTimelineaccessible to all components in a given subtree - Components then can use
useFeedContextanduseFeedActivitieshooks to access the data they need - You can find the full list of feed state hooks on the Contexts and Hooks page of the documentation
Activity Composer
Let's create an ActivityComposer component to be able to post, and add it to the Home page:
As mentioned previously: users post on their
userfeed, and it automatically appears in theirtimelinefeed via follow relationship.
123456789101112131415161718192021222324252627282930313233343536373839404142434445464748495051525354555657585960616263646566676869707172737475767778798081828384858687888990919293949596979899100101102103104105106107108109110111112113114115import React, { useCallback, useState } from "react";
import {
  View,
  Text,
  TextInput,
  StyleSheet,
  Pressable,
  Platform,
} from "react-native";
import { useFeedContext } from "@stream-io/feeds-react-native-sdk";

export const ActivityComposer = () => {
  const feed = useFeedContext();
  const [newText, setNewText] = useState("");

  const canPost = newText.trim().length > 0;

  const sendActivity = useCallback(async () => {
    if (!feed || !canPost) return;

    await feed.addActivity({
      text: newText,
      type: "post",
    });

    setNewText("");
  }, [feed, newText, canPost]);

  return (
    <View style={styles.card}>
      <View style={styles.inner}>
        <TextInput
          style={styles.input}
          multiline
          placeholder="What is happening?"
          value={newText}
          onChangeText={setNewText}
          textAlignVertical="top"
          underlineColorAndroid="transparent"
          placeholderTextColor="#9CA3AF"
        />
        <View style={styles.footerRow}>
          <Pressable
            onPress={sendActivity}
            disabled={!canPost}
            style={({ pressed }) => [
              styles.button,
              !canPost && styles.buttonDisabled,
              pressed && canPost && styles.buttonPressed,
            ]}
          >
            <Text style={styles.buttonText}>Post</Text>
          </Pressable>
        </View>
      </View>
    </View>
  );
};

const styles = StyleSheet.create({
  card: {
    padding: 12,
    borderRadius: 12,
    marginHorizontal: 16,
    marginTop: 8,
    backgroundColor: "#FFFFFF",
    borderWidth: 1,
    borderColor: "#E5E7EB",
    shadowColor: "#000",
    shadowOffset: { width: 0, height: 1 },
    shadowOpacity: 0.05,
    shadowRadius: 3,
    elevation: 2,
  },
  inner: {
    width: "100%",
    flexDirection: "column",
    gap: 8,
  },
  input: {
    minHeight: 80,
    maxHeight: 160,
    borderRadius: 10,
    borderWidth: 1,
    borderColor: "#E5E7EB",
    paddingHorizontal: 12,
    paddingVertical: Platform.OS === "ios" ? 10 : 8,
    fontSize: 14,
    color: "#111827",
  },
  footerRow: {
    width: "100%",
    marginTop: 8,
    flexDirection: "row",
    justifyContent: "flex-end",
    alignItems: "center",
  },
  button: {
    paddingHorizontal: 16,
    paddingVertical: 8,
    borderRadius: 999,
    backgroundColor: "#2563EB",
  },
  buttonPressed: {
    opacity: 0.8,
  },
  buttonDisabled: {
    backgroundColor: "#93C5FD",
  },
  buttonText: {
    color: "#FFFFFF",
    fontWeight: "600",
    fontSize: 14,
  },
});
123456789101112131415161718192021222324252627282930313233import React from "react";
import { View, StyleSheet } from "react-native";
import { StreamFeed } from "@stream-io/feeds-react-native-sdk";
import { useOwnFeedsContext } from "@/contexts/own-feeds-context";
import { ActivityList } from "@/components/activity/ActivityList";
import { ActivityComposer } from "@/components/activity/ActivityComposer";

export default () => {
  const { ownTimeline, ownFeed } = useOwnFeedsContext();

  if (!ownTimeline || !ownFeed) {
    return null;
  }

  return (
    <View style={styles.container}>
      <StreamFeed feed={ownFeed}>
        <ActivityComposer />
      </StreamFeed>
      <StreamFeed feed={ownTimeline}>
        <ActivityList />
      </StreamFeed>
    </View>
  );
};

const styles = StyleSheet.create({
  container: {
    flex: 1,
    alignItems: "stretch",
    justifyContent: "flex-start",
  },
});
Go ahead and post something! It'll automatically appear on your timeline.
Explore Page
The "Explore" page uses the foryou feed to explore new content by showing popular activities.
The layout is similar to the Home page, we're reusing the ActivityList component, but there is no composer. Code for Explore.tsx:
12345678910111213141516171819202122232425262728293031323334import {
  useFeedsClient,
  useClientConnectedUser,
  StreamFeed,
} from "@stream-io/feeds-react-native-sdk";
import { useEffect, useMemo } from "react";
import { ActivityList } from "@/components/activity/ActivityList";

export default () => {
  const client = useFeedsClient();
  const currentUser = useClientConnectedUser();
  const feed = useMemo(() => {
    if (!currentUser?.id || !client) {
      return undefined;
    }
    return client.feed("foryou", currentUser.id);
  }, [client, currentUser?.id]);

  useEffect(() => {
    if (feed) {
      feed.getOrCreate({ limit: 10 });
    }
  }, [feed]);

  if (!feed) {
    return null;
  }

  return (
    <StreamFeed feed={feed}>
      <ActivityList />
    </StreamFeed>
  );
};
You may have noticed that we don't use
watch: truefor this feed. This is because theforyoufeed uses the "popular" activity selector, which doesn't support real-time updates. Addingwatch:truewon't cause an error, but does nothing here. The documentation details how real-time updates work.
In the next step, we're adding a follow button, so we can follow users from the foryou page.
Follow and Unfollow
To implement following and unfollowing feeds we're adding:
FollowButtoncomponent- Extending the
Activitycomponent with the follow/unfollow button
12345678910111213141516171819202122232425262728293031323334353637383940414243444546474849505152535455565758596061626364656667686970717273747576777879808182838485868788899091929394import React, { useCallback, useMemo } from "react";
import { Pressable, Text, StyleSheet } from "react-native";
import { useOwnFeedsContext } from "@/contexts/own-feeds-context";
import {
  FeedResponse,
  FollowResponse,
  useFeedsClient,
  useOwnFollows,
} from "@stream-io/feeds-react-native-sdk";

export const FollowButton = ({
  feed: activityFeed,
}: {
  feed?: FeedResponse;
}) => {
  const client = useFeedsClient();
  const feed = useMemo(() => {
    if (!activityFeed) return;

    return client?.feed(activityFeed.group_id, activityFeed.id);
  }, [client, activityFeed]);
  const { ownTimeline } = useOwnFeedsContext();

  const { own_follows: ownFollows } =
    useOwnFollows(feed) ?? {};
  const ownFollow = useMemo(
    () =>
      ownFollows &&
      ownFollows.find(
        (follow: FollowResponse) => follow.source_feed.group_id === "timeline",
      ),
    [ownFollows],
  );
  const isFollowing = ownFollow?.status === "accepted";

  const follow = useCallback(async () => {
    await ownTimeline?.follow(feed!.feed);

    // Reload to pull new activities
    await ownTimeline?.getOrCreate({ watch: true });
  }, [feed, ownTimeline]);

  const unfollow = useCallback(async () => {
    await ownTimeline?.unfollow(feed!.feed);

    // Reload to remove activities
    await ownTimeline?.getOrCreate({ watch: true });
  }, [feed, ownTimeline]);

  const toggleFollow = useCallback(() => {
    if (isFollowing) unfollow();
    else follow();
  }, [isFollowing, follow, unfollow]);

  return (
    <Pressable
      onPress={toggleFollow}
      style={({ pressed }) => [
        styles.button,
        isFollowing ? styles.unfollow : styles.follow,
        pressed && styles.pressed,
      ]}
    >
      <Text style={styles.buttonText}>
        {isFollowing ? "Unfollow" : "Follow"}
      </Text>
    </Pressable>
  );
};

const styles = StyleSheet.create({
  button: {
    paddingHorizontal: 14,
    paddingVertical: 6,
    borderRadius: 8,
    alignItems: "center",
    justifyContent: "center",
    minWidth: 80,
  },
  follow: {
    backgroundColor: "#2563EB",
  },
  unfollow: {
    backgroundColor: "#DC2626",
  },
  pressed: {
    opacity: 0.8,
  },
  buttonText: {
    color: "white",
    fontWeight: "600",
    fontSize: 14,
  },
});
12345678910111213141516171819202122232425262728293031323334353637383940414243444546474849505152535455565758596061626364656667import React from "react";
import { StyleSheet } from "react-native";
import { ThemedView } from "@/components/themed-view";
import { ThemedText } from "@/components/themed-text";
import type { ActivityResponse } from "@stream-io/feeds-react-native-sdk";
import { useClientConnectedUser } from "@stream-io/feeds-react-native-sdk";
import { FollowButton } from "@/components/follows/follow-button";

type ActivityProps = {
  activity: ActivityResponse;
};

export const Activity = ({ activity }: ActivityProps) => {
  const name = activity.user?.name || activity.user?.id || "Unknown";
  const initial = name.charAt(0).toUpperCase();

  const createdAt =
    activity.created_at instanceof Date
      ? activity.created_at
      : new Date(activity.created_at);

  const createdAtLabel = createdAt.toLocaleString();

  const connectedUser = useClientConnectedUser();

  return (
    <ThemedView style={styles.card}>
      <ThemedView style={styles.actionsRow}>
        {activity.current_feed?.feed !== `user:${connectedUser?.id}` && (
          <FollowButton feed={activity.current_feed} />
        )}
      </ThemedView>
      <ThemedView style={styles.row}>
        <ThemedView style={styles.avatarWrapper}>
          <ThemedView style={styles.avatar}>
            <ThemedText style={styles.avatarText}>{initial}</ThemedText>
          </ThemedView>
        </ThemedView>

        <ThemedView style={styles.content}>
          <ThemedView style={styles.headerRow}>
            <ThemedText style={styles.name} numberOfLines={1}>
              {name}
            </ThemedText>
            <ThemedText style={styles.timestamp} numberOfLines={1}>
              {createdAtLabel}
            </ThemedText>
          </ThemedView>

          {activity.text ? (
            <ThemedText style={styles.text}>{activity.text}</ThemedText>
          ) : null}
        </ThemedView>
      </ThemedView>
    </ThemedView>
  );
};

const styles = StyleSheet.create({
  actionsRow: {
    flexDirection: "row",
    alignItems: "center",
    justifyContent: "flex-end",
    marginBottom: 4,
  },
  // ... rest of the styles
});
Let's walk through the steps:
feed.followandfeed.unfollowlets us follow/unfollow feeds.- To immediately see the results of the follow/unfollow, we're reloading the timeline feed with
getOrCreate. - In
Activitycomponent we're usingactivity.current_feed.own_followsto know if the user's timeline feed follows the feed or not
activity.current_feedhas information about the feed the activity was posted to- It's useful if you're building Reddit-style applications where there is no 1:1 mapping between feeds and users
- It lets you display name/image of the feed the activity belongs to.
- We create a
feedinstance so that we can easily listen for state changes to it throughclient.feed(...) - Stream API also supports follow requests where approval from feed owner is required to follow
Now that the follow button is working, you can start following another user using the "Explore" page.
Reactions
To make our application more interactive, we'll add reactions for activities.
To achieve this, we need to implement the Reaction component and extend the Activity component:
123456789101112131415161718192021222324252627282930313233343536373839404142434445464748495051525354555657585960616263646566676869707172737475767778798081828384import React, { useCallback } from "react";
import { Pressable, Text, StyleSheet, View } from "react-native";
import {
  ActivityResponse,
  useFeedsClient,
} from "@stream-io/feeds-react-native-sdk";

type ToggleReactionProps = {
  activity: ActivityResponse;
};

export const Reaction = ({ activity }: ToggleReactionProps) => {
  const client = useFeedsClient();

  const hasReacted = activity.own_reactions?.length > 0;
  const likeCount = activity.reaction_groups?.like?.count ?? 0;

  const toggleReaction = useCallback(() => {
    if (!client) return;

    if (hasReacted) {
      client.deleteActivityReaction({
        activity_id: activity.id,
        type: "like",
      });
    } else {
      client.addActivityReaction({
        activity_id: activity.id,
        type: "like",
      });
    }
  }, [client, activity.id, hasReacted]);

  return (
    <Pressable
      onPress={toggleReaction}
      style={({ pressed }) => [
        styles.button,
        hasReacted && styles.buttonActive,
        pressed && styles.buttonPressed,
      ]}
    >
      <View style={styles.innerRow}>
        <Text style={styles.heart}>{hasReacted ? "❤️" : "🤍"}</Text>
        <Text style={styles.count}>{likeCount}</Text>
      </View>
    </Pressable>
  );
};

const styles = StyleSheet.create({
  button: {
    paddingHorizontal: 12,
    paddingVertical: 6,
    borderRadius: 50,
    borderWidth: 1,
    borderColor: "#E5E7EB",
    backgroundColor: "#FFFFFF",
    width: 60,
    alignItems: "center",
    justifyContent: "center",
  },
  buttonActive: {
    backgroundColor: "#2563EB20",
    borderColor: "#2563EB",
  },
  buttonPressed: {
    opacity: 0.7,
  },
  innerRow: {
    flexDirection: "row",
    alignItems: "center",
    gap: 4,
  },
  heart: {
    fontSize: 16,
  },
  count: {
    fontSize: 14,
    fontWeight: "600",
    color: "#111827",
    marginLeft: 4,
  },
});
123456789101112131415161718192021222324252627282930313233343536373839404142434445464748495051525354555657585960616263646566676869import React from "react";
import { StyleSheet } from "react-native";
import { ThemedView } from "@/components/themed-view";
import { ThemedText } from "@/components/themed-text";
import type { ActivityResponse } from "@stream-io/feeds-react-native-sdk";
import { useClientConnectedUser } from "@stream-io/feeds-react-native-sdk";
import { FollowButton } from "@/components/follows/follow-button";
import { Reaction } from "@/components/activity/Reaction";

type ActivityProps = {
  activity: ActivityResponse;
};

export const Activity = ({ activity }: ActivityProps) => {
  const name = activity.user?.name || activity.user?.id || "Unknown";
  const initial = name.charAt(0).toUpperCase();

  const createdAt =
    activity.created_at instanceof Date
      ? activity.created_at
      : new Date(activity.created_at);

  const createdAtLabel = createdAt.toLocaleString();

  const connectedUser = useClientConnectedUser();

  return (
    <ThemedView style={styles.card}>
      <ThemedView style={styles.actionsRow}>
        {activity.current_feed?.feed !== `user:${connectedUser?.id}` && (
          <FollowButton feed={activity.current_feed} />
        )}
      </ThemedView>
      <ThemedView style={styles.row}>
        <ThemedView style={styles.avatarWrapper}>
          <ThemedView style={styles.avatar}>
            <ThemedText style={styles.avatarText}>{initial}</ThemedText>
          </ThemedView>
        </ThemedView>

        <ThemedView style={styles.content}>
          <ThemedView style={styles.headerRow}>
            <ThemedText style={styles.name} numberOfLines={1}>
              {name}
            </ThemedText>
            <ThemedText style={styles.timestamp} numberOfLines={1}>
              {createdAtLabel}
            </ThemedText>
          </ThemedView>

          {activity.text ? (
            <ThemedText style={styles.text}>{activity.text}</ThemedText>
          ) : null}
        </ThemedView>
      </ThemedView>
      <ThemedView style={styles.bottomRow}>
        <Reaction activity={activity} />
      </ThemedView>
    </ThemedView>
  );
};

const styles = StyleSheet.create({
  bottomRow: {
    flexDirection: "row",
    marginTop: 4,
  },
  // ... rest of the styles
});
You can now use the For You tab to follow your other user's feeds and to react to their activities.
Let's recap what we did in this step:
client.addActivityReactionandclient.deleteActivityReactiontoggles reactions
typecan be any string you'd like- Since the React Native SDK provides reactive state management, the UI is automatically updated anytime anything on the activity changes
- We use
activity.own_reactionsandactivity.reaction_groupsto get real-time reaction data for activity - Some advanced features not shown in tutorial:
- A single user can add multiple reactions to an activity
- Comments can have reactions too
- Checkout the activity reactions and comment reactions pages in the documentation for more information.
Comments
Comments are another good way to add interactivity to your app. To add this feature, we need to do the following tasks:
- Implement
CommentComposerto post comments - Implement
CommentListto list comments - Implement the
comments-modalscreen so that we can navigate to it - Extend the
Activitycomponent with a new comment button
In order for us to be able to reliably load the comments section of any activity (ones in the For You feed as well, for example), we'll rely on the activityWithStateUpdates API.
This is very convenient for these particular types of situations, as since the activity itself needs to be serialized before we pass it to our router and this way we can simply rely only on passing the activityId and the modal will handle everything else.
To make everything easier, our useActivityComments hook also allows an ActivityWithStateUpdates instance to be passed instead of an ActivityResponse.
123456789101112131415161718192021222324252627282930313233343536373839404142434445464748495051525354555657585960616263646566676869707172737475767778798081828384858687888990919293949596979899100101102103104105106107108109import React, { useState, useCallback } from "react";
import {
  TextInput,
  Pressable,
  Text,
  StyleSheet,
  Platform,
  KeyboardAvoidingView,
} from "react-native";
import {
  ActivityWithStateUpdates,
  useFeedsClient,
} from "@stream-io/feeds-react-native-sdk";

type CommentComposerProps = {
  activity: ActivityWithStateUpdates;
};

export const CommentComposer = ({ activity }: CommentComposerProps) => {
  const client = useFeedsClient();
  const [commentDraft, setCommentDraft] = useState("");

  const canReply = commentDraft.trim().length > 0;

  const addComment = useCallback(async () => {
    if (!client || !canReply) return;

    await client.addComment({
      object_id: activity.id,
      object_type: "activity",
      comment: commentDraft,
    });

    setCommentDraft("");
  }, [client, activity.id, commentDraft, canReply]);

  return (
    <KeyboardAvoidingView
      style={styles.container}
      behavior={Platform.OS === "ios" ? "padding" : undefined}
      keyboardVerticalOffset={Platform.OS === "ios" ? 128 : 0}
    >
      <TextInput
        style={styles.input}
        placeholder="Post your reply"
        value={commentDraft}
        onChangeText={setCommentDraft}
        placeholderTextColor="#9CA3AF"
        autoCapitalize="sentences"
        autoCorrect
        returnKeyType="send"
        onSubmitEditing={addComment}
      />
      <Pressable
        onPress={addComment}
        disabled={!canReply}
        style={({ pressed }) => [
          styles.button,
          !canReply && styles.buttonDisabled,
          pressed && canReply && styles.buttonPressed,
        ]}
      >
        <Text style={styles.buttonText}>Reply</Text>
      </Pressable>
    </KeyboardAvoidingView>
  );
};

const styles = StyleSheet.create({
  container: {
    width: "100%",
    flexDirection: "row",
    alignItems: "center",
    gap: 8,
    marginTop: 8,
    paddingHorizontal: 12,
  },
  input: {
    flex: 1,
    borderRadius: 999,
    borderWidth: 1,
    borderColor: "#E5E7EB",
    paddingHorizontal: 14,
    paddingVertical: Platform.OS === "ios" ? 10 : 8,
    fontSize: 14,
    color: "#111827",
    backgroundColor: "#FFFFFF",
  },
  button: {
    paddingHorizontal: 14,
    paddingVertical: 8,
    borderRadius: 999,
    backgroundColor: "#2563EB",
    alignItems: "center",
    justifyContent: "center",
    minWidth: 70,
  },
  buttonDisabled: {
    backgroundColor: "#93C5FD",
  },
  buttonPressed: {
    opacity: 0.8,
  },
  buttonText: {
    color: "#FFFFFF",
    fontWeight: "600",
    fontSize: 14,
  },
});
123456789101112131415161718192021222324252627282930313233343536373839404142434445464748495051525354555657585960616263646566676869707172737475767778798081828384858687888990919293949596979899100101102103104105106107108import React from "react";
import { View, Text, StyleSheet } from "react-native";
import { CommentResponse } from "@stream-io/feeds-client";

type CommentItemProps = {
  comment: CommentResponse;
};

export const Comment = ({ comment }: CommentItemProps) => {
  const name = comment.user?.name || comment.user?.id || "Unknown";
  const initial = name.charAt(0).toUpperCase();

  const createdAtRaw = comment.created_at;
  const createdAt =
    createdAtRaw instanceof Date
      ? createdAtRaw
      : createdAtRaw
        ? new Date(createdAtRaw)
        : null;
  const createdAtLabel = createdAt
    ? createdAt.toLocaleString(undefined, {
        hour: "2-digit",
        minute: "2-digit",
        day: "2-digit",
        month: "short",
      })
    : "";

  return (
    <View style={styles.container}>
      <View style={styles.avatarWrapper}>
        <View style={styles.avatar}>
          <Text style={styles.avatarText}>{initial}</Text>
        </View>
      </View>

      <View style={styles.bubble}>
        <View style={styles.headerRow}>
          <Text style={styles.author} numberOfLines={1}>
            {name}
          </Text>
          {createdAtLabel ? (
            <Text style={styles.timestamp} numberOfLines={1}>
              · {createdAtLabel}
            </Text>
          ) : null}
        </View>

        <Text style={styles.text}>{comment.text}</Text>
      </View>
    </View>
  );
};

const styles = StyleSheet.create({
  container: {
    width: "100%",
    flexDirection: "row",
    alignItems: "center",
    justifyContent: "center",
    paddingVertical: 6,
    paddingHorizontal: 12,
  },
  avatarWrapper: {
    marginRight: 8,
  },
  avatar: {
    width: 32,
    height: 32,
    borderRadius: 16,
    backgroundColor: "#6366F1",
    alignItems: "center",
    justifyContent: "center",
  },
  avatarText: {
    color: "#FFFFFF",
    fontSize: 16,
    fontWeight: "600",
  },
  bubble: {
    flex: 1,
    borderRadius: 12,
    paddingHorizontal: 10,
    paddingVertical: 8,
    backgroundColor: "#F3F4F6",
  },
  headerRow: {
    flexDirection: "row",
    alignItems: "baseline",
    marginBottom: 2,
    flexWrap: "wrap",
  },
  author: {
    fontWeight: "600",
    fontSize: 14,
    color: "#111827",
    marginRight: 4,
  },
  timestamp: {
    fontSize: 11,
    color: "#6B7280",
  },
  text: {
    fontSize: 14,
    color: "#111827",
    lineHeight: 18,
  },
});
1234567891011121314151617181920212223242526272829303132333435363738394041424344454647484950515253545556575859606162636465666768697071727374757677787980818283848586878889import React, { useCallback } from "react";
import { View, FlatList, StyleSheet, ActivityIndicator } from "react-native";
import {
  ActivityWithStateUpdates,
  useActivityComments,
  CommentResponse,
} from "@stream-io/feeds-react-native-sdk";

import { Comment } from "@/components/comments/Comment";

type CommentListProps = {
  activity: ActivityWithStateUpdates;
};

const renderItem = ({ item }: { item: CommentResponse }) => (
  <Comment comment={item} />
);

const keyExtractor = (item: CommentResponse) => item.id;

const maintainVisibleContentPosition = {
  minIndexForVisible: 0,
  autoscrollToTopThreshold: 10,
};

export const CommentList = ({ activity }: CommentListProps) => {
  const {
    comments = [],
    loadNextPage: loadNextCommentsPage,
    has_next_page,
    is_loading_next_page,
  } = useActivityComments({ activity });

  const loadNextPage = useCallback(() => {
    if (!loadNextCommentsPage || !has_next_page || is_loading_next_page) {
      return;
    }

    loadNextCommentsPage({
      limit: 10,
      sort: "last",
    });
  }, [loadNextCommentsPage]);

  return (
    <View style={styles.container}>
      <FlatList
        data={comments}
        keyExtractor={keyExtractor}
        renderItem={renderItem}
        contentContainerStyle={styles.listContent}
        maintainVisibleContentPosition={maintainVisibleContentPosition}
        onEndReachedThreshold={0.2}
        onEndReached={loadNextPage}
        ListFooterComponent={
          is_loading_next_page && has_next_page ? ActivityIndicator : null
        }
      />
    </View>
  );
};

const styles = StyleSheet.create({
  container: {
    width: "100%",
    flex: 1,
    marginTop: 8,
  },
  listContent: {
    flexGrow: 1,
    paddingBottom: 4,
  },
  loadMoreButton: {
    marginTop: 8,
    alignSelf: "flex-start",
    paddingHorizontal: 12,
    paddingVertical: 6,
    borderRadius: 999,
    backgroundColor: "#2563EB20",
  },
  loadMoreButtonPressed: {
    opacity: 0.8,
  },
  loadMoreText: {
    color: "#2563EB",
    fontWeight: "600",
    fontSize: 13,
  },
});
12345678910111213141516171819202122232425262728293031323334353637383940414243444546474849505152535455565758596061import { useLocalSearchParams } from "expo-router";
import { StyleSheet } from "react-native";
import { useEffect, useMemo, useState } from "react";
import {
  ActivityWithStateUpdates,
  useFeedsClient,
} from "@stream-io/feeds-react-native-sdk";
import { CommentList } from "@/components/comments/CommentList";
import { CommentComposer } from "@/components/comments/CommentComposer";
import { SafeAreaView } from "react-native-safe-area-context";

export default () => {
  const client = useFeedsClient();
  const { activityId: activityIdParam } = useLocalSearchParams();
  const [activityWithStateUpdates, setActivityWithStateUpdates] = useState<
    ActivityWithStateUpdates | undefined
  >(undefined);

  const activityId = activityIdParam as string;

  useEffect(() => {
    const activity = client?.activityWithStateUpdates(activityId);

    if (!activity) {
      return;
    }

    if (typeof activity.currentState.activity?.comments === "undefined") {
      activity.get().then(() => setActivityWithStateUpdates(activity));
    }

    return () => {
      activity?.dispose();
    };
  }, [client, activityId]);

  if (!activityWithStateUpdates) {
    return null;
  }

  return (
    <SafeAreaView style={styles.safeArea}>
      <CommentList activity={activityWithStateUpdates} />
      <CommentComposer activity={activityWithStateUpdates} />
    </SafeAreaView>
  );
};

const styles = StyleSheet.create({
  safeArea: { flex: 1, backgroundColor: "white" },
  container: {
    flex: 1,
    alignItems: "center",
    justifyContent: "center",
    padding: 20,
  },
  link: {
    marginTop: 15,
    paddingVertical: 15,
  },
});
123456789101112131415161718192021222324252627282930313233343536373839404142434445464748495051525354555657585960616263646566676869707172737475767778798081828384858687888990919293949596import React from "react";
import { Pressable, StyleSheet } from "react-native";
import { ThemedView } from "@/components/themed-view";
import { ThemedText } from "@/components/themed-text";
import type { ActivityResponse } from "@stream-io/feeds-react-native-sdk";
import { useClientConnectedUser } from "@stream-io/feeds-react-native-sdk";
import { FollowButton } from "@/components/follows/follow-button";
import { Reaction } from "@/components/activity/Reaction";
import { useRouter } from "expo-router";

type ActivityProps = {
  activity: ActivityResponse;
};

export const Activity = ({ activity }: ActivityProps) => {
  const router = useRouter();
  const name = activity.user?.name || activity.user?.id || "Unknown";
  const initial = name.charAt(0).toUpperCase();

  const createdAt =
    activity.created_at instanceof Date
      ? activity.created_at
      : new Date(activity.created_at);

  const createdAtLabel = createdAt.toLocaleString();

  const connectedUser = useClientConnectedUser();

  return (
    <ThemedView style={styles.card}>
      <ThemedView style={styles.actionsRow}>
        {activity.current_feed?.feed !== `user:${connectedUser?.id}` && (
          <FollowButton feed={activity.current_feed} />
        )}
      </ThemedView>
      <ThemedView style={styles.row}>
        <ThemedView style={styles.avatarWrapper}>
          <ThemedView style={styles.avatar}>
            <ThemedText style={styles.avatarText}>{initial}</ThemedText>
          </ThemedView>
        </ThemedView>

        <ThemedView style={styles.content}>
          <ThemedView style={styles.headerRow}>
            <ThemedText style={styles.name} numberOfLines={1}>
              {name}
            </ThemedText>
            <ThemedText style={styles.timestamp} numberOfLines={1}>
              {createdAtLabel}
            </ThemedText>
          </ThemedView>

          {activity.text ? (
            <ThemedText style={styles.text}>{activity.text}</ThemedText>
          ) : null}
        </ThemedView>
      </ThemedView>
      <ThemedView style={styles.bottomRow}>
        <Reaction activity={activity} />
        <Pressable
          style={({ pressed }) => [
            styles.commentButton,
            pressed && styles.commentButtonPressed,
          ]}
          onPress={() => {
            router.push({
              pathname: "/comments-modal",
              params: {
                activityId: activity.id,
              },
            });
          }}
        >
          <ThemedText style={styles.commentText}>💬</ThemedText>
          <ThemedText>{activity.comment_count}</ThemedText>
        </Pressable>
      </ThemedView>
    </ThemedView>
  );
};

const styles = StyleSheet.create({
  commentButton: {
    flexDirection: "row",
    justifyContent: "center",
    alignItems: "center",
    marginLeft: 8,
  },
  commentText: {
    fontSize: 20,
  },
  commentButtonPressed: {
    opacity: 0.7,
  },
  // ...rest of the styles
});
Let's recap what happened in this step:
client.addCommentlets us create a commentuseActivityCommentslets you read and paginate comments
- Stream API provides multiple ways to sort comments
activity.comment_countstores how many comments the activity has
Comments can be threaded/nested too (not shown in the tutorial).
Posting Images
Stream API allows attaching files to activities and comments. Let's extend our app with attaching images to activities. To achieve this we need to:
- Implement the
ImagePickercomponent to let users pick files, and upload them to Stream's CDN - Extend the
ActivityComposerto send attachments with the activity as well as display previews of the attachments - Extend the
Activitycomponent to display the attachment
123456789101112131415161718192021222324252627282930313233343536373839404142434445464748495051525354555657585960616263646566676869707172737475767778798081828384858687888990919293949596import React, { useCallback, useState } from "react";
import { Pressable, Text, StyleSheet, ActivityIndicator } from "react-native";
import * as ExpoImagePicker from "expo-image-picker";
import {
  ImageUploadResponse,
  StreamResponse,
  useFeedsClient,
} from "@stream-io/feeds-react-native-sdk";
import Animated, { FadeIn, FadeOut } from "react-native-reanimated";

type PhotoButtonProps = {
  onUpload: (
    uploadedImage: StreamResponse<ImageUploadResponse> | undefined,
  ) => void;
};

export const ImagePicker = ({ onUpload }: PhotoButtonProps) => {
  const client = useFeedsClient();
  const [isUploading, setIsUploading] = useState<boolean>(false);

  const pickImage = useCallback(async () => {
    const result = await ExpoImagePicker.launchImageLibraryAsync({
      mediaTypes: "images",
      allowsMultipleSelection: false,
      quality: 1,
    });

    if (!result.canceled) {
      const asset = result.assets[0];

      const file = {
        uri: asset.uri,
        name: asset.fileName ?? (asset.uri as string).split("/").reverse()[0],
        duration: asset.duration,
        type: asset.mimeType ?? "image/jpeg",
      };

      setIsUploading(true);
      const uploadedFile = await client?.uploadImage({
        file,
      });
      setIsUploading(false);

      onUpload(uploadedFile);
    }
  }, [client, onUpload]);

  return (
    <Animated.View
      entering={FadeIn.duration(150)}
      exiting={FadeOut.duration(150)}
    >
      <Pressable
        onPress={pickImage}
        disabled={isUploading}
        style={({ pressed }) => [
          styles.button,
          pressed && !isUploading && styles.buttonPressed,
          isUploading && styles.buttonDisabled,
        ]}
      >
        {isUploading ? (
          <ActivityIndicator size="small" />
        ) : (
          <Text style={styles.text}>📎</Text>
        )}
      </Pressable>
    </Animated.View>
  );
};

const styles = StyleSheet.create({
  button: {
    alignItems: "center",
    justifyContent: "center",
    minHeight: 36,
    alignSelf: "flex-start",
  },
  buttonPressed: {
    opacity: 0.8,
  },
  buttonDisabled: {
    opacity: 0.7,
  },
  content: {
    flexDirection: "row",
    alignItems: "center",
    justifyContent: "center",
    minWidth: 60,
  },
  text: {
    color: "#FFFFFF",
    fontWeight: "600",
    fontSize: 30,
  },
});
123456789101112131415161718192021222324252627282930313233343536373839404142434445464748495051525354555657585960616263646566676869707172737475767778798081828384858687888990919293949596979899100101102103104105106107108109110111112113114115116117118119120121122123124125126127128import React, { useCallback, useState } from "react";
import {
  View,
  Text,
  TextInput,
  StyleSheet,
  Pressable,
  Platform,
} from "react-native";
import {
  ImageUploadResponse,
  StreamResponse,
  useFeedContext,
} from "@stream-io/feeds-react-native-sdk";
import { ImagePicker } from "@/components/activity/ImagePicker";
import Animated, {
  LinearTransition,
  ZoomIn,
  ZoomOut,
} from "react-native-reanimated";

export const ActivityComposer = () => {
  const feed = useFeedContext();
  const [newText, setNewText] = useState("");
  const [image, setImage] = useState<
    StreamResponse<ImageUploadResponse> | undefined
  >(undefined);

  const canPost = newText.trim().length > 0;

  const sendActivity = useCallback(async () => {
    if (!feed || !canPost) return;

    await feed.addActivity({
      text: newText,
      type: "post",
      ...(image
        ? {
            attachments: [{ type: "image", image_url: image.file, custom: {} }],
          }
        : null),
    });

    setNewText("");
    setImage(undefined);
  }, [feed, newText, canPost, image]);

  return (
    <View style={styles.card}>
      <View style={styles.inner}>
        <TextInput
          style={styles.input}
          multiline
          placeholder="What is happening?"
          value={newText}
          onChangeText={setNewText}
          textAlignVertical="top"
          underlineColorAndroid="transparent"
          placeholderTextColor="#9CA3AF"
        />
        {image ? (
          <View>
            <Animated.Image
              style={styles.imagePreview}
              entering={ZoomIn.duration(150)}
              exiting={ZoomOut.duration(150)}
              source={{ uri: image?.file }}
            />
            <Pressable
              onPress={() => setImage(undefined)}
              style={styles.removeButton}
            >
              <Text style={styles.removeButtonText}>X</Text>
            </Pressable>
          </View>
        ) : null}
        <Animated.View layout={LinearTransition.duration(200)}>
          <View style={styles.footerRow}>
            {image ? <View /> : <ImagePicker onUpload={setImage} />}
            <Pressable
              onPress={sendActivity}
              disabled={!canPost}
              style={({ pressed }) => [
                styles.button,
                !canPost && styles.buttonDisabled,
                pressed && canPost && styles.buttonPressed,
              ]}
            >
              <Text style={styles.buttonText}>Post</Text>
            </Pressable>
          </View>
        </Animated.View>
      </View>
    </View>
  );
};

const styles = StyleSheet.create({
  imagePreview: {
    width: "100%",
    resizeMode: "cover",
    height: 100,
    paddingHorizontal: 16,
    borderRadius: 16,
  },
  removeButtonText: { color: "white" },
  removeButton: {
    position: "absolute",
    top: 4,
    right: 20,
    backgroundColor: "rgba(0,0,0,0.6)",
    borderRadius: 999,
    padding: 2,
    width: 24,
    height: 24,
    alignItems: "center",
    justifyContent: "center",
  },
  // ...other styles
  footerRow: {
    width: "100%",
    marginTop: 8,
    flexDirection: "row",
    justifyContent: "space-between",
    alignItems: "center",
  },
  // ...other styles
});
123456789101112131415161718192021222324252627282930313233343536373839404142434445464748495051525354555657585960616263646566676869707172737475767778798081828384858687888990919293949596import React from "react";
import { Pressable, StyleSheet } from "react-native";
import { ThemedView } from "@/components/themed-view";
import { ThemedText } from "@/components/themed-text";
import type { ActivityResponse } from "@stream-io/feeds-react-native-sdk";
import { useClientConnectedUser } from "@stream-io/feeds-react-native-sdk";
import { FollowButton } from "@/components/follows/follow-button";
import { Reaction } from "@/components/activity/Reaction";
import { useRouter } from "expo-router";
import { Image } from "expo-image";

type ActivityProps = {
  activity: ActivityResponse;
};

export const Activity = ({ activity }: ActivityProps) => {
  const router = useRouter();
  const name = activity.user?.name || activity.user?.id || "Unknown";
  const initial = name.charAt(0).toUpperCase();

  const createdAt =
    activity.created_at instanceof Date
      ? activity.created_at
      : new Date(activity.created_at);

  const createdAtLabel = createdAt.toLocaleString();

  const connectedUser = useClientConnectedUser();

  const image = activity.attachments?.length > 0 && activity.attachments[0];

  return (
    <ThemedView style={styles.card}>
      <ThemedView style={styles.actionsRow}>
        {activity.current_feed?.feed !== `user:${connectedUser?.id}` && (
          <FollowButton feed={activity.current_feed} />
        )}
      </ThemedView>
      {image ? (
        <Image source={{ uri: image.image_url }} style={styles.imagePreview} />
      ) : null}
      <ThemedView style={styles.row}>
        <ThemedView style={styles.avatarWrapper}>
          <ThemedView style={styles.avatar}>
            <ThemedText style={styles.avatarText}>{initial}</ThemedText>
          </ThemedView>
        </ThemedView>

        <ThemedView style={styles.content}>
          <ThemedView style={styles.headerRow}>
            <ThemedText style={styles.name} numberOfLines={1}>
              {name}
            </ThemedText>
            <ThemedText style={styles.timestamp} numberOfLines={1}>
              {createdAtLabel}
            </ThemedText>
          </ThemedView>

          {activity.text ? (
            <ThemedText style={styles.text}>{activity.text}</ThemedText>
          ) : null}
        </ThemedView>
      </ThemedView>
      <ThemedView style={styles.bottomRow}>
        <Reaction activity={activity} />
        <Pressable
          style={({ pressed }) => [
            styles.commentButton,
            pressed && styles.commentButtonPressed,
          ]}
          onPress={() => {
            router.push({
              pathname: "/comments-modal",
              params: {
                activityId: activity.id,
              },
            });
          }}
        >
          <ThemedText style={styles.commentText}>💬</ThemedText>
          <ThemedText>{activity.comment_count}</ThemedText>
        </Pressable>
      </ThemedView>
    </ThemedView>
  );
};

const styles = StyleSheet.create({
  imagePreview: {
    width: "100%",
    height: 200,
    marginBottom: 12,
    borderRadius: 16,
  },
  // ...rest of the styles
});
Go ahead and post an image! Or send a URL, as Stream API can automatically attach URL metadata as an attachment.
Final Thoughts
In this tutorial, we built a fully-functioning React Native activity feed application with Stream's Activity Feed V3 SDK. We showed how easy it is to:
- Set up a simple activity feed application and connect it to Stream's Activity Feed V3 SDK.
- Create user and timeline feeds.
- Add activities, reactions and comments.
- Explore new content with "For you" feed.
Even though this was a long tutorial, Activity Feed V3 has even more features:
- Activity selectors and ranking for customizing what content to show for users
- Activity processors for extracting topics from activity content
- Notification feeds (with aggregation)
- Story feed (activity expiration)
- Custom feed groups
- Feed and activity visibility including premium activities with feed memberships
- Moderation and fine-grained permission system
- Polls
- For more React examples, checkout stream-feeds-js repository
- Full list of supported Hooks and Contexts