Stream's Activity Feed V3 SDK enables teams of all sizes to build scalable activity feeds. This SDK is designed to enable you to get a feed application up and running quickly and efficiently while supporting customization for complex use cases.
In this tutorial, we will use Stream's Activity Feed V3 SDK for Android to:
- Set up a simple activity feed application and connect it to Stream's Activity Feed V3 SDK.
- Create user and timeline feeds.
- Add activities, reactions and comments.
- Explore new content with "For you" feed.
Notes about this tutorial:
- Whenever we mention "activities" we're referring to items that are part of a feed, such as posts. Not to be confused with the Android
Activityclass.- In most steps, the code is split between different tabs, one per file. Be sure to check them all!
- We provide "new imports" code blocks separately from main code changes, to make it easier to copy them independently.
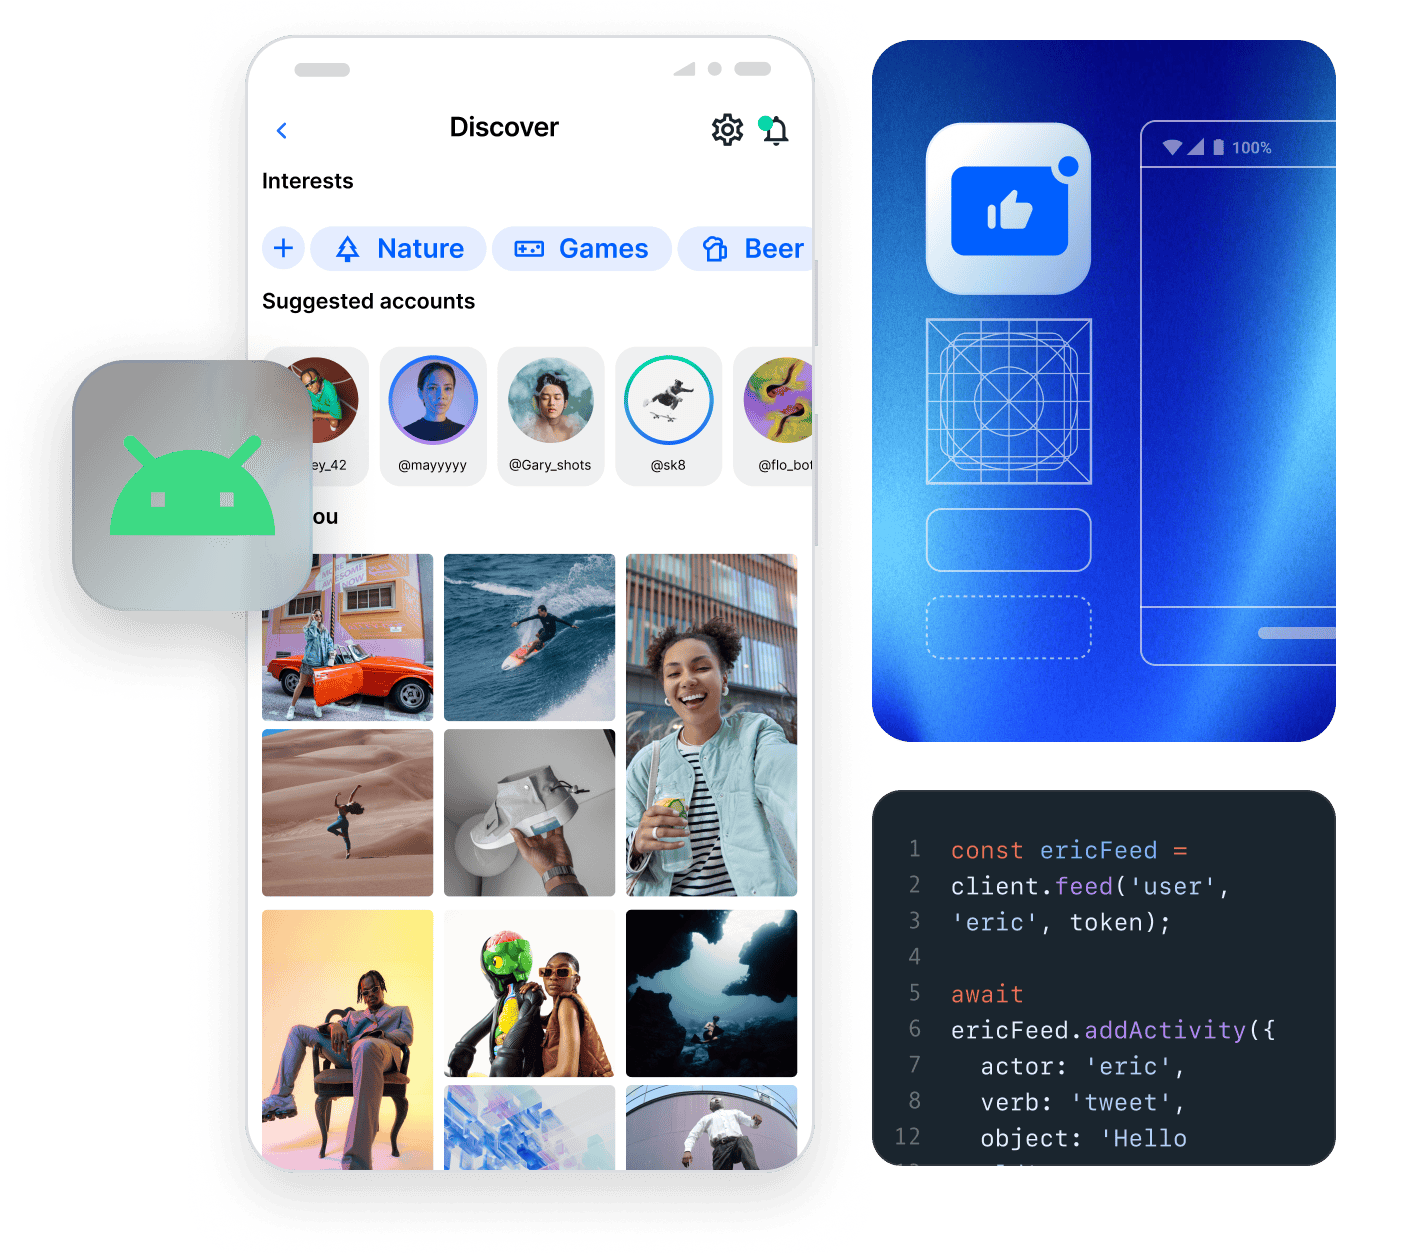
Here is a quick visual overview of the application we're building:

Project Setup and Installation
To follow the tutorial make sure you're using Android Studio Meerkat 2024.3.1 or newer.
As a first step, you need to clone or download the starter project containing boilerplate code and the skeleton of the application we're going to implement:
We'll start the tutorial from the initial commit. If you wish to see the finished source code, it's the latest commit in the stream-feeds-android-tutorial repository.
1234# or download the zip from https://github.com/GetStream/stream-feeds-android-tutorial/releases/tag/tutorial-start
git clone git@github.com:GetStream/stream-feeds-android-tutorial.git
cd stream-feeds-android-tutorial
git checkout tutorial-start
Open the project with Android Studio.
In the dependencies block of the app's build.gradle.kts add Stream's Feeds v3 SDK:
1implementation("io.getstream:stream-feeds-android-client:<latest-version>")
Replace <latest-version> with the version you see below. You can also check releases in the GitHub repository.

Sync Android studio to download the dependencies.
To make the tutorial as easy as possible, we generated credentials for you to pick up and use. These credentials consist of:
API_KEY- an API key that is used to identify your Stream application by our serversidandtoken- authorization information of the current username- optional, used as a display name of the current user
To start using credentials, replace the contents of the Credentials.kt file:
123456object Credentials {
    const val API_KEY = "REPLACE_WITH_API_KEY"
    const val USER_ID = "REPLACE_WITH_USER_ID"
    const val USER_NAME = "REPLACE_WITH_USER_NAME"
    const val USER_TOKEN = "REPLACE_WITH_TOKEN"
}
Security Note: In production applications, never expose your API secret or generate tokens on the client side. Tokens should always be generated on your backend server to ensure security. The credentials in this tutorial are for development purposes only.
You can now run the application in Android Studio.
For now, the application doesn't do anything, but this will change as we complete the tutorial step by step.
Connect to the Stream API
Let's create and connect the demo user to the Stream API.
The starter application you cloned has all necessary files. You can update their content from the code snippets in the tutorial. No need to create any additional files.
To achieve this, we're creating a ClientProvider object to encapsulate the client creation and make it available throughout the code. In a real app, you'll likely have a factory to create a new client instance on user sign in instead of a singleton client.
1234567891011121314151617181920212223242526272829303132333435363738import android.content.Context
import io.getstream.android.core.api.model.value.StreamApiKey
import io.getstream.android.core.api.model.value.StreamToken
import io.getstream.feeds.android.client.api.FeedsClient
import io.getstream.feeds.android.client.api.model.User
import kotlinx.coroutines.sync.Mutex
import kotlinx.coroutines.sync.withLock

object ClientProvider {
    private val mutex = Mutex()
    private var instance: FeedsClient? = null

    // In a real app, you'll likely have a factory to create a new client instance on user sign in
    suspend fun get(context: Context): FeedsClient {
        instance?.let { return it }

        mutex.withLock {
            instance?.let { return@get it }

            val feedsClient = createClient(context)

            feedsClient.connect().fold(
                onSuccess = { /* Connected successfully */ },
                onFailure = { /* We're skipping error handling for tutorial purposes */ }
            )

            instance = feedsClient
            return feedsClient
        }
    }

    private fun createClient(context: Context): FeedsClient = FeedsClient(
        context = context.applicationContext,
        apiKey = StreamApiKey.fromString(Credentials.API_KEY),
        user = User(id = Credentials.USER_ID, name = Credentials.USER_NAME),
        tokenProvider = { StreamToken.fromString(Credentials.USER_TOKEN) },
    )
}
For simplicity, the tutorial doesn't handle errors. In a real application, you should always make sure to handle errors.
Creating Feeds
In this step we're creating a few feeds using built-in feed groups. Before we dive into the code, let's understand the core concepts:
- User Feed: A feed that contains all activities (posts) created by a specific user. Each user has their own user feed (e.g.,
user:alice). - Timeline Feed: A feed that contains activities from all the feeds that you follow. When you follow someone's user feed, their activities automatically appear in your timeline feed (this concept is called fan-out).
- Follow Relationship: When you follow a user's feed, your timeline feed subscribes to their user feed. This means new activities from followed users automatically appear in your timeline.
Let's see what the concept looks like in code (no need to add this to your app yet):
1234567// Using user id for the feed id, but you can use any id you want to
val userFeed = client.feed("user", client.user.id)
userFeed.getOrCreate()

// This is our timeline feed where we want to see posts from people we follow
val timelineFeed = client.feed("timeline", client.user.id)
timelineFeed.getOrCreate()
To ensure our own posts are part of our timeline, we need to set up the follow relationship:
12345// You typically create these relationships on your server-side, we do this here for simplicity
val followsSelf = timelineFeed.state.following.first().any { it.targetFeed.fid == userFeed.fid }
if (!followsSelf) {
    timelineFeed.follow(targetFid = userFeed.fid)
}
The two main screens of our app, Home and Explore, are going to be driven by FeedsViewModel, so let's add code to create the feeds there:
1234567891011import androidx.lifecycle.application
import androidx.lifecycle.viewModelScope
import io.getstream.feeds.android.client.api.FeedsClient
import io.getstream.feeds.android.client.api.state.Feed
import io.getstream.feedstutorial.ClientProvider
import kotlinx.coroutines.flow.SharingStarted
import kotlinx.coroutines.flow.StateFlow
import kotlinx.coroutines.flow.first
import kotlinx.coroutines.flow.flow
import kotlinx.coroutines.flow.stateIn
import kotlinx.coroutines.launch
1234567891011121314151617181920212223242526272829303132333435363738394041424344454647484950515253545556class FeedsViewModel(application: Application) : AndroidViewModel(application) {
    val state: StateFlow<State?> =
        flow { emit(createState()) }
            .stateIn(viewModelScope, SharingStarted.WhileSubscribed(5000), null)

    data class State(
        val client: FeedsClient,
        val userFeed: Feed,
        val timelineFeed: Feed,
    )

    private suspend fun createState(): State {
        val client = ClientProvider.get(application)
        val state = State(
            client = client,
            userFeed = client.feed("user", client.user.id),
            timelineFeed = client.feed("timeline", client.user.id),
        )
        loadFeeds(state)
        return state
    }

    private suspend fun loadFeeds(state: State) {
        state.userFeed.getOrCreate()
        state.timelineFeed.getOrCreate()

        viewModelScope.launch { followSelfIfNeeded(state) }
    }

    // By default, `timeline:user_id` doesn't follow `user:user_id` so the timeline doesn't
    // show the user's own posts. For tutorial purposes we create the follow relationship
    // here, but this logic is usually implemented in the backend.
    private suspend fun followSelfIfNeeded(state: State) {
        val followsSelf = state.timelineFeed.state.following.first()
            .any { it.targetFeed.fid == state.userFeed.fid }
        if (!followsSelf) {
            state.timelineFeed.follow(
                targetFid = state.userFeed.fid,
                createNotificationActivity = false
            )
        }
    }

    // These stubs remain unchanged for now
    fun onPost(text: String, imageUri: Uri?) {
        // TODO: Implement as part of the tutorial
    }

    fun onFollowClick(activity: ActivityData) {
        // TODO: Implement as part of the tutorial
    }

    fun onLikeClick(activity: ActivityData) {
        // TODO: Implement as part of the tutorial
    }
}
The ViewModel creates a State object that contain client and feeds and exposes it as a StateFlow. We'll use this state both in the ViewModel, to perform operations, and in the UI, to display data.
Activity List
Activity Feeds SDKs don't have UI components (yet).
Now that we created feeds, we can create UI components to display the activities. To achieve this we're creating an ActivityItem component.
For now, the
ActivityItemdisplays only the most basic activity information (for exampleactivity.text) and parameters that we'll be relevant in a bit, when we'll extend it with more features.
1234567891011121314151617181920import androidx.compose.foundation.background
import androidx.compose.foundation.layout.Box
import androidx.compose.foundation.layout.Column
import androidx.compose.foundation.layout.Row
import androidx.compose.foundation.layout.fillMaxWidth
import androidx.compose.foundation.layout.padding
import androidx.compose.foundation.layout.size
import androidx.compose.foundation.shape.CircleShape
import androidx.compose.material3.Card
import androidx.compose.material3.MaterialTheme
import androidx.compose.material3.Text
import androidx.compose.ui.Alignment
import androidx.compose.ui.Modifier
import androidx.compose.ui.draw.clip
import androidx.compose.ui.layout.ContentScale
import androidx.compose.ui.text.font.FontWeight
import androidx.compose.ui.unit.dp
import androidx.compose.ui.unit.sp
import coil3.compose.AsyncImage
import io.getstream.feeds.android.client.api.model.UserData
123456789101112131415161718192021222324252627282930313233343536373839404142434445464748495051525354555657585960616263646566@Composable
fun ActivityItem(
    activity: ActivityData,
    feedId: FeedId,
    currentUserId: String,
    navController: NavController,
    onFollowClick: (ActivityData) -> Unit,
    onLikeClick: (ActivityData) -> Unit,
) {
    Card {
        Column(
            modifier = Modifier
                .fillMaxWidth()
                .padding(16.dp)
        ) {
            ActivityHeader(activity)

            Text(
                text = activity.text.orEmpty(),
                fontSize = 14.sp,
                lineHeight = 20.sp,
                modifier = Modifier.padding(start = 56.dp, bottom = 8.dp),
            )
        }
    }
}

@Composable
private fun ActivityHeader(
    activity: ActivityData,
) {
    Row(modifier = Modifier.fillMaxWidth(), verticalAlignment = Alignment.CenterVertically) {
        Avatar(activity.user)

        Text(
            text = activity.user.name ?: "Unknown",
            fontSize = 16.sp,
            fontWeight = FontWeight.SemiBold,
            modifier = Modifier
                .weight(1f)
                .padding(horizontal = 16.dp),
        )
    }
}

@Composable
private fun Avatar(user: UserData) {
   Box(
      modifier = Modifier.background(MaterialTheme.colorScheme.secondary, CircleShape),
      contentAlignment = Alignment.Center
   ) {
      Text(
         text = user.name?.firstOrNull()?.uppercase() ?: "?",
         color = MaterialTheme.colorScheme.onSecondary,
         fontWeight = FontWeight.Bold,
      )
      AsyncImage(
         modifier = Modifier
            .size(40.dp)
            .clip(CircleShape),
         model = user.image,
         contentDescription = null,
         contentScale = ContentScale.Crop,
      )
   }
}
1234567891011121314import android.net.Uri
import androidx.compose.foundation.layout.Arrangement
import androidx.compose.foundation.layout.PaddingValues
import androidx.compose.foundation.layout.fillMaxSize
import androidx.compose.foundation.lazy.LazyColumn
import androidx.compose.foundation.lazy.items
import androidx.compose.runtime.getValue
import androidx.compose.ui.Modifier
import androidx.compose.ui.unit.dp
import androidx.lifecycle.compose.collectAsStateWithLifecycle
import io.getstream.feeds.android.client.api.model.ActivityData
import io.getstream.feedstutorial.ui.ActivityItem
import io.getstream.feedstutorial.ui.EmptyContent
import io.getstream.feedstutorial.ui.LoadingScreen
1234567891011121314151617181920212223242526272829303132333435363738394041424344454647484950@Composable
fun HomeScreen(navController: NavController) {
    val viewModel: FeedsViewModel = viewModel(LocalActivity.current as ComponentActivity)
    val state by viewModel.state.collectAsStateWithLifecycle()

    Surface {
        when (val state = state) {
            null -> LoadingScreen()
            else -> HomeContent(
                state = state,
                navController = navController,
                onLikeClick = { activity -> viewModel.onLikeClick(activity) },
                onPost = { text, imageUri -> viewModel.onPost(text, imageUri) },
                onFollowClick = { activity -> viewModel.onFollowClick(activity) }
            )
        }
    }
}

@Composable
fun HomeContent(
    state: FeedsViewModel.State,
    navController: NavController,
    onLikeClick: (ActivityData) -> Unit,
    onPost: (String, Uri?) -> Unit,
    onFollowClick: (ActivityData) -> Unit,
) {
    val timelineActivities by state.timelineFeed.state.activities.collectAsStateWithLifecycle()

    LazyColumn(
        modifier = Modifier.fillMaxSize(),
        contentPadding = PaddingValues(16.dp),
        verticalArrangement = Arrangement.spacedBy(16.dp)
    ) {
        if (timelineActivities.isEmpty()) {
            item { EmptyContent("Write something to start your timeline ✨") }
        } else {
            items(timelineActivities) { activity ->
                ActivityItem(
                    activity = activity,
                    feedId = state.timelineFeed.fid,
                    currentUserId = state.client.user.id,
                    navController = navController,
                    onLikeClick = onLikeClick,
                    onFollowClick = onFollowClick
                )
            }
        }
    }
}
The activity list is currently empty. We'll change that in the next step. Before doing that, let's recap what we did in this step:
- We created an instance of
FeedsClientfor our user (1 instance maps to 1 user) - We used the client to create
userFeedandtimelineFeed, representing the feeds of the user's own activities and followed users' activities respectively - We created an
ActivityItemcomponent and used it to display the activities from the timeline feed's statefeed.state.activitiesis aStateFlowthat automatically updates when activities are updated
Activity Composer
Let's add an ActivityComposer component and add it as the very first item of the LazyColumn in HomeContent:
As mentioned previously: users post on their
userfeed and their posts automatically appear in theirtimelinefeed via follow relationship.
12345678910111213141516import androidx.compose.foundation.layout.Arrangement
import androidx.compose.foundation.layout.Column
import androidx.compose.foundation.layout.Row
import androidx.compose.foundation.layout.fillMaxSize
import androidx.compose.foundation.layout.fillMaxWidth
import androidx.compose.material3.Button
import androidx.compose.material3.HorizontalDivider
import androidx.compose.material3.OutlinedTextField
import androidx.compose.material3.Text
import androidx.compose.runtime.getValue
import androidx.compose.runtime.mutableStateOf
import androidx.compose.runtime.remember
import androidx.compose.runtime.setValue
import androidx.compose.ui.Alignment
import androidx.compose.ui.Modifier
import androidx.compose.ui.unit.dp
12345678910111213141516171819202122232425@Composable
fun ActivityComposer(onPost: (String, Uri?) -> Unit) {
    var text by remember { mutableStateOf("") }

    Column(verticalArrangement = Arrangement.spacedBy(16.dp)) {
        OutlinedTextField(
            value = text,
            onValueChange = { text = it },
            modifier = Modifier.fillMaxSize(),
            placeholder = { Text("What is happening?") },
        )

        Row(Modifier.align(Alignment.End), Arrangement.spacedBy(16.dp)) {
            Button(
                onClick = {
                    onPost(text, null)
                    text = ""
                },
                enabled = text.isNotBlank(),
                content = { Text("Post") },
            )
        }
        HorizontalDivider(Modifier.fillMaxWidth())
    }
}
1import io.getstream.feedstutorial.ui.ActivityComposer
123456789101112131415161718192021222324252627282930313233@Composable
fun HomeContent(
    state: FeedsViewModel.State,
    navController: NavController,
    onLikeClick: (ActivityData) -> Unit,
    onPost: (String, Uri?) -> Unit,
    onFollowClick: (ActivityData) -> Unit,
) {
    val timelineActivities by state.timelineFeed.state.activities.collectAsStateWithLifecycle()

    LazyColumn(
        modifier = Modifier.fillMaxSize(),
        contentPadding = PaddingValues(16.dp),
        verticalArrangement = Arrangement.spacedBy(16.dp)
    ) {
        item { ActivityComposer(onPost = onPost) }

        if (timelineActivities.isEmpty()) {
            item { EmptyContent("Write something to start your timeline ✨") }
        } else {
            items(timelineActivities) { activity ->
                ActivityItem(
                    activity = activity,
                    feedId = state.timelineFeed.fid,
                    currentUserId = state.client.user.id,
                    navController = navController,
                    onLikeClick = onLikeClick,
                    onFollowClick = onFollowClick
                )
            }
        }
    }
}
With the UI ready, we can implement the posting logic in the FeedsViewModel. To do that, we just need to replace the onPost function stub with the actual implementation:
1import io.getstream.feeds.android.client.api.model.FeedAddActivityRequest
Replace the existing function stub with this implementation:
123456789101112fun onPost(text: String, imageUri: Uri?) {
    val state = state.value ?: return

    viewModelScope.launch {
        val request = FeedAddActivityRequest(
            type = "post",
            text = text.trim(),
            feeds = listOf(state.userFeed.fid.rawValue),
        )
        state.userFeed.addActivity(request = request)
    }
}
Go ahead and post something! It'll automatically appear on your timeline.
Explore Page
The "Explore" page uses the foryou feed to explore new content by showing popular activities.
Just like we did for other feeds, we are going to add an exploreFeed to FeedsViewModel.State and initialize it accordingly in the createState and loadFeeds functions:
12345678910111213141516171819202122232425262728data class State(
    val client: FeedsClient,
    val userFeed: Feed,
    val timelineFeed: Feed,
    val exploreFeed: Feed,
)

private suspend fun createState(): State {
    val client = ClientProvider.get(application)
    val state = State(
        client = client,
        userFeed = client.feed("user", client.user.id),
        timelineFeed = client.feed("timeline", client.user.id),
        exploreFeed = client.feed("foryou", client.user.id),
    )
    loadFeeds(state)
    return state
}

private suspend fun loadFeeds(state: State) {
    state.userFeed.getOrCreate()
    state.timelineFeed.getOrCreate()
    state.exploreFeed.getOrCreate()

    viewModelScope.launch {
        followSelfIfNeeded(state)
    }
}
Now we're ready to implement the "Explore" page UI. The layout is similar to HomeScreen, except that we're not adding the activity composer:
12345678910111213import androidx.compose.foundation.layout.Arrangement
import androidx.compose.foundation.layout.PaddingValues
import androidx.compose.foundation.layout.fillMaxSize
import androidx.compose.foundation.lazy.LazyColumn
import androidx.compose.foundation.lazy.items
import androidx.compose.runtime.getValue
import androidx.compose.ui.Modifier
import androidx.compose.ui.unit.dp
import androidx.lifecycle.compose.collectAsStateWithLifecycle
import io.getstream.feeds.android.client.api.model.ActivityData
import io.getstream.feedstutorial.ui.ActivityItem
import io.getstream.feedstutorial.ui.EmptyContent
import io.getstream.feedstutorial.ui.LoadingScreen
12345678910111213141516171819202122232425262728293031323334353637383940414243444546474849505152@Composable
fun ExploreScreen(navController: NavController) {
    val viewModel: FeedsViewModel = viewModel(LocalActivity.current as ComponentActivity)
    val state by viewModel.state.collectAsStateWithLifecycle()

    Surface {
        when (val state = state) {
            null -> LoadingScreen()
            else -> ExploreContent(
                state = state,
                navController = navController,
                onLikeClick = { activity -> viewModel.onLikeClick(activity) },
                onFollowClick = { activity -> viewModel.onFollowClick(activity) }
            )
        }
    }
}

@Composable
fun ExploreContent(
    state: FeedsViewModel.State,
    navController: NavController,
    onLikeClick: (ActivityData) -> Unit,
    onFollowClick: (ActivityData) -> Unit,
) {
    val activities by state.exploreFeed.state.activities.collectAsStateWithLifecycle()

    LazyColumn(
        modifier = Modifier.fillMaxSize(),
        contentPadding = PaddingValues(16.dp),
        verticalArrangement = Arrangement.spacedBy(16.dp)
    ) {
        if (activities.isEmpty()) {
            item {
                EmptyContent(
                    "Popular activities will show up here once your application has more content"
                )
            }
        } else {
            items(activities) { activity ->
                ActivityItem(
                    activity = activity,
                    feedId = state.exploreFeed.fid,
                    currentUserId = state.client.user.id,
                    navController = navController,
                    onLikeClick = onLikeClick,
                    onFollowClick = onFollowClick
                )
            }
        }
    }
}
Note that the
foryoufeed uses the "popular" activity selector, which doesn't support real-time updates. The documentation details how real-time updates work.
In the next step, we're adding a follow button, so we can follow users from the foryou page.
Follow and Unfollow
To implement following and unfollowing feeds we're:
- Performing the actual follow/unfollow operation in
FeedsViewModel - Extending the
ActivityItemcomponent by adding the follow/unfollow button
1import io.getstream.feeds.android.client.api.model.FeedId
Replace the existing function stub with this implementation:
12345678910111213141516171819fun onFollowClick(activity: ActivityData) {
    val state = state.value ?: return

    viewModelScope.launch {
        val targetFeedId = FeedId("user", activity.user.id)
        val isFollowing = activity.currentFeed?.ownFollows.isNullOrEmpty().not()

        val result = if (isFollowing) {
            state.timelineFeed.unfollow(targetFeedId)
        } else {
            state.timelineFeed.follow(targetFeedId)
        }
        // Ensure the feeds are up to date after follow/unfollow
        result.onSuccess {
            launch { state.timelineFeed.getOrCreate() }
            launch { state.exploreFeed.getOrCreate() }
        }
    }
}
1import androidx.compose.material3.TextButton
12345678910111213141516171819202122232425262728293031323334353637383940414243444546474849505152535455565758@Composable
fun ActivityItem(
    activity: ActivityData,
    feedId: FeedId,
    currentUserId: String,
    navController: NavController,
    onFollowClick: (ActivityData) -> Unit,
    onLikeClick: (ActivityData) -> Unit,
) {
    Card {
        Column(
            modifier = Modifier
                .fillMaxWidth()
                .padding(16.dp)
        ) {
            ActivityHeader(activity, currentUserId, onFollowClick)

            Text(
                text = activity.text.orEmpty(),
                fontSize = 14.sp,
                lineHeight = 20.sp,
                modifier = Modifier.padding(start = 56.dp, bottom = 8.dp),
            )
        }
    }
}

@Composable
private fun ActivityHeader(
    activity: ActivityData,
    currentUserId: String,
    onFollowClick: (ActivityData) -> Unit,
) {
    Row(modifier = Modifier.fillMaxWidth(), verticalAlignment = Alignment.CenterVertically) {
        Avatar(activity.user)

        Text(
            text = activity.user.name ?: "Unknown",
            fontSize = 16.sp,
            fontWeight = FontWeight.SemiBold,
            modifier = Modifier
                .weight(1f)
                .padding(horizontal = 16.dp),
        )

        if (activity.user.id != currentUserId) {
            TextButton(onClick = { onFollowClick(activity) }) {
                if (activity.currentFeed?.ownFollows.isNullOrEmpty()) {
                    Text("Follow")
                } else {
                    Text("Unfollow")
                }
            }
        }
    }
}

// Other code remains unchanged
Let's walk through the steps:
feed.followandfeed.unfollowlet us follow/unfollow feeds.- To immediately see the results of the follow/unfollow, we're reloading the feeds with
getOrCreate. - We're using
activity.currentFeed.ownFollowsto know if the user's timeline feed follows the feed or not.activity.currentFeedhas information about the feed the activity was posted to. It's useful if you're building Reddit-style applications where there is no 1:1 mapping between feeds and users. It lets you display name/image of the feed the activity belongs to.
- The Stream API also supports follow requests where approval from the feed owner is required to follow
Now that the follow button is working, you can start following other users using the "Explore" page.
Reactions
To make our application more interactive, we'll add reactions for activities.
To achieve this, we'll follow the same approach we used for the follow button:
- Implementing the "like" operation in
FeedsViewModel - Extend the
ActivityItemcomponent by adding the button to toggle a "like" reaction
1import io.getstream.feeds.android.network.models.AddReactionRequest
Replace the existing function stub with this implementation:
12345678910111213fun onLikeClick(activity: ActivityData) {
    val state = state.value ?: return
    val hasOwnReaction = activity.ownReactions.any { it.type == "like" }

    viewModelScope.launch {
        if (hasOwnReaction) {
            state.timelineFeed.deleteActivityReaction(activity.id, "like")
        } else {
            val request = AddReactionRequest("like", createNotificationActivity = true)
            state.timelineFeed.addActivityReaction(activity.id, request)
        }
    }
}
1234567import androidx.compose.foundation.clickable
import androidx.compose.material.icons.Icons
import androidx.compose.material.icons.filled.Favorite
import androidx.compose.material.icons.filled.FavoriteBorder
import androidx.compose.material3.Icon
import androidx.compose.ui.graphics.Color
import androidx.compose.ui.graphics.vector.ImageVector
123456789101112131415161718192021222324252627282930313233343536373839404142434445464748495051525354555657585960616263646566676869@Composable
fun ActivityItem(
    activity: ActivityData,
    feedId: FeedId,
    currentUserId: String,
    navController: NavController,
    onFollowClick: (ActivityData) -> Unit,
    onLikeClick: (ActivityData) -> Unit,
) {
    Card {
        Column(
            modifier = Modifier
                .fillMaxWidth()
                .padding(16.dp)
        ) {
            ActivityHeader(activity, currentUserId, onFollowClick)

            Text(
                text = activity.text.orEmpty(),
                fontSize = 14.sp,
                lineHeight = 20.sp,
                modifier = Modifier.padding(start = 56.dp, bottom = 8.dp),
            )

            Row(
                modifier = Modifier
                    .fillMaxWidth()
                    .padding(top = 8.dp),
            ) {
                val reactionCount = activity.reactionGroups["like"]?.count ?: 0
                val hasOwnReaction = activity.ownReactions.any { it.type == "like" }
                ActionButton(
                    icon = if (hasOwnReaction) Icons.Default.Favorite else Icons.Default.FavoriteBorder,
                    count = reactionCount,
                    contentDescription = "Like",
                    onClick = { onLikeClick(activity) },
                )
            }
        }
    }
}

@Composable
fun ActionButton(
    icon: ImageVector,
    count: Int,
    contentDescription: String,
    onClick: () -> Unit,
) {
    Row(
        verticalAlignment = Alignment.CenterVertically,
        modifier = Modifier
            .clickable(onClick = onClick)
            .padding(horizontal = 8.dp, vertical = 4.dp),
    ) {
        Icon(
            imageVector = icon,
            contentDescription = contentDescription,
            modifier = Modifier.size(20.dp),
        )
        Text(
            text = count.toString(),
            fontSize = 12.sp,
            color = Color.Gray,
            modifier = Modifier.padding(start = 4.dp),
        )
    }
}
// Other code remains unchanged
You can use the demo app to follow your tutorial user, and to react to their activities.
Let's do a recap of this step:
- We used
client.addActivityReactionandclient.deleteActivityReactionto toggle reactions- We used "like" as reaction
type, but it can be any string you'd like - Since the Android SDK provides reactive state management, the UI is automatically updated anytime anything on the activity changes
- We used "like" as reaction
- We use
activity.ownReactionsandactivity.reactionGroupsto get real-time reaction data for the activity - Some advanced features not shown in the tutorial:
- A single user can add multiple reactions to an activity
- Comments can have reactions too
- Check out the activity reactions and comment reactions pages in the documentation for more information
Comments
Comments are another good way to add interactivity to an app. To add this feature to the tutorial project we need to:
- Implement
CommentsViewModelwith the logic for loading the activity and posting comments - Implement
CommentScreenand the components to display and post comments - Extend the
ActivityItemcomponent with a button to navigate to the comments screen
1234567891011121314151617181920212223242526272829303132333435363738import androidx.lifecycle.application
import androidx.lifecycle.viewModelScope
import io.getstream.feeds.android.client.api.model.request.ActivityAddCommentRequest
import io.getstream.feeds.android.client.api.state.Activity
import io.getstream.feedstutorial.ClientProvider
import kotlinx.coroutines.flow.SharingStarted
import kotlinx.coroutines.flow.StateFlow
import kotlinx.coroutines.flow.flow
import kotlinx.coroutines.flow.stateIn
import kotlinx.coroutines.launch

class CommentsViewModel(
    private val activityId: String,
    private val feedId: FeedId,
    application: Application
) : AndroidViewModel(application) {
    val activity: StateFlow<Activity?> =
        flow { emit(createActivity()) }
            .stateIn(viewModelScope, SharingStarted.WhileSubscribed(5000), null)

    private suspend fun createActivity(): Activity {
        return ClientProvider.get(application)
            .activity(activityId, feedId)
            .apply { get() }
    }

    fun onComment(text: String) {
        val activity = activity.value ?: return

        viewModelScope.launch {
            val request = ActivityAddCommentRequest(
                comment = text,
                activityId = activity.activityId
            )
            activity.addComment(request)
        }
    }
}
123456789101112131415161718192021222324252627282930313233343536373839404142434445464748495051525354555657585960616263646566676869707172737475767778798081828384858687888990919293949596979899100101102103104105106107108109110111112113114115116import androidx.compose.foundation.layout.Arrangement
import androidx.compose.foundation.layout.Column
import androidx.compose.foundation.layout.PaddingValues
import androidx.compose.foundation.layout.fillMaxWidth
import androidx.compose.foundation.layout.padding
import androidx.compose.foundation.lazy.LazyColumn
import androidx.compose.foundation.lazy.items
import androidx.compose.material.icons.Icons
import androidx.compose.material.icons.automirrored.filled.Send
import androidx.compose.material3.Card
import androidx.compose.material3.HorizontalDivider
import androidx.compose.material3.Icon
import androidx.compose.material3.IconButton
import androidx.compose.material3.OutlinedTextField
import androidx.compose.material3.Text
import androidx.compose.runtime.getValue
import androidx.compose.runtime.mutableStateOf
import androidx.compose.runtime.remember
import androidx.compose.runtime.setValue
import androidx.compose.ui.Modifier
import androidx.compose.ui.text.font.FontWeight
import androidx.compose.ui.unit.dp
import androidx.lifecycle.compose.collectAsStateWithLifecycle
import io.getstream.feedstutorial.ui.LoadingScreen
import io.getstream.feeds.android.client.api.model.ThreadedCommentData
import io.getstream.feeds.android.client.api.state.Activity

@Composable
fun CommentsScreen(activityId: String, feedId: FeedId) {
    val viewModel = viewModel {
        CommentsViewModel(
            activityId = activityId,
            feedId = feedId,
            application = get(APPLICATION_KEY)!!
        )
    }

    val activity by viewModel.activity.collectAsStateWithLifecycle()

    Surface {
        when (val activity = activity) {
            null -> LoadingScreen()
            else -> CommentsContent(
                activity = activity,
                onComment = { text -> viewModel.onComment(text) }
            )
        }
    }
}

@Composable
private fun CommentsContent(activity: Activity, onComment: (String) -> Unit) {
    val comments by activity.state.comments.collectAsStateWithLifecycle()

    Column {
        LazyColumn(
            modifier = Modifier.weight(1f),
            contentPadding = PaddingValues(16.dp),
            verticalArrangement = Arrangement.spacedBy(8.dp)
        ) {
            items(comments) { comment ->
                CommentItem(comment)
            }
        }

        HorizontalDivider(Modifier.fillMaxWidth())

        CommentComposer(onComment = onComment)
    }
}

@Composable
private fun CommentItem(data: ThreadedCommentData) {
    Card {
        Column(
            Modifier
                .padding(16.dp)
                .fillMaxWidth(),
            verticalArrangement = Arrangement.spacedBy(4.dp),
        ) {
            Text(data.user.name.orEmpty(), fontWeight = FontWeight.SemiBold)
            Text(data.text.orEmpty())
        }
    }
}

@Composable
fun CommentComposer(
    onComment: (String) -> Unit,
) {
    var text by remember { mutableStateOf("") }

    OutlinedTextField(
        value = text,
        onValueChange = { text = it },
        modifier = Modifier
            .fillMaxWidth()
            .padding(16.dp),
        placeholder = { Text("Write a comment...") },
        maxLines = 4,
        trailingIcon = {
            IconButton(
                onClick = {
                    onComment(text)
                    text = ""
                },
                enabled = text.isNotBlank(),
            ) {
                Icon(
                    imageVector = Icons.AutoMirrored.Default.Send,
                    contentDescription = "Send comment",
                )
            }
        }
    )
}
1import androidx.compose.material.icons.filled.ChatBubbleOutline
123456789101112131415161718192021222324252627282930313233343536373839404142434445464748495051@Composable
fun ActivityItem(
    activity: ActivityData,
    feedId: FeedId,
    currentUserId: String,
    navController: NavController,
    onFollowClick: (ActivityData) -> Unit,
    onLikeClick: (ActivityData) -> Unit,
) {
    Card {
        Column(
            modifier = Modifier
                .fillMaxWidth()
                .padding(16.dp)
        ) {
            ActivityHeader(activity, currentUserId, onFollowClick)

            Text(
                text = activity.text.orEmpty(),
                fontSize = 14.sp,
                lineHeight = 20.sp,
                modifier = Modifier.padding(start = 56.dp, bottom = 8.dp),
            )

            Row(
                modifier = Modifier
                    .fillMaxWidth()
                    .padding(top = 8.dp),
            ) {
                ActionButton(
                    icon = Icons.Default.ChatBubbleOutline,
                    count = activity.commentCount,
                    contentDescription = "Comments",
                    onClick = {
                        navController.navigate("comments/${feedId.rawValue}/${activity.id}")
                    },
                )

                val reactionCount = activity.reactionGroups["like"]?.count ?: 0
                val hasOwnReaction = activity.ownReactions.any { it.type == "like" }
                ActionButton(
                    icon = if (hasOwnReaction) Icons.Default.Favorite else Icons.Default.FavoriteBorder,
                    count = reactionCount,
                    contentDescription = "Like",
                    onClick = { onLikeClick(activity) },
                )
            }
        }
    }
}
// Other code remains unchanged
Let's recap what happened in this step:
- We instantiated an
Activityobject usingclient.activityand called.get()to load the activity data, including the comments- Notice this is very similar to what we did for
Feedobjects
- Notice this is very similar to what we did for
- We posted new comments by calling
activity.addComment - We use
activity.commentCountto display the total number of comments on an activity
Comments can be threaded/nested too (not shown in the tutorial).
Posting Images
Stream API allows attaching files to activities and comments. Let's extend our app with attaching images to activities. To achieve this we need to:
- Extend the
ActivityComposercomponent to let users pick an image to attach and display a preview - Update the activity posting logic to include the attachment
- Extend the
Activitycomponent to display the attachment
123456789101112import androidx.activity.compose.rememberLauncherForActivityResult
import androidx.activity.result.PickVisualMediaRequest
import androidx.activity.result.contract.ActivityResultContracts
import androidx.compose.foundation.layout.size
import androidx.compose.foundation.shape.RoundedCornerShape
import androidx.compose.material.icons.Icons
import androidx.compose.material.icons.outlined.Image
import androidx.compose.material3.Icon
import androidx.compose.material3.IconButton
import androidx.compose.ui.draw.clip
import androidx.compose.ui.layout.ContentScale
import coil3.compose.AsyncImage
1234567891011121314151617181920212223242526272829303132333435363738394041424344454647484950@Composable
fun ActivityComposer(onPost: (String, Uri?) -> Unit) {
    var text by remember { mutableStateOf("") }
    var imageUri by remember { mutableStateOf<Uri?>(null) }

    val launcher = rememberLauncherForActivityResult(ActivityResultContracts.PickVisualMedia()) {
        imageUri = it
    }

    Column(verticalArrangement = Arrangement.spacedBy(16.dp)) {
        OutlinedTextField(
            value = text,
            onValueChange = { text = it },
            modifier = Modifier.fillMaxSize(),
            placeholder = { Text("What is happening?") },
        )

        imageUri?.let {
            AsyncImage(
                model = it,
                contentDescription = "Selected image",
                modifier = Modifier
                    .size(64.dp)
                    .clip(RoundedCornerShape(25)),
                contentScale = ContentScale.Crop
            )
        }

        Row(Modifier.align(Alignment.End), Arrangement.spacedBy(16.dp)) {
            IconButton(
                onClick = {
                    launcher.launch(
                        PickVisualMediaRequest(ActivityResultContracts.PickVisualMedia.ImageOnly)
                    )
                },
                content = { Icon(Icons.Outlined.Image, contentDescription = "Add image") }
            )
            Button(
                onClick = {
                    onPost(text, imageUri)
                    imageUri = null
                    text = ""
                },
                enabled = text.isNotBlank() || imageUri != null,
                content = { Text("Post") },
            )
        }
        HorizontalDivider(Modifier.fillMaxWidth())
    }
}
1234567import android.content.Context
import io.getstream.feeds.android.client.api.file.FeedUploadPayload
import io.getstream.feeds.android.client.api.file.FileType
import kotlinx.coroutines.Dispatchers
import kotlinx.coroutines.withContext
import java.io.File
import java.io.FileOutputStream
123456789101112131415161718192021222324252627282930313233343536373839// Replace the current `onPost` implementation and add the two helper functions
fun onPost(text: String, imageUri: Uri?) {
    val state = state.value ?: return

    viewModelScope.launch {
        val imageFile: File? = imageUri?.let { application.copyToCache(it) }?.getOrElse {
            // Failed to copy the file to cache
            return@launch
        }
        val attachment = imageFile?.let { listOf(FeedUploadPayload(it, FileType.Image)) }

        val request = FeedAddActivityRequest(
            type = "post",
            text = text.trim(),
            feeds = listOf(state.userFeed.fid.rawValue),
            attachmentUploads = attachment,
        )
        state.userFeed.addActivity(request = request)

        imageFile?.let { deleteFile(it) }
    }
}

private suspend fun Context.copyToCache(uri: Uri) = withContext(Dispatchers.IO) {
    runCatching {
        val outputFile = File(cacheDir, "attachment_${System.currentTimeMillis()}.tmp")

        contentResolver.openInputStream(uri).use { inputStream ->
            checkNotNull(inputStream) { "Error opening input stream for URI: $uri" }

            FileOutputStream(outputFile).use(inputStream::copyTo)
        }
        outputFile
    }
}

private suspend fun deleteFile(file: File) = runCatching {
    withContext(Dispatchers.IO) { file.delete() }
}
123import androidx.compose.foundation.layout.height
import androidx.compose.foundation.shape.RoundedCornerShape
import io.getstream.feeds.android.network.models.Attachment
123456789101112131415161718192021222324252627282930313233343536373839404142434445464748495051525354555657585960616263646566676869@Composable
fun ActivityItem(
    activity: ActivityData,
    feedId: FeedId,
    currentUserId: String,
    navController: NavController,
    onFollowClick: (ActivityData) -> Unit,
    onLikeClick: (ActivityData) -> Unit,
) {
    Card {
        Column(
            modifier = Modifier
                .fillMaxWidth()
                .padding(16.dp)
        ) {
            ActivityHeader(activity, currentUserId, onFollowClick)

            Text(
                text = activity.text.orEmpty(),
                fontSize = 14.sp,
                lineHeight = 20.sp,
                modifier = Modifier.padding(start = 56.dp, bottom = 8.dp),
            )

            activity.attachments.firstOrNull()?.let { attachment ->
                ImageAttachment(attachment)
            }

            Row(
                modifier = Modifier
                    .fillMaxWidth()
                    .padding(top = 8.dp),
            ) {
                ActionButton(
                    icon = Icons.Default.ChatBubbleOutline,
                    count = activity.commentCount,
                    contentDescription = "Comments",
                    onClick = {
                        navController.navigate("comments/${feedId.rawValue}/${activity.id}")
                    },
                )

                val reactionCount = activity.reactionGroups["like"]?.count ?: 0
                val hasOwnReaction = activity.ownReactions.any { it.type == "like" }
                ActionButton(
                    icon = if (hasOwnReaction) Icons.Default.Favorite else Icons.Default.FavoriteBorder,
                    count = reactionCount,
                    contentDescription = "Like",
                    onClick = { onLikeClick(activity) },
                )
            }
        }
    }
}

@Composable
private fun ImageAttachment(attachment: Attachment) {
    AsyncImage(
        modifier =
            Modifier
                .fillMaxWidth()
                .height(240.dp)
                .padding(top = 8.dp)
                .clip(RoundedCornerShape(12.dp)),
        model = attachment.imageUrl,
        contentDescription = "Activity image",
        contentScale = ContentScale.Crop,
    )
}
Go ahead and post an image! Or send an image URL, as the Stream API can automatically attach URL metadata as an attachment.
Final Thoughts
In this tutorial, we built a fully-functioning Android activity feed application with Stream's Activity Feed V3 SDK. We showed how easy it is to:
- Set up a simple activity feed application and connect it to Stream's Activity Feed V3 SDK.
- Create user and timeline feeds.
- Add activities, reactions and comments.
- Explore new content with "For you" feed.
Even though this was a long tutorial, Activity Feed V3 has even more features:
- Activity selectors and ranking for customizing what content to show for users
- Activity processors for extracting topics from activity content
- Notification feeds (with aggregation)
- Story feed (activity expiration)
- Custom feed groups
- Feed and activity visibility including premium activities with feed memberships
- Moderation and fine-grained permission system
- Polls
- For more examples, checkout the stream-feeds-android repository