















Handle Commands UI
To show the command UI in the message input, set up the middlewares in MessageComposer using setupCommandUIMiddlewares:
Best Practices
- Register command middlewares once during client setup to avoid duplicates.
- Keep custom command UI minimal so typing remains fast and predictable.
- Use
useStateStoreselectors to avoid re-renders on unrelated composer state. - Always restore the composer state when closing the command UI.
- Provide a clear escape path (e.g., close button or back gesture).
import { useEffect } from "react";
import { setupCommandUIMiddlewares } from "stream-chat-react-native";

const App = () => {
  useEffect(() => {
    if (!chatClient) {
      return;
    }
    chatClient.setMessageComposerSetupFunction(({ composer }) => {
      setupCommandUIMiddlewares(composer);
    });
  }, [chatClient]);
};
This adds four middlewares to MessageComposer:
createActiveCommandGuardMiddleware(stream-io/text-composer/active-command-guard) - Prevents new triggers when a command is active.createCommandStringExtractionMiddleware(stream-io/text-composer/command-string-extraction) - Extracts the command string (for example,/ban user→user).createCommandInjectionMiddleware(stream-io/message-composer-middleware/command-string-injection) - This injects the command string into the message composer state.createDraftCommandInjectionMiddleware(stream-io/message-composer-middleware/draft-command-string-injection) - This injects the command string into the draft state.
All of the above middlewares are exported from stream-chat.
The command state in TextComposer is set via createCommandsMiddleware from stream-chat.
Customizing Command UI
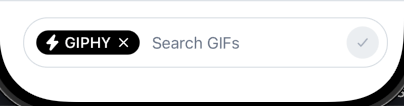
The input row (the area that renders the active-command chip alongside the text input) is drawn by the InputView component. InputView is a component override key, so you can replace it via WithComponents to render your own UI while a command is active.
Read the active command from the composer's TextComposer state with useMessageComposer and useStateStore. When a command is set, show your custom UI; otherwise fall back to the default AutoCompleteInput. Forward the props InputView receives (such as TextInputComponent and any additionalTextInputProps) to AutoCompleteInput.
import { Button, Text, View } from "react-native";
import {
  AutoCompleteInput,
  Channel,
  InputView,
  WithComponents,
  useMessageComposer,
  useStateStore,
} from "stream-chat-react-native";

import { TextComposerState } from "stream-chat";

const textComposerStateSelector = (state: TextComposerState) => ({
  command: state.command,
});

const CustomInputView = (props: React.ComponentProps<typeof InputView>) => {
  const messageComposer = useMessageComposer();
  const { textComposer } = messageComposer;
  const { command } = useStateStore(
    textComposer.state,
    textComposerStateSelector,
  );

  if (!command) {
    return <AutoCompleteInput {...props} />;
  }

  return (
    <View>
      <Text style={{ textAlign: "center" }}>{command.name}</Text>
      <AutoCompleteInput {...props} />
      <Button
        onPress={() => {
          textComposer.clearCommand();
          messageComposer.restore();
        }}
        title="Close"
      />
    </View>
  );
};

<WithComponents overrides={{ InputView: CustomInputView }}>
  <Channel channel={channel}>{/* The underlying components */}</Channel>
</WithComponents>;Your custom command UI only renders while a command is active in the message composer, which relies on the command state being set. Make sure you complete the middleware setup above so the command state is populated.