

As remote work and distributed teams become more popular, how we communicate and collaborate is evolving rapidly. Tools that support asynchronous communication are essential for team members to share updates, feedback, and walkthroughs without jumping on a call.
In this tutorial, you'll learn how to build a video recording and sharing platform using Next.js, Firebase, and Stream’s Video Calling API. The application allows users to record videos, upload them, and share them via unique links. Viewers can also leave comments and add reactions to the video recordings.
The application supports screen recording and screen sharing, making it useful for remote teams. Whether you're walking through a task, explaining a bug, or giving feedback on a project, this tool makes it easy to communicate ideas without joining a live meeting.
Prerequisites
This tutorial requires a basic understanding of React or Next.js.
We will use the following tools:
- Stream Video and Audio SDK: Provides built-in support for adding video and audio calling to your app. It includes features like call recording, customizable layouts, picture-in-picture mode, screen sharing, low-latency streaming, and more.
- Firebase: A backend-as-a-service platform developed by Google to enable us to add authentication, database, real-time communication, file storage, cloud functions, and many others within software applications.
- Stream Chat Firebase Extension: A Firebase extension that automatically connects your Firebase users to Stream.
- Shadcn UI: A UI component library that provides customizable, beautifully designed, and accessible UI components for your applications.
- React Copy-to-Clipboard: A lightweight package that makes it easy to copy video links for quick sharing.
Create a Next.js project by running the following code snippet:
1npx create-next-app loom-clone
Install the following package dependencies for the project:
1npm install firebase react-copy-to-clipboard @stream-io/node-sdk @stream-io/video-react-sdk
To install the Shadcn UI library, follow the installation guide and add Sonner to the package.
Finally, copy the following utility functions to the lib/utils.ts file:
123456789101112131415161718192021222324252627282930313233343536373839404142434445464748import { toast } from "sonner";
type ToastType = "success" | "error";

//👇🏻 creating slug from call titles
export const generateSlug = (title: string): string => {
    // Convert title to lowercase and replace spaces and non-alphanumerics with hyphens
    const slug = title
 .toLowerCase()
 .trim()
 .replace(/[^a-z0-9\s]/g, "") // remove special characters
 .replace(/\s+/g, "-"); // replace spaces with hyphens

    // Generate 4 random lowercase letters
    const randomLetters = Array.from({ length: 4 }, () =>
        String.fromCharCode(97 + Math.floor(Math.random() * 26))
 ).join("");

    return `${slug}-${randomLetters}`;
};

//👇🏻 formatting time to readable formats
export const formatReadableTime = (isoTime: string): string => {
    const date = new Date(isoTime);

    // Options for a readable date-time format
    const options: Intl.DateTimeFormatOptions = {
        year: "numeric",
        month: "long",
        day: "numeric",
        hour: "numeric",
        minute: "2-digit",
        hour12: true,
 };

    return date.toLocaleString(undefined, options);
};

//👇🏻 success/error messages
export const showToast = (type: ToastType, message: string) => {
    toast[type](message, {
        duration: 3000,
        position: "top-right",
        style: {
            backgroundColor: type === "success" ? "#16A34A" : "#DC2626",
            color: "white",
 },
 });
};
Configure Stream React Video SDK in Next.js
The Stream Audio and Video SDK supports multiple programming languages and frameworks, enabling developers to integrate video calling, audio calling, audio rooms, and live streaming within their software applications, regardless of the tech stack.
In this section, you will learn how to configure the Stream React Video SDK to add audio and video calling features to your Next.js application.
Visit the Stream sign-up page and create an account.
Next, create a new organization that holds all your Stream apps.
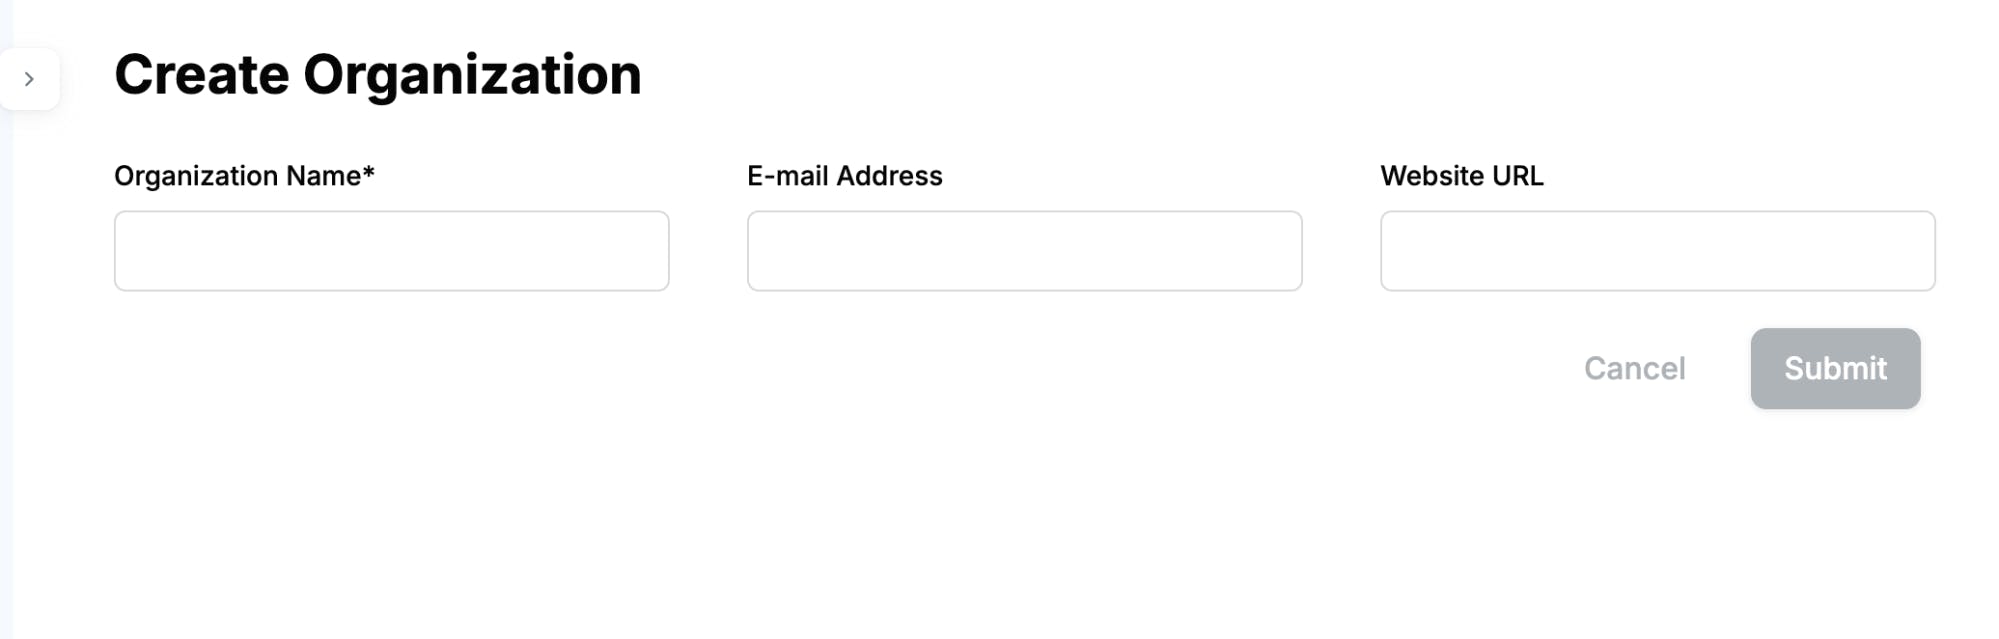
Add a new app to the organization, then copy the API Key and Secret Key into a .env.local file.
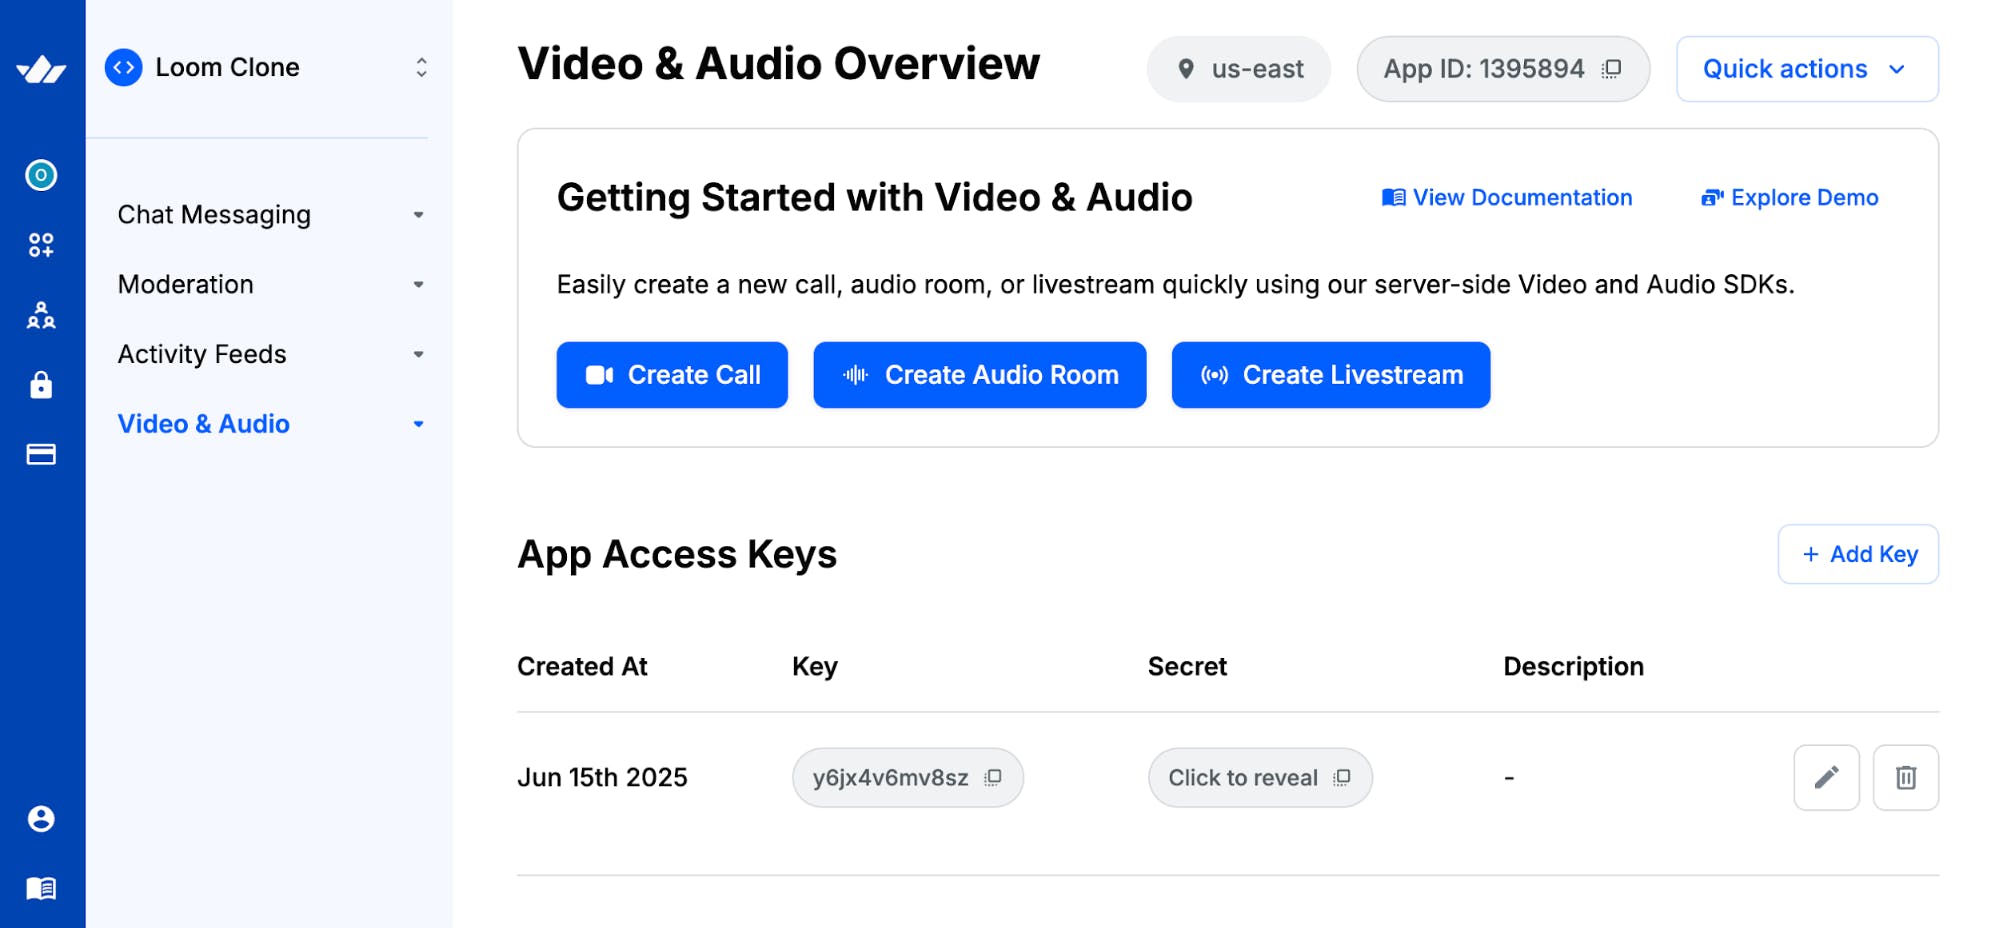
123456NEXT_PUBLIC_STREAM_API_KEY=<paste_from_Stream_app_dashboard>
STREAM_SECRET_KEY=<paste_from_Stream_app_dashboard>

# Extra variables for SVG image generation and host url
NEXT_PUBLIC_IMAGE_URL=https://api.dicebear.com/9.x/pixel-art/svg?seed=
NEXT_PUBLIC_HOST_URL=http://localhost:3000/
Create an actions folder containing a stream.action.ts file at the root of the Next.js project.
12cd loom-clone && mkdir actions && \
cd actions && touch stream.action.ts
Copy the following code snippet into the file:
12345678910111213141516171819202122"use server";
import { StreamClient } from "@stream-io/node-sdk";
const STREAM_API_KEY = process.env.NEXT_PUBLIC_STREAM_API_KEY!;
const STREAM_API_SECRET = process.env.STREAM_SECRET_KEY!;

// 👇🏻 -- For Stream Video client --
export const tokenProvider = async (user_id: string) => {
    if (!STREAM_API_KEY) throw new Error("Stream API key secret is missing");
    if (!STREAM_API_SECRET) throw new Error("Stream API secret is missing");

    const streamClient = new StreamClient(STREAM_API_KEY, STREAM_API_SECRET);

    const expirationTime = Math.floor(Date.now() / 1000) + 3600;
    const issuedAt = Math.floor(Date.now() / 1000) - 60;

    const token = streamClient.generateUserToken({
        user_id,
        Validity_in_seconds: 3600,
 });

    return token;
};
The tokenProvider function creates a Stream client using the user's API and Secret key and generates an authentication token to identify and manage users during real-time communication.
Set Up Firebase in a Next.js App
Firebase is a cloud platform that enables you to build full-stack software applications without worrying about managing your database or server infrastructure. It provides features like authentication, real-time database, cloud functions, file storage, and more.
In this section, you'll learn how to install Firebase and configure the Firestore Database and Firebase authentication in your Next.js application.
Install the Firebase Node.js package by running the code snippet below:
1npm install firebase
Open the Firebase Console in your browser and create a new Firebase project.
Within the project dashboard, click the web icon \</> to add a Firebase app to the project.
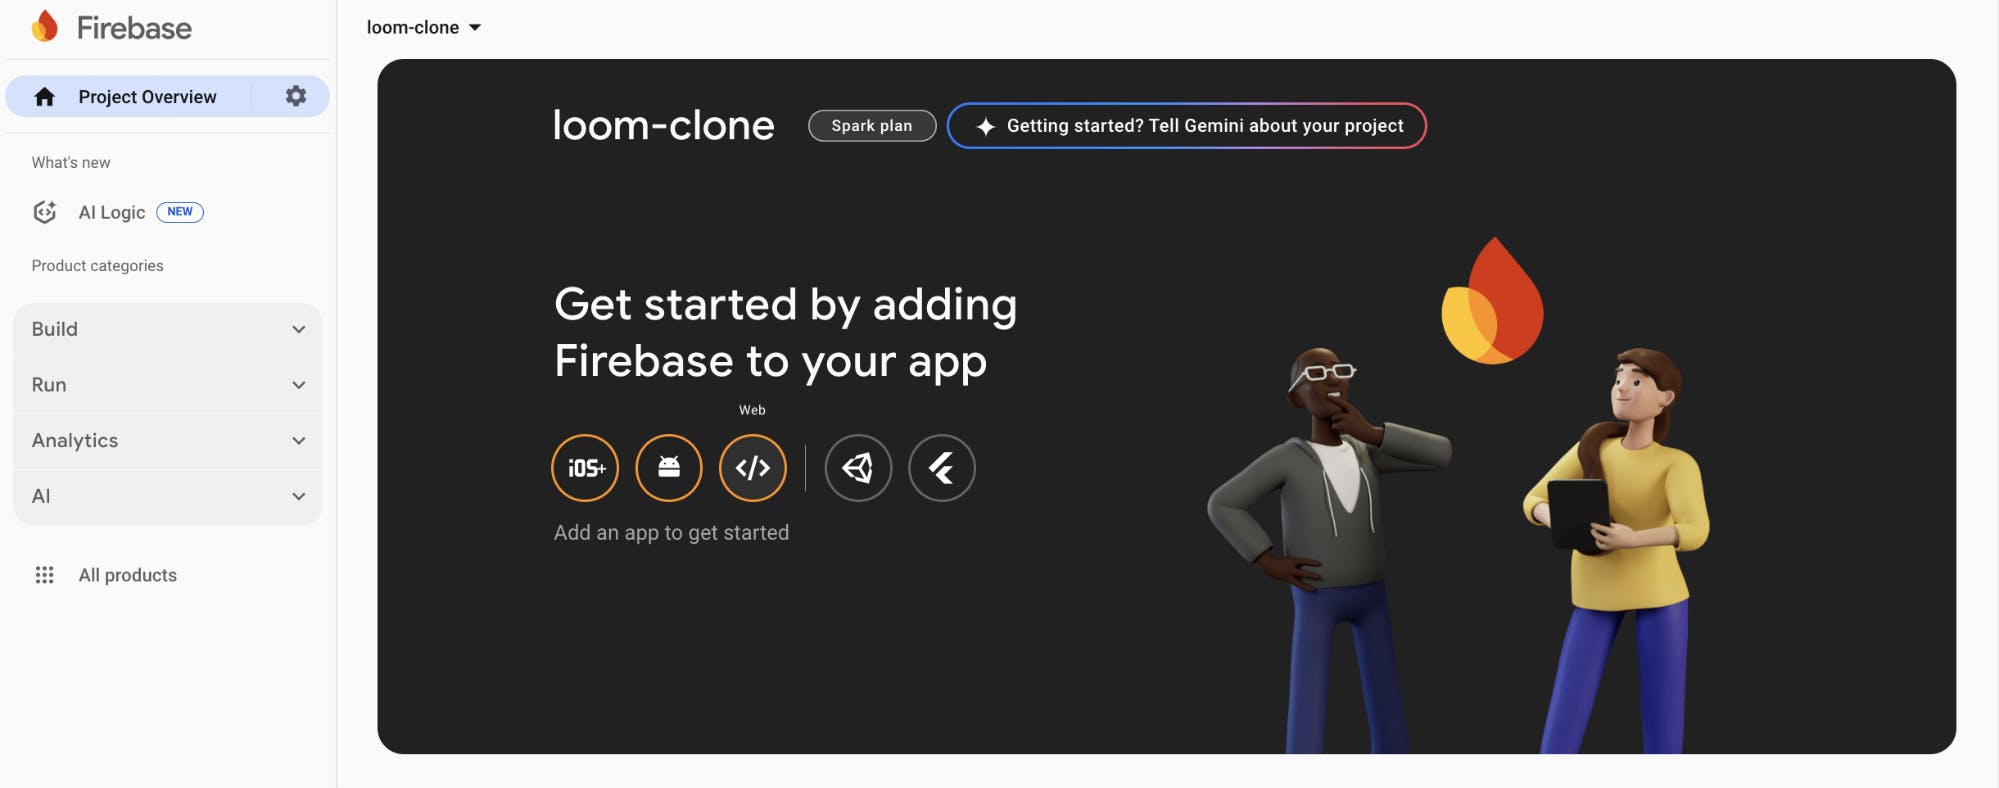
Register the app by entering a nickname, then copy the auto-generated Firebase configuration code.
Create a lib/firebase.ts file within the Next.js src folder and paste the following code snippet into the file:
12345678910111213141516171819import { initializeApp, getApps } from "firebase/app";
import { getFirestore } from "firebase/firestore";
import { EmailAuthProvider } from "firebase/auth";
import { getAuth } from "firebase/auth";

const firebaseConfig = {
    // 👉🏻 paste your Firebase config
};

//👇🏻 Initialize Firebase
const app =
    getApps().length === 0 ? initializeApp(firebaseConfig) : getApps()[0];
const provider = new EmailAuthProvider();
const db = getFirestore(app);
const auth = getAuth(app);

//👇🏻 Export modules
export { provider, auth };
export default db;
The code snippet above initializes the Firestore database and sets up Firebase's email/password authentication provider, allowing your application to interact with the database and handle user authentication.
Before interacting with Firebase features, you must set them up in your project dashboard.
Click Build in your dashboard's sidebar navigation. This will open a drop-down menu with various features you can enable for your project.
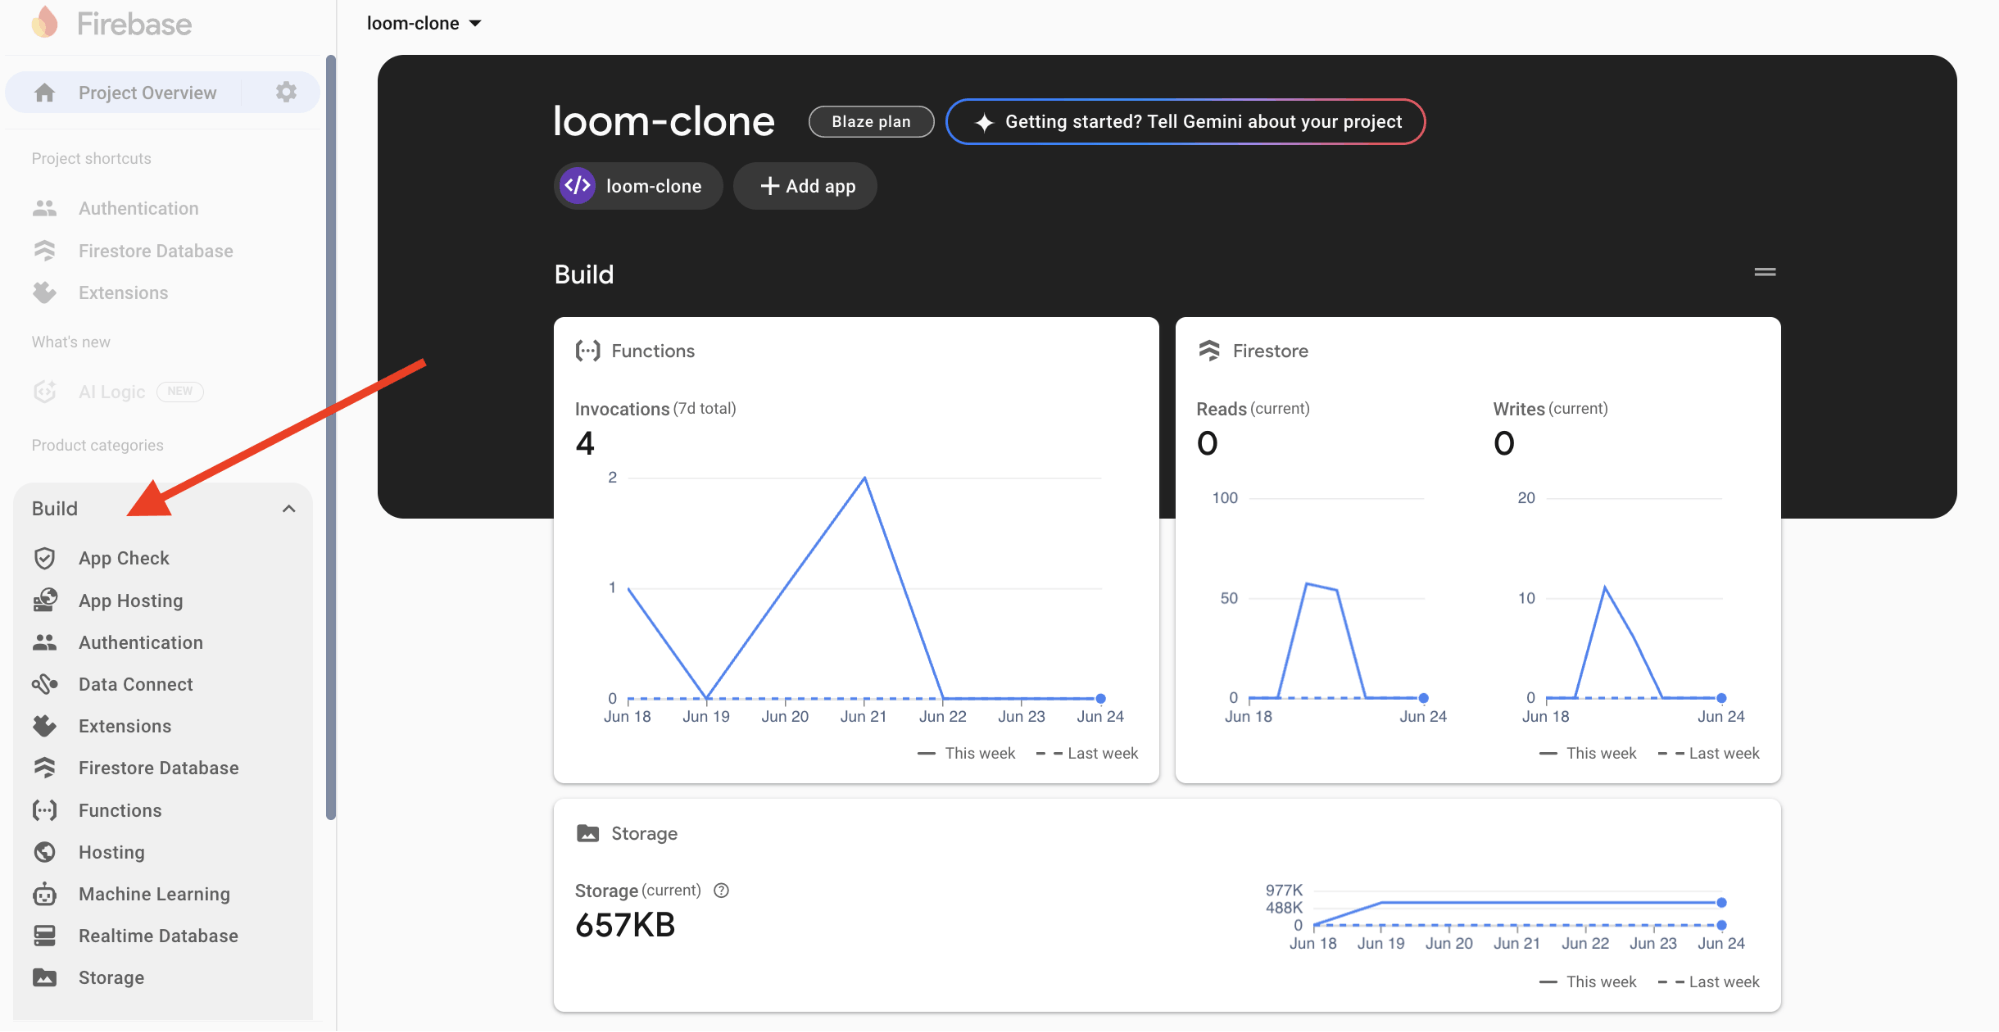
Select Authentication and Firestore Database from the drop-down and add them to the project.
Congratulations! You can now start interacting with these Firebase features in your Next.js project.
Installing the Stream Chat Firebase Extension
The Authenticate with Stream Chat extension automatically connects your Firebase users to Stream Chat, making it easy for Stream to access and manage your users.
Visit the Stream Chat Firebase Extension page and select the Firebase project where you want to install the extension.
Note: Upgrade your Firebase project to the Blaze (pay-as-you-go) plan before installing the extension.
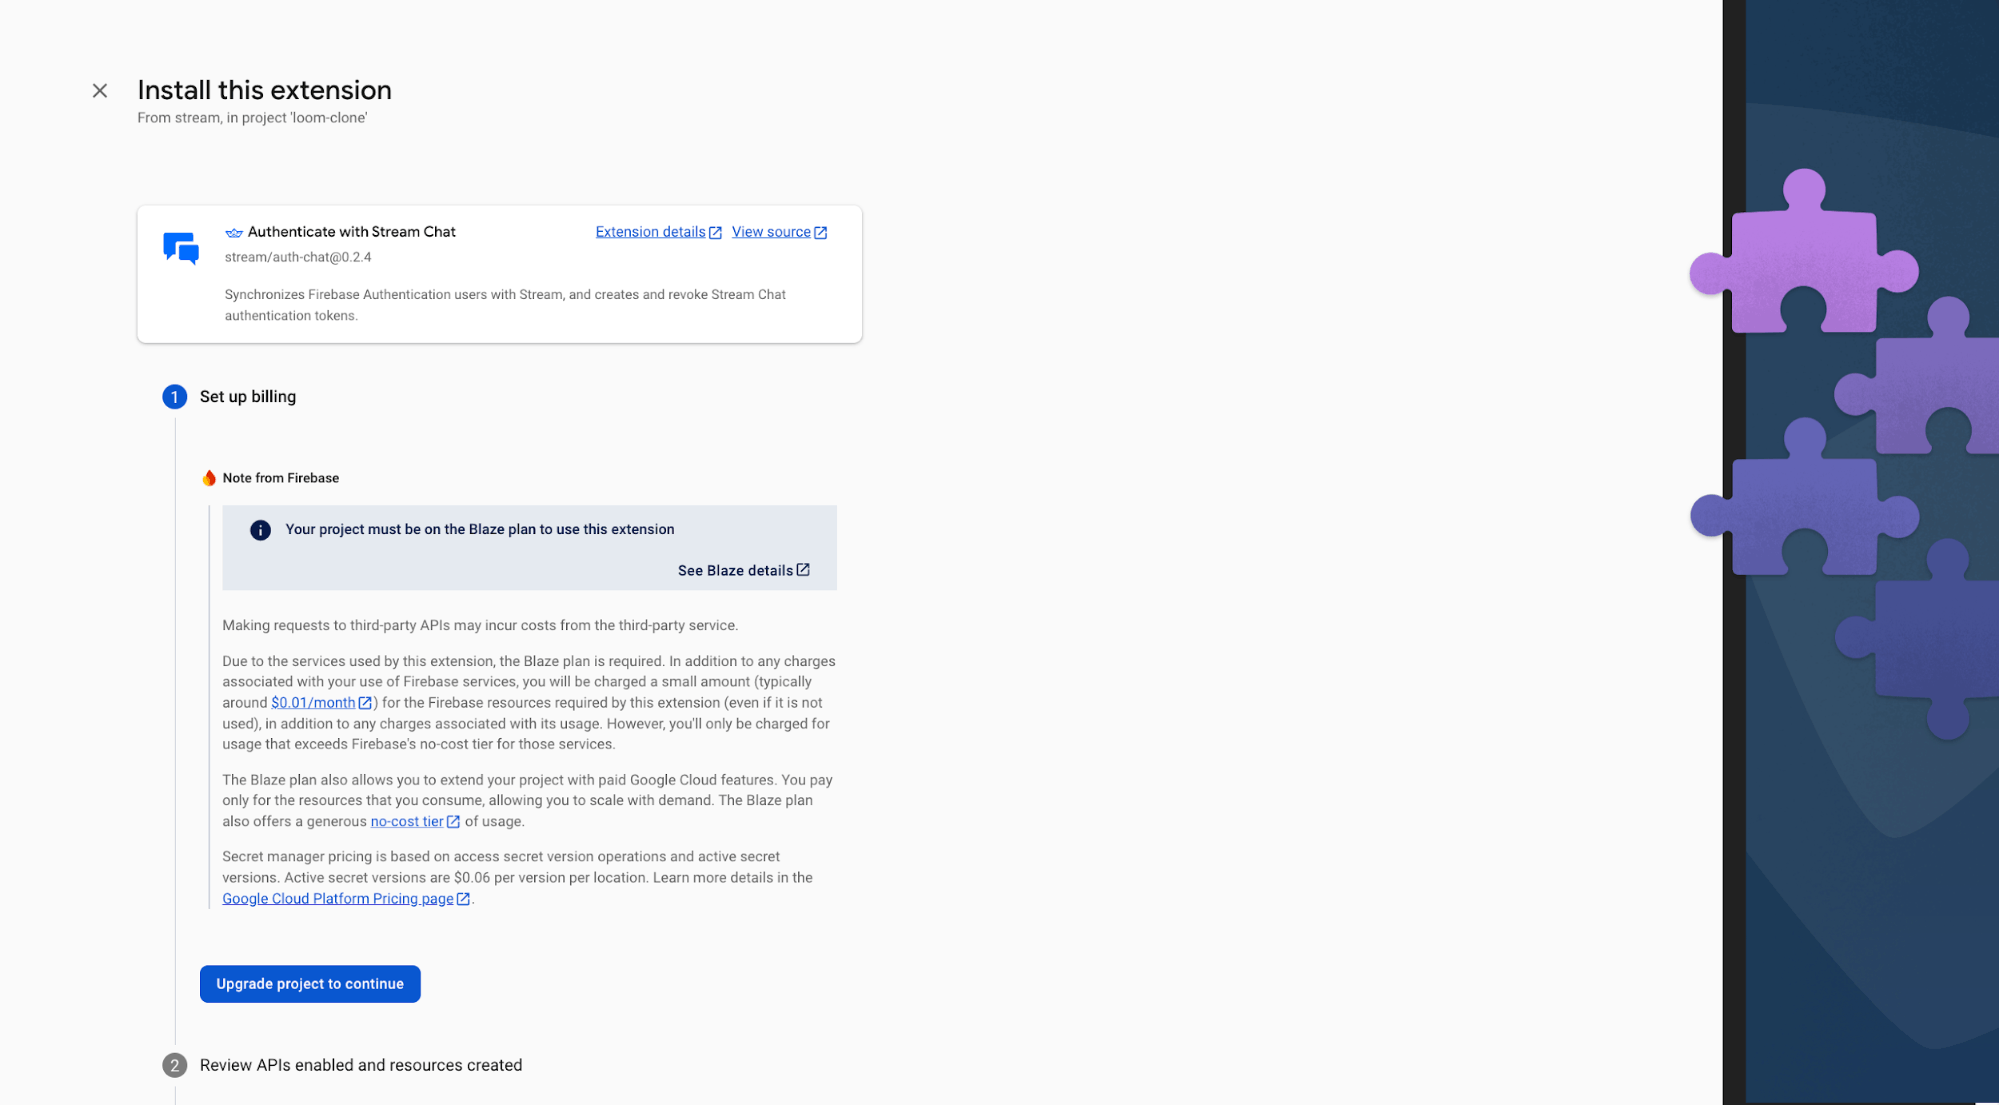
During installation, enable Artifact Registry, Cloud Functions, and Secret Manager. These permissions allow Stream to access and manage your Firebase users.
Finally, enter your Stream API key and secret in the configuration fields, then click the Install Extension button.

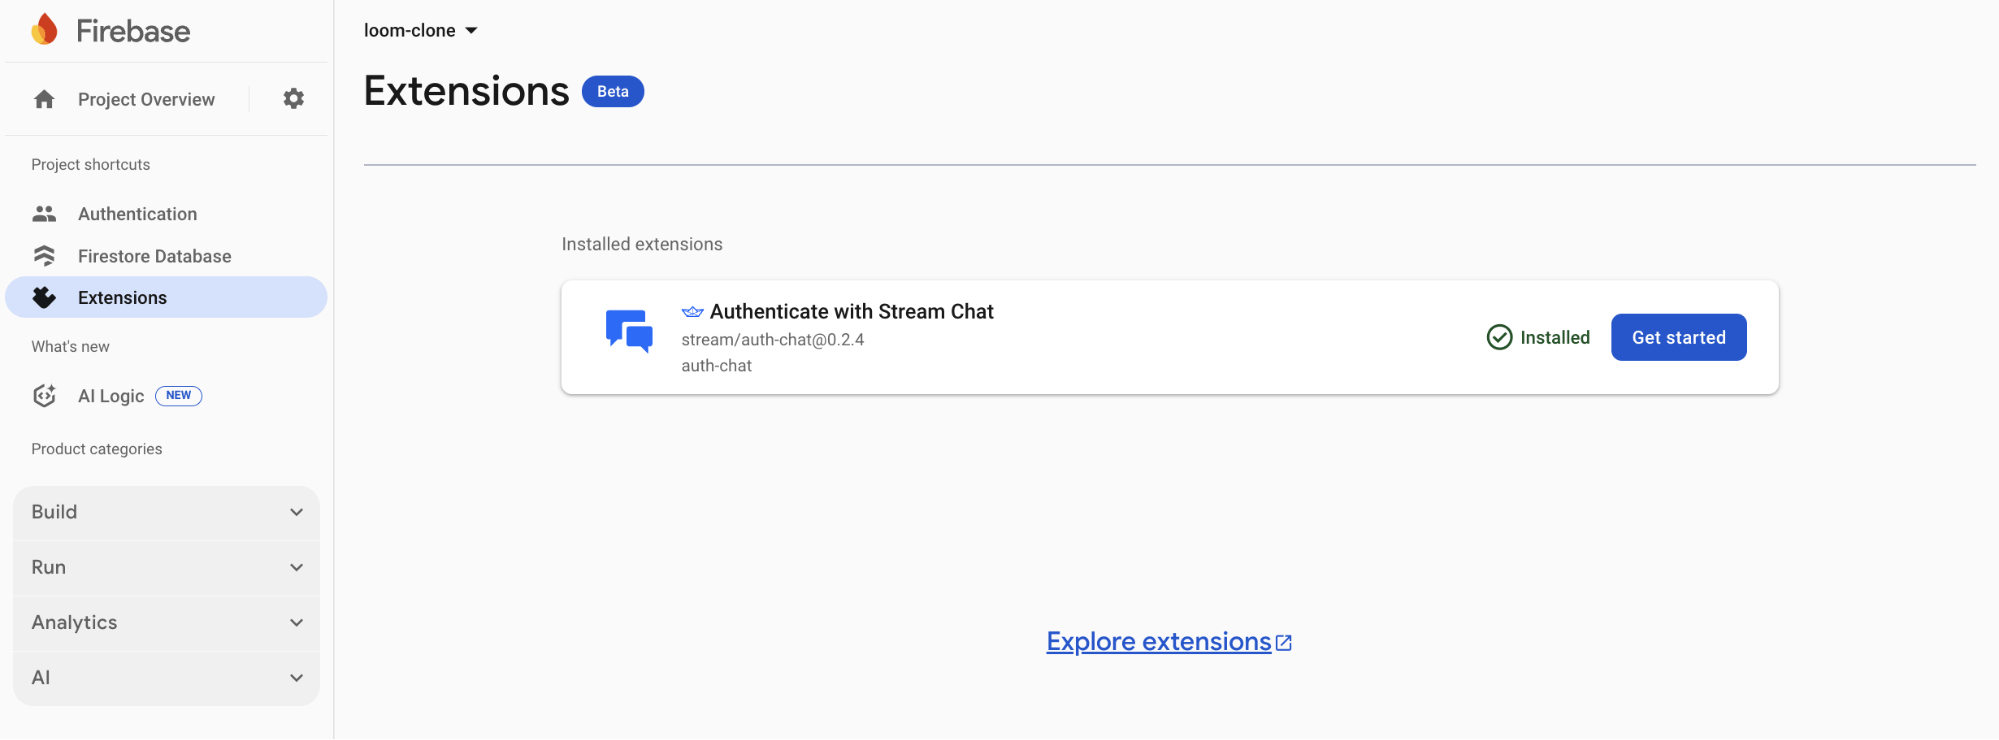
The extension will be installed within a few minutes. Once setup is complete, every new Firebase user will automatically be added to Stream.
Building the Application Pages
In this section, you will learn how to build the application's workflow key pages and UI components. The app is divided into five pages:
- /register – This page handles new user registration. It displays a form where users can enter their name, email, and password to create an account.
- /login – This page allows existing users to sign in using their email and password.
- /dashboard – This page lists all available video recordings and includes a link that directs users to the recording page.
- /record – This is the recording page. It uses Stream to record high-quality videos.
- /record/[id] – This dynamic route displays individual recordings based on their unique ID. Users can watch videos, leave comments, and react with an emoji.
User Authentication Pages: Register and Login
Inside your Next.js app directory, create a folder named (public). Then, create two sub-folders: login and register, within them.
12345678src
├── app/
│   ├── (public)/
│   │   ├── login/
│   │   │   └── page.tsx
│   │   └── register/
│   │       └── page.tsx
│   └── layout.tsx
The (public) folder holds routes like login and register, which are accessible without authentication.
Add a page.tsx file within both sub-folders and a layout.tsx directly within the (public) folder.
123456(public)/
├── layout.tsx
├── login/
│   └── page.tsx
└── register/
 └── page.tsx
Copy the following code snippet into the (public)/layout.tsx file:
12345678910111213141516171819202122232425262728293031323334353637import Link from "next/link";
import type { Metadata } from "next";
import { MoveRight } from "lucide-react";

export const metadata: Metadata = {
    title: "Authentication | Loom Clone",
    description: "Generated by create next app",
};

export default function AuthLayout({
    children,
}: Readonly<{
    children: React.ReactNode;
}>) {
    return (
 <main className='w-full min-h-screen flex items-start justify-between'>
            {/** -- Side bar Navigation -- */}
 <nav className='w-1/4 h-screen md:block hidden'>
 <div className='w-1/4 bg-blue-500 h-screen md:block hidden fixed top-0 z-10 p-8'>
 <section className='absolute bottom-20 px-2 flex flex-col'>
 <Link href='/' className='font-bold text-2xl text-gray-50'>
 Loom Clone
 </Link>
 <p className='opacity-70 mt-2 text-sm'>
 Seamless video upload and sharing{" "}
 <MoveRight className='inline-block ml-1' />
 </p>
 </section>
 </div>
 </nav>

            {/** -- End of Side bar Navigation -- */}

            {children}
 </main>
 );
}
The layout.tsx file defines metadata for the authentication pages and includes a shared sidebar navigation used by both the login and register pages.
Copy the following code snippet into the login/page.tsx file:
12345678910111213141516171819202122232425262728293031323334353637383940414243444546474849505152535455565758596061626364"use client"; import { loginUser } from "@/lib/serverfunction"; import { useRouter } from "next/navigation"; import { useState } from "react"; import Link from "next/link"; export default function Login() { const [buttonClicked, setButtonClicked] = useState<boolean>(false); const router = useRouter(); const handleSubmit = async (e: React.FormEvent<HTMLFormElement>) => { e.preventDefault(); setButtonClicked(true); const form = e.currentTarget; const formData = new FormData(form); //👇🏻 log form data console.log("Form Data:", Object.fromEntries(formData.entries())); }; return ( <section className='md:w-3/4 w-full h-screen flex flex-col justify-center md:px-8 px-6 items-center'> <h2 className='text-3xl font-bold mb-3 md:text-left text-center'> Sign into your account </h2> <form className='w-full' onSubmit={handleSubmit}> <label htmlFor='email' className='mb-2 opacity-60'> Email Address </label> <input required type='email' id='email' name='email' className='w-full px-4 py-3 border-[1px] rounded-md mb-3' /> <label htmlFor='password' className='mb-2 opacity-60'> Password </label> <input required type='password' id='password' name='password' className='w-full px-4 py-3 border-[1px] rounded-md mb-2' /> <button type='submit' className='mt-6 mb-2 text-lg text-white rounded-md bg-blue-500 w-full px-8 py-4 cursor-pointer hover:bg-blue-600' disabled={buttonClicked} > {buttonClicked ? "Signing in" : "Sign in"} </button> <p className=' opacity-60 text-center'> Don't have an account?{" "} <Link href='/register' className='text-blue-800'> Create one </Link> </p> </form> </section> ); }
The Login component renders a form that accepts the user's email and password and signs the user into the application.
Finally, modify the register/page.tsx file, as shown below:
1234567891011121314151617181920212223242526272829303132333435363738394041424344454647484950515253545556575859606162636465666768697071727374"use client";
import { registerUser } from "@/lib/serverfunction";
import { useRouter } from "next/navigation";
import { useState } from "react";
import Link from "next/link";

export default function Register() {
    const [buttonClicked, setButtonClicked] = useState<boolean>(false);
    const router = useRouter();

    const handleSubmit = async (e: React.FormEvent<HTMLFormElement>) => {
        e.preventDefault();
        setButtonClicked(true);
        const form = e.currentTarget;
        const formData = new FormData(form);
        //👇🏻 logs the form input
        console.log("Form Data:", Object.fromEntries(formData.entries()));
 };

    return (
 <section className='md:w-3/4 w-full h-screen flex flex-col justify-center md:px-8 px-6 items-center'>
 <h2 className='text-3xl font-bold mb-3 md:text-left text-center'>
 Create your account
 </h2>
 <form className='w-full' onSubmit={handleSubmit}>
 <label htmlFor='name' className='mb-2 opacity-60'>
 Name
 </label>
 <input
                    required
                    type='text'
                    id='name'
                    name='name'
                    className='w-full px-4 py-3 border-[1px] rounded-md mb-3'
 />
 <label htmlFor='email' className='mb-2 opacity-60'>
 Email Address
 </label>
 <input
                    required
                    type='email'
                    id='email'
                    name='email'
                    className='w-full px-4 py-3 border-[1px] rounded-md mb-3'
 />

 <label htmlFor='password' className='mb-2 opacity-60'>
 Password
 </label>
 <input
                    required
                    type='password'
                    id='password'
                    name='password'
                    className='w-full px-4 py-3 border-[1px] rounded-md mb-2'
 />

 <button
                    type='submit'
                    className='mt-6 mb-2 text-lg text-white rounded-md bg-blue-500 w-full px-8 py-4 cursor-pointer hover:bg-blue-600'
                    disabled={buttonClicked}
 >
                    {buttonClicked ? "Registering..." : "Sign up"}
 </button>
 <p className=' opacity-60 text-center'>
 Already have an account?{" "}
 <Link href='/login' className='text-blue-800'>
 Sign in
 </Link>
 </p>
 </form>
 </section>
 );
}
The Register component renders a form that accepts the user's name, email, and password and creates an account for the user using the provided credentials.
The Dashboard Page
Before we proceed, create a types.d.ts file at the root of your Next.js project and copy the following type definitions into it. This file holds all the type declarations used throughout the application.
12345678910type CallWithRecordings = {
    call: Call;
    recordings: CallRecording[];
};
type CommentArgs = {
    comment: string;
    userName: string;
    recordID: string;
    createdAt?: string;
};
The CallWithRecordings type represents each item in the call recordings array. Since a single call can have multiple recordings, it contains the call details along with an array of its associated recordings. The CommentArgs type defines the shape of the data required to comment on a recording.
Create a (private) folder and add a dashboard directory containing a page.tsx file.
123456src
├── app/
│   ├── (private)/
│   │   ├── dashboard/
│   │        └── page.tsx
│   └── (public)
Next, copy the following code snippet into the dashboard/page.tsx file:
12345678910111213141516171819202122232425262728293031323334353637383940414243444546474849505152535455565758596061626364656667686970"use client";
import Recordings from "@/app/(components)/Recordings";
import { Loader2 } from "lucide-react";
import Link from "next/link";

export default function Dashboard() {
    //👇🏻 Call Recordings demo
    const callWithRecordings: CallWithRecordings[] = [
 {
            call: {
                id: "call_123",
                state: {
                    custom: {
                        title: "Team Sync Meeting",
 },
 },
 },
            recordings: [
 {
                    session_id: "rec_001",
                    start_time: "2025-06-23T10:00:00Z",
 },
 {
                    session_id: "rec_002",
                    start_time: "2025-06-23T10:30:00Z",
 },
 ],
 },
 ];

    return (
 <main className='w-full h-screen'>
 <Navigation />
 <div className=' h-[90vh] md:px-8 px-3 py-4 '>
 <h2 className='text-2xl text-blue-500 font-bold'>Recordings</h2>
 <p className='opacity-60 text-xs mb-6'>
 Manage all your video recordings
 </p>

 <Recordings recordings={callWithRecordings} />
 </div>
 </main>
 );
}

const Navigation = () => {
    return (
 <nav className='flex items-center justify-between h-[10vh] md:px-8 px-2 py-4 border-b-[1px] border-gray-300 top-0 sticky bg-white z-10'>
 <Link href='/' className='font-bold text-2xl'>
 Loom Clone
 </Link>

 <div className='flex items-center gap-x-3'>
 <Link
                    href='/record'
                    className='bg-blue-500 text-sm hover:bg-blue-400 text-white px-5 py-3 rounded-md cursor-pointer'
 >
 New Recording
 </Link>

 <button
                    className='bg-red-600 text-sm hover:bg-red-500 text-white px-5 py-3 rounded-md cursor-pointer'
                    onClick={logoutUser}
 >
 Log Out
 </button>
 </div>
 </nav>
 );
};
The code snippet above renders the top navigation bar and displays the call recordings using a custom \<Recordings /> component, which receives an array of call recordings as a prop.
Create the Recordings.tsx component and copy the following code snippet into the file:
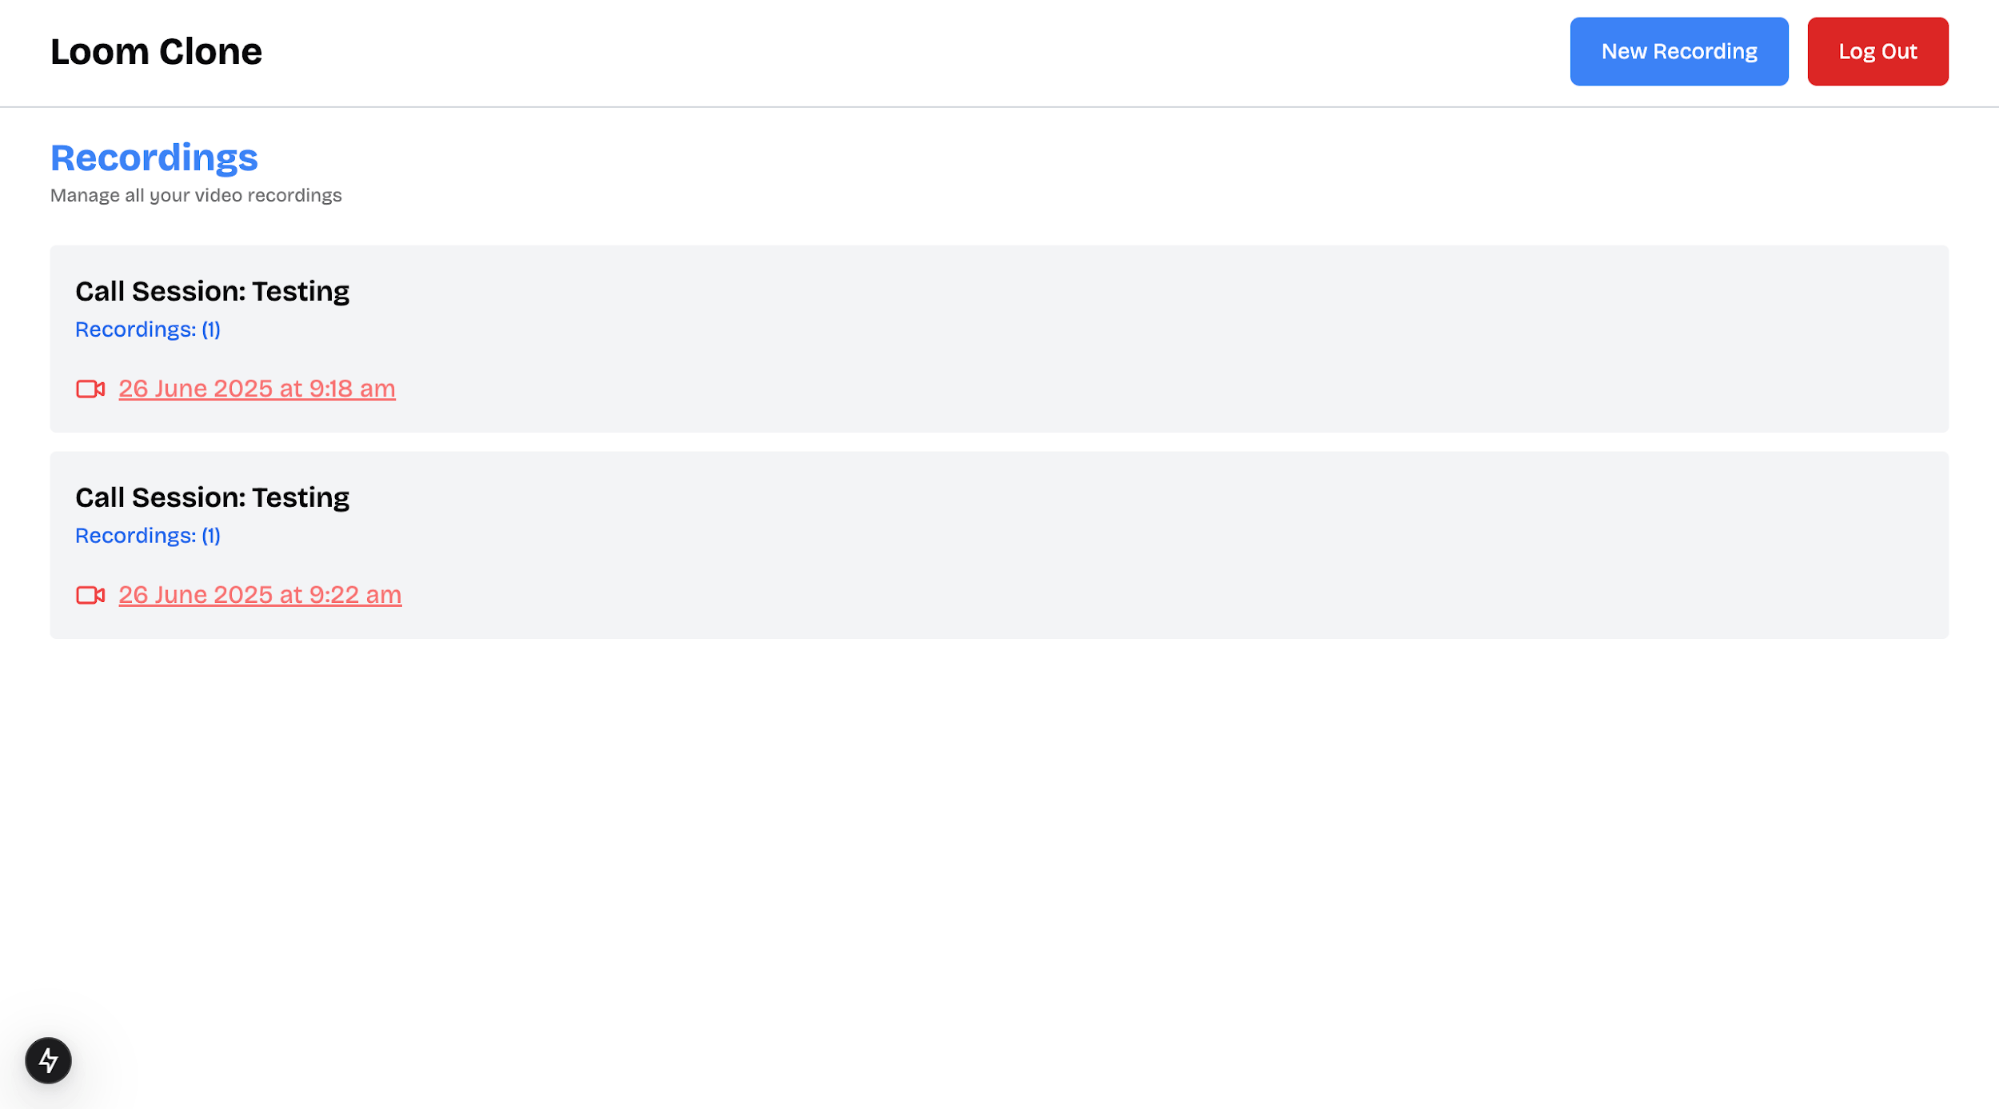
1234567891011121314151617181920212223242526272829303132333435363738394041424344454647484950515253545556import { Video } from "lucide-react";
import Link from "next/link";
import { formatReadableTime } from "@/lib/utils";

export default function Recordings({
    recordings,
}: {
    recordings: CallWithRecordings[];
}) {
    return (
 <div className='flex flex-col w-full gap-y-3'>
            {recordings.length > 0 ? (
                recordings.map((data, idx) => <Item key={idx} data={data} />)
 ) : (
 <p className='text-red-500 text-sm'>No existing recordings </p>
 )}
 </div>
 );
}

const Item = ({ data }: { data: CallWithRecordings }) => {
    return (
 <div className='w-full flex items-center justify-between rounded-sm bg-gray-100 hover:shadow-md p-4'>
 <section>
 <h3 className='font-semibold text-lg'>
 Call Session: {data.call.state.custom.title}
 </h3>

 <p className='text-sm text-blue-600 mb-4'>
 Recordings: ({data.recordings.length})
 </p>

                {data.recordings.length > 0 ? (
 <div className='flex flex-col gap-y-2'>
                        {data.recordings.map((recording, idx) => (
 <Link
                                href={`/record/${data.call.id}?search=${recording.session_id}`}
                                target='_blank'
                                className='flex items-center text-red-400 gap-x-2 underline hover:text-red-600'
                                key={idx}
 >
 <Video size={20} className='text-red-500' />

 <p className=' text-red-400'>
                                    {formatReadableTime(recording.start_time)}
 </p>
 </Link>
 ))}
 </div>
 ) : (
 <p className='text-xs text-gray-500'> No recordings available</p>
 )}
 </section>
 </div>
 );
};
The Recording component renders all the call recordings created by the current user. If there are no recordings, it displays a fallback message informing the user that no recordings are available.

The Create Recording Page
Inside the (private) directory, create a new record folder. Within that folder, add a page.tsx file and copy the following code snippet into it:
12345678910111213141516171819202122"use client";
import { Call } from "@stream-io/video-react-sdk";
import Nav from "@/app/(components)/Nav";
import { generateSlug } from "@/lib/utils";
import { Loader2 } from "lucide-react";
import { useState } from "react";

export default function Record() {
    const [createCall, setCreateCall] = useState<boolean>(false);
    const [call, setCall] = useState<Call | null>(null);

    return (
 <main>
 <Nav />
            {createCall && call ? (
 <Screen call={call} /> // 👈🏼 meeting screen
 ) : (
 <CreateForm setCreateCall={setCreateCall} setCall={setCall} />
 )}
 </main>
 );
}
Add the CreateForm component below the Record component within the page.tsx file:
1234567891011121314151617181920212223242526272829303132333435363738394041424344454647484950515253545556575859606162636465const CreateForm = ({
    setCreateCall,
    setCall,
}: {
    setCreateCall: Dispatch<SetStateAction<boolean>>;
    setCall: Dispatch<SetStateAction<Call | null>>;
}) => {
    const [processing, setProcessing] = useState<boolean>(false);

    const handleCreateCall = async (e: React.FormEvent<HTMLFormElement>) => {
        e.preventDefault();
        setProcessing(true);
        const formData = new FormData(e.currentTarget);
        const title = formData.get("title") as string;
        const description = formData.get("description") as string;
        //👇🏻 logs title and description
        console.log({ title, description });
 };

    return (
 <main>
 <form
                onSubmit={handleCreateCall}
 >
 <h2 className='text-2xl font-bold mb-4'>Create Call Session</h2>
 <div className='mb-4'>
 <label
                        htmlFor='title'
 >
 Title
 </label>
 <input
                        type='text'
                        name='title'
                        id='title'
                        required
                        placeholder='Enter recording title'
 />
 </div>
 <div className='mb-4'>
 <label
                        htmlFor='description'
                        className='block text-sm font-medium text-gray-700 mb-2'
 >
 Description
 </label>
 <textarea
                        name='description'
                        id='description'
                        rows={3}
                        required
                        placeholder='Enter recording description'
 />
 </div>

 <button
                    type='submit'
                    disabled={processing}
 >
                    {processing ? "Creating..." : "Create Session"}
 </button>
 </form>
 </main>
 );
};
From the code snippet above:
- The Record component conditionally renders the create call form or the meeting screen based on the application state.
- The meeting screen (\<Screen />) is displayed as soon as the user creates a call session.
- Both the CreateForm and Screen components are conditionally rendered depending on the value of the createCall state.
In this section, you have learned how to build the UI components for the authentication pages, the dashboard, and the create recording page. In the upcoming sections, you will make these pages functional by adding user authentication, creating calls, and retrieving recordings from Stream.
Implement Authentication and Database Operations with Firebase
In this section, you will learn how to authenticate users with Firebase and create database functions that allow users to add comments and reactions to video recordings within the application.
Start by creating a serverfunction.ts file inside the lib folder. This file will contain all the Firebase authentication and database functions.
1cd lib && touch serverfunction.ts
Next, import the necessary Firebase methods into the file:
1234567import {
    createUserWithEmailAndPassword,
    signInWithEmailAndPassword,
    updateProfile,
} from "firebase/auth";
import { doc, getDoc, setDoc, updateDoc, arrayUnion } from "firebase/firestore";
import db, { auth } from "./firebase";
User Authentication Using Firebase
Create a registerUser function inside the lib/serverfunction.ts file that accepts the user's email, password, and name and creates an account for the user.
12345678910111213141516171819202122232425262728293031323334353637export const registerUser = async (form: FormData) => {
    const email = form.get("email") as string;
    const password = form.get("password") as string;
    const name = form.get("name") as string;

    try {
        const { user } = await createUserWithEmailAndPassword(
            auth,
            email,
            password
 );
        if (!user) {
            return {
                code: "auth/failed",
                status: 500,
                user: null,
                message: "Failed to create user",
 };
 }
        //👇🏻 adds the name to the profile
        await updateProfile(user, { displayName: name });
        return {
            code: "auth/success",
            status: 200,
            user,
            message: "Acount created successfully! 🎉",
 };
 } catch (err) {
        return {
            code: "auth/failed",
            status: 500,
            user: null,
            message: "Failed to create user",
            error: err,
 };
 }
};
The registerUser function is called when a user submits the registration form.
Add a loginUser function to the serverfunction.ts file:
123456789101112131415161718192021222324252627282930export const loginUser = async (form: FormData) => {
    const email = form.get("email") as string;
    const password = form.get("password") as string;
    try {
        const { user } = await signInWithEmailAndPassword(auth, email, password);
        if (!user) {
            return {
                code: "auth/failed",
                status: 500,
                user: null,
                message: "Failed to login user",
 };
 }

        return {
            code: "auth/success",
            status: 200,
            user,
            message: "Logged in successfully! 🎉",
 };
 } catch (err) {
        return {
            code: "auth/failed",
            status: 500,
            user: null,
            message: "Failed to login user",
            error: err,
 };
 }
};
The loginUser function accepts the users' email and password, validates the credentials, and signs them into the application. Once the login form is submitted and authentication is successful, the app navigates the user to the dashboard page.
Users can also log out of the application using the Firebase signOut function.
12345678910111213141516171819export const logoutUser = async () => {
    try {
        await auth.signOut();
        return {
            code: "auth/success",
            status: 200,
            user: null,
            message: "Logged out successfully! 🎉",
 };
 } catch (err) {
        return {
            code: "auth/failed",
            status: 500,
            user: null,
            message: "Failed to logout user",
            error: err,
 };
 }
};
Finally, to restrict access to pages inside the (private) folder, you must protect them from unauthenticated users. You can achieve this by creating an authentication context and wrapping it over your application pages.
Create a new file called AuthContext.tsx and add the following code:
1234567891011121314151617181920212223242526272829303132333435363738394041424344454647484950515253"use client";
import { createContext, useState, useEffect } from "react";
import { onAuthStateChanged, User } from "firebase/auth";
import { useRouter } from "next/navigation";
import { auth } from "@/lib/firebase";
import { Loader2 } from "lucide-react";

const AuthContext = createContext<{
    user: User | null;
    loading: boolean;
}>({
    user: null,
    loading: true,
});

export function AuthProvider({
    children,
}: Readonly<{
    children: React.ReactNode;
}>) {
    const [user, setUser] = useState<User | null>(null);
    const [loading, setLoading] = useState(true);
    const router = useRouter();

    useEffect(() => {
        const unsubscribe = onAuthStateChanged(auth, async (user) => {
            if (user?.uid) {
                setUser(user);
                setLoading(false);
 } else {
                return router.push("/login");
 }
 });

        return () => unsubscribe();
 }, [router]);

    return (
 <>
            {user ? (
 <AuthContext.Provider value={{ loading, user }}>
                    {children}
 </AuthContext.Provider>
 ) : (
 <main className='flex items-center justify-center h-screen'>
 <Loader2 className='animate-spin text-4xl font-bold text-blue-500 text-center' />
 </main>
 )}
 </>
 );
}

export default AuthContext;
The AuthContext provider retrieves the current Firebase user. If a user is authenticated, it returns the user object and sets the loading state to false. If no user is found, it returns null and redirects the user to the login page.
Wrap the (private)/layout.tsx file with the \<AuthProvider/> component as shown below:
123456789101112131415161718import { AuthProvider } from "../(components)/AuthContext";
import type { Metadata } from "next";

export const metadata: Metadata = {
    title: "Dashboard | Loom Clone",
    description: "Dashboard for Loom Clone application",
};

export default function AuthLayout({
    children,
}: Readonly<{
    children: React.ReactNode;
}>) {
    return (
 <AuthProvider>
 <main>{children}</main>
 </AuthProvider>
 );
Adding and Retrieving User Reactions and Comments
Users can leave comments and react to video recordings. You can handle this functionality using the following functions.
Add the following code snippet to the serverfunction.ts file to enable users to add comments to the video recordings.
12345678910111213141516171819202122232425262728293031323334353637383940export const addComment = async ({
    comment,
    userName,
    recordID,
}: CommentArgs) => {
    //👇🏻 reference video recording using its ID
    const commentRef = doc(db, "comments", recordID);

    const commentObj = {
        userName,
        comment,
        createdAt: new Date().toISOString(),
 };

    try {
        const commentDoc = await getDoc(commentRef);

        if (commentDoc.exists()) {
            //👇🏻 Document exists -- append to comments array
            await updateDoc(commentRef, {
                comments: arrayUnion(commentObj),
 });
 } else {
            //👇🏻 Document doesn't exist -- create it
            await setDoc(commentRef, {
                comments: [commentObj],
 });
 }
        return {
            success: true,
            message: "Comment added successfully.",
 };
 } catch (error) {
        return {
            success: false,
            message: "Failed to add comment.",
            error,
 };
 }
};
The addComment function accepts the user's name, comment, and the ID of the video recording. It then adds the comment to the Firestore database. If a comment document already exists for the given recording ID, the new comment will be added to the existing array. Otherwise, it creates a new document with the comment.
Fetch all the comments made on a video using the code snippet below:
12345678910111213141516export const getComments = async (recordID: string) => {
    const commentRef = doc(db, "comments", recordID);
    try {
        const commentDoc = await getDoc(commentRef);
        return {
            success: true,
            comments: commentDoc.data()?.comments || [],
 };
 } catch (error) {
        return {
            success: false,
            message: "Failed to fetch comments.",
            error,
 };
 }
};
The getComments function accepts the video recording ID as a parameter and retrieves the comments from the Firestore database.
The function below also allows users to react to video recordings by adding the user ID to a reactions array:
12345678910111213141516171819202122232425262728293031323334353637383940export const addReaction = async (userId: string, recordID: string) => {
    const docRef = doc(db, "comments", recordID);

    try {
        const docSnap = await getDoc(docRef);
        if (!docSnap.exists()) {
            const reactions = [userId];
            await setDoc(docRef, { reactions });
            return {
                success: true,
                message: "Reaction added successfully.",
                reactions,
 };
 }

        const reactions: string[] = docSnap.data()?.reactions || [];

        if (reactions.includes(userId)) {
            return {
                success: false,
                message: "You have already reacted to this recording.",
                reactions,
 };
 }

        await updateDoc(docRef, { reactions: arrayUnion(userId) });
        return {
            success: true,
            message: "Reaction added successfully.",
            reactions: [...reactions, userId],
 };
 } catch (error) {
        return {
            success: false,
            message: "Failed to add reaction.",
            reactions: [],
            error,
 };
 }
};
The addReaction function takes the user ID and the video recording ID as arguments and adds the user ID to the reactions array in Firestore. If the user has already reacted to the video (i.e., their ID already exists in the array), the function returns an error message.
The function also returns the updated reactions array, which contains the IDs of all users who have reacted to the video. You can use the length of this array to display the total reaction count for each video.
On page load, you can retrieve the reactions for a video using the function below:
1234567891011121314151617181920212223export const getReactions = async (recordID: string) => {
    const docRef = doc(db, "comments", recordID);
    try {
        const docSnap = await getDoc(docRef);
        if (!docSnap.exists()) {
            return {
                reactions: [],
 };
 }

        const reactions = docSnap.data()?.reactions || [];
        return {
            success: true,
            reactions,
 };
 } catch (error) {
        return {
            success: false,
            reactions: [],
            error,
 };
 }
};
When the page component mounts, the getReactions function is called inside a useEffect hook to fetch reactions array.
Set Up the Stream for Video Calls
In this section, you’ll learn how to set up the Stream Audio and Video Client SDK, create video calls, and build meeting pages using Stream’s built-in UI components.
Before we proceed, create a (stream) folder inside your Next.js app directory. This folder will contain the Stream client provider and custom hooks for retrieving call recordings.
1234app/
├── (stream)/ // 👉🏻 Stream UI components & custom hooks
├── (private)/ // 🔒 Private/authenticated routes
└── (public)/ // 🌐 Public routes (login/register)
Add a StreamVideoProvider.tsx file to the (stream) folder and copy the following code snippet into the file:
123456789101112131415161718192021222324252627282930313233343536373839404142434445464748"use client";
import { useState, ReactNode, useEffect, useContext, useCallback } from "react";
import { StreamVideo, StreamVideoClient } from "@stream-io/video-react-sdk";
import { tokenProvider } from "../../../actions/stream.action";
import AuthContext from "../(components)/AuthContext";
import { Loader2 } from "lucide-react";

const apiKey = process.env.NEXT_PUBLIC_STREAM_API_KEY!;

export const StreamVideoProvider = ({ children }: { children: ReactNode }) => {
    const [videoClient, setVideoClient] = useState<StreamVideoClient | null>(
        null
 );
    //👇🏻 Gets current user
    const { user, loading } = useContext(AuthContext);

    const getClient = useCallback(async () => {
        if (!user) return null;

        //👇🏻 Generate Stream Video Client
        const client = new StreamVideoClient({
            apiKey,
            user: {
                id: user.uid,
                name: user.displayName ?? "",
                image: `${
                    process.env.NEXT_PUBLIC_IMAGE_URL
                }${user.displayName?.toLowerCase()}`,
 },
            tokenProvider: () => tokenProvider(user.uid),
 });
        setVideoClient(client);
 }, [user]);

    useEffect(() => {
        getClient();
 }, [getClient]);

    if (!videoClient || loading || !user) {
        return (
 <div className='h-screen flex items-center justify-center'>
 <Loader2 size='32' className='mx-auto animate-spin' />
 </div>
 );
 }

    return <StreamVideo client={videoClient}>{children}</StreamVideo>;
};
The StreamVideoProvider component retrieves the current user's ID and name, generates a Stream Video client using the credentials and the tokenProvider function, and returns a \<StreamVideo/> wrapper component that provides the video client context to the call pages.
Next, update the (private)/layout.tsx file by wrapping the protected pages with the StreamVideoProvider component.
1234567891011121314151617181920212223import { AuthProvider } from "../(components)/AuthContext";
import type { Metadata } from "next";
//👇🏻 Stream Video Provider
import { StreamVideoProvider } from "../(stream)/StreamVideoProvider";

export const metadata: Metadata = {
    title: "Dashboard | Loom Clone",
    description: "Dashboard for Loom Clone application",
};

export default function AuthLayout({
    children,
}: Readonly<{
    children: React.ReactNode;
}>) {
    return (
 <AuthProvider>
 <StreamVideoProvider>
 <main>{children}</main>
 </StreamVideoProvider>
 </AuthProvider>
 );
}
At this point, you can implement the functions that allow users to create calls, join calls, record calls, and retrieve call recordings.
Update the CreateForm component within the /record route with the following code snippet:
12345678910111213141516171819202122232425262728293031323334353637383940414243444546474849505152import AuthContext from "@/app/(components)/AuthContext";
import { useContext } from "react";
import { useStreamVideoClient } from "@stream-io/video-react-sdk";

const CreateForm = ({
    setCreateCall,
    setCall,
}: {
    setCreateCall: Dispatch<SetStateAction<boolean>>;
    setCall: Dispatch<SetStateAction<Call | null>>;
}) => {
    const { user } = useContext(AuthContext);
    const client = useStreamVideoClient();

    const handleCreateCall = async (e: React.FormEvent<HTMLFormElement>) => {
        e.preventDefault();
        if (!client || !user)
            return console.error("Stream Video client is not initialized");
        setProcessing(true);

        const formData = new FormData(e.currentTarget);
        const title = formData.get("title") as string;
        const description = formData.get("description") as string;

        try {
            //👇🏻 generates call ID
            const call = client.call("default", generateSlug(title));
            if (!call) throw new Error("Failed to create meeting");
            //👇🏻 creates call
            await call.getOrCreate({
                data: {
                    starts_at: new Date().toISOString(),
                    custom: {
                        title,
                        description,
 },
                    members: [{ user_id: user.uid }],
 },
 });

            setProcessing(false);
            setCall(call);
            setCreateCall(true);
 } catch (error) {
            console.error("Error creating call:", error);
            setProcessing(false);
 }
 };
    return {
        /** --- UI component displaying the form*/
 };
};
The handleCreateCall function accepts the call title and description from the form input. It first verifies that the user is authenticated and the Stream Video client is available. If both conditions are met, it generates a call ID from the title, creates a new call using the Stream client, and adds the current user as a call member. After successfully creating the call, it updates the local states: setCall and setCreateCall.
Creating the Call Setup and Call Pages with Stream UI Components
After creating a call, update the call state with the new call object. Then, display the call setup page, where users can turn their microphone and camera on or off before joining the call.
To implement this, create a Screen component that accepts the current call as a prop. This component will conditionally render either the call setup page or the live call page, depending on whether the user has joined the call.
12345678910111213141516171819import { StreamCall, StreamTheme } from "@stream-io/video-react-sdk";

const Screen = ({ call }: { call: Call }) => {
    const [isCallJoined, setIsCallJoined] = useState(false);

    return (
 <main className='w-full'>
 <StreamCall call={call}>
 <StreamTheme>
                    {isCallJoined ? (
 <CallRoom call={call} />
 ) : (
 <SetUp call={call} setIsCallJoined={setIsCallJoined} />
 )}
 </StreamTheme>
 </StreamCall>
 </main>
 );
};
The StreamCall component accepts the call as a prop and makes the call instance and its state available to all child components. The StreamTheme component provides the default UI styling for Stream’s built-in elements. When the user joins the call, the Screen component renders the \<CallRoom /> component; otherwise, it shows the \<SetUp /> component.
Create a SetUp.tsx file and copy the following code snippet into the file:
12345678910111213141516171819202122232425262728293031323334353637383940414243444546474849505152"use client";
import { showToast } from "@/lib/utils";
import { Call, VideoPreview } from "@stream-io/video-react-sdk";
import { Camera, CameraOff, Mic, MicOff } from "lucide-react";
import { useState } from "react";

export default function SetUp({
    call,
    setIsCallJoined,
}: {
    call: Call;
    setIsCallJoined: React.Dispatch<React.SetStateAction<boolean>>;
}) {
    const [camEnabled, setCamEnabled] = useState<boolean>(false);
    const [micEnabled, setMicEnabled] = useState<boolean>(false);

    //👇🏻 enable/disable camera
    const handleEnableCamera = () => {
        if (!camEnabled) {
            call?.camera.enable();
            setCamEnabled(true);
            showToast("success", "Camera enabled");
 } else {
            call?.camera.disable();
            setCamEnabled(false);
            showToast("error", "Camera disabled");
 }
 };

    //👇🏻 enable/disable microphone
    const handleEnableMic = () => {
        if (!micEnabled) {
            call?.microphone.enable();
            setMicEnabled(true);
            showToast("success", "Microphone enabled");
 } else {
            call?.microphone.disable();
            setMicEnabled(false);
            showToast("error", "Microphone disabled");
 }
 };

    //👇🏻 join call
    const handleJoinCall = () => {
        call.join();
        setIsCallJoined(true);
 };

    return {
        /**-- UI components- */
 };
}
The SetUp component includes functions that let users enable or disable their microphone and camera before joining a call and allow them to join the call once they're ready.
Next, render the following UI elements within the \<SetUp/> component:
12345678910111213141516171819202122232425262728293031323334353637383940414243444546474849return (
 <main className=' w-full flex flex-col items-center justify-center'>
 <h2 className='text-xl font-bold text-center text-blue-500'>
            {call.state.custom.title}
 </h2>
 <p className='text-center mb-4 text-gray-400 text-sm'>
            {call.state.custom.description}
 </p>

 <h2 className='text-lg font-bold text-center mb-4'>
 Please update your microphone and camera settings
 </h2>

 <div className='w-2/5 h-[400px] rounded-lg shadow-md'>
 <VideoPreview className='w-full h-full mt-4' />
 </div>

 <div className='flex gap-4 my-4'>
 <div
                className='shadow-md rounded-full p-4 bg-gray-100 hover:bg-gray-200 transition-all duration-200 cursor-pointer'
                onClick={handleEnableCamera}
 >
                {camEnabled ? (
 <CameraOff className='text-blue-500' size={30} />
 ) : (
 <Camera className='text-blue-500' size={30} />
 )}
 </div>

 <div
                className='shadow-md rounded-full p-3 bg-gray-100 hover:bg-gray-200 transition-all duration-200 cursor-pointer'
                onClick={handleEnableMic}
 >
                {micEnabled ? (
 <MicOff className='text-blue-500' size={40} />
 ) : (
 <Mic className='text-blue-500' size={40} />
 )}
 </div>
 </div>

 <button
            className='bg-blue-500 mt-2 text-white rounded-lg  px-8 py-3 shadow-md hover:bg-blue-600 transition-all duration-200'
            onClick={handleJoinCall}
 >
 Join Call
 </button>
 </main>
);
Create the CallRoom.tsx file and copy the following code snippet into the file:
12345678910111213141516171819202122232425262728293031323334"use client";
import { useEffect } from "react";
import {
    SpeakerLayout,
    CallControls,
    Call,
    useCallStateHooks,
} from "@stream-io/video-react-sdk";
import { showToast } from "@/lib/utils";
import { useRouter } from "next/navigation";

export default function CallRoom({ call }: { call: Call }) {
    const { useIsCallRecordingInProgress } = useCallStateHooks();
    const isCallRecordingInProgress = useIsCallRecordingInProgress();
    const router = useRouter();

    const handleLeave = () =>
        confirm("Leave the call?") && router.push("/dashboard");

    return (
 <section className='min-h-screen w-full'>
 <div className='flex h-[80vh] items-center'>
 <SpeakerLayout participantsBarPosition='right' />
 </div>
 <div className='bg-gray-100 flex w-full items-center justify-center gap-5'>
 <CallControls onLeave={handleLeave} />
                {isCallRecordingInProgress && (
 <p className='text-green-500 text-sm'>Recording in progress...</p>
 )}
 <EndCallButton call={call} />
 </div>
 </section>
 );
}
Stream provides pre-built video components that make it easy to build and customize your video call layout. In the code snippet above:
- The SpeakerLayout component defines how to display participants during a call, such as in a grid or with the active speaker shown more prominently.
- The CallControls component renders all the essential video call features, including screen sharing, muting or unmuting the microphone, toggling the camera, sending live reactions, and leaving the call.
- The useCallStateHooks function provides access to various available call functions. For instance, useIsCallRecordingInProgress tracks the recording state, allowing you to conditionally display UI elements, such as a "Recording in progress" message.
Finally, a custom button component (EndCallButton) will be created that allows users to end the call after the recording session has ended.
1234567891011121314151617181920212223242526const EndCallButton = ({ call }: { call: Call }) => {
    const { useLocalParticipant } = useCallStateHooks();
    const localParticipant = useLocalParticipant();
    const router = useRouter();

    const participantIsHost =
        localParticipant &&
        call.state.createdBy &&
        localParticipant.userId === call.state.createdBy.id;

    if (!participantIsHost) return null;

    const handleEndCall = () => {
        call.endCall();
        showToast("success", "Call ended successfully");
        router.push("/dashboard");
 };

    return (
 <button
            onClick={handleEndCall}
 >
 End call
 </button>
 );
};
The handleEndCall function ensures that the user is the call host before ending the call.
Congratulations! You have successfully set up the call pages and learned how to record call sessions with Stream.
Retrieve Call Recordings from Stream
In the previous section, you learned how to create, join, and record video call sessions. Here, you will learn how to retrieve the call recordings from Stream.
Before we proceed, create a [id] folder containing a page.tsx file within the (private)/record directory.
1234record/
├── [id]/         // 👉🏻 Dynamic route for individual video recording
│   └── page.tsx  // Page for viewing a specific record by ID
└── page.tsx      // Page for creating new video recording
Next, create two custom hooks: useGetRecordings and useGetSingleRecording.
The useGetRecordings hook retrieves the list of recorded calls, while useGetSingleRecording fetches a specific recording using its ID. Add both hook files to the (stream) folder in your project.
Copy the following code snippet into the useGetRecordings.ts file:
123456789101112131415161718192021222324252627282930313233343536373839404142434445464748495051525354555657585960616263646566676869import { useEffect, useState } from "react";
import { useStreamVideoClient } from "@stream-io/video-react-sdk";

export const useGetRecordings = (userId: string) => {
    const [callWithRecordings, setCallWithRecordings] = useState<
        CallWithRecordings[]
    >([]);
    const [isLoading, setIsLoading] = useState<boolean>(true);
    const client = useStreamVideoClient();

    useEffect(() => {
        if (!client) return;

        const loadCallRecordings = async () => {
            try {
                //👇🏻 get all calls
                const { calls } = await client.queryCalls({
                    sort: [{ field: "starts_at", direction: -1 }],
                    filter_conditions: {
                        $or: [
 { created_by_user_id: userId },
 { members: { $in: [userId] } },
 ],
 },
 });

                if (!calls || calls.length === 0) {
                    setCallWithRecordings([]);
                    setIsLoading(false);
                    return;
 }
                //👇🏻 get all calls and their recordings
                const enrichedCallsRaw = await Promise.all(
                    calls.map(async (call) => {
                        try {
                            const { recordings } = await call.queryRecordings();

                            if (recordings && recordings.length > 0) {
                                return { recordings, call };
 } else {
                                return null;
 }
 } catch (error) {
                            console.error(
                                "Error fetching recordings for call:",
                                call.id,
                                error
 );
                            return null;
 }
 })
 );
                //👇🏻 ensures that none of the recordings value are null
                const enrichedCalls: CallWithRecordings[] = enrichedCallsRaw.filter(
 (item): item is CallWithRecordings => item !== null
 );
                //👇🏻 update the state
                setCallWithRecordings(enrichedCalls);
                setIsLoading(false);
 } catch (error) {
                console.error("Error fetching calls:", error);
                setIsLoading(false);
 }
 };
        loadCallRecordings();
 }, [client, userId]);
    //👇🏻 return calls and recordings
    return { callWithRecordings, isLoading };
};
The useGetRecordings hook accepts the user ID and retrieves all calls associated with that user from Stream. It then maps through the list of calls to fetch the corresponding recordings for each one. Finally, it returns an array containing the call objects and their recordings. This hook is used in the /dashboard page to load and display all existing calls and their associated recordings.
Copy the code snippet below into the useGetSingleRecording.ts file:
12345678910111213141516171819202122232425262728293031323334353637383940414243444546474849505152535455565758import { useEffect, useState } from "react";
import {
    CallRecording,
    useStreamVideoClient,
} from "@stream-io/video-react-sdk";
import { useRouter } from "next/navigation";

export const useGetSingleRecording = (callId: string, recordId: string) => {
    const [recording, setRecording] = useState<CallRecording | null>(null);
    const [isLoading, setIsLoading] = useState<boolean>(true);
    const client = useStreamVideoClient();
    const router = useRouter();

    useEffect(() => {
        //👇🏻 ensures callId, Stream client and recording Id exists
        if (!client || !callId || !recordId) {
            setIsLoading(false);
            return;
 }

        const loadRecording = async () => {
            try {
                //👇🏻 queries the call
                const { calls } = await client.queryCalls({
                    filter_conditions: { id: callId },
 });

                if (!calls || calls.length === 0) {
                    console.error(`No call found with ID: ${callId}`);
                    setIsLoading(false);
                    return;
 }
                //👇🏻 queries the call recordings
                const { recordings } = await calls[0].queryRecordings();
                //👇🏻 gets exact recording with matching ID
                const foundRecording = recordings.find(
 (rec) => rec.session_id === recordId
 );

                if (!foundRecording) {
                    setIsLoading(false);
                    return router.push("/dashboard");
 }
                //👇🏻 updates recording
                setRecording(foundRecording);
 } catch (error) {
                console.error("Error fetching recording:", error);
 } finally {
                setIsLoading(false);
 }
 };

        loadRecording();
 }, [callId, recordId, client, router]);

    //👇🏻 returns recording and loading state
    return { isLoading, recording };
};
The useGetSingleRecording hook accepts a call ID and a recording ID as arguments. Then, it retrieves the call object using the call ID and fetches the list of recordings associated with that call. From this list, it searches for the recording that matches the provided recording ID. This step is necessary because a single call can have multiple recordings.
This hook is used in the [id]/page.tsx file to display a specific video recording based on its unique session ID.
Copy the following code snippet into the [id]/page.tsx file:
123456789101112131415161718192021222324252627282930313233343536373839404142"use client";
import Nav from "@/app/(components)/Nav";
import { useGetSingleRecording } from "@/app/(stream)/useGetSingleRecording";
import { useParams, useSearchParams } from "next/navigation";

export default function Recording() {
    const { id } = useParams<{ id: string }>();
    const searchParams = useSearchParams();
    const recordID = searchParams.get("search");
    const { isLoading, recording } = useGetSingleRecording(
        id,
        recordID as string
 );

    if (!recording && !isLoading) {
        return (
 <div className='w-full h-[75vh] flex items-center justify-center'>
 <p className='text-red-500'>No recording found</p>
 </div>
 );
 }

    return (
 <div>
 <Nav />
 <main className='w-full md:px-8 px-2 py-4'>
 <div className=' w-full h-[75vh] rounded-md bg-gray-200 flex items-center justify-center'>
 <video
                        controls
                        width='100%'
                        style={{ borderRadius: "12px", height: "100%" }}
 >
 <source src={recording?.url} type='video/mp4' />
 Your browser does not support the video tag.
 </video>
 </div>

                {/** -- Reactions and Comments section -- */}
 </main>
 </div>
 );
}
The code snippet above uses the useGetSingleRecording hook to retrieve the recording URL and renders it in a \<video> element, allowing users to play or download the recording directly from the browser.
The useGetSingleRecording hook takes two arguments: the call ID and the recording ID. This is possible by structuring the page URL as follows:
1const URL = `${process.env.NEXT_PUBLIC_HOST_URL}record/${id}?search=${recordID}`;
In this format:
- The id in the path refers to the call ID.
- The recordID is passed as a search parameter (?search=...).
When users click on a recording from the dashboard, they are directed to this URL page, enabling the app to fetch the specific call and corresponding recording using the hook.
Congratulations! You have completed this tutorial. The source code is available on GitHub.
Next Steps
So far, you have learned how to integrate Stream into a Next.js application, use Firebase for authentication and database operations, and create, join, and record video call sessions using the Stream Audio and Video SDK.
If you are building anything from a simple communication tool to a complex collaborative platform, Stream provides the building blocks to help you bring your product to life quickly and at scale.
Here are some helpful resources to explore next:
- Build Video Consultations in Headless E-Commerce
- Create a Job Application and Interview Platform with Next.js and Firebase
- Build a Video Interview App with React and Next.js
Thank you for following along! 🎉