Cross-platform development provides significant advantages, especially in mobile development, where Android and iOS operate on fundamentally different ecosystems. Developing native apps for each platform can be resource-intensive since it requires separate developers with expertise in different programming languages (Kotlin for Android and Swift/Objective-C for iOS). Managing two distinct codebases also increases development and maintenance costs for consistency.
Cross-platform solutions, such as React Native, or Flutter, streamline this process by allowing developers to write a single codebase that works on both platforms. This approach is especially beneficial for startups aiming to launch their products on multiple platforms quickly and efficiently. It helps reduce development time, lower costs, and accelerate time to market, enabling teams to focus on scaling and iterating the product rapidly.
Switching to cross-platform development can be challenging for native developers due to differences in programming languages and ecosystems. Additionally, cross-platform frameworks often rely on bridges to support both platforms, resulting in lower performance and less efficient memory management compared to fully native apps. These frameworks may not offer the same level of optimization or control as native development.
Another new rising star is Kotlin Multiplatform. Last year, JetBrains announced the stable release of Kotlin Multiplatform, allowing developers to target platforms like Android, iOS, Web, and Desktop using shared business logic written in Kotlin. KMP enables fully native UIs for both Android and iOS, which results in performance that is on par with fully native apps. In this article, you'll learn about Kotlin Multiplatform architecture, how to set it up, and how to build your first Android and iOS app with KMP.
Kotlin Multiplatform
Kotlin Multiplatform (KMP) is designed with a strong emphasis on flexibility and adaptability, bridging the gap between cross-platform and native development. It enables developers to maximize code reuse by sharing business logic across platforms while still granting full access to native APIs for platform-specific needs. This means developers can leverage existing platform-specific APIs and functionalities alongside shared Kotlin code, offering the best of both worlds: cross-platform efficiency with native performance and capabilities.
As shown in the case studies, Kotlin Multiplatform (KMP) has been adopted by prominent companies like Netflix, Philips, McDonald’s, 9GAG, and Baidu since its initial release. These companies have recognized the benefits of KMP in streamlining cross-platform development, and many more are beginning to integrate it into their production environments. KMP's ability to share business logic across platforms while retaining access to native APIs has made it an attractive option for large-scale applications as well, as you can see in the illustration below:
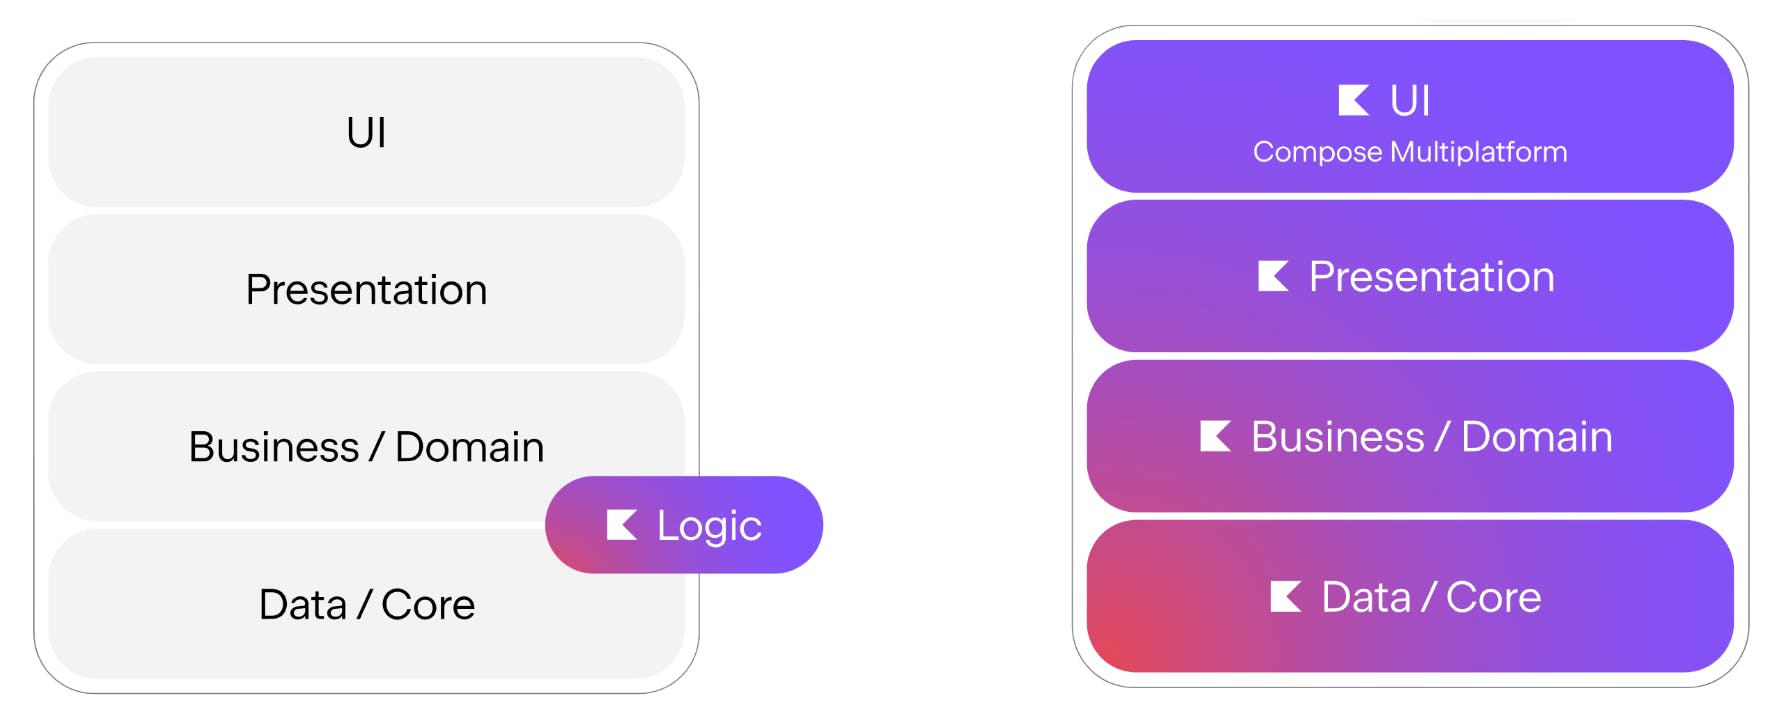
Unlike other cross-platform solutions like React Native or Flutter, Kotlin Multiplatform does not include the UI layer itself. Instead, KMP focuses solely on sharing business logic across different platforms while allowing developers to build platform-specific UIs for Android, iOS, and others. The idea is to write the core logic once in Kotlin and reuse it across various platforms, such as Android, JVM, iOS, macOS, JavaScript, and Linux, while retaining full control over the native UI on each platform. This approach provides flexibility, as shown in the illustration below:
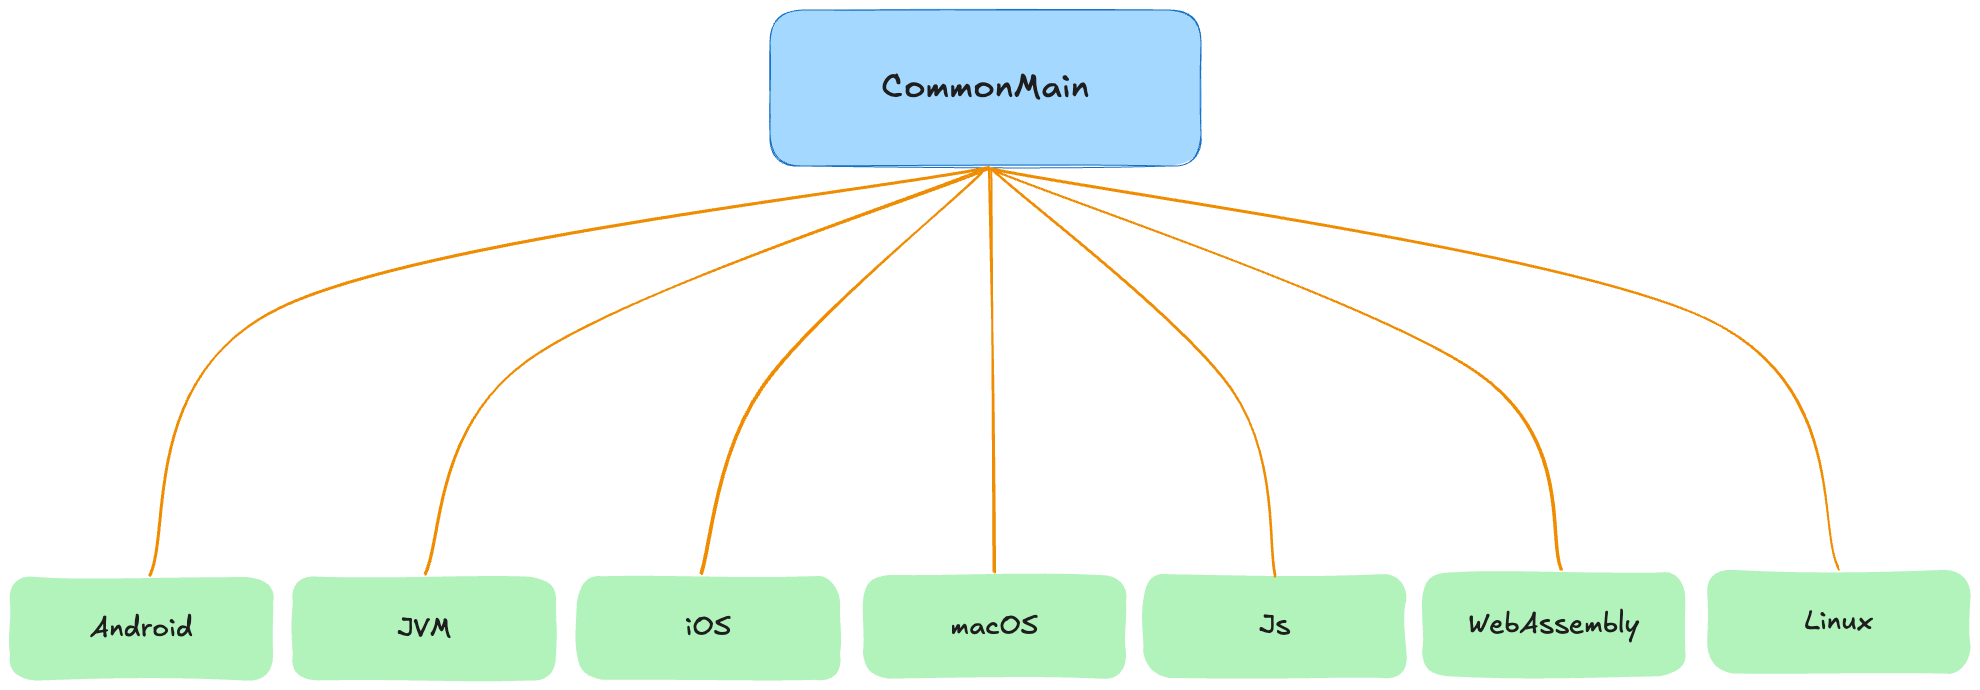
Compose Multiplatform
On the UI side, Compose Multiplatform, built on top of Kotlin Multiplatform, allows developers to share UI logic written in Jetpack Compose across various platforms. Essentially, Compose Multiplatform functions as a dedicated client, following a similar approach to Android's Jetpack Compose UI, and is built on top of the existing Compose compiler and runtime system. This framework enables the creation of UIs for Android, iOS, desktop, and web, all using the same declarative Kotlin-based syntax.
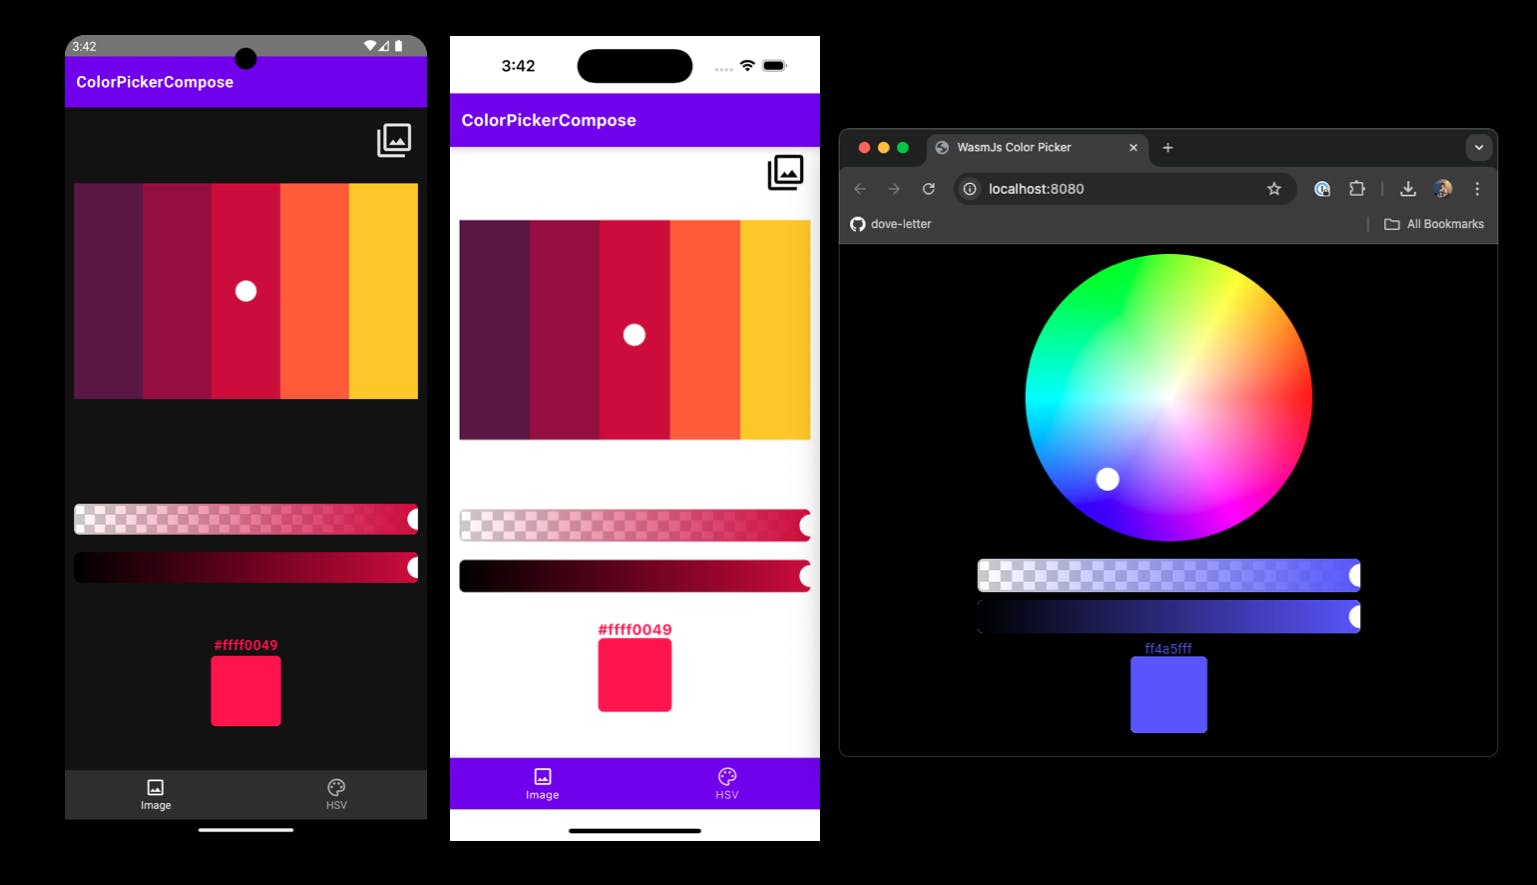
By leveraging Compose Multiplatform, developers can seamlessly write and share both UI and business logic across platforms, while still ensuring native performance and platform-specific functionality.
Setting Up Kotlin Multiplatform in Android Studio
In this article, you'll learn how to set up the Kotlin Multiplatform development environment using Android Studio. To begin, open Android Studio and install Kotlin Multiplatform plugin follow the instructions below:
- Navigate to the Settings > Plugins menu
- Click on the Marketplace tab.
- From there, search for "Kotlin Multiplatform" as shown in the screenshot below.
- Install the plugin to enable KMP support in your project.
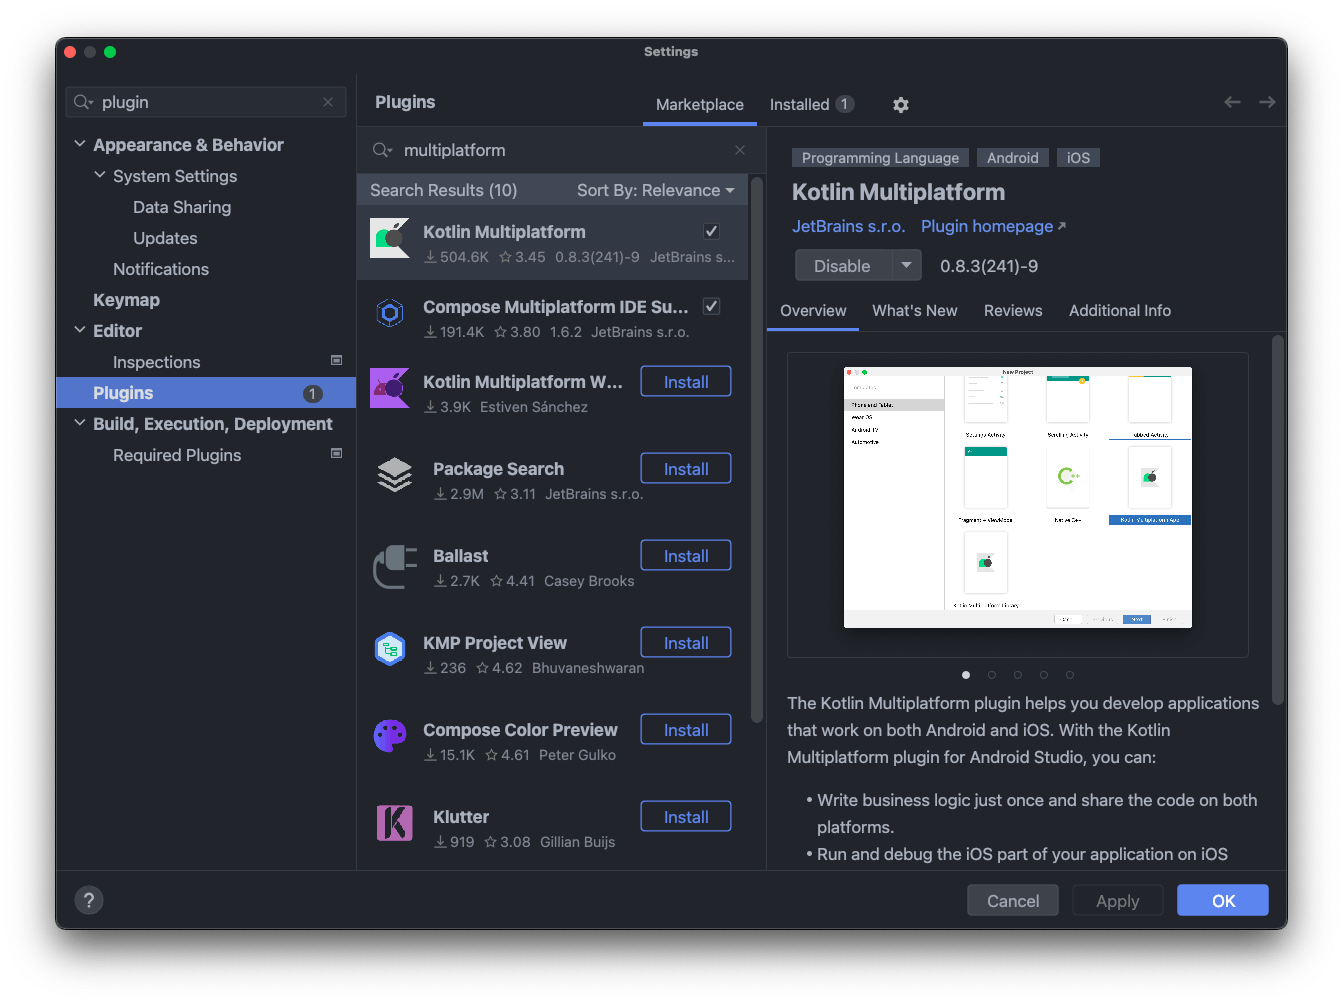
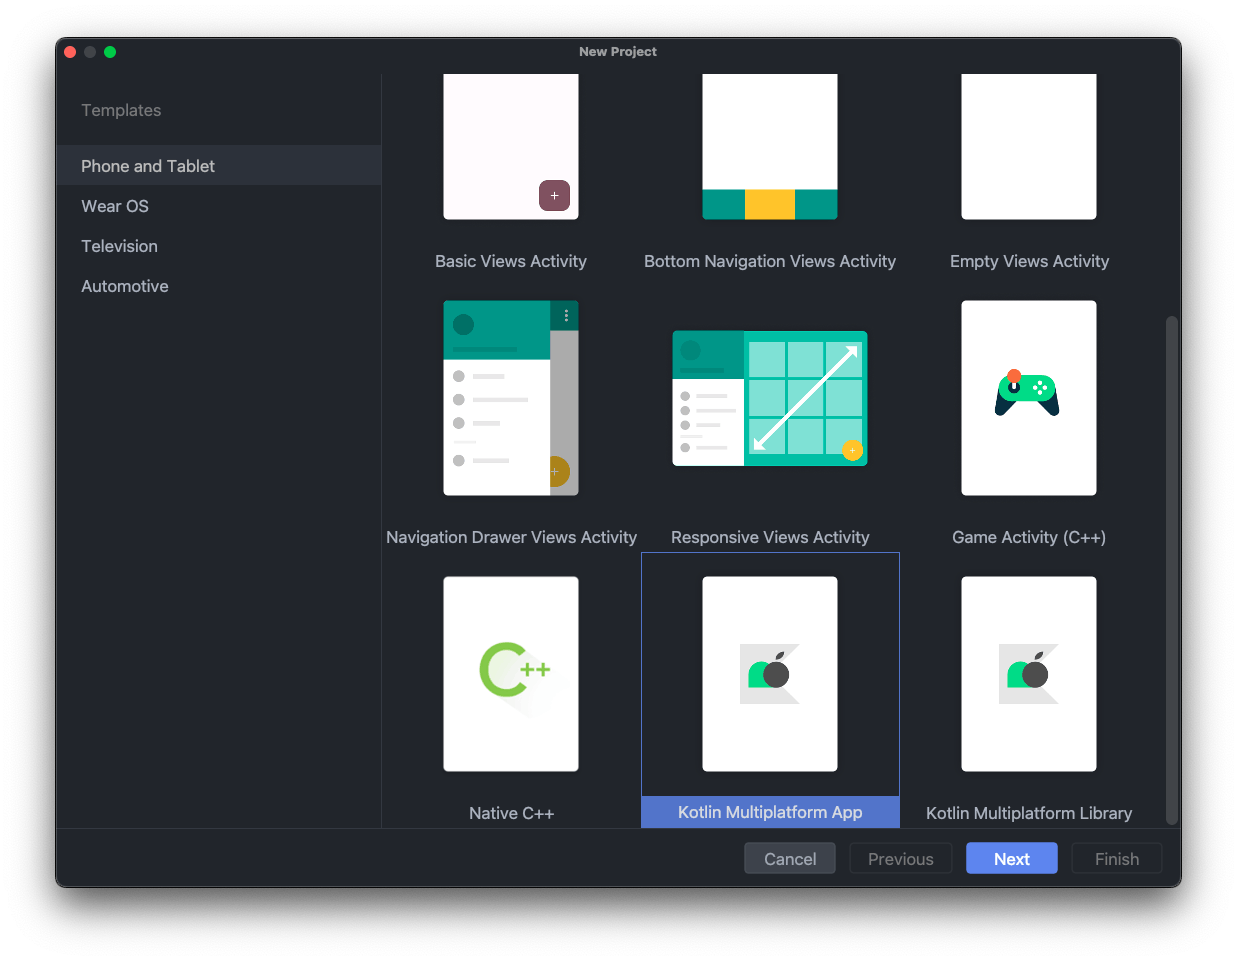
After installation, be sure to restart Android Studio to properly apply the plugin and ensure it's fully integrated into your IDE. This will enable you to begin working with Kotlin Multiplatform seamlessly. Once Android Studio restarts, click "New Project" and you will find the "Kotlin Multiplatform App" template under the "Phone and Tablet" menu, as shown in the image below. This template lets you quickly set up a Kotlin Multiplatform project with default configurations.
Next, click the "Next" button to configure your Kotlin Multiplatform project, including settings such as the project name and package. Enter the appropriate information for your project, then click "Next" again to continue configuring the application settings. This will ensure that all the required configurations are set correctly before generating your project files.
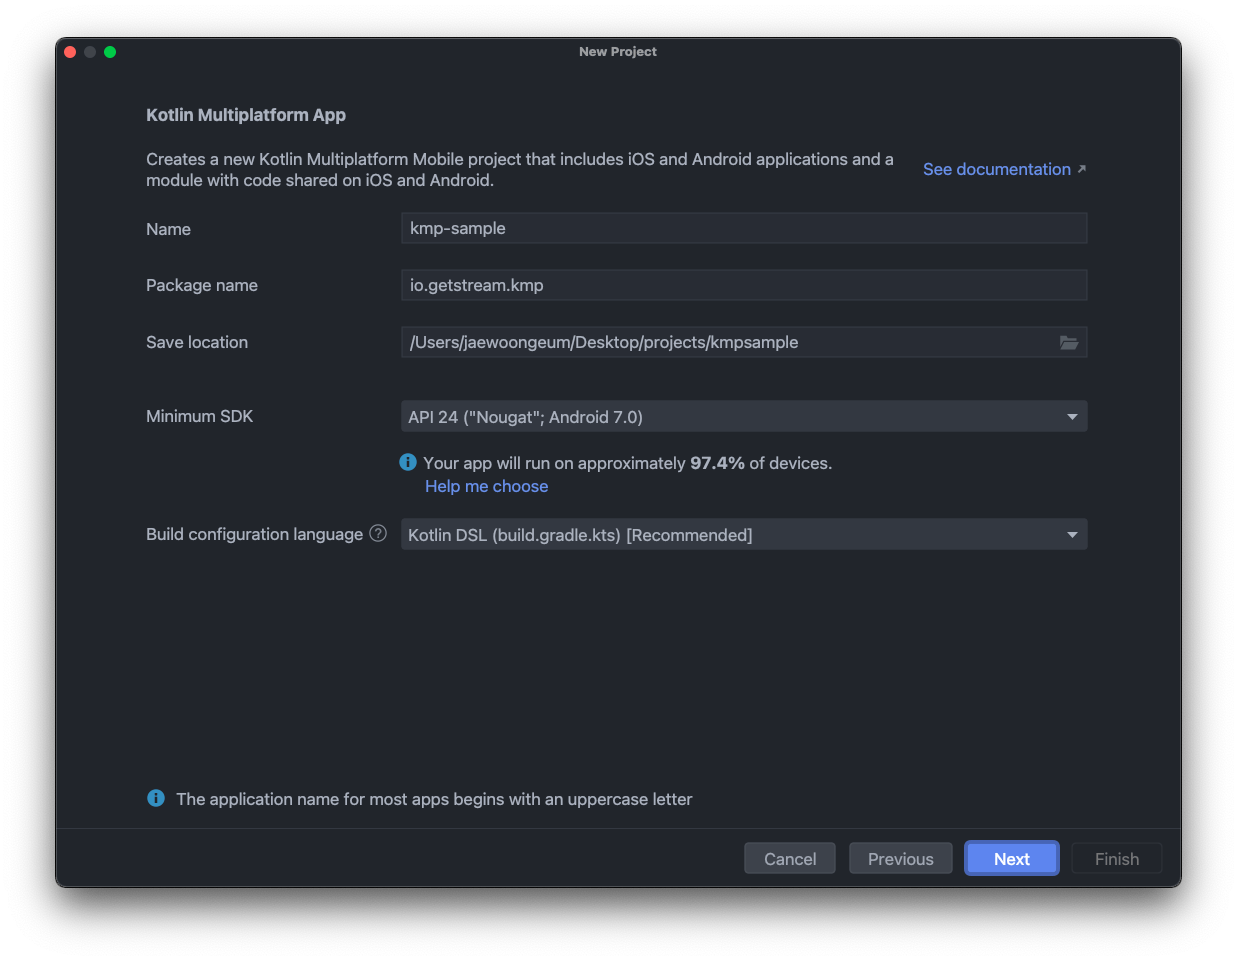
Finally, configure the application details, such as the app name for both Android and iOS, and set the iOS framework distribution. It's typically recommended to use the "Regular framework" option for iOS framework settings. This setup ensures optimal compatibility and ease of integration when sharing logic between platforms.

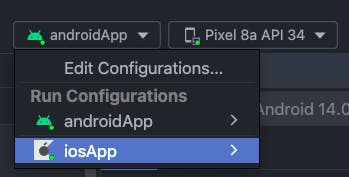
Now, your project has been creaed. If you look at the top menu, you'll notice that you can run both Android and iOS platforms directly from Android Studio, as shown in the image below.
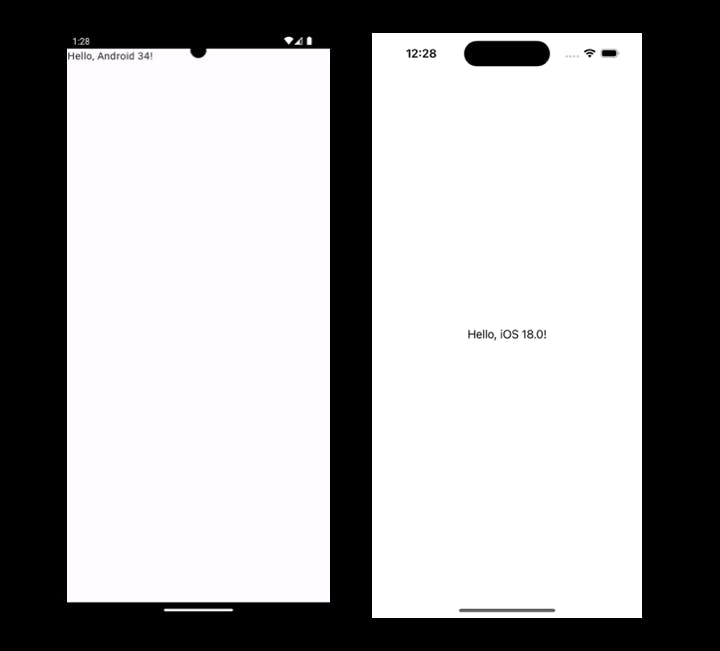
If you run both the Android and iOS versions of the application, the results will be displayed as shown below.
Building Shared UIs With Compose Multiplatform
We've already discussed that Kotlin Multiplatform focuses on sharing business logic, not UI, which means you cannot directly write a shared UI for different platforms by default. However, Compose Multiplatform provides a solution for this by allowing you to write shared UI code across multiple platforms, such as Android, iOS, macOS, JVM (Desktop), and WebAssembly (Wasm).
By leveraging Compose Multiplatform, you can create cross-platform applications that share UI code, making it easier to maintain consistency across platforms while maximizing development efficiency. To get started with Compose Multiplatform, you'll need to add it to your project. Begin by adding the required dependency to your libs.versions.toml file, as shown in the example below:
[versions]
jetbrains-compose = "1.6.11"

[plugins]
jetbrains-compose = { id = "org.jetbrains.compose", version.ref = "jetbrains-compose" }
Next, add the plugin dependency to your project’s build.gradle.kts file, as well as to your shared module’s build.gradle.kts, as shown below:
1234567891011121314151617// project's gradle.build.ktx
plugins {
    alias(libs.plugins.androidApplication).apply(false)
    alias(libs.plugins.androidLibrary).apply(false)
    alias(libs.plugins.kotlinAndroid).apply(false)
    alias(libs.plugins.kotlinMultiplatform).apply(false)
    alias(libs.plugins.compose.compiler).apply(false)
    alias(libs.plugins.jetbrains.compose).apply(false)
}

// shared module's gradle.build.ktx
plugins {
    alias(libs.plugins.kotlinMultiplatform)
    alias(libs.plugins.androidLibrary)
    alias(libs.plugins.jetbrains.compose)
    alias(libs.plugins.compose.compiler)
}
1234567891011@Composable
fun Main() {
    Box(modifier = Modifier.fillMaxSize()) {
        Button(
            modifier = Modifier.align(Alignment.Center),
            onClick = {}
        ) {
            Text(text = "Button")
        }
    }
}
Next, create a file named MainViewController in the iosMain package of the shared module, and implement the MainViewController function as shown below. This function delegates the Main composable function to serve as the main view for iOS applications.
123import androidx.compose.ui.window.ComposeUIViewController

fun MainViewController() = ComposeUIViewController { Main() }
Lastly, navigate to the iosApp module and modify the ContentView.swift file as shown below:
123456789101112131415161718import UIKit
import SwiftUI
import shared

struct ComposeView: UIViewControllerRepresentable {
    func makeUIViewController(context: Context) -> UIViewController {
        MainViewControllerKt.MainViewController()
    }

    func updateUIViewController(_ uiViewController: UIViewController, context: Context) {}
}

struct ContentView: View {
    var body: some View {
        ComposeView()
                .ignoresSafeArea()
    }
}
Now you can implement and share your UI components with Compose Multiplatform. Once you build both the Android and iOS applications, you will see the output as shown below, demonstrating the unified UI across platforms.

You can find the source code on GitHub, which contains a minimal Kotlin Multiplatform and Compose Multiplatform template designed to build applications for both Android and iOS. This template serves as a starting point for developers looking to create cross-platform projects with shared business logic and UI components, making it easier to get started with cross-platform development.
Conclusion
In this article, you’ve learned how to set up the Kotlin Multiplatform environment and build a shared UI using Compose Multiplatform. Although the Kotlin Multiplatform ecosystem is still in its early stages and has room for growth, its biggest advantage is that Android developers can easily get started with it since it’s all built in Kotlin. This familiarity makes it an accessible option for developers looking to explore cross-platform development while leveraging their existing skills.
If you have any questions or feedback on this article, you can find the author on Twitter @github_skydoves or GitHub if you have any questions or feedback. If you’d like to stay up to date with Stream, follow us on Twitter @getstream_io for more great technical content.
As always, happy coding!
— Jaewoong

