

In today's business environment, virtual meetings consume a significant portion of professionals' workdays. Yet, much of their value evaporates once participants leave the virtual room. Critical insights, decisions, and action items often get lost amid daily tasks, leading to misalignment, missed deadlines, and the dreaded "Wait, what did we decide?" follow-up communications.
AI meeting assistants are systems designed to capture, process, and extract meaningful real-time information from conversations. By combining Stream Video’s robust infrastructure with the powerful language understanding capabilities of Large Language Models (LLMs), organizations can deploy smart meeting solutions that transform how teams collaborate, capture knowledge, and execute decisions.
This article explores how to build effective AI meeting assistants that provide real-time transcription, intelligent summarization, and automated action item extraction without affecting the user experience or disrupting the natural flow of conversation.
What Does Stream Video Offer?
Stream Video provides a comprehensive platform for building video applications, equipped with features essential for creating compelling meeting experiences:
- Low-latency video and audio transmission.
- Secure and reliable connections across various network conditions.
- Recording capabilities with cloud storage.
- Customizable layouts and user interfaces.
- Access to transcription and captions after meetings.
- Extensive APIs for integration with other services.
The platform serves as the foundation upon which you can build advanced AI capabilities, providing access to the meeting content that LLMs will analyze.
Technical Prerequisite
Before we begin, ensure you have the following:
- A Stream account with an API key and secret.
- Access to an LLM API (e.g., OpenAI, Anthropic, Gemini, etc.).
- Node.js and npm/yarn installed.
- Basic knowledge of React and Node.js.
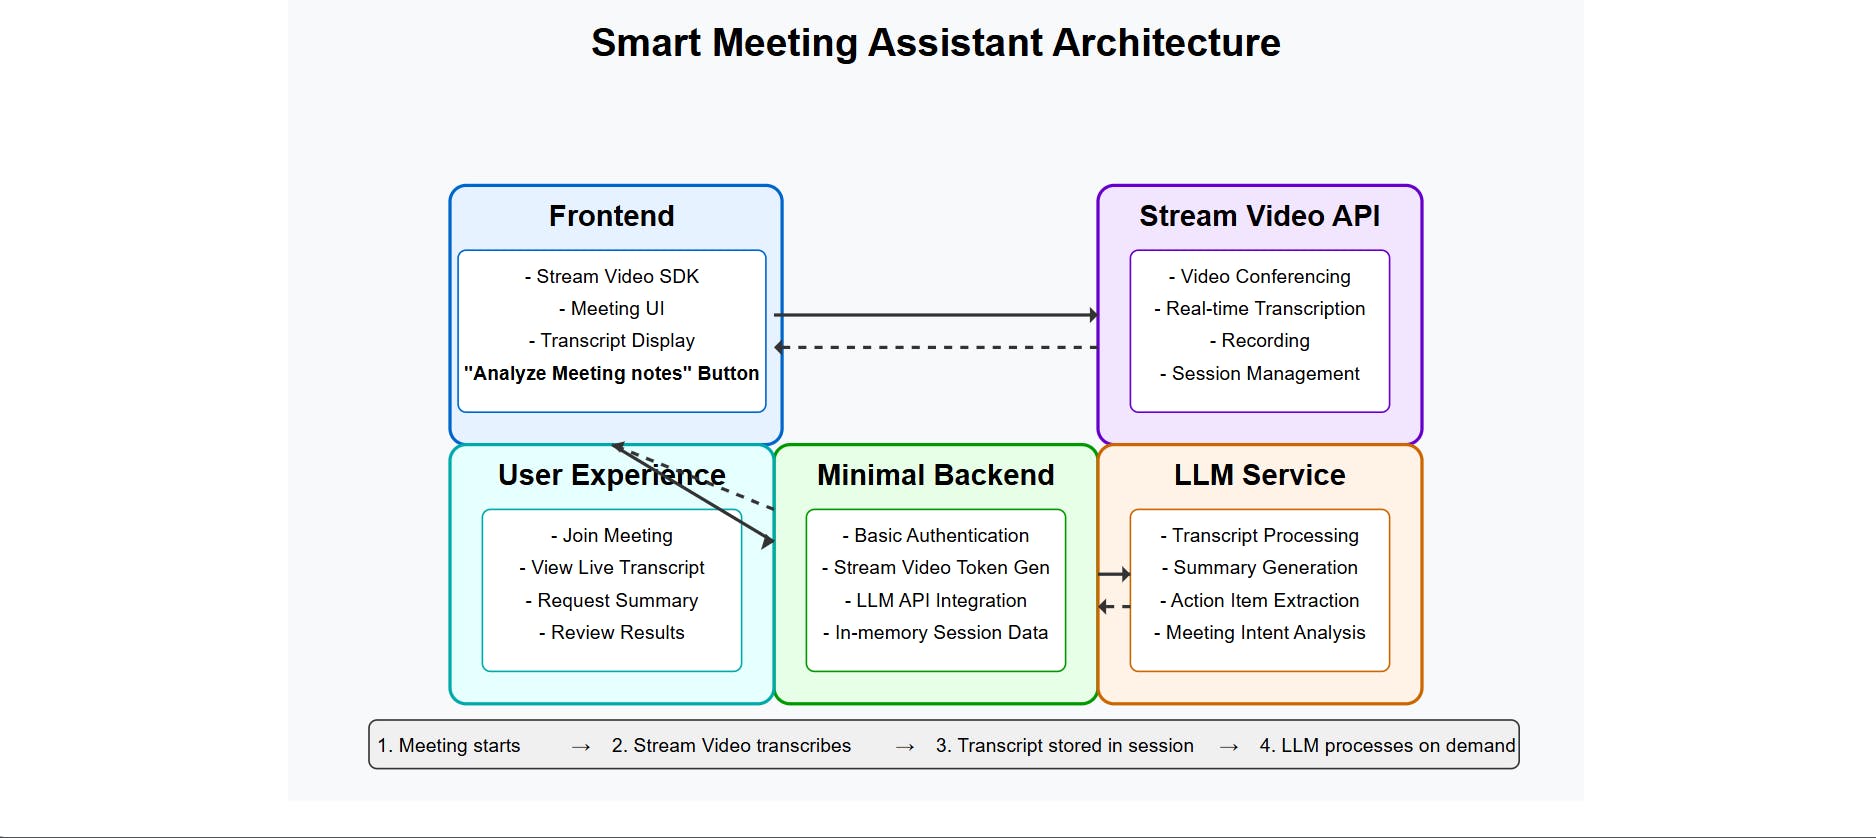
Solution Architecture
The integration between Stream Video and LLMs typically follows this flow:
- Stream Video captures and transmits the meeting’s audio/video content.
- Speech-to-text processing converts spoken language into written transcripts.
- The transcript is sent to an LLM via API calls for analysis.
- LLM outputs (summaries, action items) are stored and presented to users.
Backend Implementation
Before creating the middleware and connecting it to the client, you'll need to complete a few setup steps.
Set Up Your Server
Start by building your backend.
1. Create a Node.js project and install dependencies:
12345mkdir smart-meeting-assistant
cd smart-meeting-assistant
cd backend
npm init
npm install express stream-chat nodemon dotenv cors axios @google/generative-ai
2. Create a .env file to store your configuration credentials, including your Stream and LLM provider keys:
12345STREAM_API_KEY=your_stream_api_key
STREAM_API_SECRET=your_stream_api_secret
GEMINI_API_KEY=your_llm_api_key
LLM_API_URL="https://generativelanguage.googleapis.com/v1beta"
PORT="5000"
3. Create an index.js file and import the necessary modules:
12345678910111213141516import express from 'express';
import cors from 'cors';
import dotenv from 'dotenv';
import { GoogleGenerativeAI } from '@google/generative-ai';
import { StreamChat } from 'stream-chat';
import axios from 'axios';
dotenv.config();

const app = express();

// Simple in-memory storage for transcripts { callCid: transcriptText }
let callTranscripts = {};

// Middleware
app.use(cors());
app.use(express.json());
Service Initialization
We initialize the services required for token generation and LLM processing:
12345678// Initialize Gemini
const genAI = new GoogleGenerativeAI(process.env.GEMINI_API_KEY);

// Initialize Stream Chat Client (for token generation)
const serverClient = StreamChat.getInstance(
  process.env.STREAM_API_KEY,
  process.env.STREAM_API_SECRET
);
Server Initialization
This listens for what port the server is running on, which is currently set to run on port 5000:
12345const port = process.env.PORT || 5000;

app.listen(port, () => {
  console.log(`Server is running on port ${port}`);
});
API Endpoints
Your server should expose these key endpoints:
1. Video Meeting Creation
- POST /api/create-meeting – Generates a Stream video/chat token for a user.
12345678910111213141516171819202122// Stream Video Routes
app.post('/api/create-meeting', async (req, res) => {
  try {
    const { userId } = req.body; // Only need userId to generate a token
    if (!userId) {
      return res.status(400).json({ error: 'userId is required' });
    }

    // Create a token using the StreamChat client
    const expirationTime = Math.floor(Date.now() / 1000) + 3600; // Token valid for 1 hour
    const token = serverClient.createToken(userId, expirationTime);

    res.json({
      token,
      apiKey: process.env.STREAM_API_KEY // Send API key to frontend
    });
  } catch (error) {
    // Use a more specific error message if possible
    console.error('Error generating Stream token:', error);
    res.status(500).json({ error: 'Failed to generate meeting token' });
  }
});
2. Real-Time Transcription Webhook
POST /api/webhook – Handles incoming webhook events from Stream.
This route listens for transcription-ready events, downloads the transcript, parses it, and stores it in memory.
Note: All meeting data is stored in memory and tied to the active session. This approach focuses on showcasing real-time capabilities with Stream Video and LLMs.
Additionally, always verify webhook signatures in production to ensure requests originate from Stream.
12345678910111213141516171819202122232425262728293031323334353637383940414243444546474849505152535455565758596061626364656667686970717273747576app.post('/api/webhook', express.raw({ type: 'application/json' }), (req, res) => {
  const event = req.body; // Stream sends event data in the request body

  // NOTE FOR PRODUCTION: Add signature verification for security

  console.log(`Received Stream Event Type: ${event?.type}`);
  console.log('Full Event Body:', JSON.stringify(event, null, 2));

  // Respond quickly to Stream to acknowledge receipt
  res.status(200).send('Event received');

  // Event Handler for transcription.
  if (event?.type === 'call.transcription_ready') {
    const transcriptUrl = event.call_transcription?.url;
    const callCid = event.call_cid; // e.g., "default:test-meeting-2"
    console.log(`Full transcription is ready for call ${callCid}: ${transcriptUrl}`);

    if (transcriptUrl && callCid) {
      // --- Download and Parse Transcript ---
      (async () => {
        try {
          console.log(`Downloading transcript for ${callCid} from ${transcriptUrl}`);
          // Make sure axios is required/imported (it is, at the top)
          const response = await axios.get(transcriptUrl, { responseType: 'text' });
          const jsonlContent = response.data;
          console.log(`Downloaded transcript content length: ${jsonlContent.length}`);

          // Parse the JSONL content
          const lines = jsonlContent.trim().split('\n');
          let fullTranscript = '';
          let speakerTimestamps = {}; // Optional: Track speaker time

          console.log(`Parsing ${lines.length} lines from JSONL...`);
          for (const line of lines) {
            try {
              const speechFragment = JSON.parse(line);
              if (speechFragment.text) {
                const speaker = speechFragment.speaker_id || 'Unknown';
                // Add speaker name if you want it inline
                fullTranscript += `[${speaker}]: ${speechFragment.text} `;
                // Uncomment the below and comment the line above if you do not want the speaker name attached.
                // fullTranscript += speechFragment.text + ' '; // Add space between fragments
              }
            } catch (parseError) {
              console.error(`Error parsing JSONL line: ${line}`, parseError);
            }
          }
          fullTranscript = fullTranscript.trim();
          console.log(`--- Full Transcript for ${callCid} ---`);
          console.log(fullTranscript);
          console.log(`--- End Transcript ---`);

          // --- Store the fullTranscript ---
          console.log(`Storing transcript for ${callCid}`);
          callTranscripts[callCid] = fullTranscript;

        } catch (downloadError) {
          // Log axios errors more informatively
          if (axios.isAxiosError(downloadError)) {
            console.error(`Axios error downloading transcript from ${transcriptUrl}:`, {
              status: downloadError.response?.status,
              data: downloadError.response?.data,
              message: downloadError.message,
            });
          } else {
            console.error(`Error downloading transcript from ${transcriptUrl}:`, downloadError);
          }
        }
      })(); // Immediately invoke the async function

    } else {
        console.warn('Received call.transcription_ready event but no URL or callCid found.');
    }
  }

});
Exposing/Configuring Your Stream Webhook
To test your webhook locally:
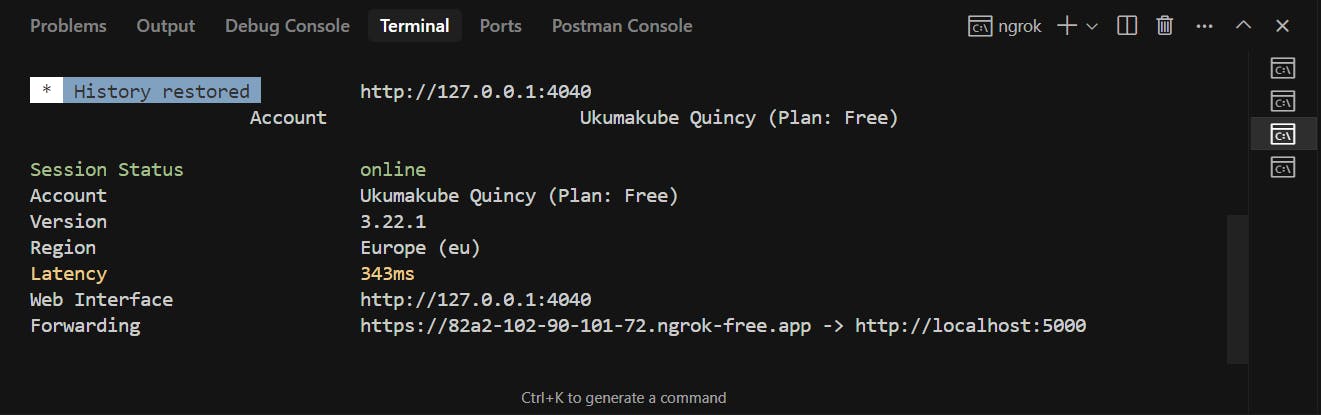
- Expose your server using ngrok:
1ngrok http 5000
Copy the HTTPS forwarding URL from your terminal.
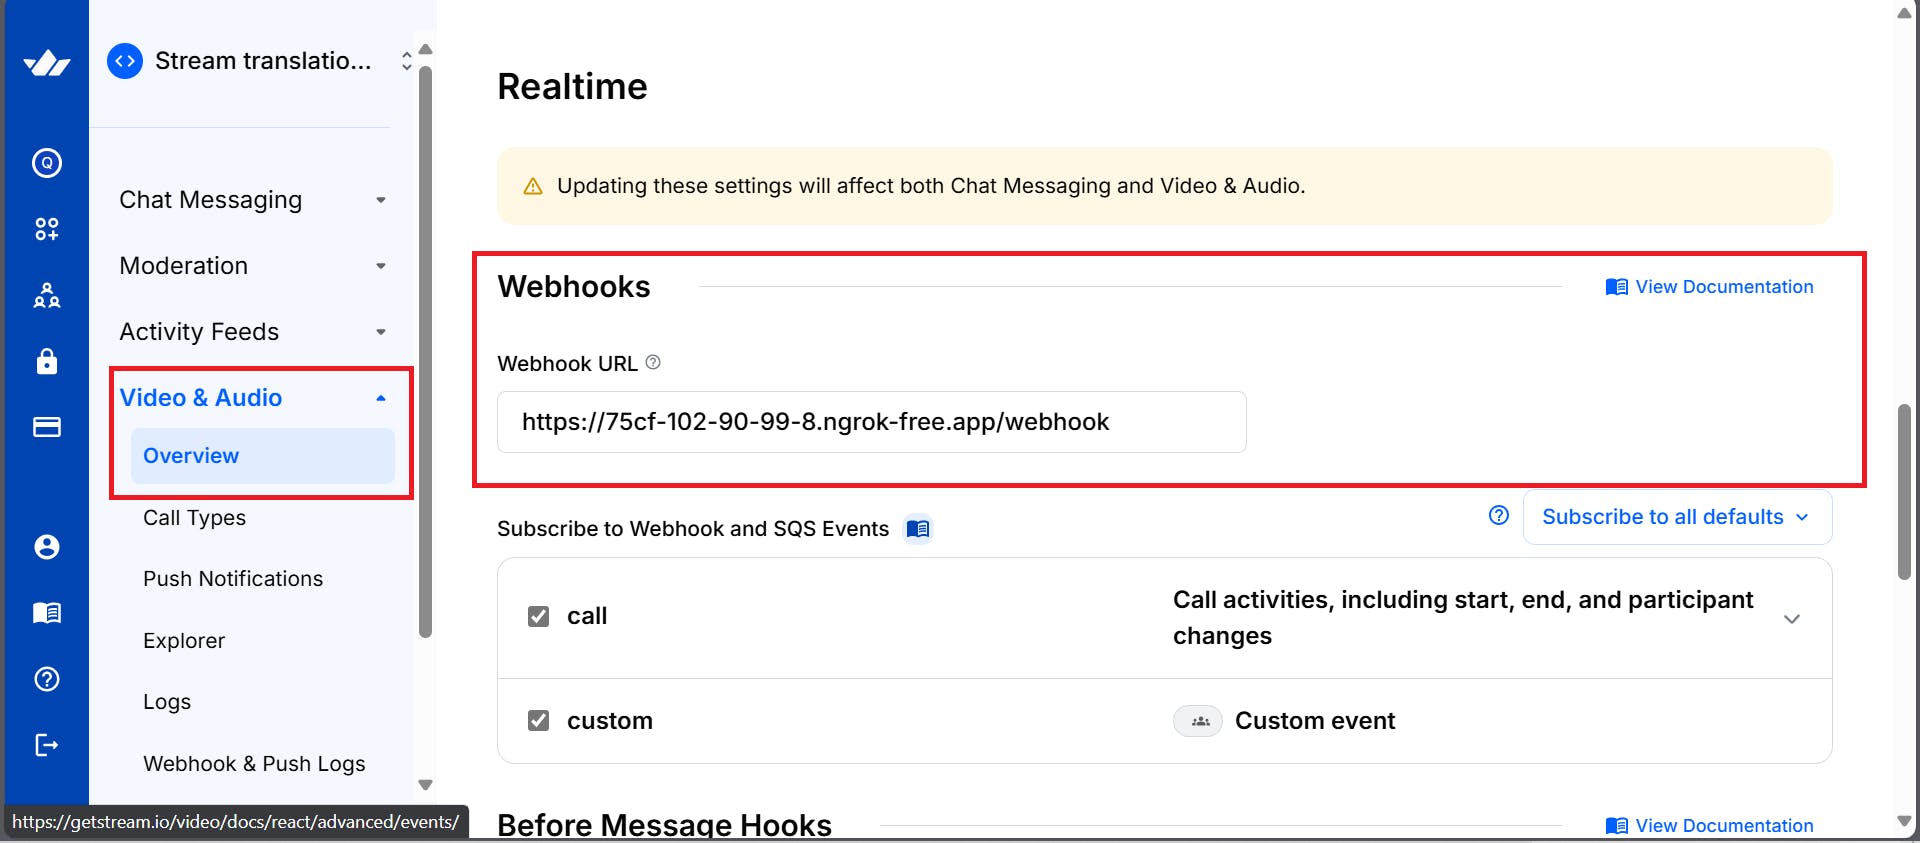
- Configure the webhook in the Stream dashboard:
- Log in to your Stream account.
- Navigate to your application > "Video & Audio" > "Webhooks".
- Paste the URL as:
https://<your-ngrok-url>/api/webhook - Enable relevant events like
call.created,call.ended, andcall.transcription_ready
Note: The ngrok URL changes every time it's restarted.
3. Meeting Note Analyzer
POST /api/analyze-meeting – Analyzes the meeting transcript using Gemini and returns summarized content, highlighting the action items.
1234567891011121314151617181920212223242526272829// Meeting Note Analyser
app.post('/api/analyze-meeting', async (req, res) => {
  try {
    const { meetingNotes } = req.body;

    const model = genAI.getGenerativeModel({ model: "gemini-2.0-flash" });

    const prompt = `Please analyze the following meeting transcript/notes and provide:
1.  **Concise Summary:** A brief paragraph summarizing the main topic and outcome of the discussion.
2.  **Key Discussion Points:** A bulleted list of the most important topics discussed.
3.  **Action Items:** A numbered list of tasks assigned, including who is responsible if mentioned (e.g., "Action: [Task description] - @[Username/Name]").
4.  **Decisions Made:** A bulleted list of any clear decisions reached during the meeting.

Meeting Transcript/Notes:
---
${meetingNotes}
---

Format the output clearly under these headings.`;

    const result = await model.generateContent(prompt);
    const response = await result.response;

    res.json({ analysis: response.text() });
  } catch (error) {
    console.error('Error analyzing meeting:', error);
    res.status(500).json({ error: 'Failed to analyze meeting notes' });
  }
});
4. Getting the Transcript
GET /api/get-transcript/:callType/:callId – Returns the full transcript for a given meeting ID if available.
This route allows the frontend to retrieve the processed transcript. It takes in two parameters: callType, which is usually set to "default", and callId, also known as the meeting ID. When a request is made from the frontend, the route looks up the transcript in the in-memory store. If found, it returns an object containing the transcript:
{ "transcript": "..." }.
If not found, it returns an error object:
{ "error": "Transcript not found or not ready yet." }
1234567891011121314151617// --- Endpoint to Retrieve Transcript ---
app.get('/api/get-transcript/:callType/:callId', (req, res) => {
  const { callType, callId } = req.params;
  const callCid = `${callType}:${callId}`;

  console.log(`Frontend requested transcript for ${callCid}`);
  const transcript = callTranscripts[callCid];

  if (transcript !== undefined) {
    res.json({ transcript: transcript });
  } else {
    console.log(`Transcript not found for ${callCid}`);
    // Could be that the call ended before transcription was ready,
    // or it wasn't processed yet. Return empty or 404.
    res.status(404).json({ error: 'Transcript not found or not ready yet.' });
  }
});
Frontend Implementation
The frontend of your smart meeting assistant app is built using React, Vite, and the Stream Video SDK. This combination provides a fast development environment and a powerful, real-time video communication layer.
Set Up Your React Application
12345npm create vite@latest frontend --template react
cd frontend
npm install @stream-io/video-react-sdk
axios @emotion/react @emotion/styled @mui/icons-material @mui/material
npm run dev
Set Up Environment Variables
In your .env file, add the following:
12VITE_STREAM_API_KEY=your_stream_api_key
VITE_BACKEND_URL=your_backend_url
Vite Configuration (frontend/vite.config.js)
The vite.config.js file configures the Vite development server and build process.
Plugins:
@vitejs/plugin-react: This essential plugin enables React support in Vite, providing features like Fast Refresh (HMR for React components) and JSX transformation.
Development Server (server options):
-
port: 3000: Specifies that the Vite development server should run on port 3000. -
Proxy (proxy option): This is a crucial part for development when the frontend (Vite server) and backend API run on different ports. This configuration tells Vite's dev server: "Any request that starts with
/api(e.g.,/api/analyze-meeting,/api/create-meeting) should be forwarded tohttp://localhost:5000."target: 'http://localhost:5000': The URL of your backend server.changeOrigin: true: This option is important for virtual hosting environments and sets theOriginheader of the request to thetargetURL. It helps avoid CORS issues or backend configurations that might reject requests based on the origin.
This proxy setup allows the frontend code to make API calls to relative paths like /api/analyze-meeting without worrying about CORS during development, as the browser sends the request to localhost:3000 (Vite server), which then proxies it to localhost:5000 (backend server). In production, a reverse proxy like Nginx or your hosting platform would handle a similar setup.
12345678910111213141516import { defineConfig } from 'vite'
import react from '@vitejs/plugin-react'

// https://vitejs.dev/config/
export default defineConfig({
  plugins: [react()],
  server: {
    port: 3000,
    proxy: {
      '/api': {
        target: 'http://localhost:5000',
        changeOrigin: true,
      },
    },
  },
})
The Header Component
This is the presentational component for the application's header.
123456789101112131415import { AppBar, Toolbar, Typography } from '@mui/material';
import AutoStoriesIcon from '@mui/icons-material/AutoStories';

function Header() {
  return (
    <AppBar position="static">
      <Toolbar>
        <AutoStoriesIcon sx={{ mr: 2 }} />
        <Typography variant="h6" component="div">
          Smart Meeting Assistant
        </Typography>
      </Toolbar>
    </AppBar>
  );
}
The Action Item Display Component
This is a dedicated component used for rendering or showing action items from the analysis text provided by MeetingAnalyzer.jsx.
It takes structured insights and presents them in a clean, user-friendly format—often as a list of tasks or bullet points. This separation of concerns ensures that the logic for extracting action items remains within the analyzer, while this component focuses solely on visualizing the output.
To identify these actions, a parsing function is used, which takes the text as an argument and makes use of Regular Expressions (Regex):
123456789101112131415161718192021222324252627282930313233343536373839const parseActionItems = (analysisText) => {
  if (!analysisText) return [];

  const lines = analysisText.split('\n');
  const actionItemsSection = [];
  let inActionItemsSection = false;

  for (const line of lines) {
    const trimmedLine = line.trim();
    if (trimmedLine.includes('**Action Items:**')) {
      inActionItemsSection = true;
      continue; // Skip the header line
    }
    // Stop if we hit the next section or empty line after starting
    if (inActionItemsSection && (trimmedLine.startsWith('**') || trimmedLine === '')) {
         if(actionItemsSection.length > 0) break; // Stop only if we've found items
         else continue; // Skip empty lines before items
    }

    if (inActionItemsSection && trimmedLine) {
        // Check if the line looks like an action item (e.g., starts with number. or 'Action:')
        if (/^\d+\.\s/.test(trimmedLine) || trimmedLine.toLowerCase().startsWith('action:')) {
             actionItemsSection.push(trimmedLine.replace(/^\d+\.\s*/, '')); // Remove leading number/dot
        }
    }
  }

  // Fallback if specific section not found, try finding lines starting with 'Action:' anywhere
  if (actionItemsSection.length === 0) {
      for (const line of lines) {
          const trimmedLine = line.trim();
          if (trimmedLine.toLowerCase().startsWith('action:')) {
               actionItemsSection.push(trimmedLine);
          }
      }
  }

  return actionItemsSection;
};
Then the UI is rendered as below:
12345678910111213141516171819202122232425262728293031323334353637import React from 'react';
import {
  Box,
  Card,
  CardContent,
  List,
  ListItem,
  ListItemText,
  Typography,
} from '@mui/material';

const ActionItemsDisplay = ({ analysisText }) => {
  const actionItems = parseActionItems(analysisText);

  if (actionItems.length === 0) {
    return null; // Don't render anything if no action items are found
  }

  return (
    <Card sx={{ mt: 3 }}>
      <CardContent>
        <Typography variant="h6" gutterBottom>
          Action Items
        </Typography>
        <List dense>
          {actionItems.map((item, index) => (
            <ListItem key={index} disablePadding>
              <ListItemText primary={`- ${item}`} />
            </ListItem>
          ))}
        </List>
      </CardContent>
    </Card>
  );
};

export default ActionItemsDisplay;
The Meeting Analyser Component
This component provides the UI for users to input or view transcripts, which is received as a prop named initialNotes.
By passing initialNotes as a prop, the component remains decoupled and reusable, enabling dynamic rendering of transcript data as it becomes available after the meeting. This approach also makes it easier to sync with backend services.
Inside MeetingAnalyzer.jsx, the useEffect hook listens for changes to the initialNotes prop. When latestTranscript in App.jsx is updated, this prop changes and updates its internal meetingNotes state, populating its text field with the new transcript.
12345useEffect(() => {
  if (initialNotes) {
    setMeetingNotes(initialNotes);
  }
}, [initialNotes]);
When clicked, the button “Analyze Meeting Notes” sends the notes/transcript to the backend API for analysis and then displays the analysis.
const handleSubmit = async (e) => {\
    e.preventDefault();\
    setLoading(true);\
    setError('');\
    setAnalysis('');
 try {\
 const response = await axios.post('/api/analyze-meeting', {\
        meetingNotes,\
      });\
      setAnalysis(response.data.analysis);\
} catch (error) {\
      setError('Failed to analyze meeting notes. Please try again.');\
 console.error('Error:', error);\
} finally {\
      setLoading(false);\
    }\
  };
Action Items are listed using the ActionItemsDisplay.jsx component, which is integrated into this component.
123456789101112131415161718const handleSubmit = async (e) => {
    e.preventDefault();
    setLoading(true);
    setError('');
    setAnalysis('');

    try {
      const response = await axios.post('/api/analyze-meeting', {
        meetingNotes,
      });
      setAnalysis(response.data.analysis);
    } catch (error) {
      setError('Failed to analyze meeting notes. Please try again.');
      console.error('Error:', error);
    } finally {
      setLoading(false);
    }
  };
The Video Call Component
Here's the complete VideoCall.jsx logic broken into key sections:
Initial Setup and Imports
The Stream Video SDK is primarily integrated into the
Videocall.jsxcomponent.StreamVideo,StreamCall, andStreamVideoClientare core wrappers needed for client setup.
These core wrappers handle the initialization and context management required to enable real-time video features across your application. StreamVideoClient establishes the connection with Stream’s backend, while StreamCall provides context for managing a specific call instance. StreamVideo wraps the call UI and ensures all child components have access to the necessary call state and configuration. By centralizing these elements in the Videocall.jsx component, the app maintains a clean structure and consistent video behavior across different views or routes.
This SDK provides UI components such as CallControls, CallParticipantsList, SpeakerLayout, and VideoPreview.
These UI components are designed to streamline video call interface development. For example, CallControls offers built-in actions like mute, unmute, and screen sharing, while SpeakerLayout ensures the active speaker is prominently displayed. VideoPreview lets users check their camera feed before joining a call, enhancing the user experience.
The SDK also comes with its own default CSS stylin, which can be customized as needed to match your application’s branding or design system:
12345678910111213141516171819202122import { useState, useEffect } from 'react';
import {
  StreamVideo,
  StreamCall,
  StreamVideoClient,

  CallControls,
  CallParticipantsList,
  SpeakerLayout,
  VideoPreview,
} from '@stream-io/video-react-sdk';
import {
  Box,
  Button,
  TextField,
  Typography,
  CircularProgress,
} from '@mui/material';
import axios from 'axios';

// Import the Stream Video CSS
import '@stream-io/video-react-sdk/dist/css/styles.css';
State Management
The VideoCall.jsx file uses several state variables to manage the application effectively:
1234567const VideoCall = ({ onTranscriptReady }) => {
  const [client, setClient] = useState(null);
  const [call, setCall] = useState(null);
  const [userId, setUserId] = useState('');
  const [meetingId, setMeetingId] = useState('');
  const [loading, setLoading] = useState(false);
  const [error, setError] = useState('');
The fetchTranscriptWithRetry Function
This function fetches the transcript from the backend API. It takes four arguments:
callType: Specifies the type of call (always set to'default').callId: The unique meeting ID.retries: Number of retry attempts.delayMs: Delay in milliseconds between retries.
Retries are necessary because Stream might not have sent the transcript to the backend when the request is first made. If that happens, an error is logged, but the function will retry (up to three times).
12345678910111213141516171819202122232425262728293031const fetchTranscriptWithRetry = async (callType, callId, retries = 3, delayMs = 30000) => {
  for (let i = 0; i < retries; i++) {
    try {
      console.log(`Attempt ${i + 1} to fetch transcript for ${callType}:${callId}`);
      const response = await axios.get(`/api/get-transcript/${callType}/${callId}`);
      if (response.data?.transcript !== undefined) { // Check if transcript key exists (even if empty string)
        console.log('Transcript fetched successfully.');
        return response.data.transcript;
      }
      // If transcript key is missing but request succeeded, maybe backend error?
      console.warn('Transcript endpoint returned success, but no transcript data found.');
      // Decide if you want to retry in this case or treat as failure
      // For now, let's break and return null if data structure is unexpected
      return null;
    } catch (fetchError) {
      if (axios.isAxiosError(fetchError) && fetchError.response?.status === 404) {
        console.warn(`Transcript not found (Attempt ${i + 1}/${retries}). Retrying in ${delayMs / 1000}s...`);
        if (i < retries - 1) { // Don't wait after the last attempt
          await new Promise(resolve => setTimeout(resolve, delayMs));
        } else {
            console.error(`Transcript not found after ${retries} attempts for ${callType}:${callId}.`);
        }
      } else {
        console.error(`Error fetching transcript (Attempt ${i + 1}/${retries}):`, fetchError);
        // Don't retry on other errors (like server errors, network issues)
        return null; // Indicate failure
      }
    }
  }
  return null; // Indicate failure after all retries
};
Stream SDK Initialization
A StreamVideoClient instance is created using:
apiKey: Retrieved from environment variables.token: Fetched from your/api/create-meetingbackend endpoint.user: An object like{ id: userId }.
123456789101112131415161718const initializeClient = async (userId, token) => {
    try {
      const user = { id: userId }; // Simplified user object

      const videoClient = new StreamVideoClient({
        apiKey: import.meta.env.VITE_STREAM_API_KEY,
        token,
        user
      });

      setClient(videoClient);
      return videoClient;
    } catch (error) {
      console.error('Error initializing client:', error);
      setError('Failed to initialize video client');
      return null;
    }
  };
Join Meeting Function
After the client is initialized, videoClient.call('default', meetingId) retrieves a call object. The join({ create: true }) method joins the call and creates it if it doesn’t already exist.
Once joined, startTranscription enables Stream’s server-side transcription and captions:
123456789101112131415161718192021222324252627282930313233343536373839404142434445464748495051525354555657585960const joinMeeting = async (e) => {
    e.preventDefault();
    setLoading(true);
    setError('');

    try {
      // Create or join the call and get the token
      const response = await axios.post('/api/create-meeting', {
        meetingId,
        userId
      });

      const { token } = response.data;

      // Initialize client with the token
      const videoClient = await initializeClient(userId, token);
      if (!videoClient) {
        setLoading(false);
        return;
      }

      // Join the call
      console.log(`Attempting to join call ${meetingId} as user ${userId}`);
      const newCall = videoClient.call('default', meetingId);

      // Add event listener for connection quality changes
      newCall.on('connection.changed', (event) => {
        console.log('[Stream Call Event] Connection quality changed:', event.connection_quality);
      });

      await newCall.join({ create: true });
      console.log(`Successfully joined call ${meetingId}. Call CID: ${newCall.cid}`);

      // Start transcription and closed captions after successfully joining
      try {
        console.log('Attempting to start transcription...');
        await newCall.startTranscription({
          language: 'en',
          enable_closed_captions: true
        });
        console.log('Transcription and closed captions started successfully.');
      } catch (transcriptionError) {
        console.error('Failed to start transcription:', transcriptionError);
        // Optionally set an error state or notify the user
        // setError('Failed to start meeting transcription.');
      }

      setCall(newCall);
    } catch (error) {
      console.error('Error joining meeting:', error);
      // Check if the error object has more details
      if (error.message) {
        setError(`Failed to join meeting: ${error.message}`);
      } else {
        setError('Failed to join meeting. Check console for details.');
      }
    } finally {
      setLoading(false);
    }
  };
The Leave Meeting Function
When the user leaves the meeting:
call.leave()disconnects from the call.- Transcript fetching is triggered using
fetchTranscriptWithRetry. - The transcript is passed to the
Appcomponent viaonTranscriptReady.
123456789101112131415161718192021222324252627282930313233343536const leaveMeeting = async () => {
    console.log('Leave Meeting button clicked...');
    const currentMeetingId = meetingId;
    const callType = 'default';

    setLoading(true);
    try {
      if (call) {
        console.log('Attempting call.leave()...');
        await call.leave();
        console.log('Call left successfully via button.');
      }
    } catch (error) {
      console.error('Error during call.leave() via button:', error);
    } finally {
      // Reset UI state immediately
      setCall(null);
      setLoading(false);
      setCurrentCaption('');

      // --- Fetch Transcript after leaving (with retry) ---
      if (currentMeetingId && callType) {
         // Call the retry helper function - runs in background, doesn't block UI reset
        (async () => {
            const transcript = await fetchTranscriptWithRetry(callType, currentMeetingId);
            if (transcript !== null) {
                onTranscriptReady(transcript); // Pass transcript up to App
            } else {
                console.log('Failed to fetch transcript after retries.');
                 // Optionally inform App/user that transcript is unavailable
                 // onTranscriptReady('[Transcript unavailable]');
            }
        })();
      }
    }
  };
Client Disconnection
Ensures a clean disconnect when the component unmounts:
1234567891011121314151617181920212223useEffect(() => {
    // Capture the client instance at the time the component mounts
    // (or when client state is first set)
    const clientInstance = client;

    // This cleanup function now runs ONLY when the component unmounts
    return () => {
      console.log('Component unmount cleanup effect running...');
      if (clientInstance) {
        console.log('Unmount Cleanup: Disconnecting user...');
        // Disconnect the user when the component unmounts.
        // The SDK should handle leaving any active call during disconnect.
        clientInstance.disconnectUser().then(() => {
           console.log('Unmount Cleanup: User disconnected successfully.');
        }).catch(disconnectError => {
           console.error('Unmount Cleanup: Error disconnecting user:', disconnectError);
        });
      } else {
         console.log('Unmount Cleanup: No active client instance to disconnect.');
      }
    };

  }, [client]); // Run effect when client instance is set/changes
UI Rendering
Before the Call
Displays form fields for name and meeting ID:
1234567891011121314151617181920212223242526272829303132333435363738394041if (!call) {
    return (
      <Box component="form" onSubmit={joinMeeting} sx={{ mt: 3 }}>
        <Typography variant="h6" gutterBottom>
          Join Video Meeting
        </Typography>
        <TextField
          fullWidth
          label="Your Name"
          value={userId}
          onChange={(e) => setUserId(e.target.value)}
          margin="normal"
          required
          disabled={loading}
        />
        <TextField
          fullWidth
          label="Meeting ID"
          value={meetingId}
          onChange={(e) => setMeetingId(e.target.value)}
          margin="normal"
          required
          disabled={loading}
        />
        <Button
          type="submit"
          fullWidth
          variant="contained"
          disabled={loading || !userId || !meetingId}
          sx={{ mt: 2 }}
        >
          {loading ? <CircularProgress size={24} /> : 'Join Meeting'}
        </Button>
        {error && (
          <Typography color="error" sx={{ mt: 2 }}>
            {error}
          </Typography>
        )}
      </Box>
    );
  }
During the Call
Displays the video layout and controls:
123456789101112131415161718192021222324return (
    <Box sx={{ mt: 3, height: '60vh', position: 'relative' }}> {/* Added position: relative */}
      <StreamVideo client={client}>
        <StreamCall call={call}>
          <Box sx={{ height: '100%', position: 'relative', display: 'flex', flexDirection: 'column' }}>
            <Box sx={{ flex: 1, minHeight: 0 }}>
              <SpeakerLayout />
            </Box>
            <Box sx={{ p: 2, bgcolor: 'background.paper' }}>
              <CallControls />
            </Box>
            <Button
              variant="contained"
              color="error"
              onClick={leaveMeeting}
              sx={{ position: 'absolute', top: 16, right: 16, zIndex: 1 }}
            >
              Leave Meeting
            </Button>
          </Box>
        </StreamCall>
      </StreamVideo>
    </Box>
  );
Structuring the Main App Component
App.jsx serves as the central hub for passing the transcript between VideoCall and MeetingAnalyzer.
State Management
1const [latestTranscript, setLatestTranscript] = useState('');
Callback Mechanism/Function
A callback function, handleTranscriptReady, is defined within App.jsx. This function takes the transcript as an argument and updates the latestTranscript state using setLatestTranscript(transcript).
12345// Callback function for VideoCall to pass up the transcript
  const handleTranscriptReady = (transcript) => {
    console.log('App.jsx received transcript:', transcript.substring(0, 100) + '...'); // Log snippet
    setLatestTranscript(transcript);
  };
Data Flow
handleTranscriptReady is passed as onTranscriptReady to VideoCall.
latestTranscript is passed as initialNotes to MeetingAnalyzer.
12<VideoCall onTranscriptReady={handleTranscriptReady} />
<MeetingAnalyzer initialNotes={latestTranscript} />
The UI
1234567891011121314151617181920return (
    <ThemeProvider theme={theme}>
      <CssBaseline />
      <Header />
      <Container maxWidth="lg" sx={{ mt: 4, mb: 4 }}>
        <Grid container spacing={3}>
          <Grid item xs={12} md={6}>
            {/* Pass the callback down to VideoCall */}
            <VideoCall onTranscriptReady={handleTranscriptReady} />
          </Grid>
          <Grid item xs={12} md={6}>
            {/* Pass the transcript state down to MeetingAnalyzer */}
            <MeetingAnalyzer initialNotes={latestTranscript} />
          </Grid>
        </Grid>

      </Container>
    </ThemeProvider>

  );
Styling with MUI
The app uses Material-UI (MUI) for styling, which is a set of components that help you build beautiful and responsive user interfaces in React applications.
MUI supports theming out of the box and allows developers to maintain visual consistency while speeding up UI development. MUI also integrates well with responsive layouts and accessibility standards, ensuring the interface works seamlessly across devices and user needs.
In the App.jsx, a custom Material-UI theme is created using createTheme, which allows for a consistent color palette and typography for all MUI components used within the application.
1234567891011const theme = createTheme({
  palette: {
    mode: 'light',
    primary: {
      main: '#1976d2',
    },
    secondary: {
      main: '#dc004e',
    },
  },
});
Common MUI components used include: Button, TextField, Container, Grid, Typography, CircularProgress, and Box.
These components help create a clean, responsive layout while reducing the need to write custom styles from scratch. For instance, Grid and Box simplify layout management with Flexbox and spacing utilities, while Typography ensures consistent text styling.
The sx prop is used extensively for inline styling and layout control.
Example:
123<Container maxWidth="lg" sx={{ mt: 4, mb: 4 }}>

      </Container>
Testing the Application
You must run both the backend and frontend code to test your implementation.
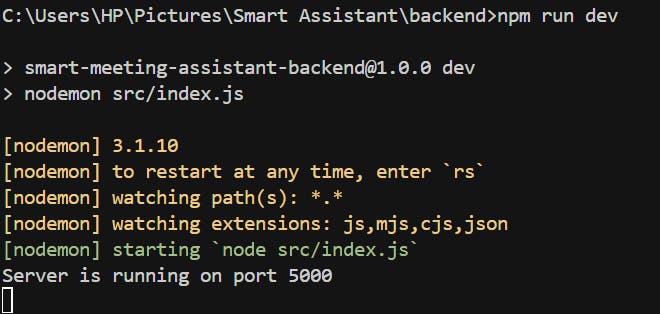
Running the Backend
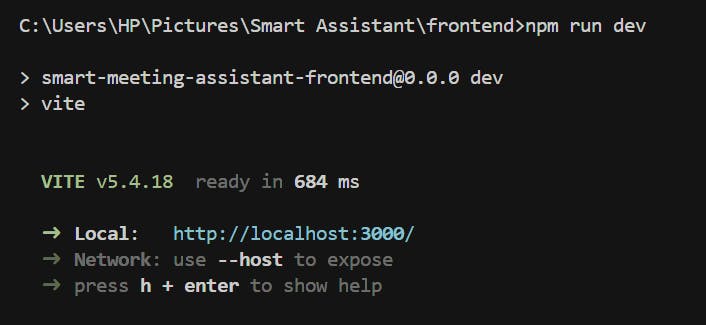
To run the backend code using nodemon, navigate to the backend folder and execute the following command:
1npm run dev
You should see an output similar to the screenshot below in your terminal:
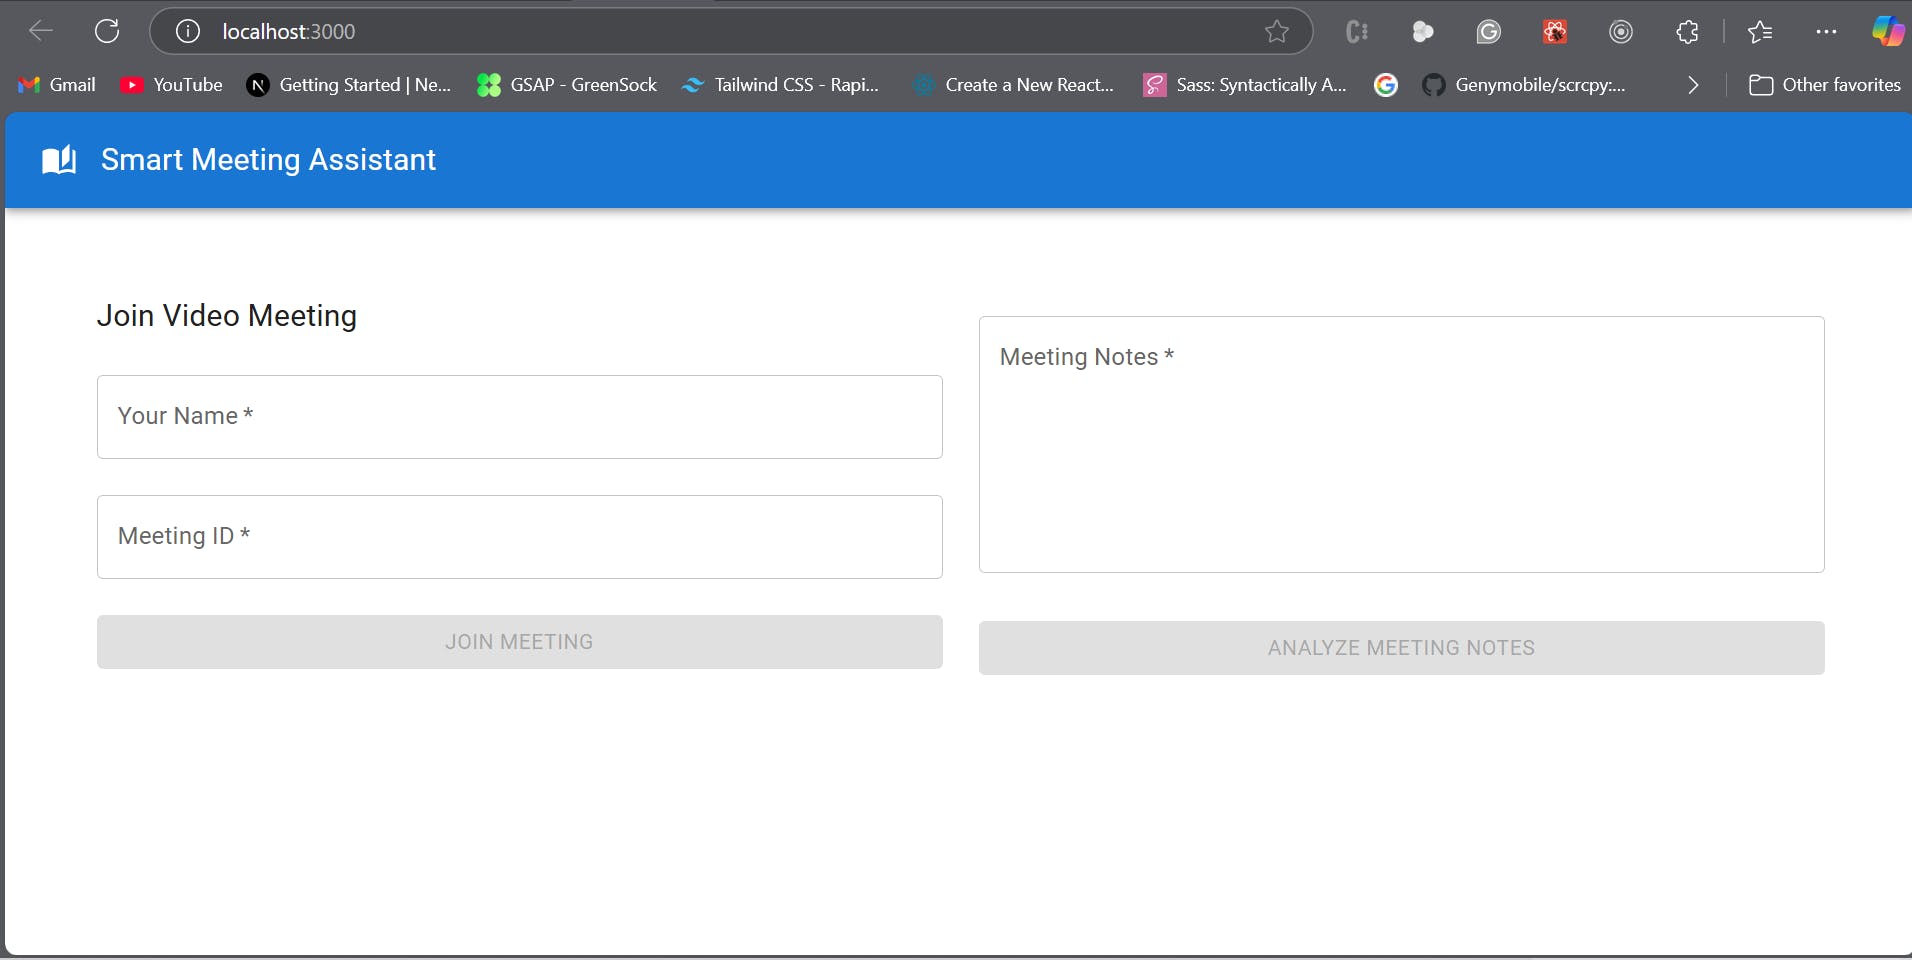
Running the Frontend
To start the frontend, navigate to the frontend folder and use a command similar to the one above. You should see the following interface:
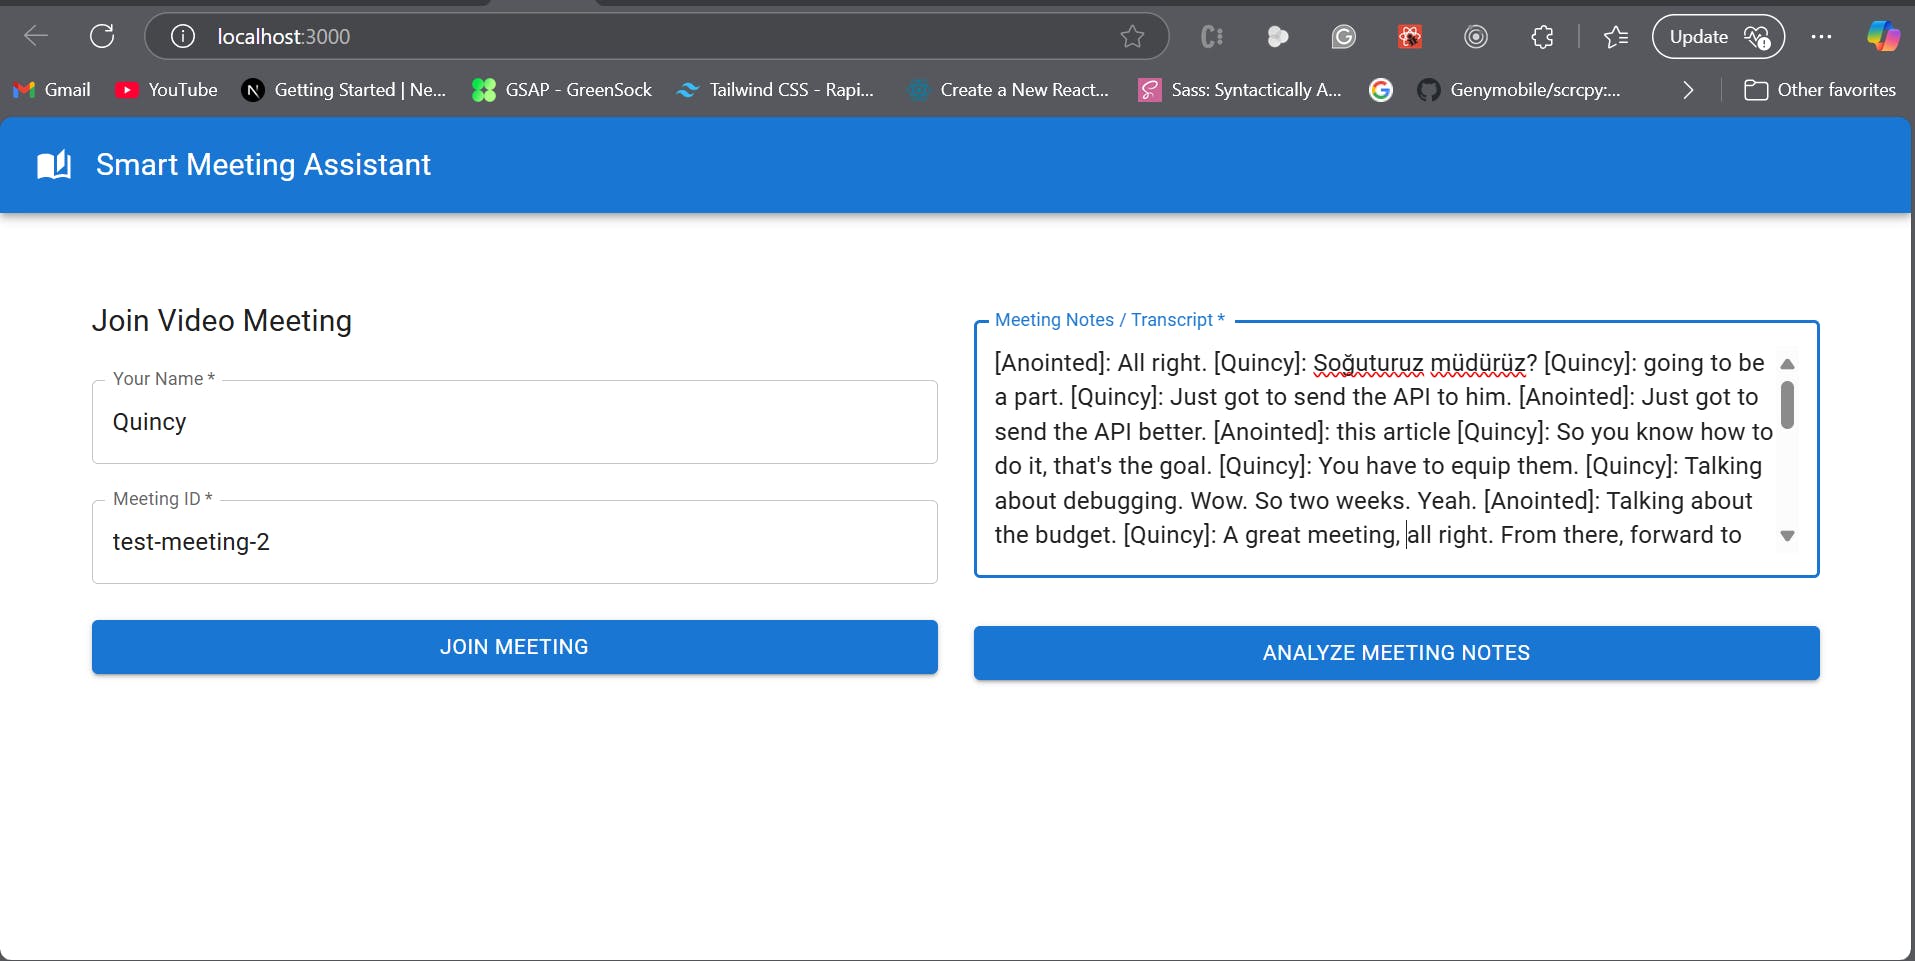
After running the app, the first view lets users input their name and a meeting ID.
Join a Meeting with Two Users
You can test your project by having two users join and interact during the same meeting.
This allows you to validate video and audio functionality, check real-time updates like participant lists, test UI responsiveness during active calls, verify that Stream's transcript is being returned, and ensure that the LLM sends back the analyzed results, which are correctly displayed in the UI.
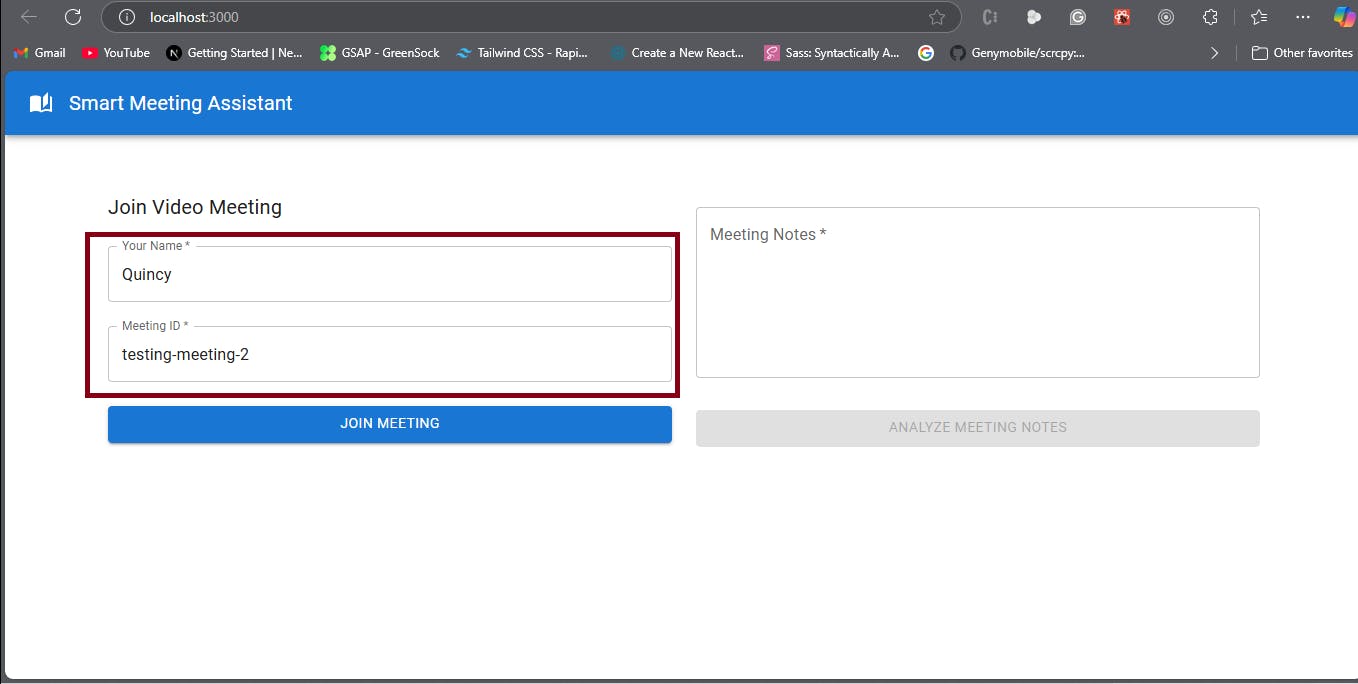
Let's name the first user Quincy and the meeting ID test-meeting-2 as shown in the image below.
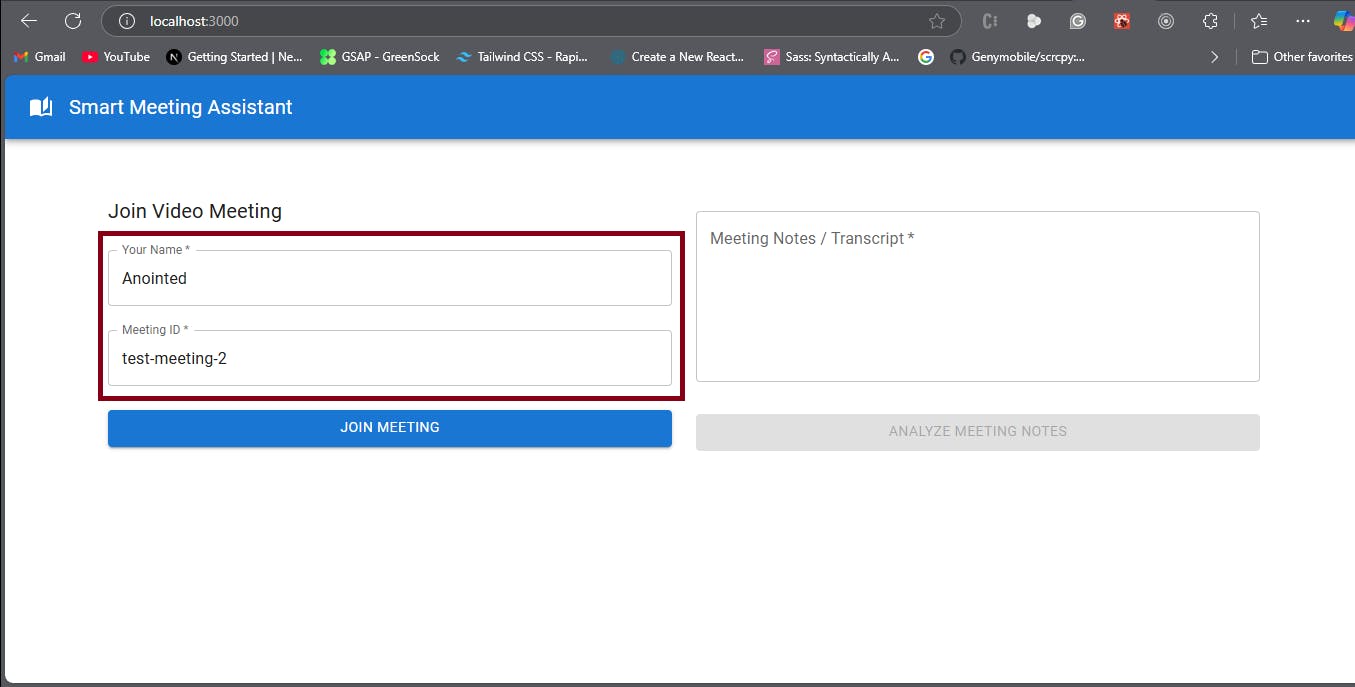
The second user is named Anointed and has the same meeting ID.
Now, here is a video from the meeting:
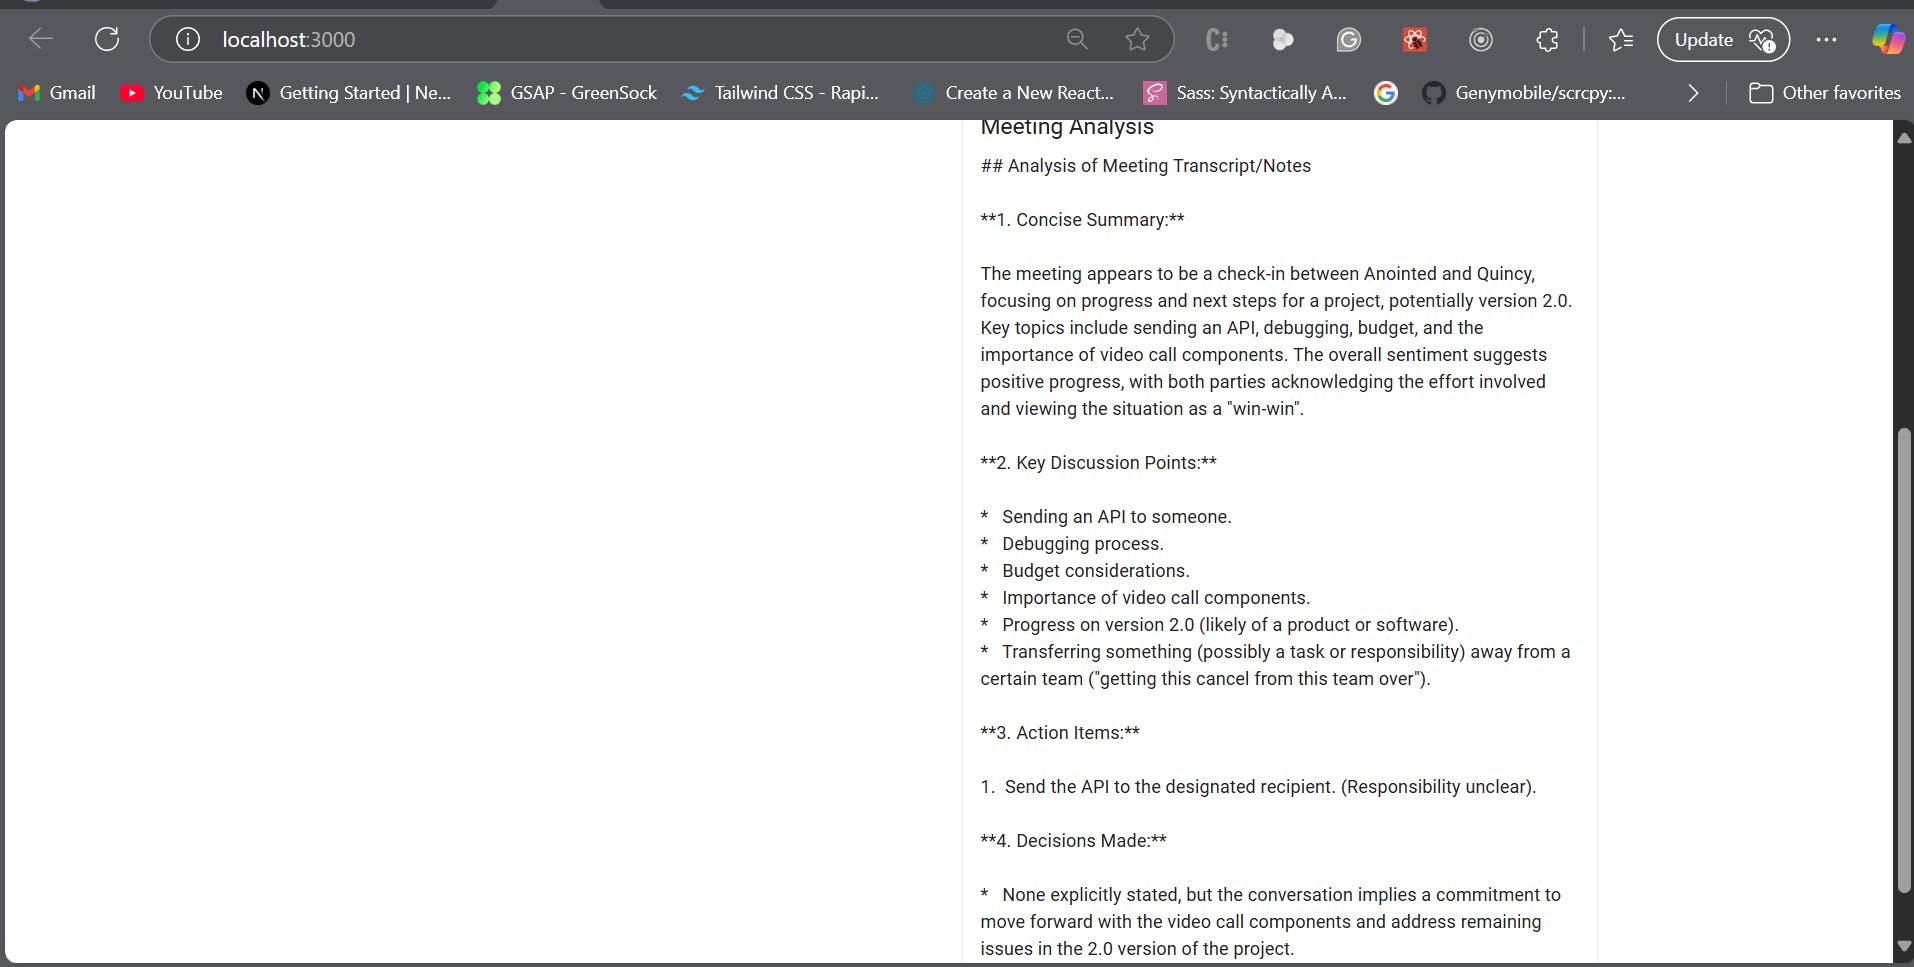
After the meeting concludes:
- Stream generates a transcript.
- The backend stores it.
- The frontend fetches it.
- The user can click “Analyze Meeting Notes” to get insights.
Conclusion
Building effective AI meeting assistants using Stream Video and LLMs offers a huge productivity boost. Teams can operate more efficiently by turning conversations into structured summaries and action points.
The complete source code is available on the GitHub repository.
Now that you know how to combine Stream Video and LLMs to build an AI meeting assistants—what’s next? Try integrating these analyzed action items with task management tools like Trello, Jira, or Asana. To take it a step further, learn how to schedule meetings automatically, make your video experiences accessible, or build a full-featured video conferencing app using our in-depth guides.