How To Create a Data Transmitting Page
You've covered how to transmit data between peers using RTCDataChannel . Now let's create a data transmitting page that allows you to transmit a plain text by clicking a button.
Building a functional data transmission interface requires careful consideration of user experience design principles and accessibility standards. The interface must provide clear visual feedback about connection states, intuitive controls for data transmission, and appropriate handling of various user interaction scenarios. Modern web applications expect responsive design patterns that work seamlessly across different devices and screen sizes.
The data transmission page serves as a practical demonstration of WebRTC capabilities while providing a foundation that can be extended for more complex applications. The interface design should guide users through the connection establishment process and provide clear feedback about data transmission success or failure.
User interface state management becomes particularly important in WebRTC applications because the underlying connection states directly impact what actions users can perform. The interface should reflect these states through appropriate button enabling/disabling, visual indicators, and contextual help text that guides users through the workflow.
First, create an index.html HTML file that contains three buttons, start, send, and close with two text areas:
            <div id="container">
    <h1><a homepage="" href="https://github.com/GetStream/webrtc-for-the-brave" samples="" title="WebRTC">WebRTC samples</a> <span>Transmit text</span></h1>

    <div id="buttons">
        <button id="startButton">Start</button>
        <button disabled="disabled" id="sendButton">Send</button>
        <button disabled="disabled" id="closeButton">Stop</button>
    </div>

    <div id="sendReceive">
        <div id="send">
            <h2>Send</h2>
            <textarea disabled="disabled" enter="" id="dataChannelSend" placeholder="Press" press="" send.="" some="" start="" text="" then=""></textarea>
        </div>
        <div id="receive">
            <h2>Receive</h2>
            <textarea disabled="disabled" id="dataChannelReceive"></textarea>
        </div>
    </div>
</div>
The HTML structure implements a progressive disclosure pattern where users are guided through the necessary steps to establish data channel communication. The initial state shows only the "Start" button as enabled, preventing users from attempting invalid operations before the connection is established. This approach reduces user confusion and prevents error conditions that could result from premature actions.
The dual textarea design provides immediate visual feedback about bidirectional data transmission capabilities. The "Send" textarea allows users to compose messages, while the "Receive" textarea displays incoming data, creating a clear mental model of the communication flow. This separation also enables future enhancements like message history, formatting options, or file attachment capabilities.
The disabled attribute on form elements serves both functional and accessibility purposes. Screen readers and other assistive technologies can interpret these states to provide appropriate feedback to users with disabilities. The visual distinction between enabled and disabled elements also provides immediate feedback about current system capabilities.
Semantic HTML structure with appropriate heading hierarchies (h1, h2) ensures that the page is properly structured for both visual users and assistive technologies. The logical organization of content into distinct sections (buttons, send, receive) creates a clear information architecture that scales well as applications become more complex.
Next, you should import an additional script, adapter-latest.js. The adapter.js is a shim to insulate apps from spec changes and prefix differences. Also, you can add the css file for decorating your components:
            <meta charset="utf-8"></meta>
    <meta content="width=device-width," initial-scale="1," maximum-scale="1" name="viewport" user-scalable="yes,"></meta>
    <meta content="#ffffff" id="theme-color" name="theme-color"></meta>

    <title>Transmit text</title>

    <link href="css/main.css/" rel="stylesheet"></link>

   ..

<script src="https://webrtc.github.io/adapter/adapter-latest.js"></script>
<script async="" src="js/main.js"></script>
The meta tag configuration ensures optimal mobile experience through proper viewport settings that control zoom behavior and initial scale. The user-scalable attribute allows users to adjust text size for accessibility while maintaining the intended layout structure. These settings are particularly important for WebRTC applications that users might access from various devices with different screen characteristics.
The theme-color meta tag enables integration with mobile browser chrome, allowing the application to blend seamlessly with the device's native interface. This small detail contributes to a more professional, native-feeling user experience that matches modern web application standards.
Asynchronous script loading (async attribute) improves page load performance by allowing the HTML parsing to continue while JavaScript resources are downloaded. This is particularly important for WebRTC applications where users expect responsive interfaces, and any delays during initial page load can negatively impact user experience.
The CSS file inclusion enables sophisticated styling that can transform the basic HTML structure into a polished, professional interface. Modern CSS capabilities allow for responsive layouts, smooth animations, and visual feedback that enhances the overall user experience beyond basic functionality.
Complete a peer connection
You've implemented a data transmitting page, and now it's time to combine the page and RTCDataChannel . First, add the elements that you've added on the index.html file.
            const dataChannelSend = document.querySelector('textarea#dataChannelSend');
const dataChannelReceive = document.querySelector('textarea#dataChannelReceive');
const startButton = document.querySelector('button#startButton');
const sendButton = document.querySelector('button#sendButton');
const closeButton = document.querySelector('button#closeButton');

startButton.onclick = createConnection;
sendButton.onclick = sendData;
closeButton.onclick = closeDataChannels;
The DOM element selection and event handler binding demonstrate modern JavaScript practices for creating maintainable, readable code. Using querySelector with specific selectors ensures robust element selection that remains stable even as the HTML structure evolves. The descriptive variable names clearly indicate each element's purpose and make the code self-documenting.
Event handler assignment through onclick properties provides a straightforward approach for simple event handling scenarios. This pattern works well for demonstration applications where event delegation or complex event management isn't required. The direct binding creates clear associations between user interface elements and their corresponding functionality.
The separation of element selection from event handler binding enables easier testing and debugging by allowing developers to verify element availability before attempting to attach event handlers. This pattern also facilitates dynamic interface modifications where event handlers might need to be changed based on application state.
Error handling considerations should include verification that DOM elements exist before attempting to bind event handlers. Production applications should implement graceful fallbacks when expected elements are missing, potentially due to HTML structure changes or loading timing issues.
Now, let's go back to your main.js file's createConnection function and combine the data transmitting and elements:
            function createConnection() {
  dataChannelSend.placeholder = '';
  localConnection = new RTCPeerConnection();

  sendChannel = localConnection.createDataChannel('sendDataChannel');

  localConnection.onicecandidate = e => {
    onIceCandidate(localConnection, e);
  };
  sendChannel.onopen = onSendChannelStateChange;
  sendChannel.onclose = onSendChannelStateChange;

  remoteConnection = new RTCPeerConnection();

  remoteConnection.onicecandidate = e => {
    onIceCandidate(remoteConnection, e);
  };
  remoteConnection.ondatachannel = receiveChannelCallback;

  localConnection.createOffer().then(
      gotDescription1,
      onCreateSessionDescriptionError
  );
  startButton.disabled = true;
  closeButton.disabled = false;
}

function onCreateSessionDescriptionError(error) {
  console.log('Failed to create session description: ' + error.toString());
}
The createConnection function orchestrates the complex process of establishing WebRTC data channel communication while managing the user interface state to provide appropriate feedback. The function demonstrates the integration of WebRTC APIs with DOM manipulation to create a cohesive user experience.
Placeholder text manipulation provides subtle user interface feedback that helps guide users through the application workflow. Clearing the placeholder when connections are established signals that the textarea is now ready for user input, creating a more intuitive interaction model.
The function implements proper WebRTC initialization patterns by creating peer connections, establishing data channels, and configuring all necessary event handlers before initiating the SDP offer-answer exchange. This sequencing ensures that all components are properly configured before network negotiation begins.
Button state management throughout the connection process provides clear visual feedback about system status and available actions. Disabling the start button prevents multiple simultaneous connection attempts while enabling the close button gives users control over connection termination.
The promise-based error handling pattern demonstrates modern JavaScript practices for managing asynchronous operations. The explicit error handler provides opportunities for graceful error recovery and user notification when connection establishment fails.
Event handler registration follows WebRTC best practices by establishing listeners for both connection-level events (icecandidate) and data channel-specific events (onopen, onclose). This comprehensive event handling enables the application to respond appropriately to all aspects of the connection lifecycle.
Lastly, add some elements cleaning codes inside the closeDataChannels() method like the one below:
            function closeDataChannels() {
  sendChannel.close();
  receiveChannel.close();
  localConnection.close();
  remoteConnection.close();
  localConnection = null;
  remoteConnection = null;
  startButton.disabled = false;
  sendButton.disabled = true;
  closeButton.disabled = true;
  dataChannelSend.value = '';
  dataChannelReceive.value = '';
  dataChannelSend.disabled = true;
  disableSendButton();
  enableStartButton();
}
The comprehensive cleanup function demonstrates proper resource management practices that prevent memory leaks and ensure consistent application state across multiple connection cycles. The function addresses both WebRTC resource cleanup and user interface state reset, creating a complete teardown process.
WebRTC resource cleanup follows a specific sequence to ensure graceful termination. Data channels are closed before peer connections to allow proper closure signaling, and connection references are nullified to facilitate garbage collection. This pattern prevents resource accumulation that could impact browser performance over extended usage periods.
User interface state reset encompasses both visual elements (button states, text areas) and functional aspects (input enablement, placeholder text). This comprehensive reset ensures that users can restart the connection process from a clean state without browser refresh or manual intervention.
The function includes calls to additional utility functions (disableSendButton, enableStartButton) that suggest a modular approach to interface state management. This pattern enables consistent state transitions across different parts of the application and facilitates maintenance as interface complexity grows.
Error handling considerations for the cleanup function should account for scenarios where resources might already be closed or in invalid states. Robust cleanup implementations include appropriate error checking to prevent exceptions during the teardown process.
The dual approach of setting disabled properties and calling specialized functions provides both immediate state changes and opportunities for additional interface logic that might be required as applications become more sophisticated.
Running the WebRTC demo application
Now it's time to run the demo application. If you execute the index.html file, you will see the demo below:
This interactive demonstration provides a hands-on experience with WebRTC data channel communication, allowing developers to observe the complete workflow from connection establishment through data transmission to connection termination. The demo environment offers real-time feedback on data transmission behavior and interface state management.
The runnable code environment enables experimentation with different data transmission patterns, message sizes, and transmission frequencies. Developers can observe how the data channel handles various types of content and test the robustness of the connection under different usage scenarios.
If you click the Connect button, Send and Disconnect buttons will be enabled like the image below:
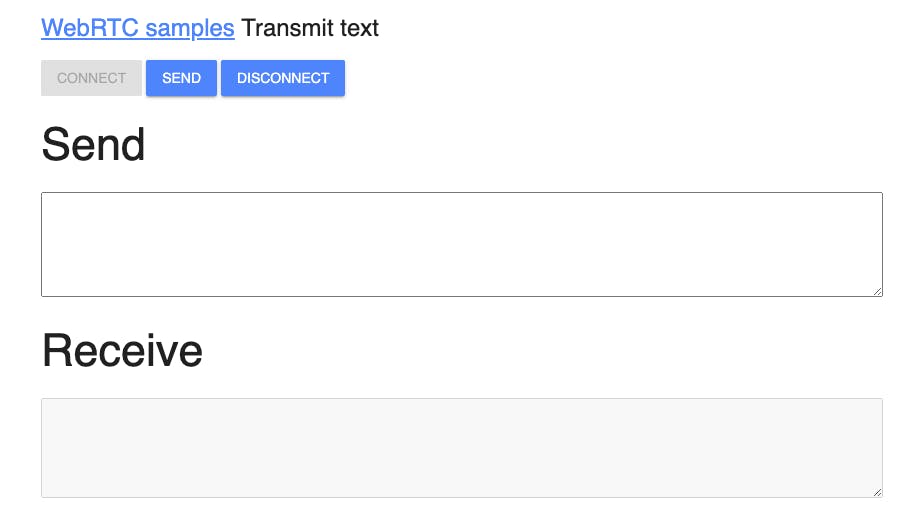
The interface state transition demonstrates the progressive disclosure design pattern where functionality becomes available as the underlying system capabilities are established. The button state changes provide immediate visual feedback about successful connection establishment and available actions.
The enabled send button indicates that the data channel is operational and ready for message transmission. This state change occurs only after the complete WebRTC negotiation process has completed successfully, including SDP exchange, ICE connectivity establishment, and data channel opening confirmation.
The enabled disconnect button provides users with control over connection termination, allowing them to cleanly close the connection when finished. This capability is essential for proper resource management and enables users to restart the connection process when needed.
The visual feedback system helps users understand the current system state and available actions without requiring technical knowledge of the underlying WebRTC processes. This abstraction makes the technology accessible to users while maintaining the full power of the underlying capabilities.
Type some text messages and if you click the Send button, you'll be able to see the Receive text area gets the message you just sent like the image below:

The successful message transmission and display demonstrates the complete data channel communication pipeline working correctly. The immediate appearance of sent text in the receive area confirms that data is flowing through the WebRTC data channel infrastructure and being properly handled by the receiving peer.
This visual confirmation validates that all components of the WebRTC stack are functioning correctly, including data channel creation, SDP negotiation, ICE connectivity establishment, and SCTP data transport. The bidirectional nature of the demonstration shows that both sending and receiving capabilities are operational.
The real-time data transmission demonstrates the low-latency characteristics of WebRTC data channels, where messages appear almost instantaneously in the receiving area. This performance characteristic makes WebRTC suitable for interactive applications that require responsive user experiences.
The demonstration also validates the text encoding and decoding processes, confirming that string data is properly serialized for transmission and accurately reconstructed at the receiving end. This reliability is essential for applications that depend on exact data fidelity.
This tutorial concludes how to connect peer connections, transmitting messages via the data channel on the same computer and the browser.
The local demonstration environment provides an ideal learning platform for understanding WebRTC data channel concepts without the complexity of network infrastructure or signaling server implementation. While the same-page peer connections don't represent real-world deployment scenarios, they effectively demonstrate all the core WebRTC mechanisms that apply to distributed environments.
The foundation established in this tutorial scales directly to production applications where peers operate on different networks, devices, and geographical locations. The core concepts of data channel creation, event handling, and state management remain consistent regardless of the deployment scale or complexity.
Understanding the local implementation provides developers with the knowledge needed to implement signaling servers, handle network traversal challenges, and build robust production WebRTC applications. The principles demonstrated here form the foundation for more advanced WebRTC features and integration patterns.
Note: You can demonstrate and test the sample application about Transmit Text Data on your web browser without building the project.