import React, { PropsWithChildren, useCallback, useMemo } from "react";
import {
  Chat,
  OverlayProvider,
  Streami18n,
  useCreateChatClient,
} from "stream-chat-react-native";
import { useChatClient } from "../hooks/useChatClient";
import { SafeAreaView, ActivityIndicator, StyleSheet } from "react-native";

const STREAM_API_KEY = "your-api-key";

const streami18n = new Streami18n({ language: "en" });

export const ChatWrapper = ({ children }: PropsWithChildren<{}>) => {
  const user = { id: "your-user-id", name: "your-user-name" };
  const token = "your-user-token";

  const chatClient = useCreateChatClient({
    apiKey: STREAM_API_KEY,
    userData: user,
    tokenProvider: token,
  });

  if (!chatClient) {
    // Show a loader until the Chat client loads
    return (
      <SafeAreaView style={styles.container}>
        <ActivityIndicator size={"large"} style={StyleSheet.absoluteFill} />
      </SafeAreaView>
    );
  }

  return (
    <OverlayProvider i18nInstance={streami18n}>
      <Chat client={chatClient} i18nInstance={streami18n}>
        {children}
      </Chat>
    </OverlayProvider>
  );
};

const styles = StyleSheet.create({
  container: { flex: 1, justifyContent: "center", alignItems: "center" },
});Chat Integration
Stream's Chat and Video SDKs integrate seamlessly for calling apps with chat or chat apps with calling features.
Installation
Install Stream Chat SDK following the Getting Started and installation guides.
Creating and Passing Chat Client
Follow this tutorial for Chat Client setup.
Wrapping the chat client
Create a ChatWrapper component at the app root to provide the client to all children:
src/components/ChatWrapper.tsx
It is essential for you to wrap the GestureHandlerRootView, OverlayProvider and Chat component on the root of your chat integration hierarchy.
GestureHandlerRootView should be wrapped into the root of your application as follows:
App.tsx
import React, { useEffect, useState } from "react";
import { StyleSheet } from "react-native";
import {
  Call,
  StreamCall,
  StreamVideo,
  StreamVideoClient,
} from "@stream-io/video-react-native-sdk";
import { VideoCallUI } from "src/components/VideoCallUI";
import { GestureHandlerRootView } from "react-native-gesture-handler";

export default function App() {
  // ...

  return (
    <GestureHandlerRootView style={styles.container}>
      <StreamVideo client={client}>
        <StreamCall call={call}>
          <VideoCallUI />
        </StreamCall>
      </StreamVideo>
    </GestureHandlerRootView>
  );
}

const styles = StyleSheet.create({
  container: { flex: 1 },
});
Adding Chat into Video
Step 1: Wrapping the ChatWrapper
Wrap ChatWrapper with StreamVideo from the Video Calling Tutorial:
App.tsx
import React, { useEffect, useState } from "react";
import {
  Call,
  StreamCall,
  StreamVideo,
  StreamVideoClient,
} from "@stream-io/video-react-native-sdk";
import { VideoCallUI } from "./components/VideoCallUI";
import { ChatWrapper } from "./src/components/ChatWrapper";
import { GestureHandlerRootView } from "react-native-gesture-handler";

export default function App() {
  // ...

  return (
    <ChatWrapper>
      <GestureHandlerRootView style={styles.container}>
        <StreamVideo client={client}>
          <StreamCall call={call}>
            <VideoCallUI />
          </StreamCall>
        </StreamVideo>
      </GestureHandlerRootView>
    </ChatWrapper>
  );
}
Step 2: Creating the Chat window/screen
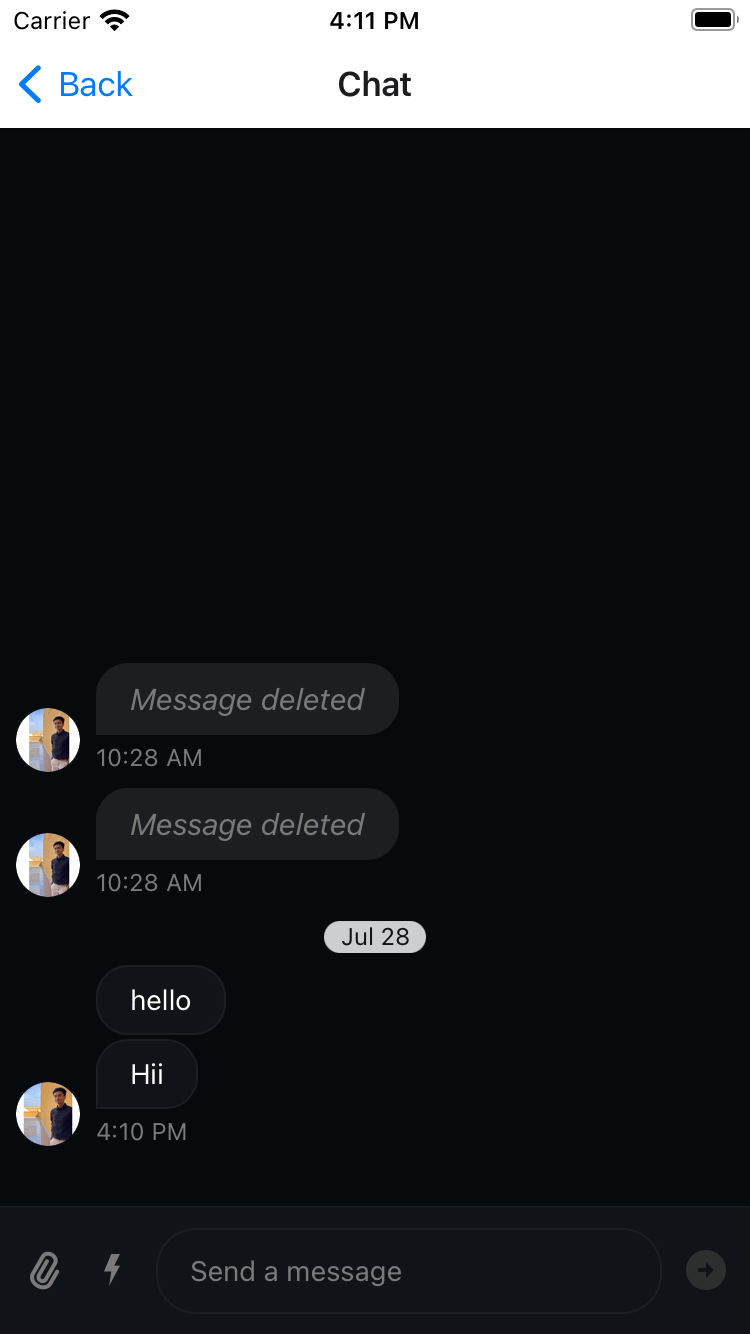
Use Channel, MessageList, and MessageInput components. Use call ID as channel ID for distinction.
src/ChatScreen.tsx
import React, { useEffect, useState } from "react";
import { SafeAreaView, ActivityIndicator, StyleSheet } from "react-native";
import {
  Channel,
  MessageInput,
  MessageList,
  useChatContext,
} from "stream-chat-react-native";
import { Channel as ChannelType } from "stream-chat";

export const ChatScreen = () => {
  const [channel, setChannel] = useState<ChannelType>(undefined);
  const { client } = useChatContext();

  const CHANNEL_TYPE = "messaging";
  const CHANNEL_ID = "your-call-id";

  useEffect(() => {
    const newChannel = client.channel(CHANNEL_TYPE, CHANNEL_ID);
    setChannel(newChannel);
  }, [client]);

  if (!channel) {
    return (
      <SafeAreaView style={styles.container}>
        <ActivityIndicator size={"large"} style={StyleSheet.absoluteFill} />
      </SafeAreaView>
    );
  }

  return (
    <SafeAreaView style={styles.wrapper}>
      <Channel channel={channel}>
        <MessageList />
        <MessageInput />
      </Channel>
    </SafeAreaView>
  );
};

const styles = StyleSheet.create({
  wrapper: { flex: 1 },
  container: { flex: 1, justifyContent: "center", alignItems: "center" },
});
Step 3: Open the chat window
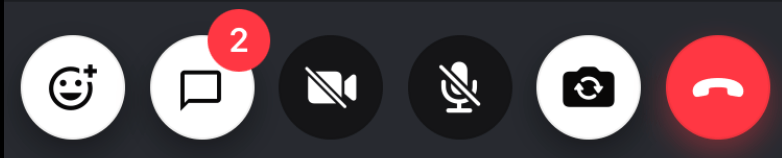
Create custom CallControls with ChatButton. The onPressHandler opens ChatScreen.

src/components/VideoCallUI.tsx
import React from "react";
import { SafeAreaView, StyleSheet, View } from "react-native";
import {
  CallContent,
  CallControlsButton,
  HangUpCallButton,
  ToggleAudioPublishingButton,
  ToggleCameraFaceButton,
  ToggleVideoPublishingButton,
  useTheme,
} from "@stream-io/video-react-native-sdk";
import { IconWrapper } from "@stream-io/video-react-native-sdk/src/icons";

type ChatButtonProps = {
  onPressHandler?: () => void;
};

export const ChatButton = ({ onPressHandler }: ChatButtonProps) => {
  const {
    theme: { colors, chatButton, variants },
  } = useTheme();
  return (
    <CallControlsButton onPress={onPressHandler} style={chatButton}>
      <IconWrapper>{/* Your Chat Icon here */}</IconWrapper>
    </CallControlsButton>
  );
};

export type CallControlsComponentProps = {
  onChatOpenHandler?: () => void;
  onHangupCallHandler?: (err?: Error) => void;
};

export const CallControlsComponent = ({
  onChatOpenHandler,
  onHangupCallHandler,
}: CallControlsComponentProps) => {
  return (
    <View style={styles.callControlsWrapper}>
      <ChatButton onPressHandler={onChatOpenHandler} />
      <ToggleVideoPublishingButton />
      <ToggleAudioPublishingButton />
      <ToggleCameraFaceButton />
      <HangUpCallButton onHangupCallHandler={onHangupCallHandler} />
    </View>
  );
};

export const VideoCallUI = () => {
  const onChatOpenHandler = useCallback(() => {
    // handle how to open the Chat window/screen.
    // You can use this to navigate to the chat screen, open a bottom sheet modal, etc.
  }, []);

  const CustomControlsComponent = useCallback(() => {
    return <CallControlsComponent onChatOpenHandler={onChatOpenHandler} />;
  }, [onChatOpenHandler]);

  return (
    <SafeAreaView style={styles.container}>
      <CallContent CallControls={CustomControlsComponent} />
    </SafeAreaView>
  );
};

const styles = StyleSheet.create({
  container: { flex: 1, backgroundColor: "#272A30" },
  callControlsWrapper: {
    flexDirection: "row",
    justifyContent: "space-evenly",
    paddingVertical: 12,
    zIndex: 2,
    backgroundColor: "#272A30",
  },
});
Step 4: Showing unread count indicator for new chats
Watch the channel and listen for message.new and notification.mark_read events to track unread count.
src/hooks/useUnreadCount.tsx
import { useEffect, useState } from "react";
import { useChatContext } from "stream-chat-react-native";
import { Event, Channel as ChannelType } from "stream-chat";
import { useCall } from "@stream-io/video-react-native-sdk";

/**
 * This hook is responsible for returning the unread count of the channel.
 * This is done through listening to multiple events.
 * @returns number
 */
export const useUnreadCount = () => {
  const [unreadCount, setUnreadCount] = useState(0);
  const CHANNEL_TYPE = "messaging";
  const { client } = useChatContext();
  const call = useCall();

  const cid = `${CHANNEL_TYPE}:${call?.id}`;

  // Effect to watch the channel
  useEffect(() => {
    const channel = client.channel(CHANNEL_TYPE, call?.id);
    channel.watch();
    return () => {
      channel.stopWatching();
    };
  }, [call?.id, client]);

  // Effect to set the unreadCount to 0 when the `notification.mark_read` event is received
  useEffect(() => {
    if (!client) return;
    const handleEvent = (event: Event) => {
      if (event?.cid === cid) {
        setUnreadCount(0);
      }
    };

    client.on("notification.mark_read", handleEvent);
    return () => client.off("notification.mark_read", handleEvent);
  }, [client, cid]);

  // Effect to update the unread count when the 'message.new' is received
  useEffect(() => {
    if (!client) return;
    const handleEvent = () => {
      const channel = client.activeChannels[cid];
      setUnreadCount(channel?.countUnread() ?? 0);
    };

    handleEvent();
    client.on("message.new", handleEvent);
    return () => {
      client.off("message.new", handleEvent);
    };
  }, [client, cid]);

  return unreadCount;
};
Make sure to clean up/unsubscribe to all the events when the hook un-mounts.
Pass unread count via unreadBadgeCountIndicator in CallControls:
src/components/VideoCallUI.tsx
import React from "react";
import { SafeAreaView, StyleSheet, View } from "react-native";
import { CallContent, useTheme } from "@stream-io/video-react-native-sdk";

export const BadgeCountIndicator = ({
  count,
}: {
  count: number | undefined;
}) => {
  const {
    theme: { colors, typefaces },
  } = useTheme();

  // Don't show badge if count is 0 or undefined
  if (!count) return null;

  return (
    <View style={[styles.badge, { backgroundColor: colors.iconSuccess }]}>
      <Text
        style={[
          styles.badgeText,
          { color: colors.sheetPrimary },
          typefaces.caption,
        ]}
      >
        {count}
      </Text>
    </View>
  );
};

type ChatButtonProps = {
  onPressHandler?: () => void;
  unreadBadgeCount?: number;
};

export const ChatButton = ({
  onPressHandler,
  unreadBadgeCount,
}: ChatButtonProps) => {
  const {
    theme: { colors, chatButton, variants },
  } = useTheme();
  return (
    <CallControlsButton onPress={onPressHandler} style={chatButton}>
      <IconWrapper>{/* Your Chat Icon here */}</IconWrapper>
      <BadgeCountIndicator count={unreadBadgeCount} />
    </CallControlsButton>
  );
};

export type CallControlsComponentProps = {
  onChatOpenHandler?: () => void;
  onHangupCallHandler?: (err?: Error) => void;
  unreadBadgeCount?: number;
};

export const CallControlsComponent = ({
  onChatOpenHandler,
  onHangupCallHandler,
  unreadBadgeCount,
}: CallControlsComponentProps) => {
  return (
    <View style={styles.callControlsWrapper}>
      // ...
      <ChatButton
        onPressHandler={onChatOpenHandler}
        unreadBadgeCount={unreadBadgeCount}
      />
      // ...
    </View>
  );
};

export const VideoCallUI = () => {
  const unreadBadgeCount = useUnreadCount();
  const onChatOpenHandler = () => {
    // handle how to open the Chat window/screen.
    // You can use this to navigate to the chat screen, open a modal, etc.
  };

  const CustomControlsComponent = useCallback(() => {
    return (
      <CallControlsComponent
        onChatOpenHandler={onChatOpenHandler}
        unreadBadgeCount={unreadBadgeCount}
      />
    );
  }, [onChatOpenHandler]);

  return (
    <SafeAreaView style={styles.container}>
      <CallContent CallControls={CustomControlsComponent} />
    </SafeAreaView>
  );
};

const styles = StyleSheet.create({
  container: { flex: 1 },
  badge: { borderRadius: 10, paddingHorizontal: 5, paddingVertical: 2 },
  badgeText: { fontSize: 12, fontWeight: "bold" },
});
Adding Video into Chat
Add video calling to chat for messenger-like functionality.
Use useChatClient and ChatWrapper from earlier setup.
Step 1: Setting up navigation
Use React Navigation for navigation.
Installing the dependencies
Install native stack navigator packages:
yarn add @react-navigation/native @react-navigation/elements @react-navigation/native-stack react-native-screens react-native-safe-area-contextInstall pods:
npx pod-installYou can also follow the Getting started guide to install the React Navigation dependencies effectively.
Wrapping the App in NavigationContainer
Wrap with NavigationContainer for state management:
App.tsx
import React from "react";
import { GestureHandlerRootView } from "react-native-gesture-handler";
import { NavigationContainer } from "@react-navigation/native";

export default function App() {
  // ...

  return (
    <GestureHandlerRootView style={styles.container}>
      <NavigationContainer>{/* Rest of the code */}</NavigationContainer>
    </GestureHandlerRootView>
  );
}

const styles = StyleSheet.create({
  container: { flex: 1 },
});
Step 2: Setting up the AppContext
Create AppContext to persist channel data between screens:
src/context/AppContext.tsx
import React, { PropsWithChildren, useState } from "react";
import { Channel as ChannelType } from "stream-chat";
import { ThreadContextValue } from "stream-chat-react-native";

type AppContextType = {
  channel: ChannelType | undefined;
  setChannel: React.Dispatch<React.SetStateAction<ChannelType | undefined>>;
  setThread: React.Dispatch<
    React.SetStateAction<ThreadContextValue["thread"] | undefined>
  >;
  thread: ThreadContextValue["thread"] | undefined;
};

export const AppProvider = ({ children }: PropsWithChildren<{}>) => {
  const [channel, setChannel] = useState<ChannelType>();
  const [thread, setThread] = useState<ThreadContextValue["thread"]>();
  return (
    <AppContext.Provider value={{ channel, setChannel, thread, setThread }}>
      {children}
    </AppContext.Provider>
  );
};

export const useAppContext = () => React.useContext(AppContext);
Wrap AppProvider:
App.tsx
import React from "react";
import { StyleSheet } from "react-native";
import { GestureHandlerRootView } from "react-native-gesture-handler";
import { NavigationContainer } from "@react-navigation/native";
import { AppProvider } from "./src/context/AppContext";

export default function App() {
  // ...

  return (
    <GestureHandlerRootView style={styles.container}>
      <NavigationContainer>
        <AppProvider>{/* Rest of the code */}</AppProvider>
      </NavigationContainer>
    </GestureHandlerRootView>
  );
}

const styles = StyleSheet.create({
  container: { flex: 1 },
});
Creating the screens
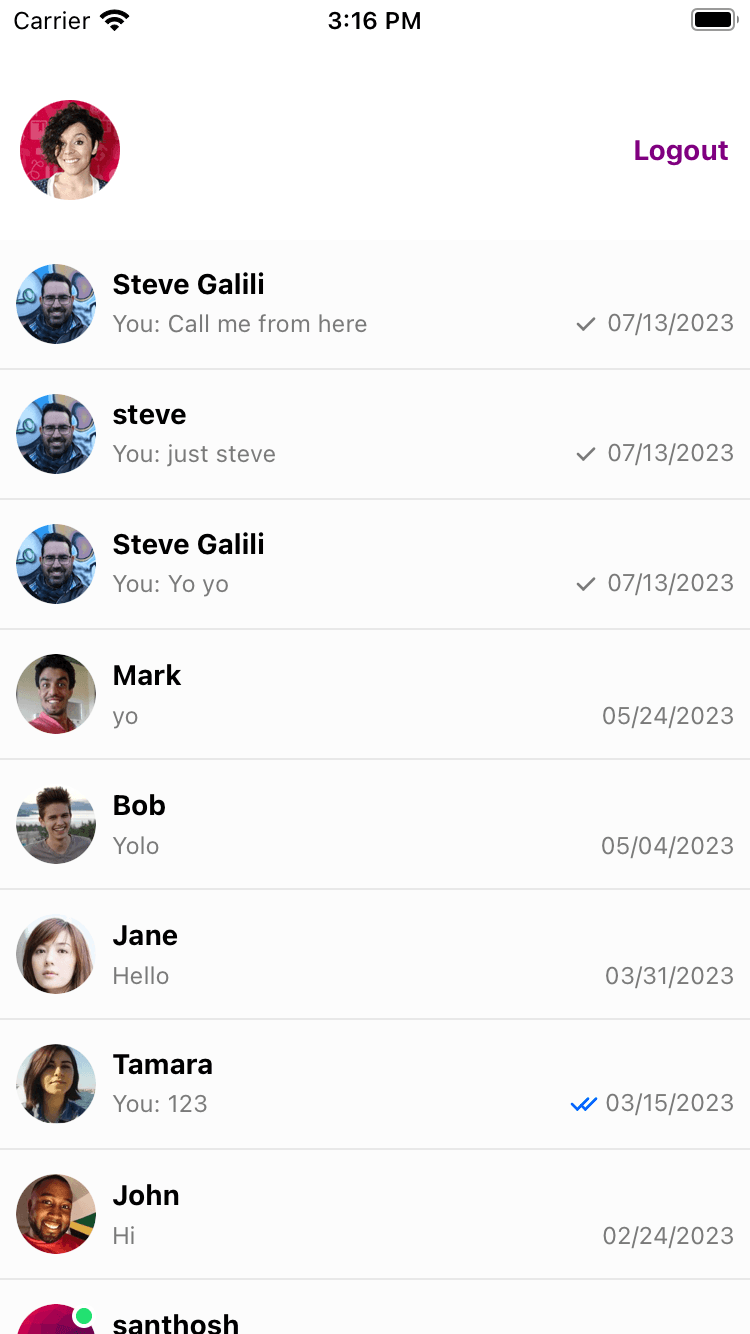
Create two screens:
- Channel list screen - Lists all channels
- Channel screen - Messages, input, and call button
Set up screen types:
src/types.ts
export type NavigationStackParamsList = {
  ChannelListScreen: undefined;
  ChannelScreen: undefined;
};
Channel List Screen:
src/screens/ChannelListScreen.tsx
import React from "react";
import { StyleSheet, View } from "react-native";
import { ChannelList } from "stream-chat-react-native";
import type { ChannelSort } from "stream-chat";
import type { NativeStackScreenProps } from "@react-navigation/native-stack";
import type { NavigationStackParamsList } from "src/types";
import { useAppContext } from "src/context/AppContext";

const sort: ChannelSort = {
  last_message_at: -1,
  // Your sort options
};
const options = {
  // Your options
};

type ChannelListScreenProps = NativeStackScreenProps<
  NavigationStackParamsList,
  "ChannelListScreen"
>;

export function ChannelListScreen({ navigation }: ChannelListScreenProps) {
  const { setChannel } = useAppContext();
  // Logged in user details
  const user = {
    id: "your-user-id",
    name: "your-user-name",
  };

  const filters = {
    type: "messaging",
    members: { $in: [user.id] },
    // Your filters
  };

  return (
    <View style={styles.container}>
      <ChannelList
        filters={filters}
        onSelect={(channel) => {
          setChannel(channel);
          navigation.navigate("ChannelScreen");
        }}
        options={options}
        sort={sort}
      />
    </View>
  );
}

const styles = StyleSheet.create({
  container: { flex: 1 },
});
Uses ChannelList component.
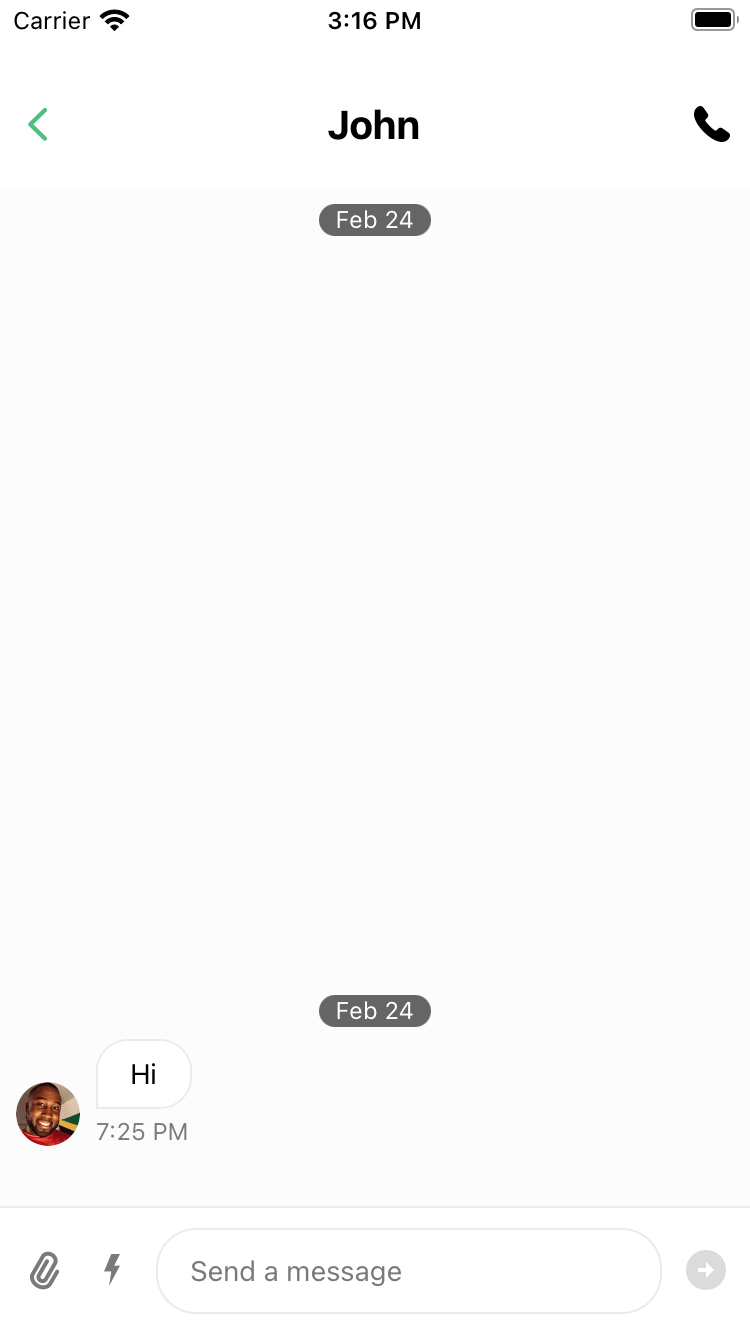
Channel Screen:
src/screens/ChannelScreen.tsx
import React, { useEffect } from "react";
import { useAppContext } from "src/context/AppContext";
import { useHeaderHeight } from "@react-navigation/elements";
import {
  Channel,
  MessageInput,
  MessageList,
  useAttachmentPickerContext,
  useOverlayContext,
} from "stream-chat-react-native";
import { NativeStackScreenProps } from "@react-navigation/native-stack";
import { NavigationStackParamsList } from "src/types";
import { Platform, StyleSheet, View } from "react-native";

type ChannelScreenProps = NativeStackScreenProps<
  NavigationStackParamsList,
  "ChannelScreen"
>;

export function ChannelScreen({ navigation }: ChannelScreenProps) {
  const { channel } = useAppContext();
  const headerHeight = useHeaderHeight();
  const { setTopInset } = useAttachmentPickerContext();
  const { overlay } = useOverlayContext();

  useEffect(() => {
    navigation.setOptions({
      gestureEnabled: Platform.OS === "ios" && overlay === "none",
    });
  }, [navigation, overlay]);

  useEffect(() => {
    setTopInset(headerHeight);
  }, [headerHeight, setTopInset]);

  if (channel === undefined) return null;

  return (
    <Channel channel={channel} keyboardVerticalOffset={headerHeight}>
      <View style={styles.container}>
        <MessageList />
        <MessageInput />
      </View>
    </Channel>
  );
}

const styles = StyleSheet.create({
  container: { flex: 1 },
});
Uses Channel, MessageList, MessageInput.
Set up Native Stack Navigator:
App.tsx
import React from "react";
import { StyleSheet } from "react-native";
import { NavigationStackParamsList } from "./src/types";
import { createNativeStackNavigator } from "@react-navigation/native-stack";
import { GestureHandlerRootView } from "react-native-gesture-handler";
import { NavigationContainer } from "@react-navigation/native";
import { ChannelListScreen } from "./src/screens/ChannelListScreen";
import { ChannelScreen } from "./src/screens/ChannelScreen";
import { AppProvider } from "./src/context/AppContext";

const Stack = createNativeStackNavigator<NavigationStackParamsList>();

const Messenger = () => {
  return (
    <Stack.Navigator>
      <Stack.Screen name="ChannelListScreen" component={ChannelListScreen} />
      <Stack.Screen name="ChannelScreen" component={ChannelScreen} />
    </Stack.Navigator>
  );
};

export default function App() {
  // ...

  return (
    <GestureHandlerRootView style={styles.container}>
      <NavigationContainer>
        <AppProvider>
          <Messenger />
        </AppProvider>
      </NavigationContainer>
    </GestureHandlerRootView>
  );
}

const styles = StyleSheet.create({
  container: { flex: 1 },
});
Step 3: Wrapping the ChatWrapper
Wrap ChatWrapper to provide chat client:
App.tsx
import React from "react";
import { StyleSheet } from "react-native";
import { GestureHandlerRootView } from "react-native-gesture-handler";
import { NavigationContainer } from "@react-navigation/native";
import { AppProvider } from "./src/context/AppContext";
import { ChatWrapper } from "./src/components/ChatWrapper";
// ...

export default function App() {
  // ...

  return (
    <GestureHandlerRootView style={styles.container}>
      <NavigationContainer>
        <AppProvider>
          <ChatWrapper>
            <Messenger />
          </ChatWrapper>
        </AppProvider>
      </NavigationContainer>
    </GestureHandlerRootView>
  );
}

const styles = StyleSheet.create({
  container: { flex: 1 },
});
Step 4: Creating and passing the Video Wrapper
Create a video wrapper per the Video Call Tutorial:
src/components/VideoWrapper.tsx
import React, { PropsWithChildren, useEffect, useState } from "react";
import {
  StreamVideo,
  StreamVideoClient,
} from "@stream-io/video-react-native-sdk";

export const VideoWrapper = ({ children }: PropsWithChildren<{}>) => {
  const [videoClient, setVideoClient] = useState<StreamVideoClient>();
  const user = { id: "your-user-id", name: "your-user-name" };
  const token = "your-user-token";

  useEffect(() => {
    if (!user) return;
    const user = { id: user.id, name: user.name };
    const _videoClient = new StreamVideoClient({
      apiKey: STREAM_API_KEY,
      user,
      tokenProvider: token,
    });

    setVideoClient(_videoClient);

    return () => {
      _videoClient.disconnectUser();
      setVideoClient(undefined);
    };
  }, [user]);

  if (!videoClient) return null;

  return (
    <StreamVideo client={videoClient} language={"en"}>
      {children}
    </StreamVideo>
  );
};
Wrap VideoWrapper:
App.tsx
import React from "react";
import { StyleSheet } from "react-native";
import { GestureHandlerRootView } from "react-native-gesture-handler";
import { NavigationContainer } from "@react-navigation/native";
import { AppProvider } from "./src/context/AppContext";
import { ChatWrapper } from "./src/components/ChatWrapper";
import { VideoWrapper } from "./src/components/VideoWrapper";
// ...

export default function App() {
  // ...

  return (
    <GestureHandlerRootView style={styles.container}>
      <NavigationContainer>
        <AppProvider>
          <ChatWrapper>
            <VideoWrapper>
              <Messenger />
            </VideoWrapper>
          </ChatWrapper>
        </AppProvider>
      </NavigationContainer>
    </GestureHandlerRootView>
  );
}

const styles = StyleSheet.create({
  container: { flex: 1 },
});
Step 5: Passing the call to StreamCall
Use useCalls for pending calls and StreamCall to provide call context:
import React, { useCallback, useEffect } from "react";
import { StreamCall, useCalls } from "@stream-io/video-react-native-sdk";
import { Alert } from "react-native";
export const Calls = () => {
const calls = useCalls();
const handleMoreCalls = useCallback(() => {
const lastCallCreatedBy = calls[1].data?.created_by;
Alert.alert(
`Incoming call from ${
lastCallCreatedBy?.name ?? lastCallCreatedBy?.id
}, only 1 call at a time is supported`,
);
}, [calls]);
// Reset the state of the show variable when there are no calls.
useEffect(() => {
if (calls.length > 1) {
handleMoreCalls();
}
}, [calls.length, handleMoreCalls]);
const firstCall = calls[0];
if (!firstCall) return null;
return <StreamCall call={firstCall}>{/* Rest of the code */}</StreamCall>;
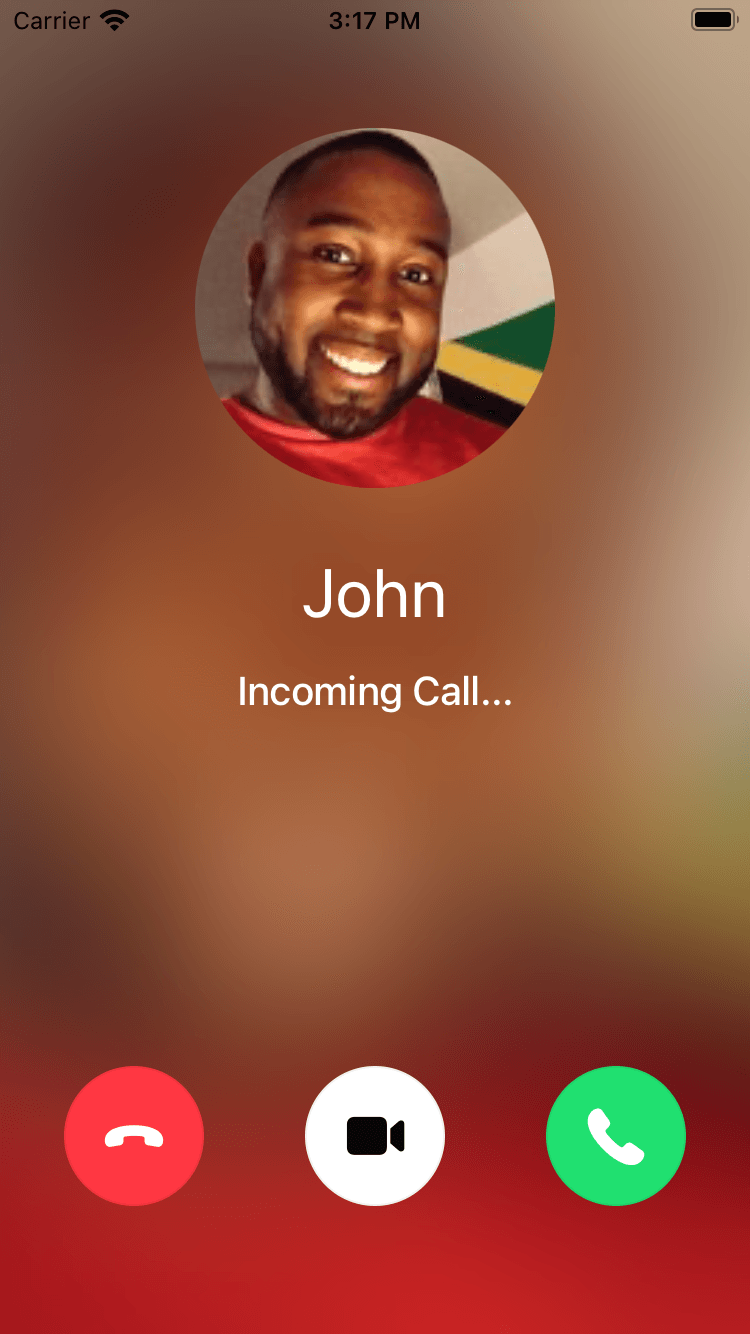
};We currently support one call at a time, and therefore we show an alert, if a user gets multiple calls while they are in the call already. You can handle it in a different way.
This is the reason why we pass calls[0] to the StreamCall component, for now.
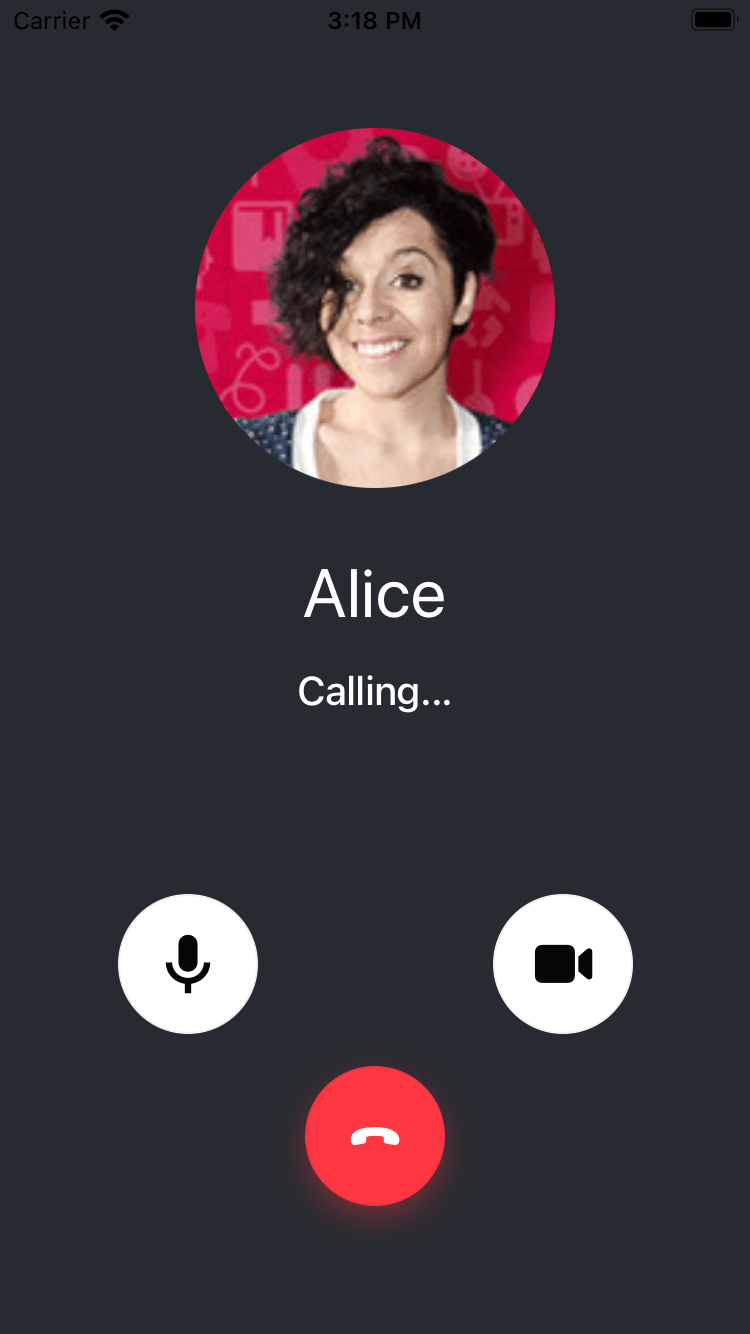
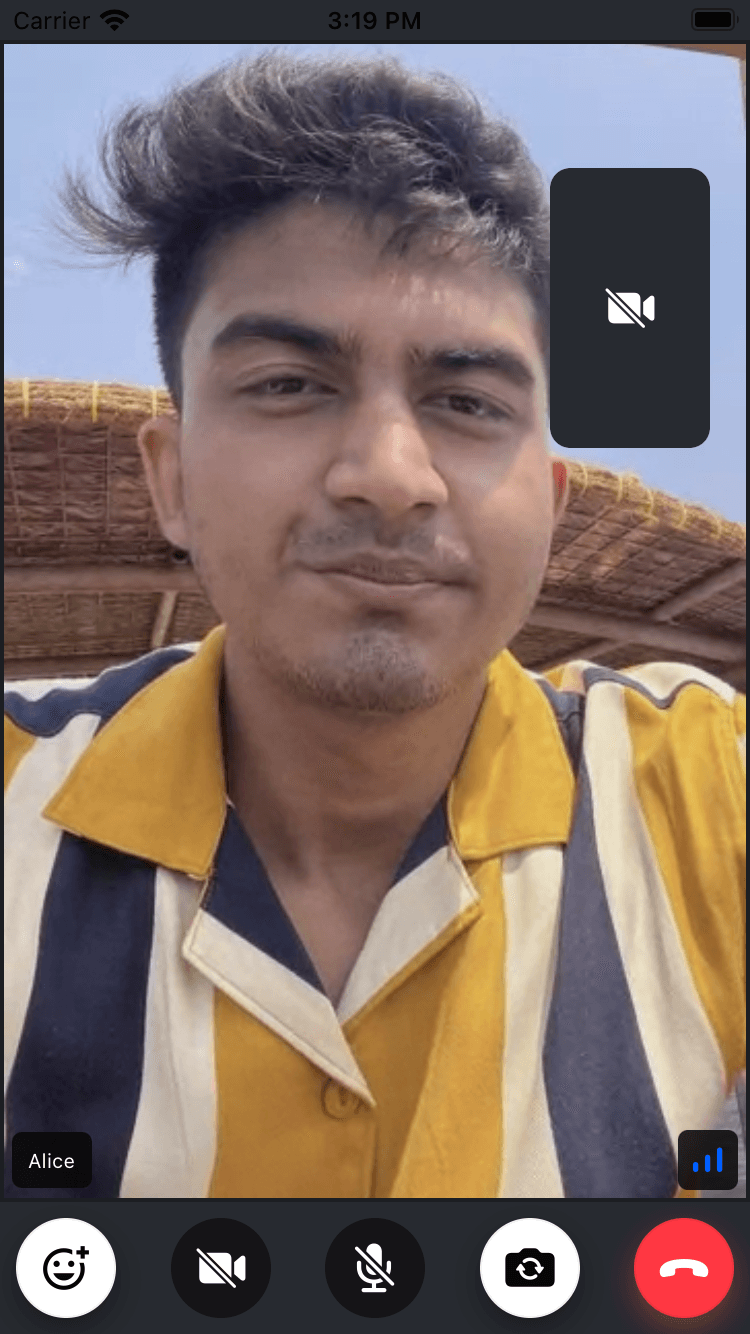
Step 6: Using the RingingCallContent
Use RingingCallContent to handle Incoming, Outgoing, JoiningCallIndicator, and CallContent states:
src/components/Calls.tsx
import {
StreamCall,
useCalls,
RingingCallContent,
} from "@stream-io/video-react-native-sdk";
import { CallPanel } from "src/components/CallPanel";
export const Calls = () => {
const calls = useCalls();
// ...
const firstCall = calls[0];
if (!firstCall) return null;
return (
<StreamCall call={firstCall}>
<View style={styles.container}>
<RingingCallContent />
</View>
</StreamCall>
);
};
const styles = StyleSheet.create({
container: { flex: 1 },
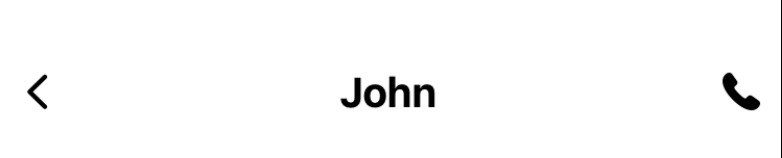
});Step 7: Creating the Channel Header with ability to Create Call
Pass a header component via options.header on StackScreen:
<Stack.Screen
  name="ChannelScreen"
  component={ChannelScreen}
  options={{
    header: ChannelHeaderComponent,
  }}
/>
ChannelHeader implementation:
src/components/ChannelHeader.tsx
import React, { useCallback } from "react";
import { Pressable, StyleSheet, Text, View } from "react-native";
import { useAppContext } from "src/context/AppContext";
import { NativeStackHeaderProps } from "@react-navigation/native-stack";
import {
  type MemberRequest,
  useStreamVideoClient,
} from "@stream-io/video-react-native-sdk";

type ChannelHeaderProps = NativeStackHeaderProps;

const ChannelHeader = (props: ChannelHeaderProps) => {
  const { navigation } = props;
  const { channel } = useAppContext();
  const videoClient = useStreamVideoClient();
  const members = Object.values(
    channel?.state?.members ?? {},
  ).map<MemberRequest>((member) => ({
    user_id: member.user_id!,
  }));

  const joinCallHandler = useCallback(async () => {
    try {
      const call = videoClient?.call("default", "random-call-id");
      await call?.getOrCreate({
        ring: true,
        data: {
          // more timeout to cancel the call automatically so that it works when callee's app is in quit state
          settings_override: {
            ring: {
              auto_cancel_timeout_ms: 30000,
              incoming_call_timeout_ms: 5000,
            },
          },
          custom: { channelCid: channel?.cid },
          members: members,
        },
      });
    } catch (error) {
      console.log("Failed to createCall", error);
    }
  }, [videoClient, members, channel?.cid]);

  const goBackHandler = useCallback(() => {
    navigation.goBack();
  }, [navigation]);

  return (
    <View style={styles.header}>
      <Pressable onPress={goBackHandler} style={styles.icon}>
        {/* Back icon component */}
      </Pressable>
      <Text style={styles.name}>{/* Your custom Header Title */}</Text>
      <Pressable onPress={joinCallHandler} style={styles.icon}>
        {/* Call icon component */}
      </Pressable>
    </View>
  );
};

export const ChannelHeaderComponent = (props: NativeStackHeaderProps) => {
  return <ChannelHeader {...props} />;
};

const styles = StyleSheet.create({
  header: {
    backgroundColor: "white",
    flexDirection: "row",
    justifyContent: "space-between",
    alignItems: "center",
    paddingHorizontal: 10,
    paddingTop: 50,
    paddingBottom: 20,
  },
  name: { fontSize: 20, fontWeight: "bold" },
  icon: { height: 18, width: 18 },
});
Pressing the call button sends an outgoing call. Recipients can accept/reject via the Incoming call screen.
Further Steps
Use this template for chat-primary apps with video features.
Related guides:
On this page: