const call =
  /* Created call */

  useEffect(() => {
    const getOrCreateCall = async () => {
      try {
        await call?.getOrCreate();
      } catch (error) {
        console.error("Failed to get or create call", error);
      }
    };

    getOrCreateCall();
}, [call]);Lobby Preview
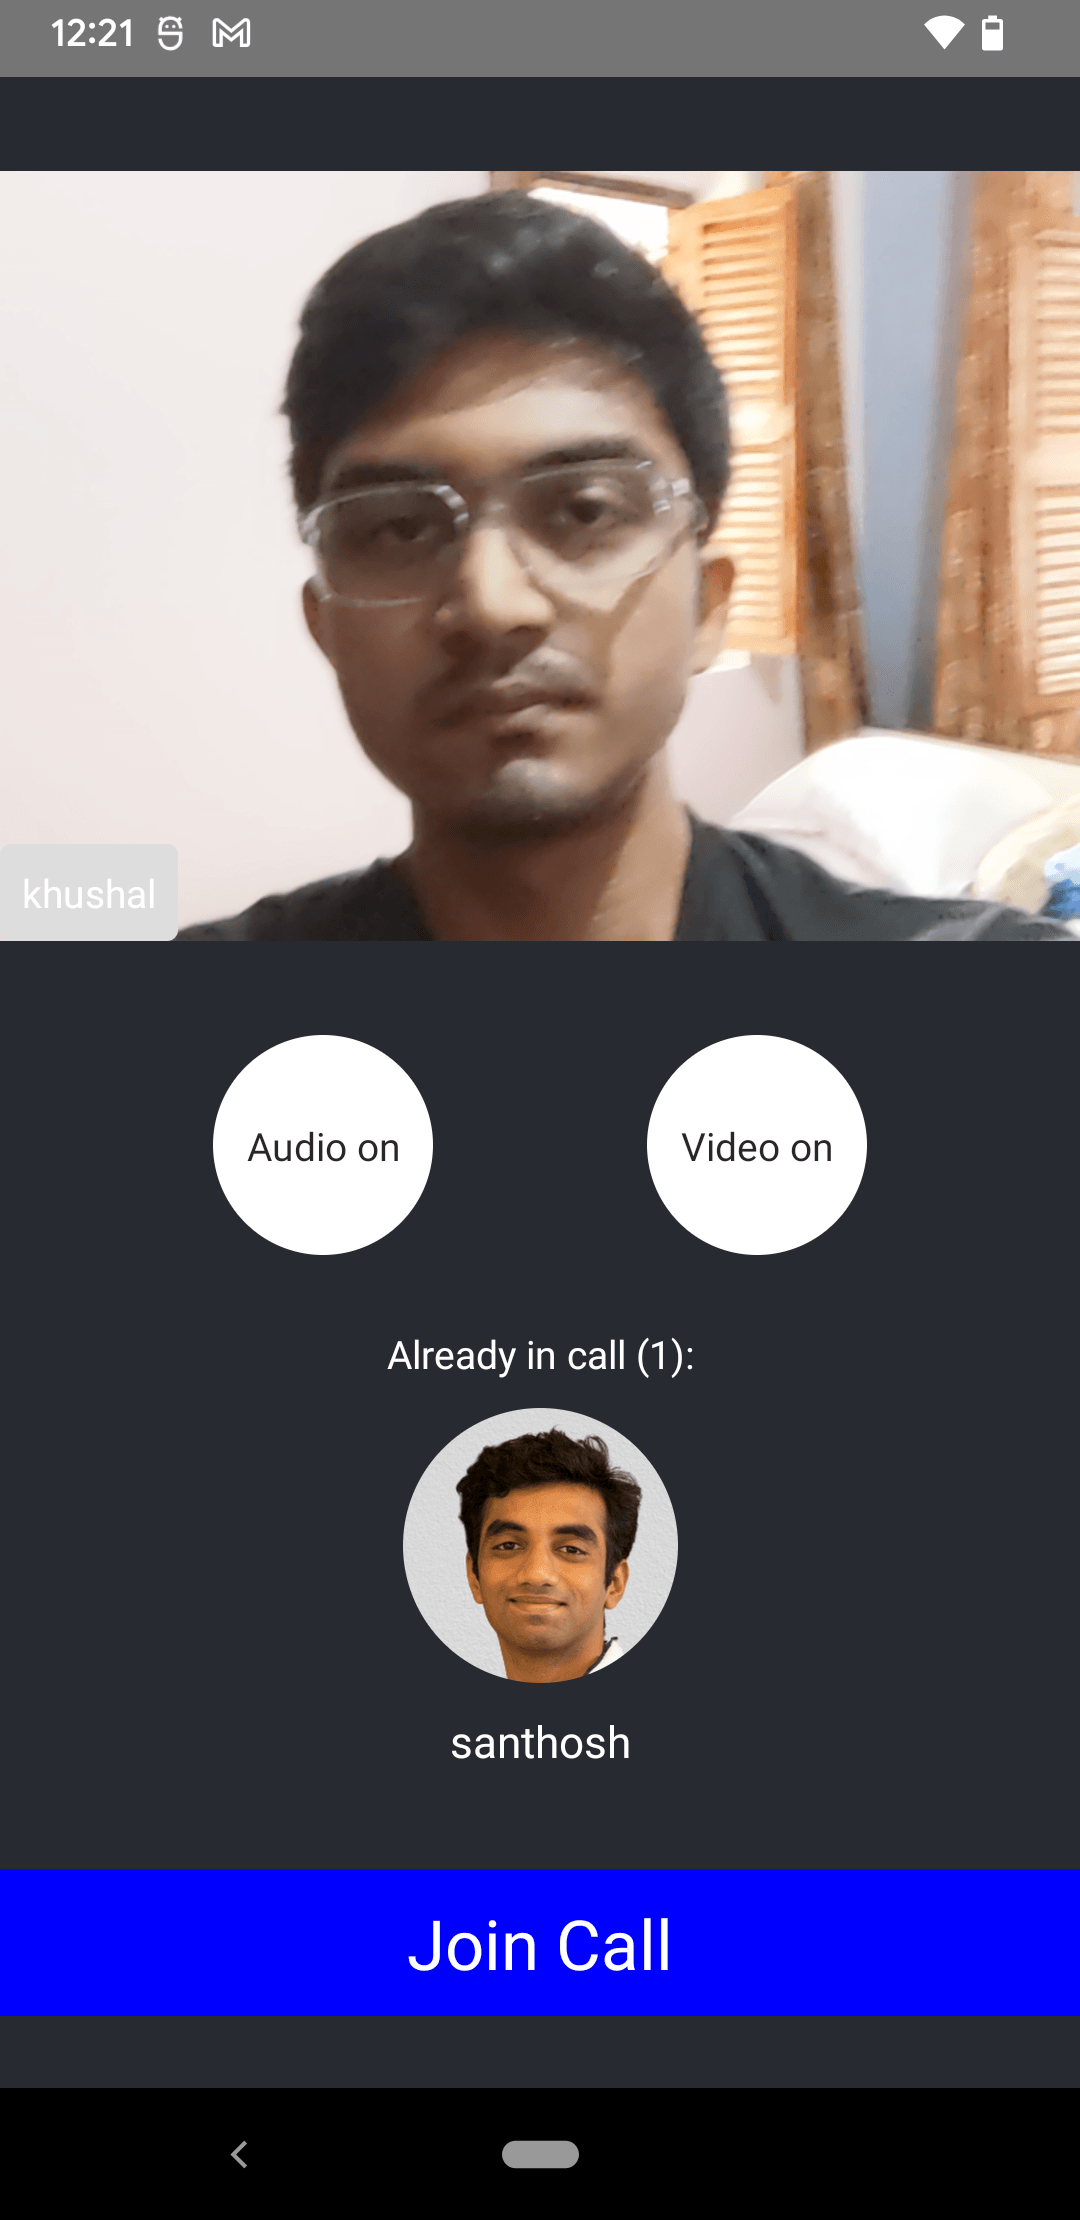
This guide covers creating an effective lobby experience before joining calls. A well-designed lobby enhances user experience and ensures smooth transitions into video calls.
Best Practices
- Show video preview - Let users verify camera setup before joining
- Display call information - Show who's already in the call
- Enable media controls - Allow audio/video toggle before joining
- Request permissions early - Handle camera/microphone permissions in the lobby
- Provide clear join action - Make the join button prominent and accessible
Lobby capabilities:
- Video preview - Users see themselves before joining
- Call information - Display call details and participants
- Media preferences - Set audio/video mute state before joining
- Participant list - Show who has already joined
Component visualization varies by application. This guide focuses on building principles and data source integration.
The Call data
Display call information when users arrive at the lobby:
- Call ID and type - Retrieved via
useCallhook - Joined participants - Retrieved via
useCallMetadatahook
Retrieve initial call information using the get or getOrCreate method of a Call instance. Register an effect where the call is created:
These hooks provide real-time updates via Stream's WebSocket events.
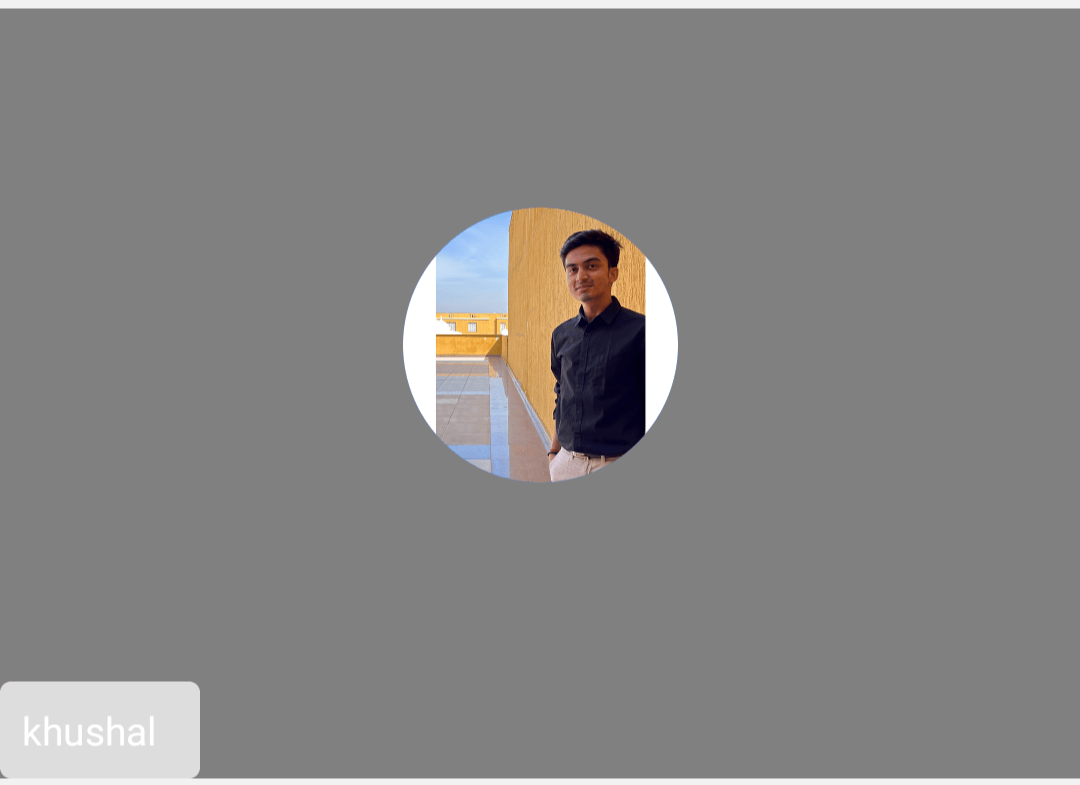
Video Input Preview
Display local video preview before joining to verify camera setup. Get the video stream from call.camera and render it using RTCView from @stream-io/react-native-webrtc. Use useConnectedUser for user info.

Example:
import {
Avatar,
StreamVideoParticipant,
useConnectedUser,
useCall,
useCallStateHooks,
} from '@stream-io/video-react-native-sdk';
import React from 'react';
import { StyleSheet, View, Text } from 'react-native';
import { RTCView } from '@stream-io/react-native-webrtc';
export const LocalVideoRenderer = () => {
const call = useCall();
const localVideoStream = call?.camera.state.mediaStream;
const connectedUser = useConnectedUser();
const { useCameraState } = useCallStateHooks();
const { status: cameraStatus } = useCameraState();
const connectedUserAsParticipant = {
userId: connectedUser?.id,
image: connectedUser?.image,
name: connectedUser?.name,
} as StreamVideoParticipant;
return (
<View style={styles.videoView}>
<View style={styles.topView} />
{cameraStatus === 'enabled ? (
<RTCView
streamURL={localVideoStream?.toURL()}
objectFit="cover"
style={StyleSheet.absoluteFillObject}
/>
) : (
<Avatar participant={connectedUserAsParticipant} />
)}
<ParticipantStatus />
</View>
);
};
const ParticipantStatus = () => {
const connectedUser = useConnectedUser();
const participantLabel = connectedUser?.name ?? connectedUser?.id;
const { useMicrophoneState } = useCallStateHooks();
const { status: microphoneStatus } = useMicrophoneState();
return (
<View style={styles.status}>
<Text style={styles.userNameLabel} numberOfLines={1}>
{participantLabel}
</Text>
{microphoneStatus === 'disabled' && (
<View style={styles.svgContainerStyle}>
<Text>(Mic off)</Text>
</View>
)}
</View>
);
};
const styles = StyleSheet.create({
videoView: {
backgroundColor: 'gray',
height: 280,
width: '100%',
justifyContent: 'space-between',
alignItems: 'center',
overflow: 'hidden',
marginVertical: 8,
},
topView: {},
status: {
alignSelf: 'flex-start',
flexDirection: 'row',
alignItems: 'center',
padding: 8,
borderRadius: 4,
backgroundColor: '#dddddd',
},
userNameLabel: {
flexShrink: 1,
color: 'white',
},
svgContainerStyle: {
marginLeft: 8,
},
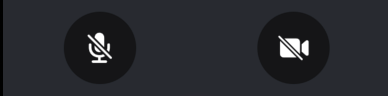
});Media Stream Management
To control audio or video mute status in the Lobby, you can use the useCameraState and useMicrophoneState hooks from the useCallStateHooks, that orchestrates the local state of the device within the SDK and handles streaming of the media effectively.
When accessing camera and microphone, native permissions are required. Make sure to request permissions before attempting to access devices, and handle cases where permissions are denied. See the Native Permissions guide for details.

The button's created will orchestrate the video preview in the Video Input Preview guide above.
You can add this in the code above:
const { useMicrophoneState, useCameraState } = useCallStateHooks();
const { status: cameraStatus } = useCameraState();
const isVideoAvailable = !!localVideoStream && cameraStatus === "enabled";
Example:
MediaStreamButtonGroup.tsx
import React from "react";
import { Pressable, View, Text, StyleSheet } from "react-native";
import { useCallStateHooks } from "@stream-io/video-react-native-sdk";
export const MediaStreamButtonGroup = () => {
const { useMicrophoneState, useCameraState } = useCallStateHooks();
const { isMuted: microphoneMuted } = useMicrophoneState();
const { isMuted: cameraMuted } = useCameraState();
const audioButtonStyles = [
styles.button,
{
backgroundColor: microphoneStatus === "disabled" ? "#080707dd" : "white",
},
];
const videoButtonStyles = [
styles.button,
{
backgroundColor: cameraStatus === "disabled" ? "#080707dd" : "white",
},
];
const audioButtonTextStyles = [
styles.mediaButtonText,
{
color: microphoneStatus === "disabled" ? "white" : "#080707dd",
},
];
const videoButtonTextStyles = [
styles.mediaButtonText,
{
color: cameraStatus === "disabled" ? "white" : "#080707dd",
},
];
const toggleAudioMuted = async () => {
await call?.microphone.toggle();
};
const toggleVideoMuted = async () => {
await call?.camera.toggle();
};
return (
<View style={styles.buttonGroup}>
<Pressable onPress={toggleAudioMuted} style={audioButtonStyles}>
{!microphoneMuted ? (
<Text style={audioButtonTextStyles}>Audio on</Text>
) : (
<Text style={audioButtonTextStyles}>Audio off</Text>
)}
</Pressable>
<Pressable onPress={toggleVideoMuted} style={videoButtonStyles}>
{!cameraMuted ? (
<Text style={videoButtonTextStyles}>Video on</Text>
) : (
<Text style={videoButtonTextStyles}>Video off</Text>
)}
</Pressable>
</View>
);
};
const styles = StyleSheet.create({
buttonGroup: {
flexDirection: "row",
justifyContent: "space-evenly",
},
button: {
height: 80,
width: 80,
borderRadius: 40,
justifyContent: "center",
},
mediaButtonText: {
textAlign: "center",
},
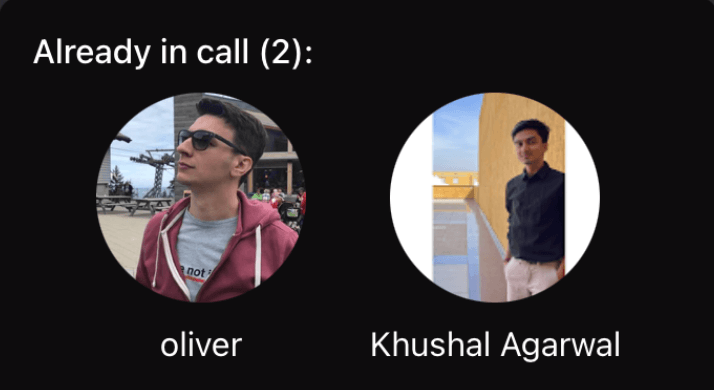
});Participants in a call
Retrieve joined participants via session.participants, maintained by the useCallSession hook.
LobbyParticipantsPreview.tsx
import { Image, StyleSheet, Text, View } from "react-native";
import { useCallStateHooks } from "@stream-io/video-react-native-sdk";

export const LobbyParticipantsPreview = () => {
  const { useCallSession } = useCallStateHooks();
  const session = useCallSession();

  if (!(session?.participants && session?.participants.length)) {
    return null;
  }

  return (
    <View>
      <Text style={styles.infoText}>
        Already in call ({session.participants.length}):
      </Text>
      <View style={styles.userInfo}>
        {session.participants.map((participant) => (
          <View key={participant.user.id}>
            <Image
              source={{ uri: participant.user.image }}
              style={styles.avatar}
            />
            {participant.user.name && (
              <Text style={styles.title}>{participant.user.name}</Text>
            )}
          </View>
        ))}
      </View>
    </View>
  );
};

const styles = StyleSheet.create({
  infoText: {
    color: "white",
    textAlign: "center",
  },
  userInfo: {
    flexDirection: "row",
    justifyContent: "space-evenly",
    marginTop: 10,
  },
  avatar: {
    height: 100,
    width: 100,
    borderRadius: 50,
  },
  title: {
    fontSize: 16,
    color: "white",
    marginVertical: 10,
    textAlign: "center",
  },
});
Joining the call button
Join calls using call.join(). See the Joining & Creating Calls guide.
JoinCallButton.tsx
import React, { useCallback } from "react";
import { Pressable, StyleSheet, Text } from "react-native";
import { useCall } from "@stream-io/video-react-native-sdk";
export const JoinCallButton = () => {
const call = useCall();
const onCallJoinHandler = useCallback(async () => {
try {
await call?.join({ create: true });
} catch (error) {
if (error instanceof Error) {
console.log("Error joining call:", error);
}
}
}, [call]);
return (
<Pressable onPress={onCallJoinHandler} style={styles.joinButton}>
<Text style={styles.joinButtonText}>Join Call</Text>
</Pressable>
);
};
const styles = StyleSheet.create({
joinButton: {
backgroundColor: "blue",
paddingVertical: 10,
},
joinButtonText: {
textAlign: "center",
fontSize: 25,
color: "white",
},
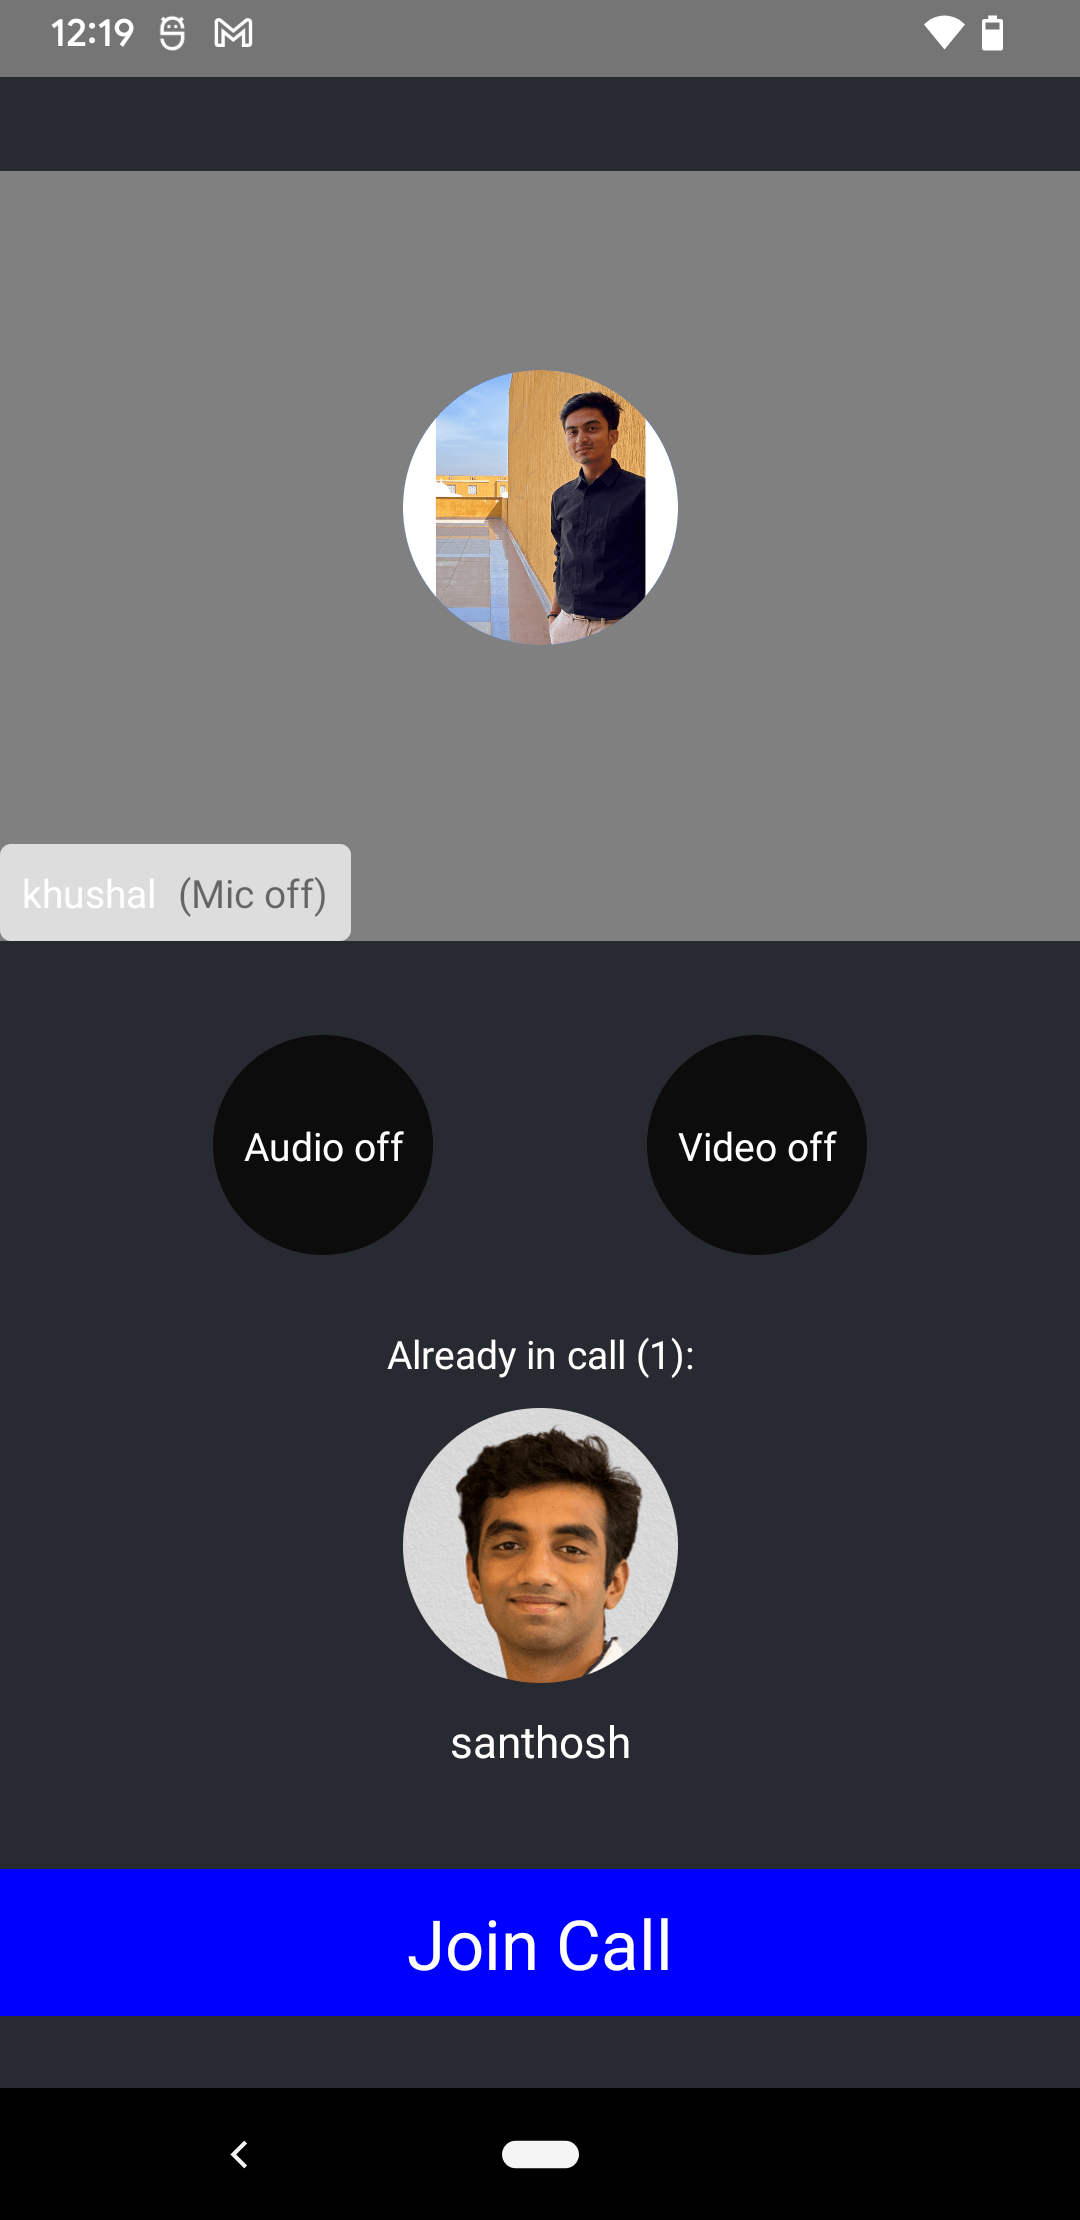
});Assembling it all together
import { StyleSheet, View } from "react-native";

export const Lobby = () => {
  return (
    <View style={styles.container}>
      <LocalVideoRenderer />
      <MediaStreamButtonGroup />
      <LobbyParticipantsPreview />
      <JoinCallButton />
    </View>
  );
};

const styles = StyleSheet.create({
  container: {
    flex: 1,
    backgroundColor: "#272A30",
    justifyContent: "space-evenly",
  },
});