yarn add @react-native-firebase/app \
  @react-native-firebase/messaging \
  @stream-io/react-native-callingx

npx pod-installReact Native
If you are on version 1.31.0 or below, you would need to upgrade to 1.32.0 or above to follow the setup. As 1.32.0 release had breaking changes with respect to setting up of push notifications and CallKit integration. We recommend to update to the current latest version. Additionally, the ringing flow requires @stream-io/react-native-webrtc version 137.1.2 or higher.
This guide discusses how to add push notifications for ringing calls to your project and to make your calls registered in CallKit/Telecom. It will discuss both Android and iOS and go through all the necessary steps.
The normal user experience in a ringing app, when a user receives a call, is to show a push notification or corresponding system UI. The user can then interact with the notification to accept or reject the call. In this guide, you will learn how to set up your React Native app to get push notifications from Stream for the incoming calls that your user will receive.
| Android preview | iOS preview |
|---|---|
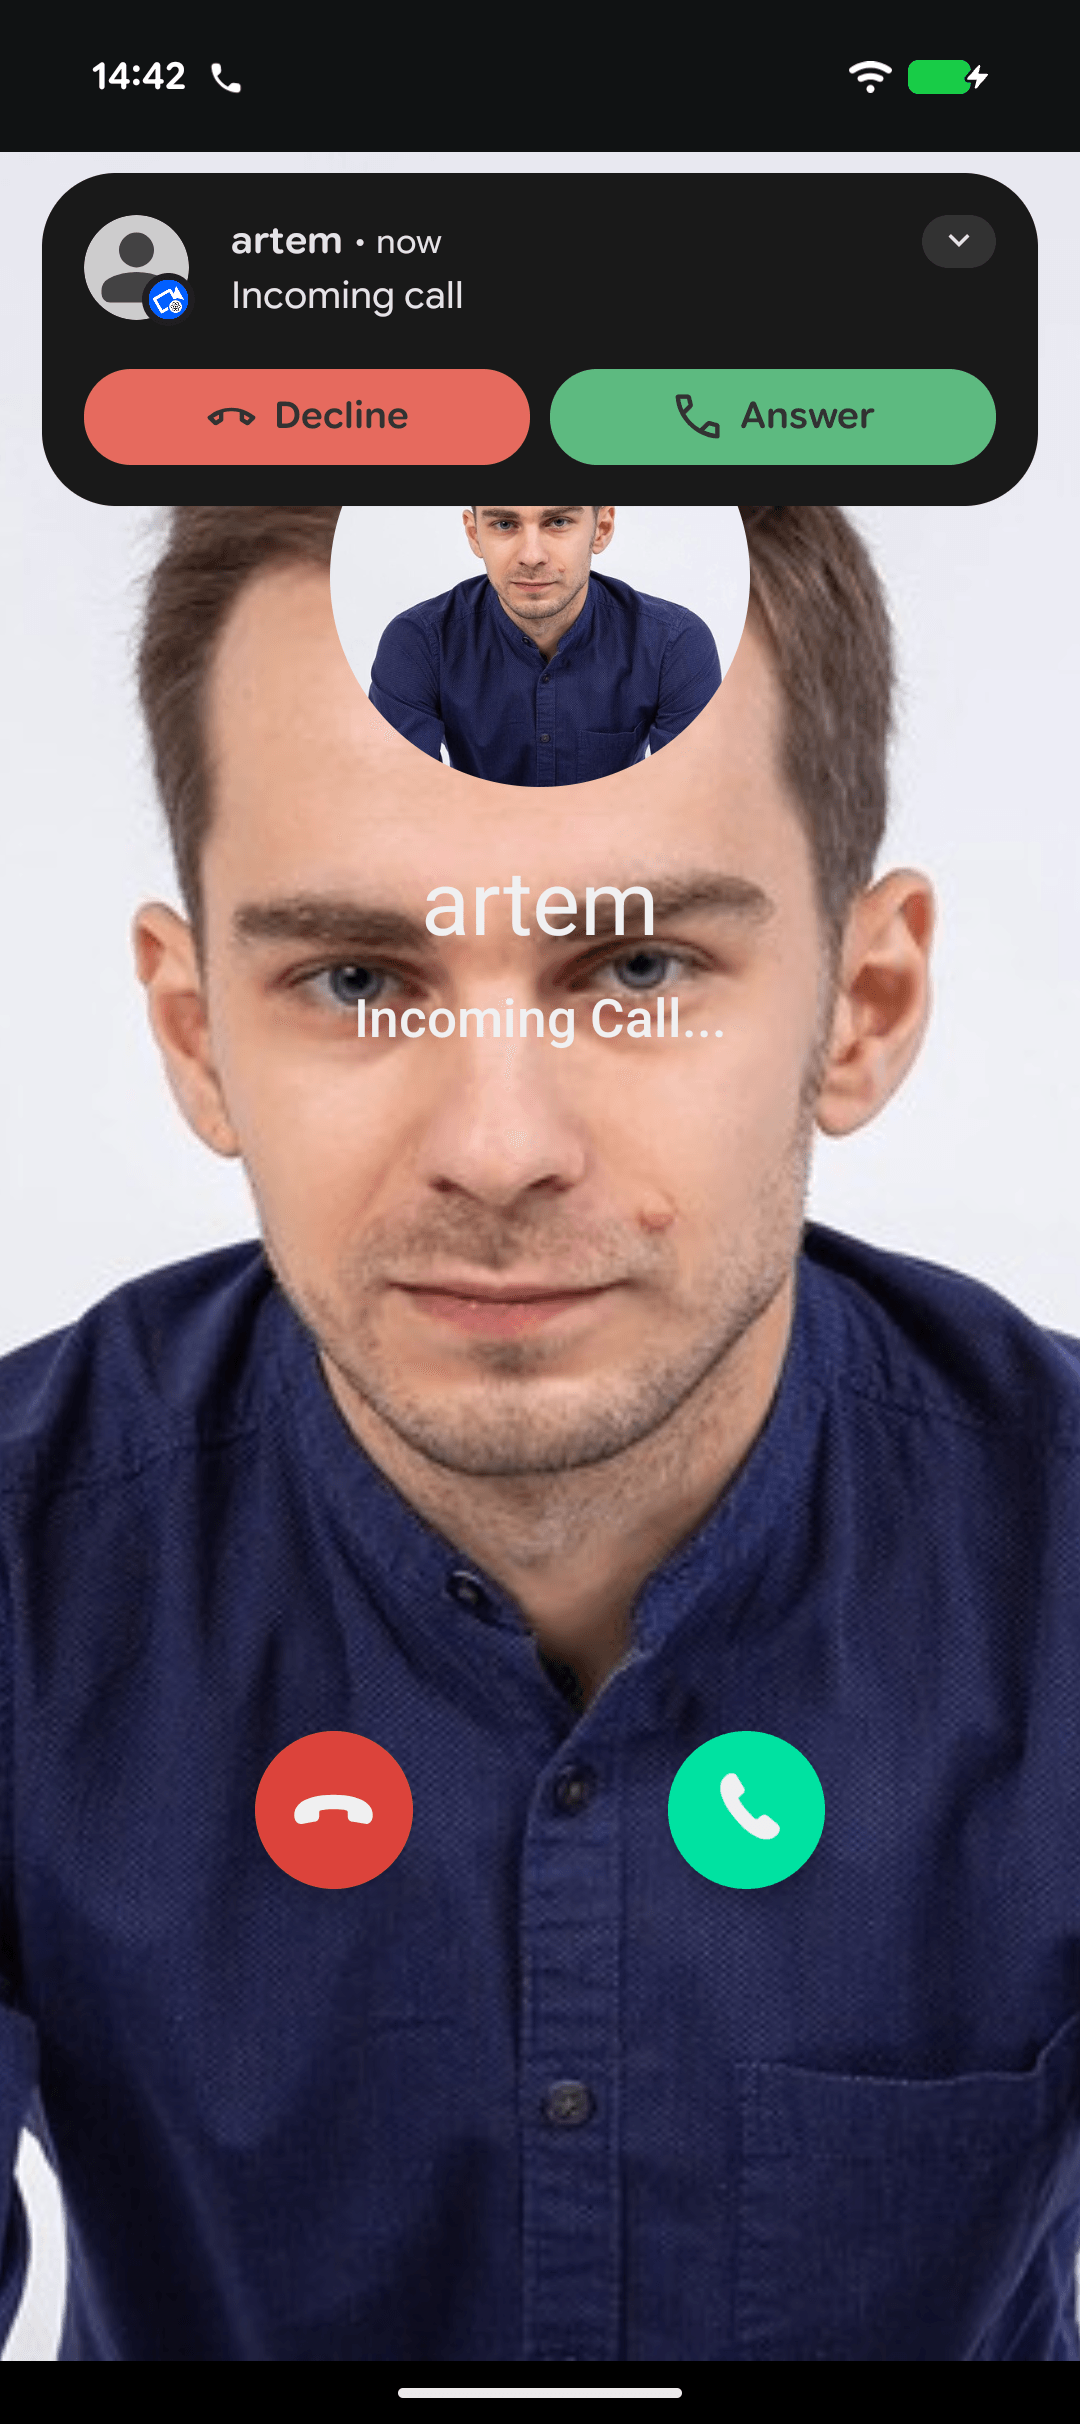 | 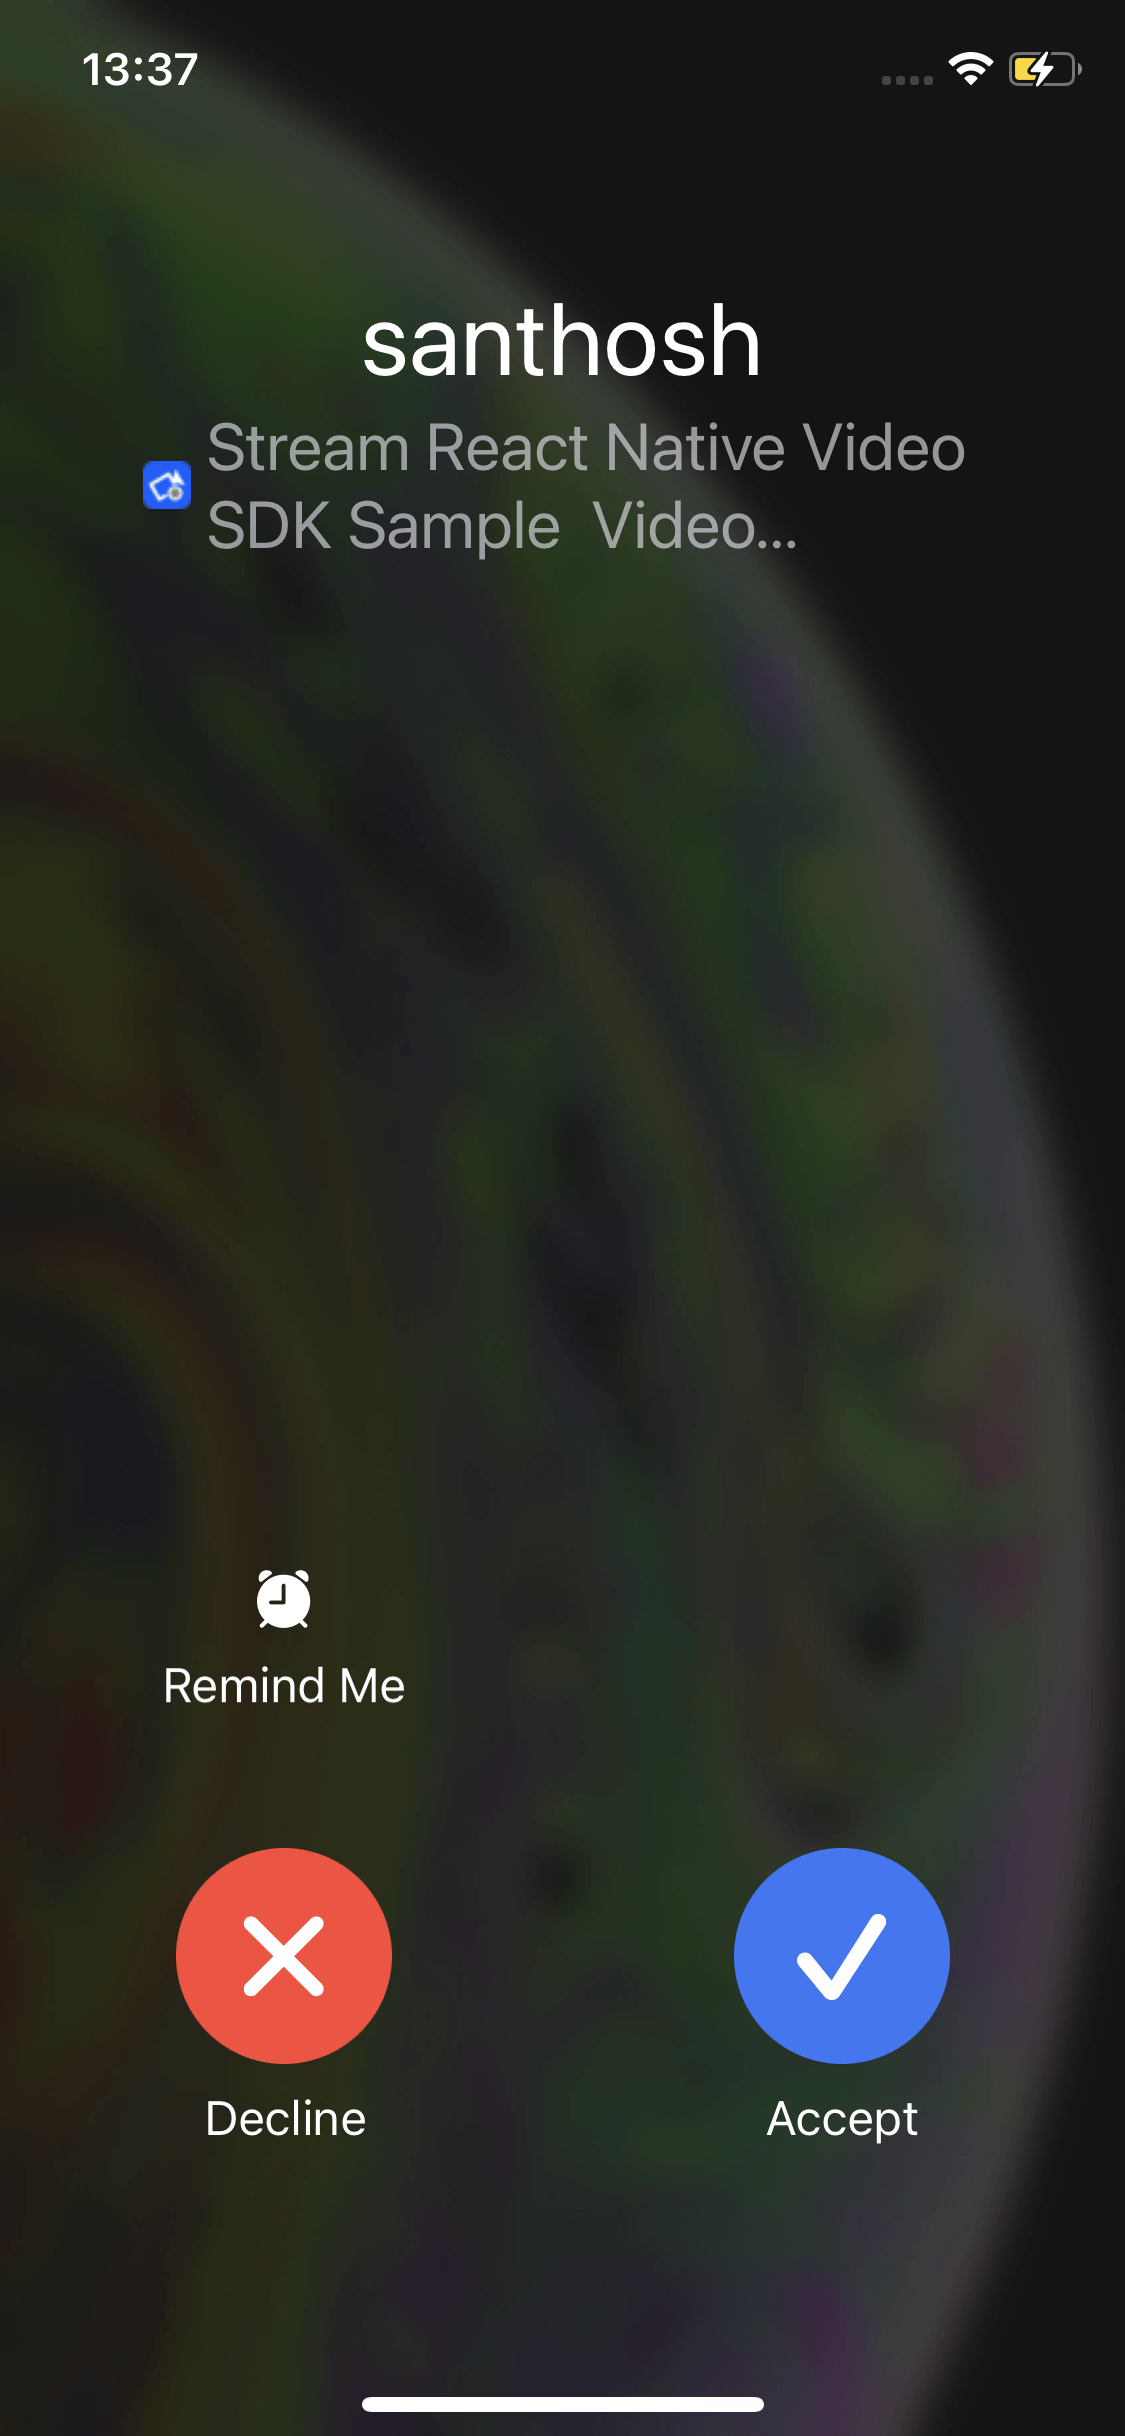 |
Full-screen notifications are displayed when the phone screen is locked or the app is active (foreground state). However, when the app is terminated or in the background and the screen is awake, notifications may appear as heads-up notifications instead of a full-screen alerts.
Add push provider credentials to Stream
Follow these guides to add push providers:
- Android - Firebase Cloud Messaging
- iOS - Apple Push Notification Service (APNs)
Install Dependencies
Package purposes:
@react-native-firebase/appand@react-native-firebase/messagingfor handling incoming Firebase Cloud Messaging notifications on Android.@stream-io/react-native-callingxfor registering calls in iOS CallKit and Android Telecom.
iOS-specific setup
Disable Firebase integration
Firebase Cloud Messaging is not used for iOS. Disable auto-linking unless Firebase is needed for other purposes. Create react-native.config.js in your project root:
react-native.config.js
module.exports = {
  dependencies: {
    "@react-native-firebase/app": {
      platforms: {
        ios: null,
      },
    },
    "@react-native-firebase/messaging": {
      platforms: {
        ios: null,
      },
    },
  },
};
Then run pod install again:
npx pod-installAdd background modes
In Xcode, open Info.plist and add UIBackgroundModes:
<key>BGTaskSchedulerPermittedIdentifiers</key>
<array>
  <string>$(PRODUCT_BUNDLE_IDENTIFIER)</string>
</array>
<key>UIBackgroundModes</key>
<array>
  <string>audio</string>
  <string>processing</string>
  <string>remote-notification</string>
  <string>voip</string>
</array>
Enable push notifications
Enable Push Notifications capability in Xcode: Project > Signing & Capabilities.
Update AppDelegate
The SDK owns the PKPushRegistry delegate internally, so your AppDelegate only needs one line to enable VoIP push handling.
Add header
AppDelegate.mm
#import "StreamVideoReactNative.h"Initialize on app launch
Register VoIP at app launch by adding the following to your existing didFinishLaunchingWithOptions method:
AppDelegate.mm
- (BOOL)application:(UIApplication *)application didFinishLaunchingWithOptions:(NSDictionary *)launchOptions
{
  [StreamVideoReactNative voipRegistration];
  // the rest
}Requires @stream-io/video-react-native-sdk 1.37.0 or newer. If you are upgrading from an earlier version, see the 1.37.0 migration guide for the steps to remove the old manual PKPushRegistryDelegate setup.
The SDK creates the PKPushRegistry, owns the delegate, validates the Stream payload, reports the call to CallKit, and forwards events to JS — all internally.
Android-specific setup
- Create a Firebase project at Firebase console
- Add your Android app in Project settings > Your apps. Use the same package name as
android.packagein app.json - Download google-services.json to
/android/app/google-services.json - Enable the
google-servicesplugin:
/android/build.gradle
buildscript {
  dependencies {
    // ... other dependencies
    classpath 'com.google.gms:google-services:4.3.15'
  }
}
/android/build.gradle
apply plugin: 'com.android.application'
apply plugin: 'com.google.gms.google-services'
The google-services.json file contains unique and non-secret identifiers of your Firebase project. For more information, see Understand Firebase Projects.
The foreground service and its permissions are essential for displaying incoming call notifications when the app is running in the background, as well as for maintaining video and audio calls during background operation. When uploading the app to the Play Store, it is necessary to declare the foreground service permissions in the Play Console and provide an explanation of their usage. This includes adding a link to a video that demonstrates how the foreground service is utilized for video and audio calls. This procedure is required only once. For more details, refer to here.
The permissions to be explained are:
android.permission.FOREGROUND_SERVICE_PHONE_CALL- To maintain active video and audio calls when app goes to background
Add Firebase message handlers
Add SDK utility functions to Firebase notification listeners:
src/utils/setFirebaseListeners.ts
import messaging from "@react-native-firebase/messaging";
import {
  isFirebaseStreamVideoMessage,
  firebaseDataHandler,
} from "@stream-io/video-react-native-sdk";

export const setFirebaseListeners = () => {
  // Set up the background message handler
  messaging().setBackgroundMessageHandler(async (msg) => {
    if (isFirebaseStreamVideoMessage(msg)) {
      await firebaseDataHandler(msg.data);
    } else {
      // your other background notifications (if any)
    }
  });

  // Optionally: set up the foreground message handler
  messaging().onMessage((msg) => {
    if (isFirebaseStreamVideoMessage(msg)) {
      firebaseDataHandler(msg.data);
    } else {
      // your other foreground notifications (if any)
    }
  });
};
Firebase message handlers:
- The
onMessagehandler should not be added if you do not want notifications to show up when the app is in the foreground. When the app is in foreground, you would automatically see the incoming call screen. - The
isFirebaseStreamVideoMessagemethod is used to check if this push message is a video related message. And only this needs to be processed by the SDK. - The
firebaseDataHandlermethod is the callback to be invoked to process the message. This callback reads the message and display push notifications.
If you had disabled the installation of Firebase on iOS, add the above method only for Android using the Platform-specific extensions for React Native.
For example, say you add the following files in your project:
setFirebaseListeners.android.ts
setFirebaseListeners.ts
The method above must only be added to the file that .android extension. The other file must add the method but do nothing like below:
setFirebaseListeners.ts
export const setFirebaseListeners = () => {
  // do nothing
};
This is to ensure that @react-native-firebase/messaging is only imported on the Android platform.
Setup the push notifications configuration for the SDK
The SDK automatically processes the incoming push notifications once the setup above is done if the push notifications configuration has been set using StreamVideoRN.setPushConfig.
Also you can override the default notification texts and adjust ringtone for both iOS CallKit and Android Telecom.
Below is an example of how these methods can be called:
src/utils/setPushConfig.ts
import {
  StreamVideoClient,
  StreamVideoRN,
  User,
} from "@stream-io/video-react-native-sdk";
import AsyncStorage from "@react-native-async-storage/async-storage";
import { STREAM_API_KEY } from "../../constants";

export function setPushConfig() {
  StreamVideoRN.setPushConfig({
    ios: {
      // add your push_provider_name for iOS that you have setup in Stream dashboard
      pushProviderName: __DEV__ ? "apn-video-staging" : "apn-video-production",
      supportsVideo: true,
      callsHistory: true,
      displayCallTimeout: 60000,
    },

    android: {
      // add your push_provider_name for Android that you have setup in Stream dashboard
      pushProviderName: __DEV__
        ? "firebase-video-staging"
        : "firebase-video-production",
      incomingChannel: {
        id: "incoming_call_channel",
        name: "Call notifications",
        vibration: true,
      },
      notificationTexts: {
        accepting: "Connecting...",
        rejecting: "Declining...",
      },
    },

    shouldRejectCallWhenBusy: true,

    // add the async callback to create a video client
    // for incoming calls in the background on a push notification
    createStreamVideoClient: async () => {
      const userId = await AsyncStorage.getItem("@userId");
      const userName = await AsyncStorage.getItem("@userName");
      if (!userId) return undefined;

      // an example promise to fetch token from your server
      const tokenProvider = async (): Promise<string> =>
        yourServerAPI.getTokenForUser(userId).then((auth) => auth.token);

      const user: User = { id: userId, name: userName };
      return StreamVideoClient.getOrCreateInstance({
        apiKey: STREAM_API_KEY, // pass your stream api key
        user,
        tokenProvider,
        options: { rejectCallWhenBusy: true },
      });
    },
  });
}
Always use StreamVideoClient.getOrCreateInstance(..) instead of new StreamVideoClient(..). Reusing the client instance preserves call accept/decline states changed while the app was in the background. The getOrCreateInstance method ensures the same user reuses the existing instance.
iOS calling experience options:
supportsVideo- tells CallKit that video calls should be supported. Affects system UI and routing. Default value istrue.callsHistory- enables calls history. When enabled, all registered calls will be displayed in recent calls section in default dial app. Default value isfalse.displayCallTimeout– timeout value in ms which will be used to hide system UI if JS is not loaded during that time. Default value is60000.sound- ringtone resource name that will be used by CallKit. Detailed instructions are provided on CallKit options page.imageName- image resource name that will be used on CallKit dialer UI. Detailed instructions are provided on CallKit options page.enableOngoingCalls– enables CallKit support for outgoing calls. Default value isfalse.skipIncomingPushInForeground– whentrue, ringing VoIP pushes that arrive while your app is in the foreground are not shown by CallKit. The push is still delivered to JS so your app can show its own ringing UI. Requires iOS 26.4+ at runtime and building your app with Xcode 26.4 or newer. Apps built with older Xcode versions silently ignore this option even on iOS 26.4+ devices. Default value isfalse. Available in SDK 1.36.0 or newer.
Android calling experience options:
incomingChannel.id- notification channel id for incoming callsincomingChannel.name- notification channel nameincomingChannel.sound- ringtone resource name that will be used for ringing notification. Detailed instructions are provided on Android custom ringtone page.incomingChannel.vibration- enables vibration for notification channelnotificationTexts– allows to override default texts displayed in notifications for accepting/declining intermediate state. By default,Connecting...andDeclining...will be displayed for corresponding state.titleTransformer- allows you to modify displayed notification title. Receives member name andincomingboolean flag as parameters. By default, just returns the member name value.enableOngoingCalls– enables Telecom support for outgoing calls. Default value isfalse.skipIncomingPushInForeground- Whentrue, incoming call push notifications (call.ring) will not be displayed as a notification when the app is in the foreground. Default value isfalse. Available in SDK 1.36.0 or newer.
General calling experience options:
shouldRejectCallWhenBusy– blocks new incoming calls in cases when there is an active ongoing call. Default value isfalse. For setting up call interruption behavior on a client level, please check Reject call when busy. Note: for consistent behavior, this flag should be defined both in the client constructor and insetPushConfigcall.
Please note that all described parameters are optional.
Initialize SDK push notification methods
Call the methods we have created outside your application cycle. That is, alongside your AppRegistry.registerComponent() method call at the entry point of your application code.
We do this because the app can be opened from a dead state through a push notification, and in that case, we need to use the configuration and notification callbacks as soon as the JS bridge is initialized.
index.js
import { AppRegistry } from "react-native";
import { setPushConfig } from "src/utils/setPushConfig";
import { setFirebaseListeners } from "src/utils/setFirebaseListeners";
import App from "./App";

setPushConfig(); // Set push config
setFirebaseListeners(); // Set the firebase listeners

AppRegistry.registerComponent("app", () => App);
Disabling push notifications
Disable push on user logout or user switch:
import { StreamVideoRN } from "@stream-io/video-react-native-sdk";

await StreamVideoRN.onPushLogout();
Android full-screen incoming call view on locked phone
Display full-screen notification on locked phones by adding to onCreate in MainActivity:
MainActivity.kt
override fun onCreate(savedInstanceState: Bundle?) {
    // ..the rest
    super.onCreate()
    // Add this
    StreamVideoReactNative.setupCallActivity(this)
}For apps installed on phones running versions Android 13 or lower, the USE_FULL_SCREEN_INTENT permission is enabled by default.
For all apps being installed on Android 14 and above, the Google Play Store revokes the USE_FULL_SCREEN_INTENT for apps that do not have calling or alarm functionalities. Which means, while submitting your app to the play store, if you do declare that 'Making and receiving calls' is a 'core' functionality in your app, this permission is granted by default on Android 14 and above.
If the USE_FULL_SCREEN_INTENT permission is not granted, the notification will show up as an expanded heads up notification on the lock screen.
Incoming and Outgoing call UI in foreground
Show call UIs during ringing calls. See watching for calls for implementation.
Testing Ringing calls
To test properly:
- Use a real physical device (APNs do not work in simulators).
- Ensure your Firebase/APNs credentials are correctly configured in the Stream Dashboard.
- Ensure your iOS provisioning profile includes Push Notifications capability.
For the best experience, run the Android and iOS app without the metro bundler to the respective physical devices using the following command:
For iOS:
npx react-native run-ios --mode Release --device "DEVICE_NAME"For Android:
npx react-native run-android --mode release --deviceId <DEVICE_ID>NOTE: make sure the singing configuration for iOS and Android are setup correctly for your app. This is necessary for the release mode variant.
Troubleshooting
See the Troubleshooting guide for common issues.
On this page:
- Add push provider credentials to Stream
- Install Dependencies
- iOS-specific setup
- Android-specific setup
- Setup the push notifications configuration for the SDK
- Initialize SDK push notification methods
- Disabling push notifications
- Android full-screen incoming call view on locked phone
- Incoming and Outgoing call UI in foreground
- Testing Ringing calls
- Troubleshooting