ng g c textarea --inline-style --inline-templateCustom textarea
Introduction
This guide shows you how to replace the built in textarea component inside the message input component. One example where it's useful, is if you want to implement a HTML based editor for your chat users.
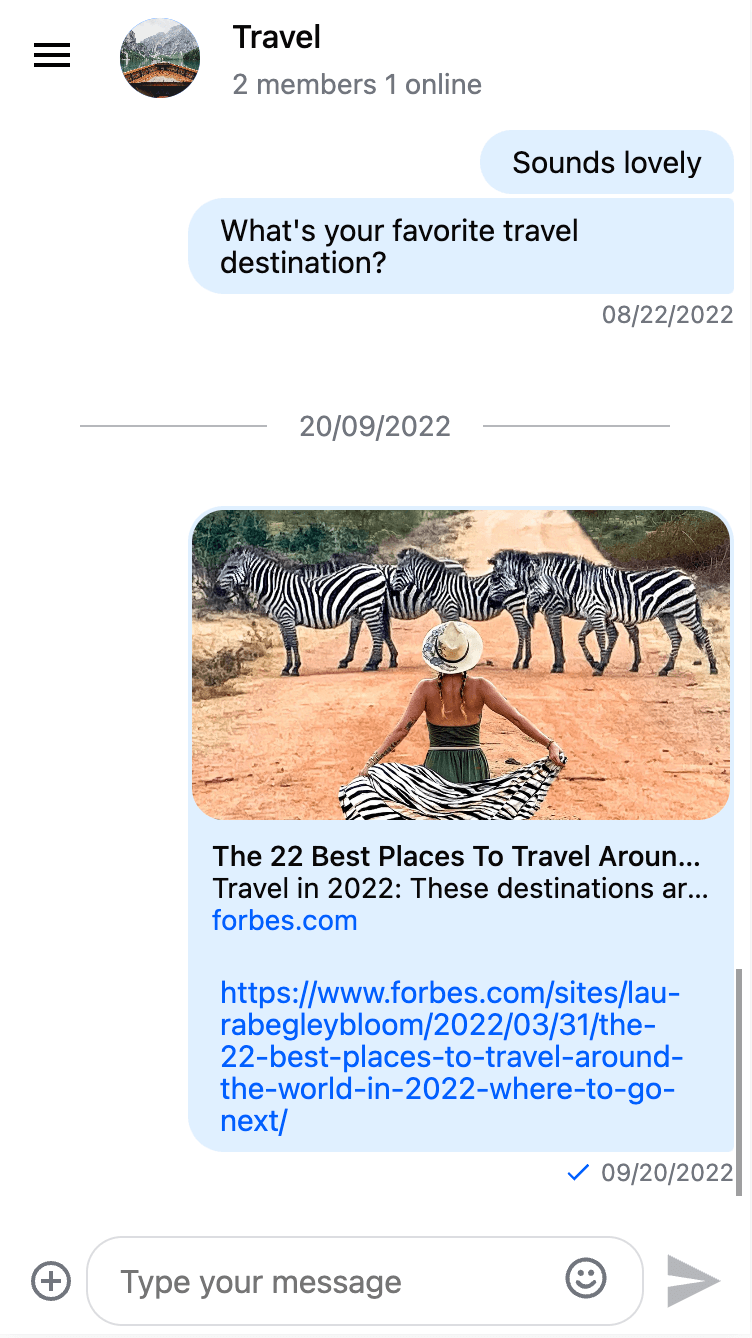
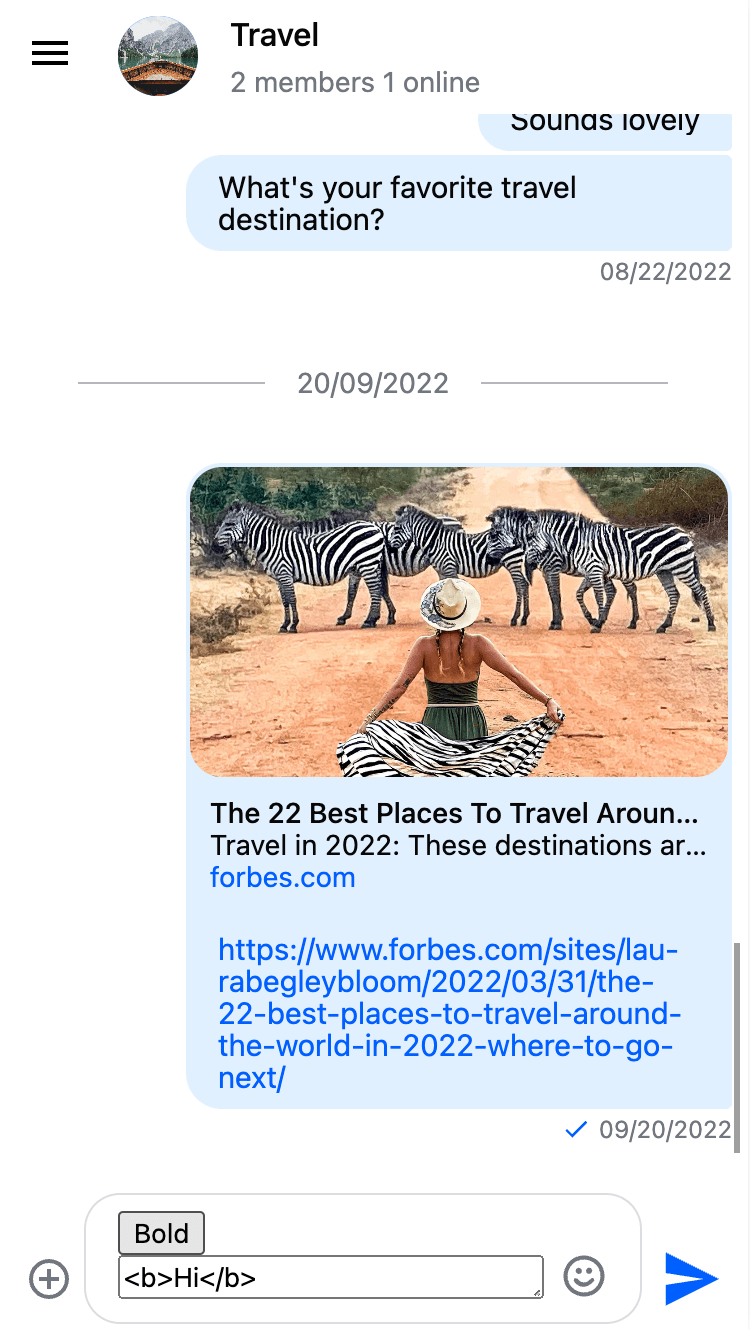
The guide will provide step-by-step instructions to create the textarea on the right:
If you want to follow the tutorial, make sure to have a simple stream-chat-angular application set up. If you don't already have that, follow our tutorial.
Custom textarea component
Let's create a new component for our custom textarea:
The textarea will be displayed inside the stream-message-input component, and the two components need to communicate with each other. To ensure compatibility, your custom textarea component needs to implement the Textarea interface.
The interface has some optional elements that you might decide to ignore based on your own requirements. Below you'll find the essential parts of the interface:
@Input() value: string = '';
@Output() readonly valueChange = new EventEmitter<string>();
@Output() readonly send = new EventEmitter<void>();| Name | Input/Output | Description |
|---|---|---|
value | Input | The value to display inside the textarea. For new messages it will be undefined, but for editing messages this will be the original message content |
valueChange | Output | An output to notify the message input component about value changes. It is used to send typing.start and typing.end events to other users |
send | Output | An output to notify the message input component to send the message. It is useful if you want to enable your users to trigger message send with hitting the Enter |
Now let's see a very simple custom textarea implementation:
import { Component, EventEmitter, Input, Output } from "@angular/core";
import { TextareaInterface } from "stream-chat-angular";

@Component({
  selector: "app-textarea",
  template: `
    <button (click)="setToBold(input)">Bold</button>
    <textarea
      style="width: 100%"
      [value]="value || ''"
      #input
      placeholder="Type your message here"
      rows="1"
      (input)="inputChanged(input.value)"
      (keydown.enter)="enterHit($event)"
    ></textarea>
  `,
  styles: [":host {width: 100%}"],
})
export class TextareaComponent implements TextareaInterface {
  @Input() value = "";
  @Output() readonly valueChange = new EventEmitter<string>();
  @Output() readonly send = new EventEmitter<void>();

  constructor() {}

  inputChanged(value: string) {
    this.valueChange.emit(value);
  }

  setToBold(input: HTMLTextAreaElement) {
    const currentValue = input.value;
    const newValue = `<b>${currentValue}</b>`;
    input.value = newValue;
    this.inputChanged(newValue);
  }

  enterHit(event: Event) {
    event.preventDefault();
    this.send.next();
  }
}
Registering the component
To use the custom textarea component we need to let the stream-message-input component know which component to create for the textarea slot. To do this you need to define a provider for the textareaInjectionToken.
Let's update your app.module.ts to the following:
import { NgModule } from "@angular/core";
import { BrowserModule } from "@angular/platform-browser";
import { TranslateModule } from "@ngx-translate/core";

import { AppComponent } from "./app.component";
import { StreamChatModule, textareaInjectionToken } from "stream-chat-angular";
import { TextareaComponent } from "./textarea/textarea.component";

@NgModule({
  declarations: [AppComponent, TextareaComponent],
  imports: [
    BrowserModule,
    TranslateModule.forRoot(),
    StreamChatModule,
    // Make sure you remove any import to StreamAutocompleteTextareaModule or StreamTextareaModule
  ],
  providers: [
    {
      provide: textareaInjectionToken,
      useValue: TextareaComponent,
    },
  ],
  bootstrap: [AppComponent],
})
export class AppModule {}
With that the built-in textarea will be replaced with your custom textarea component.
Displaying HTML content
By default the Message and ChannelPreview components will format message content as text. So the message bubble will display something like this: <b>Hi</b> instead of this: Hi.
To fix this, you need to set text formatting to HTML using the MessageService
constructor(
    private chatService: ChatClientService,
    private channelService: ChannelService,
    private streamI18nService: StreamI18nService,
    messageService: MessageService
  ) {
    // Set message formatting before initializing the ChannelService
    messageService.displayAs = 'html';
    void this.chatService.init(
      environment.apiKey,
      environment.userId,
      environment.userToken
    );
    void this.channelService.init({
      type: 'messaging',
      members: { $in: [environment.userId] },
    });
    this.streamI18nService.setTranslation();
  }
If you want to use a different formatting, you have to provide your own message and channel preview components for that.
Limitations
- The built-in
TextareaComponentandAutocompleteTextareaComponenthave additional features that you have to implement for yourself if you decide to create your own textarea component. - The built-in
MessageandChannelPreviewcomponents can only format message content as text or HTML. If you want to implement a different formatting (for example Markdown), you need to create a custom message and channel preview components.