<io.getstream.chat.android.ui.message.input.MessageInputView
        android:id="@+id/messageInputView"
        android:layout_width="0dp"
        android:layout_height="wrap_content"
        app:layout_constraintBottom_toBottomOf="parent"
        app:layout_constraintEnd_toEndOf="parent"
        app:layout_constraintStart_toStartOf="parent"
        app:layout_constraintTop_toBottomOf="@+id/messageListView"
/>Message Input
MessageInputView is the view used to create a new chat message and send it to a channel.
| Light | Dark |
|---|---|
 |  |
It supports the following features:
- Emoticons
- Attachments
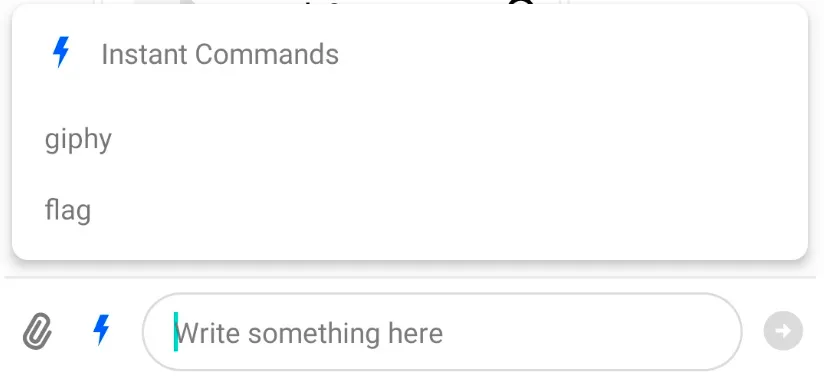
- Slash Commands
- Typing events
- Editing messages
- Threads
- Mentions
- Replies
Usage
To use MessageInputView, include it in your XML layout. It usually goes below a MessageListView.
The recommended way of setting up the input view is by binding it to a MessageInputViewModel. This will make it fully functional by setting up any necessary listeners and data handling.
// Instantiate the ViewModel for a given channel
val factory: MessageListViewModelFactory = MessageListViewModelFactory(cid = "channelType:channelId")
val viewModel: MessageInputViewModel by viewModels { factory }
// Bind it with MessageInputView
viewModel.bindView(messageInputView, viewLifecycleOwner)
// Init view model
ViewModelProvider.Factory factory = new MessageListViewModelFactory.Builder()
.cid("messaging:123")
.build();
ViewModelProvider provider = new ViewModelProvider(this, factory);
MessageInputViewModel viewModel = provider.get(MessageInputViewModel.class);
// Bind view and viewModel
MessageInputViewModelBinding.bind(viewModel, messageInputView, getViewLifecycleOwner());Handling Actions
Actions can be handled by setting listeners on this view. For example, you can handle clicks of the send button:
messageInputView.setOnSendButtonClickListener {
    // Handle send button click
}messageInputView.setOnSendButtonClickListener(() -> {
// Handle send button click
});Typing updates should be sent sparingly as a way of saving valuable API calls. Luckily, we offer such behavior out of the box by using our DefaultTypingUpdatesBuffer in order to intelligently make start and stop typing API calls.
If you want to implement your own buffering mechanism you can pass in an implementation of the TypingUpdatesBuffer interface instead:
messageInputView.setTypingUpdatesBuffer(object : TypingUpdatesBuffer {
    override fun onKeystroke() {
        // Your custom implementation of TypingUpdatesBuffer
    }

    override fun clear() {
        // Your custom implementation of TypingUpdatesBuffer
    }
})messageInputView.setTypingUpdatesBuffer(new TypingUpdatesBuffer() {
@Override
public void onKeystroke() {
// Your custom implementation of TypingUpdatesBuffer
}
@Override
public void clear() {
// Your custom implementation of TypingUpdatesBuffer
}
});You can show a custom error when the maximum message length is exceeded:
messageInputView.setMaxMessageLengthHandler { messageText, messageLength, maxMessageLength, maxMessageLengthExceeded ->
    if (maxMessageLengthExceeded)  {
        // Show custom max-length error
    } else {
        // Hide custom max-length error
    }
}messageInputView.setMaxMessageLengthHandler((messageText, messageLength, maxMessageLength, maxMessageLengthExceeded) -> {
if (maxMessageLengthExceeded) {
// Show custom max-length error
} else {
// Hide custom max-length error
}
});You can also change the handler that sends messages. By default, this is set up by bindView and calls into the ViewModel to perform these actions.
messageInputView.setSendMessageHandler(
    object : MessageInputView.MessageSendHandler {
        override fun sendMessage(messageText: String, messageReplyTo: Message?) {
            // Handle send message
        }

        override fun sendMessageWithAttachments(
            message: String,
            attachmentsWithMimeTypes: List<Pair<File, String?>>,
            messageReplyTo: Message?,
        ) {
            // Handle message with attachments
        }

        override fun sendToThreadWithAttachments(
            parentMessage: Message,
            message: String,
            alsoSendToChannel: Boolean,
            attachmentsWithMimeTypes: List<Pair<File, String?>>,
        ) {
           // Handle message to thread with attachments
        }

        override fun sendToThread(parentMessage: Message, messageText: String, alsoSendToChannel: Boolean) {
            // Handle message to thread
        }

        override fun editMessage(oldMessage: Message, newMessageText: String) {
            // Handle edit message
        }

        override fun dismissReply() {
            // Handle dismiss reply
        }
    }
)messageInputView.setSendMessageHandler(new MessageInputView.MessageSendHandler() {
@Override
public void sendMessage(@NonNull String messageText, @Nullable Message messageReplyTo) {
// Handle send message
}
@Override
public void sendMessageWithAttachments(@NonNull String message, @NonNull List<? extends Pair<? extends File, String>> attachmentsWithMimeTypes, @Nullable Message messageReplyTo) {
// Handle message with attachments
}
@Override
public void sendMessageWithCustomAttachments(@NonNull String message, @NonNull List<Attachment> attachments, @Nullable Message messageReplyTo) {
// Handle message with custom attachments
}
@Override
public void sendToThread(@NonNull Message parentMessage, @NonNull String messageText, boolean alsoSendToChannel) {
// Handle message to thread
}
@Override
public void sendToThreadWithAttachments(@NonNull Message parentMessage, @NonNull String message, boolean alsoSendToChannel, @NonNull List<? extends Pair<? extends File, String>> attachmentsWithMimeTypes) {
// Handle message to thread with attachments
}
@Override
public void sendToThreadWithCustomAttachments(@NonNull Message parentMessage, @NonNull String message, boolean alsoSendToChannel, @NonNull List<Attachment> attachmentsWithMimeTypes) {
// Handle message to thread with custom attachments
}
@Override
public void editMessage(@NonNull Message oldMessage, @NonNull String newMessageText) {
// Handle edit message
}
@Override
public void dismissReply() {
// Handle dismiss reply
}
});Customization
MessageInputView can be customized using:
- XML attributes
- Style transformations
- Methods called on
MessageInputView's instance
Using XML Attributes
Many attributes of this View can be configured, like changing its color, the border and the color of the message input, fonts, components visibility, and so on. The full list of available attributes can be found here.
Here's an example of setting some custom attributes:
<io.getstream.chat.android.ui.message.input.MessageInputView
    android:id="@+id/messageInputView"
    android:layout_width="0dp"
    android:layout_height="wrap_content"
    android:background="@color/grey_light"
    app:streamUiMessageInputEditTextBackgroundDrawable="@drawable/stream_ui_shape_edit_text_squared"
    app:streamUiMessageInputTextStyle="italic"
    app:streamUiMessageInputDividerBackgroundDrawable="@drawable/stream_ui_divider_green"
    app:streamUiMessageInputTextColor="@color/stream_ui_white"
    />
This will create this version of MessageInputView:

Here's another example with different attributes set:
<io.getstream.chat.android.ui.message.input.MessageInputView
    android:id="@+id/messageInputView"
    android:layout_width="0dp"
    android:layout_height="wrap_content"
    app:layout_constraintBottom_toBottomOf="parent"
    app:layout_constraintEnd_toEndOf="parent"
    app:layout_constraintStart_toStartOf="parent"
    app:layout_constraintTop_toBottomOf="@+id/messageListView"
    app:streamUiMessageInputEditTextBackgroundDrawable="@drawable/stream_ui_shape_edit_text_rounded"
    app:streamUiMessageInputTextStyle="italic"
    android:background="@color/stream_ui_black"
    app:streamUiMessageInputDividerBackgroundDrawable="@drawable/stream_ui_divider_green"
    app:streamUiMessageInputTextColor="@color/stream_ui_white"
    />
This produces the following styling:

Different configurations can be used to achieve the desired appearance of MessageListView. If you don't need to change this View appearance at runtime, XML should be enough. But if you need to able to customize it at runtime, then you can use MessageInputViewStyle as described in the next section.
Using Style Transformations
You can use TransformStyle to apply global style transformations to all MessageInputView instances. For example, you can create set up a messageInputStyleTransformer like this one to change the input text color:
TransformStyle.messageInputStyleTransformer = StyleTransformer { viewStyle ->
    viewStyle.copy(
        messageInputTextStyle = viewStyle.messageInputTextStyle.copy(
            color = ContextCompat.getColor(
                requireContext(),
                R.color.stream_ui_white,
            ),
        )
    )
}TransformStyle.setMessageInputStyleTransformer(source -> {
// Customize the style
return source;
});The transformer should be set before the View is rendered to make sure that the new style was applied.
Changing Send Message Button
Send message button drawable can be changed dynamically based on the current input mode. You can
set the MessageInputModeListener on MessageInputView instance and change drawables based on the current input mode.
Keep in mind that MessageInputView displays two different send message buttons:
sendMessageButtonEnabled- when the user is able to send a messagesendMessageButtonDisabled- when the user is not able to send a message (send button is disabled)
Drawable will override the one provided either by attributes or TransformStyle.messageInputStyleTransformer.
Make sure to set different drawables in all input modes.
messageInputView.setMessageInputModeListener {
    when(it) {
        is MessageInputView.InputMode.Edit -> {
            messageInputView.setSendMessageButtonEnabledDrawable(context.getDrawable(R.drawable.stream_ui_ic_check_single)!!)
            messageInputView.setSendMessageButtonDisabledDrawable(context.getDrawable(R.drawable.stream_ui_ic_close)!!)
        }
        else -> {
            messageInputView.setSendMessageButtonEnabledDrawable(context.getDrawable(R.drawable.stream_ui_ic_filled_up_arrow)!!)
            messageInputView.setSendMessageButtonDisabledDrawable(context.getDrawable(R.drawable.stream_ui_ic_filled_right_arrow)!!)
        }
    }
}messageInputView.setMessageInputModeListener(inputMode -> {
if (inputMode instanceof MessageInputView.InputMode.Edit) {
messageInputView.setSendMessageButtonEnabledDrawable(requireContext().getDrawable(R.drawable.stream_ui_ic_check_single));
messageInputView.setSendMessageButtonDisabledDrawable(requireContext().getDrawable(R.drawable.stream_ui_ic_close));
} else {
messageInputView.setSendMessageButtonEnabledDrawable(requireContext().getDrawable(R.drawable.stream_ui_ic_filled_up_arrow));
messageInputView.setSendMessageButtonDisabledDrawable(requireContext().getDrawable(R.drawable.stream_ui_ic_filled_right_arrow));
}
});Creating Custom Suggestion Items
The suggestion list popup is used to provide autocomplete suggestions for commands and mentions. To customize the appearance of suggestion list items you need to provide your own SuggestionListViewHolderFactory. Here's an example of a custom command item that displays just a command name:
- Create the
item_command.xmllayout:
<?xml version="1.0" encoding="utf-8"?>
<FrameLayout xmlns:android="http://schemas.android.com/apk/res/android"
    android:layout_width="match_parent"
    android:layout_height="wrap_content"
    android:background="?attr/selectableItemBackground"
    android:paddingStart="16dp"
    android:paddingEnd="16dp"
    android:paddingTop="8dp"
    android:paddingBottom="8dp">

    <TextView
        android:id="@+id/commandNameTextView"
        android:layout_width="wrap_content"
        android:layout_height="wrap_content" />

</FrameLayout>- Create a custom ViewHolder that extends
BaseSuggestionItemViewHolder, and a custom ViewHolder factory which extendsSuggestionListItemViewHolderFactory:
class CustomCommandViewHolder(
    private val binding: ItemCommandBinding,
) : BaseSuggestionItemViewHolder<SuggestionListItem.CommandItem>(binding.root) {

    override fun bindItem(item: SuggestionListItem.CommandItem) {
        binding.commandNameTextView.text = item.command.name
    }
}

class CustomSuggestionListViewHolderFactory : SuggestionListItemViewHolderFactory() {
    override fun createCommandViewHolder(
        parent: ViewGroup,
    ): BaseSuggestionItemViewHolder<SuggestionListItem.CommandItem> {
        return ItemCommandBinding
            .inflate(LayoutInflater.from(parent.context), parent, false)
            .let(::CustomCommandViewHolder)
    }
}
public final class CustomCommandViewHolder extends BaseSuggestionItemViewHolder<SuggestionListItem.CommandItem> {
ItemCommandBinding binding;
public CustomCommandViewHolder(ItemCommandBinding binding) {
super(binding.getRoot());
this.binding = binding;
}
@Override
public void bindItem(@NonNull SuggestionListItem.CommandItem item) {
binding.commandNameTextView.setText(item.getCommand().getName());
}
}
public final class CustomSuggestionListViewHolderFactory extends SuggestionListItemViewHolderFactory {
@NonNull
@Override
public BaseSuggestionItemViewHolder<SuggestionListItem.CommandItem> createCommandViewHolder(@NonNull ViewGroup parentView) {
return new CustomCommandViewHolder(ItemCommandBinding.inflate(LayoutInflater.from(parentView.getContext()), parentView, false));
}
}- Set the custom ViewHolder factory on
MessageInputView:
messageInputView.setSuggestionListViewHolderFactory(CustomSuggestionListViewHolderFactory())messageInputView.setSuggestionListViewHolderFactory(new CustomSuggestionListViewHolderFactory());This produces the following result:

Changing Mention Search
It is possible to change the search method in the mention list. The default class: DefaultUserLookupHandler removes diacritics and uses Levenstein distance to include similar words in the results.
val defaultUserLookupHandler = DefaultUserLookupHandler(users)
messageInputView.setUserLookupHandler(defaultUserLookupHandler)MessageInputView.DefaultUserLookupHandler defaultUserLookupHandler = new MessageInputView.DefaultUserLookupHandler(users, new DefaultStreamTransliterator(null));
messageInputView.setUserLookupHandler(defaultUserLookupHandler);Transliteration
You can add transliteration to DefaultUserLookupHandler by setting the desired id for transliteration inside DefaultStreamTransliterator and passing it to DefaultUserLookupHandler constructor.
DefaultStreamTransliterator only supports transliteration prior to API 29 (Android Q) and it will not apply transliteration for APIs smaller than this.
val defaultUserLookupHandler = DefaultUserLookupHandler(
    users,
    DefaultStreamTransliterator("Cyrl-Latn")
)
messageInputView.setUserLookupHandler(defaultUserLookupHandler)MessageInputView.DefaultUserLookupHandler defaultUserLookupHandler = new MessageInputView.DefaultUserLookupHandler(
users,
new DefaultStreamTransliterator("Cyrl-Latn")
);
messageInputView.setUserLookupHandler(defaultUserLookupHandler);You can also use your own implementation of StreamTransliterator to add support for lowers APIs. An interesting library is ICU4J
Attachment Size Limits
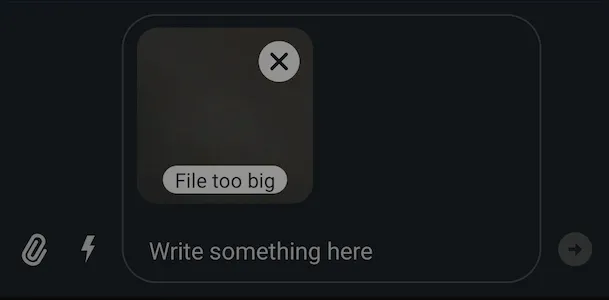
There is a limit for the size of attachments you can send. The default value is 100 MB and selecting a file larger than that limit will notify the user:

You can use MessageInputViewStyle.attachmentMaxFileSize to change the maximum allowed size of attachments. However, the same default limit applies to Stream Chat's CDN as well. To send larger attachments, you can use your own CDN.
You can listen for large attachments being added to the list of attachments (for example, to present a custom message to the user in this case) with MessageInputView.listenForBigAttachments.