class MyMessageListActivity : AppCompatActivity() {

    override fun onCreate(savedInstanceState: Bundle?) {
        super.onCreate(savedInstanceState)
        setContentView(R.layout.stream_ui_fragment_container)

        if (savedInstanceState == null) {
            supportFragmentManager.beginTransaction()
                .replace(R.id.container, MessageListFragment.newInstance(cid = "channelType:channelId"))
                .commit()
        }
    }
}This is documentation for Stream Chat Android SDK v5, which is no longer actively maintained. For up-to-date documentation, see the latest version (v7).
Message List Screen
To set up a self-contained chat screen that shows a list of messages and give users the ability to send messages you can use one of the following components:
MessageListFragment: A Fragment that represents a self-contained chat screen.MessageListActivity: An Activity that is just a thin wrapper aroundMessageListFragment.
The MessageListFragment contains these three inner components:
MessageListHeaderView: Displays a navigation icon, the name of the channel or thread and a channel avatar.MessageListView: Shows a list of paginated messages, with threads, replies, reactions and deleted messages.MessageInputView: Handles the message input, as well as attachments and message actions like editing and replying.
Fragments and Activities representing self-contained screens are easy to use. They allow you to explore the SDK's features in a breeze, however, they offer limited customization.
Usage
To use the message list screen, you just need to add MessageListFragment to your Activity or Fragment:
Alternatively, you can simply start MessageListActivity from the SDK to achieve similar result with a single line of code:
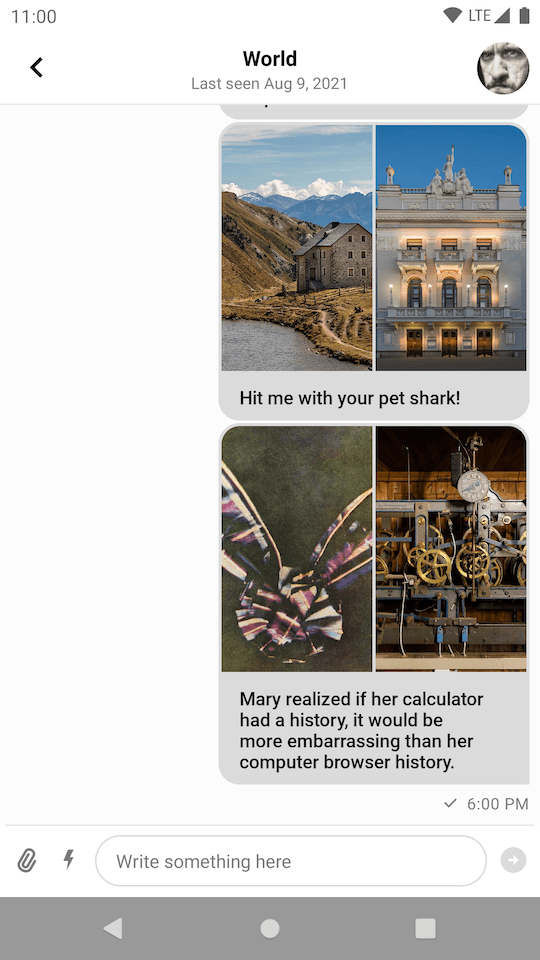
context.startActivity(MessageListActivity.createIntent(context, cid = "channelType:channelId"))This small snippet will produce a fully working solution, as shown in the image below.
Handling Actions
To handle actions supported by MessageListFragment you have to implement corresponding click listeners in the parent Fragment or Activity:
class MainActivity : AppCompatActivity(), MessageListFragment.BackPressListener {

    override fun onCreate(savedInstanceState: Bundle?) {
        super.onCreate(savedInstanceState)
        // Add MessageListFragment to the layout
    }

    override fun onBackPress() {
        // Handle back press
    }
}Currently, there is one click listener you can use with the MessageListFragment:
BackPressListener: Click listener for the navigation button in the header. Finishes Activity by default.
Customization
Message list screen component offers limited customization. The MessageListFragment exposes a builder with the following methods:
setFragment: Sets custom message list Fragment. The Fragment must be a subclass ofMessageListFragment.customTheme: Custom theme for the screen.showHeader: Whether the header is shown or hidden.messageId: The ID of the message to highlight.
Other than that, you can use inheritance for further customization as shown in the example below:
class CustomMessageListFragment : MessageListFragment() {

    override fun setupMessageListHeader(messageListHeaderView: MessageListHeaderView) {
        super.setupMessageListHeader(messageListHeaderView)
        // Customize message list header view. For example, set a custom back button click listener:
        messageListHeaderView.setBackButtonClickListener {
            // Handle back press
        }
    }

    override fun setupMessageList(messageListView: MessageListView) {
        super.setupMessageList(messageListView)
        // Customize message list view
    }

    override fun setupMessageInput(messageInputView: MessageInputView) {
        super.setupMessageInput(messageInputView)
        // Customize message input view
    }
}

class CustomMessageListActivity : MessageListActivity() {

    override fun createMessageListFragment(cid: String, messageId: String?): MessageListFragment {
        return MessageListFragment.newInstance(cid) {
            setFragment(CustomMessageListFragment())
            customTheme(R.style.StreamUiTheme)
            showHeader(true)
            messageId(messageId)
        }
    }
}Fragments and Activities representing self-contained screens can be styled using the options described in the theming guide.