

The main reason is that there are several factors that one needs to consider for the backbone or underlying technology. One way to embed live media into iOS applications is to use Web Real-Time Communication (WebRTC). In this article, you will discover how WebRTC works and how you can integrate it into your next iOS application. It demonstrates how you can establish a peer-to-peer connection with WebRTC and any Swift/iOS project.
What is WebRTC?
WebRTC is an open-source API made by Google in 2011. The WebRTC protocol provides low-latency secure, peer-to-peer, and live communication for the web and native mobile applications. Using WebRTC, users can communicate, share and receive audio, peer-to-peer data, video, and other media types.
WebRTC API Demos
WebRTC uses the following APIs to fetch, communicate and send over connected channels. One of the excellent places to try, test, and demonstrate these WebRTC communication APIs is using these video-chat demos in the browser. The WebRTC demos in this section work on desktop and mobile browsers such as Chrome, Safari, Firefox, Opera, and Edge. The examples are from Google’s local and remote WebRTC samples on the web. You will get a broad idea of how the technology works and what you can achieve with it after you test them in the browser.
-
Media Stream Get User Media: The webRTC Get User Media API helps apps to access the cameras and microphones of media devices (computers and smartphones). The API’s get user media method asks the user to grant permission to use the microphone or camera. In addition, it synchronizes the camera and microphone inputs (audio and video). Check out and experiment with the video below in a web browser using the link above to understand how the “Get User Media” API works.
-
Media Recorder API: The media recorder API provides WebRTC applications with a simple way to record content for different use cases. It works as follows. When you want to use an application for recording, the app will initiate the media recorder object to start the recording. It will then invokes a stop method to end the recording. The recorded content/media will be available in the default encoding of the media recorder.

- Peer-to-peer communication with WebRTC RTCPeerConnection: The standard API enables users to stream audio and video between devices. For example, audio and video calling between two users. It also handles bandwidth management and data encryption. In this API demo, the web page displays the caller and the callee on the same page.

- Real-time communication with WebRTC data channel:
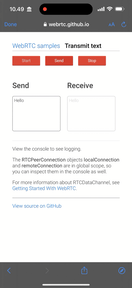
The Real-time Communication Data Channel RTCDataChannel API enables the streaming and exchange of arbitrary data through bidirectional peer-to-peer connections. The example below illustrates how to send messages using the WebRTC data channels. The local connection object allows you to start and enter some text to send. Once you send the text, the remote connection object will receive it. The data transfer and file transfer over peer-to-peer connections are other examples of the RTDataChannel.
Advantages of Using WebRTC
- Cost: WebRTC makes it cheaper to add audio and video streaming experiences to any iOS app.
- Works across platforms: It is available on several platforms like the web (Chrome, Chrome for Android, Firefox), Android, iOS, native Java, and Objective-C bindings.
- Security: WebRTC provides encryption and congestion control for media and data using the Secure Real-time Transport Protocol (SRTP). It ensures confidentiality and authentication of video and audio exchange which prevents recording and distributing audio and video without the knowledge of peers.
- No plugins required for WebRTC: Using plugins often compromises the security of applications. They can be challenging to maintain, secure, debug, and test. Since you do not have to use plugins for WebRTC applications, there is no fear of security breaches.
- Allows commercial use and contribution: The APIs of WebRTC are open-source, standardized, and free of charge. In addition, it provides high-quality audio and video communication between users.
- Flexibility: It is easy to customize.
WebRTC Use Cases
WebRTC has several use cases. Here is a collection of areas where you can use WebRTC on iOS.
- Audio rooms: Audio-only chatting and recording
- Text and video chat
- Audio and video conferencing
- Screen recording and sharing
- File sharing
- Online multiplayer game streaming
Understanding Signaling and Negotiation
To build real-world WebRTC applications, you need servers to manage connections between devices. The WebRTC servers enable WebRTC peers to identify each other and share information about their networks. As a result, the end-users can send and receive media in different formats. The server side of WebRTC consists of four main components. These are signaling, Network Address Translation (NAT) gateway traversal, user discovery, and relay servers (for failure in peer-to-peer communications). This article covers only the signaling server component of WebRTC.
The mechanism used for establishing, coordinating, and controlling communication in WebRTC is known as signaling. RTCPeerConnection or WebRTC does not define the signaling protocols. As a result of this, developers can choose the signaling methods they prefer to use. During signaling, one of the users sends an offer to connect with another user. The WebRTC negotiation component notifies the other user (device) about the offer request. The second user can accept or reject the offer made by the first user. When the offer is accepted, the first user gets a notification. The server then transfers information between both users. Finally, the connection either fails or succeeds.
Generally, apps use WebRTC for streaming audio, data, and video. WebRTC obtains the users’ IP addresses, network information, and ports to exchange and stream data. It also enables streaming and communication through NAT gateways and firewalls.
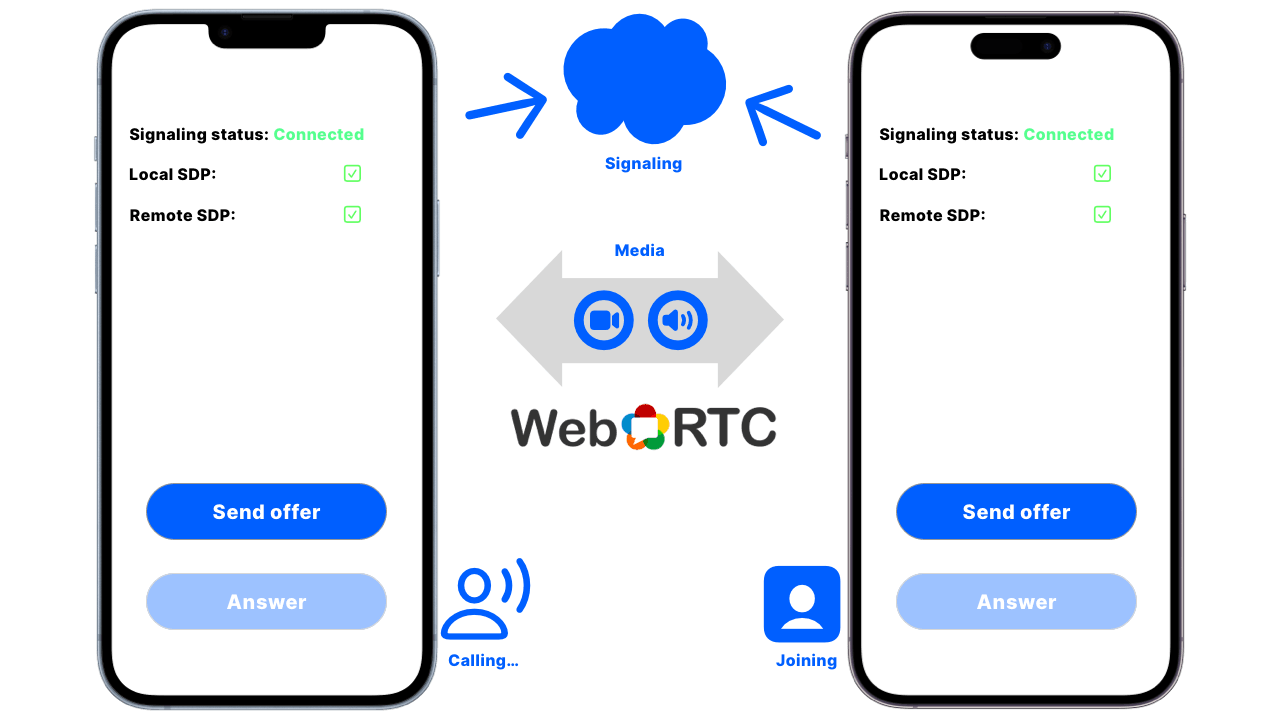
Supposing two iOS devices want to communicate together, there must be a signaling server between the two devices. To establish a peer-to-peer connection between the iOS devices, you can use a Swift server built with WebSocket so that they can start communicating and exchanging data. In the image above, the first device needs to make an offer to the second device. When the second device tries to answer or join the conversation, there will be a negotiation between the devices. Finally, the two devices will establish a two-way connection or fail. The image below demonstrates how two iOS devices can connect.
How WebRTC Session Works
Using WebRTC for audio, video calling, and streaming apps to communicate between peers, there must be a requirement to display the information about media exchange. For example, the IP addresses of the devices and their session description metadata. The Session Description Protocol (SDP) handles and manages such information. SDP forms an essential part of the WebRTC workflow because it provides all the information about specific communication to the WebRTC protocol. SDP provides
- The name of the session
- The objective of the session
- The active time of the session
- The media type of the session (audio or video)
- Information required to exchange data (the port number and IP address).
Supposing iPhone1 wants to start a video call or an audio call with iPhone2. For iPhone1 to initiate the call offer, it will need to provide its information to a WebRTC server to make an offer. iPhone2 then checks the offer notification and accepts or rejects it. The image below illustrates the operation of the SDP.

The WebRTC session does not share the IP addresses of the communicating devices publicly because of Network Address Translation (NAT). Whenever devices transfer data over the internet to other devices, NAT hides the IP addresses of the devices. When using WebRTC, there is a requirement to provide a specific IP to work with NAT gateways and firewalls. You can achieve this using Session Traversal Utilities for NAT (STUN). The STUN server generates and provides public IP addresses to send to each device to communicate. For example, if iPhone1 tries to make an offer, its IP address is sent to the STUN server. The STUN server then generates a public IP address and puts it into the SDP to send over to iPhone2. The image below illustrates the basic operating principle of the STUN server.

How WebRTC Handles Stable and Efficient Communication
The RTCPeerConnection manages the connection between local and remote devices and closes the connection. It ensures that streaming data between peers is stable and efficient. Below summarizes what it does:
- It shows whether the callee (remote device) can accept the communication or not
- It indicates the present status of the connection. For example, connecting, connected, and failed.
How To Integrate WebRTC With iOS Apps
WebRTC enables audio and video calling capability for iOS applications using a peer-to-peer connection. Establishing this connection for an actual production application requires a signaling server. The server is responsible for managing the connectivity between the communicating devices. It handles the following:
- Helping one device locate another peer on the network.
- Assisting in connection negotiation
- Closing the established connection or resetting it if needed
You can use several signaling implementations for WebRTC projects. For an iOS application, you can use a Node.js server or a Swift signaling server with WebSocket implementation. For example, the open-source WebRTC and WebSocket sipml5 SIP client gateway server allows users to make video chats/calls using the browser and iOS devices.
There are several ways to integrate WebRTC into iOS applications. One way is to use a third-party API like the LiveKit WebRTC iOS SDK. If you like to compile your WebRTC framework, the official WebRTC iOS development guide provides developers with step-by-step instructions. Another possible option to add WebRTC to your iOS application is using a Swift package like the WebRTC Binaries for iOS and macOS. Using the Swift package integration is one of the easiest ways to integrate WebRTC into your iOS projects.
Using WebRTC Binary Frameworks for iOS Apps
In this section, you find out how to add WebRTC implementation to your iOS application using the Swift package, WebRTC Binaries for iOS. To follow this section, you can use Xcode 13 or 14 and follow the steps below.
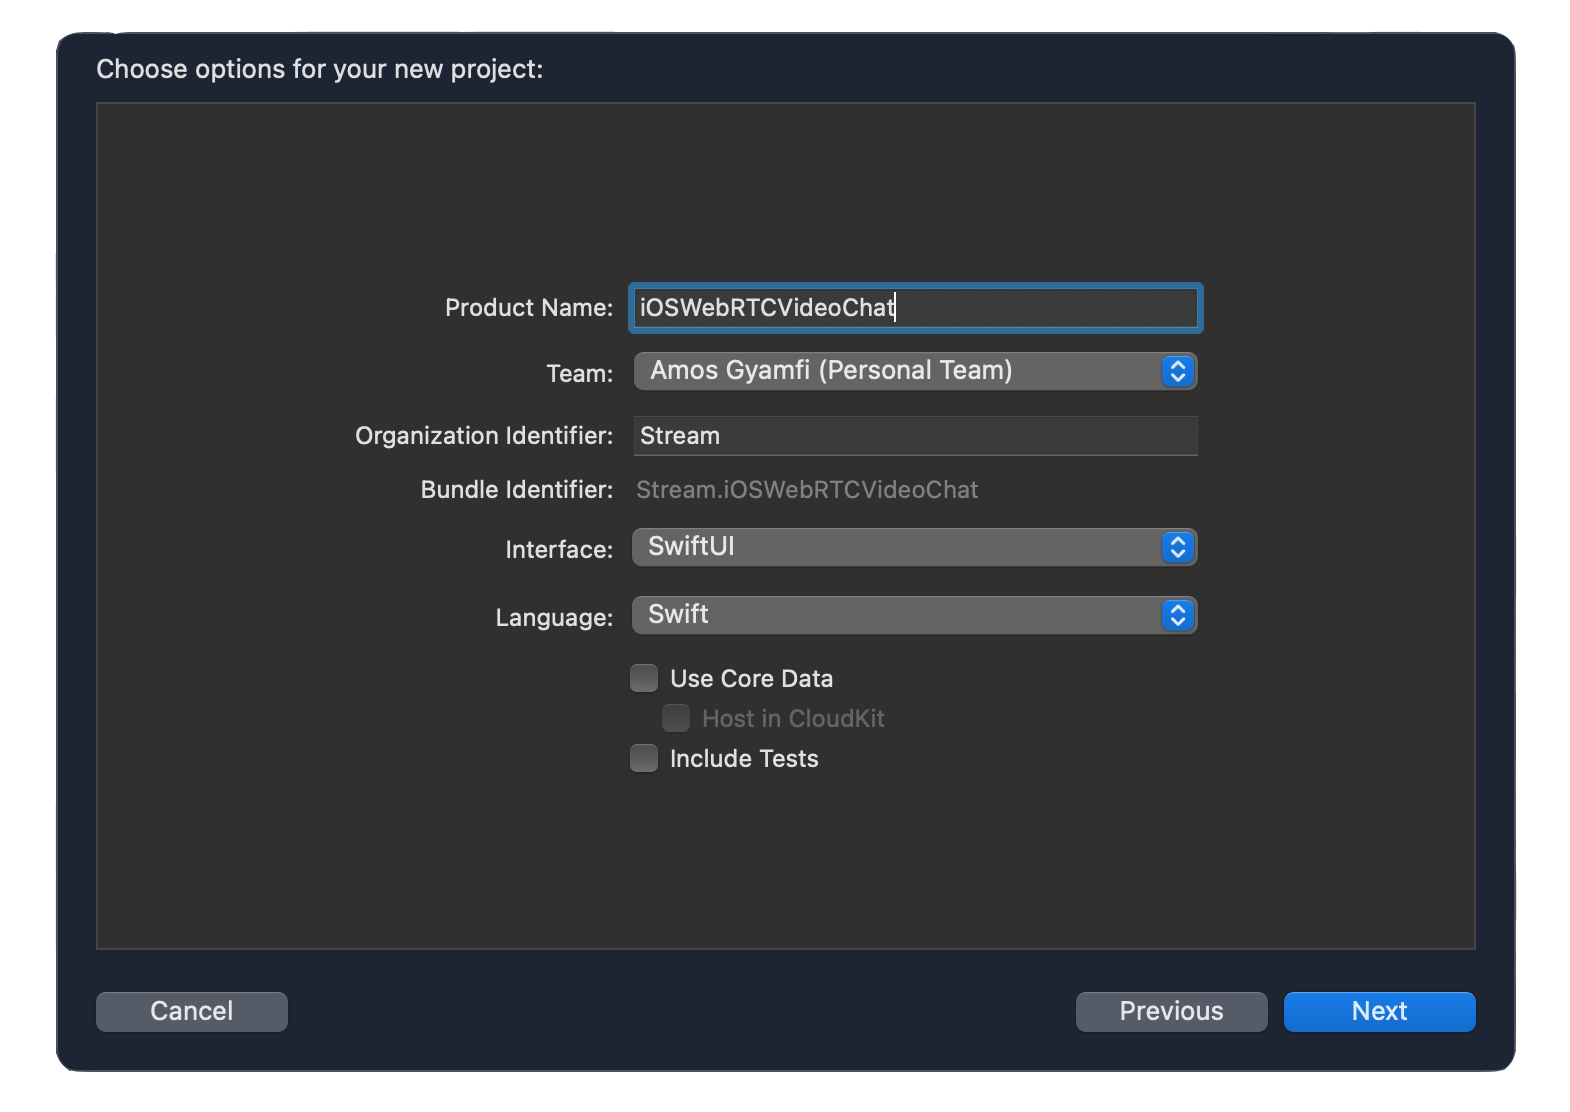
- Launch Xcode and create a blank SwiftUI project called iOSWebRTCVideoChat. Select SwiftUI as the interface and choose Swift as the language.
- To fetch the WebRTC binaries from GitHub, you can use dependency managers such as CocoaPods or Swift Package Manager. Since Xcode has built-in support for Swift Package Manager, you should use it to keep the integration process simple. Click File, select Add Packages…, and paste this package URL https://github.com/stasel/WebRTC in the search field.

- Then, click Add Package to integrate it into your project.
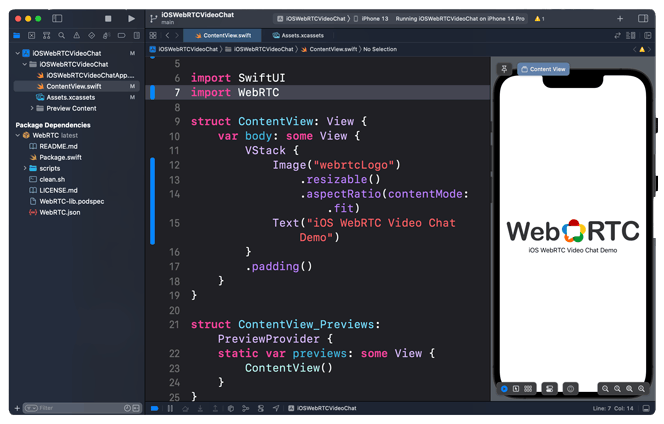
Once you complete this step successfully, you will see the WebRTC implementation under the Package Dependencies in your project navigator.

You can now add WebRTC to your code by importing it import WebRTC.
Use and Test WebRTC Through an iOS Demo App
You can download and test the iOS WebRTC demo application used in this section from GitHub. The framework uses two signaling servers. A Node.js server and a Swift server built with WebSocket. You can start any of the servers to run the app. Each of these serves the same purpose:
- Reporting information about errors, session, and connection status.
- Managing the network configurations of the media to be communicated.
Imagine you want to use one iOS device to communicate with another iOS device. To establish communication between the two iOS devices, here is a sample signaling server Xcode project from WebRTC-iOS that you can use.
To get the WebRTC iOS demo app running, you should have
- Xcode 12 or later and iOS 12 or later
- npm and Node.js (for starting the NodeJS signaling server)
- macOS 10.15 or later (for running the Swift signaling server).
Xcode project and setup
- Clone or download the WebRTC-iOS project from GitHub.
- Open the Xcode project and find Config.swift to set up the default signaling server URL.
- Replace the server URL with your network name from the macOS system preferences.
- Navigate to the downloaded folder and find the signaling folder. It contains two servers. Start the NodeJS server or the Swift server. The simplest way is to open SignalingServer.xcodeproj from the Swift folder and run the code.
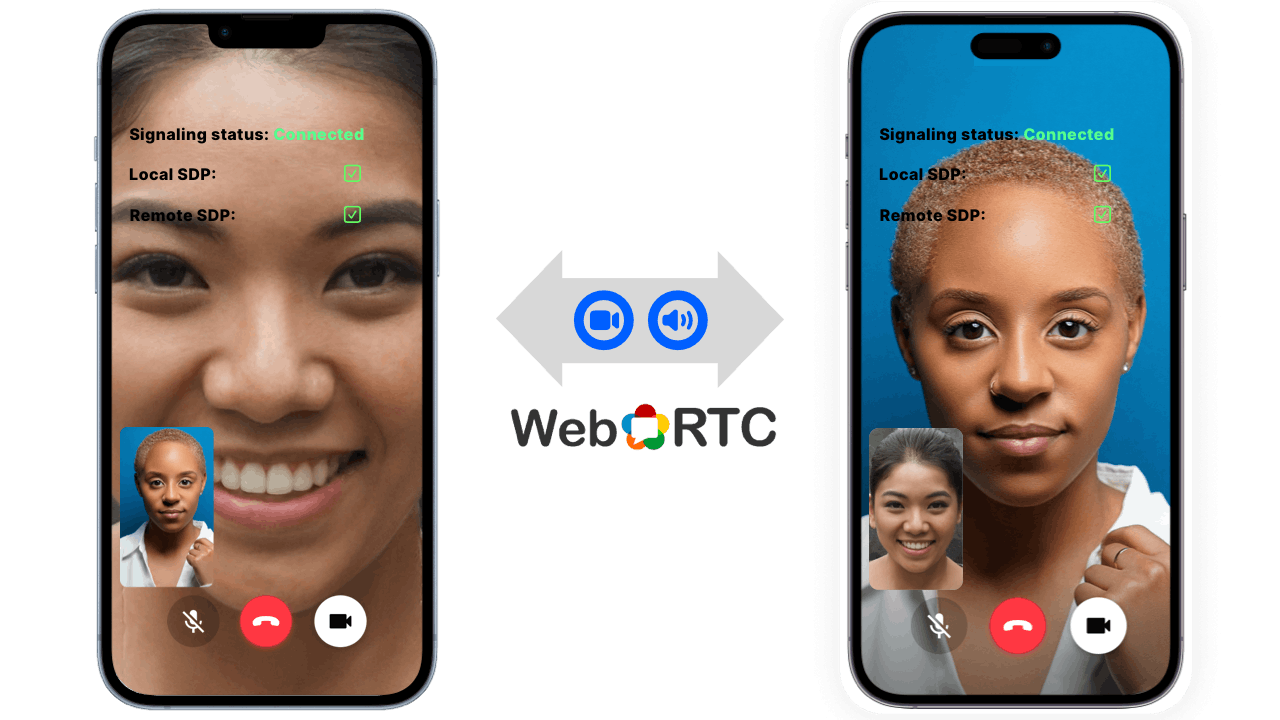
Running the app on two devices
After starting the signaling server, you can run the app on actual iOS devices by selecting the attached devices from Xcode. First, both devices need to exchange network information.
Wrap Up
To conclude, you can integrate WebRTC for your iOS audio and video calling applications in many ways. Since the standards of WebRTC do not define the signaling protocols of the technology, developers can choose whatever signaling server they prefer. For instance, you can build a Swift server from WebSocket, NodeJS server, and FireStore, or use web frameworks such as Python, PHP, and Ruby servers for your iOS WebRTC implementation.
What Do I Do Next?
To learn more about WebRTC and other communication protocols, you can read this article and 36 essential WebRTC tutorials. You can find the demo application used in this article and the iOS WebRTC binaries framework on GitHub.