Expo
This guide discusses how to add push notifications for ringing calls to your project. It will discuss both Android and iOS and go through all the necessary steps.
The normal user experience in a ringing app, when a user receives a call, is to show a push notification. The user can then interact with the notification to accept or reject the call. In this guide, you will learn how to set up your Expo app to get push notifications from Stream for the incoming calls that your user will receive.
| Android preview | iOS preview |
|---|---|
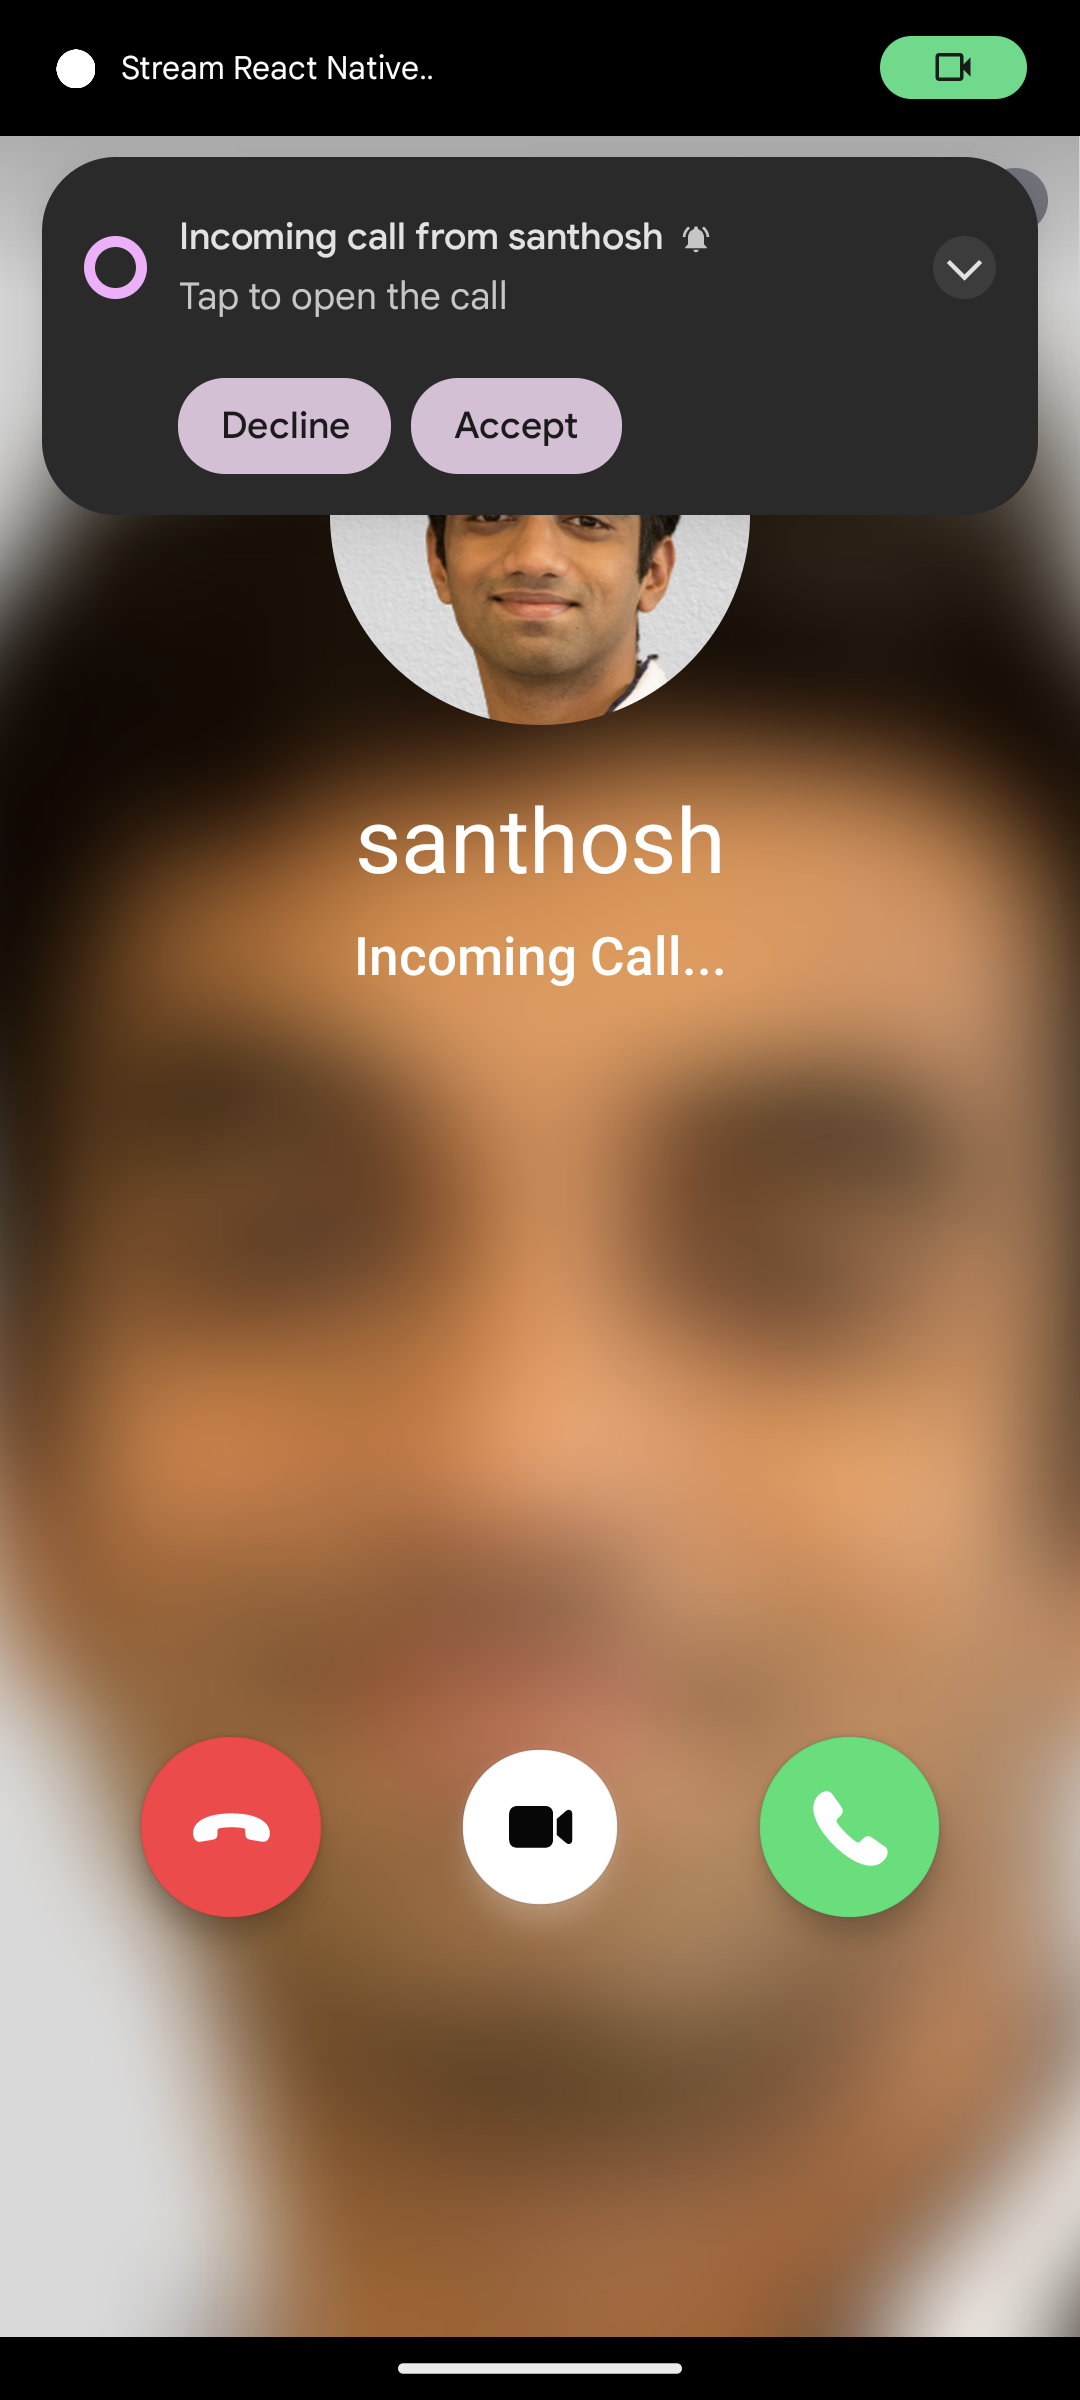 | 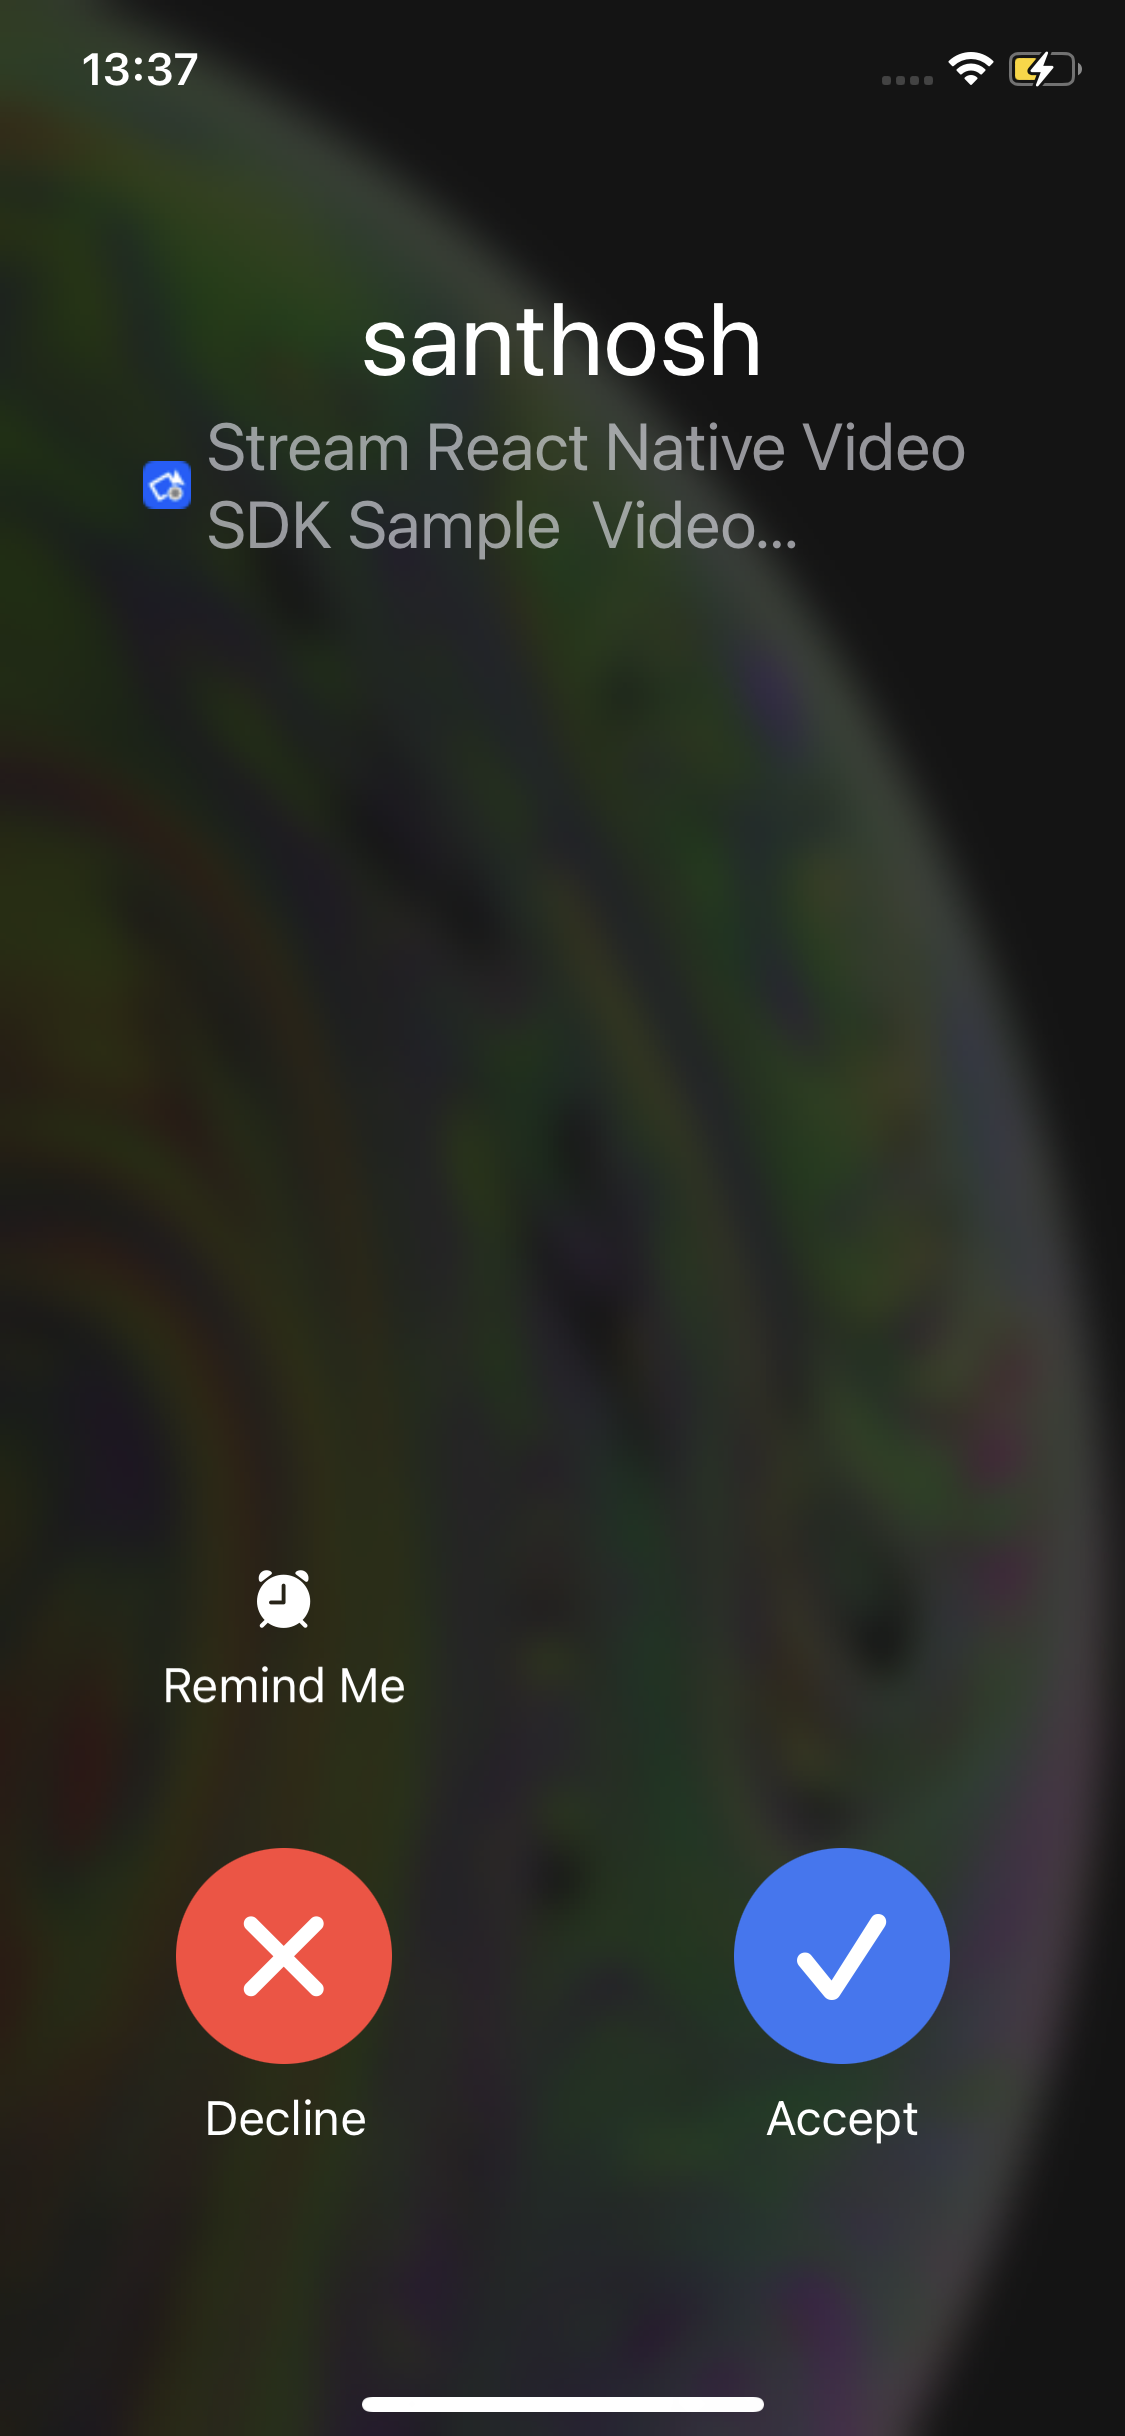 |
Add push provider credentials to Stream
Please follow the below guides for adding appropriate push providers to Stream:
- Android - Firebase Cloud Messaging
- iOS - Apple Push Notification Service (APNs)
Install Dependencies
npx expo install @react-native-firebase/app
npx expo install @react-native-firebase/messaging
npx expo install react-native-voip-push-notification
npx expo install react-native-callkeep
npx expo install @notifee/react-native
So what did we install precisely?
@react-native-firebase/appand@react-native-firebase/messagingfor handling incoming Firebase Cloud Messaging notifications on Android.react-native-voip-push-notificationfor handling incoming PushKit notifications on iOS.react-native-callkeepfor reporting incoming calls to iOS CallKit.
Add Firebase credentials
To create a Firebase project, go to the Firebase console and click on Add project.
In the console, click the setting icon next to Project overview and open Project settings. Then, under Your apps, click the Android icon to open Add Firebase to your Android app and follow the steps. Make sure that the Android package name you enter is the same as the value of
android.packagefrom your app.json.After registering the app, download the google-services.json file and place it in your project's root directory.
In app.json, add an
android.googleServicesFilefield with the relative path to the downloaded google-services.json file. If you placed it in the root directory, the path is:
{
  "android": {
    "googleServicesFile": "./google-services.json"
  }
}
Similarly, for iOS, in the console, click the setting icon next to Project overview and open Project settings. Then, under Your apps, click the iOS icon to open Add Firebase to your Apple app and follow the steps. Make sure that the Apple bundle ID you enter is the same as the value of
ios.bundleIdentifierfrom your app.json.After registering the app, download the GoogleService-Info.plist file and place it in your project's root directory.
In app.json, add an
ios.googleServicesFilefield with the relative path to the downloaded GoogleService-Info.plist file. If you placed it in the root directory, the path is:
{
    "ios": {
      "googleServicesFile": "./GoogleService-Info.plist",
    },
}
The google-services.json and GoogleService-Info.plist files contain unique and non-secret identifiers of your Firebase project. For more information, see Understand Firebase Projects.
We will not be using firebase for iOS. But it is necessary for the setup for react-native-firebase to have the GoogleService-Info.plist file.
Add the config plugin properties
In app.json, in the plugins field, add the ringingPushNotifications property to the @stream-io/video-react-native-sdk plugin. Also, add the @config-plugins/react-native-callkeep plugin.
{
 "plugins": [
      [
        "@stream-io/video-react-native-sdk",
        {
          "ringingPushNotifications": {
            "disableVideoIos": false,
            "includesCallsInRecentsIos": false,
            "showWhenLockedAndroid": true
          },
        }
      ],
      "@config-plugins/react-native-callkeep",
      "@react-native-firebase/app",
      [
        "expo-build-properties",
        {
          "ios": {
            "useFrameworks": "static"
          }
        }
      ]
      // your other plugins
  ]
}
- The
disableVideoIosfield is used for apps with audio only calls. Pass true to this property to disable video in iOS CallKit. - The
includesCallsInRecentsIosfield is used to show call history. Pass true to show the history of calls made in the iOS native dialer - The
showWhenLockedAndroidfield is used to display a full-screen notification for the incoming call when the phone is locked. Pass true to enable it. - For iOS only, since
firebase-ios-sdkrequiresuse_frameworksthen you want to configureexpo-build-propertiesby adding"useFrameworks": "static".
Optional: Disable Firebase initialisation on iOS
React Native Firebase Messaging automatically registers the device with APNs to receive remote messages. But since we do not use Firebase on iOS, we can disable it via the firebase.json file that we can newly create:
{
  "react-native": {
    "messaging_ios_auto_register_for_remote_messages": false
  }
}
Setup the push config for the SDK
The SDK automatically processes the incoming push notifications once the setup above is done if the push config has been set using StreamVideoRN.setPushConfig. To do this follow the steps below,
Add the ability to statically navigate to screens in your app
When a user taps on the push notification and the JS engine is not ready, they should still be able to navigate to the screen that shows the active call. You can achieve this by using imperative navigation in the expo router.
The following is an example implementation of a utility file that has helpers to statically navigate in the app:
import { User } from '@stream-io/video-react-native-sdk';
import { router } from 'expo-router';

/**
 * This is used to run the navigation logic from root level
 */
export const staticNavigateToRingingCall = () => {
  const intervalId = setInterval(async () => {
    // add any requirements here (like authentication)
    if (GlobalState.hasAuthentication) {
      clearInterval(intervalId);
      router.push('/ringing');
    }
  }, 300);
};
Setup the push config
Once we have set up the methods to navigate the app from a static method we are ready to call the StreamVideoRN.setPushConfig method. Below is an example of how this method can be called,
import {
  StreamVideoClient,
  StreamVideoRN,
} from '@stream-io/video-react-native-sdk';
import { AndroidImportance } from '@notifee/react-native';
import AsyncStorage from '@react-native-async-storage/async-storage';
import { STREAM_API_KEY } from '../../constants';
import { staticNavigateToRingingCall } from './staticNavigationUtils';

export function setPushConfig() {
  StreamVideoRN.setPushConfig({
    // pass true to inform the SDK that this is an expo app
    isExpo: true,
    ios: {
      // add your push_provider_name for iOS that you have setup in Stream dashboard
      pushProviderName: __DEV__ ? 'apn-video-staging' : 'apn-video-production',
    },
    android: {
      // add your push_provider_name for Android that you have setup in Stream dashboard
      pushProviderName: __DEV__
        ? 'firebase-video-staging'
        : 'firebase-video-production',
      // configure the notification channel to be used for incoming calls for Android.
      incomingCallChannel: {
        id: 'stream_incoming_call',
        name: 'Incoming call notifications',
        // This is the advised importance of receiving incoming call notifications.
        // This will ensure that the notification will appear on-top-of applications.
        importance: AndroidImportance.HIGH,
        // optional: if you dont pass a sound, default ringtone will be used
        // sound: <your sound url>
      },
      // configure the functions to create the texts shown in the notification
      // for incoming calls in Android.
      incomingCallNotificationTextGetters: {
        getTitle: (createdUserName: string) =>
          `Incoming call from ${createdUserName}`,
        getBody: (_createdUserName: string) => 'Tap to answer the call',
      },
    },
    // add the callback to be executed a call is accepted, used for navigation
    navigateAcceptCall: () => {
      staticNavigateToRingingCall();
    },
    // add the callback to be executed when a notification is tapped,
    // but the user did not press accept or decline, used for navigation
    navigateToIncomingCall: () => {
      staticNavigateToRingingCall();
    },
    // add the async callback to create a video client
    // for incoming calls in the background on a push notification
    createStreamVideoClient: async () => {
      // note that since the method is async,
      // you can call your server to get the user data or token or retrieve from offline storage.
      const userId = await AsyncStorage.getItem('@userId');
      const userName = await AsyncStorage.getItem('@userName');
      if (!userId) return undefined;
      // an example promise to fetch token from your server
      const tokenProvider = () => yourServer.getTokenForUser(userId).then((auth) => auth.token);
      const user = { id: userId, name: userName };
      return StreamVideoClient.getOrCreateInstance({
        apiKey: STREAM_API_KEY, // pass your stream api key
        user,
        tokenProvider,
      });
    },
  });
}
Now, call the method outside of your application cycle. That is inside index.js. This is because the app can be opened from a dead state through a push notification and in that case, we need to use the config as soon as the JS bridge is initialized. Following is an example,
import 'expo-router/entry';
import { setPushConfig } from './utils/setPushConfig';

setPushConfig();
Request for notification permissions
At an appropriate place in your app, request for notification permissions from the user. Below is a small example of how to request permissions in Expo:
import {PermissionsAndroid} from 'react-native';
PermissionsAndroid.request(PermissionsAndroid.PERMISSIONS.POST_NOTIFICATIONS);
Disabling push - usually on logout
In some cases you would want to disable push from happening. For example, if user logs out of your app. Or if the user switches. You can disable push like below:
import { StreamVideoRN } from '@stream-io/video-react-native-sdk';

await StreamVideoRN.onPushLogout();
Troubleshooting
- During development, you may be facing a situation where push notification is shown but its events like accepting or rejecting a call don't work. This is because, during hot module reloading the global event listeners may get de-registered. To properly test during development, make sure that you fully restart the app or test in release mode without the metro packager.
- You can check the "Webhook & Push Logs" section in the Stream Dashboard to see if Notifications were sent by Stream.
- If you are still having trouble with Push Notifications, please submit a ticket to us at support.