import React, { useEffect } from "react";
import { SafeAreaView, StyleSheet, Text } from "react-native";
import {
  Call,
  StreamCall,
  CallContent,
  CallingState,
  StreamVideoClient,
  StreamVideo,
} from "@stream-io/video-react-native-sdk";

const apiKey = "REPLACE_WITH_API_KEY";
const token = "REPLACE_WITH_TOKEN";
const userId = "REPLACE_WITH_USER_ID";
const callId = "REPLACE_WITH_CALL_ID";

const user = {
  id: userId,
  name: "John Malkovich",
  image: "https://robohash.org/John",
};

const client = new StreamVideoClient({ apiKey, user, token });

const RootContainer = (props: React.PropsWithChildren<{}>) => {
  return <SafeAreaView style={styles.container}>{props.children}</SafeAreaView>;
};

export const App = () => {
  const [call, setCall] = React.useState<Call>();

  useEffect(() => {
    const _call = client.call("default", callId);
    _call.join({ create: true }).then(() => setCall(_call));

    return () => {
      _call.leave().catch(() => console.error("Failed to leave the call"));
      setCall(undefined);
    };
  }, []);

  if (!call) {
    return (
      <RootContainer>
        <Text style={styles.text}>Joining call...</Text>
      </RootContainer>
    );
  }

  return (
    <StreamVideo client={client}>
      <StreamCall call={call}>
        <RootContainer>
          <CallContent />
        </RootContainer>
      </StreamCall>
    </StreamVideo>
  );
};

const styles = StyleSheet.create({
  container: {
    flex: 1,
    justifyContent: "center",
    backgroundColor: "white",
  },
  text: {
    color: "black",
    fontSize: 20,
    fontWeight: "bold",
    marginBottom: 20,
    textAlign: "center",
  },
});

export default App;Manual Video Quality Selection
The SDK automatically selects incoming video quality based on display size, avoiding bandwidth waste (e.g., receiving Full HD for a 320x240 display).
Override this behavior to manually request higher resolution for quality, lower resolution for bandwidth savings, or disable video for audio-only experience.
Best Practices
- Default to auto - Let the SDK optimize quality unless users need control
- Save preferences - Remember user's quality selection across sessions
- Show current setting - Display the active quality level clearly
- Explain tradeoffs - Help users understand bandwidth vs quality implications
Actual quality depends on source video quality and network conditions. Manual selection specifies preference; actual resolution is selected from available options to match as closely as possible.
This guide covers building a UI control for manual video quality selection.
Prerequisites
For a video calling application starting point, see the Video Calling Tutorial.
Basic application setup:
Getting and Setting Incoming Video Settings
Use the useIncomingVideoQualitySettings hook to get current settings:
- enabled - Boolean indicating whether incoming video is enabled
- preferredResolution - Object
{ width: number; height: number }containing preferred resolution (when video is enabled)
Modify settings using Call object methods:
- setIncomingVideoEnabled - Enable/disable incoming video, clearing preferred resolution
- setPreferredIncomingVideoResolution - Set preferred resolution, enabling video if previously disabled
Combine settings into a single control with mapping:
import type { Call } from "@stream-io/video-react-native-sdk";

const incomingVideoSettings = ["auto", "1080p", "720p", "480p", "off"] as const;
type IncomingVideoSetting = (typeof incomingVideoSettings)[number];
type VideoDimension = { width: number; height: number };

const applyIncomingVideoSetting = (
  call: Call,
  setting: IncomingVideoSetting,
) => {
  if (setting === "auto") {
    call.setIncomingVideoEnabled(true);
  } else if (setting === "off") {
    call.setIncomingVideoEnabled(false);
  } else {
    call.setPreferredIncomingVideoResolution(
      incomingVideoSettingToResolution(setting),
    );
  }
};

const incomingVideoSettingToResolution = (
  setting: Exclude<IncomingVideoSetting, "auto" | "off">,
): VideoDimension => {
  switch (setting) {
    case "1080p":
      return { width: 1920, height: 1080 };
    case "720p":
      return { width: 1280, height: 720 };
    case "480p":
      return { width: 640, height: 480 };
  }
};

const incomingVideoResolutionToSetting = (
  resolution: VideoDimension,
): IncomingVideoSetting => {
  switch (true) {
    case resolution.height >= 1080:
      return "1080p";
    case resolution.height >= 720:
      return "720p";
    case resolution.height >= 480:
      return "480p";
    default:
      return "auto";
  }
};
Set preferred resolution per participant using the optional second parameter of setPreferredIncomingVideoResolution with an array of session IDs:
import { useCallStateHooks } from "@stream-io/video-react-native-sdk";

const { useParticipants } = useCallStateHooks();
const participants = useParticipants();
const [dominantParticipant] = participants;

call.setPreferredIncomingVideoResolution(
  incomingVideoSettingToResolution("1080p"),
  [dominantParticipant.sessionId],
);
This guide applies preferred resolution to all call participants.
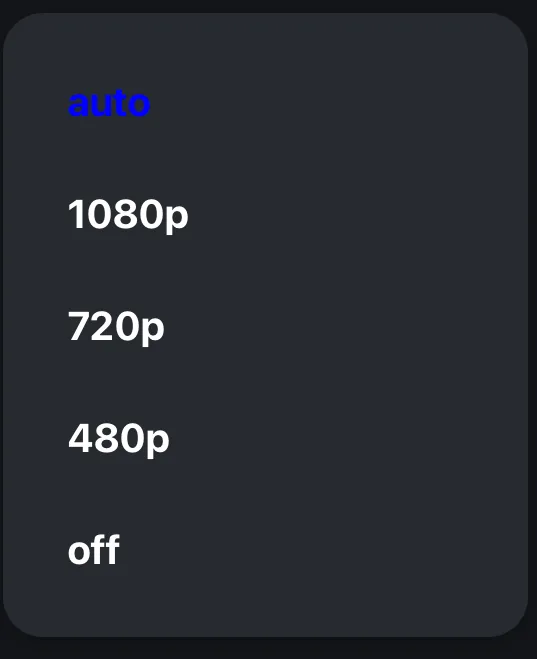
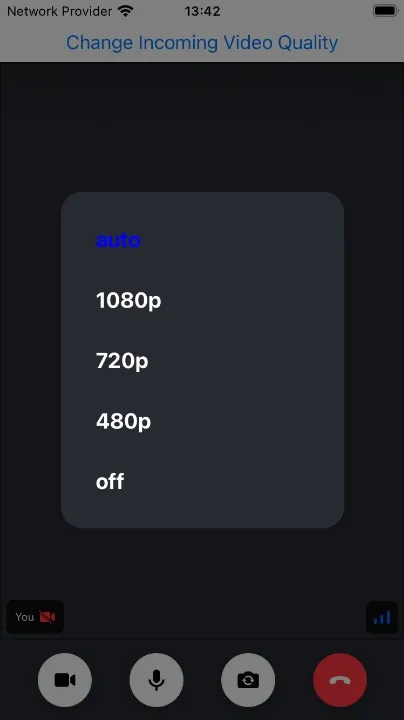
Building Incoming Video Quality Selector Button
Build a UI control using React Native's Modal component:
import {
  useCall,
  useCallStateHooks,
  type Call,
} from "@stream-io/video-react-native-sdk";
import React, { useState } from "react";
import { Button, Modal, Pressable, StyleSheet, Text, View } from "react-native";

/* This is the individual item inside the model */
const SettingSelectionItem = ({
  value,
  setValue,
  selectedValue,
  closeModal,
}: {
  value: IncomingVideoSetting;
  setValue: (setting: IncomingVideoSetting) => void;
  selectedValue: IncomingVideoSetting;
  closeModal: () => void;
}) => {
  return (
    <Pressable
      onPress={() => {
        setValue(value);
        closeModal();
      }}
      style={styles.modalButton}
    >
      <Text
        style={[
          styles.modalText,
          selectedValue === value ? styles.selectedModalText : null,
        ]}
      >
        {value}
      </Text>
    </Pressable>
  );
};

/* This button that opens the modal along with the modal component */
export const IncomingVideoQualitySelectorButton = () => {
  const [modalVisible, setModalVisible] = useState(false);
  const closeModal = () => setModalVisible(false);

  const call = useCall();
  const { useIncomingVideoSettings } = useCallStateHooks();
  const { enabled, preferredResolution } = useIncomingVideoSettings();
  let currentSetting: IncomingVideoSetting;

  if (!preferredResolution) {
    currentSetting = enabled ? "auto" : "off";
  } else {
    currentSetting = incomingVideoResolutionToSetting(preferredResolution);
  }

  const handleChange = (setting: IncomingVideoSetting) => {
    if (call) {
      applyIncomingVideoSetting(call, setting);
    }
  };

  return (
    <>
      <Modal
        animationType="fade"
        transparent
        visible={modalVisible}
        onRequestClose={closeModal}
      >
        <Pressable
          style={styles.centeredView}
          onPress={() => setModalVisible(false)}
        >
          <View style={styles.modalView} onStartShouldSetResponder={() => true}>
            {incomingVideoSettings.map((setting) => (
              <SettingSelectionItem
                key={setting}
                value={setting}
                selectedValue={currentSetting}
                setValue={handleChange}
                closeModal={closeModal}
              />
            ))}
          </View>
        </Pressable>
      </Modal>
      {/* This is the button to open/close the modal */}
      <Button
        title="Change Incoming Video Quality"
        onPress={() => setModalVisible(true)}
      />
    </>
  );
};

const styles = StyleSheet.create({
  centeredView: {
    flex: 1,
    justifyContent: "center",
    alignItems: "center",
    backgroundColor: "rgba(0, 0, 0, 0.5)",
  },
  modalView: {
    backgroundColor: "#272A30",
    borderRadius: 20,
    padding: 16,
    alignItems: "flex-start",
    shadowColor: "#000",
    shadowOffset: {
      width: 0,
      height: 2,
    },
    shadowOpacity: 0.25,
    shadowRadius: 4,
    elevation: 5,
    minWidth: "70%",
  },
  modalButton: {
    padding: 16,
  },
  modalText: {
    fontSize: 20,
    fontWeight: "bold",
    color: "white",
  },
  selectedModalText: {
    color: "blue",
  },
});
Add the component inside StreamCall for a video quality selector button:
<StreamVideo client={client}>
  <StreamCall call={call}>
    <IncomingVideoQualitySelectorButton />
    <SpeakerLayout />
  </StreamCall>
</StreamVideo>