<uses-permission android:name="android.permission.POST_NOTIFICATIONS" />
<!-- We declare the permissions to for using foreground service -->
<uses-permission android:name="android.permission.FOREGROUND_SERVICE" />
<uses-permission android:name="android.permission.FOREGROUND_SERVICE_MEDIA_PROJECTION" />React Native CLI Setup
This guide covers screen share setup for Android and iOS in React Native apps.
Android Setup
Android uses a foreground service for screen capturing, managed by @stream-io/react-native-webrtc.
Edit AndroidManifest
Declare foreground service permissions in AndroidManifest.xml:
AndroidManifest.xml
When uploading the app to the Play Store, it is essential to declare the permissions for foreground services in the Play Console and provide an explanation for their use. This includes adding a link to a video that demonstrates how the foreground service is utilized during video and audio calls. This procedure is required only once. For more details, click here.
Changes to MainActivity
Add the following import:
MainActivity.kt
import com.oney.WebRTCModule.WebRTCModuleOptionsAfter that, add the following code inside the onCreate function:
MainActivity.kt
override fun onCreate(savedInstanceState: Bundle?) {
    val options: WebRTCModuleOptions = WebRTCModuleOptions.getInstance()
    options.enableMediaProjectionService = true
    // ..the rest
}iOS Broadcast Upload Extension
Screen sharing requires iOS 14+. Create a Broadcast Upload Extension to capture screen contents.
Step 1: Create the Broadcast Upload Extension
Open your project with Xcode, select File > New > Target in menu bar. Select Broadcast Upload Extension, and click Next.
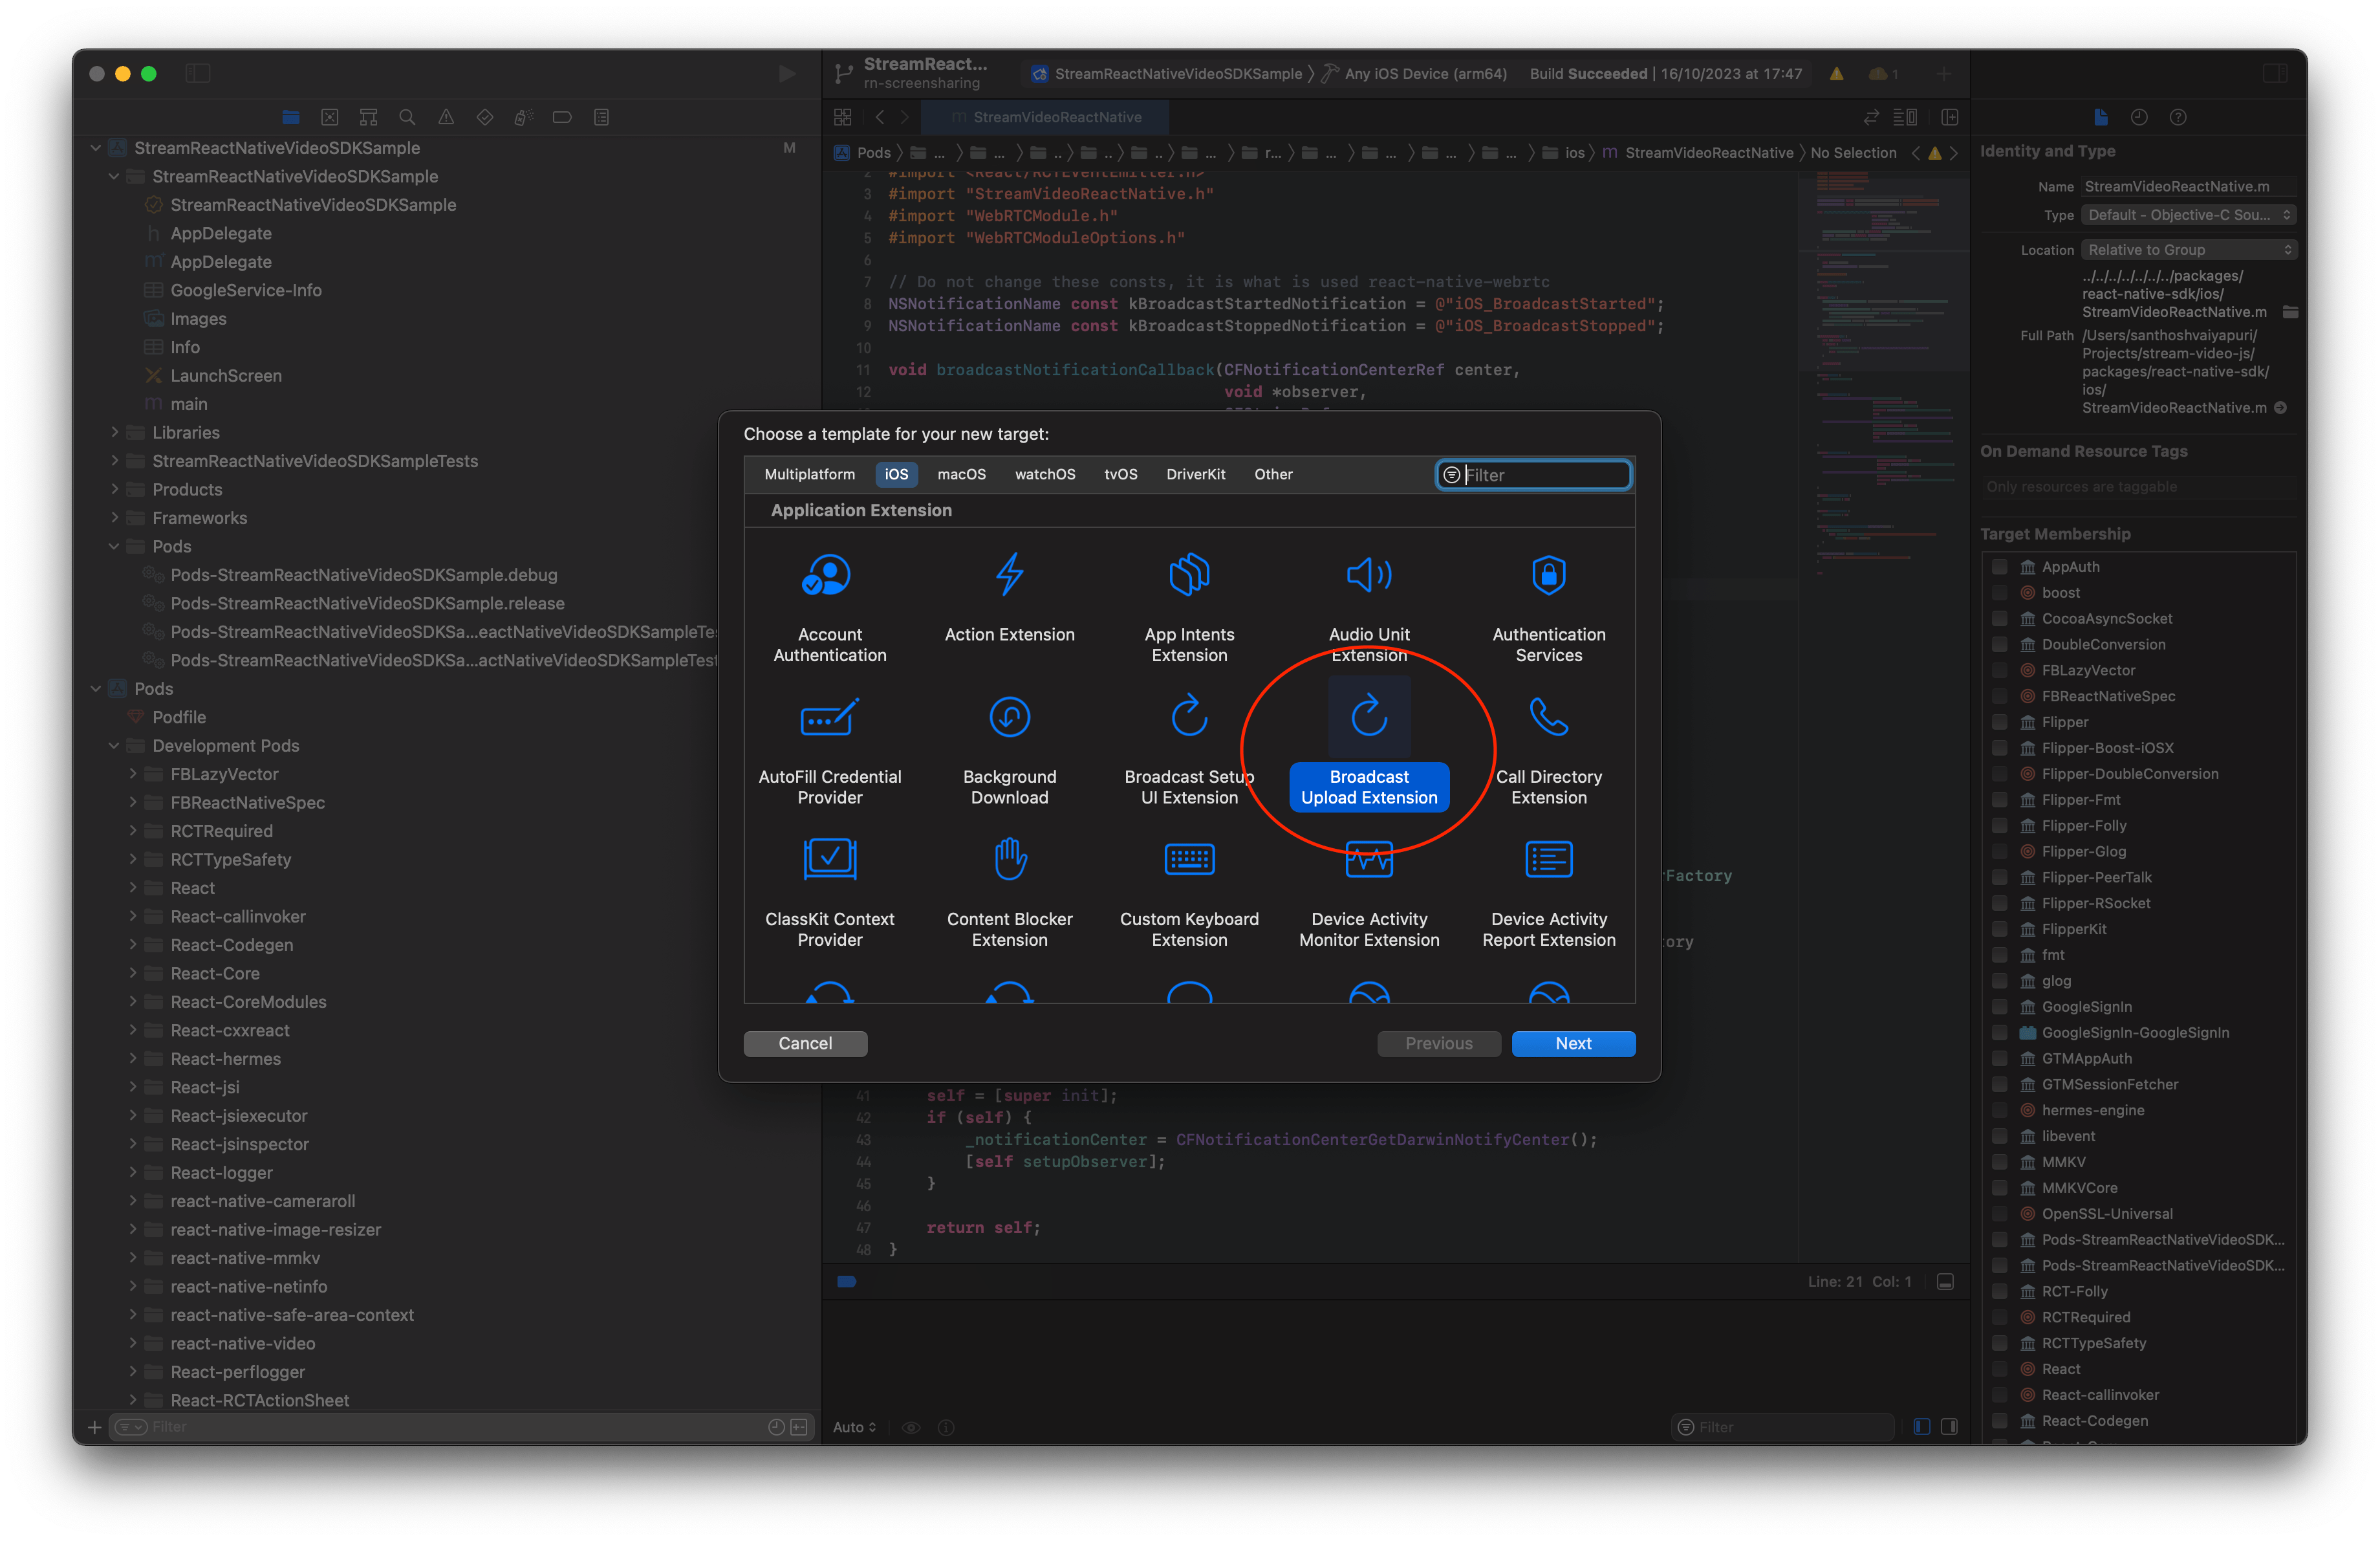
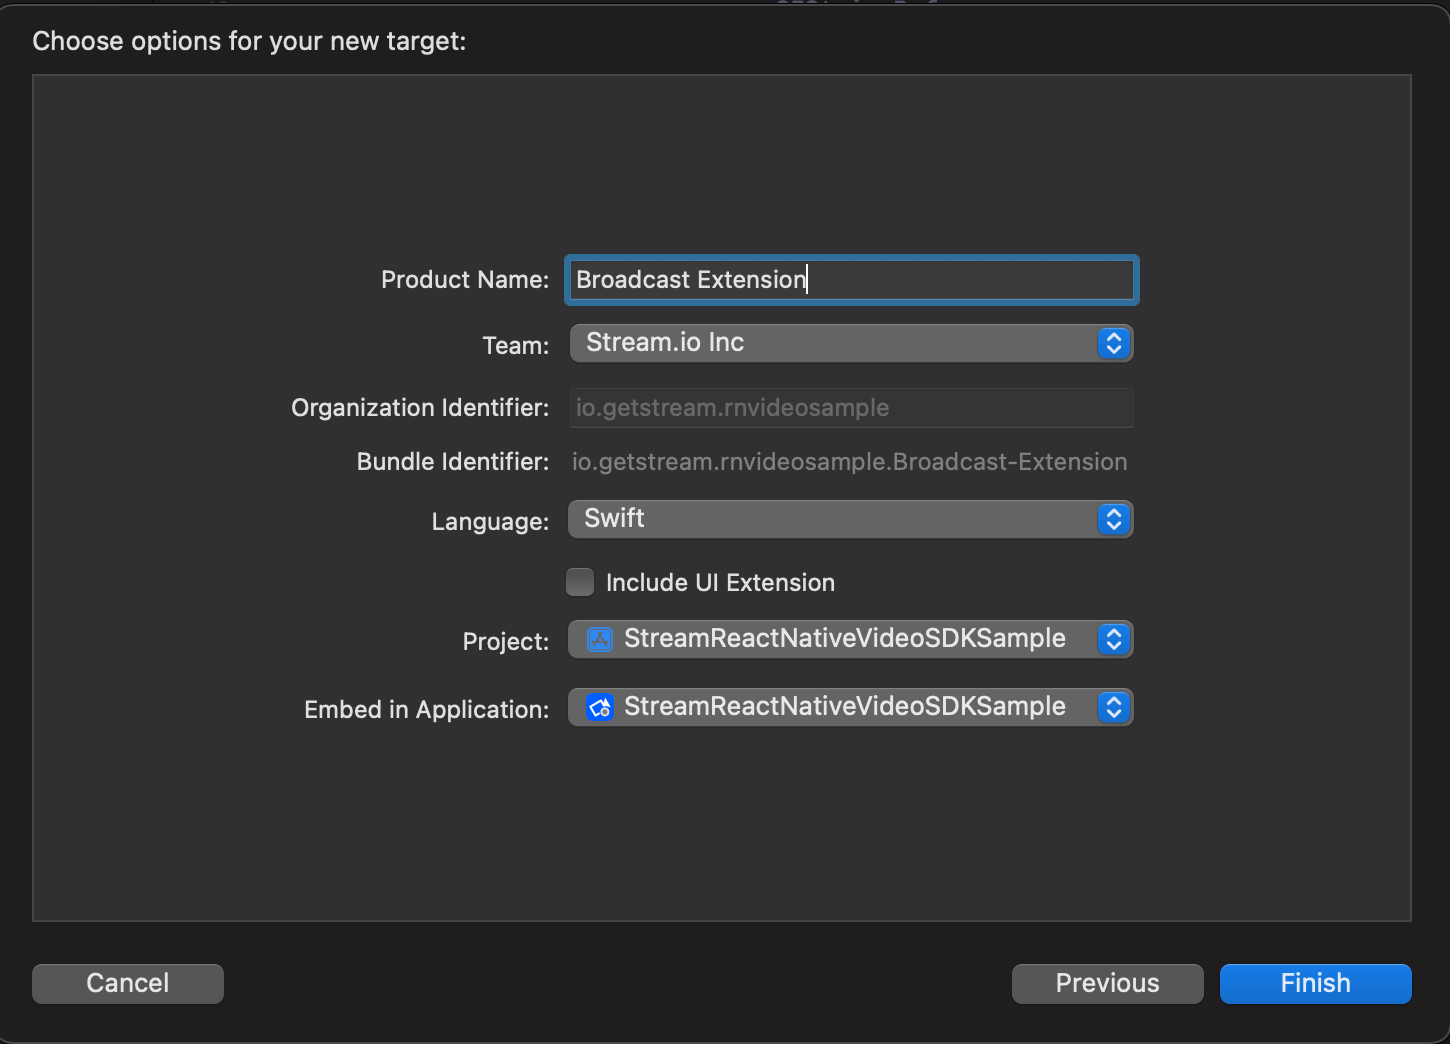
Enter a name in Product Name field, lets say "Broadcast Extension", choose the Team from dropdown, choose the Language to be Swift from dropdown, uncheck include UI extension field and click Finish. You will then be prompted with pop-up titled Activate "Broadcast Extension" scheme?, click Activate button on that.
Step 2: Copy over the files from Sample App
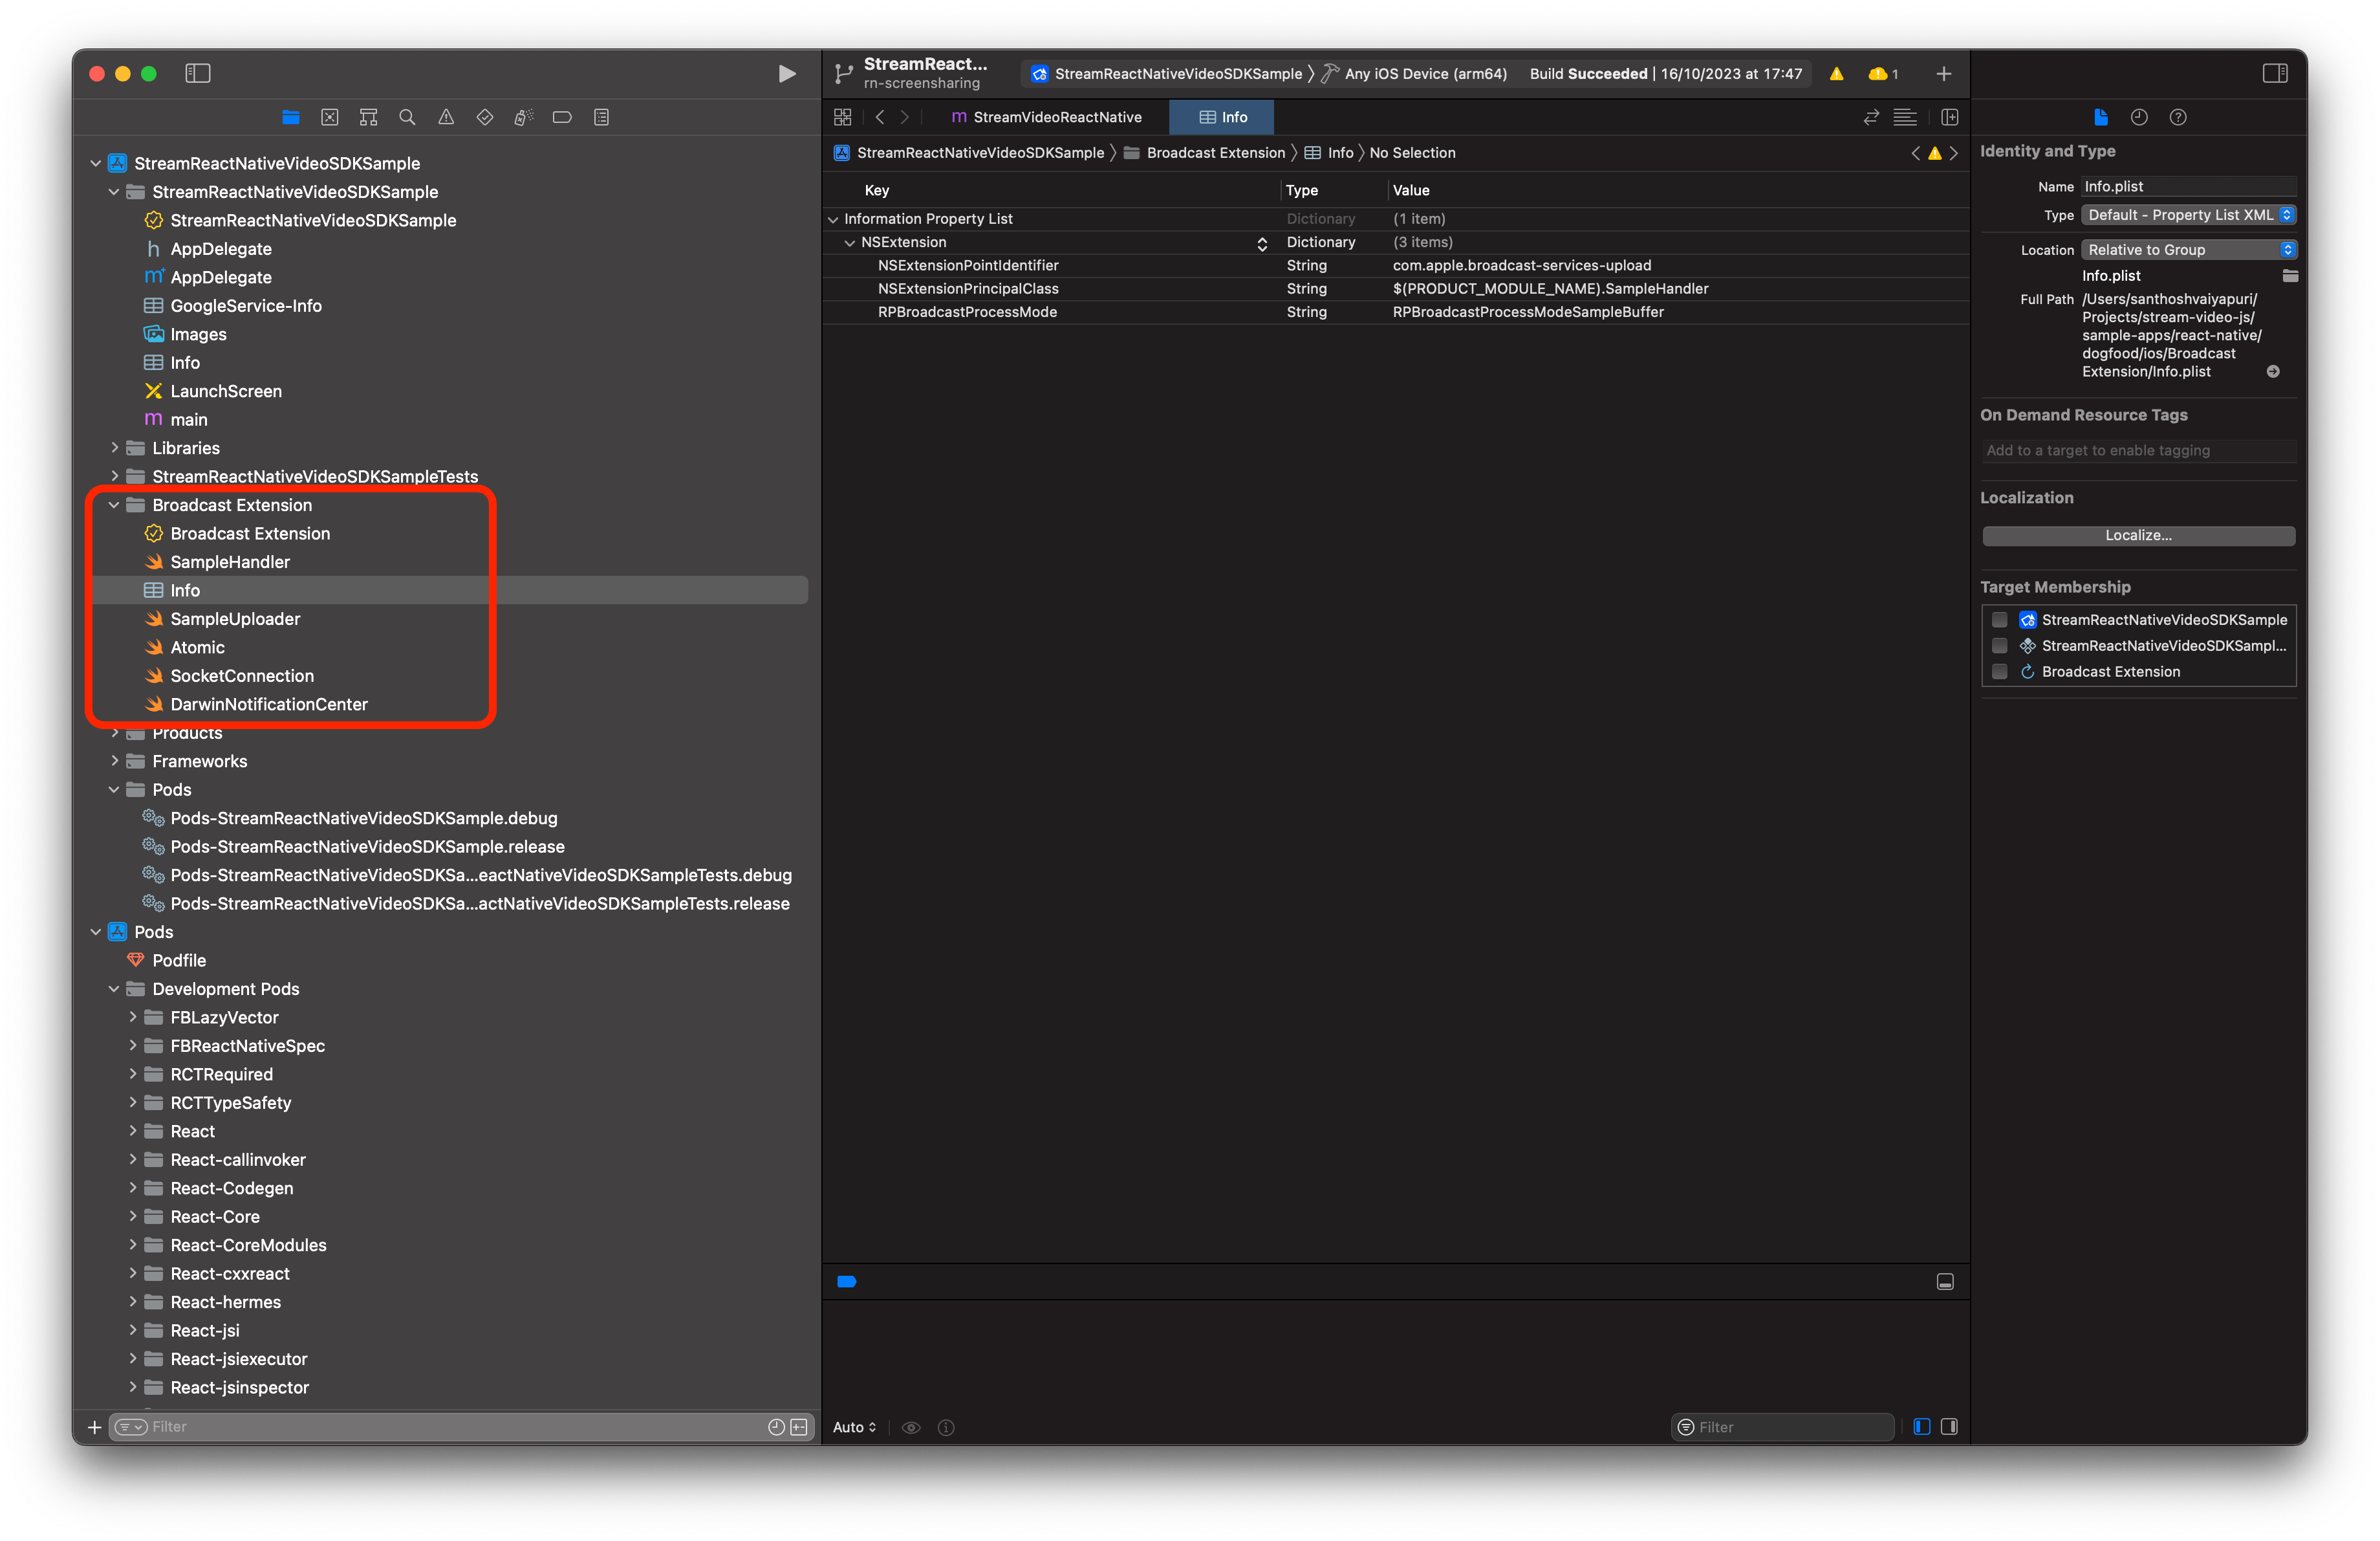
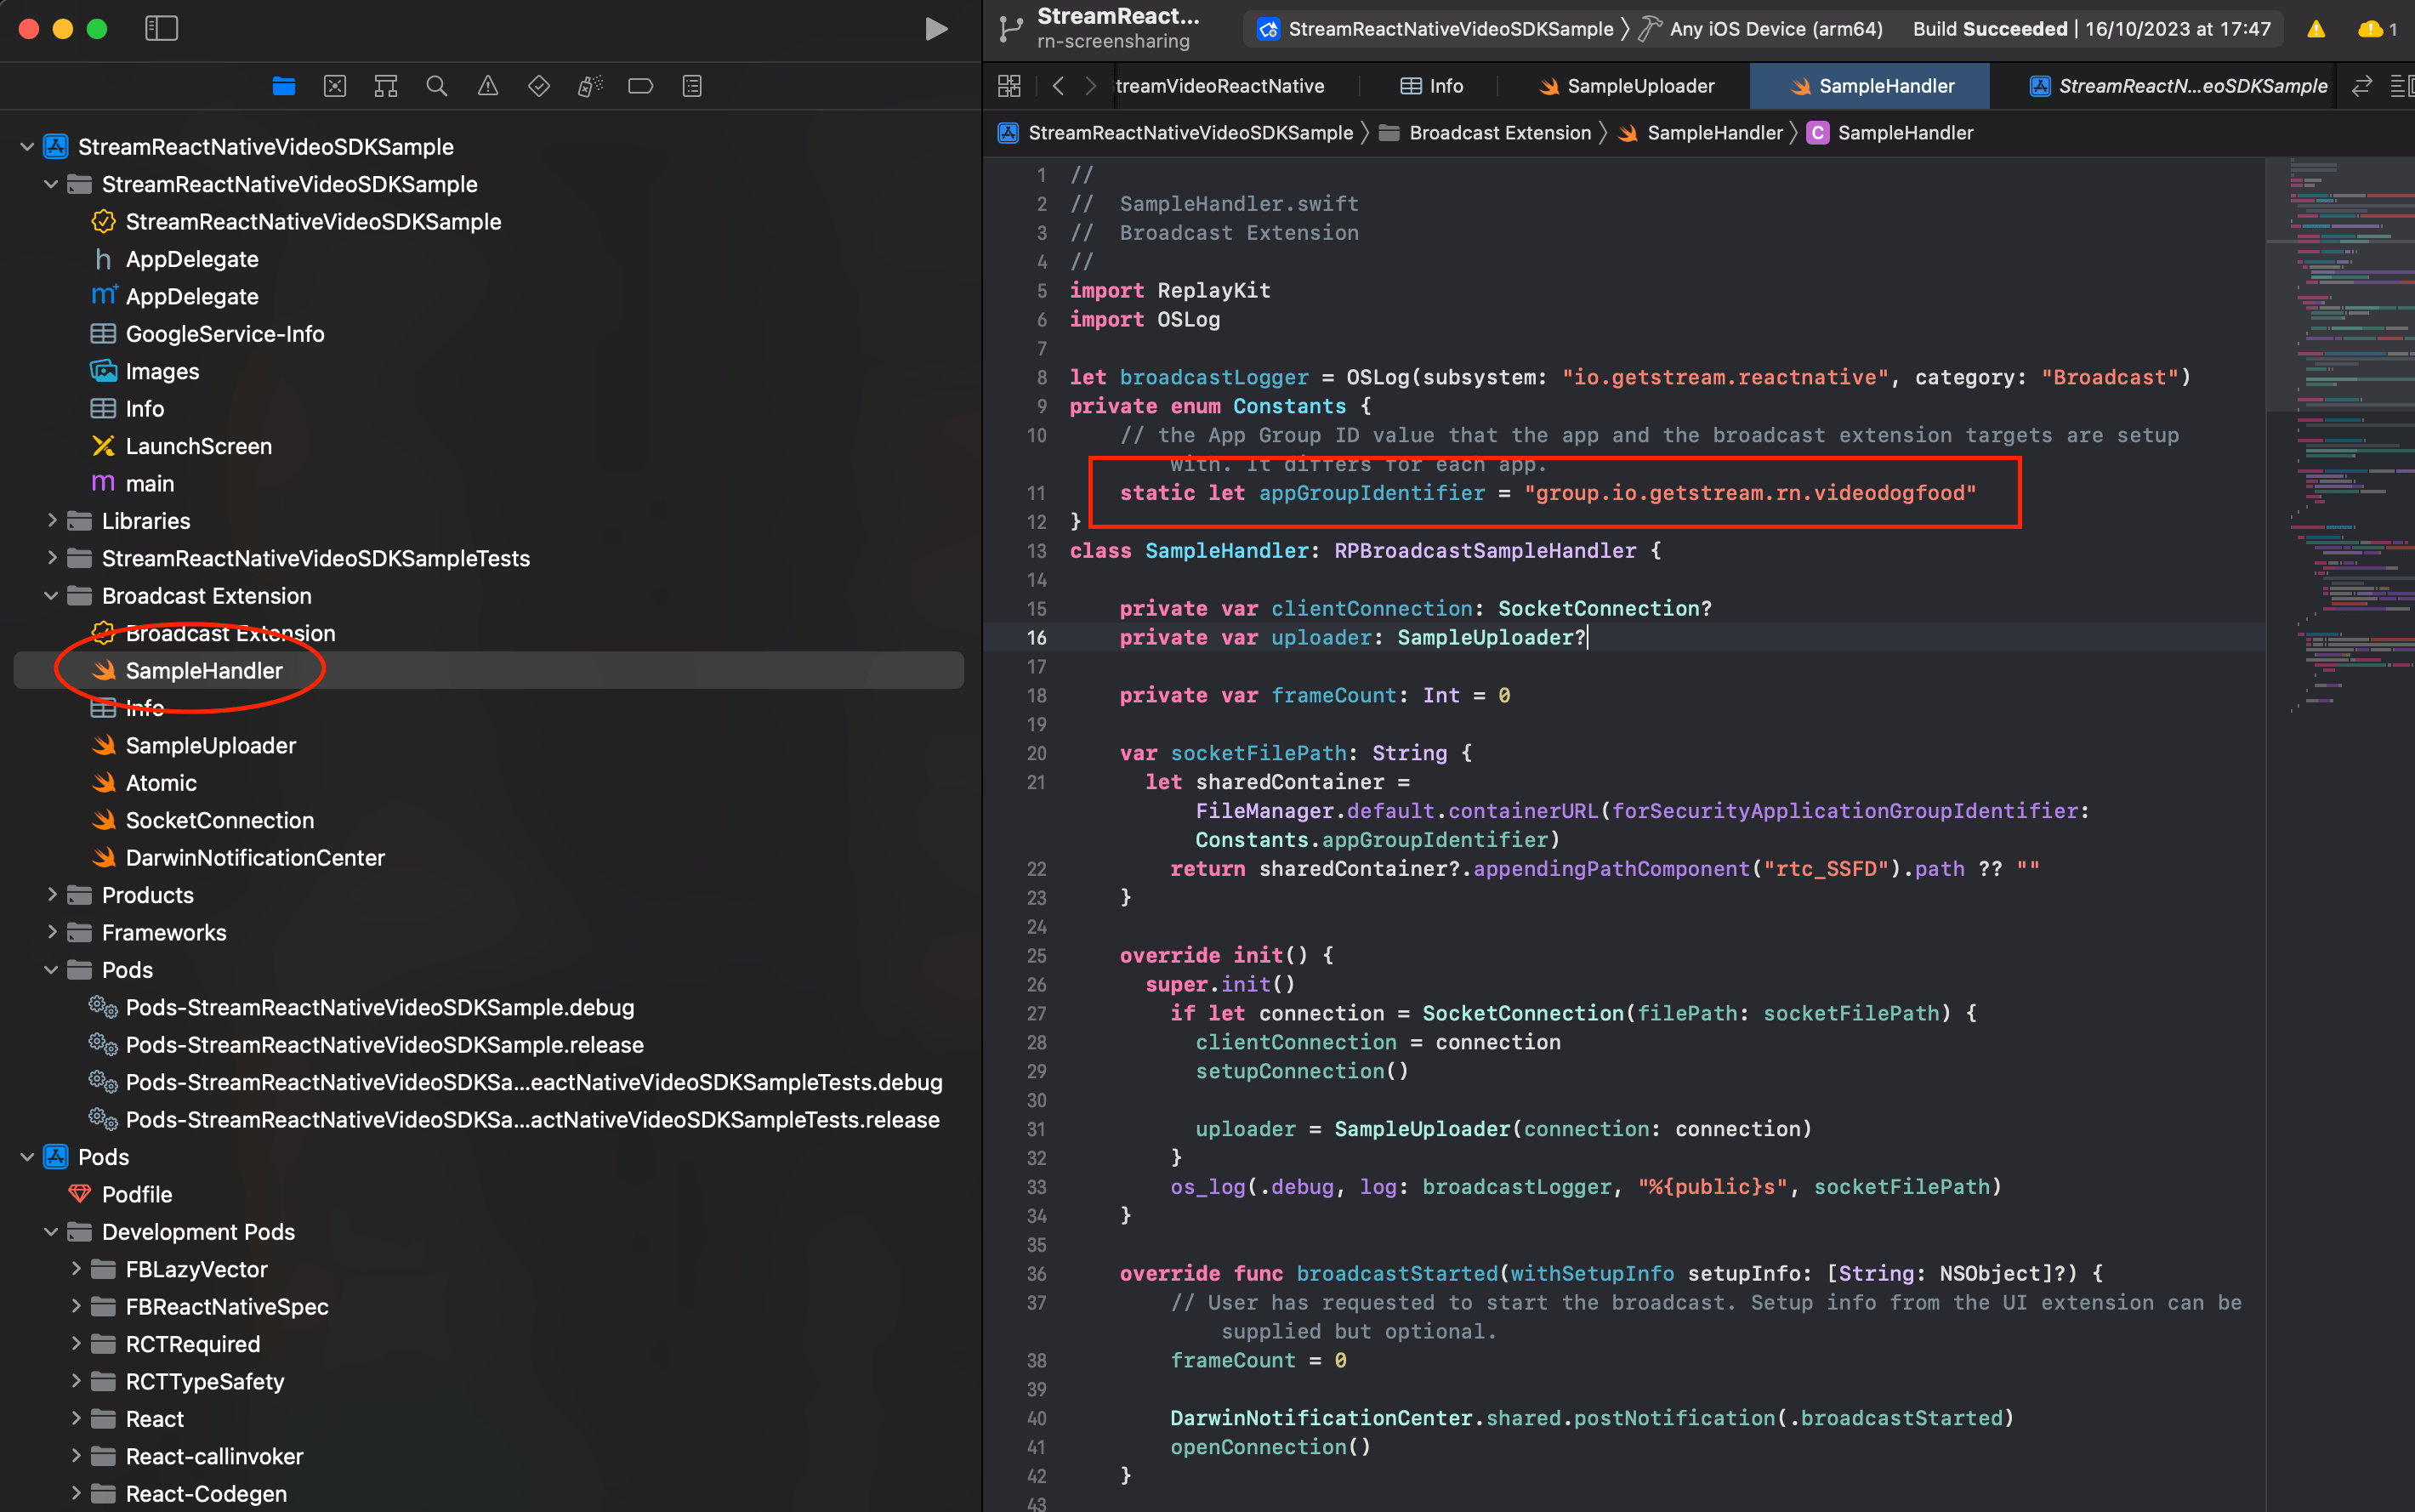
From @stream-io/video-react-native-dogfood app, copy the content of SampleHandler.swift file and paste it to the SampleHandler.swift file in your extension and also copy Atomic.swift, SocketConnection.swift, SampleUploader.swift and DarwinNotificationCenter.swift files to your extension's folder and ensure that they are added to the target.
Step 3: Add App Group Id
Go to App-Name > Signing & Capabilities and add App Groups Capability. Also, go to Broadcast Extension > Signing & Capabilities and add App Groups Capability.
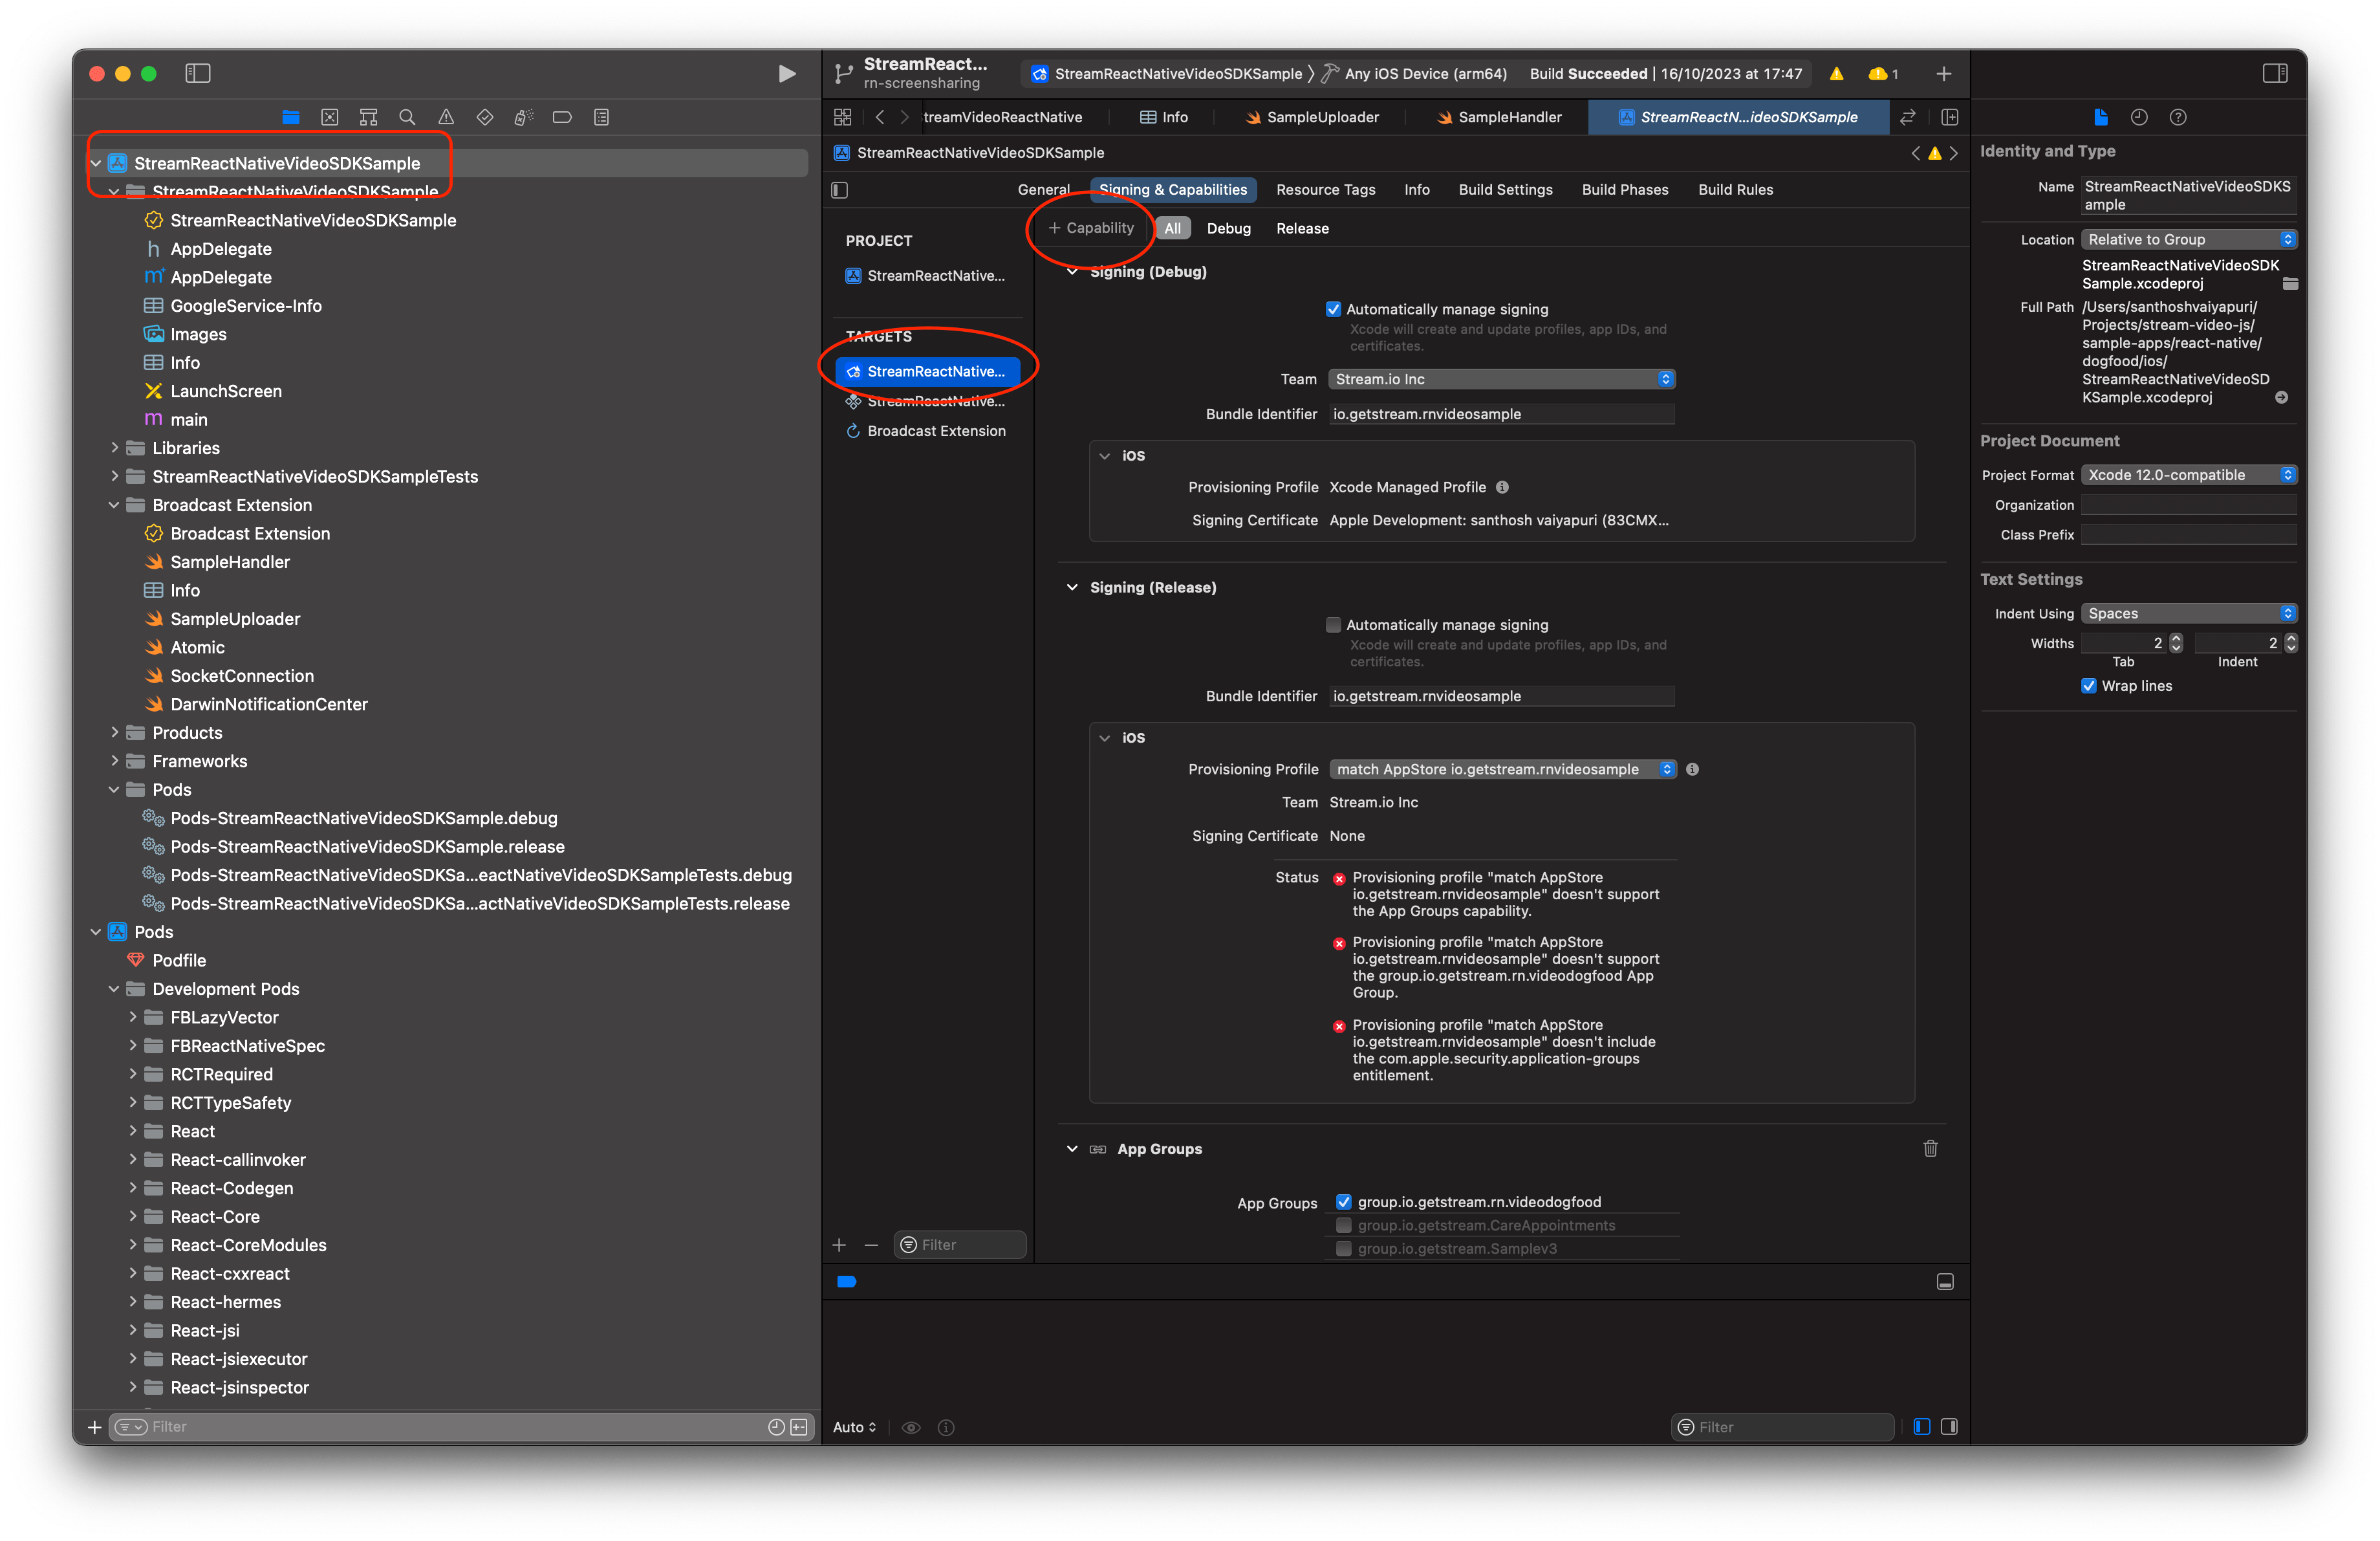
Then, select or add a new app-group-identifier to both the App and the Extension. Ensure that the App Group for both the targets are the same.

Then, head over to SampleHandler.swift file and paste the app-group-identifier in the appGroupIdentifier constant variable.
Step 4: Update Info
Go to the info.plist of the App and add two new keys:
| Key | Value |
|---|---|
| RTCScreenSharingExtension | The-bundle-identifier-of-broadcast-extension |
| RTCAppGroupIdentifier | The-app-group-identifier |
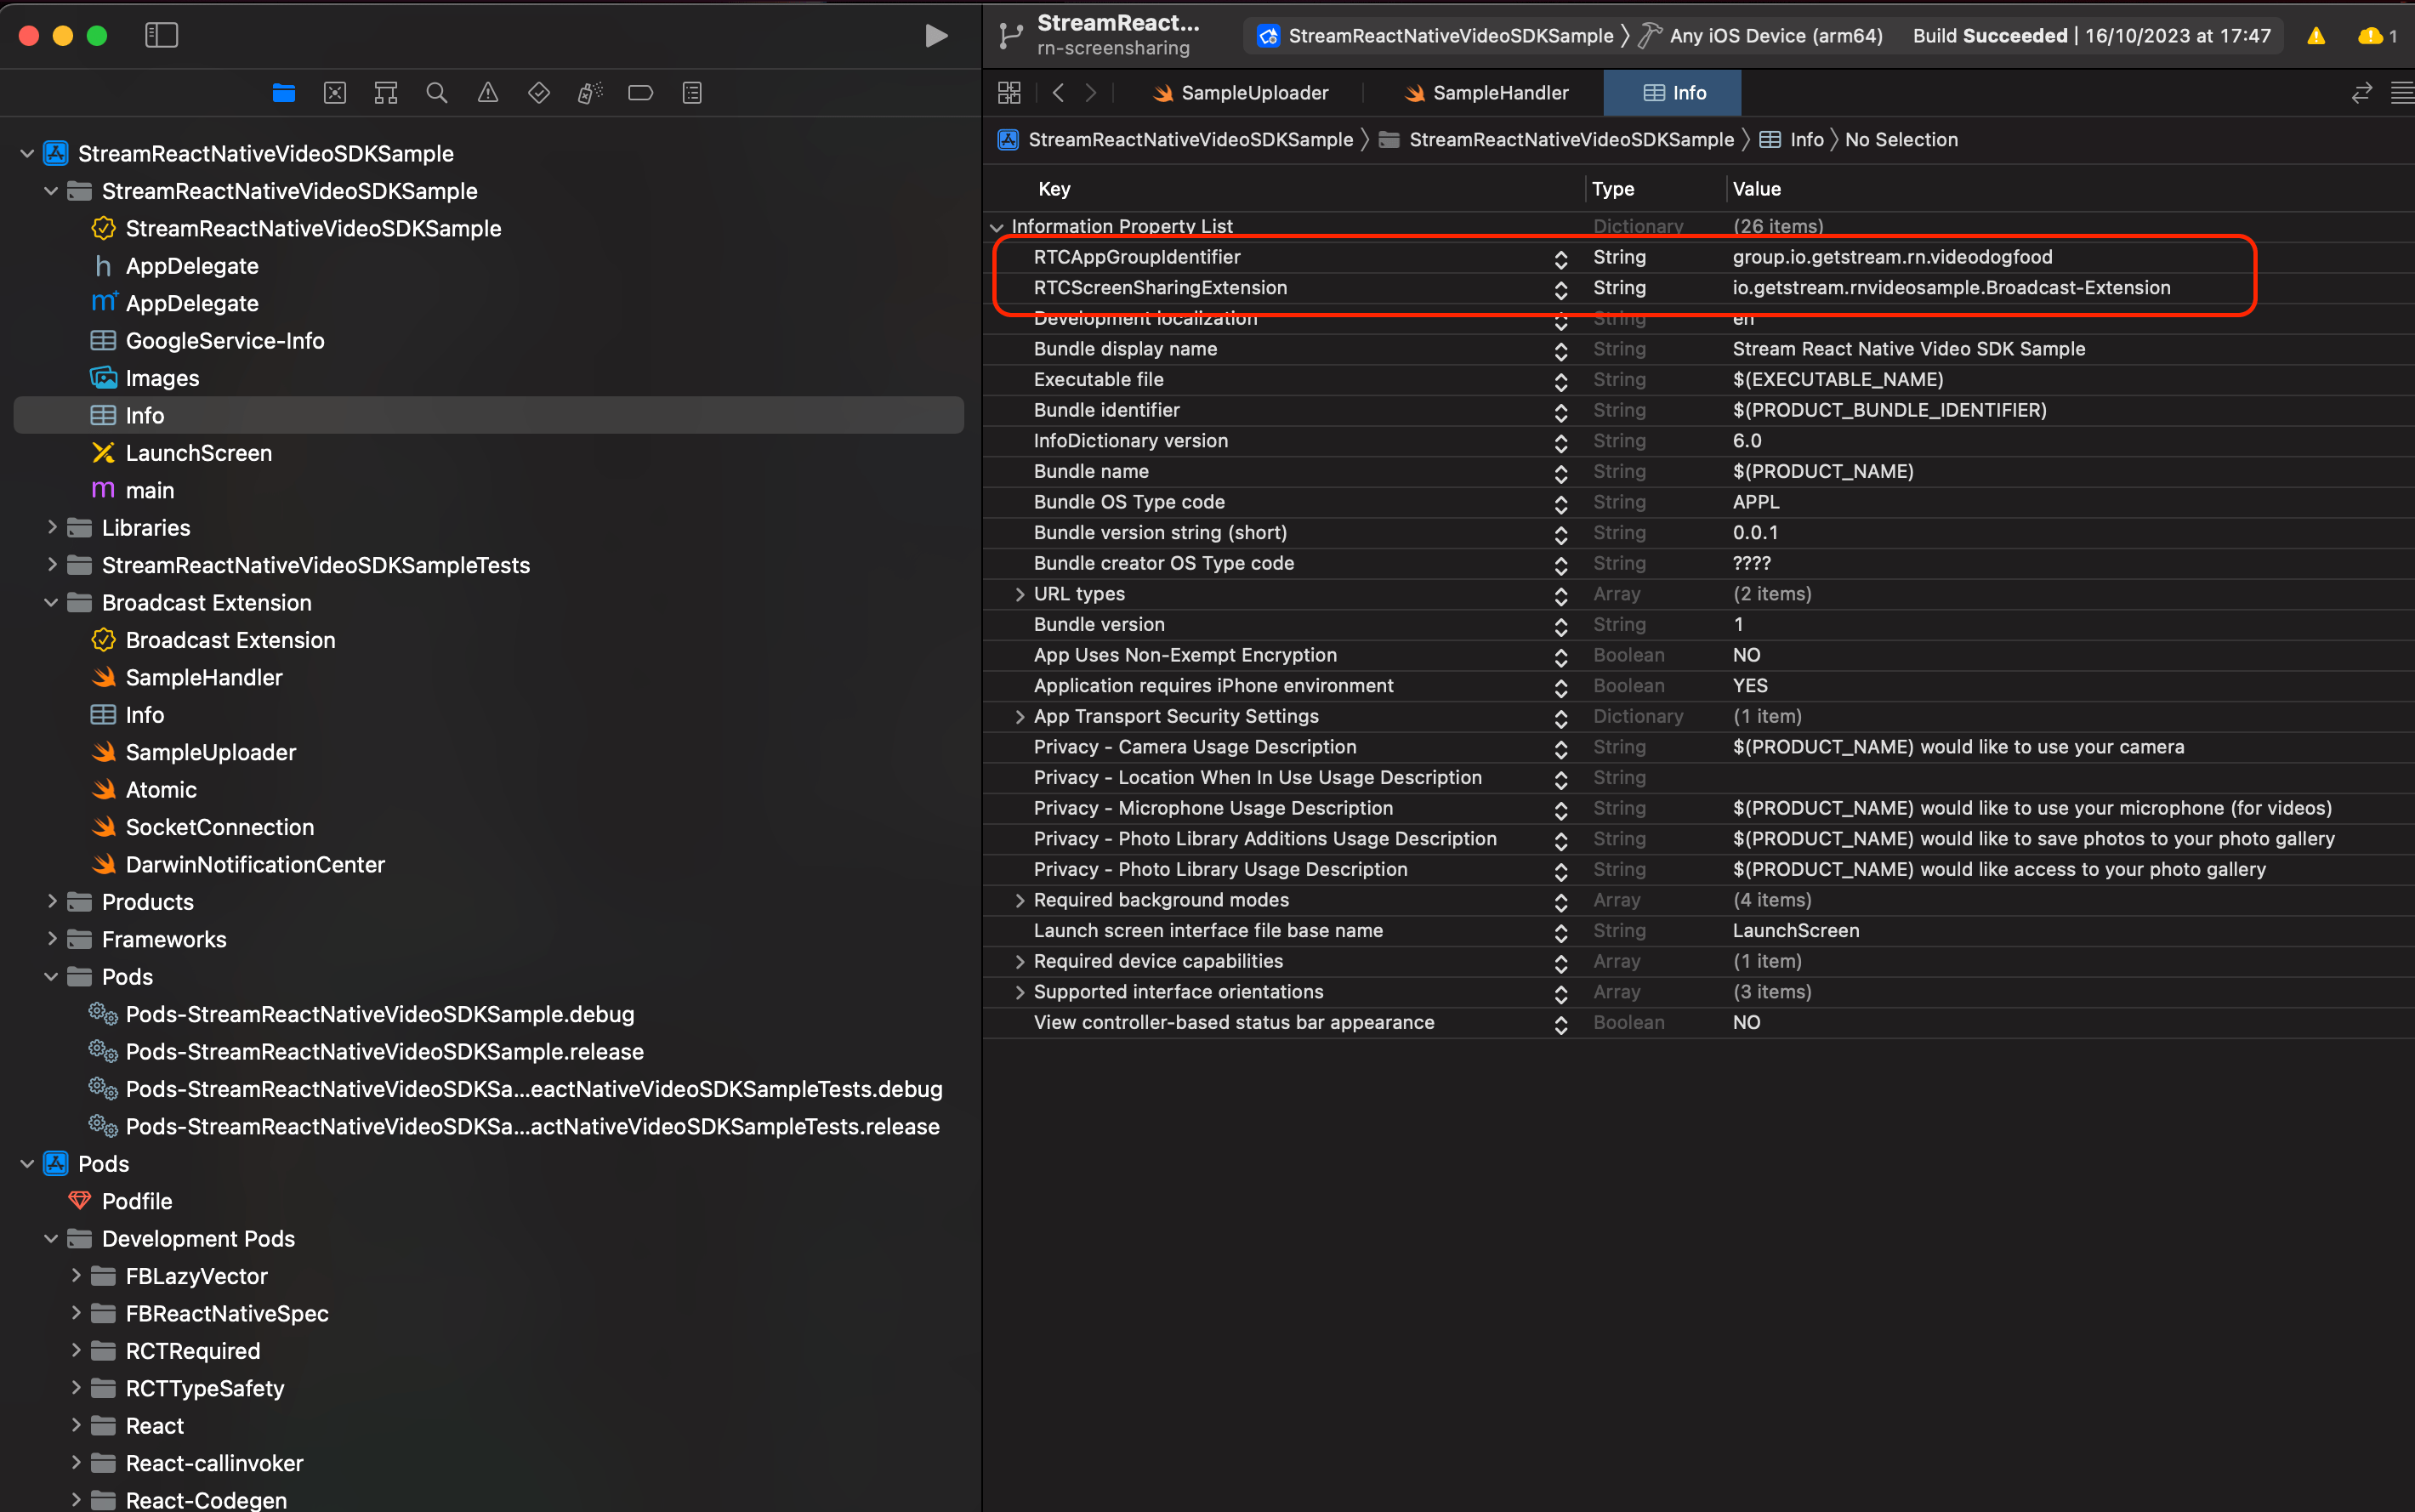
Head over to the Info of the broadcast extension target and ensure that the Bundle version string (short) is the same for both the App and the broadcast extension.

Finally, head over to the Build Settings of the broadcast extension target and ensure that the iOS Deployment Target is 14.0 or above. The deployment target is the minimum iOS version that the extension can run on. The minimum it can run on is 14.0. But if your app is set to a higher iOS deployment target then it is best to keep them both aligned.

iOS In-App Screen Sharing
As an alternative to the broadcast extension, you can use in-app screen sharing which captures the current app's screen using RPScreenRecorder. This mode is simpler to set up because it does not require a Broadcast Upload Extension target.
To use in-app mode, pass type: 'inApp' in the screenShareOptions prop:
<ScreenShareToggleButton screenShareOptions={{ type: "inApp" }} />Or if you use the useScreenShareButton hook directly:
const { onPress, hasPublishedScreenShare } = useScreenShareButton(
  screenCapturePickerViewiOSRef,
  onStarted,
  onStopped,
  onMissingScreenSharePermission,
  { type: "inApp", includeAudio: true },
);
Screen Share with Audio
To include system/app audio in the screen share, set includeAudio: true:
<ScreenShareToggleButton screenShareOptions={{ includeAudio: true }} />This works on both Android and iOS (in-app mode only).
Android
- Requires Android 10+ (API 29).
- Uses
AudioPlaybackCaptureConfigurationto capture media audio (music, games, video players). - System sounds and notifications are not captured.
- No additional permissions or native setup is needed beyond the standard Android screen share setup.
iOS
Audio capturing is supported only in in-app screen share mode (type: 'inApp'). Broadcast mode does not support audio capturing.
While audio mixing is active, the SDK automatically disables noise cancellation (if @stream-io/noise-cancellation-react-native is installed). It is restored when screen sharing stops. Screen audio is mixed after voice processing (echo cancellation, auto gain control, noise suppression), so these filters do not affect the mixed audio.
On this page: