Hello Stream Chat
Adding feature rich chat to a React Native application can be quite challenging when starting from scratch. There are many considerations, states, and edge cases that need accounting for, styling, message grouping, read states, context menus, etc. all add to the complexity of the challenge. Stream Chat for React Native provides an easy to implement flexible solution.
Stream Chat for React Native provides a way to add chat to an existing or new application with very little code. The library was built with flexibility and customization in mind, starting with the out of the box form and function one would expect from a chat app you can modify the UI and UX as desired.
Before starting make sure you have installed stream-chat-react-native as directed in the getting started guide.
Creating a Chat Client
Stream Chat for React Native uses stream-chat, Stream's JavaScript client, to interact with Stream's chat services.
stream-chat is a dependency of Stream Chat for React Native so it is can be used once stream-chat-react-native is installed.
To start you must get an instance of Stream Chat, for this you will need an API key. To create one you can sign up for a free 30-day trial of Stream Chat, no CC is required.
import { StreamChat } from 'stream-chat';

const client = StreamChat.getInstance('api_key');
There are multiple ways to access the client throughout your application. You can store the client in a context.
Create your own class. Or using the Singleton structure you can call getInstance when required.
Connecting a User
Tokens are used to authenticate a user.
Typically, you send this token from your backend to the client when a user registers or logs in.
See the Tokens & Authentication documentation to learn more about creating tokens.
You can use a developer token if desired, but for the purpose of this guide it will be assumed you have created and retrieved a user_token.
To connect a user the connectUser function should be called and provided with the user object and user_token.
Connecting a user could be done in the login flow or elsewhere in the application after the client is instantiated.
await client.connectUser(
  {
    id: 'jlahey',
    name: 'Jim Lahey',
    image: 'https://i.imgur.com/fR9Jz14.png',
  },
  'user_token',
);
It is recommended to not repeatedly call connectUser unnecessarily, multiple calls to connectUser will result in warnings, and attempting to call connectUser before disconnecting a current user will throw an Error.
To disconnect a user you can call disconnectUser on the client.
await client.disconnectUser();
Creating a Channel
Channels are at the core of Stream Chat, they are where messages are contained, sent, and interacted with. Before delving into the UI components a channel is needed that can be displayed. Let’s start by initializing one.
A channel type is required for creating a channel and controls the settings for a given channel. There are 5 default types of channels.
commercegaminglivestreammessagingteam
These five options provide you with sensible defaults for the named use cases. You can also define custom channel types if Stream Chat defaults don’t work for your use case.
A channel must be initialized with either an id or a list of members for the channel.
If you provide a list of members an id will be auto-generated on backend for the channel.
You can't add or remove members from channel created using a list of members.
You can also add additional custom data to a channel. You can add as many custom fields as you desire as long as the total size of the custom fields object is less than 5KB.
For the purpose of this guide you should create a channel as you see fit utilizing either a members list that includes your user's id, or a channel id.
This can be done once, then the code removed as this guide will not be covering on the fly channel creation.
- Channel Id
- Members List
/**
 *  Channel created using a channel id
 */
const channel = client.channel('messaging', 'the_park', {
  name: 'The Park',
});
/**
 *  Channel created using a members list
 */
const channel = client.channel('messaging', {
  members: ['jlahey', 'rlafleur'],
  name: 'The Park',
});
To create this channel on the server you must call create on the new channel instance.
await channel.create();
For on the fly channel creation you would instead call the watch function on the channel as this both creates the channel and subscribes the client to channel updates.
Configuring UI Components
Now that you have a client instance, a user set, and a channel created on the server you can setup your project to use the UI components.
All major stream-chat-react-native components rely on contexts to function properly.
The UI and functionality are heavily controlled by a number of components that contain Providers to give access to these contexts.
Overlay Provider
The OverlayProvider is the highest level of the Stream Chat components.
The OverlayProvider allows users to interact with messages on long press above the underlying views, use the full screen image viewer, and use the AttachmentPicker as a keyboard-esk view.
The OverlayProvider can be used with no props provided but there are a plethora of props for customizing the components in the overlay.
For additional information on the OverlayProvider check the OverlayProvider docs for detailed usage instructions, including how to properly use the OverlyProvider with React Navigation.
import { OverlayProvider } from 'stream-chat-react-native';

export const Screen = () => <OverlayProvider>{/** App components */}</OverlayProvider>;
Chat
Chat is the next level down of context component from OverlyProvider that is required for stream-chat-react-native to function as designed.
You can choose to wrap your entire application in Chat similar to what is required for the OverlayProvider or you can implement Chat at the screen level.
Chat has one required prop, client, which is the instance of StreamChat you created.
For additional information on the Chat component check the Chat component docs for detailed usage instructions, including how to provide theming and translations to the app.
- App
- Screen
import { StreamChat } from 'stream-chat';
import { Chat, OverlayProvider } from 'stream-chat-react-native';

const client = StreamChat.getInstance('api_key');

export const App = () => (
  <OverlayProvider>
    <Chat client={client}>{/** App components */}</Chat>
  </OverlayProvider>
);
import { StreamChat } from 'stream-chat';
import { Chat } from 'stream-chat-react-native';

const client = StreamChat.getInstance('api_key');

export const Screen = () => <Chat client={client}>{/** App components */}</Chat>;
import { OverlayProvider } from 'stream-chat-react-native';
import { Screen } from './Screen';

export const App = () => (
  <OverlayProvider>
    <Screen />
  </OverlayProvider>
);
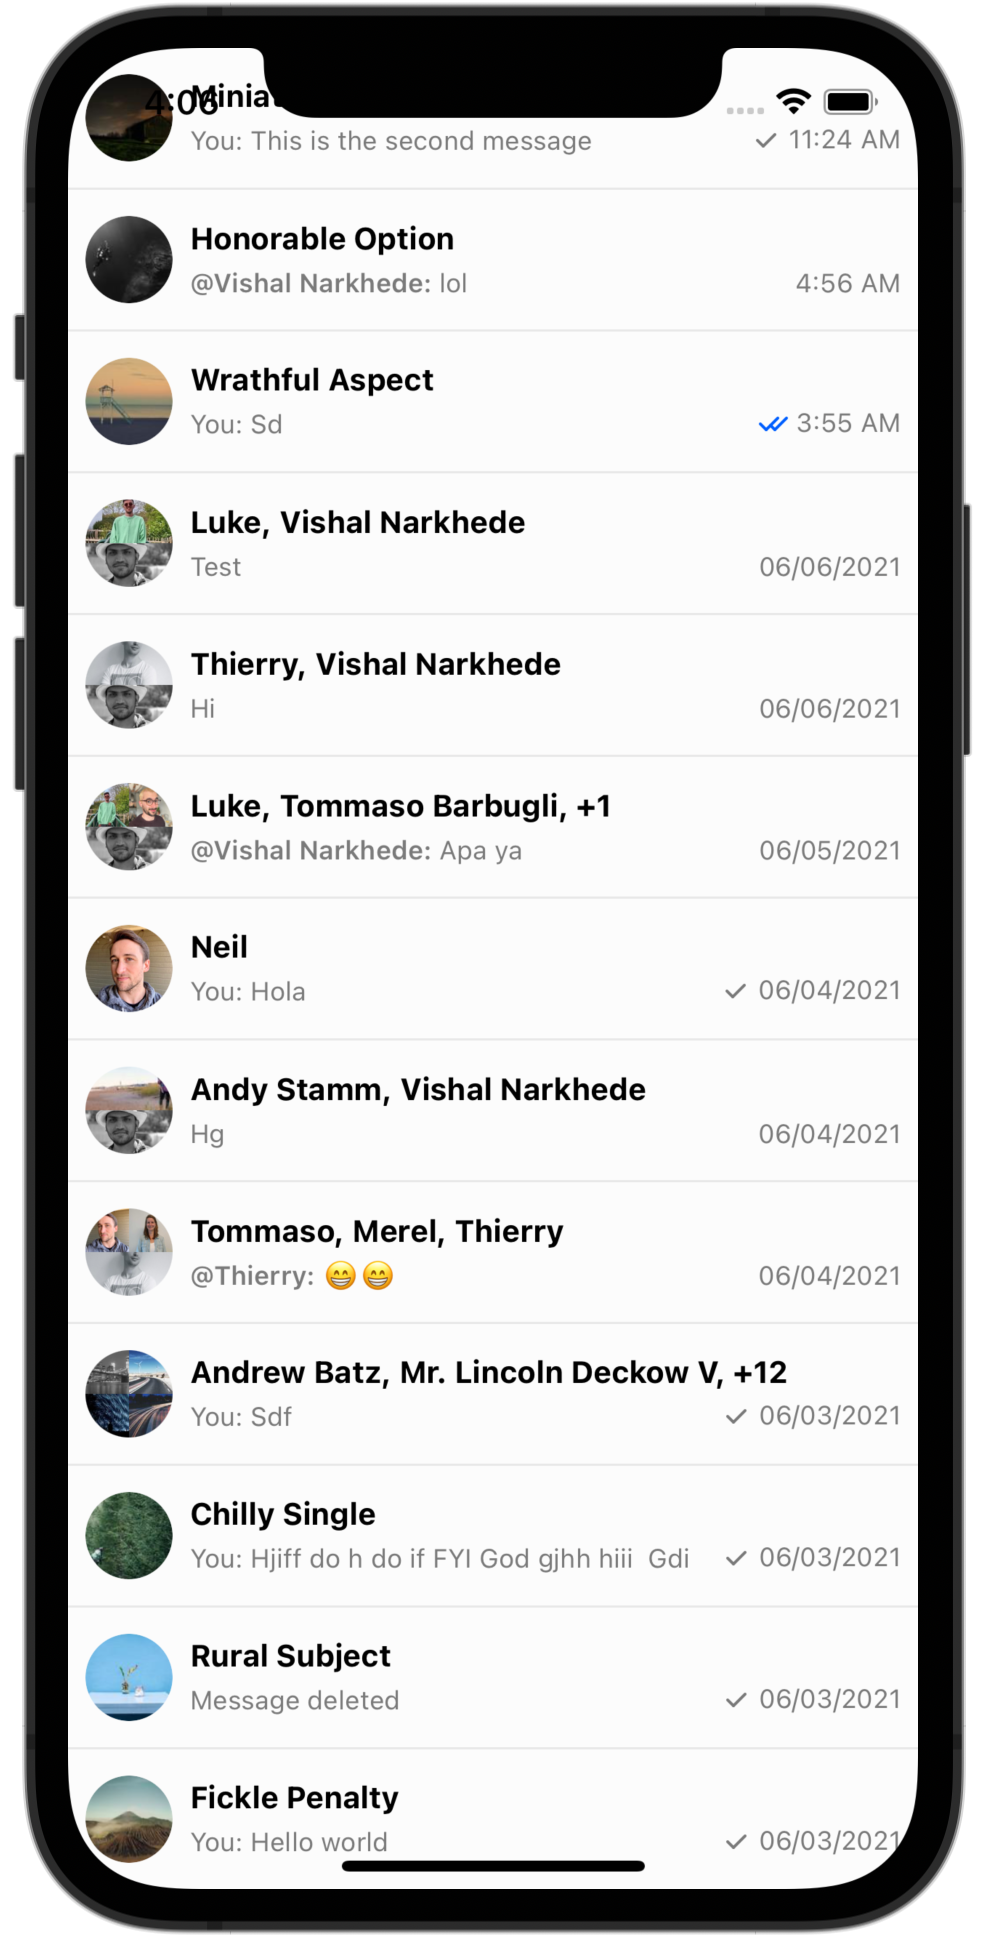
Channel List
Stream Chat for React Native provides a ChannelList component out of the box for displaying a list of channels.
ChannelList can be used with no props and will return all of the channels the set user has access to.
To functionally use the ChannelList an onSelect prop should be provided.
The onSelect function is called with the selected Channel instance and can then be used to react to the user interaction, for example store the Channel in state and navigate to the appropriate channel screen.
For additional information on the ChannelList component check the ChannelList component docs, these include instructions on how to filter and sort the ChannelList.
The ChannelList should be implemented inside of the UI components previously configured to provide the appropriate contexts.
For the purpose of this guide the example implementation will continue to be given in a single component with the assumption that the client has already been instantiated, a user connected, and a channel the user has access to exists.
import { StreamChat } from 'stream-chat';
import { ChannelList, Chat, OverlayProvider } from 'stream-chat-react-native';

const client = StreamChat.getInstance('api_key');

export const App = () => (
  <OverlayProvider>
    <Chat client={client}>
      <ChannelList />
    </Chat>
  </OverlayProvider>
);
These three components in conjunction will provide a FlatList of all channels available to the connected user.
Channel
When creating a chat screen it is required that the Channel component wrap the stream-chat-react-native components being used.
Channel provides multiple contexts to the enclosed components and allows for modification and replacement of many of the components.
Channel is the major entry point for modifying the look and feel of your chat application.
For additional information on the Channel component, how to modify various features, adjusting for keyboard offsets, and more, check the Channel component docs.
The Channel component does not require any props, but will not function as desired without the channel prop being provided.
The channel prop expects a StreamChat Channel instance.
This can be created as you did previously, pulled directly from the client.activeChannels, or conveniently stored when a channel is selected from the ChannelList.
import React, { useState } from 'react';
import { Channel as ChannelType, StreamChat } from 'stream-chat';
import { ChannelList, Chat, OverlayProvider } from 'stream-chat-react-native';

const client = StreamChat.getInstance('api_key');

export const App = () => {
  const [channel, setChannel] = useState<ChannelType>();

  return (
    <OverlayProvider>
      <Chat client={client}>
        {channel ? <Channel channel={channel}>{/** App components */}</Channel> : <ChannelList onSelect={setChannel} />}
      </Chat>
    </OverlayProvider>
  );
};
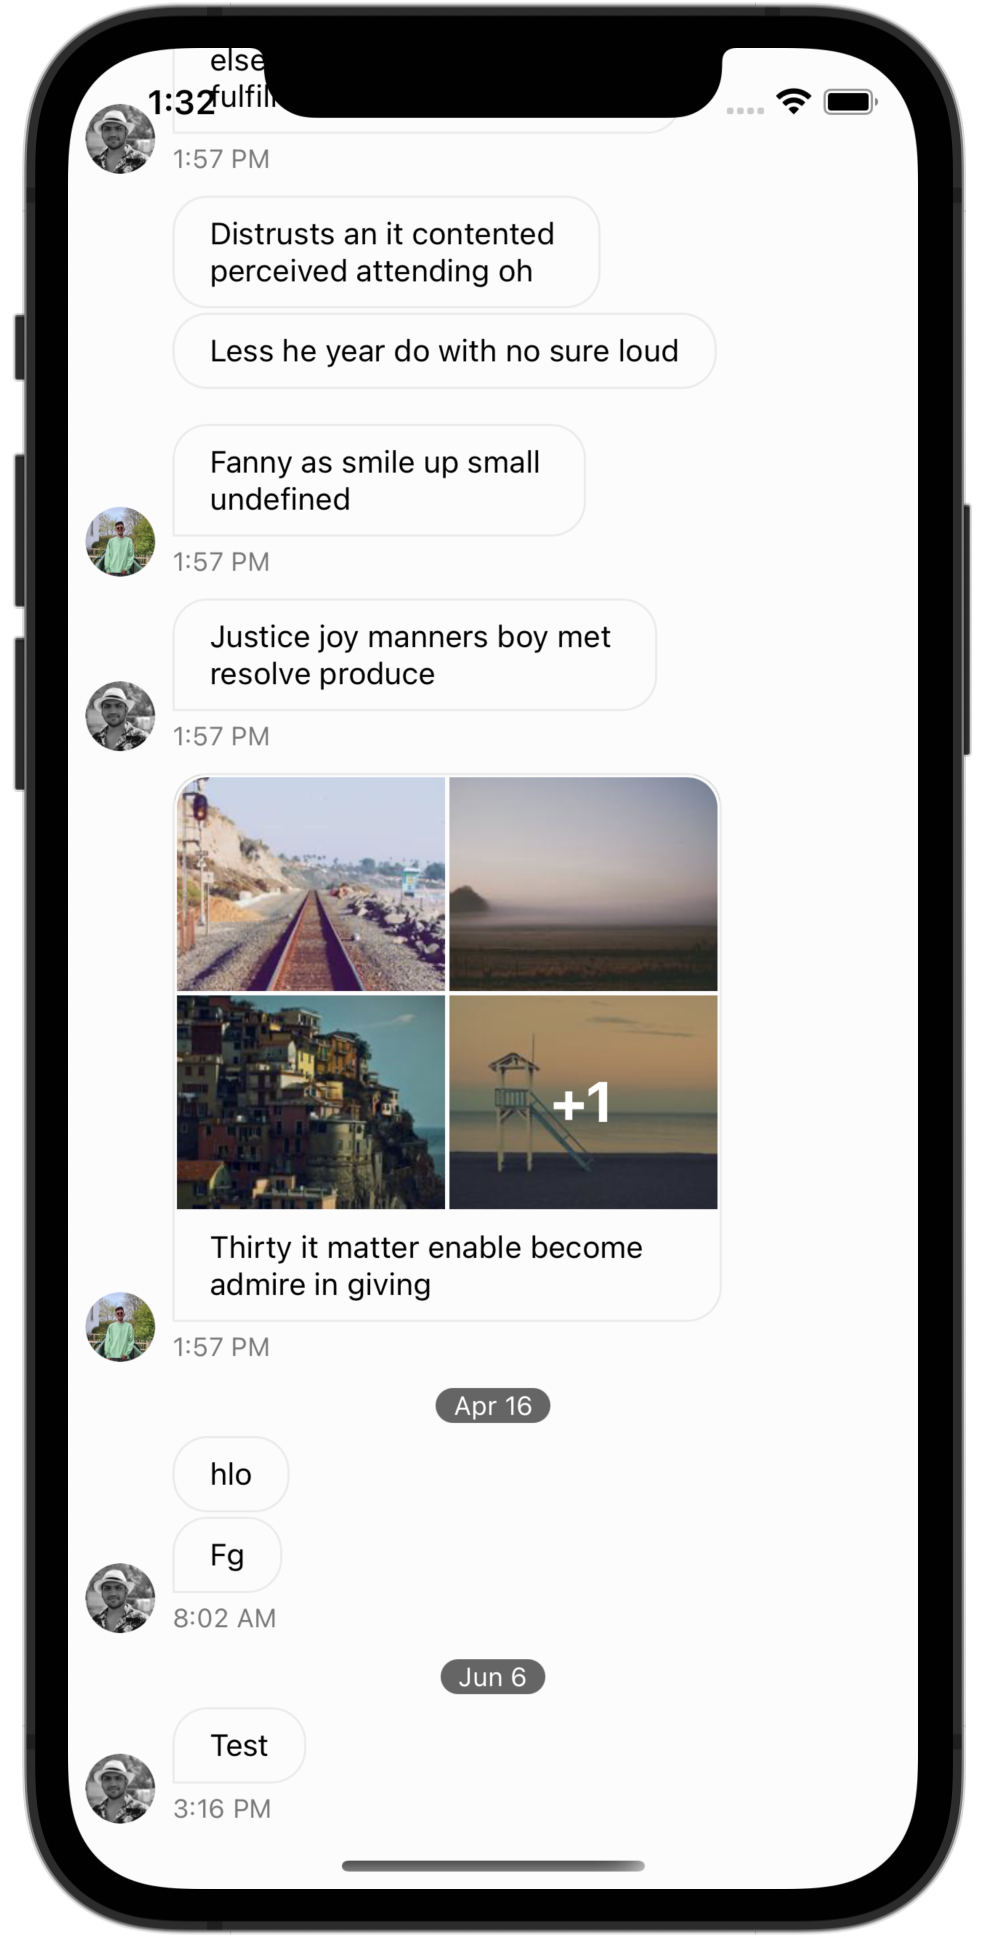
Message List
The Channel component on it's own will not provide any UI.
For this additional components are required, most notably the MessageList component.
MessageList has no required props, and when used in concert with the Channel component should function properly out of the box.
For additional information on the MessageList component, how to pass props to the underlying FlatList, or use the MessageList for threads, check the MessageList component docs.
import React, { useState } from 'react';
import { Channel as ChannelType, StreamChat } from 'stream-chat';
import { ChannelList, Chat, OverlayProvider } from 'stream-chat-react-native';

const client = StreamChat.getInstance('api_key');

export const App = () => {
  const [channel, setChannel] = useState<ChannelType>();

  return (
    <OverlayProvider>
      <Chat client={client}>
        {channel ? (
          <Channel channel={channel}>
            <MessageList />
          </Channel>
        ) : (
          <ChannelList onSelect={setChannel} />
        )}
      </Chat>
    </OverlayProvider>
  );
};
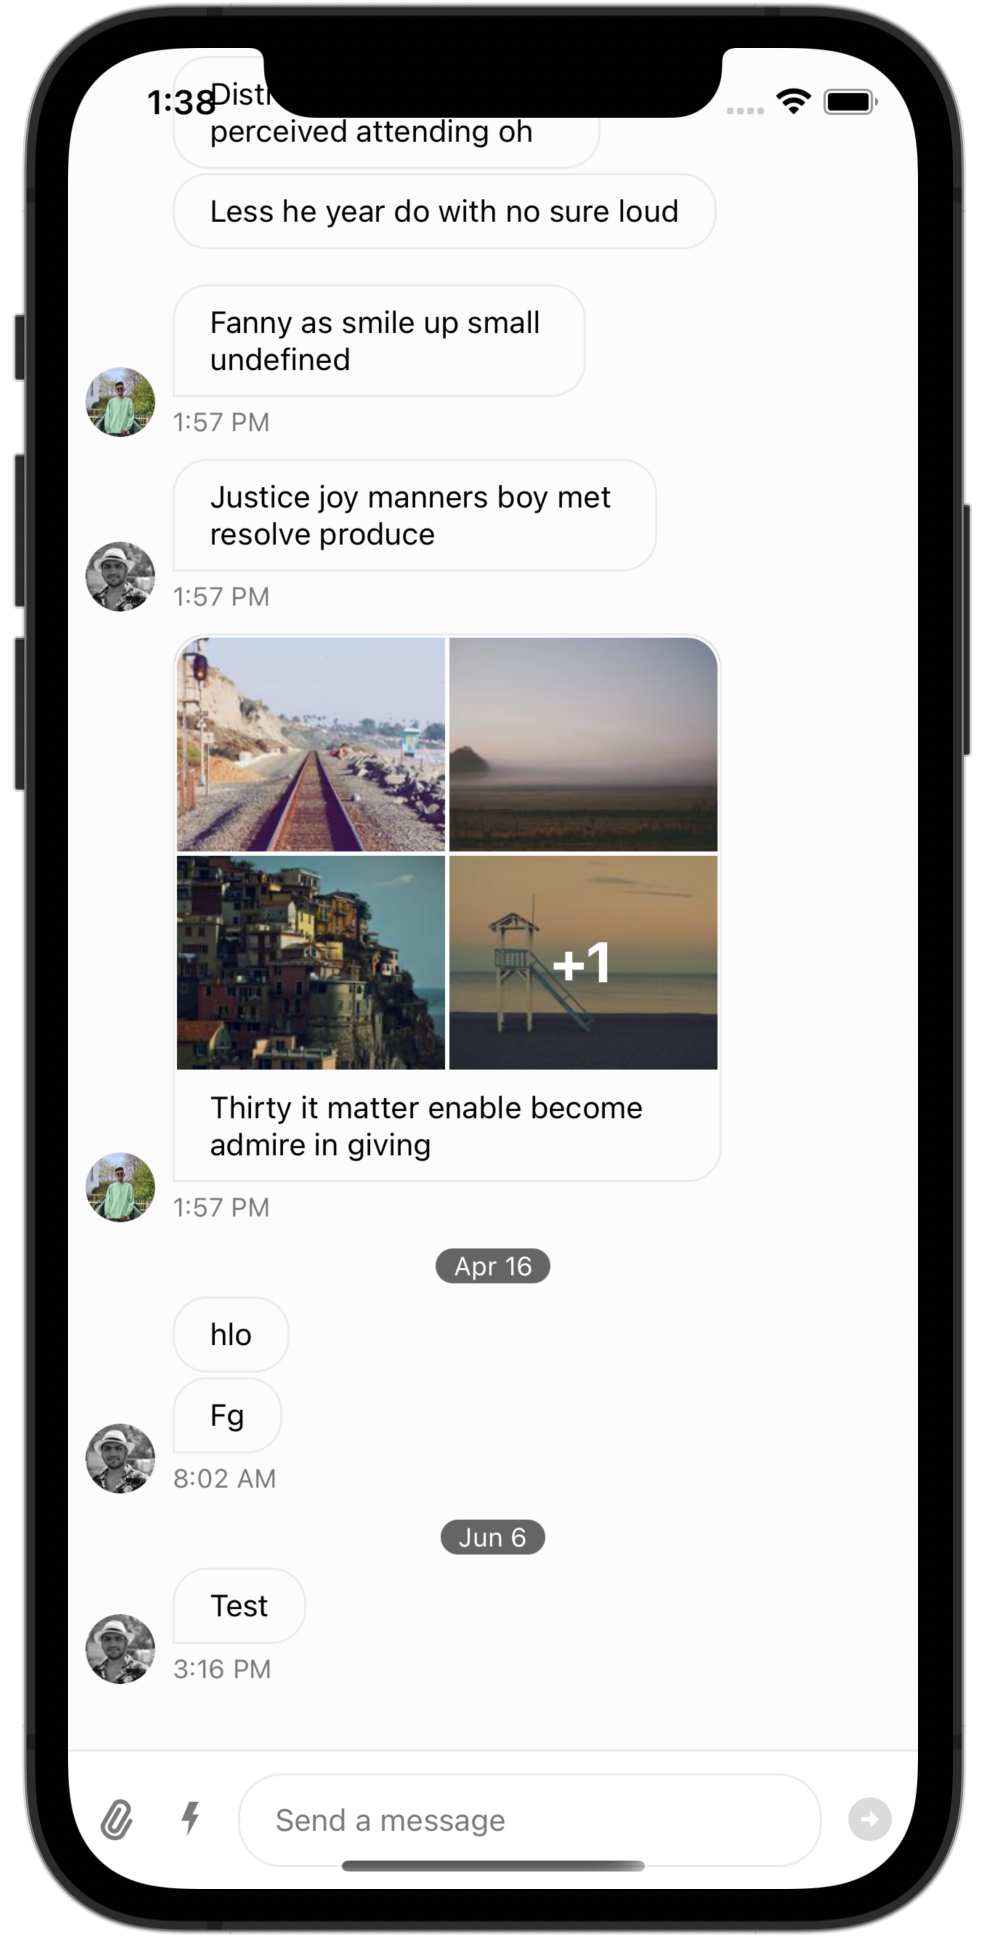
Message Input
A chat app needs to be able to send messages, and for this Stream Chat for React Native provides a MessageInput component.
Similar to the MessageList component MessageInput has no required props.
Adding it to the app is as simple as rendering it below the MessageList.
Be sure to set the keyboardVerticalOffset on Channel to the appropriate height based off any header spacing.
As there is currently no header the keyboardVerticalOffset can be set to 0.
For additional information on the MessageInput component, how to modify it using context, or designate it for thread use via the threadList prop, check the MessageInput component docs.
import React, { useState } from 'react';
import { Channel as ChannelType, StreamChat } from 'stream-chat';
import { ChannelList, Chat, OverlayProvider } from 'stream-chat-react-native';

const client = StreamChat.getInstance('api_key');

export const App = () => {
  const [channel, setChannel] = useState<ChannelType>();

  return (
    <OverlayProvider>
      <Chat client={client}>
        {channel ? (
          <Channel channel={channel} keyboardVerticalOffset={0}>
            <MessageList />
            <MessageInput />
          </Channel>
        ) : (
          <ChannelList onSelect={setChannel} />
        )}
      </Chat>
    </OverlayProvider>
  );
};
This small code snippet is enough to render a list of channels and swap them out for a functional and feature rich message list and input when one is selected.
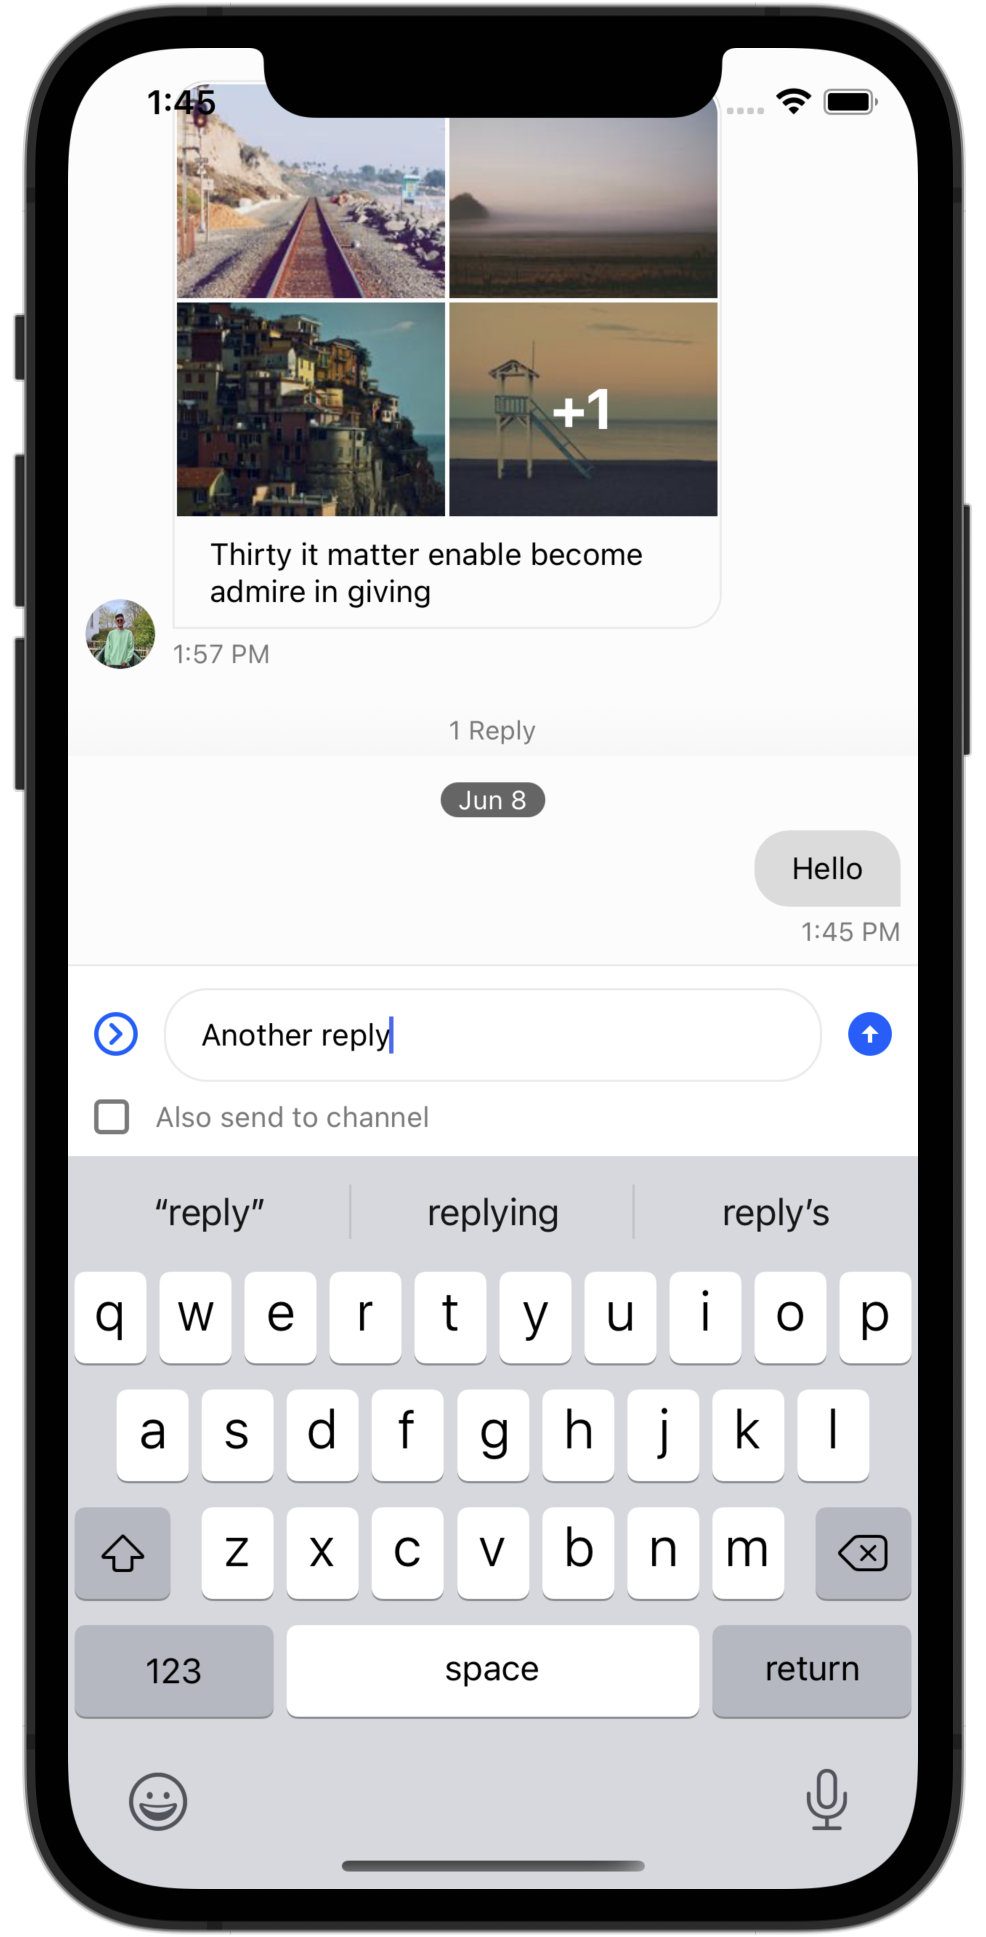
Thread
There is one more high level component that Stream Chat for React Native provides out of the box, and that is Thread.
Stream Chat supports threaded messages, and the MessageList supplies a UI for threads out of the box.
But as a thread on a mobile messaging app generally exists in a separate screen it is up to you to handle thread selection and subsequent navigation in your implementation.
Thread has no required props as it relies heavily on context to function.
The simple code snippet can be extended to include Thread and keep track of a thread state similarly to channel by utilizing the onThreadSelect prop on the MessageList.
The code snippet now has a fully functional ChannelList, MessageList, and threadList, although currently it provides no way to back out of the sudo-navigation.
For additional information on the Thread component, such as how to use onThreadDismount to manage your thread state, check the Thread component docs.
import React, { useState } from 'react';
import { Channel as ChannelType, StreamChat } from 'stream-chat';
import { ChannelList, Chat, MessageType, OverlayProvider } from 'stream-chat-react-native';

const client = StreamChat.getInstance('api_key');

export const App = () => {
  const [channel, setChannel] = useState<ChannelType>();
  const [thread, setThread] = useState<MessageType | null>();

  return (
    <OverlayProvider>
      <Chat client={client}>
        {channel ? (
          <Channel channel={channel} keyboardVerticalOffset={0} thread={thread}>
            {thread ? (
              <Thread />
            ) : (
              <>
                <MessageList onThreadSelect={setThread} />
                <MessageInput />
              </>
            )}
          </Channel>
        ) : (
          <ChannelList onSelect={setChannel} />
        )}
      </Chat>
    </OverlayProvider>
  );
};
Summary
You need a
clientthat is an instance ofStreamChatto provide to the UI components so they function correctly.You need to connect a user via the
connectUsercall to interact with the backend properly. To do this you need to create tokens as per the Tokens & Authentication docs.You need to surround your app with the
OverlayProviderfor the UI to function properly, and your app or chat screen with theChatcomponent to provide data to the UI components.ChannelListprovides access to the list of available channels in the UI, and using props, can be queried, filtered, and sorted as desired.ChannelListalso provides convenient functionality for implementing navigation to a selectedChannel.The
Channelcomponent is the functional wrapper of theMessageList,MessageInput, andThreadcomponents. It is the access point for the majority of the customization of the SDK, and controls much of the functionality.
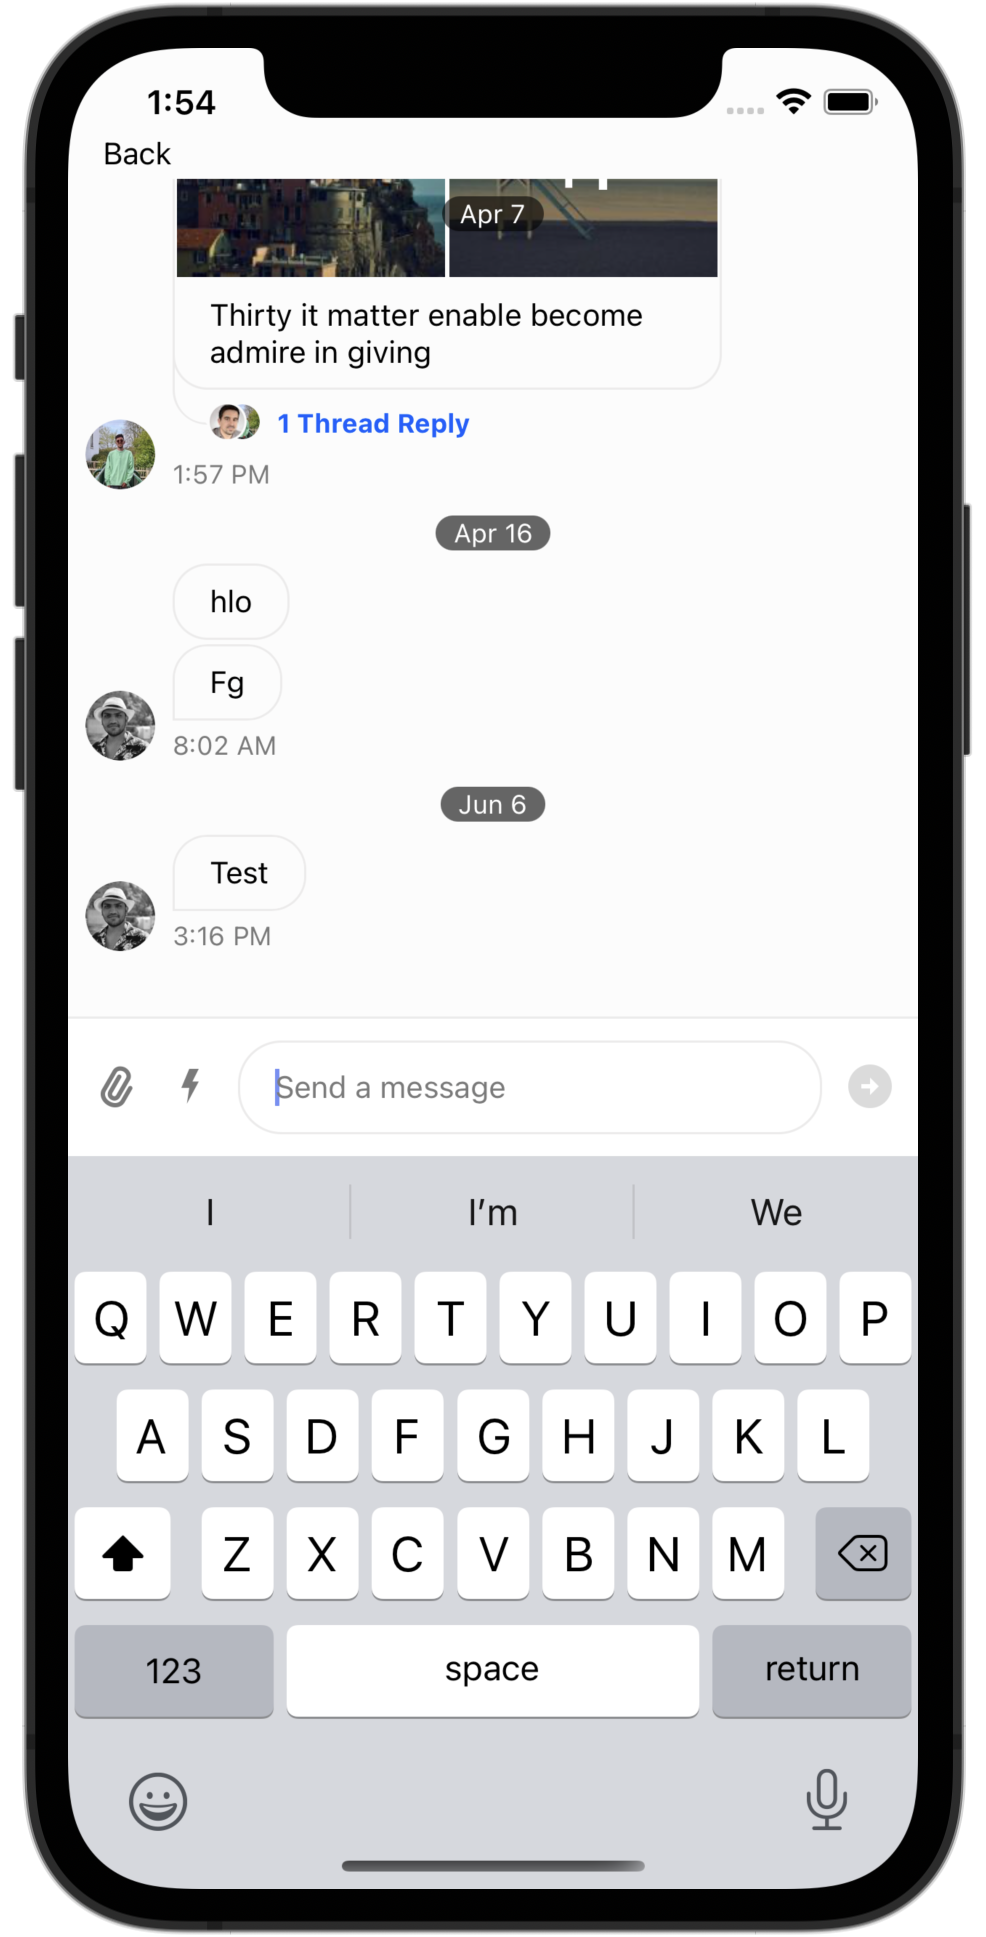
Hello Stream Chat
Putting everything covered together into a single functional component most of the Stream Chat for React Native SDK can be tested with a few additional setup.
The final sample code:
- Adds a
useEffectto connect the user on mount and render the UI when ready. - Adds a
backbutton for sudo-navigation by resetting the states ofthreadandchannelwhen appropriate. - Adds a
Viewaround theChatcomponent with styleflex: 1to allowChatto adjust for thebackbutton height, and an emptyThreadcomponent to layout properly. - Adjusts the
topInsetandkeyboardVerticalOffsetto account for thebackbutton height.
These additions result in a small but functional chat sample app.
import React, { useEffect, useState } from 'react';
import { View, TouchableOpacity, Text } from 'react-native';
import { Channel as ChannelType, StreamChat } from 'stream-chat';
import {
  Channel,
  ChannelList,
  Chat,
  MessageInput,
  MessageList,
  MessageType,
  OverlayProvider,
  Thread,
} from 'stream-chat-react-native';

const client = StreamChat.getInstance('api_key');

export const App = () => {
  const [channel, setChannel] = useState<ChannelType>();
  const [clientReady, setClientReady] = useState(false);
  const [thread, setThread] = useState<MessageType | null>();

  useEffect(() => {
    const setupClient = async () => {
      try {
        await client.connectUser(
          {
            id: 'jlahey',
            name: 'Jim Lahey',
            image: 'https://i.imgur.com/fR9Jz14.png',
          },
          'user_token',
        );
        setClientReady(true);
      } catch (e) {
        console.log(e);
      }
    };

    setupClient();
  }, []);

  const onBackPress = () => {
    if (thread) {
      setThread(undefined);
    } else if (channel) {
      setChannel(undefined);
    }
  };

  if (!clientReady) return null;

  return (
    <OverlayProvider topInset={60}>
      <TouchableOpacity onPress={onBackPress} disabled={!channel}>
        <View style={{ height: 60, paddingLeft: 16, paddingTop: 40 }}>{channel && <Text>Back</Text>}</View>
      </TouchableOpacity>
      <View style={{ flex: 1 }}>
        <Chat client={client}>
          {channel ? (
            <Channel channel={channel} keyboardVerticalOffset={60} thread={thread}>
              {thread ? (
                <Thread />
              ) : (
                <>
                  <MessageList onThreadSelect={setThread} />
                  <MessageInput />
                </>
              )}
            </Channel>
          ) : (
            <ChannelList onSelect={setChannel} />
          )}
        </Chat>
      </View>
    </OverlayProvider>
  );
};