

This tutorial will guide you in creating an instant Node-based chat app that runs on a JavaScript server and outside a web browser.
First, grab your favorite command-line tool, Terminal or Warp, and a code editor, preferably VS Code and let’s begin.
Before You Start
Before proceeding with the tutorial, make sure you have the following.
- Install Node: Download the latest prebuilt installer or use a package manager.
- Install Yarn or NPM to add the required packages and modules.
- Signup for a Stream account: To get an API key and app secret. You will use these credentials later in this tutorial.
A Preview of What You Will Build
The image above illustrates the chat application you will build using Node and Stream’s chat API. Download the completed project from GitHub, explore the source code, and test it using VS Code.
Create a New Node Project
Launch your favorite command line tool and make a new directory with the command below.
mkdir node-chatcd into the node-chat folder and initialize a new Node project with the following command.
yarn init -yThe above command adds two files, package.json and README.md, to the folder node-chat.
Install Server Dependencies
In this tutorial, we must build a Node server to run the chat app. Creating the server requires the following dependencies.
- Dotenv: A module for making environment variables from a .env file accessible to a process.env object.
- Express: A lightweight framework for building web applications.
- Stream Chat JS: A real-time chat SDK for JavaScript.
- Cors: A package for providing middleware for Node.js.
- Body-parser: A body passing middleware for Node.js.
Enter the command below to install all the packages. If you prefer, you can use yarn instead of npm to add the packages.
npm add dotenv express stream-chat cors body-parserAdd Required Files in VS Code
Still in the project's root folder, node-chat in Terminal or using your chosen command line tool, enter code . to launch the project in VS Code.
Note: Using code . to open VS Code only works if you have already enabled the feature in VS Code.
Add a .env file to store the following Stream Dashboard credential placeholders in the project's root folder. You will replace the placeholder credentials shortly.
PORT=5500
STREAM_API_KEY=<your api key>
STREAM_APP_SECRET=<your app secret>
Next, add a new file, server.js in the project's root folder and use the following sample code as its content.
// server.js
require("dotenv").config();

const express = require("express");
const cors = require("cors");
const bodyParser = require("body-parser");
const { StreamChat } = require("stream-chat");

const app = express();

app.use(cors());
app.use(bodyParser.json());
app.use(bodyParser.urlencoded({ extended: true }));

// initialize Stream Chat SDKThe dotenv package we added in the previous section will make the .env file available to the process.env object in the sample code above, server.js.
Obtain App Credentials From Your Stream’s Dashboard
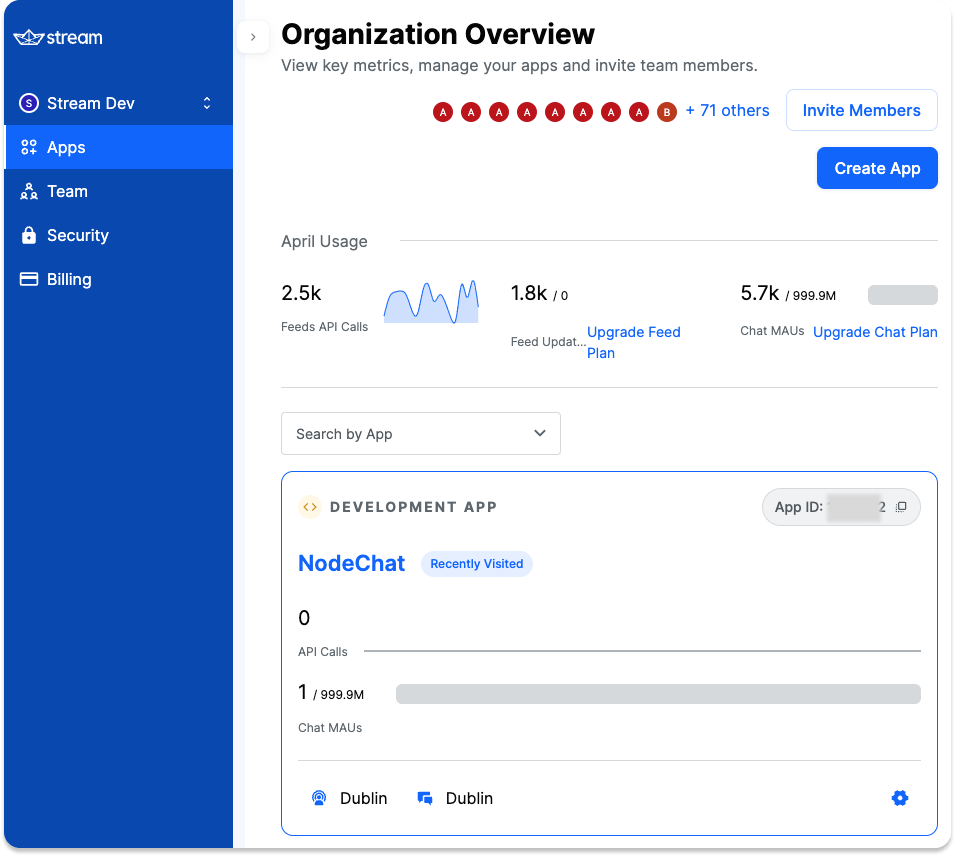
In this section, you will create a new app in your Stream’s dashboard and use your API key and the app's secret to populate the .env file you added earlier. If you do not have an account yet, sign up for a free one. When you log in to your dashboard:
- Select the Apps category in the left sidebar and click the Create App button.
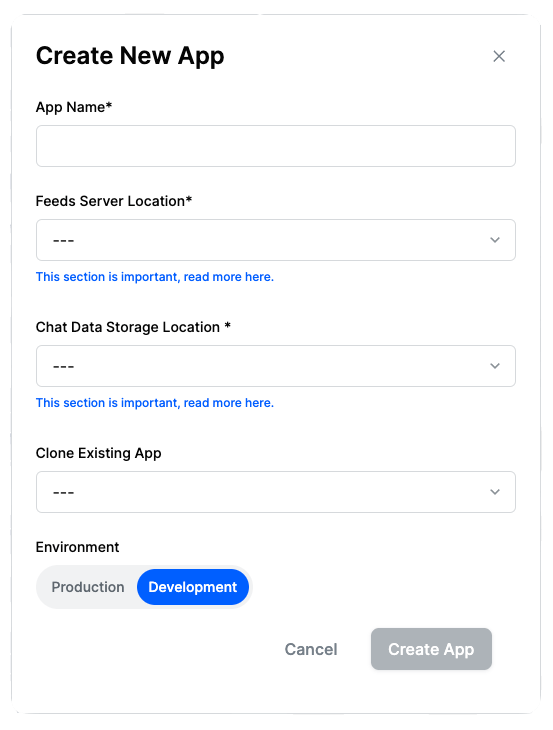
- Fill in the required information to create the new in app in your Dashboard.
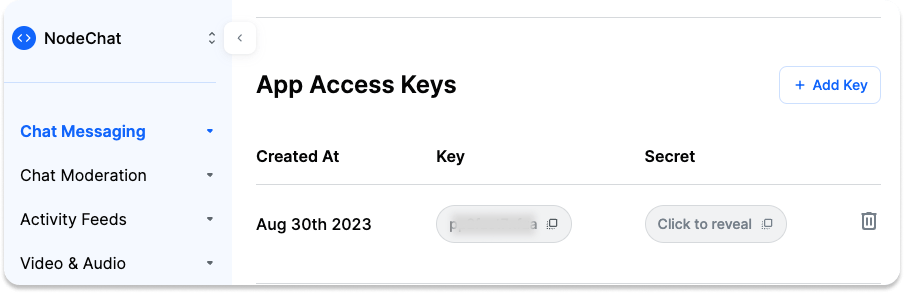
- When you finish the app creation, click the its name to access the key and secret. Copy them to fill their placeholders in the .env file.
Run the Server
At this point, we can run the server via the command line. Since we have already opened the app in VS Code, it is more convenient to use the built-in VS Code Terminal.
- Launch the Terminal in VS Code by navigating the toolbar and selecting Terminal -> New Terminal.
- Add the command
node server.jsto start the server. Run the command in the root folder, as illustrated in the image below.
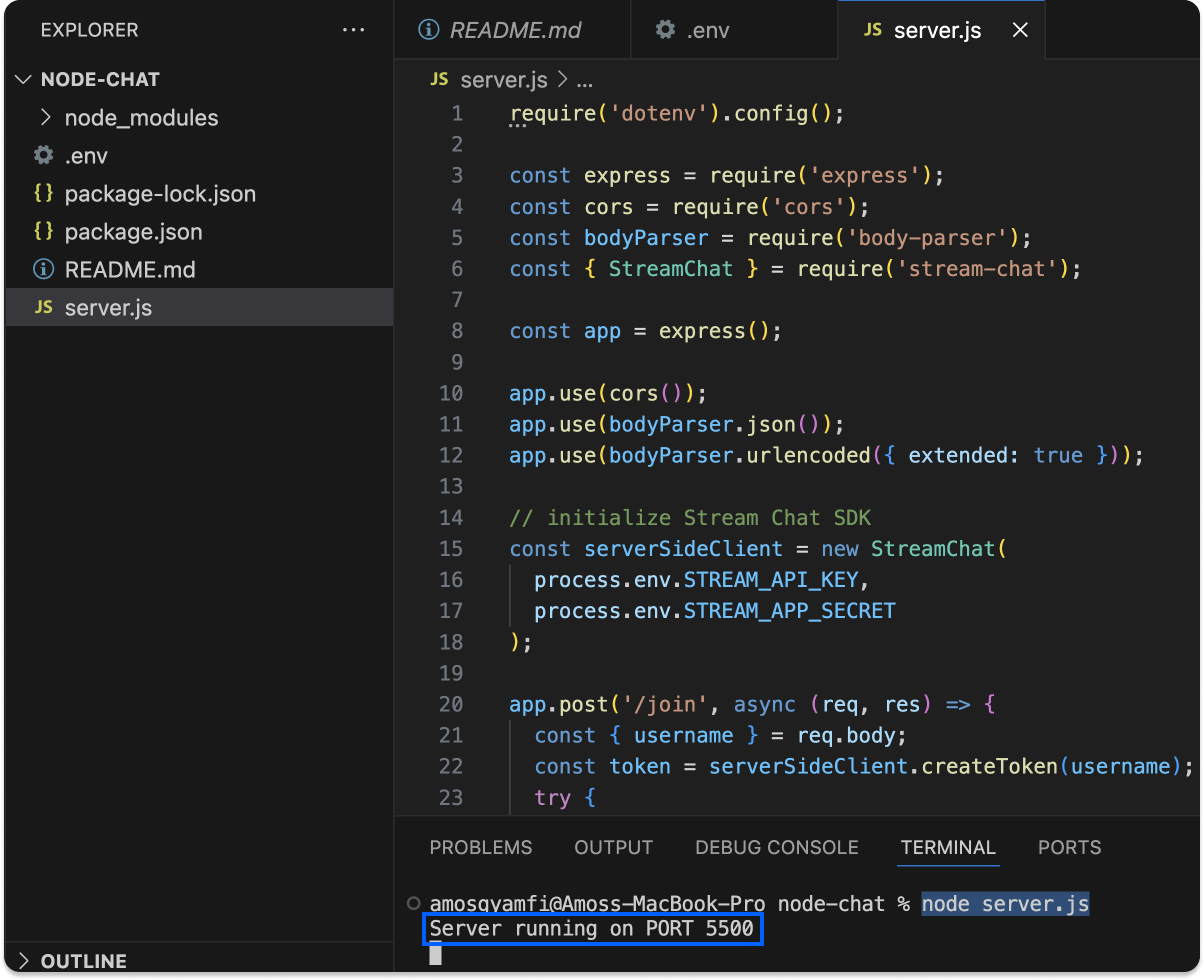
You will now see the message Server running on PORT 5500. Congratulations 🎉 👏. You now have the server up and running. Let’s create a chat client in the next section.
Create a Chat Client
Our chat client will have the following dependencies:
- Axios: An HTTP client for Node.js and the web.
- Prompt: A command-line prompt for Node.js.
- Ora: A dynamic loading spinner for Terminal.
- Util: A utility module for Node.js.
- Neo-blessed: A cursor-like library for Node applications. Add the following command in the VS Code’s Terminal to install all the above dependencies.
npm add axios prompt ora util neo-blessed
Next, add a new file, app.js, to the project’s root folder in VS Code. Use the sample code below to fill in the file’s content.
// app.js
const axios = require("axios");
const prompt = require("prompt");
const ora = require("ora");
const { StreamChat } = require("stream-chat");
const util = require("util");
const blessed = require("neo-blessed");

function fetchToken(username) {
  return axios.post("http://localhost:5500/join", {
    username,
  });
}

async function main() {The above sample code uses the Prompt package we installed earlier to request the user's username. The username request is then sent to the server to retrieve a token for authentication. To verify that the user authentication works successfully, keep the server running with the command node server.js.

While the server is still running, open another Terminal in VS Code and enter the command node app.js to receive a prompt to enter a user name. Press the return key after adding the user name. You will then get a similar result in the image below.

Note: If you get an ora package error after running node app.js in the Terminal, remove the package with npm r ora. Then, install an older version of ora with the command, npm i ora@5.4.1.
Create the Chat UI With Neo-blessed
Let's create a chat UI using the package called Neo-blessed. Neo-blessed is a cursor-like library that helps developers to build Node-based Terminal interfaces. To create the chat UI, you should update the sample code in app.js with the following.
// app.js: updated
const axios = require("axios");
const prompt = require("prompt");
const ora = require("ora");
const { StreamChat } = require("stream-chat");
const util = require("util");
const blessed = require("neo-blessed");

function fetchToken(username) {
  return axios.post("http://localhost:5500/join", {
    username,
  });
}

async function main() {The previous content of app.js authenticated the user and printed a message about the authentication on the screen. Let’s take a look at the following changes.
const screen = blessed.screen({
  smartCSR: true,
  title: "Stream Chat Demo",
});

var messageList = blessed.list({
  align: "left",
  mouse: true,
  keys: true,
  width: "100%",
  height: "90%",
  top: 0,
  left: 0,
  scrollbar: {
ch: " ",In the updated version of app.js, we used the Neo-blessed package to create a simple chat interface consisting of a text area and a container for holding a list of messages as shown in the code snippet above.
Retrieve and Send a Message
input.key("enter", async function () {
  var message = this.getValue();
  try {
    await channel.sendMessage({
      text: message,
    });
  } catch (err) {
    // error handling
  } finally {
    this.clearValue();
    screen.render();
  }
});
In this code snippet, when a user types a new message and presses the return key, the message is retrieved and sent to the message channel using the Stream Chat's sendMessage method. Head to our documentation to learn more about sending simple messages using Stream.
Run the Node Server and the Chat App
Open a new Terminal window in VS Code and run the Node server with node server.js. Next, launch another Terminal window and run the updated chat app with node app.js.
Bravo 👏. You will now see a chat interface similar to the one in the image below, allowing you to enter and send instant text messages.
Chat Between Multiple Terminal Instances
When the app is running after performing the previous steps, you can open an additional terminal instance and chat between them. Here, you should authenticate yourself with a different user name and tile the Terminal windows vertically or horizontally in VS Code. You can now send and receive messages between the two authenticated users, similar to the demonstration in the video below.
Wrap Up
In this tutorial, you learned how to create a simple chat application using Node.js. You made a backend server that authenticates chat users with Stream's Dashboard credentials. Eventually, you discovered how to send and receive messages among multiple users in a channel. The Node.js chat application you built in this tutorial demonstrates a basic use case of what you can build with Node and Stream's JavaScript SDK for chat messaging. Check out the related links to learn more and discover where to go from here.
