

I always wondered how to create the dynamic chat experience of livestreams, like those found on YouTube, but with an added convenience of allowing anyone to participate without logging in.
With Next.js and Stream, I was able to successfully create that experience. In this tutorial, I cover a straightforward approach to create a livestream chat environment with granular control over user permissions, making real-time interaction more accessible.
Demo
Before we jump into the technical stuff, let me give you a sneak peek of what you will be building in this tutorial.
Prerequisites
You will need the following to get going with the implementation:
- Node.js 18 or later
- A Stream account
- A Vercel Account
Setting up a new Stream application
In this section, you will learn how to create a Stream application, enable authless users, and define user permissions to read and post into a channel. Let’s get started.
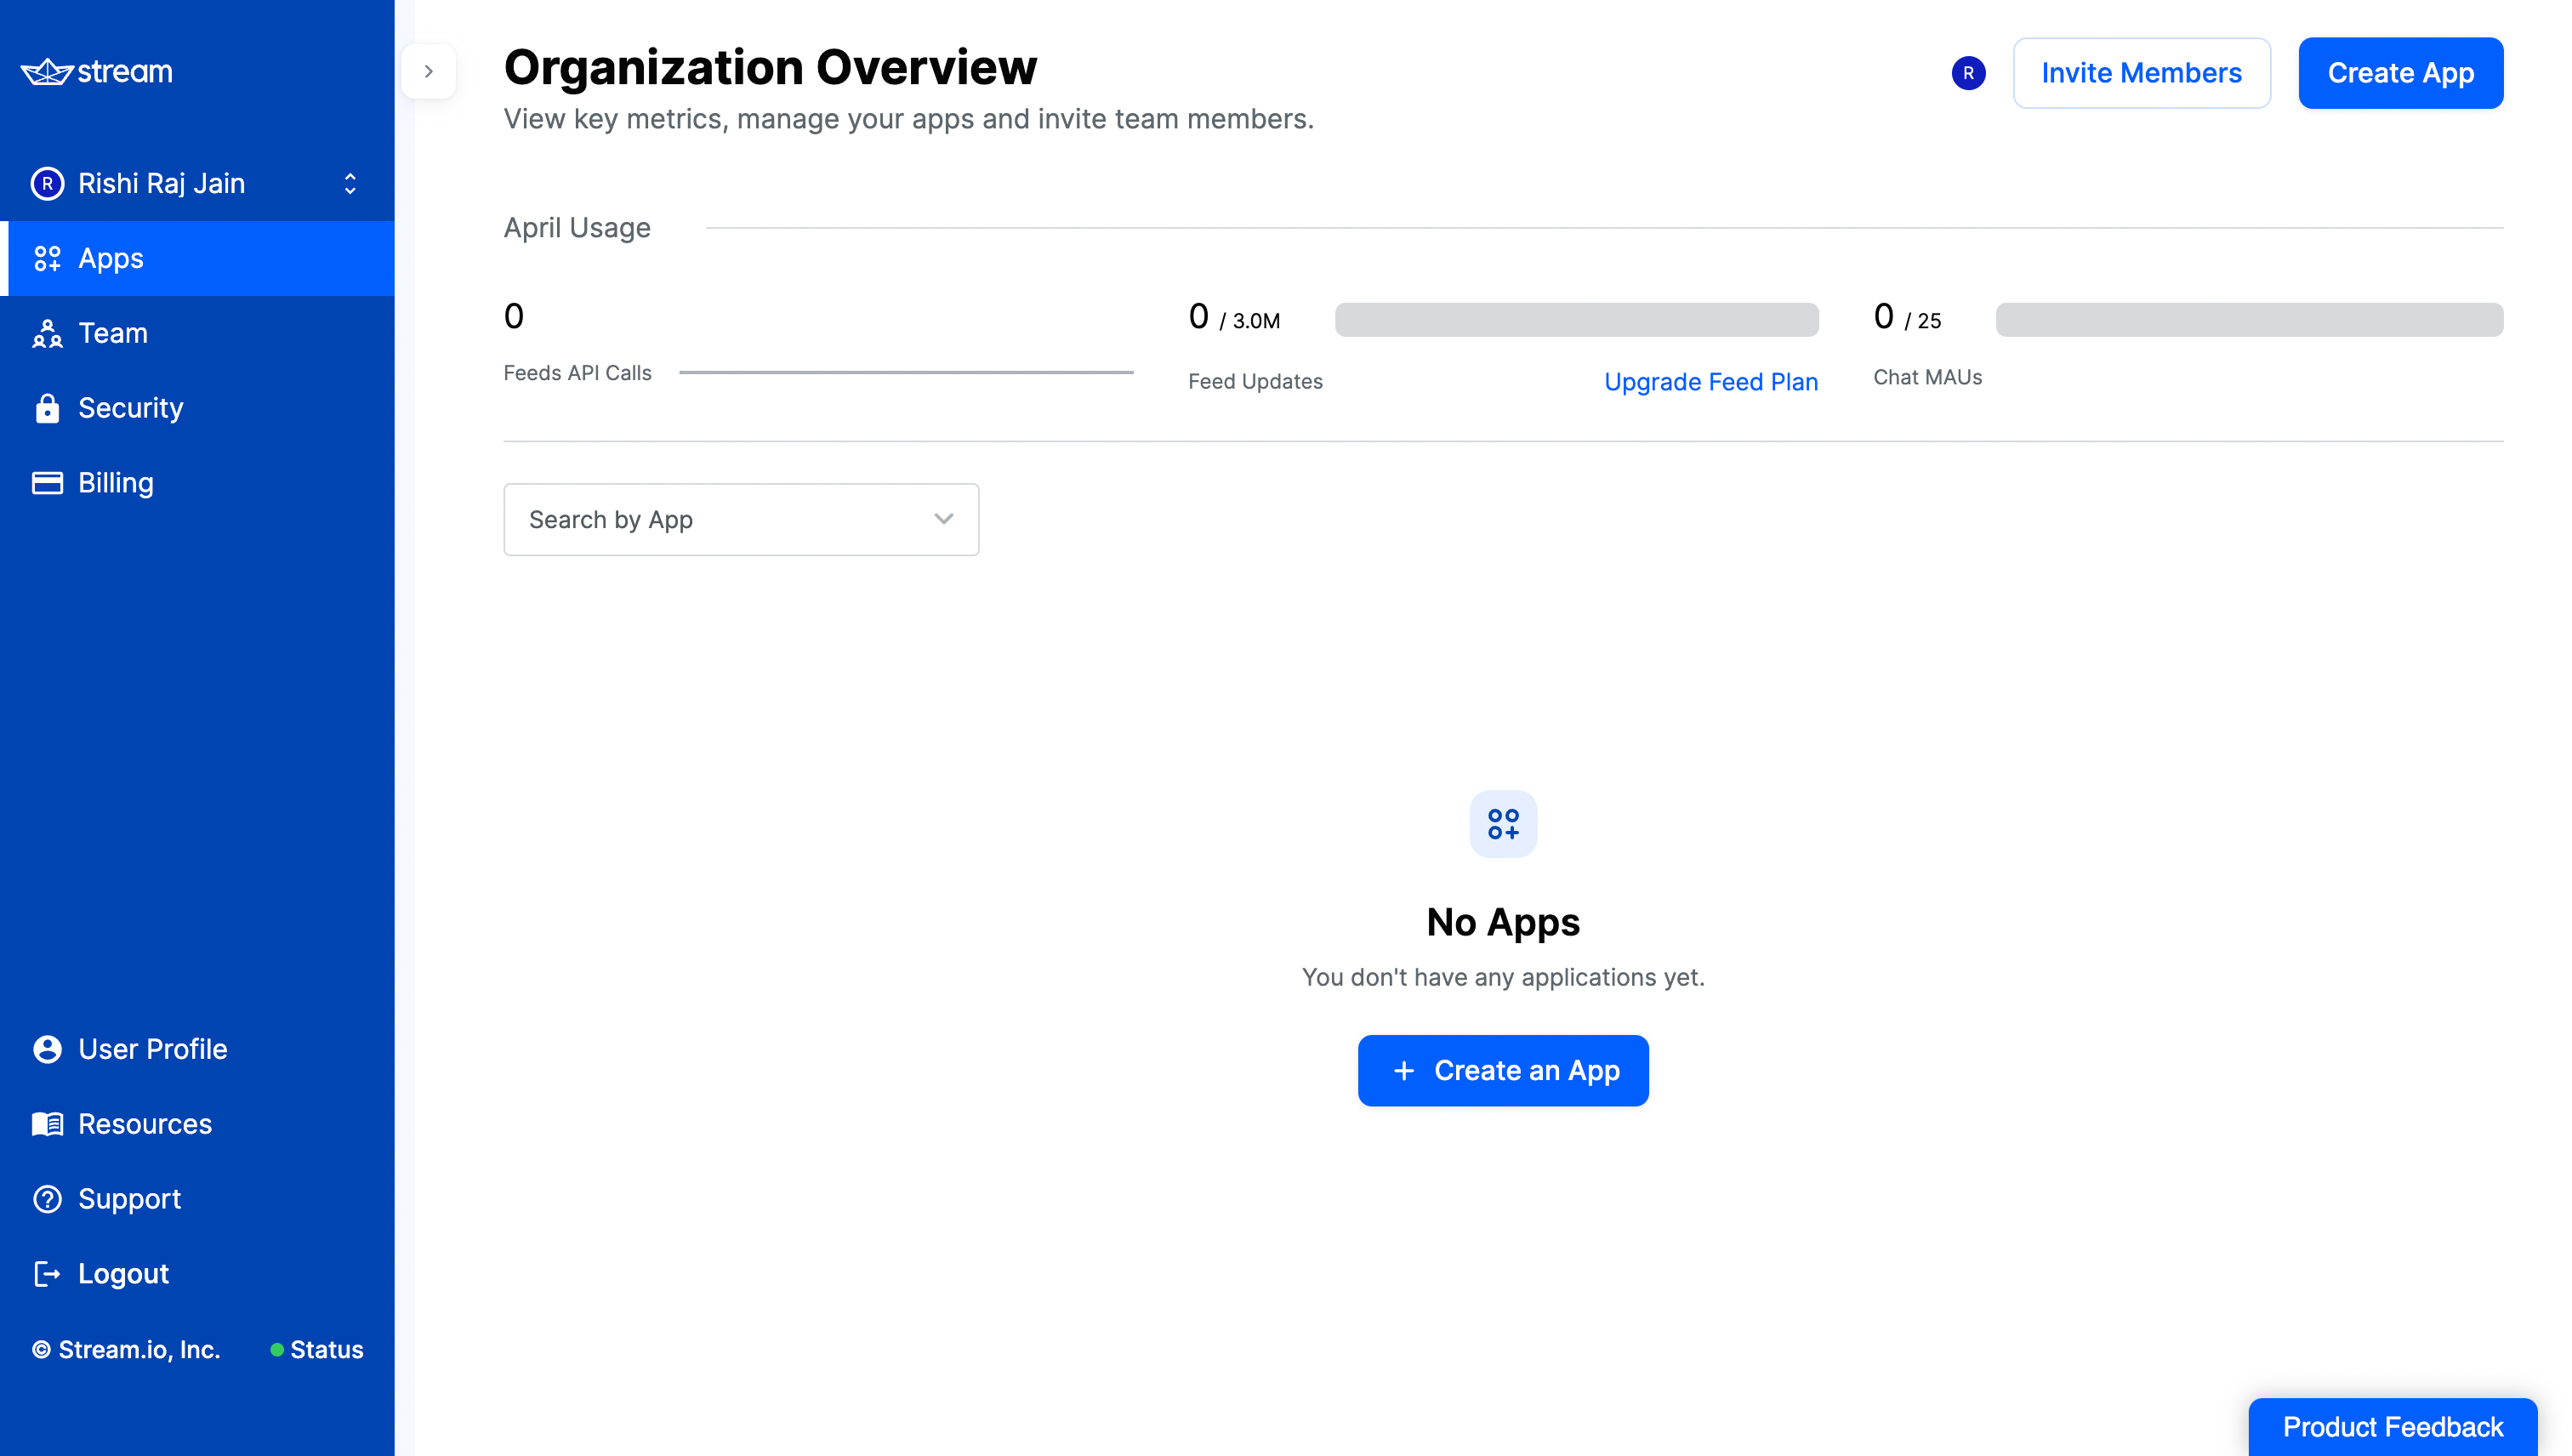
Once you have created a Stream account and are logged in, click on + Create an App to start creating a Stream chat application.
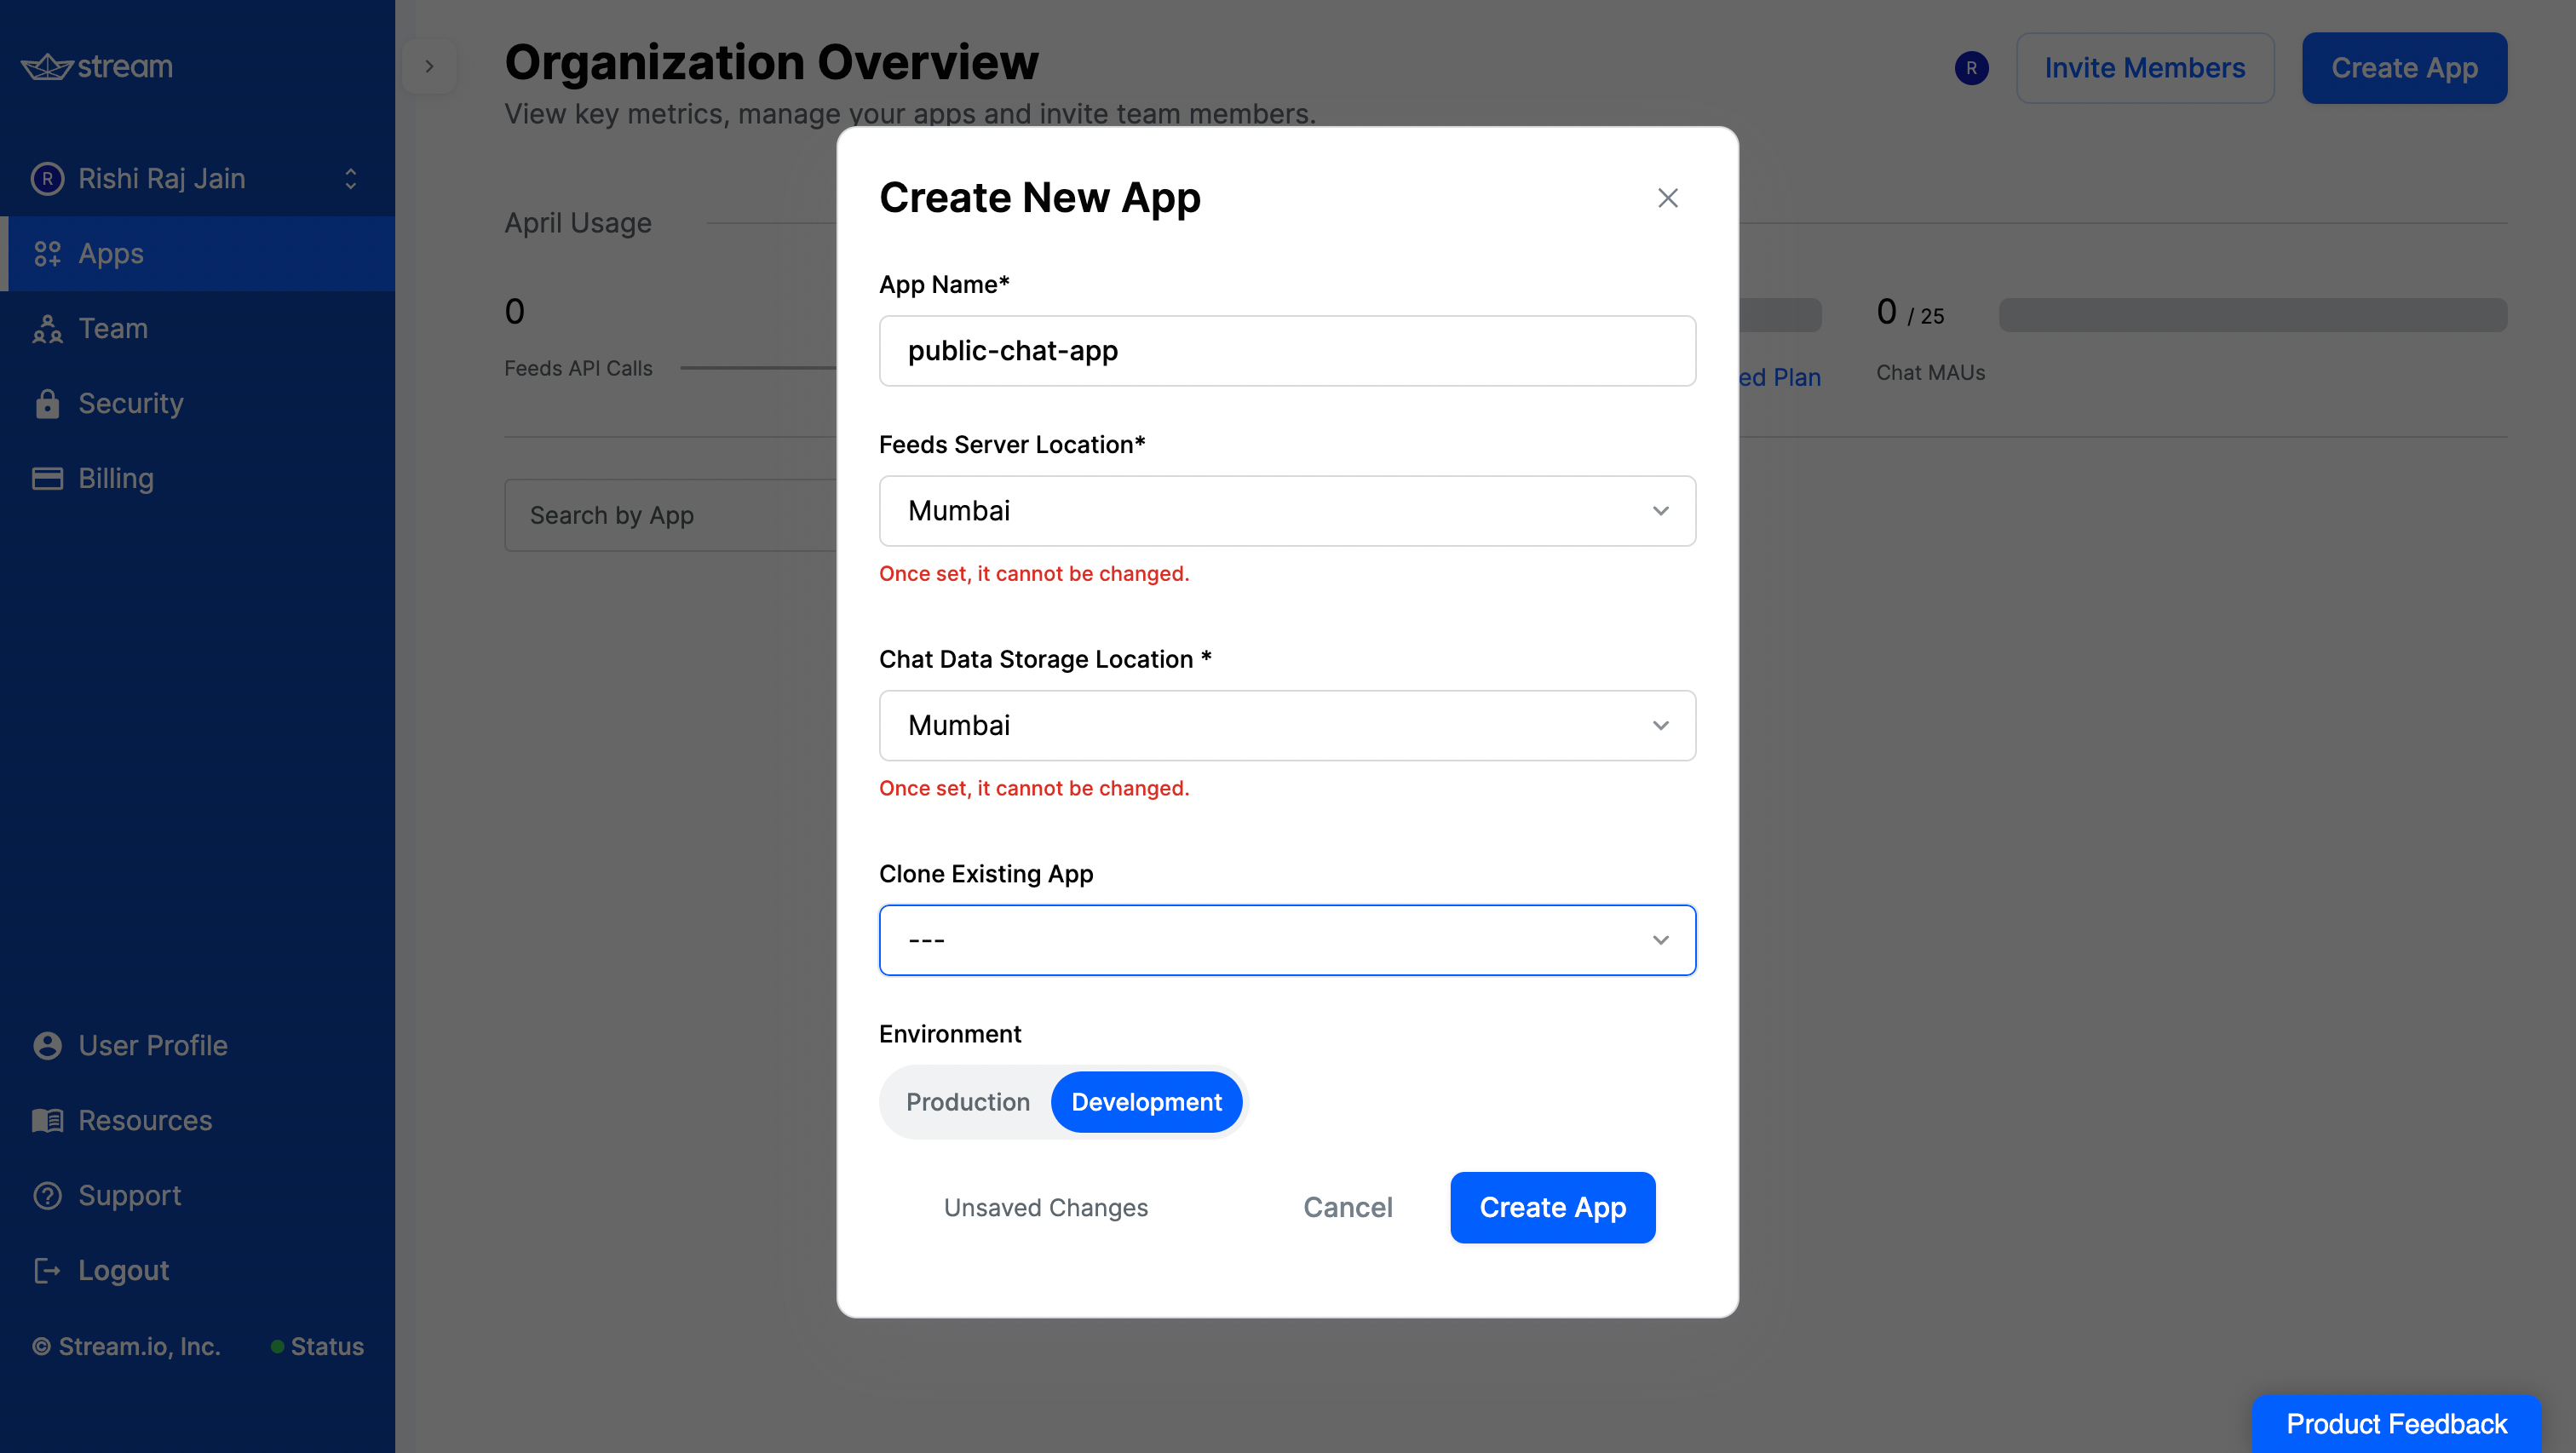
Enter an application name of your choice. Further, select the Chat Storage Location near to your website deployment region/function. I am in India, so I have set it to Mumbai.
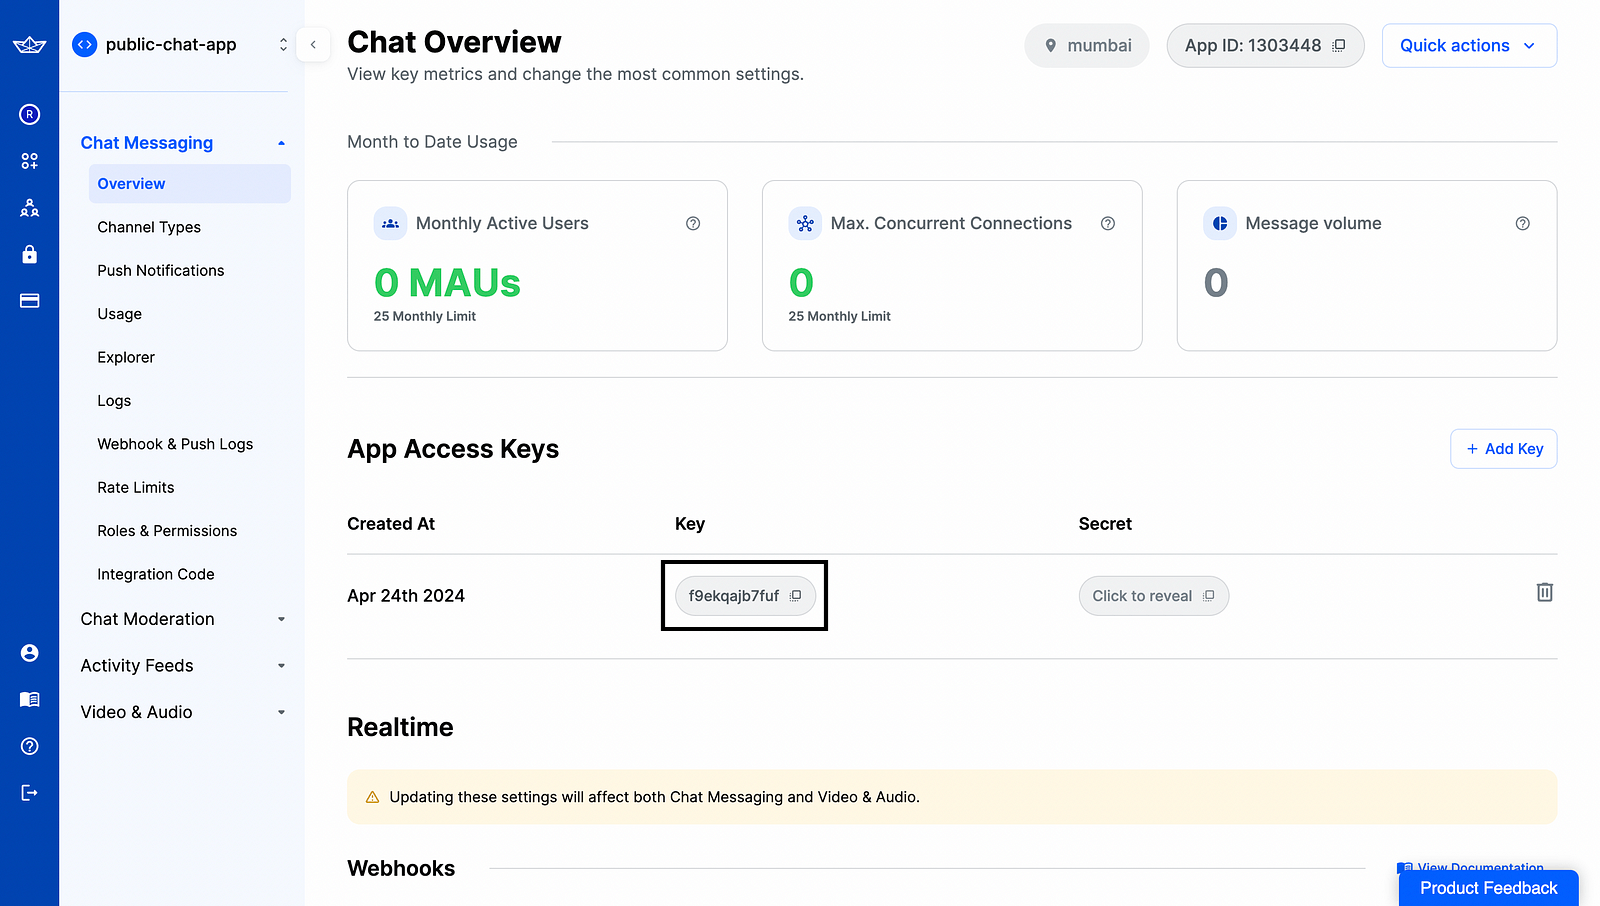
Once done, you will be taken to the Chat Overview screen. Copy the API Key, and save it somewhere safe to be used further in your Next.js application as NEXT_PUBLIC_STREAM_API_KEY.
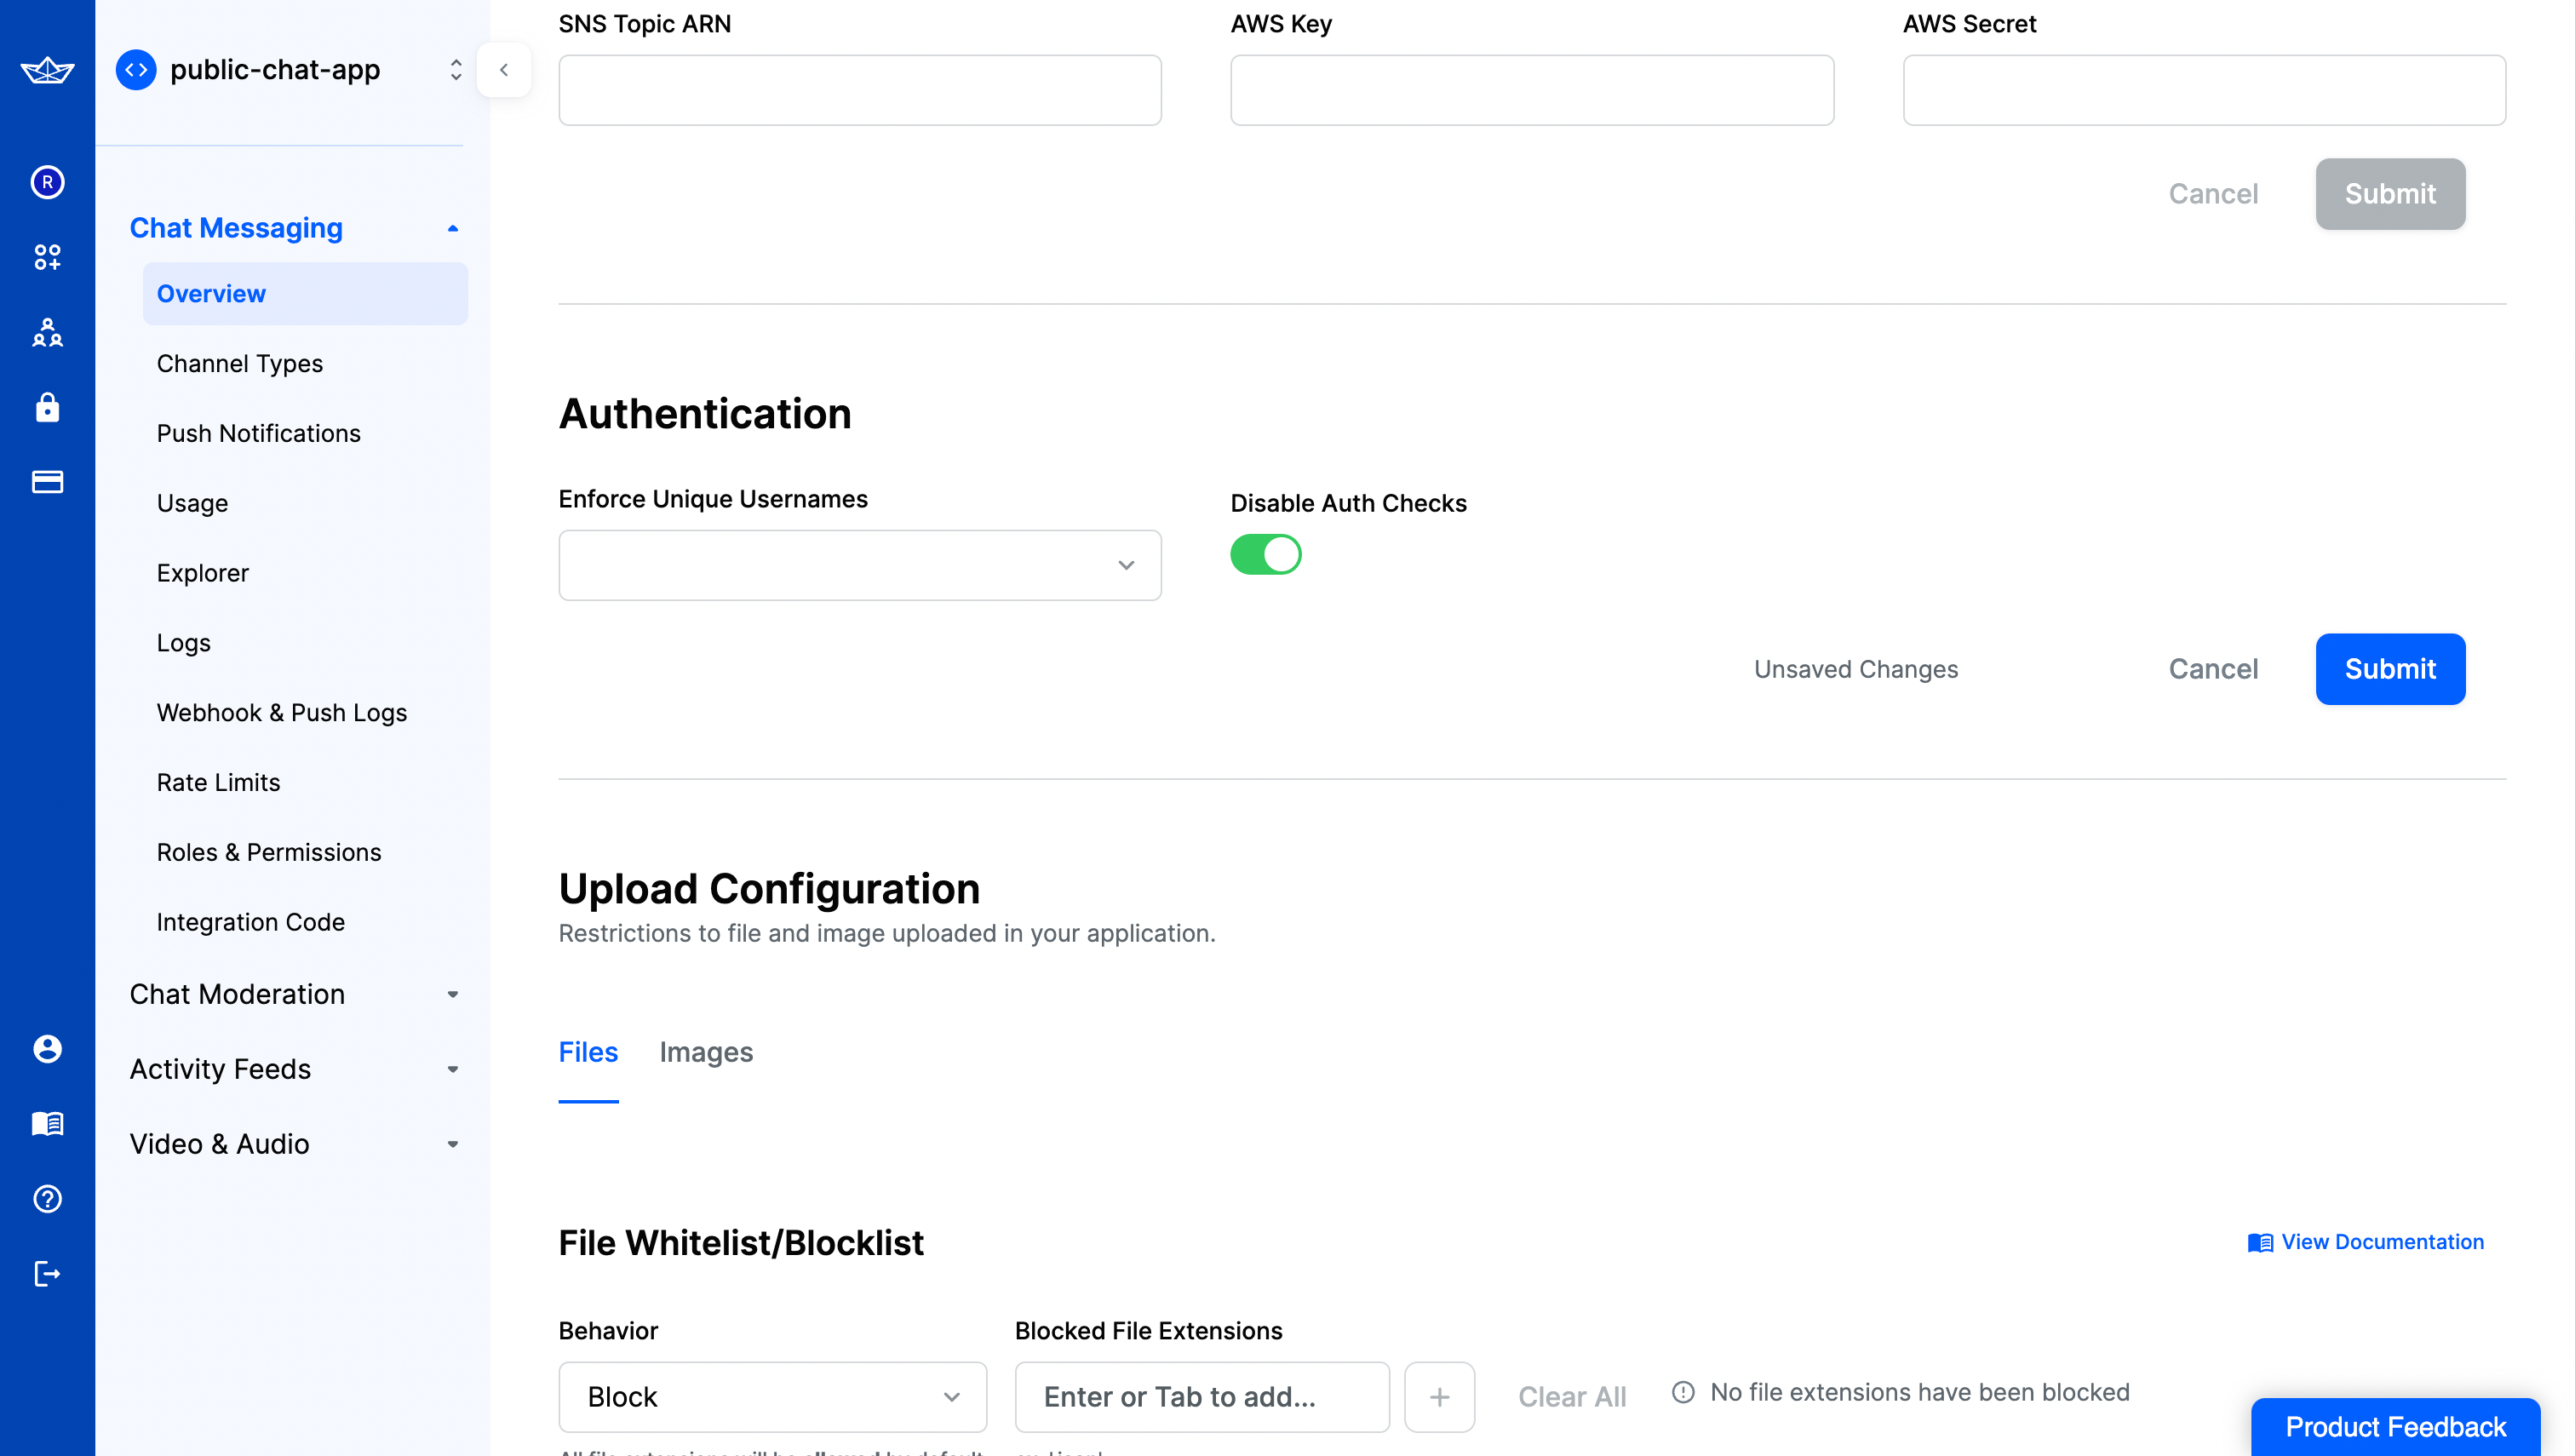
To allow visitors post chat messages without authorization, scroll down and enable the Disable Auth Checks toggle button. Click Submit to sync the changes.
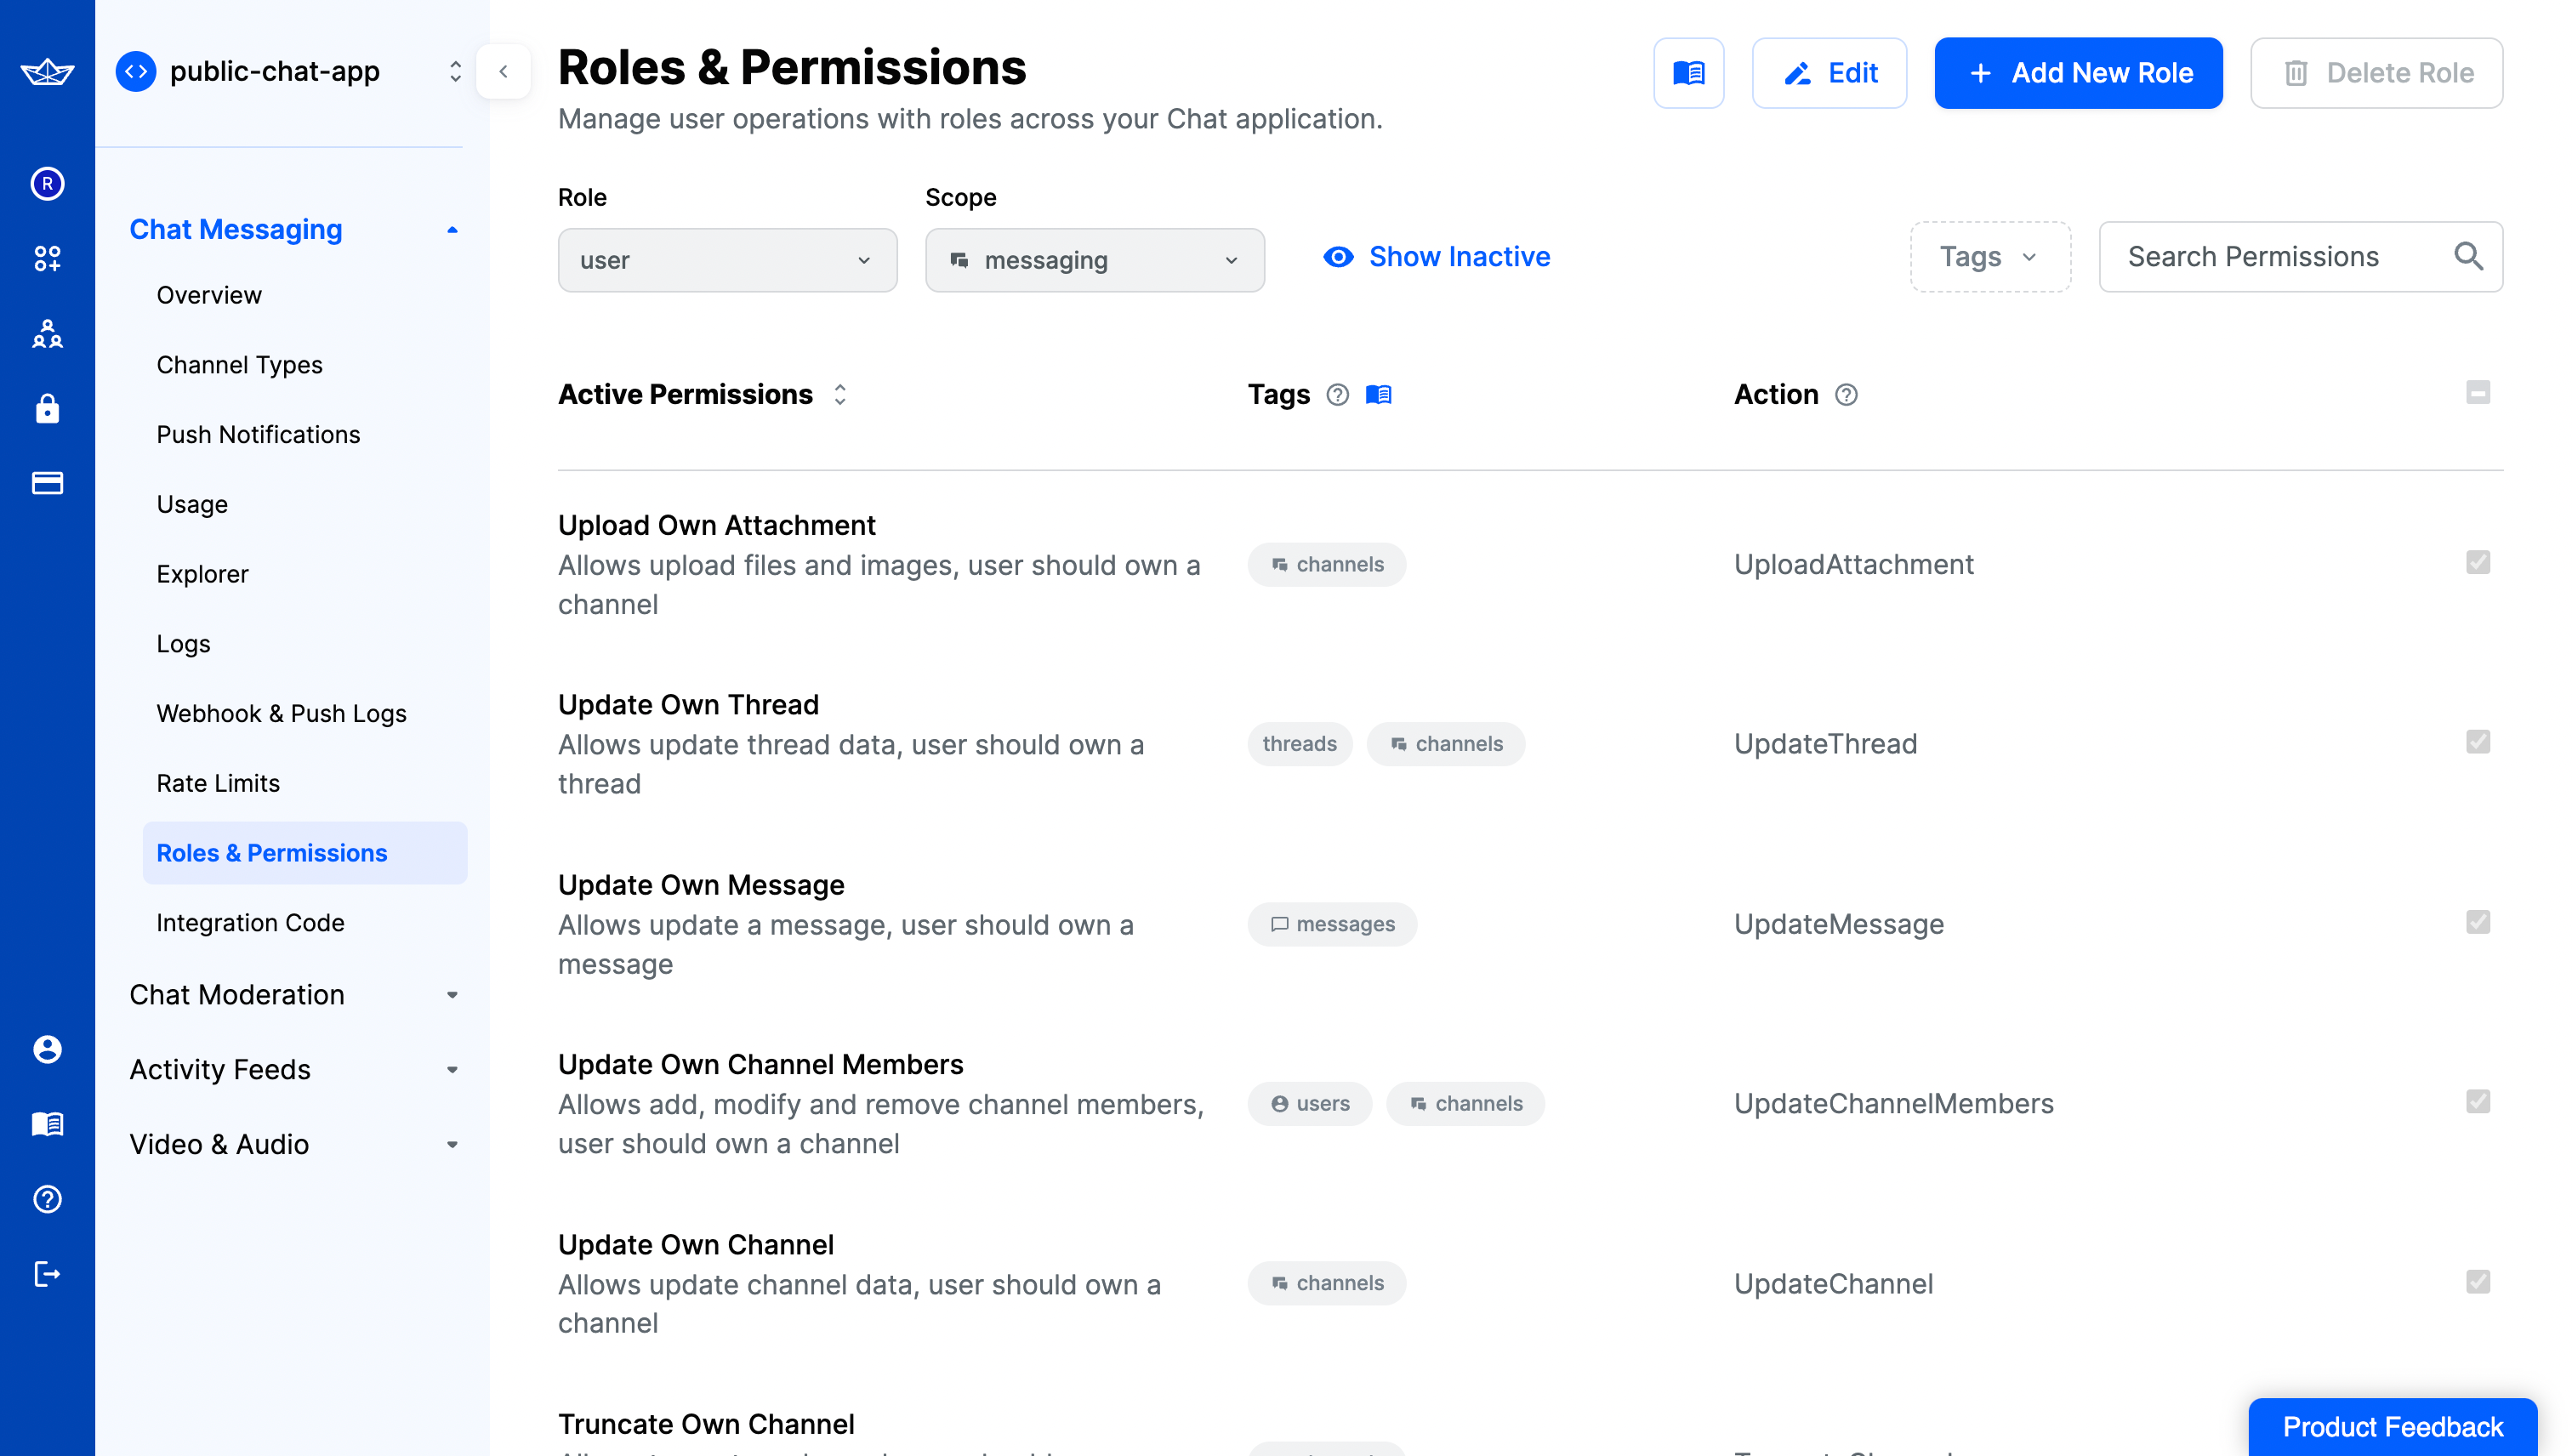
To allow visitors to post a message (as a user in a particular channel), you would need to enable read and post permissions for them. This comes handy to make sure that you are able to configure the roles and permissions a visitor can assume in your chat application.
Select Role as user and Scope as messaging, and then click the Edit button to start configuring the permissions for a visitor.
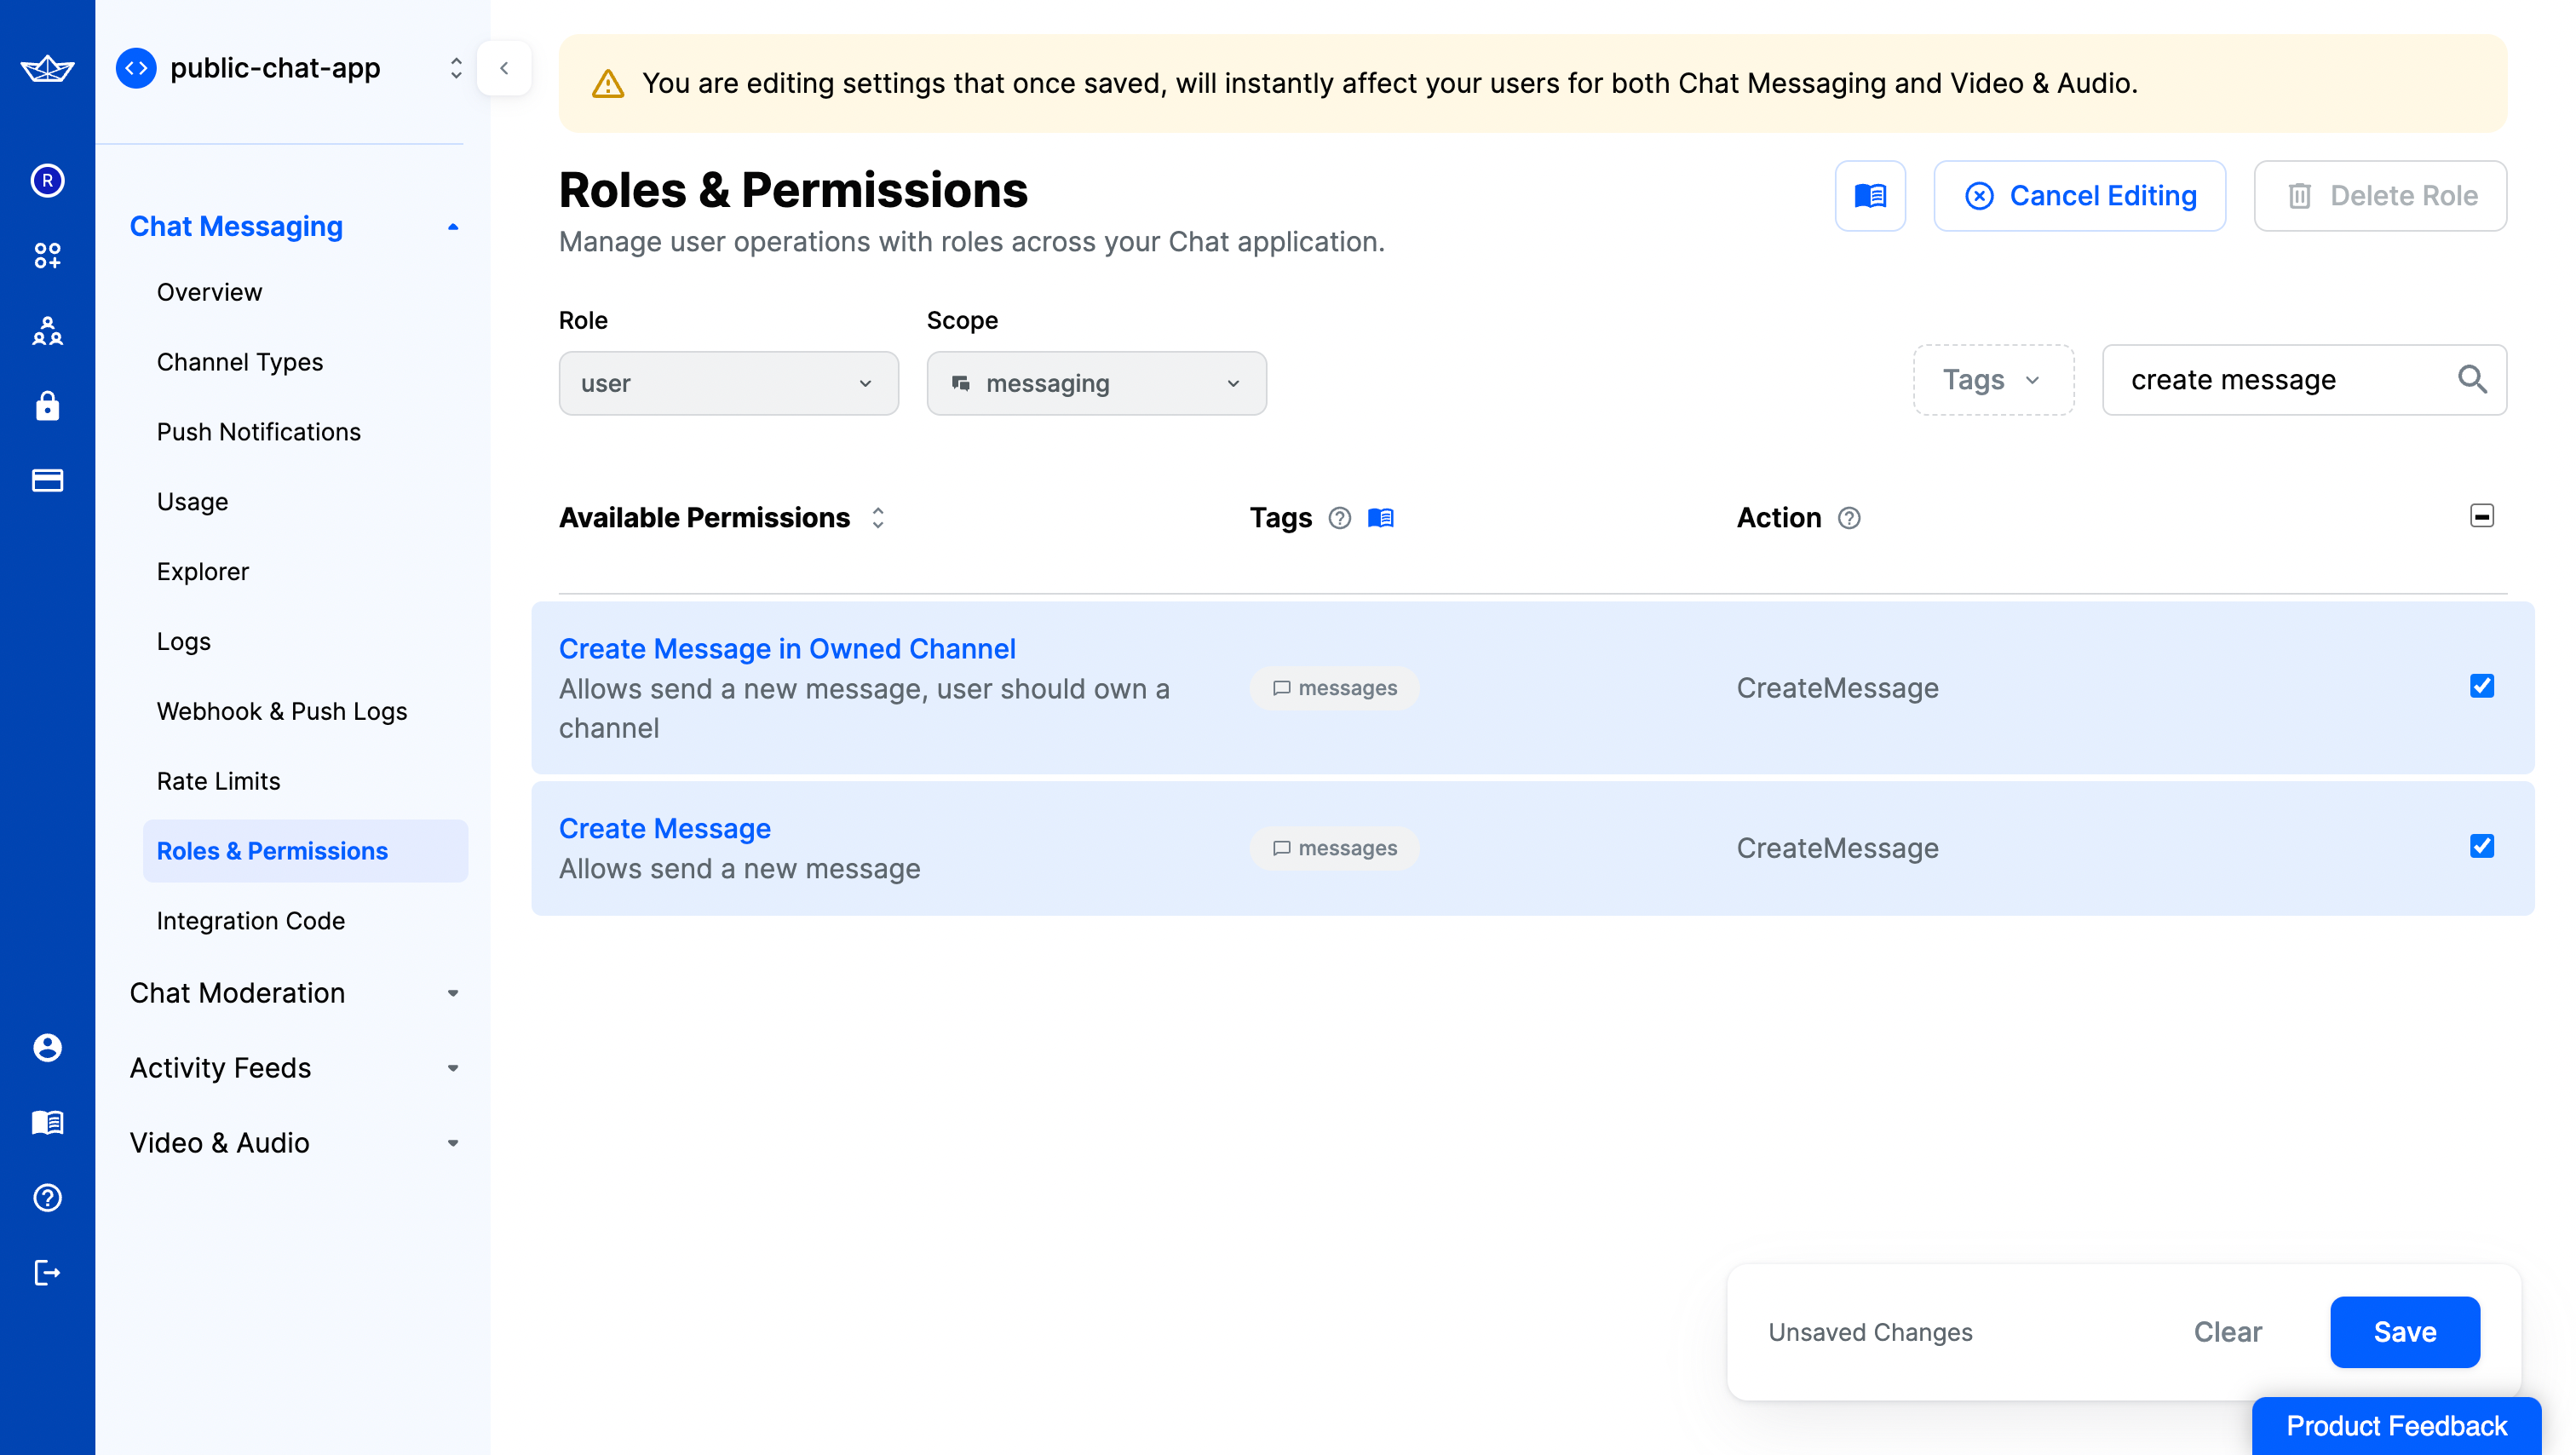
To allow visitors to post message, search for create message and enable the permission to Create Message which allows any user in the channel to send a message.
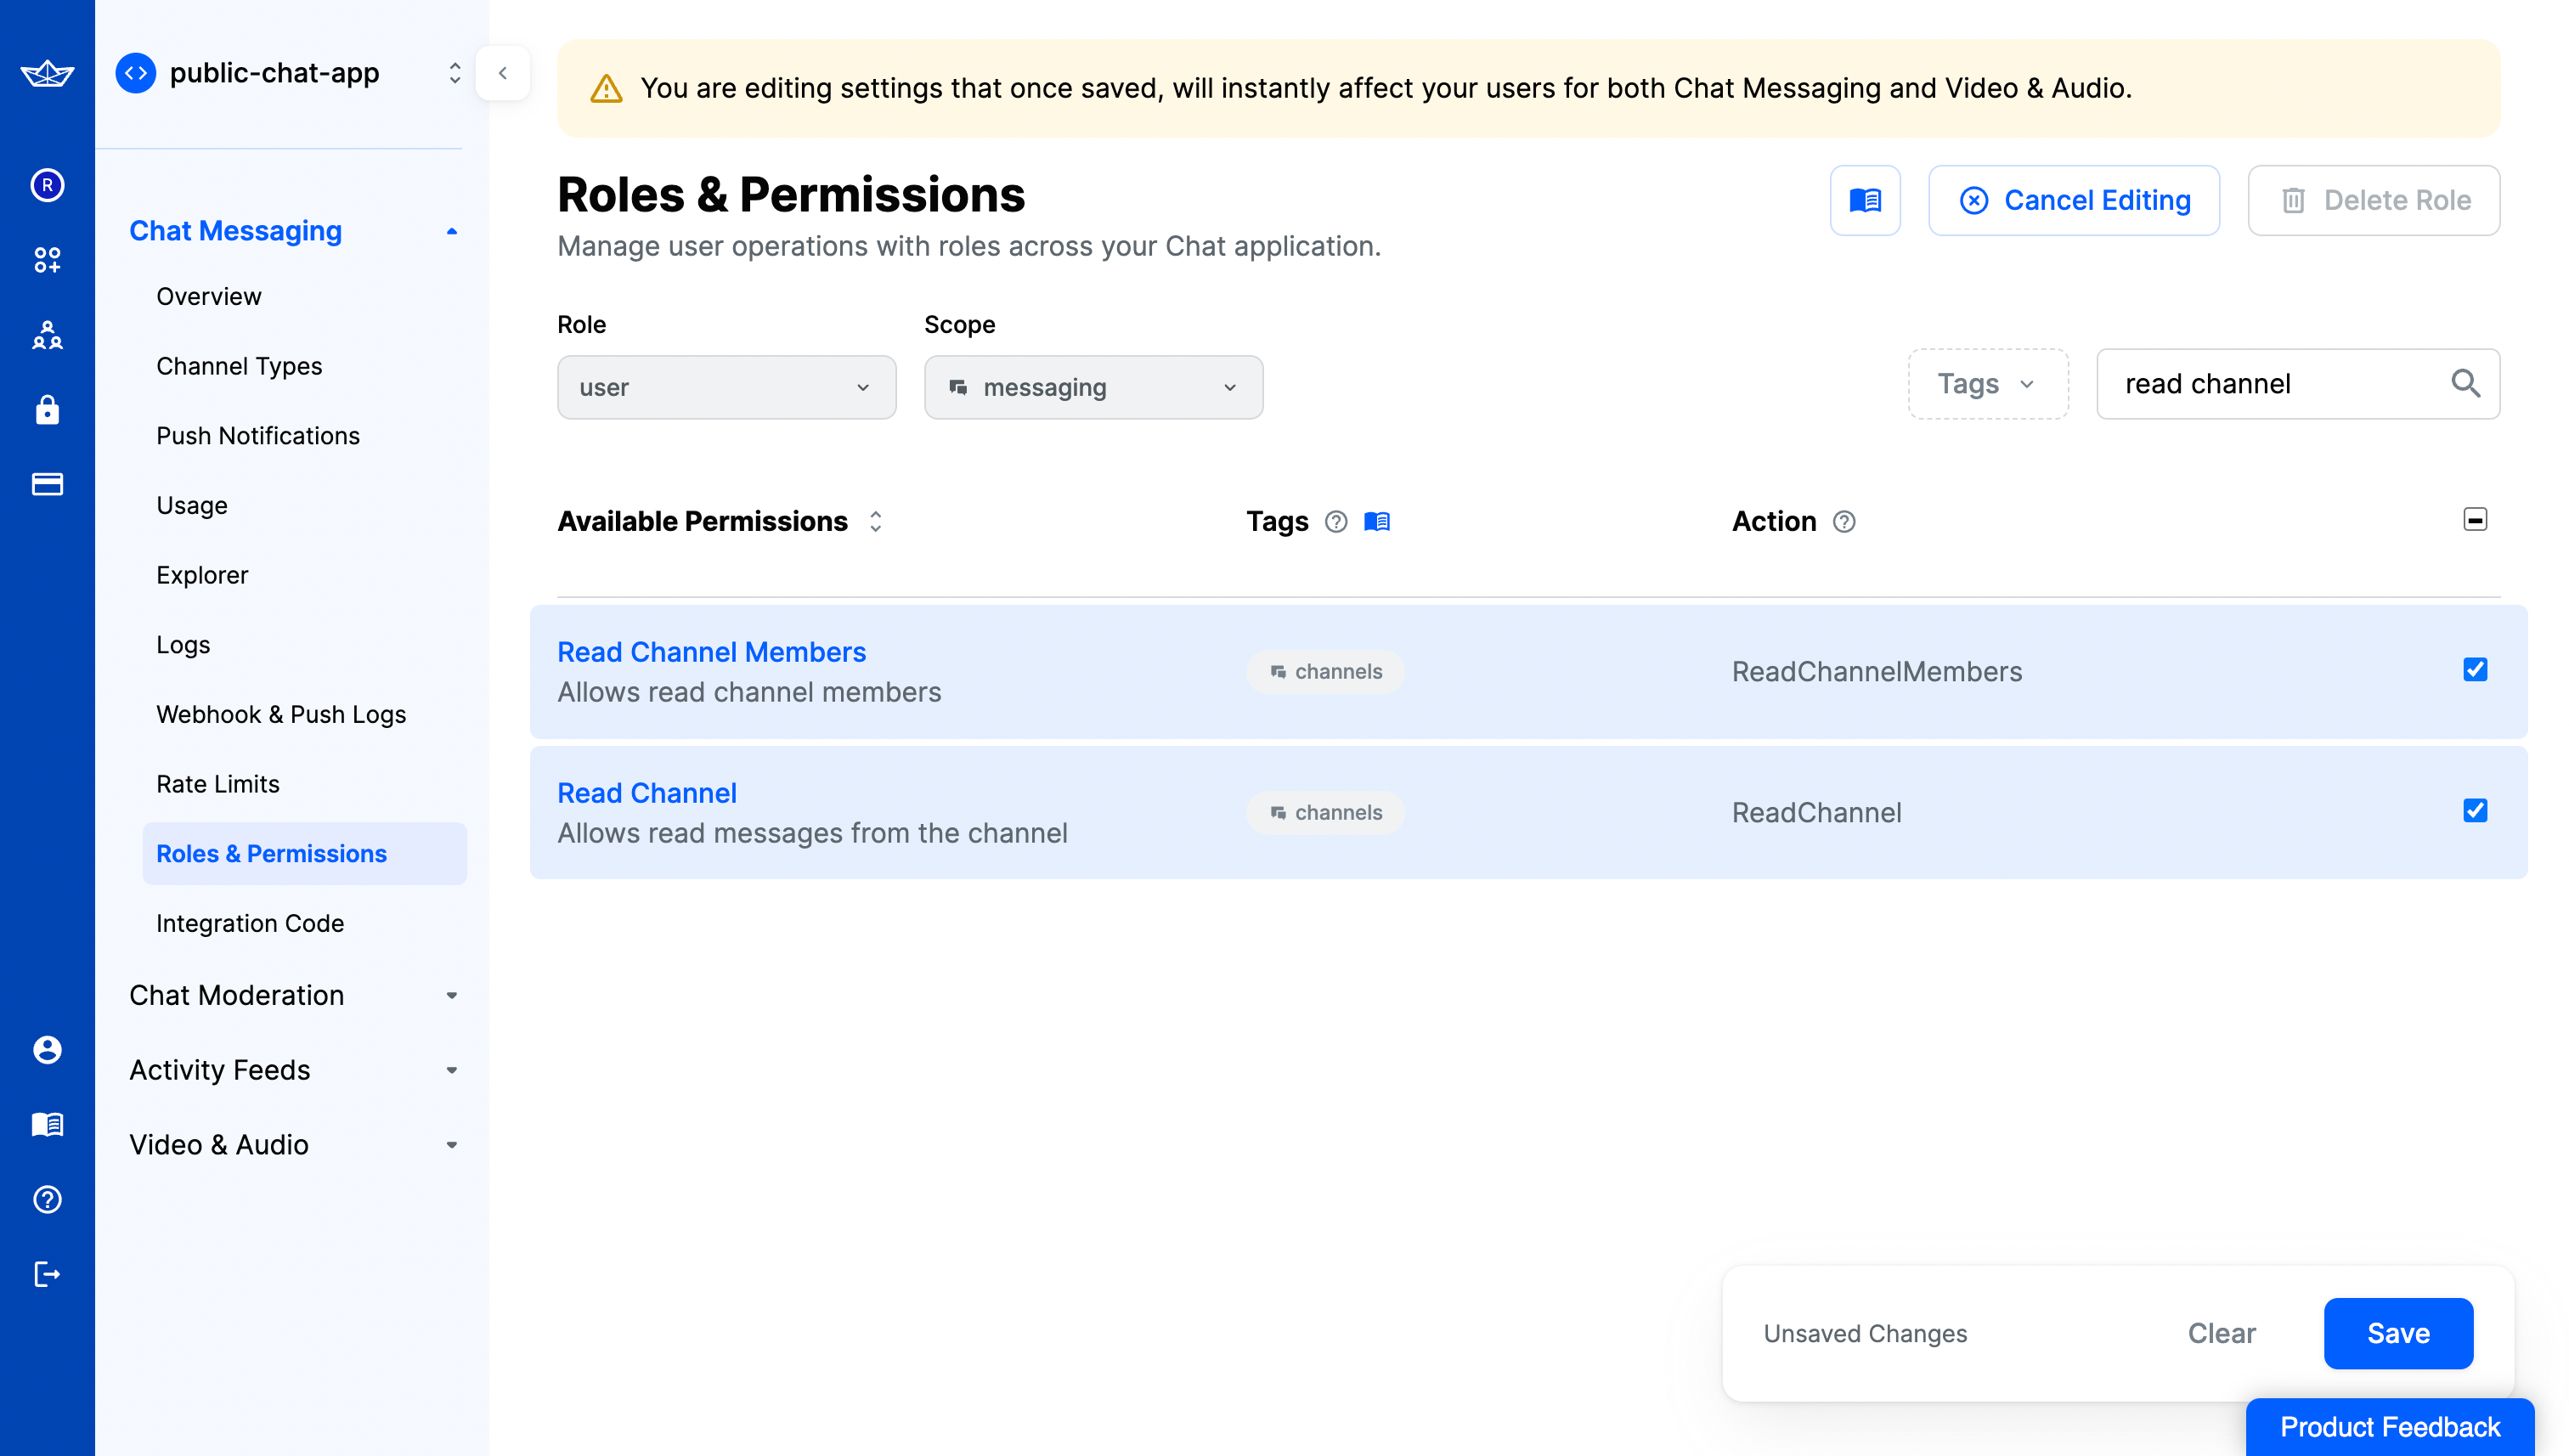
To allow visitors to read the chat history, search for read channel and enable the Read Channel and Read Channel Members which allows a visitor to read the messages along with the users who posted them.
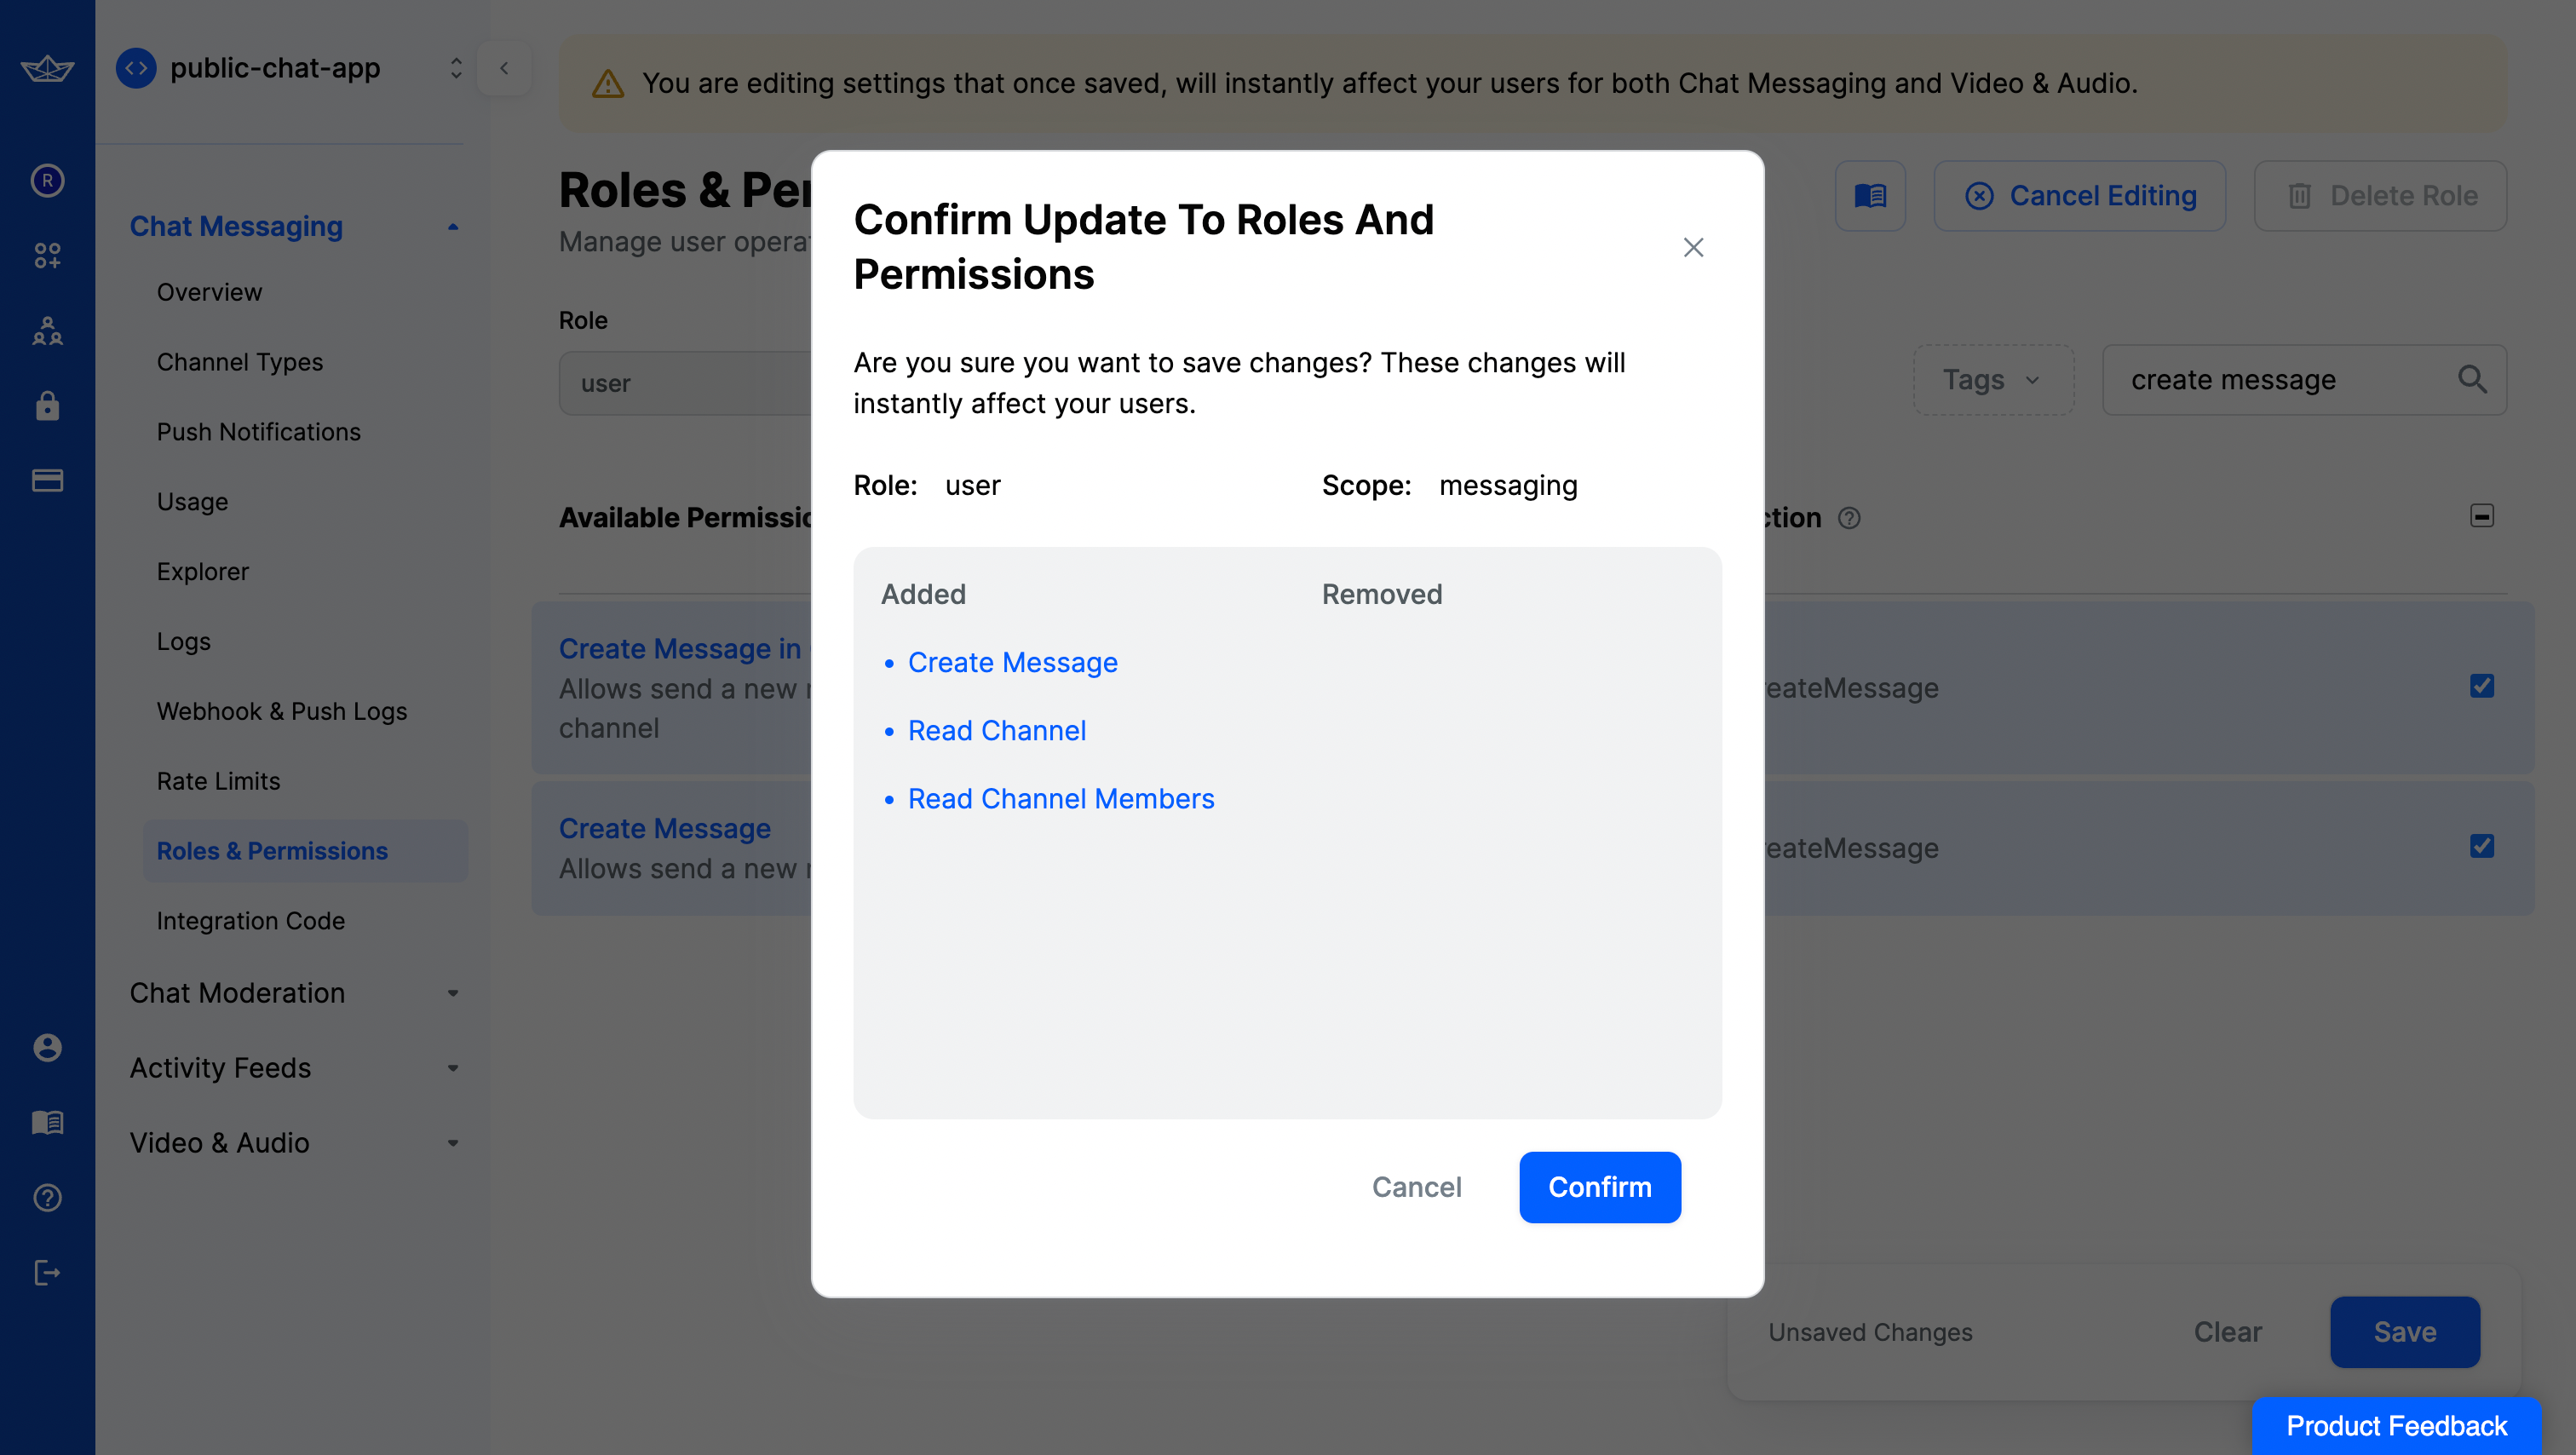
Finally, click Save to sync the changes.
You are now done with configuring the permissions and scope of what a visitor can do. Now, let’s build the chat user interface in Next.js with Chatscope UI Kit.
Setting up a new Next.js application
In this section, you will learn how to create a new Next.js application, set up shadcn/ui in it, and figure out requirements of your application to install relevant libraries for a quick implementation.
Let’s get started by creating a new Next.js project. Open your terminal and run the following command:
npx create-next-app@latest my-chat-appWhen prompted, choose:
Yeswhen prompted to use TypeScript.Nowhen prompted to use ESLint.Yeswhen prompted to use Tailwind CSS.Nowhen prompted to use src/ directory.Yeswhen prompted to use App Router.Nowhen prompted to customize the default import alias (@/*).
Once that is done, move into the project directory and start the app in development mode by executing the following command:
cd my-chat-app
npm run dev
The app should be running on localhost:3000.
Now, create a .env file at the root of your project. You are going to add the items we saved from the above sections.
It should look something like this:
# .env

# Stream Environment Variable
NEXT_PUBLIC_STREAM_API_KEY="..."
Integrating shadcn/ui components
To quickly prototype the chat user interface, you will set up the shadcn/ui with Next.js. shadcn/ui is a collection of beautifully designed components that you can copy and paste into your applications. Execute the command below to set up shadcn/ui:
npx shadcn-ui@latest initYou will be asked a few questions to configure a components.json, choose the following:
Yeswhen prompted to use TypeScript.Defaultwhen prompted to select the style to use.Slatewhen prompted to choose the base color.yeswhen prompted to use CSS variables for colors.
Once that is done, you have set up a CLI that allows us to easily add React components to your Next.js application. Execute the following command to get the button, input, and textarea elements:
npx shadcn-ui@latest add button
npx shadcn-ui@latest add input
npx shadcn-ui@latest add textarea
Once that is done, you would now see a ui directory inside the app/components directory containing button.tsx, input.tsx, and textarea.tsx files.
Installing Chatscope and Stream UI Kit for React
Let’s figure out overall actions of what is needed so that you can install the relevant dependencies to make the implementation easier.
First, as each visitor is treated as an anonymous user, you would need to identify them with a randomly generated name (id). Another is that each message received (in the channel) shall propagate to all the visitors in real time. Finally, you need to make sure that all messages are represented as incoming ones into the channel.
Execute the following command to install the necessary libraries for satisfying the requirements as above:
npm install @chatscope/chat-ui-kit-react
npm install stream-chat stream-chat-react
npm install unique-username-generator
It installs the following libraries:
unique-username-generator: A package to generate unique usernames.stream-chat: Stream’s JavaScript API client.stream-chat-react: A library of React hooks (and components) for Stream Chat.@chatscope/chat-ui-kit-react: A library of React components for prototyping Chat UI.
Now, let’s move on to building the reactive chat user interface.
Building the Chat User Interface with ChatScope and Stream
In this section, you will learn how to build React components that attach visitors to a specific channel, render the chat history, and allow them to post messages.
First, let’s build a React component that renders a list of chat messages dynamically. You will use components from Stream and Chatscope libraries.
Create a file Messages.tsx in the app directory with the following code:
import { cn } from "@/lib/utils";
import { useChannelStateContext } from "stream-chat-react";
import { Message, MessageList } from "@chatscope/chat-ui-kit-react";

export default function () {
  const { messages } = useChannelStateContext();
  return (
    <MessageList>
      {messages?.map((i, index: number) => (
        <Message
          key={i.id}
          model={{
            position: "normal",
            sender: i.user?.id,
direction: "incoming",Using the useChannelStateContext hook, you are able to retrieve the chat history, and listen to incoming messages. Using MessageList and Message Chatscope UI components you are able to mark all the messages as incoming to the channel, and map them with their sender’s information, message content, and timestamp.
Now, let’s build the route where users can view the chat history and post their message simultaneously. Update page.tsx file in the app directory with the following code:
"use client";

import { useState } from "react";
import Messages from "./Messages";
import { Button } from "@/components/ui/button";
import { Channel, Chat } from "stream-chat-react";
import { Textarea } from "@/components/ui/textarea";

export default function () {
  const [channel, setChannel] = useState(null);
  const [chatClient, setChatClient] = useState(null);
  return (
    <div className="flex max-w-[300px] flex-col gap-y-3 p-5">
      <div className="flex w-[300px] flex-col gap-y-3">
<span className="border-b border-gray-100 font-semibold">Chat</span>The index route is now able to render the list of messages, and has a textarea element to accept input from a visitor. Before implementing the functionality to post a message, you will want to associate them with a unique id. Update the code with the following:
"use client";

import Messages from "./Messages";
+ import { useEffect, useState } from "react";
import { Button } from "@/components/ui/button";
import { Channel, Chat } from "stream-chat-react";
+ import { DevToken, StreamChat } from "stream-chat";
import { Textarea } from "@/components/ui/textarea";
+ import { generateUsername } from "unique-username-generator";

export default function () {
    const [channel, setChannel] = useState(null);
    const [chatClient, setChatClient] = useState(null);
+ const loadChatClient = async () => {
+ const newChatClient = new StreamChat(You have now made a one-time call to loadChatClient function, which enables Websocket connection to a messaging channel on Stream. It then disconnects any user (if) associated with the session. Finally, it generates a unique username for the visitor (if not found in localStorage). These steps ensure that the visitor is identified uniquely.
To listen to messages in a particular channel, update the code with following:
"use client";

// Imports as is

export default function () {
    const [channel, setChannel] = useState(null);
    const [chatClient, setChatClient] = useState(null);
+  const watchChannel = () => {
+    const channel = chatClient.channel("messaging", "livestreaming_chat", {
+      name: "Live Streaming Chat",
+    });
+    channel.watch().then(() => setChannel(channel));
+  };
    const loadChatClient = async () => {
const newChatClient = new StreamChat(The visitor is now connected to the Live Stream Chat channel, identified with livestreaming_chat unqiue id. Then, the watch() utility is used to listen and update the context with incoming messages.
To post a message in the channel, update the code with the following:
"use client";

// Imports as is

export default function () {
    // Variables, Hooks as is
    return (
    <div className="flex max-w-[300px] flex-col gap-y-3 p-5">
        <div className="flex w-[300px] flex-col gap-y-3">
        {/* Rest of component as is */}
        <Button
            className="max-w-max"
+          onClick={() => {
+            if (channel) {
+ channel.sendMessage({Using the sendMessage utility in the onClick event, visitors are able to post a message (in the channel). Neat!
You are now done with building the reactive chat interface that randomly generates a unique id for the visitor, renders a list of messages dynamically and allows them to post a message. Let’s deploy the Next.js application to Vercel.
Deploy To Vercel
The code is now ready to deploy to Vercel. Use the following steps to deploy:
- Start by creating a GitHub repository containing your app’s code.
- Then, navigate to the Vercel Dashboard and create a New Project.
- Link the new project to the GitHub repository you just created.
- In Settings, update the Environment Variables to match those in your local .env file.
- Click Deploy.
Ending Thoughts
In conclusion, this tutorial provides a comprehensive guide on integrating Next.js and Stream to build a dynamic livestream chat experience. By granting users the ability to participate without authentication and ensuring granular control over their permissions, you have learnt how to make real-time interaction more accessible.
More Information
For more detailed insights, explore the references cited in this post.
