const client = StreamChat.getInstance('api_key', 'api_secret');
client.updateAppSettings({
  push_config: {
    version: 'v2'
  },
  firebase_config: {
    credentials_json: fs.readFileSync(
      './firebase-credentials.json',
      'utf-8',
    ),
});Push Notifications
Introduction
This guide details how to add push notifications to your app.
Push notifications are a core part of the experience for a messaging app. Users often need to be notified of new messages and old notifications sometimes need to be updated silently.
Stream Chat sends push notification to channel members that have at least one registered device. Push notifications are only sent for new messages and not for other events. You can use Webhooks to send push notifications on other types of events.
You can read more about Stream’s push delivery logic.
To receive push notifications from Stream Chat, you'll need to:
- Configure your push notification provider on the Stream Dashboard.
- Add the client-side integration. For Flutter this guide demonstrates using Firebase Cloud Messaging (FCM).
Push Delivery Rules
Push message delivery behaves according to these rules:
- Push notifications are sent only for new messages.
- Only channel members receive push messages.
- Members receive push notifications regardless of their online status.
- Replies inside a thread are only sent to users that are part of that thread:
- They posted at least one message
- They were mentioned
- Messages from muted users are not sent.
- Messages from muted channels are not sent.
- Messages are sent to all registered devices for a user (up to 25).
- The message doesn't contain the flag
skip_pushas true. push_notificationsis enabled (default) on the channel type for message is sent.
Push notifications require membership. Watching a channel isn't enough.
Setup FCM
To integrate push notifications in your Flutter app, you need to use the package firebase_messaging.
Follow the Flutter Firebase documentation to set up the plugin for Android and iOS. Additional setup and instructions can be found here. Be sure to read this documentation to understand Firebase messaging functionality.
Once that's done, FCM should be able to send push notifications to your devices.
Integration With Stream
Step 1 - Get the Firebase Credentials
These credentials are the private key file for your service account, in Firebase console.
To generate a private key file for your service account in the Firebase console:
-
Open Settings > Service Accounts.
-
Click Generate New Private Key, then confirm by clicking Generate Key.
-
Securely store the JSON file containing the key.
This JSON file contains the credentials that need to be uploaded to Stream’s server, as explained in the next step.
Step 2 - Upload the Firebase Credentials to Stream
You can upload your Firebase credentials using either the dashboard or the app settings API (available only in backend SDKs).
Using the Stream Dashboard
- Go to the Chat Overview page on Stream Dashboard.
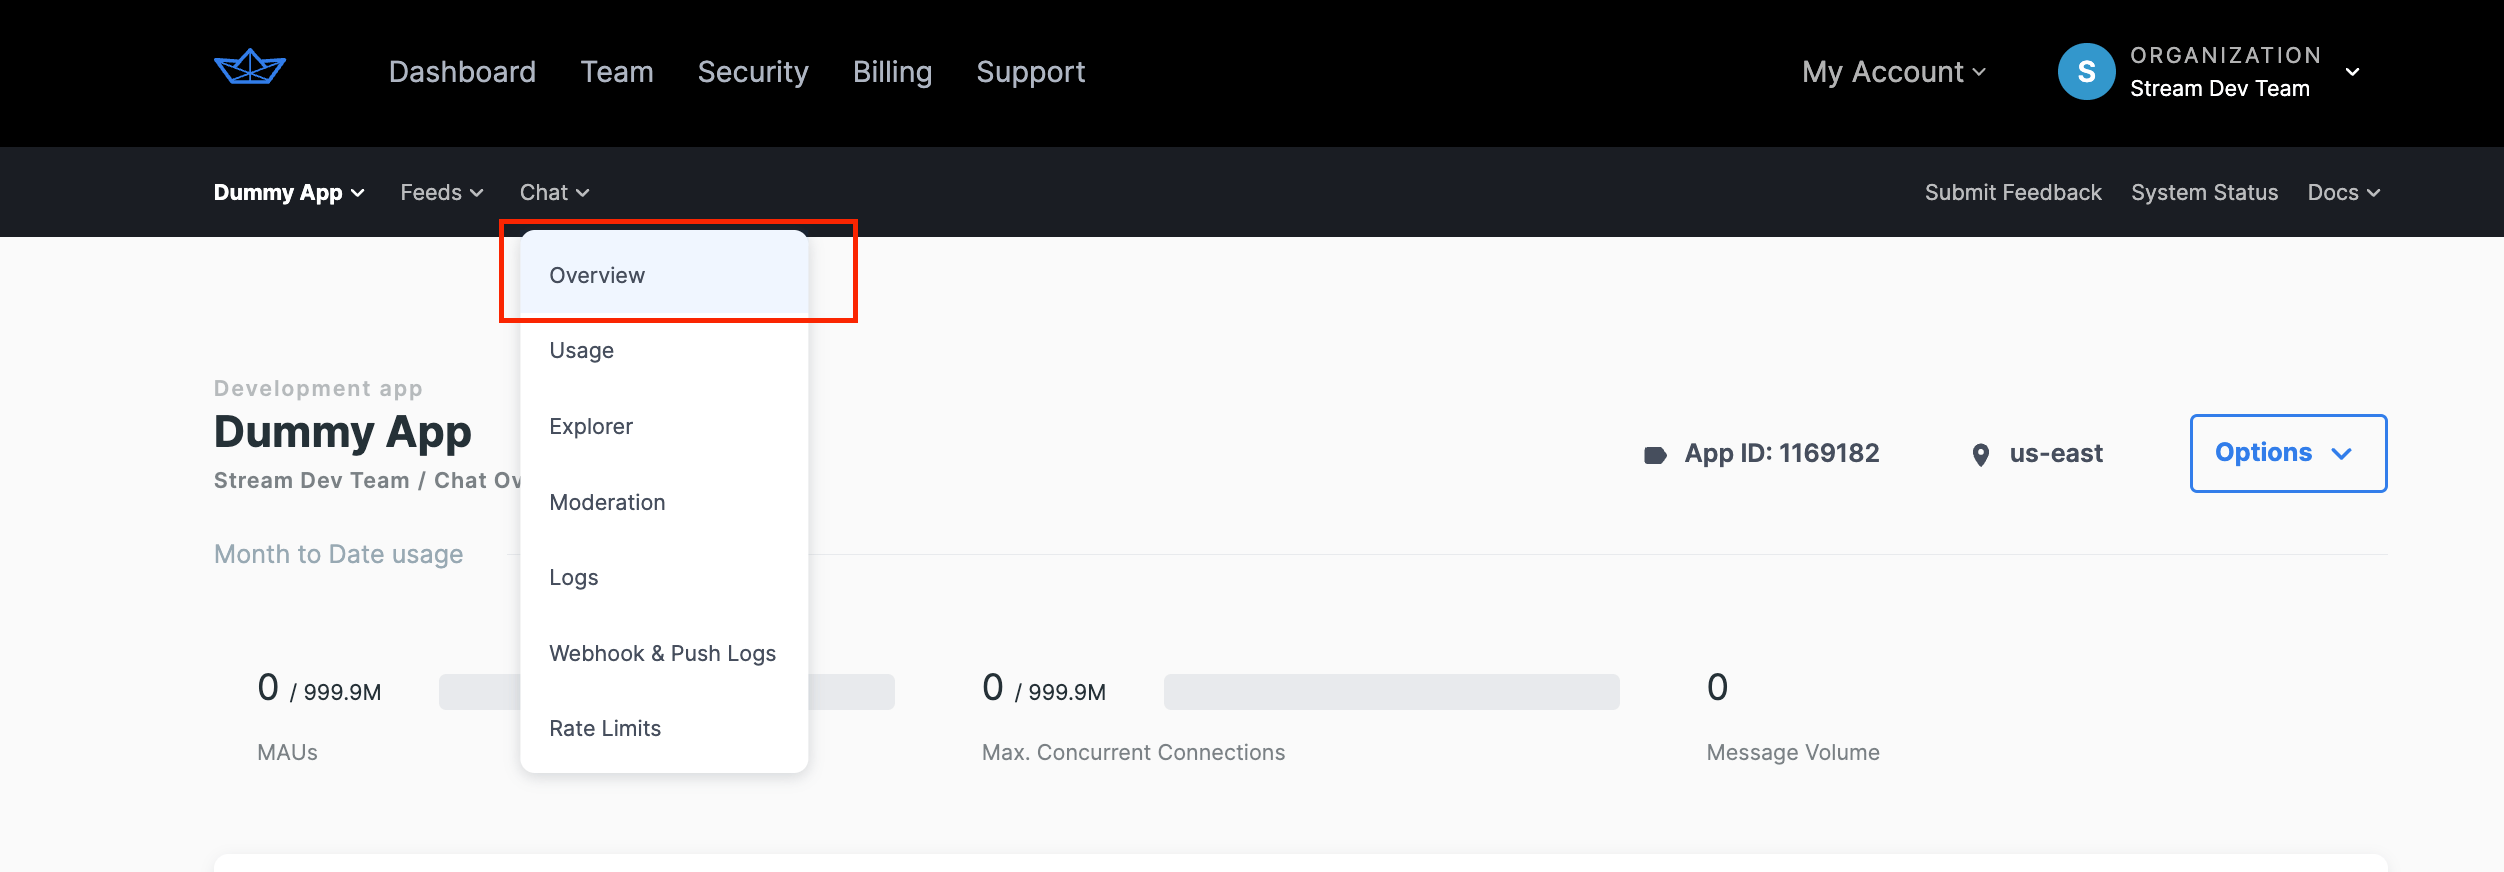
- Enable Firebase Notification toggle on Chat Overview.

- Enter your Firebase Credentials and press
"Save".
Using the API
You can also enable Firebase notifications and upload the Firebase credentials using one of our server SDKs.
For example, using the Stream JavaScript SDK:
Registering a Device With Stream Backend
Once you configure a Firebase server key and set it up on the Stream dashboard, a device that is supposed to receive push notifications needs to be registered on the Stream backend. This is usually done by listening for Firebase device token updates and passing them to the backend as follows:
firebaseMessaging.onTokenRefresh.listen((token) {
      client.addDevice(token, PushProvider.firebase);
});
Push Notifications v2 also supports specifying a name for the push device tokens you register. By setting the optional pushProviderName parameter in the addDevice call, you can support different configurations between the device and the PushProvider.
firebaseMessaging.onTokenRefresh.listen((token) {
      client.addDevice(token, PushProvider.firebase, pushProviderName: 'my-custom-config');
});
Receiving Notifications
Push notifications behave differently depending on whether you are using iOS or Android. See here to understand the difference between notification and data payloads.
iOS
On iOS, we send both a notification and a data payload. This means you don't need to do anything special to get the notification to show up. However, you might want to handle the data payload to perform some logic when the user taps on the notification.
To update the template, you can use a backend SDK. For example, using the Stream JavaScript SDK:
const client = StreamChat.getInstance(‘api_key’, ‘api_secret’);
const apn_template = `{
  "aps": {
    "alert": {
      "title": "New message from {{ sender.name }}",
      "body": "{{ truncate message.text 2000 }}"
    },
    "mutable-content": 1,
    "category": "stream.chat"
  },
  "stream": {
    "sender": "stream.chat",
      "type": "message.new",
      "version": "v2",
      "id": "{{ message.id }}",
      "cid": "{{ channel.cid }}"
  }
}`;

client.updateAppSettings({
  firebase_config: {
    apn_template,
 });
Android
On Android, we send only a data payload. This gives you more flexibility and lets you decide what to do with the notification.
For example, you can listen and generate a notification from them.
The code below demonstrates how to generate a notification when a data-only message is received and the app is in the background.
There are a few things to keep in mind about your background message handler:
- It must not be an anonymous function.
- It must be a top-level function (not a class method which requires initialization).
- It must be annotated with @pragma('vm:entry-point') right above the function declaration (otherwise it may be removed during tree shaking for release mode).
For additional information on background messages, please see the Firebase documentation.
@pragma('vm:entry-point')
Future<void> onBackgroundMessage(RemoteMessage message) async {
  final chatClient = StreamChatClient(apiKey);

  chatClient.connectUser(
    User(id: userId),
    userToken,
    connectWebSocket: false,
  );

  handleNotification(message, chatClient);
}

void handleNotification(
  RemoteMessage message,
  StreamChatClient chatClient,
) async {

  final data = message.data;

  if (data['type'] == 'message.new') {
    final flutterLocalNotificationsPlugin = await setupLocalNotifications();
    final messageId = data['id'];
    final response = await chatClient.getMessage(messageId);

    flutterLocalNotificationsPlugin.show(
      1,
      'New message from ${response.message.user!.name} in ${response.channel!.name}',
      response.message.text,
      const NotificationDetails(
          android: AndroidNotificationDetails(
        'new_message',
        'New message notifications channel',
      )),
    );
  }
}

FirebaseMessaging.onBackgroundMessage(onBackgroundMessage);
In the above example, you get the message details using the getMessage method, and then you use the flutter_local_notifications package to show the actual notification.
Using a Template on Android
Adding a notification payload to Android notifications is still possible. You can do so by adding a template using a backend SDK. For example, using the Stream JavaScript SDK:
const client = StreamChat.getInstance(‘api_key’, ‘api_secret’);
const notification_template = `
{
    "title": "{{ sender.name }} @ {{ channel.name }}",
    "body": "{{ message.text }}",
    "click_action": "OPEN_ACTIVITY_1",
    "sound": "default"
}`;

client.updateAppSettings({
  firebase_config: {
    notification_template,
 });
Possible Issues
Make sure to read the general push notification docs to prevent common issues with notifications 😢.
Testing if Push Notifications are Setup Correctly
If you're not sure whether you've set up push notifications correctly, for example, you don't always receive them, or they don’t work reliably, then you can follow these steps to make sure your configuration is correct and working:
- Clone our repository for push testing:
git clone git@github.com:GetStream/chat-push-test.git cd chat-push-test/flutter- In that folder run
flutter pub get - Input your API key and secret in
lib/main.dart - Change the bundle identifier/application ID and development team/user so you can run the app on your physical device.Do not run on an iOS simulator, as it will not work. Testing on an Android emulator is fine.
- Add your
google-services.json/GoogleService-Info.plist - Run the app
- Accept push notification permission (iOS only)
- Tap on
Device IDand copy it - After configuring stream-cli, run the following command using your user ID:
stream chat:push:test -u <USER-ID>You should get a test push notification 🥳
Foreground Notifications
You may want to show a notification when the app is in the foreground. For example, when you're in a channel and receive a new message from someone in another channel.
For this scenario, you can also use the flutter_local_notifications package to show a notification.
You need to listen for new events using FirebaseMessaging.onMessage.listen() and handle them accordingly:
FirebaseMessaging.onMessage.listen((message) async {
  handleNotification(
    message,
    chatClient,
  );
});
You should also check that the message's channel differs from the channel in the foreground. How you do this depends on your app infrastructure and how you handle navigation.
Take a look at the Stream Chat v1 sample app to see how we're doing it over there.
Saving Notification Messages to the Offline Storage (Only Android)
When the app is closed, you can save incoming messages when you receive them via a notification so that they're already there later when you open the app.
To do this, you need to integrate the package stream_chat_persistence that exports a persistence client. See here for information on how to set it up.
Then calling FirebaseMessaging.onBackgroundMessage(...) you need to use a TOP-LEVEL or STATIC function to handle background messages.
For additional information on background messages, please see the Firebase documentation.
Here is an example:
@pragma('vm:entry-point')
Future<void> onBackgroundMessage(RemoteMessage message) async {
  final chatClient = StreamChatClient(apiKey);
  final persistenceClient = StreamChatPersistenceClient();

  await persistenceClient.connect(userId);

  chatClient.connectUser(
    User(id: userId),
    userToken,
    connectWebSocket: false,
  );

  handleNotification(message, chatClient);
}

void handleNotification(
  RemoteMessage message,
  StreamChatClient chatClient,
) async {
  final data = message.data;
  if (data['type'] == 'message.new') {
    final flutterLocalNotificationsPlugin = await setupLocalNotifications();
    final messageId = data['id'];
    final cid = data['cid'];
    final response = await chatClient.getMessage(messageId);
    await persistenceClient.updateMessages(cid, [response.message]);

    await persistenceClient.disconnect();

    flutterLocalNotificationsPlugin.show(
      1,
      'New message from ${response.message.user?.name ?? ''} in ${response.channel?.name ?? ''}',
      response.message.text ?? '',
      NotificationDetails(
          android: AndroidNotificationDetails(
        'new_message',
        'New message notifications channel',
      )),
    );
  }
}

FirebaseMessaging.onBackgroundMessage(onBackgroundMessage);On this page: