Video filters

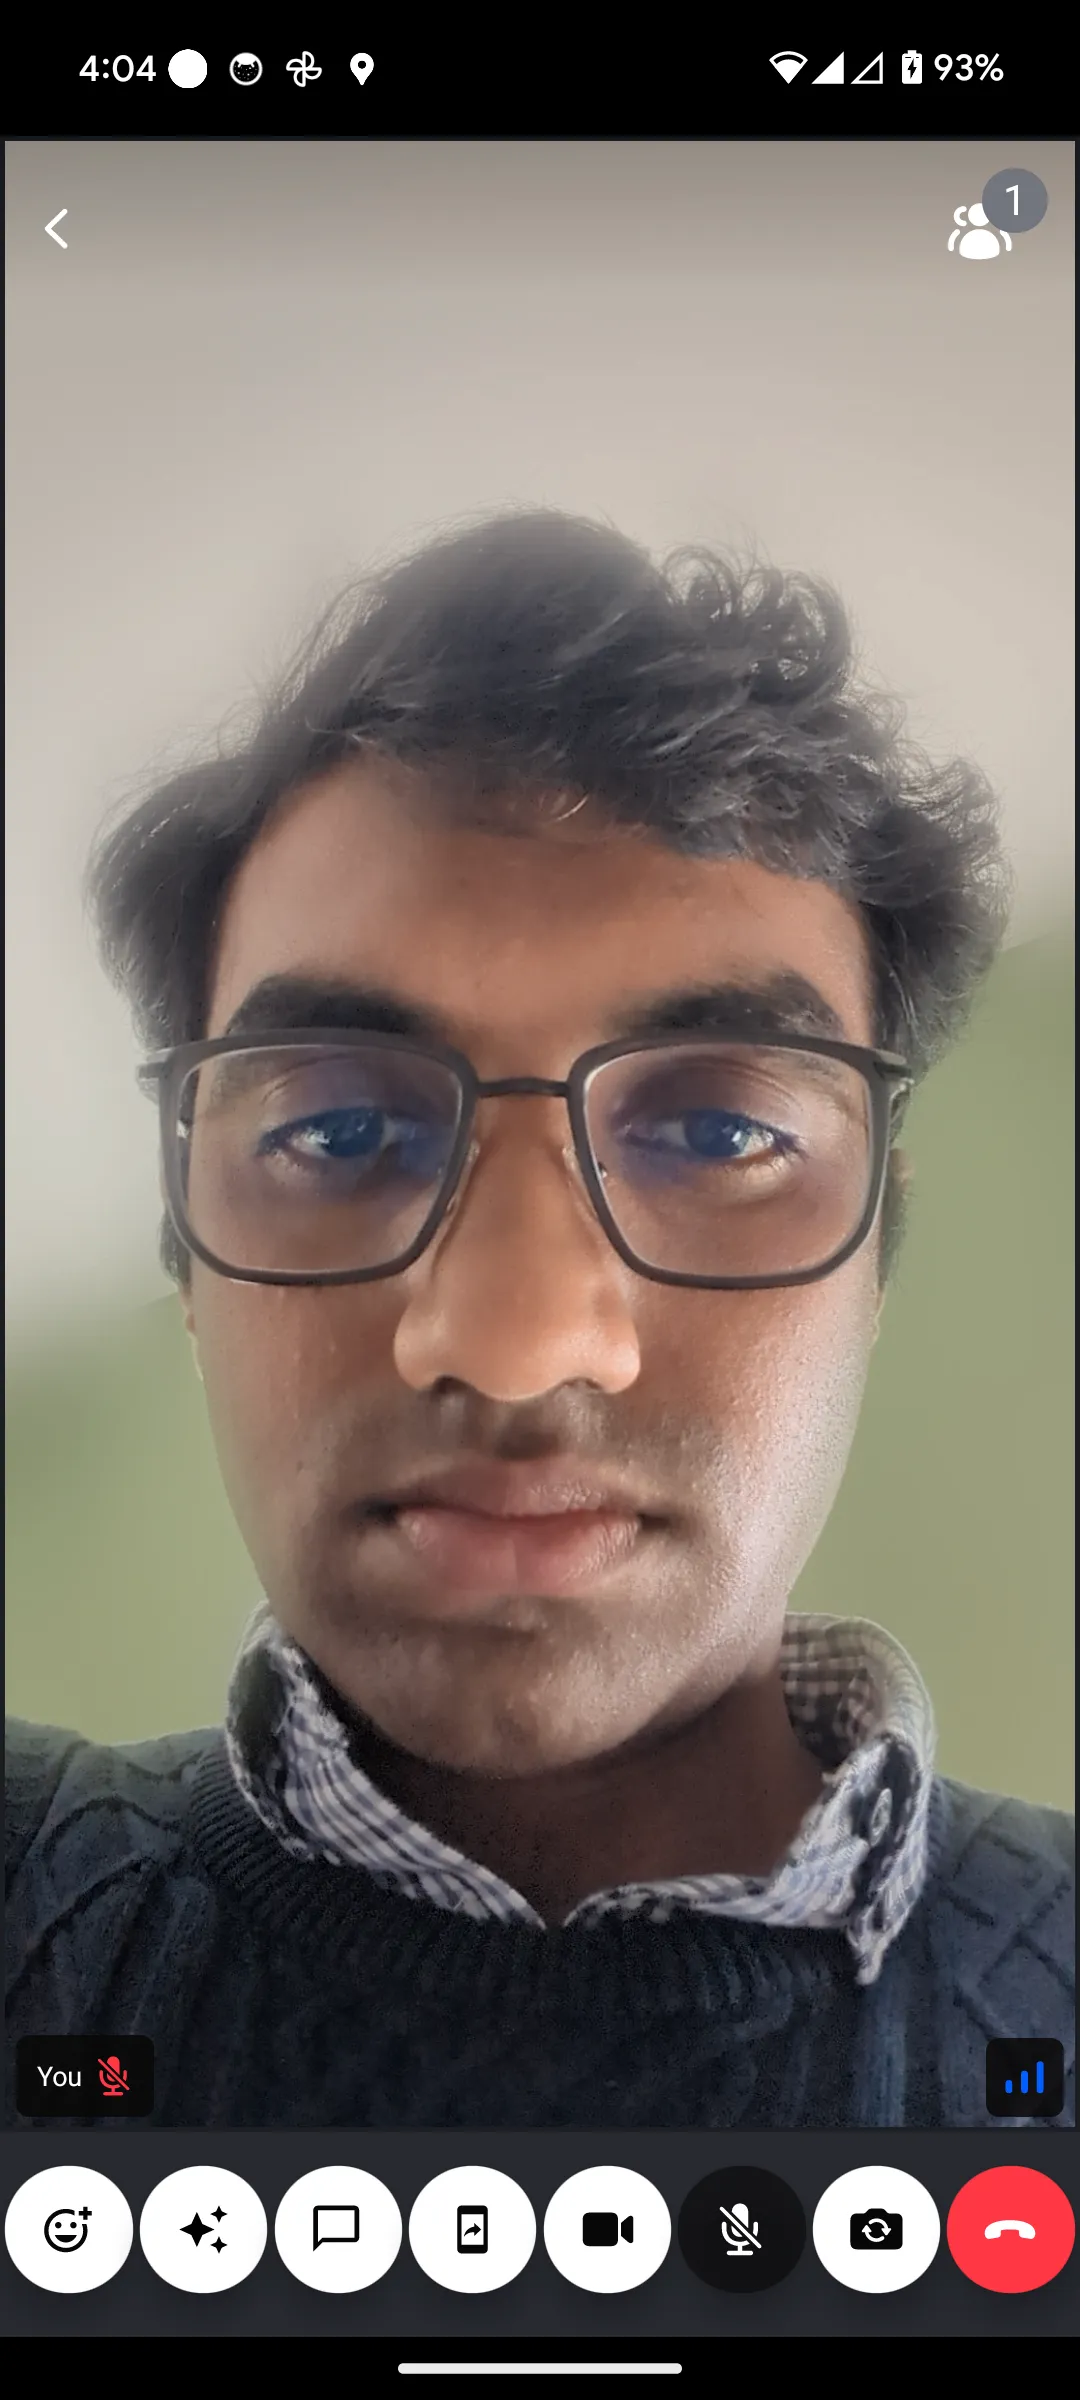
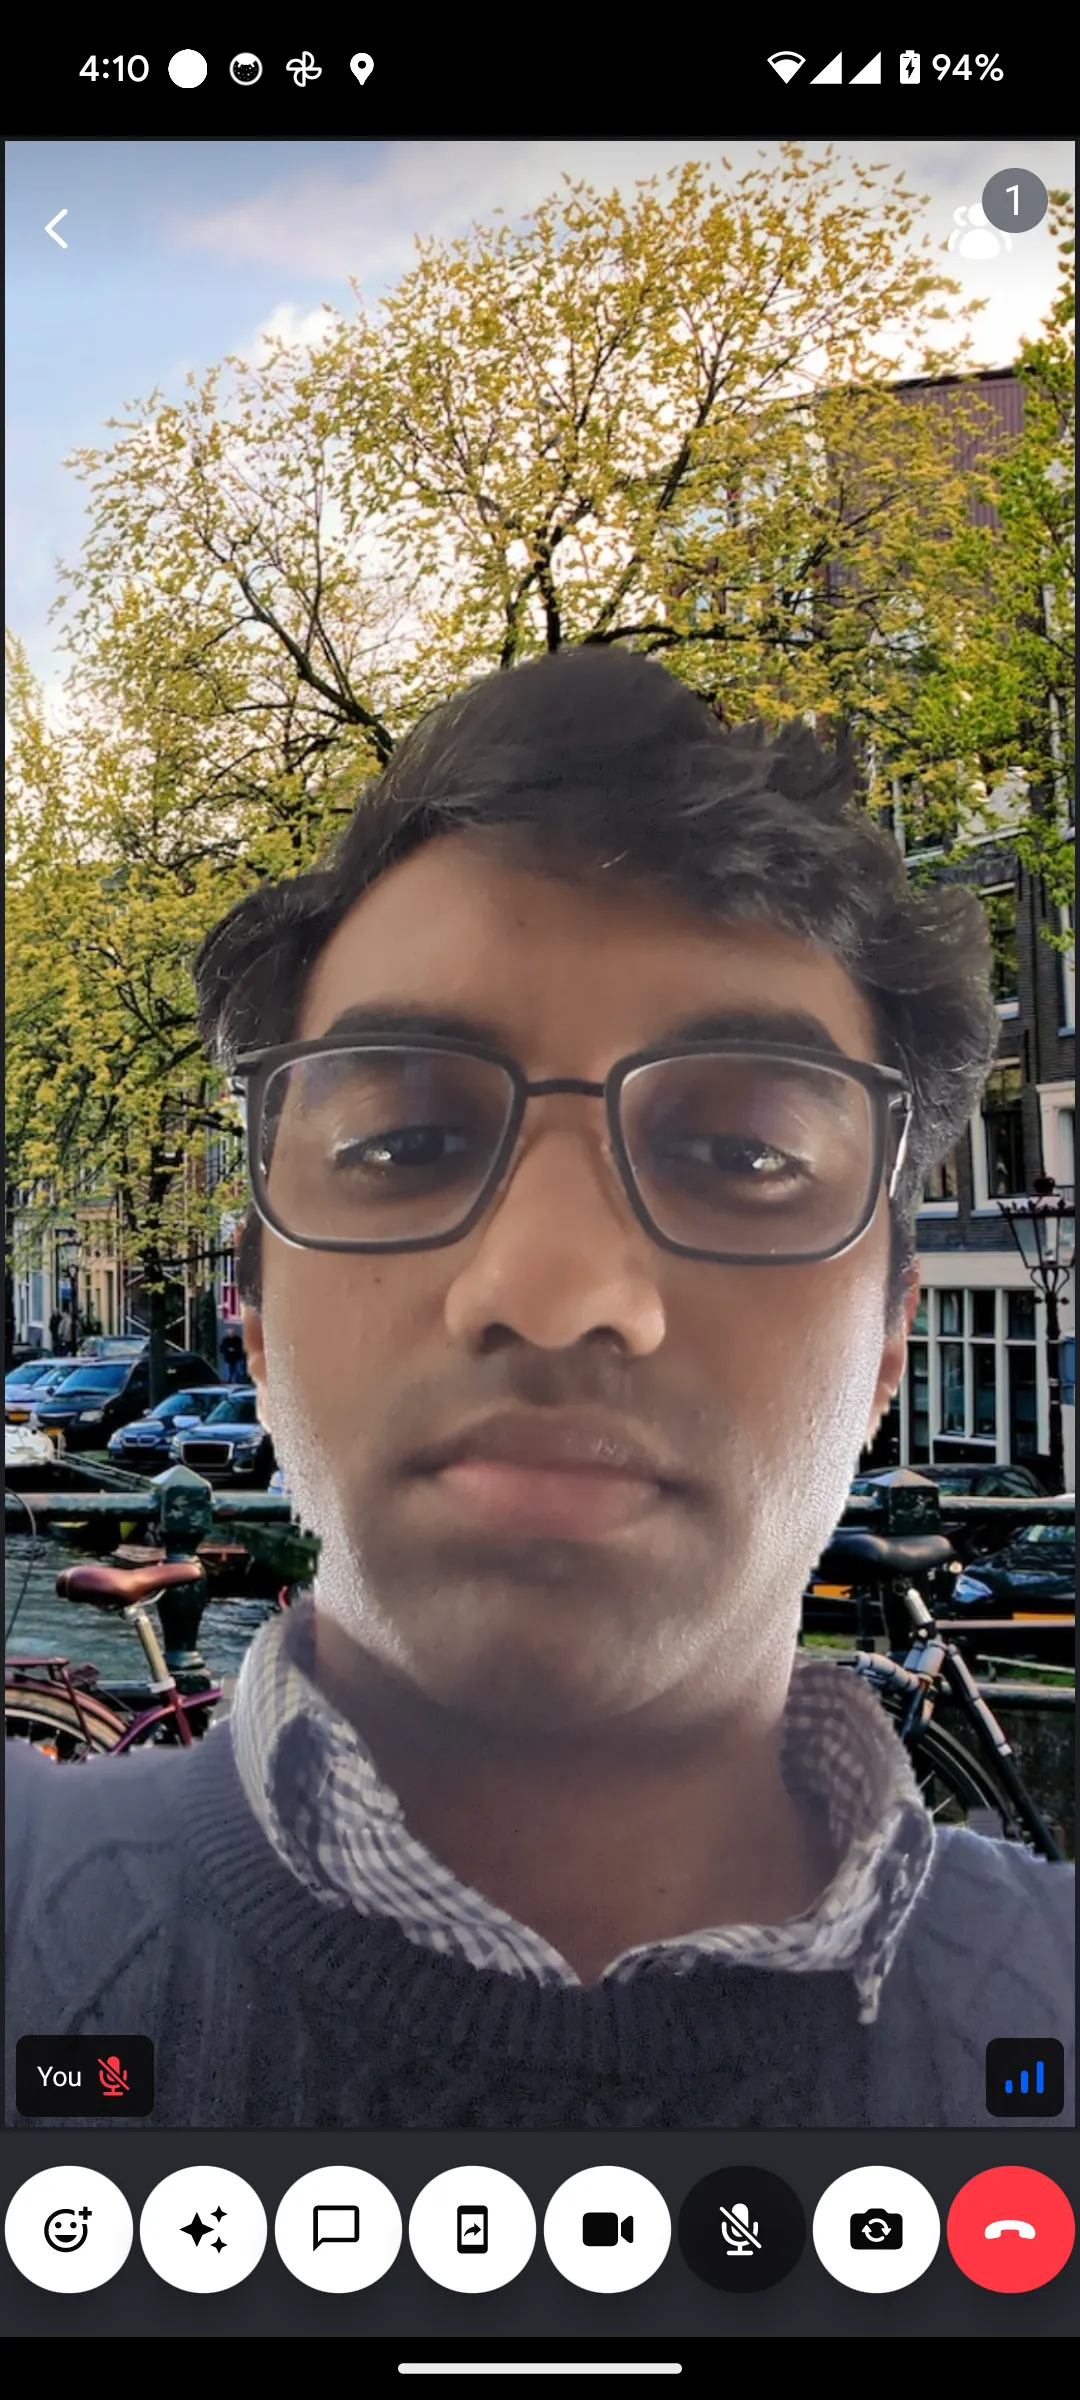
A very common use case during a video call is to apply some effect on our backgrounds. Those backgrounds can vary but the most common ones are blurring and adding a static image. Our SDK offers background blurring and virtual backgrounds with static images out of the box and also has support for injecting your custom filter into the calling experience. In this guide, we will show you how to apply video filters to a video stream.

Using the background video filters provided by the SDK

Step 1 - Install the video filters library

To enable background filters in your app. You must first add the @stream-io/video-filters-react-native library.

Terminal
yarn add @stream-io/video-filters-react-native

This library adds the required native module for processing the video stream and manipulating it with your desired video filter.

IMPORTANT

For iOS, the library is written in Swift. In order for Xcode to build the app when you use the library, your main app project must contain Swift code and a bridging header file. If your app project does not contain any Swift code yet, a simple workaround is to add a single empty .swift file and an empty bridging header.

Step 2 - Wrap under Provider component

Background filters are provided through the following APIs and components:

  • <BackgroundFiltersProvider /> - a React context provider that will allow you to use the filters API in your application.
  • useBackgroundFilters() - a React hook that will allow you to access the filters API in your application

A basic integration looks like this:

import {
BackgroundFiltersProvider,
Call,
StreamCall,
StreamVideo,
StreamVideoClient,
} from '@stream-io/video-react-native-sdk';

export default function App() {
let client: StreamVideoClient; /* = ... */
let call: Call; /* = ... */
return (
<StreamVideo client={client}>
<StreamCall call={call}>
<BackgroundFiltersProvider>
<MyCallContent />
<MyBackgroundFilterUI /> {/* your UI to enable or disable filters, for example a modal dialog */}
</BackgroundFiltersProvider>
</StreamCall>
</StreamVideo>
);
}

The BackgroundFiltersProvider holds the state of the background filters in the app. It must be wrapped under the StreamCall component so that the media stream of the call can be accessed.

Step 2 - Use the hook to control the filters

Once you have the BackgroundFiltersProvider rendered in your application, you can use the useBackgroundFilters() hook to access the filters API and control the behavior of the filters.

caution

In iOS, the background video filters are supported only on iOS 15 and above. However, the iOS platform's minimum level of support for the custom filters that you may add depends on what APIs you would use.

import { useBackgroundFilters } from '@stream-io/video-react-native-sdk';

export const MyBackgroundFilterUI = () => {
const {
isSupported, // checks if these filters can run on this device
disableAllFilter // disables all the video filters
applyBackgroundBlurFilter, // applies the blur filter
applyBackgroundImageFilter, // applies the image filter
currentBackgroundFilter, // the currently applied filter
} = useBackgroundFilters();

if (!isSupported) {
return null;
}

return (
<SafeAreaView>
<Button onPress={disableBackgroundFilter} title="Disable"/>
<Button onPress={() => applyBackgroundBlurFilter('heavy')} title="Blur Heavy"/>
<Button onPress={() => applyBackgroundBlurFilter('medium')} title="Blur Medium">
<Button onPress={() => applyBackgroundBlurFilter('light')} title="Blur Light"/>
<Button onPress={() => applyBackgroundImageFilter(require('path/to/image/amsterdam.png'))} title="Amsterdam Local Image Background"/>
<Button onPress={() => applyBackgroundImageFilter({uri: 'https://upload.wikimedia.org/wikipedia/commons/1/18/React_Native_Logo.png'})} title="React Native Remote Image Background"/>
</SafeAreaView>
);
};
Preview of background blur filterPreview of background image replacement filter
Preview of the background blur filterPreview of background image replacement filter

Advanced: adding custom video filters

Step 1 - Add your custom filter natively in Android and iOS

note

For Expo, make sure to create a new Expo local module first if you do not have any existing module set up already.

To create a new video filter, you need to implement the VideoFrameProcessorFactoryInterface from @stream-io/react-native-webrtc. A simple example that applies rotation to the video filter would be like the following:

RotationFilterFactory.kt
import com.oney.WebRTCModule.videoEffects.VideoFrameProcessor
import com.oney.WebRTCModule.videoEffects.VideoFrameProcessorFactoryInterface
import org.webrtc.VideoFrame

class RotationFilterFactory : VideoFrameProcessorFactoryInterface {
override fun build(): VideoFrameProcessor {
return VideoFrameProcessor { frame, textureHelper ->
VideoFrame(
frame.buffer.toI420(),
180, // apply rotation to the video frame
frame.timestampNs
)
}
}
}

For the easiness of processing video frames in Bitmap, we export a VideoFrameProcessorWithBitmapFilter class from the @stream-io/video-filters-react-native library. The built-in background filters of the library have been implemented using this class. To implement a video filter with Bitmap, create a class by extending a filter that extends from BitmapVideoFilter abstract class. This BitmapVideoFilter abstract class gives you a Bitmap for each video frame, which you can manipulate directly. By returning a new VideoFrameProcessorWithBitmapFilter instance with that filter we can implement a bitmap processing filter.

note

BitmapVideoFilter is less performant than a normal video filter that does not use bitmaps. It is due to the overhead of certain operations, like YUV <-> ARGB conversions.

Example: grayscale video filter

​ We can create and set a simple video filter that turns the video frame to grayscale by extending a filter that extends from BitmapVideoFilter abstract class like this:

GrayScaleVideoFilterFactory.kt
import android.graphics.Bitmap
import android.graphics.Canvas
import android.graphics.ColorMatrix
import android.graphics.ColorMatrixColorFilter
import android.graphics.Paint
import com.oney.WebRTCModule.videoEffects.VideoFrameProcessor
import com.oney.WebRTCModule.videoEffects.VideoFrameProcessorFactoryInterface
import com.streamio.videofiltersreactnative.common.BitmapVideoFilter
import com.streamio.videofiltersreactnative.common.VideoFrameProcessorWithBitmapFilter

class GrayScaleVideoFilterFactory : VideoFrameProcessorFactoryInterface {
override fun build(): VideoFrameProcessor {
return VideoFrameProcessorWithBitmapFilter {
GrayScaleFilter()
}
}
}
private class GrayScaleFilter : BitmapVideoFilter() {
override fun applyFilter(videoFrameBitmap: Bitmap) {
val canvas = Canvas(videoFrameBitmap)
val paint = Paint().apply {
val colorMatrix = ColorMatrix().apply {
// map the saturation of the color to grayscale
setSaturation(0f)
}
colorFilter = ColorMatrixColorFilter(colorMatrix)
}
canvas.drawBitmap(videoFrameBitmap, 0f, 0f, paint)
}
}

Step 2 - Register this filter in your native module

Now you have to add a method in your app to register this video filter to the @stream-io/video-filters-react-native library.

Follow the official React Native documentation to create a new Android native module if there is no native module in your app already. In that native module, add a method to add the filter to the ProcessorProvider from the @stream-io/video-filters-react-native library. For example:

VideoEffectsModule.kt
import com.facebook.react.bridge.Promise
import com.facebook.react.bridge.ReactApplicationContext
import com.facebook.react.bridge.ReactContextBaseJavaModule
import com.facebook.react.bridge.ReactMethod
import com.oney.WebRTCModule.videoEffects.ProcessorProvider
import io.getstream.rnvideosample.videofilters.GrayScaleVideoFilterFactory

class VideoEffectsModule (reactContext: ReactApplicationContext) : ReactContextBaseJavaModule(reactContext) {
override fun getName(): String {
return NAME;
}

@ReactMethod
fun registerVideoFilters(promise: Promise) {
ProcessorProvider.addProcessor("grayscale", GrayScaleVideoFilterFactory())
promise.resolve(true)
}

companion object {
private const val NAME = "VideoEffectsModule"
}
}
NOTE

While calling the addProcessor method. We need to provide a name to the filter that we are registering. In the above example, it is grayscale. This name is to be later called in JavaScript.

Step 3 - Apply the video filter in JavaScript

To apply this video filter. You have to call the method mediaStreamTrack._setVideoEffect(name). To disable the filters you have to call the method mediaStreamTrack._setVideoEffect(null) or you can call the disableAllFilter method from the useBackgroundFilters() hook. Below is a small example of a hook that can be used to apply the grayscale video filter that we created. Note that the media stream is present inside the Call instance returned from the useCall hook.

import {
useBackgroundFilters,
useCall,
} from '@stream-io/video-react-native-sdk';
import { useRef, useCallback, useState } from 'react';

import { MediaStream } from '@stream-io/react-native-webrtc';

import { NativeModules, Platform } from 'react-native';

type CustomFilters = 'GrayScale' | 'MyOtherCustomFilter';

export const useCustomVideoFilters = () => {
const call = useCall();
const isFiltersRegisteredRef = useRef(false);
const { disableAllFilters } = useBackgroundFilters();
const [currentCustomFilter, setCustomFilter] = useState<CustomFilters>();

const applyGrayScaleFilter = useCallback(async () => {
if (!isFiltersRegisteredRef.current) {
// registering is needed only once per the app's lifetime
await NativeModules.VideoEffectsModule?.registerVideoFilters();
isFiltersRegisteredRef.current = true;
}
disableAllFilters(); // disable any other filter
(call?.camera.state.mediaStream as MediaStream | undefined)
?.getVideoTracks()
.forEach((track) => {
track._setVideoEffect('grayscale'); // set the grayscale filter
});
setCustomFilter('GrayScale');
}, [call, disableAllFilters]);

const disableCustomFilter = useCallback(() => {
disableAllFilters();
setCustomFilter(undefined);
}, [disableAllFilters]);

return {
currentCustomFilter,
applyGrayScaleFilter,
disableCustomFilter,
};
};

Below is a preview of the above grayscale video filter: Preview of the grayscale video filter

NOTE

When using a custom filter along with the built-in background filters, always call the disableAllFilter method from the useBackgroundFilters() hook so that the state inside the hook is informed if the built-in filters have been disabled.

Did you find this page helpful?