type MessageToSend = {
  attachments?: MessageAttachments;
  error?: ErrorFromResponse<APIErrorResponse>;
  errorStatusCode?: number;
  id?: string;
  mentioned_users?: UserResponse[];
  parent?: StreamMessage;
  parent_id?: string;
  status?: string;
  text?: string;
};Input Submit Handler
In this example, we demonstrate how to provide custom logic and override the MessageInput
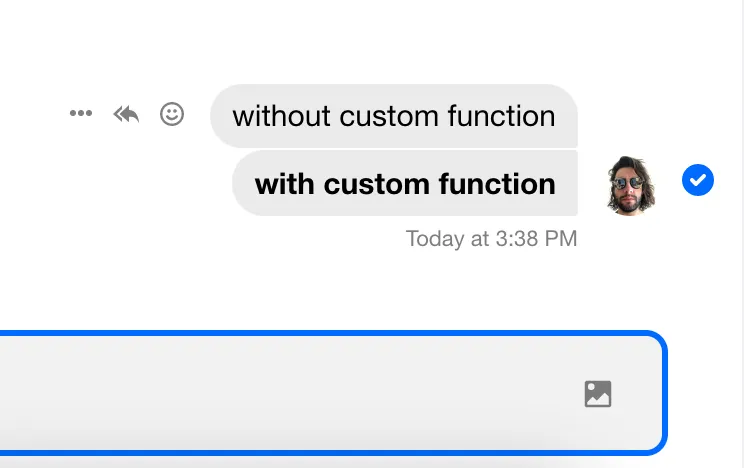
component's default submit handler function. Our custom handler function will bold any message text.
overrideSubmitHandler Prop
The MessageInput component accepts an overrideSubmitHandler prop, which allows you to add custom logic to the
conclusion of the underlying textarea element's handleSubmit
function.
You do not have to implement your custom submit handler, if the only thing you need is to pass custom message data to the underlying API call. In that case you can use the handleSubmit function from the MessageInputContext. The handleSubmit function allows you to pass custom message data through its second parameter customMessageData. This applies to sending a new message as well as updating an existing one. In order for this to work, you will have to implement custom message input components and pass them to Channel props EditMessageInput or Input respectively.
The overrideSubmitHandler function receives three arguments, the message to be sent, the cid (channel type prepended to channel id)
for the currently active channel and optionally custom message data. The message object (the first argument) is of the following type:
Call the sendMessage function from the ChannelActionContext within
your custom function to ensure a message is sent to the active channel.
Custom Function
For this example, we will take the input text entered by the user and wrap it in two asterisks to render bold markdown. Once we've
added the markdown characters, we call the sendMessage function with the updated message object.
const overrideSubmitHandler = (message: MessageToSend, cid: string) => {
  const boldMessage = {
    ...message,
    text: `**${message.text}**`,
  };

  sendMessage(boldMessage);
};
Implementation
Now that we have our custom function, we can add the overrideSubmitHandler prop to the MessageInput component and begin sending
bold text to our MessageList.
Since sendMessage is drawn from the ChannelActionContext, we must create an inner component that is a child of Channel and
call the useChannelActionContext custom hook.
The Code
const ChannelInner: React.FC = () => {
  const { sendMessage } = useChannelActionContext();

  const overrideSubmitHandler = (message: MessageToSend, cid: string) => {
    const boldMessage = {
      ...message,
      text: `**${message.text}**`,
    };

    sendMessage(boldMessage);
  };

  return (
    <>
      <Window>
        <ChannelHeader />
        <MessageList />
        <MessageInput overrideSubmitHandler={overrideSubmitHandler} />
      </Window>
      <Thread />
    </>
  );
};

const App = () => (
  <Chat client={chatClient}>
    <ChannelList />
    <Channel>
      <ChannelInner />
    </Channel>
  </Chat>
);
The Result

Adding custom message data
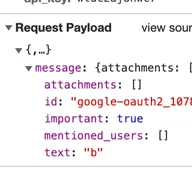
If you would like to store custom data on your message objects, you can pass additional parameters to the sendMessage function you retrieve from ChannelActionContext.
Now, the overrideSubmitHandler implementation may change as follows:
import React from "react";
import {
  ChannelHeader,
  MessageList,
  MessageInput,
  Window,
  MessageToSend,
  useChannelActionContext,
} from "stream-chat-react";

const ChannelInner = () => {
  const { sendMessage } = useChannelActionContext();

  const overrideSubmitHandler = (message: MessageToSend, cid: string) => {
    sendMessage(message, { important: true });
  };

  return (
    <Window>
      <ChannelHeader />
      <MessageList />
      <MessageInput focus overrideSubmitHandler={overrideSubmitHandler} />
    </Window>
  );
};
In your browser's Developer tools Network tab you can now observe, that the message payload includes the custom field:
