
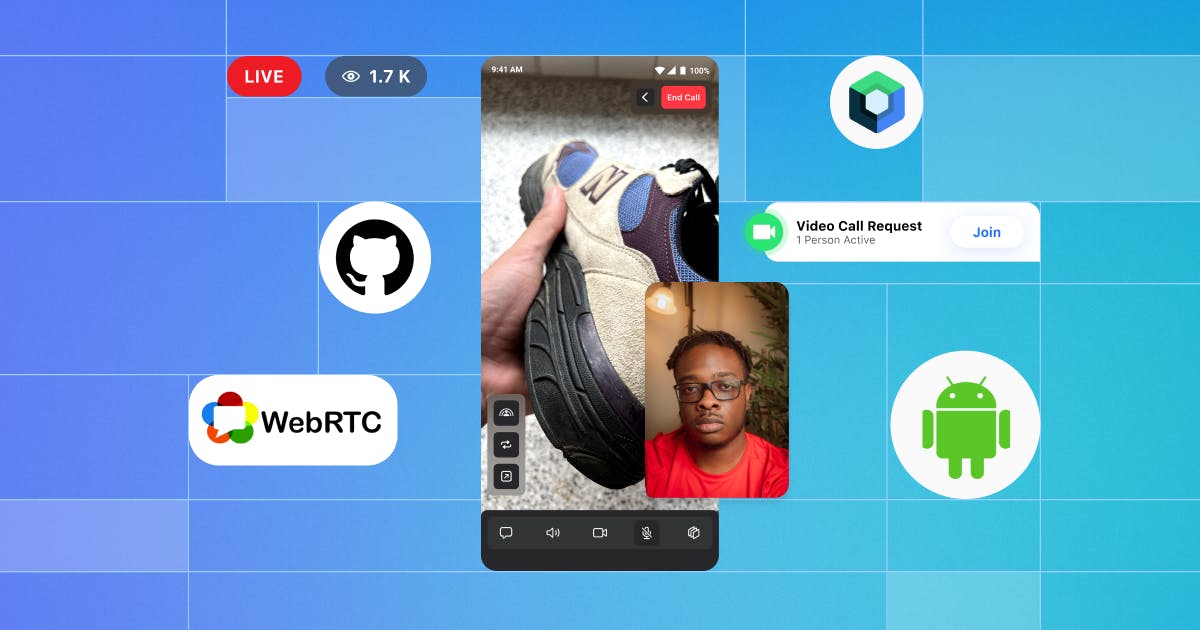
In this lesson, you'll learn concepts of WebRTC and how to build an Android video application by breaking down WebRTC in Jetpack Compose.
Since the pandemic started, it has had a huge impact on the entertainment industry especially in-home entertainment, such as streaming services, games, and social media communication. The video chat app market is one of them, and it also continues to grow, and it has been evaluated to have more than 50%-60% increased market value since two years ago.
Building a video chat app in-house requires a lot of resources to construct stable infrastructure, build complicated network protocols, and optimize UI rendering for video communication on the application side. Therefore building video chat products in a small team is very challenging in terms of time and budget.
Fortunately, we can build the audio and video communication application much easier with WebRTC (Web Real-Time Communication) rather than building all protocols from scratch.
In part one of this 2-part series, you'll start by covering concepts of WebRTC and how to build your Android video application with WebRTC by breaking WebRTC in Jetpack Compose on GitHub down one by one.
Let's get started!
What Is WebRTC?
The WebRTC protocol (stands for Web Real-Time Communication), which allows for real-time communication, such as audio & video streaming and generic data sent between multiple clients and establishing direct peer-to-peer connections.
The fundamental concept of WebRTC is peer-to-peer communication between multiple clients, which means once a connection is established, the multiple clients can transmit their data between them in real-time without touching a server, as you have seen in the figure below:
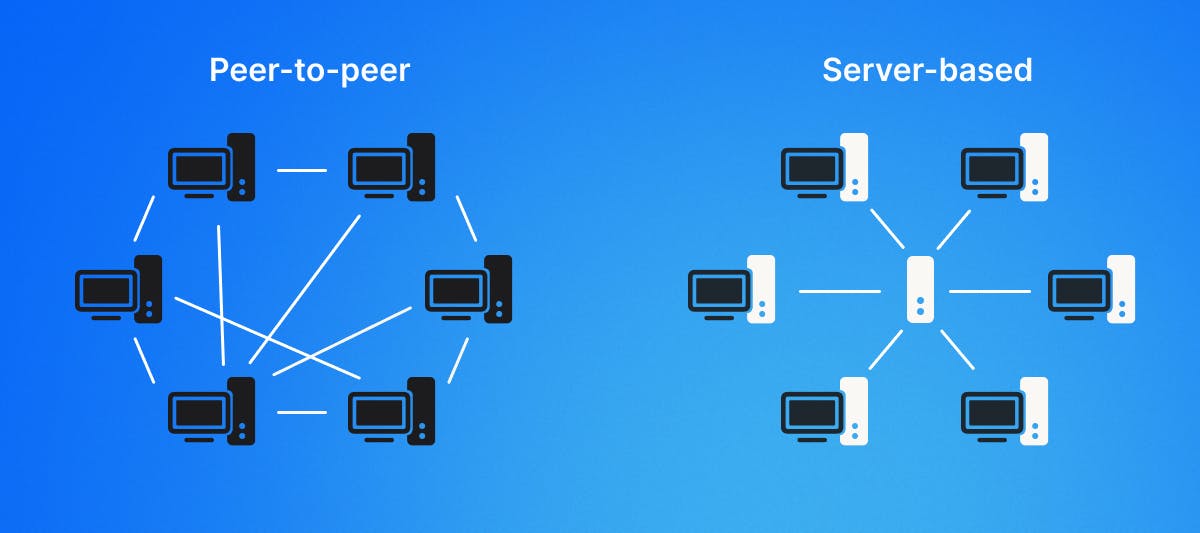
The most significant advantage of the peer-to-peer connection is that you can reduce a ton of tasks from the server by dividing the responsibilities of transmitting a lot of data that needs to be sent to each client, reducing latency.
However, it's difficult to establish a peer-to-peer connection, unlike a traditional server-based connection. Because each peer doesn't know the destination to send data and many obstacles, which means there are a lot of routers, proxies, and firewalls between peers. In some cases, there are more than tens of thousands of potential local network addresses.
The Signaling Server
To achieve this complicated connection between peers, you need to build your WebRTC signaling server. The signaling server is responsible for resolving and establishing a connection between peers to allow peers to connect with each other by exposing minimized private information like the figure below:
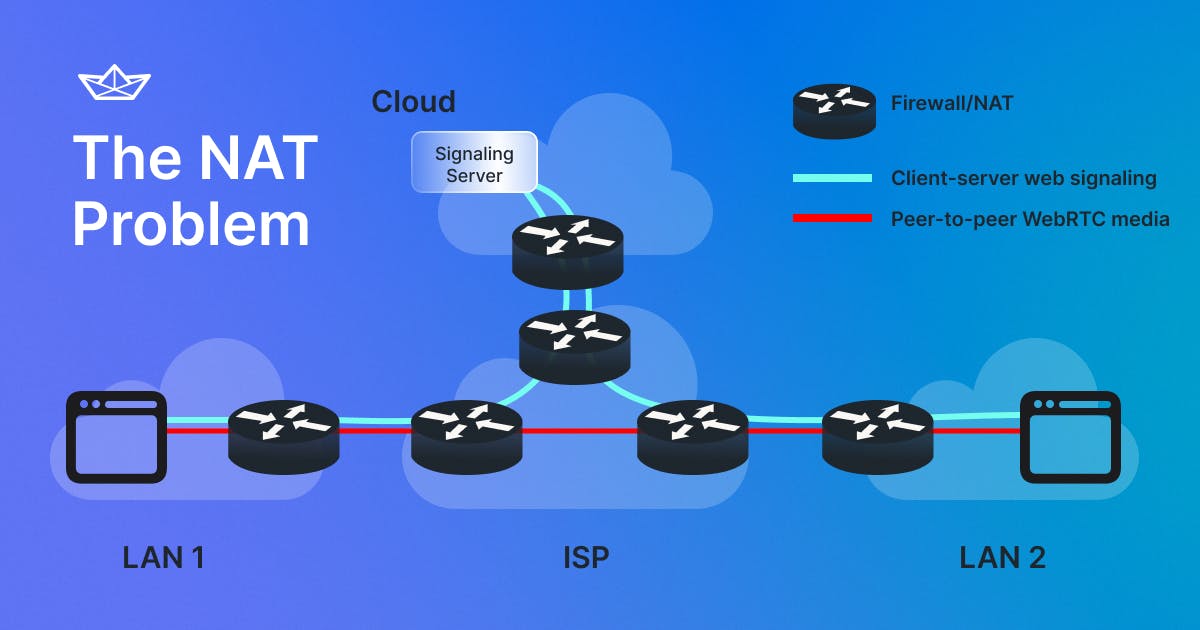
So, potentially you should build your signaling server and design signaling protocols to exchange connectivity information between peers. However, unlike traditional server-based communication, once peers have exchanged connectivity information, they can send data directly to each other in real time without touching a server. As a result, you can reduce latency and many costs rather than server-based communication.
If you want to learn more about the WebRTC signaling server, check out WebRTC Signaling Servers: Everything You Need to Know.
Session Description Protocol
For describing the connectivity information, WebRTC uses SDP (Session Description Protocol), which is a standard format for describing multimedia communication sessions for a peer-to-peer connection.
The SDP includes some information about the peer connection, such as Codec, source address, media types of audio and video, and other associated properties, as you can see in the SDP message below:
o=- 5168502270746789779 2 IN IP4 127.0.0.1
s=-
t=0 0
a=group:BUNDLE 0 1
a=extmap-allow-mixed
a=msid-semantic: WMS
m=video 9 UDP/TLS/RTP/SAVPF 96 97 98 99 35 36 123 122 125
c=IN IP4 0.0.0.0
a=rtcp:9 IN IP4 0.0.0.0
a=ice-ufrag:7WRY
a=ice-pwd:XHR3zWN/W59V38h1C6z3s6q+
a=ice-options:trickle renomination
a=fingerprint:sha-256 D7:8A:18:28:84:8D:F7:28:ED:21:99:24:CE:05:93:43:EB:32:1A:E7:6B:72:AB:75:EF:42:46:0E:DD:84:E2:82
a=setup:active
a=mid:0
..
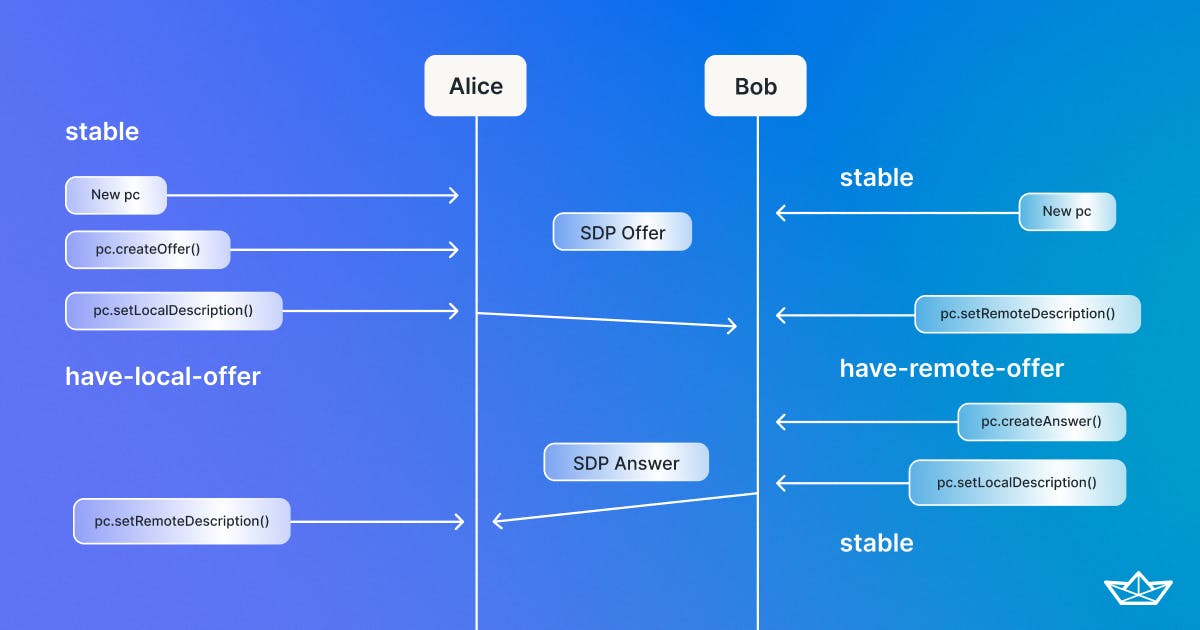
The scenario of exchanging SDP is pretty simple. Let's assume that Alice and Bob want to connect on a video call:
- Alice suggests a peer connection with Bob by creating an SDP Offer that the signaling server will deliver.
- Bob accepts the SDP Offer and responds by creating an SDP Answer that the signaling server will deliver.
- Alice accepts the SDP Answer, and they will prepare to establish a connection between them.
The steps above will be drawn like the figure below:
For more information about SDP, check out Mozilia's SDP documentation.
Interactive Connectivity Establishment
Peers exchanged SDP messages through an offer/answer to set up media sessions, and now they need to connect to transfer real-time data.
However, establishing a connection between peers is not easy because they are behind a NAT/Firewall in their local network, and they don't know how to find ways to the destination in the WAN (Wide Area Network).
For this, WebRTC uses ICE (Interactive Connectivity Establishment) protocol, and peers can negotiate the actual connection between them by exchanging ICE candidates.
ICE is used to discover the entire methods used to make that connection through the NAT with a combination of the STUN (Session Traversal Utilities for NAT) and TURN (Traversal Using Relays around NAT) protocols.
In this part, you have a better grasp of how WebRTC works. If you want to learn more about the WebRTC and each term of protocols, check out HTTP, WebSocket, gRPC or WebRTC: Which Communication Protocol is Best For Your App?.
WebRTC on Android
WebRTC is an open-source project which Google maintains on their git repository. For Android, they provide a prebuilt library that provides Android-specific features, such as rendering video UI, camera, audio, video, Codec, network handling, and much more.
However, as you can see on the maven central for google-webrtc library, they haven't maintained the prebuilt WebRTC library since 2018 anymore and outdated. Since JFrog announced that they're shutting down Bintray and JCenter, the webrtc-android library is not available anymore with Gradle system.
Luckily, we built a WebRTC pre-built library for Android that reflects the recent WebRTC updates to facilitate real-time video chat using functional UI components, Kotlin extensions for Android, and Compose. It's available on Maven Central.
Gradle Setup
Before getting started, import the stream-webrtc-android into your project. Add the dependency below to your root and app level build.gradle file:
1234// Add the dependency below to your app level `build.gradle` file:
dependencies {
  implementation "io.getstream:stream-webrtc-android:1.1.1"
}
Now let's see how to establish a peer connection with WebRTC on Android.
PeerConnection
PeerConnection is one of the essential concepts to connect between a local computer and a remote peer. It provides methods to create and set an SDP offer/answer, add ICE candidates, potentially connect to a remote peer, monitor the connection, and close the connection once it's no longer needed.
In the WebRTC in Jetpack Compose project, it was built with its dedicated class called StreamPeerConnection for establishing a peer connection and reusability. StreamPeerConnection creates an SDP offer/answer, sets local/remote session descriptions, and manages ICE candidates, as you can see in the code below:
123456789101112131415161718192021222324252627282930313233343536373839404142434445464748495051525354555657585960616263646566676869// Copyright 2023 Stream.IO, Inc. All Rights Reserved.
// SPDX-License-Identifier: Apache-2.0

class StreamPeerConnection(
  private val coroutineScope: CoroutineScope,
  private val type: StreamPeerType,
  private val mediaConstraints: MediaConstraints,
  private val onStreamAdded: ((MediaStream) -> Unit)?,
  private val onNegotiationNeeded: ((StreamPeerConnection, StreamPeerType) -> Unit)?,
  private val onIceCandidate: ((IceCandidate, StreamPeerType) -> Unit)?,
  private val onVideoTrack: ((RtpTransceiver?) -> Unit)?
) : PeerConnection.Observer {

  suspend fun createOffer(): Result<SessionDescription> {
    logger.d { "[createOffer] #sfu; #$typeTag; no args" }
    return createValue { connection.createOffer(it, mediaConstraints) }
  }

  suspend fun createAnswer(): Result<SessionDescription> {
    logger.d { "[createAnswer] #sfu; #$typeTag; no args" }
    return createValue { connection.createAnswer(it, mediaConstraints) }
  }

  suspend fun setRemoteDescription(sessionDescription: SessionDescription): Result<Unit> {
    logger.d { "[setRemoteDescription] #sfu; #$typeTag; answerSdp: ${sessionDescription.stringify()}" }
    return setValue {
      connection.setRemoteDescription(
        it,
        SessionDescription(
          sessionDescription.type,
          sessionDescription.description.mungeCodecs()
        )
      )
    }.also {
      pendingIceMutex.withLock {
        pendingIceCandidates.forEach { iceCandidate ->
          logger.i { "[setRemoteDescription] #sfu; #subscriber; pendingRtcIceCandidate: $iceCandidate" }
          connection.addRtcIceCandidate(iceCandidate)
        }
        pendingIceCandidates.clear()
      }
    }
  }

  suspend fun setLocalDescription(sessionDescription: SessionDescription): Result<Unit> {
    val sdp = SessionDescription(
      sessionDescription.type,
      sessionDescription.description.mungeCodecs()
    )
    logger.d { "[setLocalDescription] #sfu; #$typeTag; offerSdp: ${sessionDescription.stringify()}" }
    return setValue { connection.setLocalDescription(it, sdp) }
  }

  suspend fun addIceCandidate(iceCandidate: IceCandidate): Result<Unit> {
    if (connection.remoteDescription == null) {
      logger.w { "[addIceCandidate] #sfu; #$typeTag; postponed (no remoteDescription): $iceCandidate" }
      pendingIceMutex.withLock {
        pendingIceCandidates.add(iceCandidate)
      }
      return Result.failure(RuntimeException("RemoteDescription is not set"))
    }
    logger.d { "[addIceCandidate] #sfu; #$typeTag; rtcIceCandidate: $iceCandidate" }
    return connection.addRtcIceCandidate(iceCandidate).also {
      logger.v { "[addIceCandidate] #sfu; #$typeTag; completed: $it" }
    }
  }

  ..
}
As you can see in the code above, this project implemented createValue and setValue functions to handle session descriptions in coroutine ways for SdpObserver.
You can look into the details of the StreamPeerConnection on GitHub.
PeerConnectionFactory
PeerConnection.Factory is responsible for creating PeerConnection, and it helps you to create video/audio tracks/sources, provide internal loggers, and establish peer connections. It also bridges C++ native codes of WebRTC by embedding them using NDK (Native Development Kit).
If you look into the StreamPeerConnectionFactory, you will see this project uses Google's STUN (Session Traversal Utilities for NAT) server to establish ICE (Interactive Connectivity Establishment) and initializes RTCConfiguration like the code below:
1234567891011121314151617181920// Copyright 2023 Stream.IO, Inc. All Rights Reserved.
// SPDX-License-Identifier: Apache-2.0

class StreamPeerConnectionFactory constructor(
  private val context: Context
) {

  // rtcConfig contains STUN and TURN servers list
  val rtcConfig = PeerConnection.RTCConfiguration(
    arrayListOf(
      // adding google's standard server
      PeerConnection.IceServer.builder("stun:stun.l.google.com:19302").createIceServer()
    )
  ).apply {
    // it's very important to use new unified sdp semantics PLAN_B is deprecated
    sdpSemantics = PeerConnection.SdpSemantics.UNIFIED_PLAN
  }

  ..
 }
The StreamPeerConnectionFactory initializes the PeerConnectionFactory and sets up video/audio encoder and decoder, error callbacks, and internal loggers for improving reusability:
123456789101112131415161718192021222324252627// Copyright 2023 Stream.IO, Inc. All Rights Reserved.
// SPDX-License-Identifier: Apache-2.0

private val factory by lazy {
  PeerConnectionFactory.initialize(
    PeerConnectionFactory.InitializationOptions.builder(context).createInitializationOptions()
  )

  PeerConnectionFactory.builder()
    .setVideoDecoderFactory(videoDecoderFactory)
    .setVideoEncoderFactory(videoEncoderFactory)
    .setAudioDeviceModule(
      JavaAudioDeviceModule
        .builder(context)
        .setUseHardwareAcousticEchoCanceler(Build.VERSION.SDK_INT >= Build.VERSION_CODES.Q)
        .setUseHardwareNoiseSuppressor(Build.VERSION.SDK_INT >= Build.VERSION_CODES.Q)
        .setAudioRecordErrorCallback(..)
        .setAudioTrackErrorCallback(..)
        .setAudioRecordStateCallback(..)
        .setAudioTrackStateCallback(..)
        .createAudioDeviceModule().also {
          it.setMicrophoneMute(false)
          it.setSpeakerMute(false)
        }
    )
    .createPeerConnectionFactory()
}
You can look into the details of the StreamPeerConnectionFactory on GitHub.
Signaling Client
As you've discussed in the section before, we need to connect to the signaling server to exchange session descriptions and ICE candidates. In this project, WebRTC backend server was built with Ktor to build a simple signaling web socket server, so we need to create a web socket connection on Android.
To connect the web socket signaling server, you can use OkHttp and handle server responses with WebSocketListener.
In this project, there's a SignalingClient class, which connects to the signaling server for sending/receiving an SDP offer/answer, and ICE candidates. It also defines WebRTC session states to provide observable connection states to UI like the code below:
12345678910111213141516171819202122232425262728293031323334353637383940414243444546474849505152535455565758596061626364656667686970717273747576777879// Copyright 2023 Stream.IO, Inc. All Rights Reserved.
// SPDX-License-Identifier: Apache-2.0

class SignalingClient {
  private val logger by taggedLogger("Call:SignalingClient")
  private val signalingScope = CoroutineScope(SupervisorJob() + Dispatchers.Default)
  private val client = OkHttpClient()
  private val request = Request
    .Builder()
    .url(BuildConfig.SIGNALING_SERVER_IP_ADDRESS)
    .build()

  // opening web socket with signaling server
  private val ws = client.newWebSocket(request, SignalingWebSocketListener())

  // session flow to send information about the session state to the subscribers
  private val _sessionStateFlow = MutableStateFlow(WebRTCSessionState.Offline)
  val sessionStateFlow: StateFlow<WebRTCSessionState> = _sessionStateFlow

  // signaling commands to send commands to value pairs to the subscribers
  private val _signalingCommandFlow = MutableSharedFlow<Pair<SignalingCommand, String>>()
  val signalingCommandFlow: SharedFlow<Pair<SignalingCommand, String>> = _signalingCommandFlow

  fun sendCommand(signalingCommand: SignalingCommand, message: String) {
    logger.d { "[sendCommand] $signalingCommand $message" }
    ws.send("$signalingCommand $message")
  }

  private inner class SignalingWebSocketListener : WebSocketListener() {
    override fun onMessage(webSocket: WebSocket, text: String) {
      when {
        text.startsWith(SignalingCommand.STATE.toString(), true) ->
          handleStateMessage(text)
        text.startsWith(SignalingCommand.OFFER.toString(), true) ->
          handleSignalingCommand(SignalingCommand.OFFER, text)
        text.startsWith(SignalingCommand.ANSWER.toString(), true) ->
          handleSignalingCommand(SignalingCommand.ANSWER, text)
        text.startsWith(SignalingCommand.ICE.toString(), true) ->
          handleSignalingCommand(SignalingCommand.ICE, text)
      }
    }
  }

  private fun handleStateMessage(message: String) {
    val state = getSeparatedMessage(message)
    _sessionStateFlow.value = WebRTCSessionState.valueOf(state)
  }

  private fun handleSignalingCommand(command: SignalingCommand, text: String) {
    val value = getSeparatedMessage(text)
    logger.d { "received signaling: $command $value" }
    signalingScope.launch {
      _signalingCommandFlow.emit(command to value)
    }
  }

  private fun getSeparatedMessage(text: String) = text.substringAfter(' ')

  fun dispose() {
    _sessionStateFlow.value = WebRTCSessionState.Offline
    signalingScope.cancel()
    ws.cancel()
  }
}

enum class WebRTCSessionState {
  Active, // Offer and Answer messages has been sent
  Creating, // Creating session, offer has been sent
  Ready, // Both clients available and ready to initiate session
  Impossible, // We have less than two clients connected to the server
  Offline // unable to connect signaling server
}

enum class SignalingCommand {
  STATE, // Command for WebRTCSessionState
  OFFER, // to send or receive offer
  ANSWER, // to send or receive answer
  ICE // to send and receive ice candidates
}
Now let's create WebRTC connections by putting together the PeerConnection and SignalingClient.
WebRtcSessionManager
We're ready to establish a peer connection using StreamPeerConnection and SignalingClient. Now, we need to create a real connection and observe/handle the signaling responses. The WebRTC in Jetpack Compose project manages them in a session manager class called WebRtcSessionManagerImpl.
The WebRtcSessionManagerImpl class initializes the StreamPeerConnection like the code below:
1234567891011121314151617181920212223242526272829303132333435363738394041424344454647484950515253// Copyright 2023 Stream.IO, Inc. All Rights Reserved.
// SPDX-License-Identifier: Apache-2.0

class WebRtcSessionManagerImpl(
  private val context: Context,
  override val signalingClient: SignalingClient,
  override val peerConnectionFactory: StreamPeerConnectionFactory
) : WebRtcSessionManager {
  private val logger by taggedLogger("Call:LocalWebRtcSessionManager")

  private val sessionManagerScope = CoroutineScope(SupervisorJob() + Dispatchers.Default)

  // used to send remote video track to the sender
  private val _remoteVideoSinkFlow = MutableSharedFlow<VideoTrack>()
  override val remoteVideoSinkFlow: SharedFlow<VideoTrack> = _remoteVideoSinkFlow

  // declaring video constraints and setting OfferToReceiveVideo to true
  // this step is mandatory to create valid offer and answer
  private val mediaConstraints = MediaConstraints().apply {
    mandatory.addAll(
      listOf(
        MediaConstraints.KeyValuePair("OfferToReceiveAudio", "true"),
        MediaConstraints.KeyValuePair("OfferToReceiveVideo", "true")
      )
    )
  }

  private val peerConnection: StreamPeerConnection by lazy {
    peerConnectionFactory.makePeerConnection(
      coroutineScope = sessionManagerScope,
      configuration = peerConnectionFactory.rtcConfig,
      type = StreamPeerType.SUBSCRIBER,
      mediaConstraints = mediaConstraints,
      onIceCandidateRequest = { iceCandidate, _ ->
        signalingClient.sendCommand(
          SignalingCommand.ICE,
          "${iceCandidate.sdpMid}$ICE_SEPARATOR${iceCandidate.sdpMLineIndex}$ICE_SEPARATOR${iceCandidate.sdp}"
        )
      },
      onVideoTrack = { rtpTransceiver ->
        val track = rtpTransceiver?.receiver?.track() ?: return@makePeerConnection
        if (track.kind() == MediaStreamTrack.VIDEO_TRACK_KIND) {
          val videoTrack = track as VideoTrack
          sessionManagerScope.launch {
            _remoteVideoSinkFlow.emit(videoTrack)
          }
        }
      }
    )
  }

 ..
}
As you can see in the code above, the primary constructor of the WebRtcSessionManagerImpl class receives the SignalingClientand StreamPeerConnectionFactory to establish a peer connection.
Initializing the peer connection defines actions for sending an ICE candidate and handling ream-time Transceiver. RtpTransceiver represents a combination of a real-time sender and receiver, and it provides MediaStreamTrack that renders video/audio with multiple VideoSink.
Next, you need to initialize the video-relevant components to display your camera rendering screen on your local device and send the video data to peers in real-time:
1234567891011121314151617181920212223242526272829303132333435363738394041424344454647484950// Copyright 2023 Stream.IO, Inc. All Rights Reserved.
// SPDX-License-Identifier: Apache-2.0

// getting front camera
private val videoCapturer: VideoCapturer by lazy { buildCameraCapturer() }

// we need it to initialize video capturer
private val surfaceTextureHelper = SurfaceTextureHelper.create(
  "SurfaceTextureHelperThread",
  peerConnectionFactory.eglBaseContext
)

private val videoSource by lazy {
  peerConnectionFactory.makeVideoSource(videoCapturer.isScreencast).apply {
    videoCapturer.initialize(surfaceTextureHelper, context, this.capturerObserver)
    videoCapturer.startCapture(480, 720, 30)
  }
}

private val localVideoTrack: VideoTrack by lazy {
  peerConnectionFactory.makeVideoTrack(
    source = videoSource,
    trackId = "Video${UUID.randomUUID()}"
  )
}

private fun buildCameraCapturer(): VideoCapturer {
  val manager = cameraManager ?: throw RuntimeException("CameraManager was not initialized!")

  val ids = manager.cameraIdList
  var foundCamera = false
  var cameraId = ""

  for (id in ids) {
    val characteristics = manager.getCameraCharacteristics(id)
    val cameraLensFacing = characteristics.get(CameraCharacteristics.LENS_FACING)

    if (cameraLensFacing == CameraMetadata.LENS_FACING_FRONT) {
      foundCamera = true
      cameraId = id
    }
  }

  if (!foundCamera && ids.isNotEmpty()) {
    cameraId = ids.first()
  }

  val camera2Capturer = Camera2Capturer(context, cameraId, null)
  return camera2Capturer
}
Let's break the video components down one by one:
-
VideoCapturer: This is an interface for abstracting the basic abstract behaviors of CameraCapturer. We can start to capture using mobile device's cameras (facing front or back) with specific resolutions.
-
VideoSource: VideoSource is used to create video tracks and add VideoProcessor, which is a lightweight abstraction for an object that can receive video frames, process them, and pass them on to another object.
-
VideoTrack: VideoTrack is one of the essential concepts in WebRTC for Android. It manages multiple VideoSink objects, which receive a stream of video frames in real-time and it allows you to control the VideoSink objects, such as adding, removing, enabling, and disabling.
So you can configure the camera capabilities and resolutions and control the video rendering with the WebRTC components above.
Next, you need to observe the real-time signaling responses from the signaling server and handle the SDP offer/answer and ICE candidates with the peerConnection instance like the below:
123456789101112131415161718192021222324252627282930313233343536373839// Copyright 2023 Stream.IO, Inc. All Rights Reserved.
// SPDX-License-Identifier: Apache-2.0

init {
  sessionManagerScope.launch {
    signalingClient.signalingCommandFlow
      .collect { commandToValue ->
        when (commandToValue.first) {
          SignalingCommand.OFFER -> handleOffer(commandToValue.second)
          SignalingCommand.ANSWER -> handleAnswer(commandToValue.second)
          SignalingCommand.ICE -> handleIce(commandToValue.second)
          else -> Unit
        }
      }
  }
}

private fun handleOffer(sdp: String) {
  logger.d { "[SDP] handle offer: $sdp" }
  offer = sdp
}

private suspend fun handleAnswer(sdp: String) {
  logger.d { "[SDP] handle answer: $sdp" }
  peerConnection.setRemoteDescription(
    SessionDescription(SessionDescription.Type.ANSWER, sdp)
  )
}

private suspend fun handleIce(iceMessage: String) {
  val iceArray = iceMessage.split(ICE_SEPARATOR)
  peerConnection.addIceCandidate(
    IceCandidate(
      iceArray[0],
      iceArray[1].toInt(),
      iceArray[2]
    )
  )
}
Now you're ready to handle the SDP offer/answer and ICE candidates about other peers through the signaling server. Lastly, you only need to create an SDP offer and answer that should be sent to the signaling server for exchanging media information between peers.
1234567891011121314151617181920212223242526272829303132333435363738// Copyright 2023 Stream.IO, Inc. All Rights Reserved.
// SPDX-License-Identifier: Apache-2.0

override fun onSessionScreenReady() {
  peerConnection.connection.addTrack(localVideoTrack)
  peerConnection.connection.addTrack(localAudioTrack)
  sessionManagerScope.launch {
    // sending local video track to show local video from start
    _localVideoSinkFlow.emit(localVideoTrack)

    if (offer != null) {
      sendAnswer()
    } else {
      sendOffer()
    }
  }
}

private suspend fun sendOffer() {
  val offer = peerConnection.createOffer().getOrThrow()
  val result = peerConnection.setLocalDescription(offer)
  result.onSuccess {
    signalingClient.sendCommand(SignalingCommand.OFFER, offer.description)
  }
  logger.d { "[SDP] send offer: ${offer.stringify()}" }
}

private suspend fun sendAnswer() {
  peerConnection.setRemoteDescription(
    SessionDescription(SessionDescription.Type.OFFER, offer)
  )
  val answer = peerConnection.createAnswer().getOrThrow()
  val result = peerConnection.setLocalDescription(answer)
  result.onSuccess {
    signalingClient.sendCommand(SignalingCommand.ANSWER, answer.description)
  }
  logger.d { "[SDP] send answer: ${answer.stringify()}" }
}
You've done everything necessary to build a real-time video chat application with WebRTC. Now let's build and test the WebRTC in Jetpack Compose project!
Run the WebRTC Sample Project
The WebRTC in Jetpack Compose project includes a sample for the signaling server and you can run on your local computer. So you can run the server project and test the Android applications following the instructions below:
-
Run the WebRTC backend server with Intellij IDEA.
-
Add the local IP address of your local pc on the
local.propertiesfile on the Android project (Android Studio) like the below:
12// You should change 192.168.1.123 to your local IP address, which is running the WebRTC backend server.
SIGNALING_SERVER_IP_ADDRESS=ws://192.168.1.123:8080/rtc
You can get your local IP address by typing the command below on your terminal:
1ifconfig | grep "inet " | grep -Fv 127.0.0.1 | awk '{print $2}'
- Run the WebRTC Android project with your multiple devices to test peer communication.
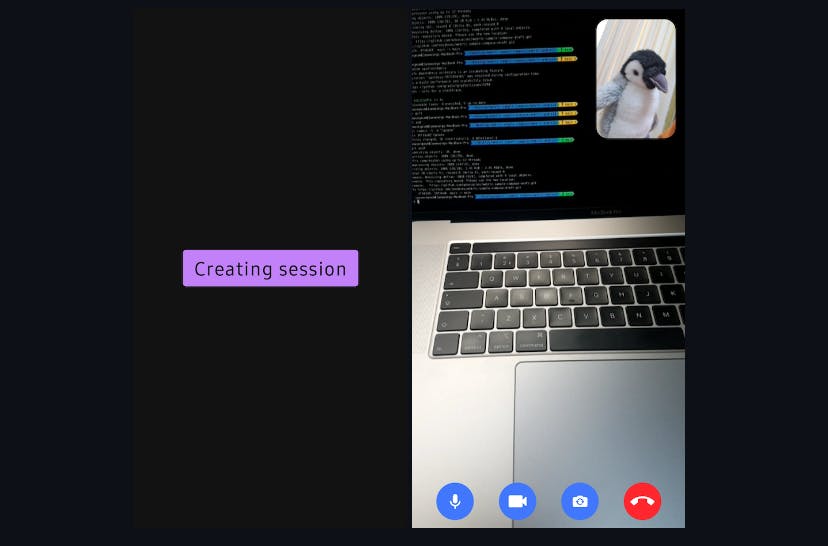
Finally, you'll get the result below:
Conclusion
This concludes part one of the WebRTC in Jetpack Compose. This installment covered the essential concepts of WebRTC and relevant terminologies, such as peer-to-peer, the signaling server, SDP (Session Description Protocol), and ICE (Interactive Connectivity Establishment), so now you have a better grasp of how WebRTC works and can be used on Android.