export type Action = {
  name?: string;
  style?: string;
  text?: string;
  type?: string;
  value?: string;
};This is documentation for
Stream Chat React SDK v12, which is nolonger actively maintained. For up-to-date documentation, see the latest version (v13)
.
Attachment Actions
In this example, we connect several different parts of the library to create a user experience where we add custom attachment actions to uploaded images. Images will render with "Love" and "Loathe" buttons, which on click will post reactions on the message. While this example might not represent a common use case, this demo is meant to highlight the flexibility of the library and show how custom features can be built on top of the existing code.
Custom Actions
The first step is to create an array of custom actions that will populate the AttachmentActions
component on send of an image attachment. The Action type comes from the stream-chat JavaScript client and conforms
to the following:
As you can tell, the Action type has no required values. We are going to simulate a voting feature and trigger the
UI on "Love" and "Loathe" potential actions. Our custom actions array becomes the following:
const attachmentActions: Action[] = [
  { name: "vote", value: "Love" },
  { name: "vote", value: "Loathe" },
];
Custom AttachmentActions
Next, we create a custom AttachmentActions
component to render and display our custom actions. If a chat user uploads an image file, we'll trigger custom logic. Otherwise,
we'll render the default library component.
Our custom component will receive the attachment type and the actions (if any) via props. We'll manually add the actions later
in the demo, but for now, know their value will reference our custom array defined above.
If an image attachment is uploaded, we map over the custom actions array and return HTML button elements with action.value
as the text. Click events on these buttons will post reactions to the message, using the handleReaction function drawn from the
useMessageContext custom hook.
const CustomAttachmentActions: React.FC<AttachmentActionsProps> = (props) => {
  const { actions, type } = props;

  const { handleReaction } = useMessageContext();

  const handleClick = async (
    event: React.MouseEvent<HTMLButtonElement, MouseEvent>,
    value?: string,
  ) => {
    try {
      if (value === "Love") await handleReaction("love", event);
      if (value === "Loathe") await handleReaction("angry", event);
    } catch (err) {
      console.log(err);
    }
  };

  if (type === "image") {
    return (
      <>
        {actions.map((action) => (
          <button
            className={`action-button ${action.value === "Love" ? "love" : ""}`}
            onClick={(event) => handleClick(event, action.value)}
          >
            {action.value}
          </button>
        ))}
      </>
    );
  }

  return <AttachmentActions {...props} />;
};
Custom Attachment
In order to render our CustomAttachmentActions component, we need to supply it as a prop to the
Attachment
component. The resulting CustomAttachment component is then added to Channel, so it can be injected into the
ComponentContext and consumed within the Message UI component.
const CustomAttachment: React.FC<AttachmentProps> = (props) => (
  <Attachment {...props} AttachmentActions={CustomAttachmentActions} />
);

<Channel Attachment={CustomAttachment}>
  {/* children of Channel component */}
</Channel>;
Input Submit Handler
To add our attachmentActions to an uploaded image and trigger the render of the CustomAttachmentActions component,
we provide custom logic to override the MessageInput component's default submit handling behavior. For a detailed,
step-by-step example, see the Input Submit Handler custom code example.
Simply put, if an image type message attachment exists, we update the attachments array on the message object
by adding the attachmentActions.
const overrideSubmitHandler = (message: MessageToSend, cid: string) => {
  let updatedMessage = message;

  if (message.attachments) {
    message.attachments.forEach((attachment) => {
      if (attachment.type === "image") {
        const updatedAttachment = {
          ...attachment,
          actions: attachmentActions,
        };

        updatedMessage = {
          ...message,
          attachments: [updatedAttachment],
        };
      }
    });
  }

  sendMessage(updatedMessage);
};
Implementation
Now that each individual piece has been constructed, we can assemble all of the snippets into the final code example.
The Code
.action-button {
  height: 40px;
  width: 100px;
  border-radius: 16px;
  color: #ffffff;
  background: red;
  font-weight: 700;
  font-size: 1.2rem;
}

.action-button.love {
  background-color: green;
}
const attachmentActions: Action[] = [
{ name: "vote", value: "Love" },
{ name: "vote", value: "Loathe" },
];
const CustomAttachmentActions: React.FC<AttachmentActionsProps> = (props) => {
const { actions, type } = props;
const { handleReaction } = useMessageContext();
const handleClick = async (
event: React.MouseEvent<HTMLButtonElement, MouseEvent>,
value?: string,
) => {
try {
if (value === "Love") await handleReaction("love", event);
if (value === "Loathe") await handleReaction("angry", event);
} catch (err) {
console.log(err);
}
};
if (type === "image") {
return (
<>
{actions.map((action) => (
<button
className={`action-button ${action.value === "Love" ? "love" : ""}`}
onClick={(event) => handleClick(event, action.value)}
>
{action.value}
</button>
))}
</>
);
}
return <AttachmentActions {...props} />;
};
const CustomAttachment: React.FC<AttachmentProps> = (props) => (
<Attachment {...props} AttachmentActions={CustomAttachmentActions} />
);
const ChannelInner: React.FC = () => {
const { sendMessage } = useChannelActionContext();
const overrideSubmitHandler = (message: MessageToSend, cid: string) => {
let updatedMessage = message;
if (message.attachments) {
message.attachments.forEach((attachment) => {
if (attachment.type === "image") {
const updatedAttachment = {
...attachment,
actions: attachmentActions,
};
updatedMessage = {
...message,
attachments: [updatedAttachment],
};
}
});
}
sendMessage(updatedMessage);
};
return (
<>
<ChannelHeader />
<MessageList />
<MessageInput overrideSubmitHandler={overrideSubmitHandler} />
</>
);
};
const App = () => (
<Chat client={client}>
<ChannelList />
<Channel Attachment={CustomAttachment}>
<ChannelInner />
</Channel>
</Chat>
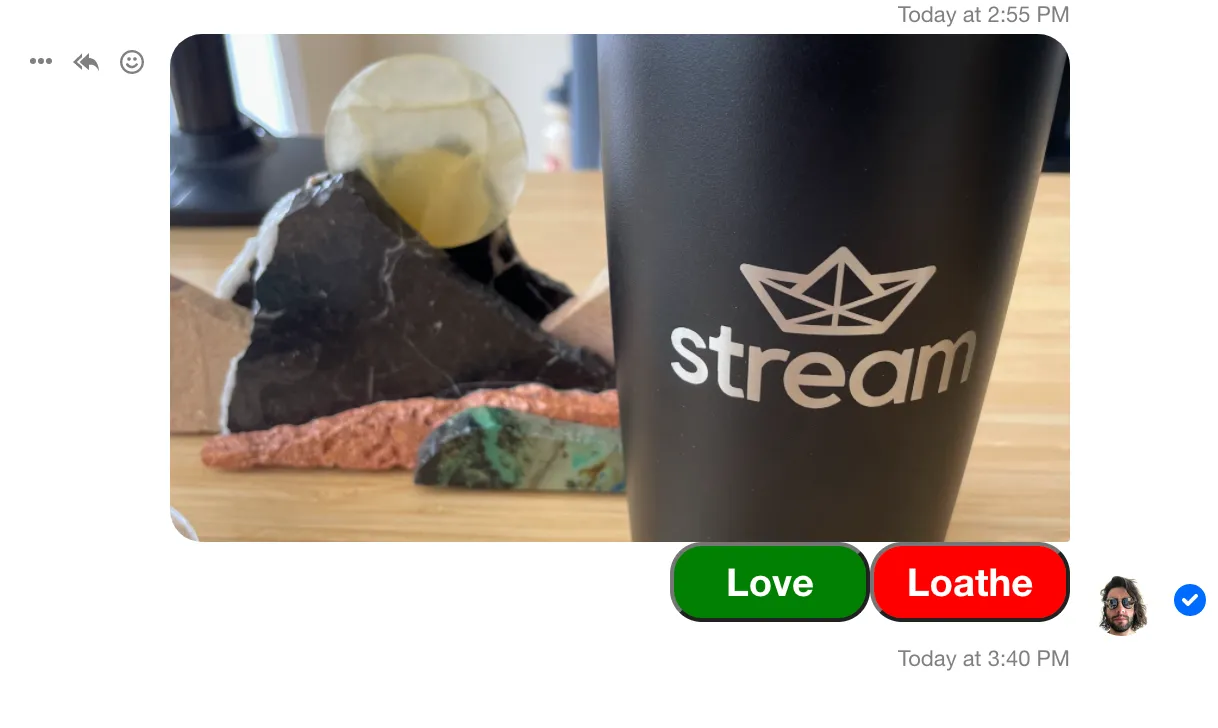
);The Result
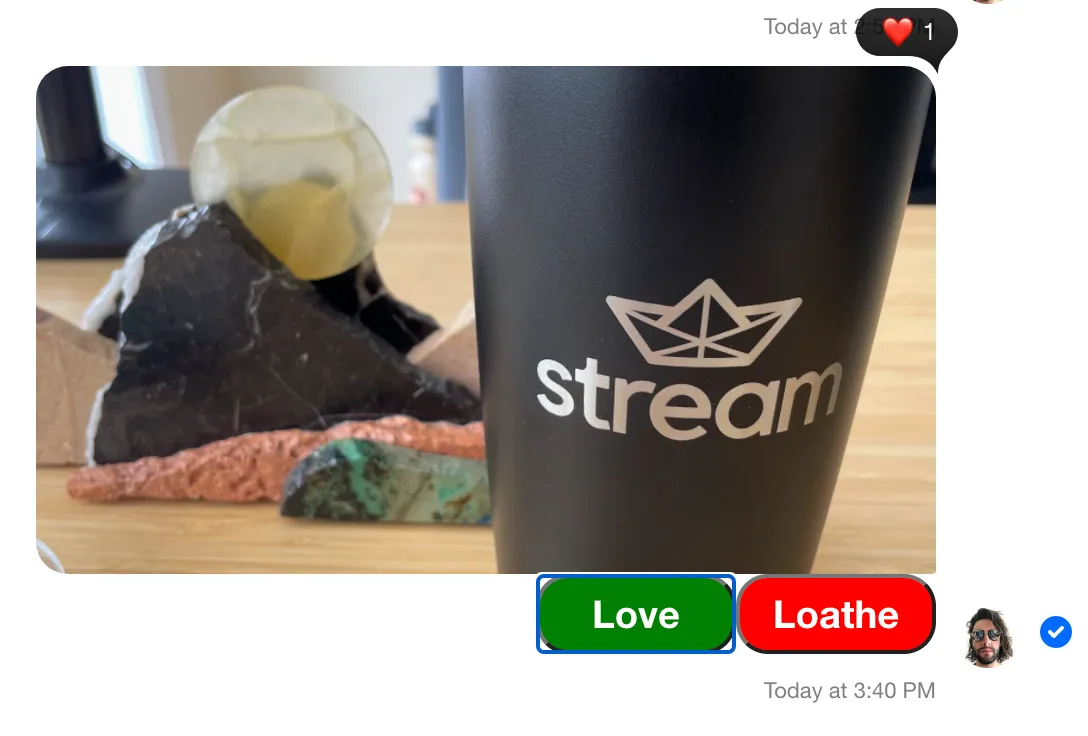
The rendered message before action click:
The rendered message after action click: