ng g c invite-buttonThis is documentation for
Stream Chat Angular SDK v4, which is nolonger actively maintained. For up-to-date documentation, see the latest version (v7)
.
Channel invites
This guide gives you a step-by-step tutorial on how to use channel invites in your chat application.
Invite button
The CustomTemplatesService has a property called channelActionsTemplate$ that can be used to add action buttons to the channel header.
Let's create a component for the invite button that we'll add to the channel header:
HTML template
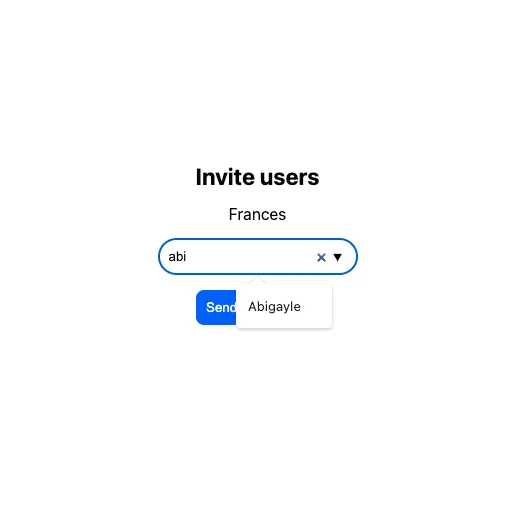
We create a simplistic UI with an "Invite users" button that opens a modal where users can search for other users in the application. The NotificationList component is used to display any error messages that may occur during the invite request.
<button *ngIf="canInviteUsers" (click)="isModalOpen = true">
  Invite users
</button>
<stream-modal [(isOpen)]="isModalOpen">
  <div class="modal-content">
    <div class="title">Invite users</div>
    <div class="invited-users">
      <div *ngFor="let u of usersToInvite">{{ u.name || u.id }}</div>
    </div>
    <div>
      <input #input type="search" (change)="addUser()" list="app-users" />
      <datalist id="app-users">
        <option (select)="addUser()" *ngFor="let o of autocompleteOptions">
          {{ o.name || o.id }}
        </option>
      </datalist>
    </div>
    <button class="invite" (click)="inviteMembers()">Send invitation(s)</button>
    <stream-notification-list class="notifications"></stream-notification-list>
  </div>
</stream-modal>
Styling
We are using stream-chat theme variables to match the default chat theme. You can read more about theme variables in our theming guide.
.modal-content {
  width: 600px;
  padding: 30px;
  display: flex;
  align-items: center;
  justify-content: center;
  flex-direction: column;
  gap: 15px;

  .title {
    font-size: 23px;
    font-weight: 700;
  }

  input {
    width: 200px;
    padding: 10px;
    border: none;
    background-color: var(--str-chat__message-textarea-background-color);
    color: var(--str-chat__message-textarea-color);
    border-radius: var(--str-chat__message-textarea-border-radius);
    border-block-start: var(--str-chat__message-textarea-border-block-start);
    border-block-end: var(--str-chat__message-textarea-border-block-end);
    border-inline-start: var(--str-chat__message-textarea-border-inline-start);
    border-inline-end: var(--str-chat__message-textarea-border-inline-end);
  }

  .invited-users {
    text-align: center;
  }

  .add {
    margin-left: 5px;
  }

  .notifications {
    width: 100%;
  }
}

button {
  background-color: var(--str-chat__cta-button-background-color);
  border: none;
  border-radius: var(--str-chat__cta-button-border-radius);
  color: var(--str-chat__cta-button-color);
  padding: 10px;
  cursor: pointer;
}
Component logic
Let's break down the most important parts of the component's logic:
- We define an input with the type
Channelto access the current active channel - this will be provided by theChannelHeadercomponent - We check if the current user has the
update-channel-memberscapability to see if they can invite members (it's important to note that not every channel can be extended with new members) - The
autocompleteUsersmethod of theChatClientServicecan be used to search for users in the application - The
inviteMembersmethod of theChannelcan be used to invite one or more members to the channel - The
NotificationServicecan be used to notify the user about the result of the invite request
import {
  Component,
  ElementRef,
  Input,
  OnChanges,
  OnInit,
  SimpleChanges,
  ViewChild,
} from "@angular/core";
import { fromEvent } from "rxjs";
import { debounceTime, switchMap } from "rxjs/operators";
import { Channel, UserResponse } from "stream-chat";
import { ChatClientService, NotificationService } from "stream-chat-angular";

@Component({
  selector: "app-invite-button",
  templateUrl: "./invite-button.component.html",
  styleUrls: ["./invite-button.component.scss"],
})
export class InviteButtonComponent implements OnInit, OnChanges {
  @Input() channel?: Channel;
  usersToInvite: UserResponse[] = [];
  canInviteUsers = false;
  isModalOpen = false;
  autocompleteOptions: UserResponse[] = [];
  @ViewChild("input", { static: true })
  private input!: ElementRef<HTMLInputElement>;

  constructor(
    private chatClientService: ChatClientService,
    private notificationService: NotificationService,
  ) {}

  ngOnInit(): void {
    fromEvent(this.input.nativeElement, "input")
      .pipe(
        debounceTime(300),
        switchMap(() =>
          this.chatClientService.autocompleteUsers(
            this.input.nativeElement.value,
          ),
        ),
      )
      .subscribe((users) => (this.autocompleteOptions = users));
  }

  ngOnChanges(changes: SimpleChanges): void {
    if (changes.channel && this.channel) {
      this.canInviteUsers = (
        this.channel.data?.own_capabilities as string[]
      ).includes("update-channel-members");
      this.usersToInvite = [];
      this.autocompleteOptions = [];
    }
  }

  async inviteMembers() {
    try {
      await this.channel?.inviteMembers(this.usersToInvite.map((u) => u.id));
      this.notificationService.addTemporaryNotification(
        "User(s) successfully invited",
        "success",
      );
      this.usersToInvite = [];
      this.autocompleteOptions = [];
      this.isModalOpen = false;
    } catch {
      this.notificationService.addTemporaryNotification(
        `User(s) couldn't be invited`,
        "error",
      );
    }
  }

  addUser() {
    const inputValue = this.input.nativeElement.value;
    const user = this.autocompleteOptions.find(
      (u) => u.id === inputValue || u.name === inputValue,
    );
    if (user) {
      this.usersToInvite.push(user);
      this.input.nativeElement.value = "";
      this.autocompleteOptions = [];
    }
  }
}
Providing the invite button to the channel header
Lastly, we provide the InviteButton component to the ChannelHeader.
Create the template (for example in your AppComponent):
<ng-template #channelActionsTemplate let-channel="channel">
  <app-invite-button [channel]="channel"></app-invite-button>
</ng-template>
Register the template in your TypeScript code (for example in your AppComponent).
These are the necessary steps:
- Create a reference to the custom template
- Import the CustomTemplatesService
- Register your custom template
import {
AfterViewInit,
Component,
TemplateRef,
ViewChild,
} from "@angular/core";
import {
ChatClientService,
ChannelService,
StreamI18nService,
} from "stream-chat-angular";
import {
CustomTemplatesService,
ChannelActionsContext,
} from "stream-chat-angular";
import { environment } from "../environments/environment";
@Component({
selector: "app-root",
templateUrl: "./app.component.html",
styleUrls: ["./app.component.scss"],
})
export class AppComponent implements AfterViewInit {
// Create a reference to the custom template
@ViewChild("channelActionsTemplate")
private channelActionsTemplate!: TemplateRef<ChannelActionsContext>;
constructor(
private chatService: ChatClientService,
private channelService: ChannelService,
private streamI18nService: StreamI18nService,
private customTemplatesService: CustomTemplatesService, // Import customTemplatesService
) {
void this.chatService.init(
environment.apiKey,
environment.userId,
environment.userToken,
);
void this.channelService.init({
type: "messaging",
members: { $in: [environment.userId] },
});
this.streamI18nService.setTranslation();
}
ngAfterViewInit(): void {
// Register your custom template
this.customTemplatesService.channelActionsTemplate$.next(
this.channelActionsTemplate,
);
}
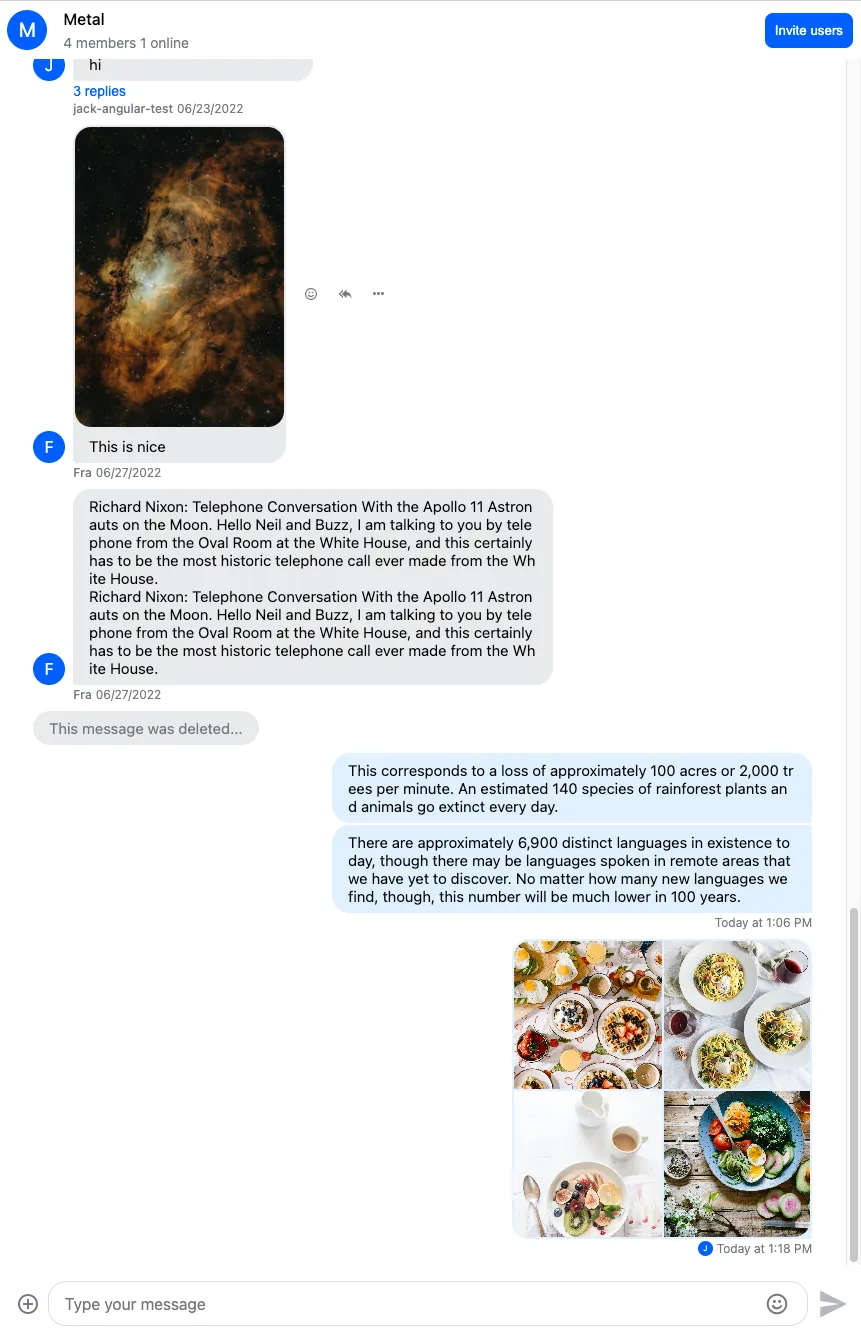
}This is how the channel header looks with the invite button present:
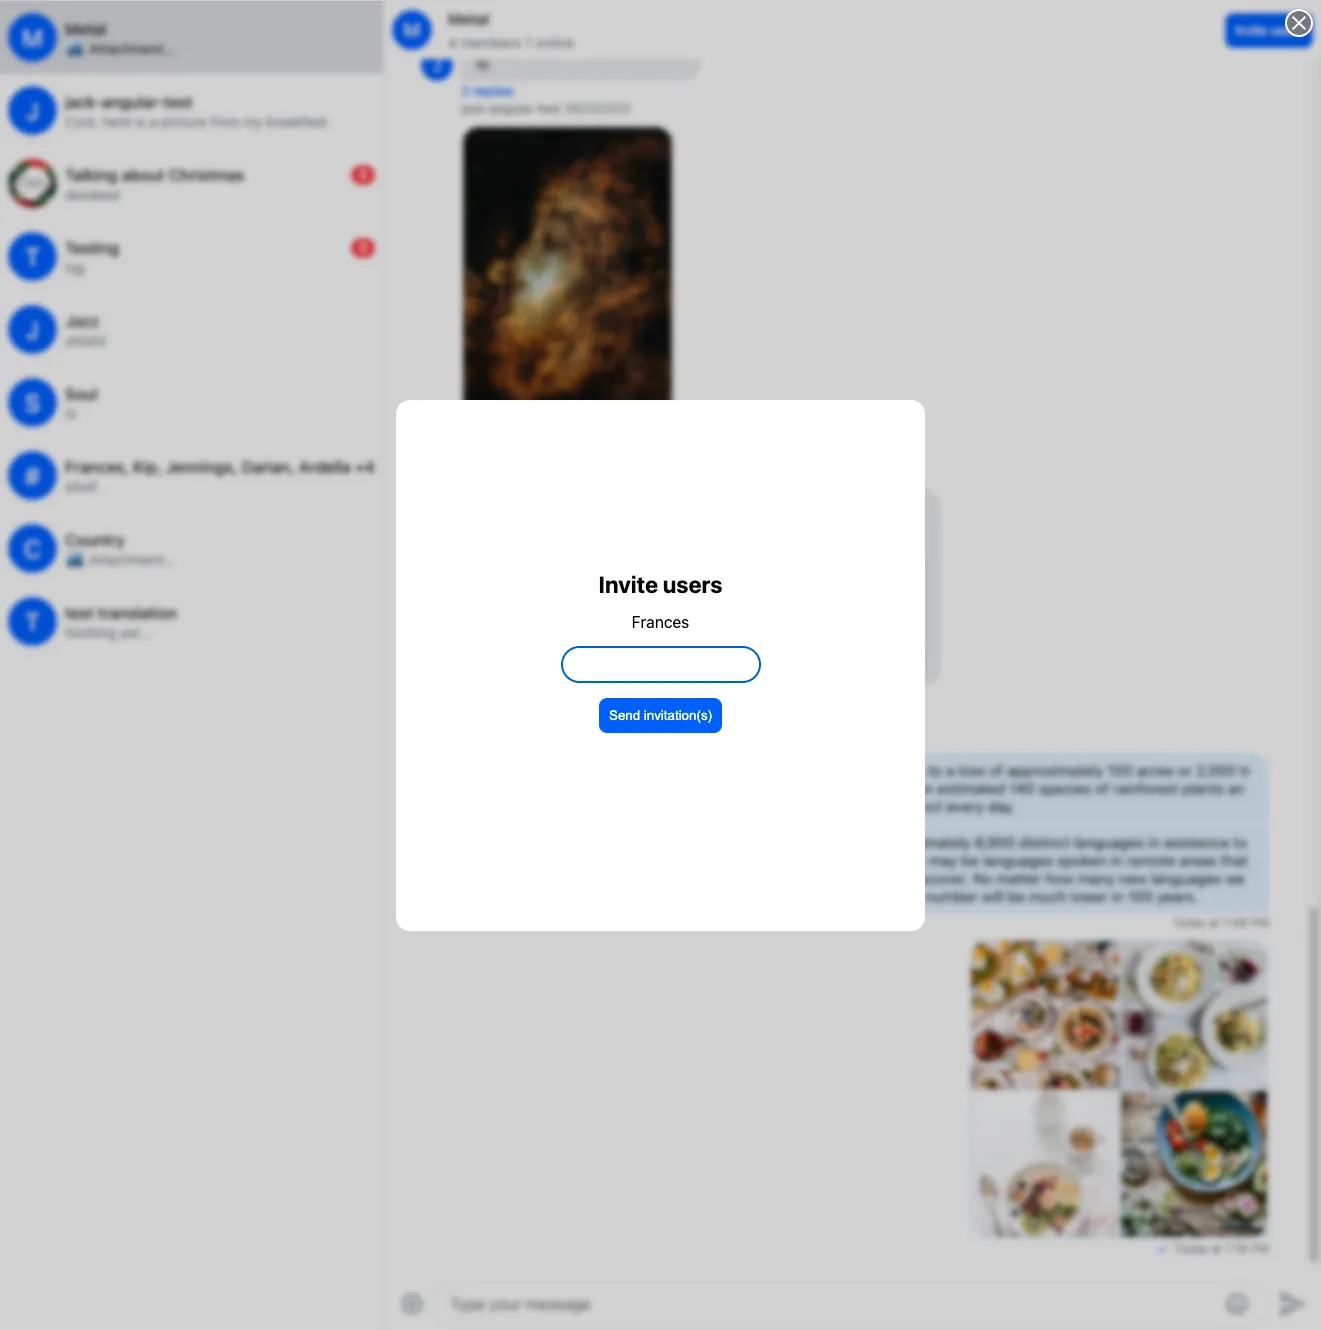
And this is how the invite modal turned out:
Pending invitations
The next step is to show the pending invitations to the user.
Invitation notification component
First we create a component that will display a pending invitation:
ng g c invitation --inline-template --inline-styleHere are the most important parts of the component:
- The component will be displayed inside the
NotificationListcomponent - We create an input with
Channeltype, this will be provided by theNotificationList - We create an input called
dismissFn, this will also be provided by theNotificationListand can be used to dismiss the notification - The
ChatClientServicecan be used to get the current chat user's id, this will be necessary when accepting/rejecting the invite - The invite can be accepted with the
acceptInvitemethod of thechannel - The invite can be rejected with the
rejectInvitemethod of thechannel
The component:
import { Component, Input, OnInit } from "@angular/core";
import { Channel } from "stream-chat";
import { ChatClientService, NotificationService } from "stream-chat-angular";

@Component({
  selector: "app-invitation",
  template: `
    <div>
      You have been invited to the
      {{ channelName }} channel. <button (click)="accept()">Accept</button> |
      <button (click)="decline()">Decline</button> |
      <button (click)="dismissFn()">Dismiss</button>
    </div>
  `,
  styles: [
    "button {border: none; background-color: transparent; color: var(--blue); font-weight: bold; cursor: pointer}",
  ],
})
export class InvitationComponent implements OnInit {
  @Input() channel?: Channel;
  @Input() dismissFn!: Function;

  constructor(
    private notificationService: NotificationService,
    private chatClientService: ChatClientService,
  ) {}

  ngOnInit(): void {}

  accept() {
    this.sendRequest("accept");
  }

  async decline() {
    this.sendRequest("reject");
  }

  get channelName() {
    return this.channel?.data?.name || this.channel?.id;
  }

  private async sendRequest(answer: "accept" | "reject") {
    const payload = {
      user_id: this.chatClientService?.chatClient.user?.id,
    };
    const request =
      answer === "accept"
        ? async () => await this.channel?.acceptInvite(payload)
        : async () => await this.channel?.rejectInvite(payload);
    try {
      await request();
      this.dismissFn();
      this.notificationService.addTemporaryNotification(
        `Invite from ${this.channelName} successfully ${answer}ed`,
        "success",
      );
    } catch {
      this.notificationService.addTemporaryNotification(
        `An error occured during ${answer}ing the invitation from ${this.channelName}`,
        "error",
      );
    }
  }
}
Displaying the invitations
The next step will be to display the invitations.
Invitation template
We will have to create the invitation template that can be passed to the NotificationList component.
Add this to your app.component.html file:
<ng-template #inviteTemplate let-channel="channel" let-dismissFn="dismissFn">
  <app-invitation [channel]="channel" [dismissFn]="dismissFn"></app-invitation>
</ng-template>
Add a reference to the template in your app.component.ts:
@ViewChild('inviteTemplate') private inviteTemplate!: TemplateRef<{channel: Channel<DefaultStreamChatGenerics> | ChannelResponse<DefaultStreamChatGenerics>}>;Displaying the invitations
The ChatClientService can keep track of pending invites, to enable this you have to initialize the service with the following flag:
this.chatService.init("<API key>", "<user>", "<token provider>", {
  trackPendingChannelInvites: true,
});
The pendingInvites$ Observable on the ChatClientService can notify us about the pending invitations of the current user. Let's subscribe to this Observable and display the invites in the ngOnInit method of the app.component.ts
ngOnInit(): void {
  this.chatService.pendingInvites$.pipe(pairwise()).subscribe((pair) => {
    const [prevInvites, currentInvites] = pair;
    const notShownInvites = currentInvites.filter(
      (i) => !prevInvites.find((prevI) => prevI.cid === i.cid)
    );
    notShownInvites.forEach((i) =>
      this.notificationService.addPermanentNotification(
        this.inviteTemplate,
        'info',
        undefined,
        { channel: i }
      )
    );
  });
}
The above method will display all the pending invitations on page load and display every new invitation received later.
This is how the invitation notifications look like:

Channel list
Channel filter
If a user is invited to a channel they immediately become member of the channel (the membership applies even if the invite is rejected).
This means that if you use a channel filter that is based on membership (for example {members: {$in: [<user id>]}}), channels with pending and rejected invites will be returned and displayed in the channel list as well.
If this is not what you need, you can use the joined flag to only list channels that the user was directly added to or the invitation was accepted by the user.
The channel filter can be provided to the init method of the ChannelService, here is an example:
this.channelService.init({
  joined: true,
});
notification.added_to_channel event
It's important to note that the filtering set above is not applied to events which means that you'll have to override the default channel list behavior if you don't want channels with pending invites to be added to the channel list when a notification.added_to_channel event is received.
To override the default behavior create a custom event handler in app.component.ts that checks if the user was invited to the channel or added directly and only adds the channel to the list if the user was added directly:
private customAddedToChannelNotificationHandler(
    clientEvent: ClientEvent,
    channelListSetter: (channels: (Channel | ChannelResponse)[]) => void
  ): void {
    let channels!: Channel[];
    this.channelService.channels$
      .pipe(take(1))
      .subscribe((c) => (channels = c || []));
    if (clientEvent.event.member?.invited) {
      return;
    }
    channelListSetter([clientEvent!.event!.channel!, ...channels]);
  }
Now register the handler to the channel service in the constructor of app.component.ts:
this.channelService.customAddedToChannelNotificationHandler =
  this.customAddedToChannelNotificationHandler.bind(this);
notification.invite_accepted event
The notification.invite_accepted event emitted by the ChatClientService signals that the user accepted an invitation to a channel, we should add the channel to the channel list, we can do this by re-initializing the channel list.
Add this to the constructor of your app.component.ts:
this.chatService.events$
  .pipe(filter((n) => n.eventType === "notification.invite_accepted"))
  .subscribe(() => {
    this.channelService.reset();
    void this.channelService.init({
      joined: true,
    });
});On this page: