cd examples/minimal
idf.py set-target esp32s3
idf.py menuconfig
idf.py build flash monitorQuickstart
This guide will help you get started with the Stream Video ESP32 SDK.
Prerequisites
- ESP-IDF v5.4 or higher installed and environment sourced (see Installation).
- ESP32-S3 board (e.g. with camera and mic).
- WiFi network and a backend that can issue Stream auth tokens.
Application flow
The app uses a small high-level API (stream_video.h):
| API | Purpose |
|---|---|
stream_video_init() | Initialize the SDK (call once at startup) |
stream_video_join_call(params, &client) | Join a call — handles coordinator, SFU, WebRTC, and media publishing automatically |
stream_video_leave_call(client) | Leave and clean up |
stream_video_deinit() | Tear down the SDK |
stream_video_error_to_string(err) | Convert error codes to human-readable strings |
Authentication (tokens) is handled by your auth service or backend. The SDK is responsible only for joining the call: it connects to the coordinator, joins the call, and connects to the SFU. Publishing starts automatically once you have joined.
Basic example
See the examples/minimal/ directory in the stream-video-esp32 repository for a complete working example. The SDK handles camera and microphone capture internally on ESP32-S3. WiFi credentials are configured via sdkconfig.defaults or idf.py menuconfig (under Stream Video Example), while user, environment, and call settings are #define constants in main.c.
Build and run
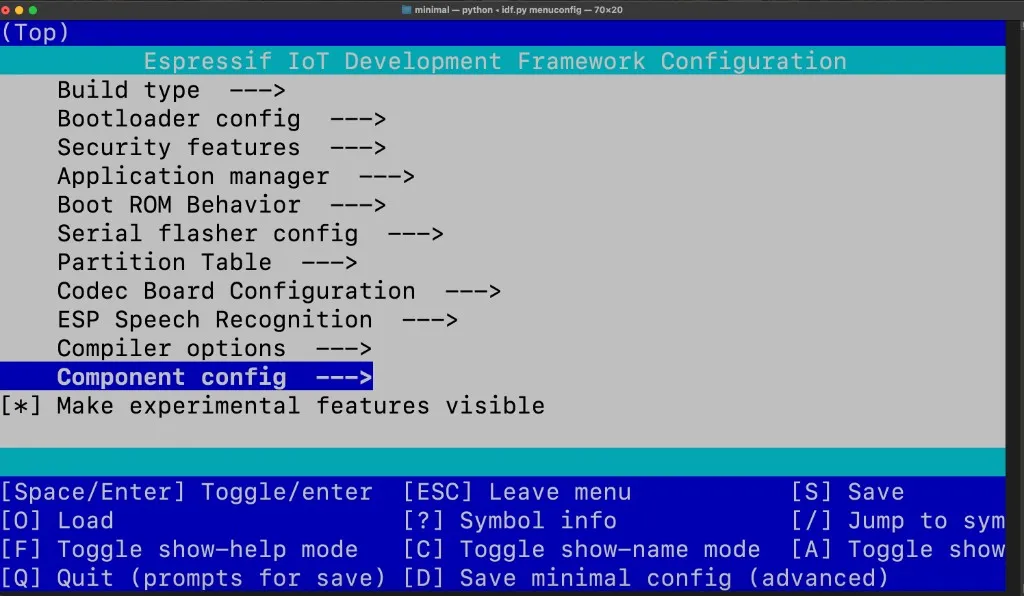
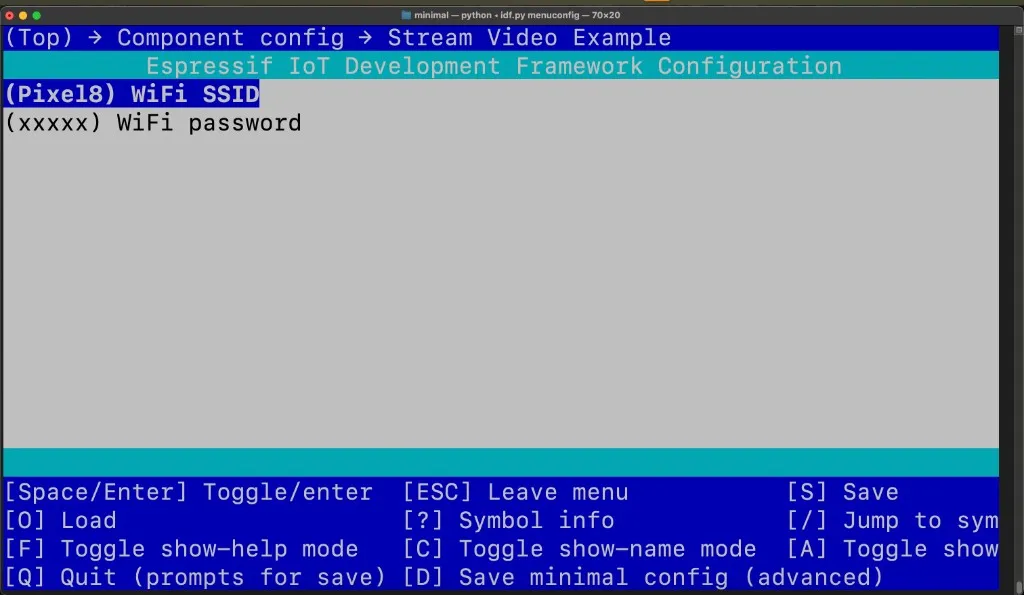
Before building, you need to configure two things in idf.py menuconfig:
1. Set WiFi credentials
Navigate to Component config → Stream Video Example and set your WiFi SSID and WiFi password:
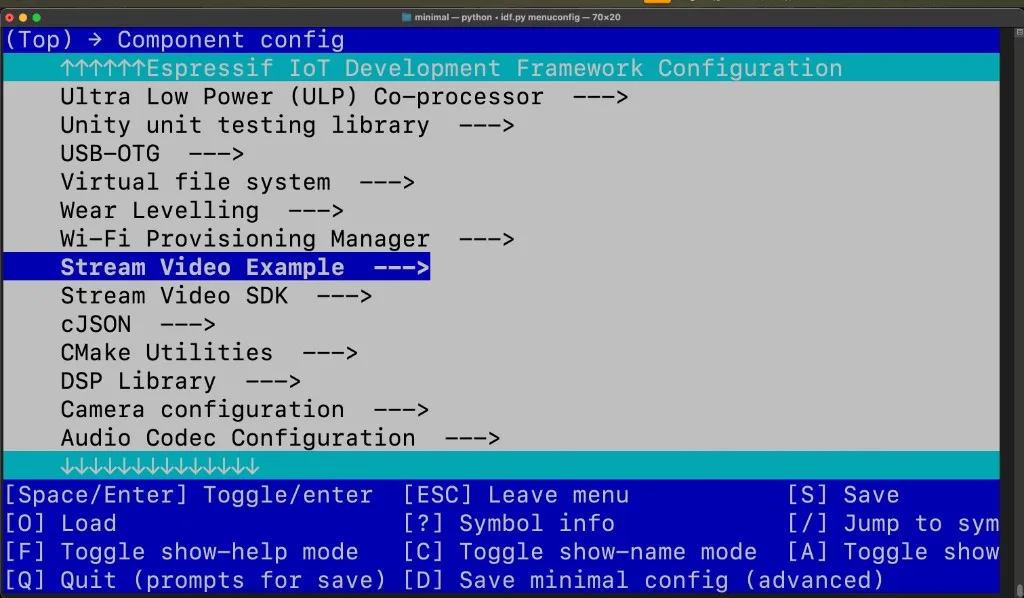
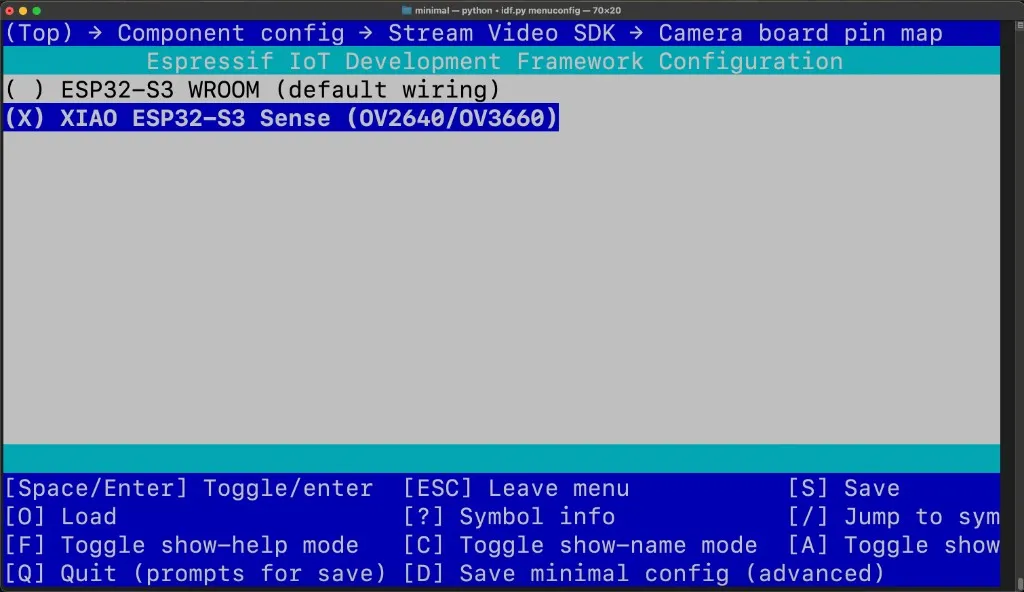
2. Select your board
Navigate to Component config → Stream Video SDK → Camera board pin map and select the board that matches your hardware:
- ESP32-S3 WROOM (default wiring) — Default option
- XIAO ESP32-S3 Sense (OV2640/OV3660)
Configure Stream settings
Edit the #define constants near the top of main/main.c:
#define STREAM_AUTH_BASE_URL "https://pronto.getstream.io/"  // Your backend or Stream's token service
#define STREAM_ENVIRONMENT   "pronto"   // "production", "staging", or "pronto"
#define STREAM_USER_ID       "esp32_user"  // User ID (can be NULL for auto-generated)
#define STREAM_CALL_TYPE     "default"     // Call type (e.g., "default", "livestream")
#define STREAM_CALL_ID       "call123" // Call ID to join (can be NULL to create new call)
Ensure your backend serves a token endpoint (e.g. GET .../api/auth/create-token?environment=...&user_id=...&exp=...). See Client auth for the request/response format.
Join a call with the high-level API
In your own app, initialize the SDK once (e.g. in app_main after WiFi is up), fetch auth data from your token service, then join:
#include "stream_video.h"
#include "app_token.h" // or your own token fetch
void app_main(void)
{
// ... WiFi init ...
stream_video_init();
stream_video_auth_data_t auth_data = {0};
stream_video_error_t err = app_request_auth_data(
"https://pronto.getstream.io/",
"pronto",
"esp32_user",
STREAM_VIDEO_DEFAULT_TOKEN_EXPIRY_SECONDS,
&auth_data);
if (err != STREAM_VIDEO_ERR_OK) {
ESP_LOGE("app", "Auth failed: %s", stream_video_error_to_string(err));
return;
}
stream_video_join_call_params_t params = {
.auth_data = &auth_data,
.call_type = "default",
.call_id = "your_call_id",
.create = true,
.result_cb = your_result_callback,
};
stream_video_client_handle_t client = NULL;
err = stream_video_join_call(¶ms, &client);
if (err != STREAM_VIDEO_ERR_OK) {
ESP_LOGE("app", "Join failed: %s", stream_video_error_to_string(err));
return;
}
// Publishing starts automatically after SFU connect
}Next steps
- API Reference — Full API: init, join, leave, error handling, and types.
- Client auth — Token request and auth base URL.
- Example configuration — User, environment, call, and mute options.