let notificationsConfig = PushNotificationsConfig(
    pushProviderInfo: PushProviderInfo(name: "apn", pushProvider: .apn)
)Push Notifications
Push notifications are sent in the following scenarios, such as adding / updating comments of an activity and adding reactions.
StreamFeeds setup
The push notification config is provided optionally, when the SDK is initalized. By default, the config uses apn as a push provider. The push provider name for regular push is "apn", but you can also specify your own.
You should have these providers configured on your dashboard. If you don't have them, an error would be thrown when trying to add a device.
Here's an example how to create your own PushNotificationsConfig:
addDeviceResponse, err := client.CreateDevice(ctx, &getstream.CreateDeviceRequest{
	ID:           deviceToken,
	PushProvider: "apn",
	UserID:       &testUserID,
})
CreateDeviceRequest addDeviceRequest =
CreateDeviceRequest.builder()
.id(deviceToken)
.pushProvider("apn")
.userID(testUserId)
.build();
Response addDeviceResponse = client.createDevice(addDeviceRequest).execute().getData();$addDeviceResponse = $this->client->createDevice(
new GeneratedModels\CreateDeviceRequest(
id: $deviceToken,
pushProvider: 'firebase',
userID: $this->testUserId
)
);var addDeviceResponse = await _client.CreateDeviceAsync(
new CreateDeviceRequest
{
ID = deviceToken,
PushProvider = "apn",
UserID = _testUserId
}
);add_device_response = self.client.create_device(
id=device_token, push_provider="apn", user_id=self.test_user_id
)When you initialize the SDK, you should provide the notifications as part of the FeedsConfig config parameter:
let config = FeedsConfig(pushNotificationsConfig: notificationsConfig)
let feedsClient = FeedsClient(
    apiKey: apiKey,
    user: user,
    token: token,
    feedsConfig: config,
    tokenProvider: tokenProvider
)addDeviceResponse, err := client.CreateDevice(ctx, &getstream.CreateDeviceRequest{
ID: deviceToken,
PushProvider: "apn",
UserID: &testUserID,
})CreateDeviceRequest addDeviceRequest =
CreateDeviceRequest.builder()
.id(deviceToken)
.pushProvider("apn")
.userID(testUserId)
.build();
Response addDeviceResponse = client.createDevice(addDeviceRequest).execute().getData();$addDeviceResponse = $this->client->createDevice(
new GeneratedModels\CreateDeviceRequest(
id: $deviceToken,
pushProvider: 'firebase',
userID: $this->testUserId
)
);var addDeviceResponse = await _client.CreateDeviceAsync(
new CreateDeviceRequest
{
ID = deviceToken,
PushProvider = "apn",
UserID = _testUserId
}
);add_device_response = self.client.create_device(
id=device_token, push_provider="apn", user_id=self.test_user_id
)Push Notifications
Push notifications can be sent for many other different events, such as adding comments, reactions etc. The setup for push notifications is the standard one - by providing a certificate or APNs key.
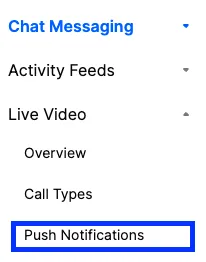
Dashboard Configuration
In order to configure Push Notifications, you need to visit your app's dashboard. From there, select the Push Notifications menu option as you can see in the image below:
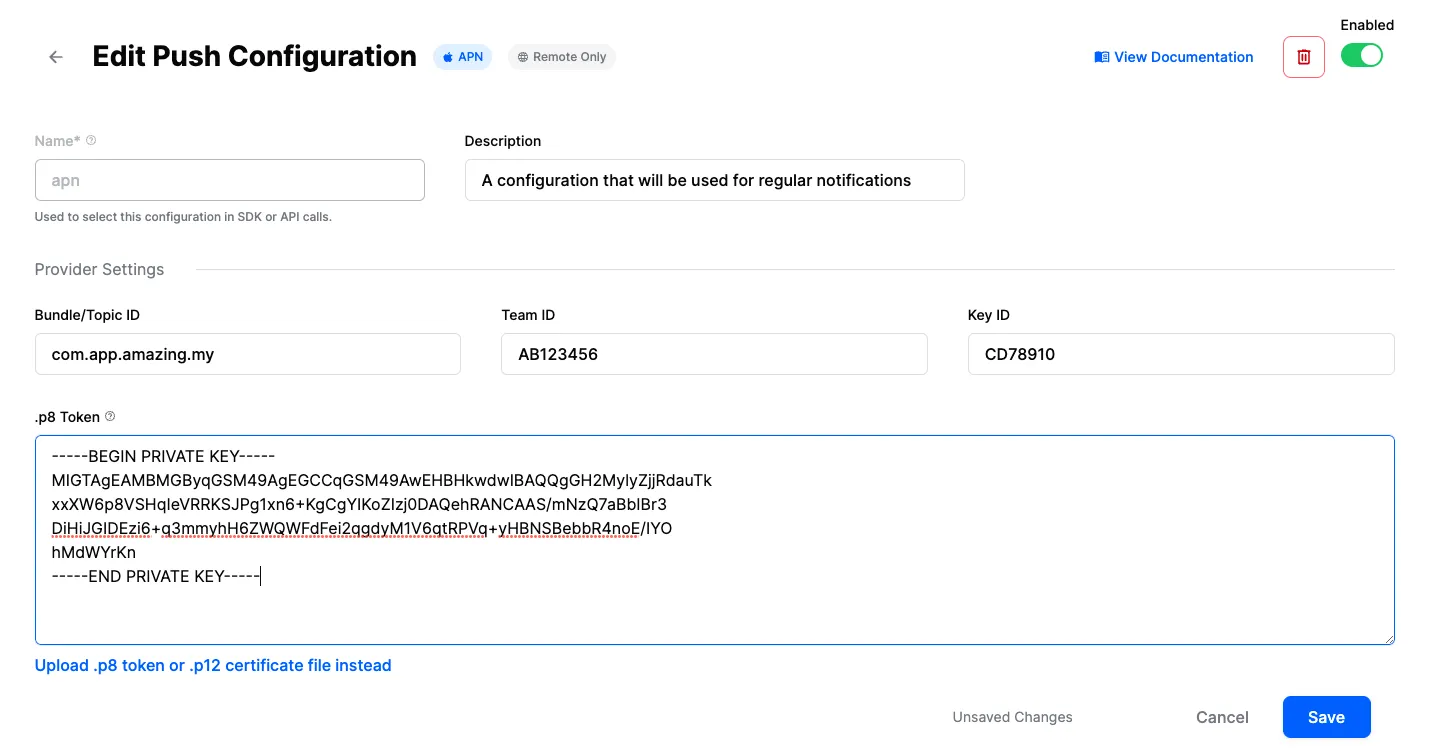
From there you can create a new configuration by clicking the New Configuration button. After selecting the Push Notification Provider you want, you will be asked to provide the following information:
| Field Name | Usage description |
|---|---|
Name | Used to select this configuration in SDK or API calls. |
Description | Allows you to set a description on the configuration to help identify its usage in your app's context. |
Bundle/Topic ID | Your app's bundle id to which the notification will be pushed to. |
TeamID | The Team ID is generated by Apple for your developer account. Can be found in the top right of your Apple developer account. |
KeyID | This is the unique identifier for the p8 authentication key. You can find your Key ID in the keys section of your Apple developer account. |
.p8 Token or .p12 Certificate | The token or certificate that will be used to send the push notification. |

For our example, we are using apn as name and we are filling the remaining information as you can see in the image below:
App Configuration
Here's an example setup in the AppDelegate:
class AppDelegate: NSObject, UIApplicationDelegate, UNUserNotificationCenterDelegate {

    func application(
        _ application: UIApplication,
        didFinishLaunchingWithOptions launchOptions: [UIApplication.LaunchOptionsKey: Any]? = nil
    ) -> Bool {
        UNUserNotificationCenter.current().delegate = self
        setupRemoteNotifications()
        return true
    }

    func application(
        _ application: UIApplication,
        didRegisterForRemoteNotificationsWithDeviceToken deviceToken: Data
    ) {
        let deviceToken = deviceToken.map { String(format: "%02x", $0) }.joined()
        AppState.shared.pushToken = deviceToken
    }

    func userNotificationCenter(
        _ center: UNUserNotificationCenter,
        didReceive response: UNNotificationResponse,
        withCompletionHandler completionHandler: @escaping () -> Void
    ) {
        log.debug("push notification received \(response.notification.request.content)")
    }

    func setupRemoteNotifications() {
        UNUserNotificationCenter
            .current()
            .requestAuthorization(options: [.alert, .sound, .badge]) { granted, _ in
                if granted {
                    DispatchQueue.main.async {
                        UIApplication.shared.registerForRemoteNotifications()
                    }
                }
            }
    }
}addDeviceResponse, err := client.CreateDevice(ctx, &getstream.CreateDeviceRequest{
ID: deviceToken,
PushProvider: "apn",
UserID: &testUserID,
})CreateDeviceRequest addDeviceRequest =
CreateDeviceRequest.builder()
.id(deviceToken)
.pushProvider("apn")
.userID(testUserId)
.build();
Response addDeviceResponse = client.createDevice(addDeviceRequest).execute().getData();$addDeviceResponse = $this->client->createDevice(
new GeneratedModels\CreateDeviceRequest(
id: $deviceToken,
pushProvider: 'firebase',
userID: $this->testUserId
)
);var addDeviceResponse = await _client.CreateDeviceAsync(
new CreateDeviceRequest
{
ID = deviceToken,
PushProvider = "apn",
UserID = _testUserId
}
);add_device_response = self.client.create_device(
id=device_token, push_provider="apn", user_id=self.test_user_id
)In the code above, we are first asking for push notification permission, and if granted, we are registering for push notifications.
Whenever we receive a push notification token, we are storing it in our AppState (in our demo app, you would also need to store it somewhere in your app). When the StreamFeeds client is initialized, we are registering the device with our backend, using the setDevice method:
private func setPushToken() {
    if let pushToken, let feedsClient {
        Task {
            try await feedsClient.createDevice(id: pushToken)
        }
    }
}addDeviceResponse, err := client.CreateDevice(ctx, &getstream.CreateDeviceRequest{
ID: deviceToken,
PushProvider: "apn",
UserID: &testUserID,
})CreateDeviceRequest addDeviceRequest =
CreateDeviceRequest.builder()
.id(deviceToken)
.pushProvider("apn")
.userID(testUserId)
.build();
Response addDeviceResponse = client.createDevice(addDeviceRequest).execute().getData();$addDeviceResponse = $this->client->createDevice(
new GeneratedModels\CreateDeviceRequest(
id: $deviceToken,
pushProvider: 'firebase',
userID: $this->testUserId
)
);var addDeviceResponse = await _client.CreateDeviceAsync(
new CreateDeviceRequest
{
ID = deviceToken,
PushProvider = "apn",
UserID = _testUserId
}
);add_device_response = self.client.create_device(
id=device_token, push_provider="apn", user_id=self.test_user_id
)Additionally, consider storing the push notifications tokens locally. You would need to remove them from the Stream backend if the user decides to logout from your app.
With that, the push notifications setup is done and you should be able to receive notifications, if you have proper setup in your Apple developer account, as well as our dashboard.
If you want to customize the content of the push notification, consider implementing a Notification Service Extension.
Removing devices
If you store the device tokens locally, you can remove them at a later stage. For example, the user can explicitly ask for this from your app UI, or you can do this for the user when they decide to logout from your app.
In order to delete a device, you should use the following method from the StreamFeeds SDK:
try await feedsClient.deleteDevice(deviceId: savedToken)removeDeviceResponse, err := client.DeleteDevice(ctx, &getstream.DeleteDeviceRequest{
ID: deviceToken,
UserID: &testUserID,
})DeleteDeviceRequest deleteDeviceRequest = DeleteDeviceRequest.builder().build();
Response removeDeviceResponse = client.deleteDevice(deleteDeviceRequest).execute().getData();$removeDeviceResponse = $this->client->deleteDevice(
$deviceToken,
$this->testUserId
);var removeDeviceResponse = await _client.DeleteDeviceAsync(
deviceToken
);remove_device_response = self.client.delete_device(
device_token, self.test_user_id
)Listing devices
If you want to list the devices that are registered to the current user, you should use the listDevices method from the StreamFeeds object:
let devices = try await streamFeeds.listDevices()removeDeviceResponse, err := client.DeleteDevice(ctx, &getstream.DeleteDeviceRequest{
ID: deviceToken,
UserID: &testUserID,
})DeleteDeviceRequest deleteDeviceRequest = DeleteDeviceRequest.builder().build();
Response removeDeviceResponse = client.deleteDevice(deleteDeviceRequest).execute().getData();$removeDeviceResponse = $this->client->deleteDevice(
$deviceToken,
$this->testUserId
);var removeDeviceResponse = await _client.DeleteDeviceAsync(
deviceToken
);remove_device_response = self.client.delete_device(
device_token, self.test_user_id
)This method returns an array of the Device type, that contains information about the device:
public var createdAt: Date
public var disabled: Bool?
public var disabledReason: String?
public var id: String
public var pushProvider: String
public var pushProviderName: String?
public var userId: String
public var voip: Bool?addDeviceResponse, err := client.CreateDevice(ctx, &getstream.CreateDeviceRequest{
ID: deviceToken,
PushProvider: "apn",
UserID: &testUserID,
})CreateDeviceRequest addDeviceRequest =
CreateDeviceRequest.builder()
.id(deviceToken)
.pushProvider("apn")
.userID(testUserId)
.build();
Response addDeviceResponse = client.createDevice(addDeviceRequest).execute().getData();$addDeviceResponse = $this->client->createDevice(
new GeneratedModels\CreateDeviceRequest(
id: $deviceToken,
pushProvider: 'firebase',
userID: $this->testUserId
)
);var addDeviceResponse = await _client.CreateDeviceAsync(
new CreateDeviceRequest
{
ID = deviceToken,
PushProvider = "apn",
UserID = _testUserId
}
);add_device_response = self.client.create_device(
id=device_token, push_provider="apn", user_id=self.test_user_id
)