# Firebase Cloud Messaging
This page shows you how to receive Stream Chat push notifications using [Firebase Cloud Messaging](https://firebase.google.com/docs/cloud-messaging).
## Configuring Notifications on the Stream Dashboard
To be able to receive notifications from Stream, you need to [provide your Firebase credentials to Stream](https://getstream.io/docs/platform/push-providers/).
Go to the [Firebase Console](https://console.firebase.google.com/), and select the project your app belongs to.
If you don't have a Firebase project yet, you'll have to create a new one.
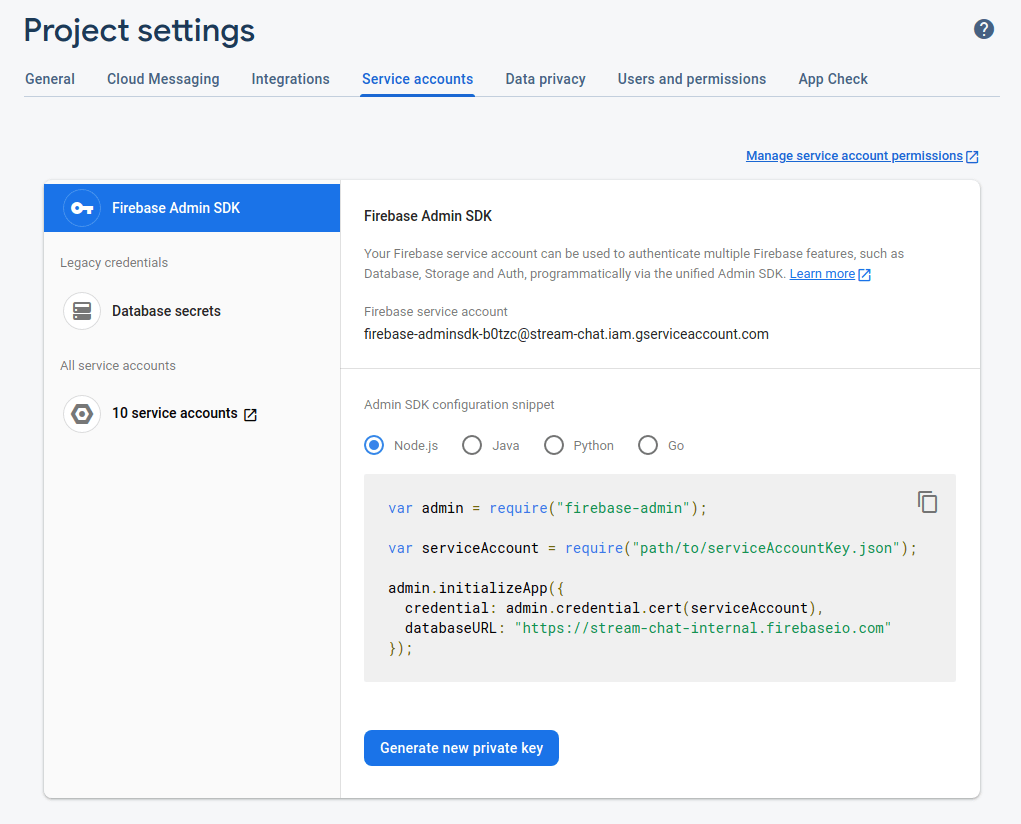
Click on the gear icon next to **Project Overview** and navigate to **Project settings**:

Navigate to the **Service Accounts** tab. Under **Firebase Admin SDK** section, click on **Generate new private key** button that will generate a _json_ file with the **Firebase Credentials**.
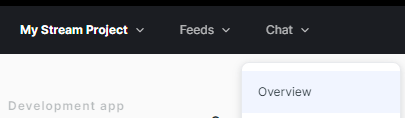
Open the [Stream Dashboard](https://getstream.io/signin/?product=chat). Navigate to the Chat **Overview** page for your app.
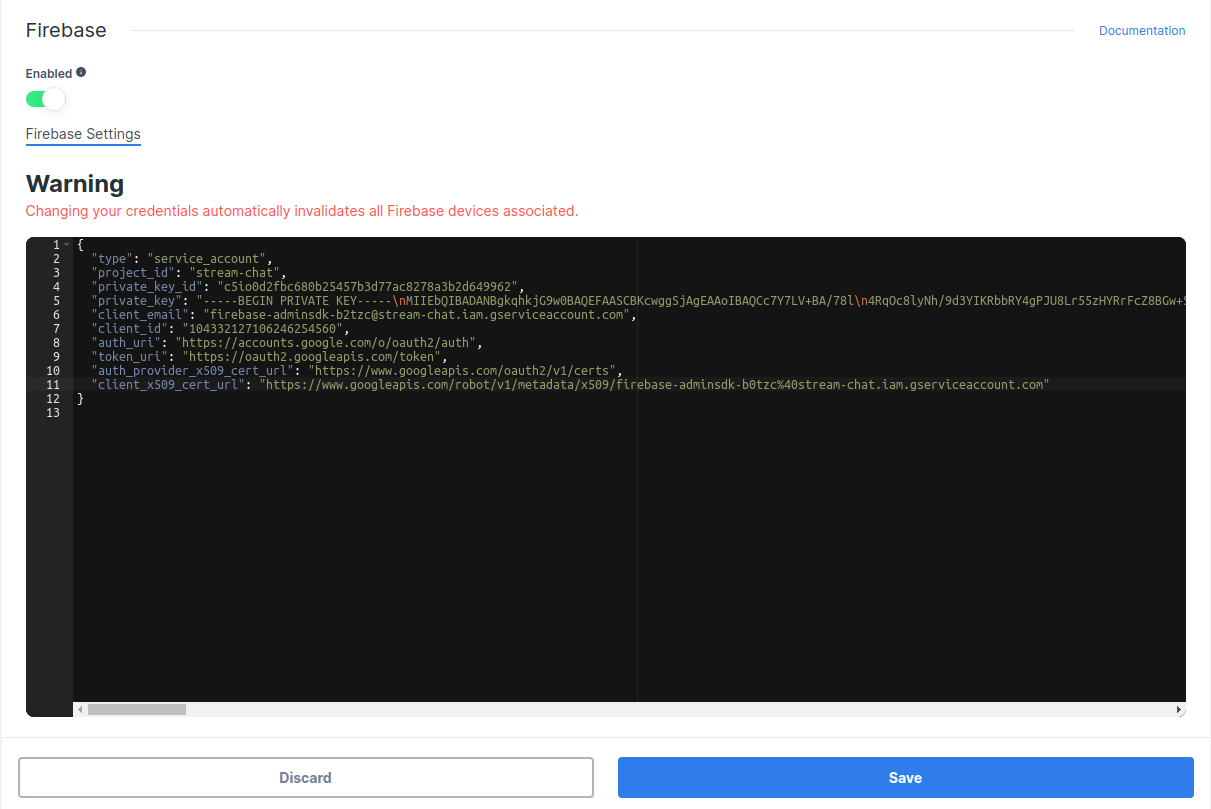
Scroll down and enable the **Firebase** switch. Paste the content of the _json_ file with the **Firebase Credentials** that you downloaded during the previous step, and click **Save** to confirm your changes.
That's the server-side setup done. You can now receive push notifications from Stream Chat on the client side. To register devices and process these notifications, follow the steps below.
## Receiving Notifications in the Client
We provide an artifact with all the implementation needed to work with **Firebase**. To use it follow the next steps:
Start by [adding Firebase to your Android project](https://firebase.google.com/docs/cloud-messaging/android/client). You only need to set up the FCM dependencies and add a _google-services.json_ file to your project source directory.
Next, add the Stream Firebase push provider artifact to your app's `build.gradle` file:
```groovy
dependencies {
implementation "io.getstream:stream-android-push-firebase:$stream_android_push_firebase_version"
}
```
Please note that this library follows a separate versioning scheme from the Stream Chat SDK. To use it correctly, make sure to check the latest version of `stream_android_push_firebase` on its own [GitHub repository](https://github.com/GetStream/stream-android-push/releases).
Finally, add the `FirebasePushDeviceGenerator` to your `NotificationConfig` and pass it into the `ChatClient.Builder` when you initialize the SDK:
```kotlin {2,5}
val notificationConfig = NotificationConfig(
pushDeviceGenerators = listOf(FirebasePushDeviceGenerator(providerName = "providerName"))
)
ChatClient.Builder("apiKey", context)
.notifications(notificationConfig)
.build()
```
```java
boolean pushNotificationEnabled = true;
List pushDeviceGeneratorList = Collections.singletonList(
new FirebasePushDeviceGenerator(
"providerName"
)
);
NotificationConfig notificationConfig = new NotificationConfig(true, pushDeviceGeneratorList);
new ChatClient.Builder("apiKey", context)
.notifications(notificationConfig)
.build();
```
Make sure that _ChatClient_ is always initialized before handling push notifications. We highly recommend initializing it in the `Application` class.
That's it. You can now receive push notifications from Stream via Firebase.
`FirebasePushDeviceGenerator` registers the device on the Stream backend automatically when `ChatClient.connectUser(...)` succeeds. You do **not** need to call `ChatClient.addDevice(...)` from your application code in addition to this — doing so adds redundant network requests and is a common source of confusion.
`FirebaseMessagingDelegate.registerFirebaseToken(...)` is only meant to be called from your custom `FirebaseMessagingService.onNewToken(...)` callback, as shown in the section below. It is not a "register the current token now" API.
### Using a Custom Firebase Messaging Service
This section is optional. The SDK already registers the device on the Stream backend on every `ChatClient.connectUser(...)` via `FirebasePushDeviceGenerator` (see the setup section above), so push notifications work without any extra code in a custom service.
You only need a custom `FirebaseMessagingService` if one of the following applies:
- You are using Firebase notifications for things other than Stream and want a single service to handle every Firebase message.
- You want your app to be notified when FCM rotates the token, so the SDK can update the device on the Stream backend right away rather than on the next `connectUser`.
In that case, your service must call into `FirebaseMessagingDelegate`:
```kotlin {6,14}
class CustomFirebaseMessagingService : FirebaseMessagingService() {
override fun onNewToken(token: String) {
// Update device's token on Stream backend
try {
FirebaseMessagingDelegate.registerFirebaseToken(token, "providerName")
} catch (exception: IllegalStateException) {
// ChatClient was not initialized
}
}
override fun onMessageReceived(message: RemoteMessage) {
try {
if (FirebaseMessagingDelegate.handleRemoteMessage(message)) {
// RemoteMessage was from Stream and it is already processed
} else {
// RemoteMessage wasn't sent from Stream and it needs to be handled by you
}
} catch (exception: IllegalStateException) {
// ChatClient was not initialized
}
}
}
```
```java
public final class CustomFirebaseMessagingService extends FirebaseMessagingService {
@Override
public void onNewToken(@NonNull String token) {
// Update device's token on Stream backend
try {
FirebaseMessagingDelegate.registerFirebaseToken(token, "providerName");
} catch (IllegalStateException exception) {
// ChatClient was not initialized
}
}
@Override
public void onMessageReceived(@NonNull RemoteMessage message) {
try {
if (FirebaseMessagingDelegate.handleRemoteMessage(message)) {
// RemoteMessage was from Stream and it is already processed
} else {
// RemoteMessage wasn't sent from Stream and it needs to be handled by you
}
} catch (IllegalStateException exception) {
// ChatClient was not initialized
}
}
}
```
Make sure that your custom service has an [`` priority](https://developer.android.com/guide/topics/manifest/intent-filter-element#priority) higher than `-1` to override our default service. (This priority is `0` by default.)
`onNewToken` is **not** the normal token-registration path. It only fires when FCM generates a new token (fresh install, reinstall, app data clear, restore on a new device). For routine sign-ins — including existing users upgrading to a new version of your app — the SDK fetches and registers the current token through `FirebasePushDeviceGenerator` on every `ChatClient.connectUser(...)`. You do not need to wait for or rely on `onNewToken` for initial registration.
When `onNewToken` does fire, `FirebaseMessagingDelegate.registerFirebaseToken(...)` only **adds** the new token. The previous token stays registered until FCM rejects it or you call `ChatClient.deleteDevice(...)` for it explicitly. Until that happens, Stream sends a push to both tokens.
### Push Notification Payload
Push notifications are delivered as data payloads that the SDK can use to convert into the same data types that are received when working with the APIs.
When a message received by the Chat API, according to the delivery rules, it kicks a job that sends a regular data message (as below) to configured push providers on your app. According to the battery and the online status of the device, push providers deliver this payload to the actual devices. When a device receives the payload, it's passed to the SDK which connects to Chat API to receive regular message and channel records and unmarshals them into in-memory objects and gives control to you by passing these objects. At this point, your application can use these objects to generate any push notification to be shown to the user.
This is the main payload which will be sent to each configured provider:
```javascript
{
"sender": "stream.chat",
"type": "message.new",
"version": "v2",
"message_id": "d152f6c1-8c8c-476d-bfd6-59c15c20548a",
"id": "d152f6c1-8c8c-476d-bfd6-59c15c20548a",
"channel_type": "messaging",
"channel_id": "company-chat",
"cid": "messaging:company-chat",
"receiver_id": "company-chat-user1"
}
```
---
This page was last updated at 2026-08-10T16:00:42.246Z.
For the most recent version of this documentation, visit [https://getstream.io/chat/docs/sdk/android/guides/push-notifications/push-providers/firebase/](https://getstream.io/chat/docs/sdk/android/guides/push-notifications/push-providers/firebase/).