
The team here at Stream enjoys building open-source sample applications to showcase the functionality of our API. Our perspective has always been that it’s better to demonstrate the capabilities of our offerings in a fully functional platform. In this case, leveraging Stream and other great services allowed us to build a podcast and RSS reader, Winds, in months rather than years. In addition, as an open-source project, Winds keeps getting better thanks to contributions from its growing user base (now over 14,000 users and ~5,500 stars!). In this post, we’ll give you a rundown on how Winds - Stream’s most popular open-source sample application – is built. If you’re not familiar with Winds, you can read more about it here. We’ll start with a detailed walkthrough on adding a feature that requires us to touch multiple aspects of the application’s front and backend. By the end of this post, you’ll be ready to add your own features to Winds and contribute to the open-source community! Whether you’re a new coder or a veteran, we are confident you’ll learn something new. 😀 Please note, this tutorial assumes the following:
- You’re running macOS or understand how to install the various required dependencies on your OS of choice. 🎁
- You understand JavaScript 🤔
- You have a basic understanding of React (it’s okay if you don’t, but it helps) 💻
- You have an understanding of git (we won’t be diving deep, but general knowledge is required). 🔦
- You’re super stoked to learn how to code against the Winds codebase! 💥
Let’s get started!
System Dependencies 🧙
As you may know, system-wide dependencies are required for every application. To ensure that we stay on track, let's only cover installations for macOS.
1. Homebrew
For those of you who are new to coding, Homebrew is an amazing tool for handling installations of system dependencies. In a single command, you can install a coding language of your choice, or use Homebrew’s Cask functionality to install full-blown applications on your machine. If you don’t have Homebrew installed, you can install it with the following command: https://gist.github.com/astrotars/4ecf9c77f8bddd10ad4d81df1a851163 Once you’ve got Homebrew all squared away, we can move on to the next step...
2. Node.js
Node.js is heavily used throughout this project – mostly for the API and test suite. With that said, let’s make sure you’re running the latest version of node. At the time of writing this, Node.js is at v10.7.0 (and changing often). If you have Node.js installed, you can check your node version with the following command: https://gist.github.com/astrotars/72ca426127680c4826f79592ee478200 Note: We’ll assume that you are running the latest version of node. If you don’t have Node.js installed, you can do so with one of the following ways:
a) Homebrew
brew install nodeb) NVM (Recommended)
NVM or Node Version Manager is a popular and open-source tool. It allows you to jump around between Node.js versions with a short command. Everything is documented here. Installing is as easy as following these steps: Step 1: Install NVM: https://gist.github.com/astrotars/0d74a0ad50283d867a6c8f3155c53052 Step 2: Install the latest version of Node.js: https://gist.github.com/astrotars/4b27b8b245db2381cf7f84b2f7f303ca Pro Tip: You can run the command nvm ls-remote and it will list out all versions, including new versions, in your console. Now if you run node --version, you should see the latest version that you installed. 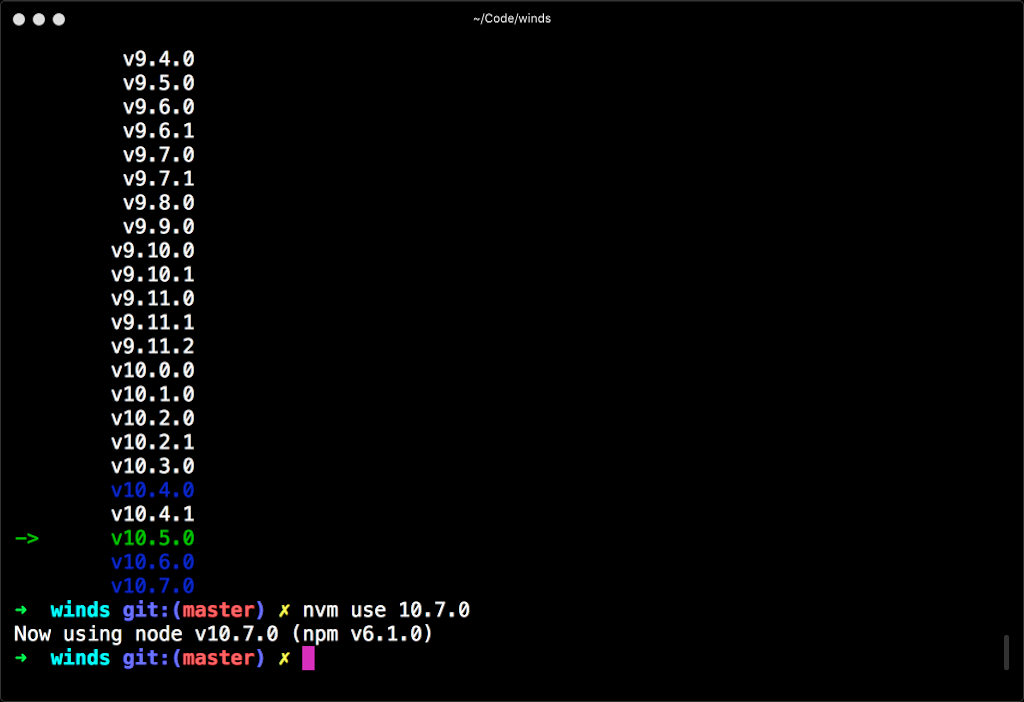
3. MongoDB
MongoDB is our primary datastore for user data, RSS, Podcasts, and much more. We use MongoDB Atlas, a hosted version of MongoDB built and maintained by MongoDB. https://gist.github.com/astrotars/9b7eb89f805f1fa70b6303700831d6db Note: The command to start MongoDB is brew services start MongoDB.
4. Redis
Redis is important as it serves as our job queue for processing RSS and Podcast feeds. We also use Redis for some basic caching on items that are not updated (such as interests). https://gist.github.com/astrotars/44a6e67b22047143cf0c87ea3082ffa2 Note: The command to start Redis is simply redis-server. A full list of commands can be found here.
4. Yarn
Yarn is a replacement for npm (node package manager). We recommend yarn over npm as we have found it to be more reliable and an overall better package manager for Node.js dependencies. https://gist.github.com/astrotars/067383ef2d0bfbbea308316a5f5d3df1
Global Yarn Dependencies 🌎
There’s one Node.js dependency that we need to be local, and for that, we’ll use Yarn. The dependency is PM2, a process manager that we’ll talk about in a bit. For now, run the following command to install PM2: https://gist.github.com/astrotars/288d888fe7f4566636358e489950612c
Clone the Repo 💾
You now have all of the necessary dependencies installed, so let’s go ahead and clone the repository. You can grab the URL from GitHub, or you can use the command below (just make sure that you’re cloning into a directory that makes sense for you (e.g. ~/Code)). https://gist.github.com/astrotars/821b85cf358ded067a1197e2f0467e37 If all goes well, your terminal will look similar to this screenshot: 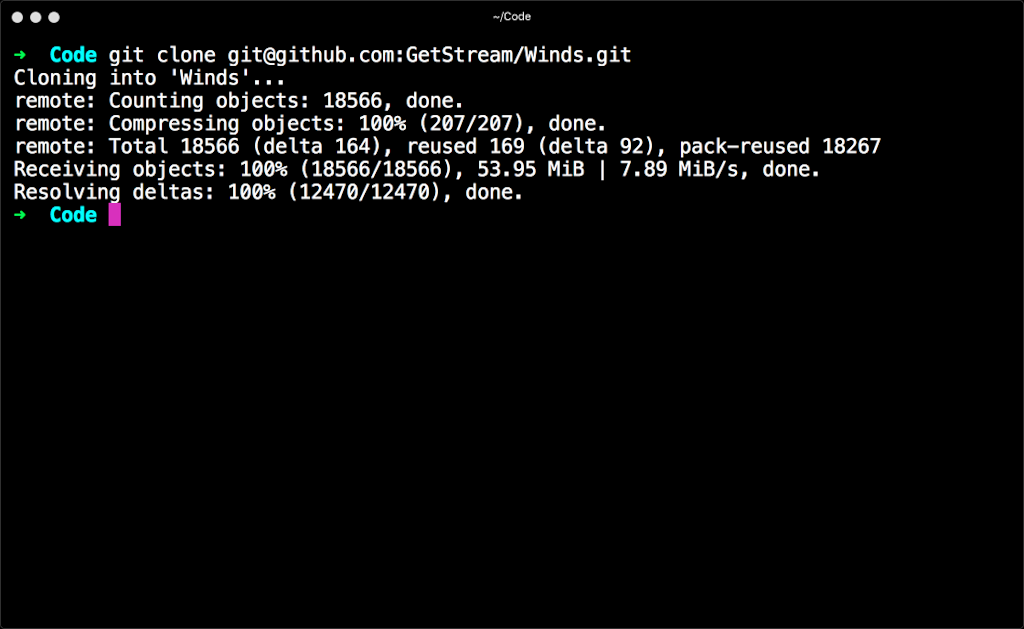
Setting Up Third-Party Services 👨👨👧👦
Winds relies on a couple of third-party resources to run. All external services will have API Keys/Secrets and other values that you will need to save for later in the post – I recommend using the Notes app in macOS. In total, it’ll take about 15-20 minutes for you to complete. Note: All services required to run Winds are free up to a certain level (generally production numbers), so no need to worry about fees for now. None of the services we recommend using will require a credit card.
1. Mercury Web Parser (~2 minutes)
Mercury Web Parser by Postlight plays a large role in Winds. It ensures that all RSS articles we parse are stripped of script tags and other messy code that is injected into HTML prior to rendering. To sign up for Mercury, head over the homepage and click “Sign Up”. Once you’ve completed that, grab the provided API key and save it somewhere special. Step 1: 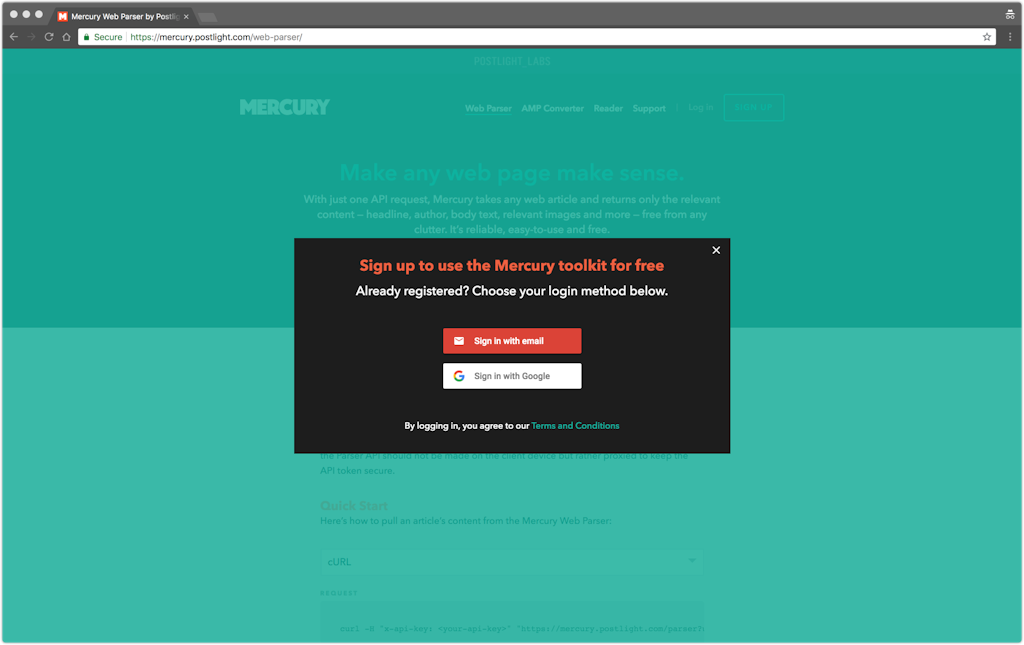 Step 2: Save the generated API key.
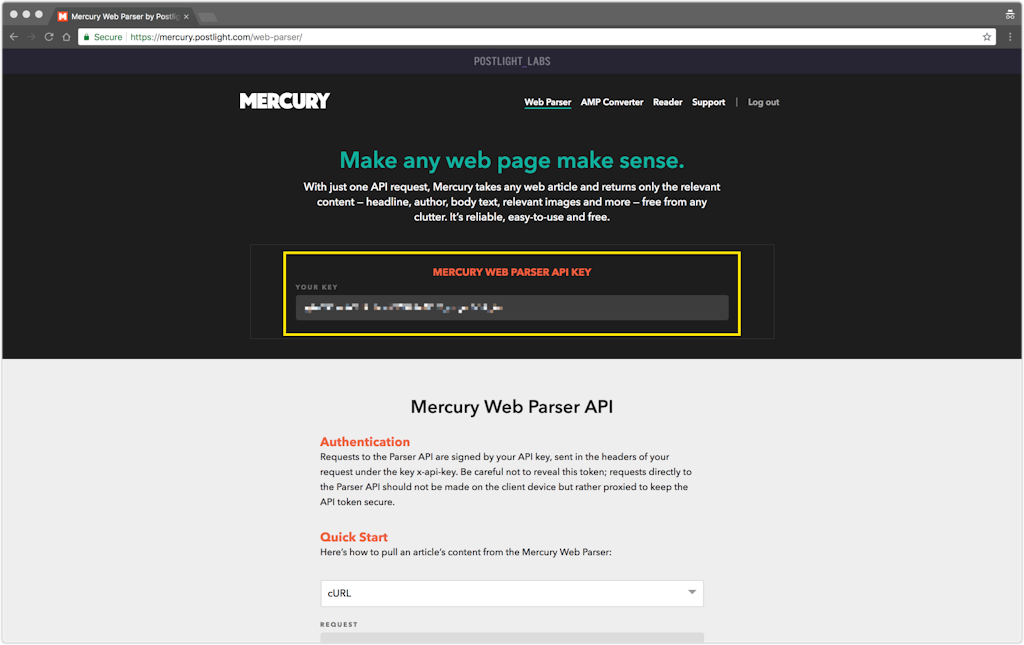
2. Stream (~5 minutes)
Stream powers the feeds within the application, along with the personalized content suggestions Step 1: Head over to the Stream website and click the “Sign Up” button. 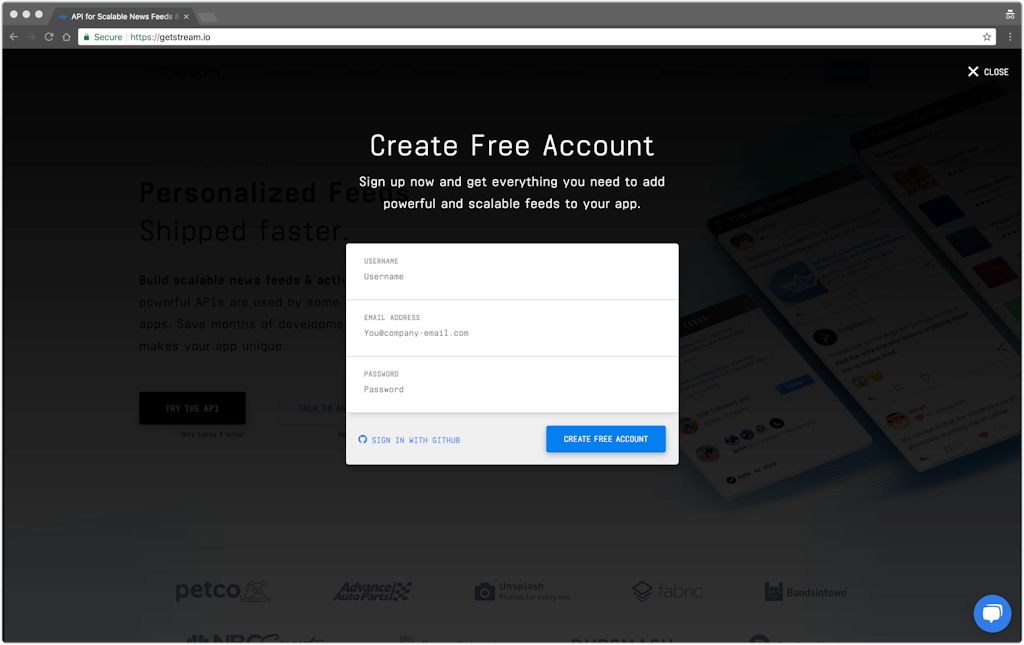 Step 2: Click on “View Dashboard” as highlighted in the screenshot below. Or, play around with the API first. 😀
 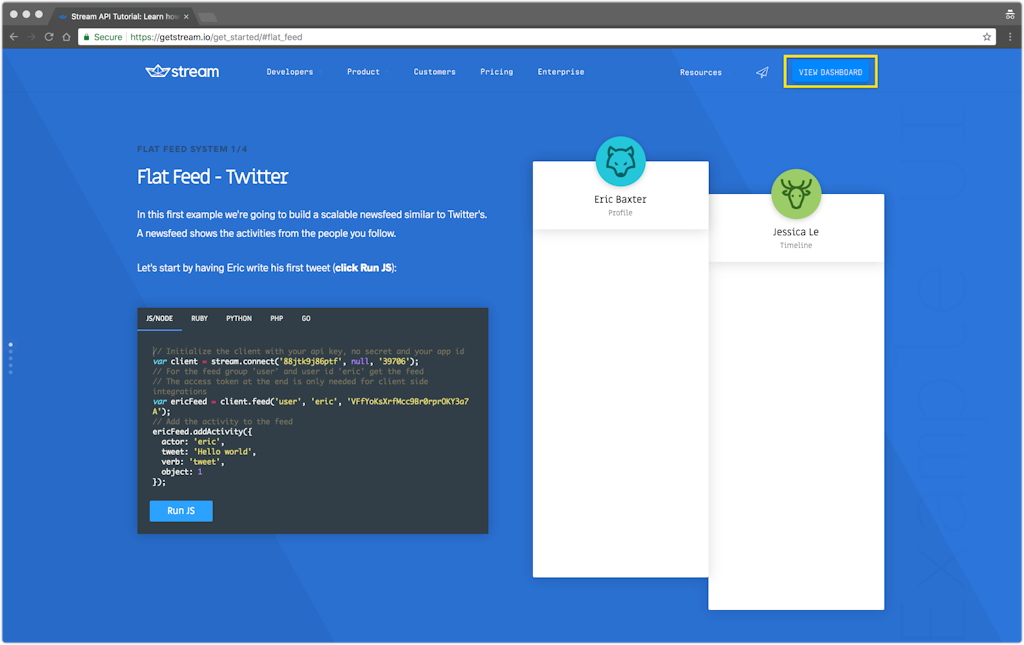 Step 3: Click “Create App” and fill in the details. Please note that the app name must be globally unique – I recommend prefixing it with your name as this will be a test project.
 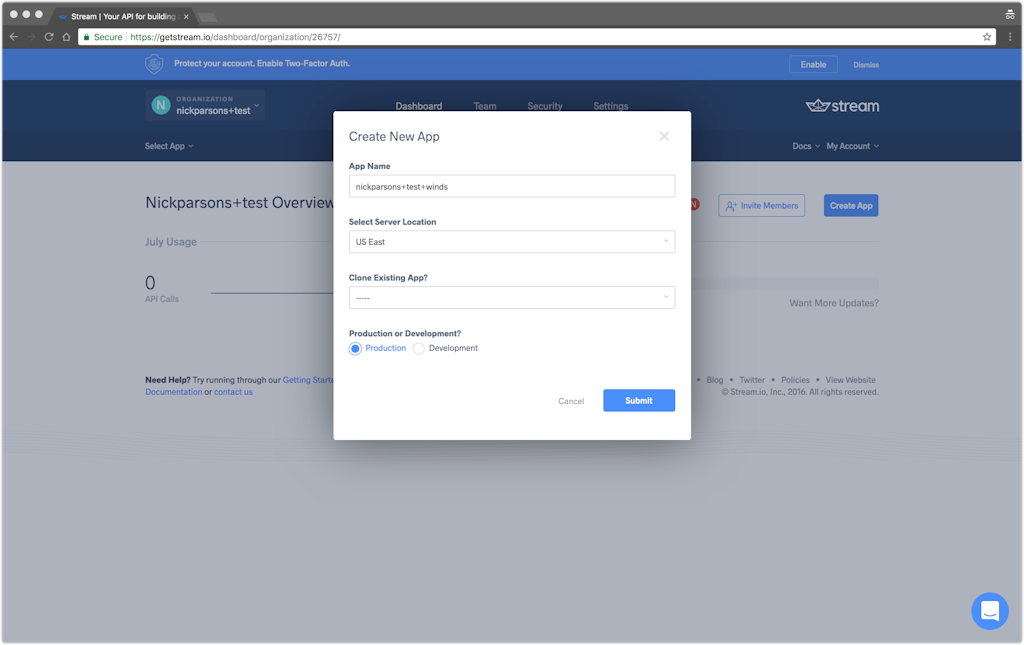 Step 4: Next, we need to configure our “Feed Groups” within Stream. The required feed groups are located on GitHub.
- podcast (flat)
- rss (flat)
- user (flat)
- timeline (flat)
- user_episode (flat)
- user_article (flat)
Step 5: Last, let’s go ahead and grab our credentials for Stream. Under your created Feed Groups, you should see a section that has your “Key” and”Secret”. Hold onto these as we’ll need them later on in the setup process. 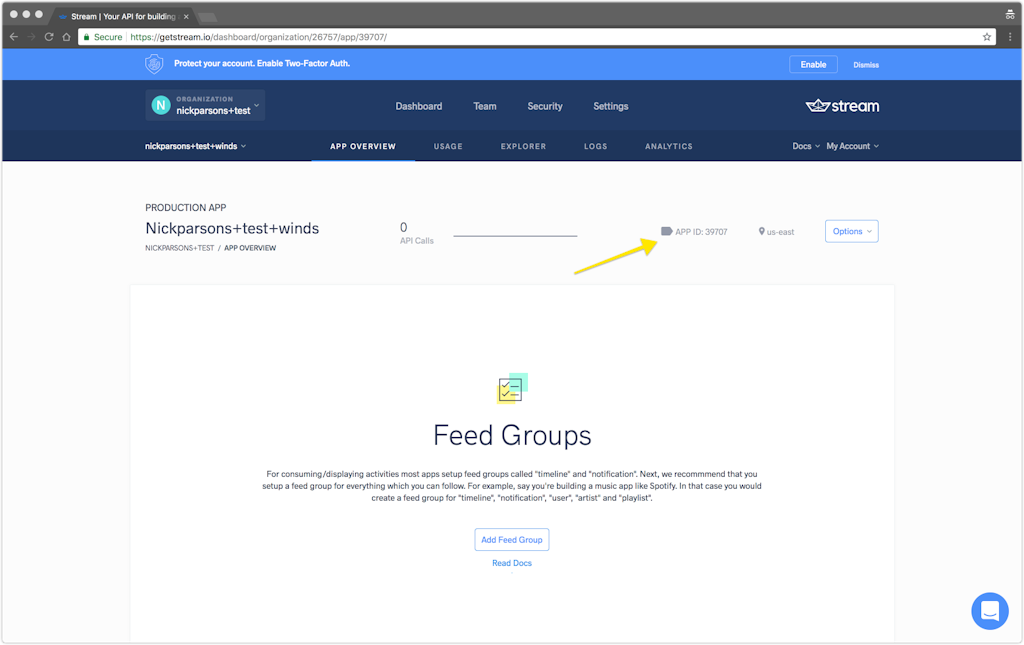 You’ll also want to grab your App ID, which is located at the top of the page and store the value.
 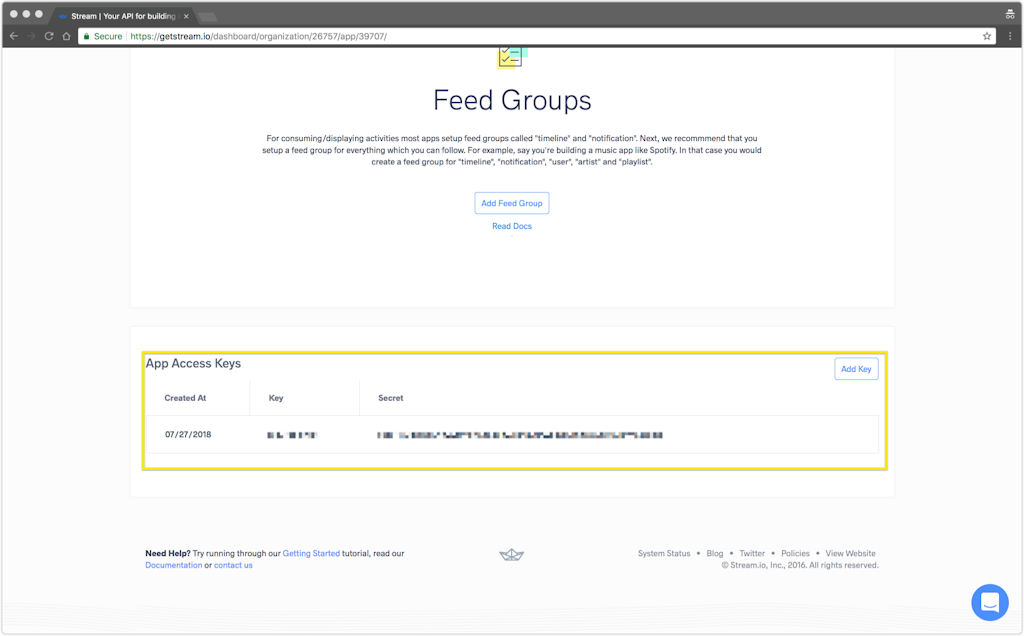 That’s it for Stream!
3. Algolia (~10 minutes)
Algolia powers search for Winds. It’s a crucial piece of technology for the application and plays a major role in the user experience. Step 1: Algolia is super easy to set up; we just need to head over to their website to create an account. 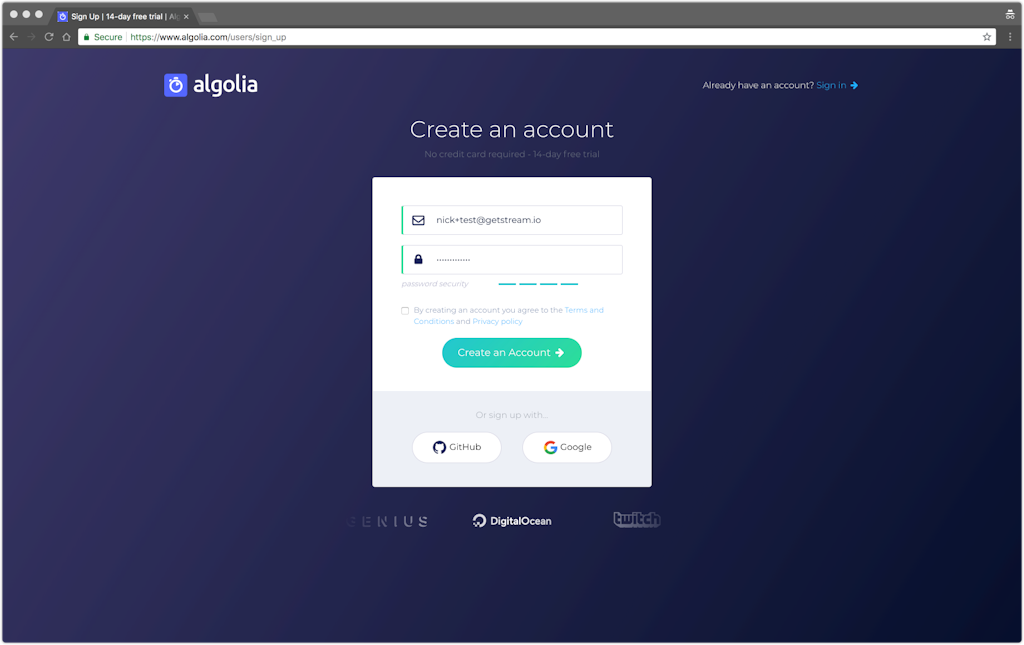 Step 2: Next, fill out the info required by Algolia.
 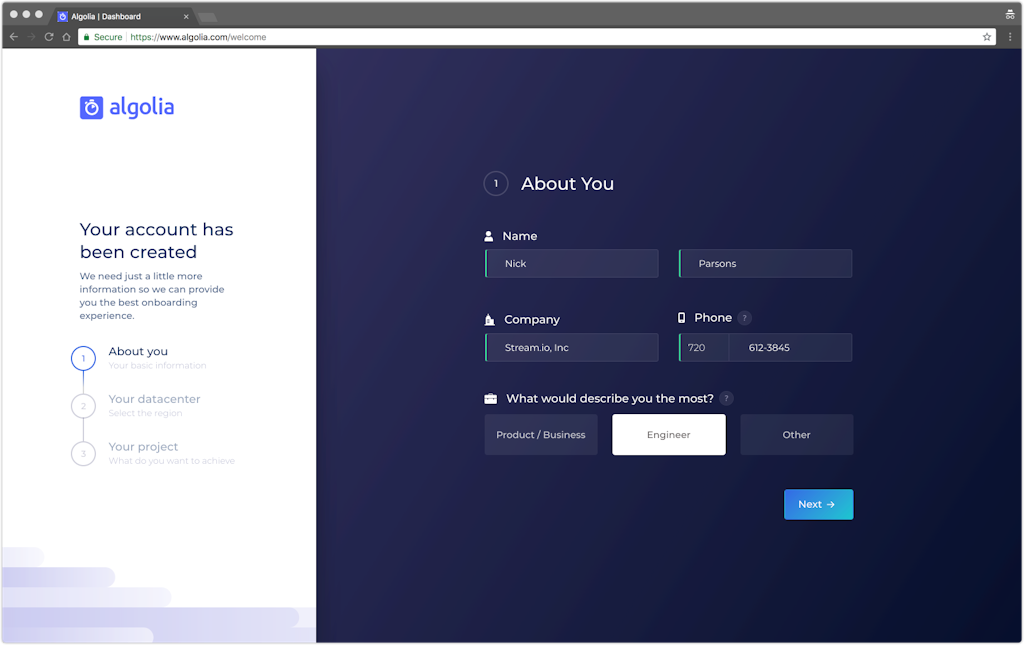 Step 3: Choose your data center. For the purpose of this tutorial, it doesn’t matter; however, I’m going to select the closest to me which is US-Central.
  Step 4: Select “Other” as the type of application you are building and “As soon as possible” in the drop-down. Then click “Finish” to wrap things up.
 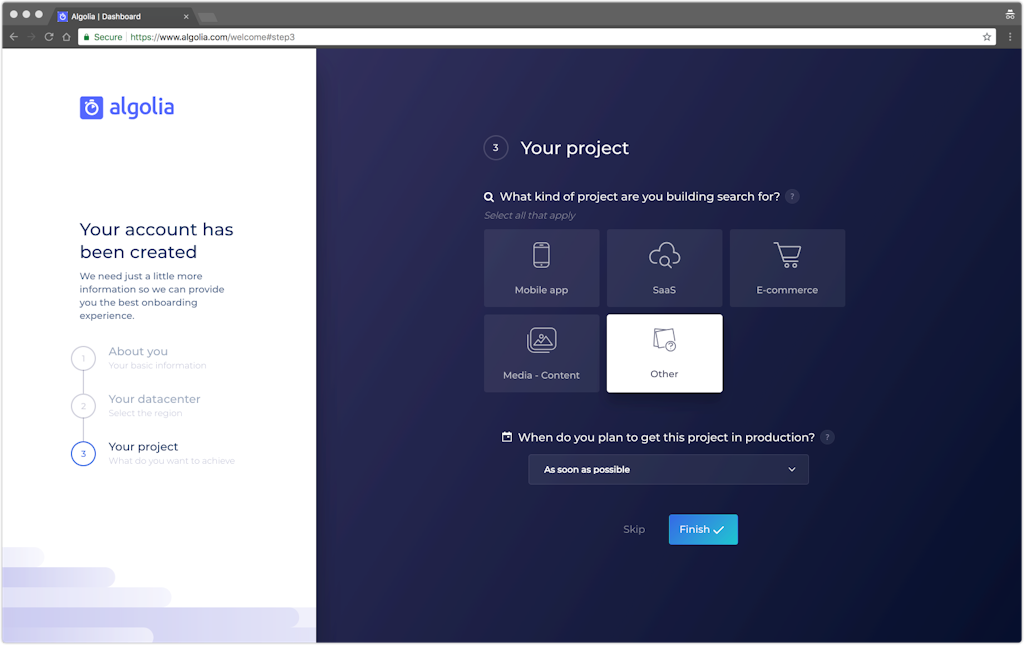 Step 5: The next step in this process is creating an index, which is where all of the Winds searchable data will live. To bypass the onboarding process, head directly to the dashboard with this link. Then click on the “Indices” button in the left-hand column. Once the page loads, click on the “Add New Index” button to generate an index. Name this whatever you want, but make sure you can write down the name of your index. I’m going to name mine “dev_Winds”.
  Step 6: The last step in the process is grabbing our “Application Name”, “Search-Only API Key” and “Admin API Key”. Both can be found under “API Keys” on the right-hand side of the page under the “API Keys” section. Keep these credentials handy for later use in the setup process.
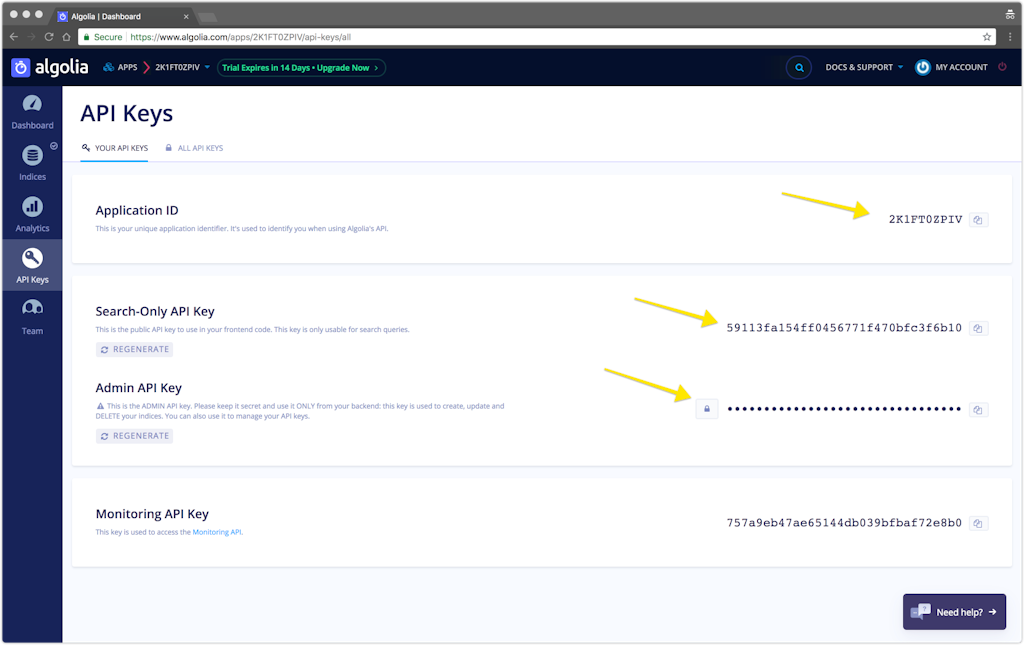
4. Sentry (~2 minutes)
Sentry is another one of the most important tools in our toolbox. Sentry captures errors that occur in the backend API, allowing us to jump on bug fixes before users even know. Step 1: Create a new account here. 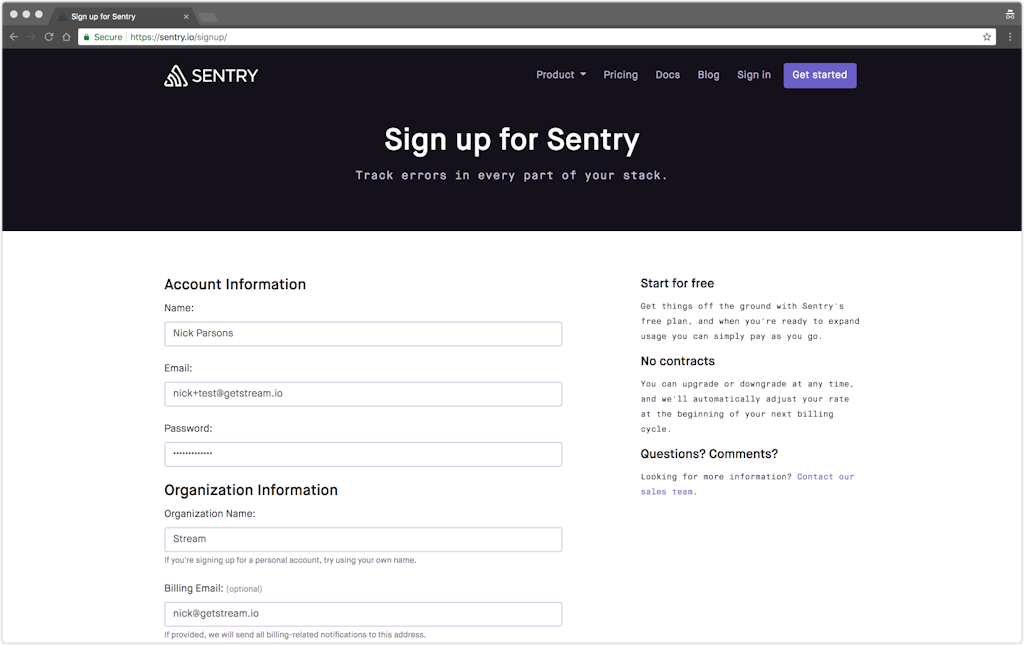 Step 2: Give your project a name. I’m calling mine “Winds” because, well, we’re working on the Winds project. 😀
 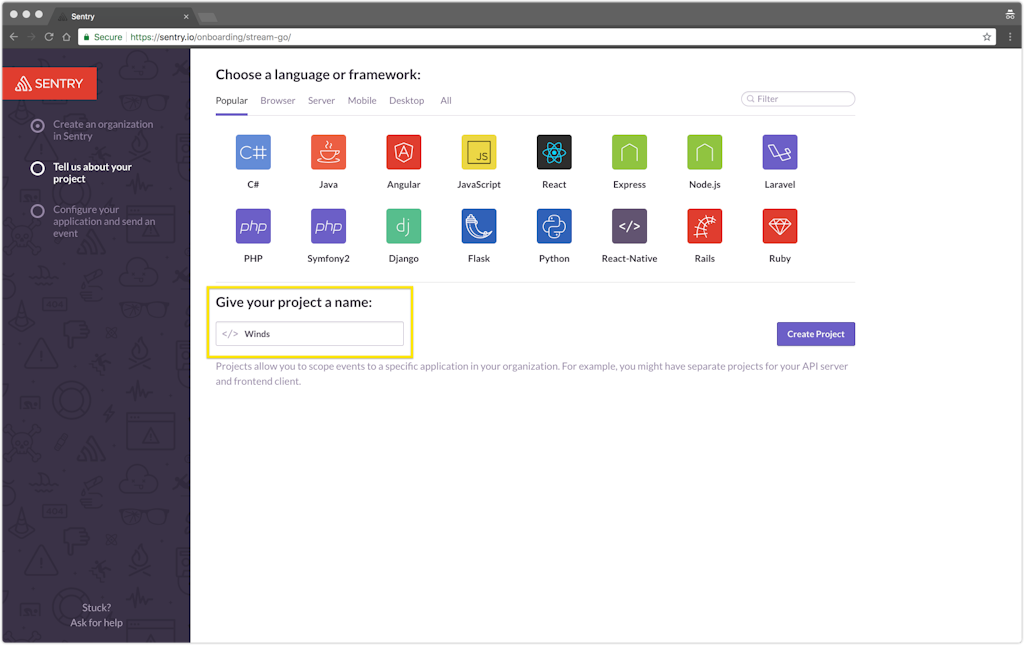 Click “Create Project” and you will be redirected. Step 3: Get your DSN by clicking on the link in “Already have things set up? Get Your DSN.”
 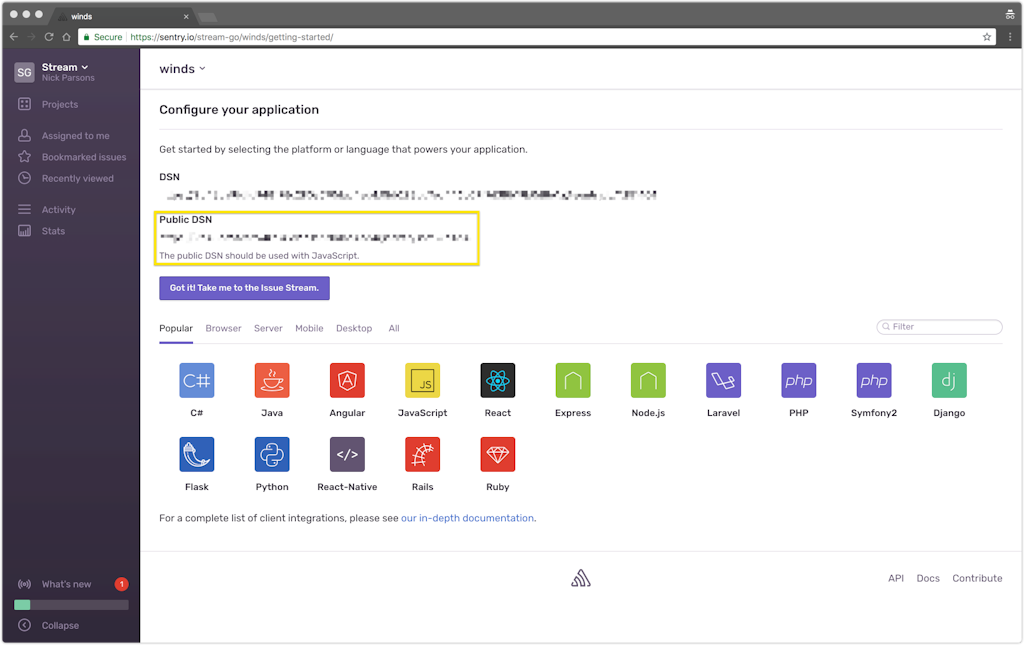 Copy this value, as we’ll need it in the coming sections.
Cloning the Repo 📀
To get started with next steps, you’ll need to clone the repository from GitHub. You can use the following command to do so: https://gist.github.com/astrotars/f2592b3889eca8fc3f30f0a73d8aeb9b Great! Now that you’ve cloned the repo, let’s go ahead and install the required dependencies with yarn.
Winds API
You’ll want to move into the /api directory and run the yarn command. Here’s a little snippet that will help you: https://gist.github.com/astrotars/accee2150c709490670aaad35f802be7 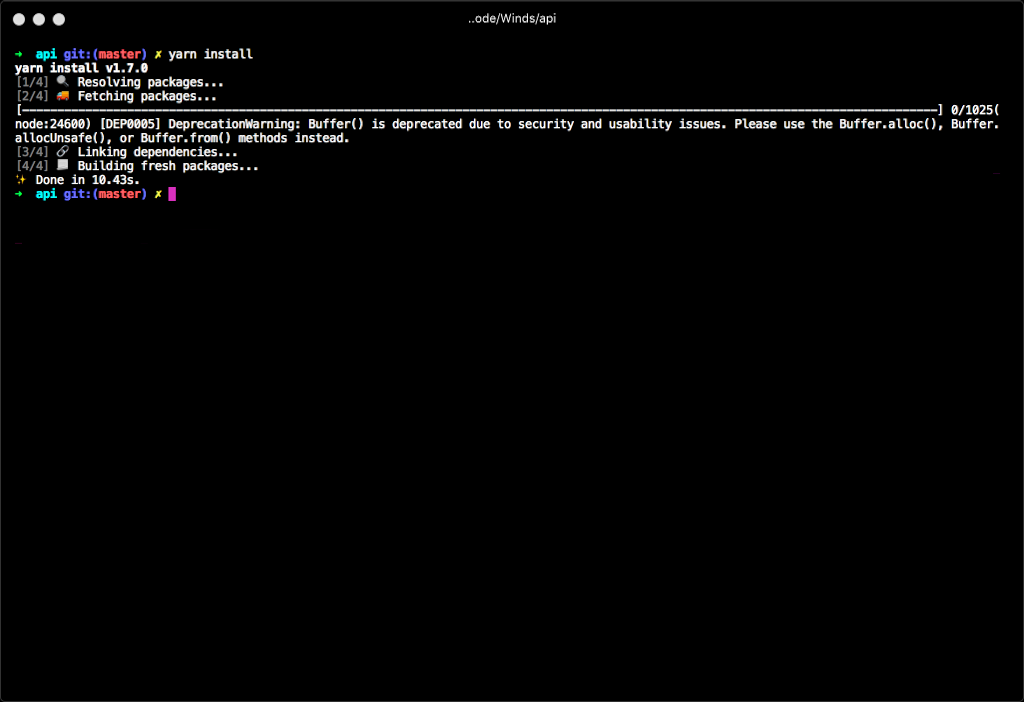
Winds App
Assuming you’re in the /api directory, you can move out and into the /app directory to do a yarn install. https://gist.github.com/astrotars/9c17339e45d1d8e60761e502dad831eb Note: API and App have separate package.json files. While this can be confusing, it’s necessary so that we don’t bloat each directory – even though they are in the same repository, the directories are deployed as separate applications. 
The Build
Before we move on, I’d like to take a minute to discuss the front- and back-end structure of the site. With any application, it’s important to understand the architecture and thought process behind it.
Winds Frontend
The front end portion of Winds is pretty straightforward. We used Create React App (CRA) to bootstrap the application and then start the development process. The frontend code can be found here: https://github.com/GetStream/Winds/tree/master/app
Winds Backend
The backend API is slightly more complicated than the frontend. Aside from being powered by Node.js, the backend handles nearly all of the business logic – communicating with third-party services, orchestrating workers for parsing RSS, Podcasts, and Open Graph data, etc. The backend can be viewed here: https://github.com/GetStream/Winds/tree/master/api.
ES6 Standards
Almost all of the code that we use is written in ES6. This allows us to keep our footprint small while maintaining readable code.
API Routes
Routes are rather simple. They do what the name suggests – route requests to the desired destination. Here’s a short example of a route file: https://gist.github.com/astrotars/5cf1d4e225ef24e72712fa9c29c9c13b Note: The route is wrapped in a wrapAsync() function. This function captures any errors that bubble up and sends them to Sentry. 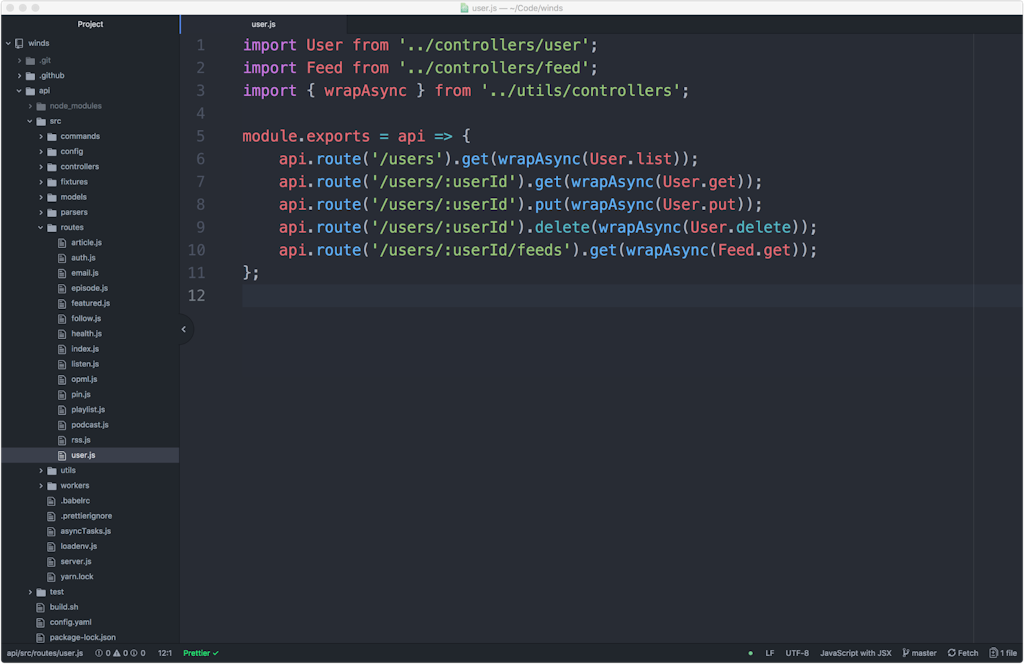
API Controllers
The controllers are called by the route files and contain most, if not all of the business logic within the API. The controllers communicate with the models, which allow them to talk to the database. 
API Models
Models are, essentially, the core foundation of the API. They provide the structure for the backend datastore (MongoDB) by enforcing what are known as “schemas”. Schemas contain various types, such as “String”, “Boolean”, etc. Here’s a short example of our user schema (I removed some of the helper functions to shorten the example, so be sure to look at the code to see them): https://gist.github.com/astrotars/071ed3001a9fd5ae2d4d1375c245e872 For a full list of Schema Types, have a look at the Mongoose website. 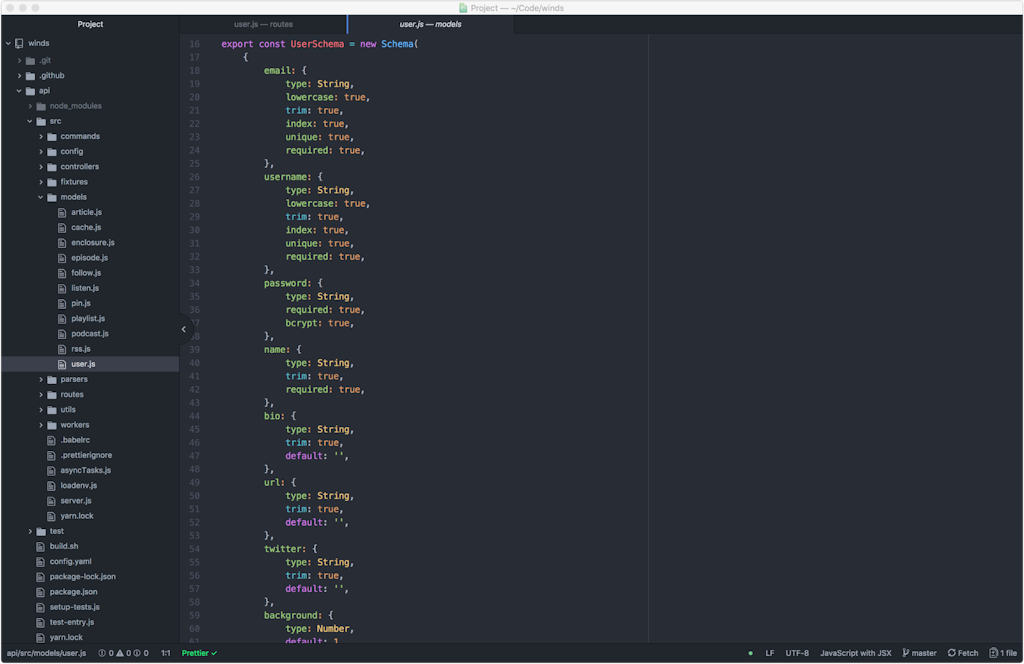
API Workers
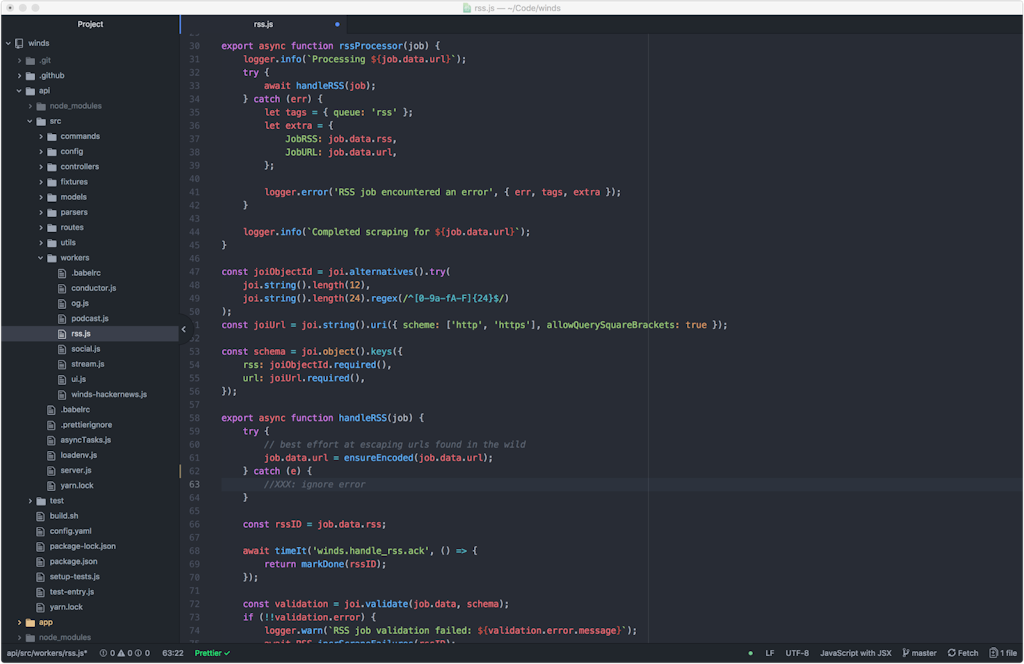
The workers perform very special tasks that would otherwise be blocking processes. For example, we use dedicated tasks for processing RSS feeds, Podcast feeds, Open Graph Images, and more. Without having dedicated processes for these tasks, our API would quickly come to a halt and users would not receive a response message in a timely manner – the API would likely timeout. Our workers use Bull Queue, a queueing infrastructure for Redis. Basically, our API inserts a call to Redis using the Bull Node.js library, then our workers pick up the job and process it asynchronously. For example, here’s the code from the Podcast.js Controller that adds a podcast after a user adds it to the system (notice how we add a high priority of 1): https://gist.github.com/astrotars/816789a22ccf01943549aabd365c291a From there, the following things happen:
- The conductor picks up on the task that needs to be processed
- The file podcast.js is notified it has a job to do (process the incoming job)
- The database is filled with populated episodes
- The User is notified that new podcasts are available
CLI Commands
The commands directory holds onto the code for specific Winds related tasks – it’s a simple, yet powerful CLI for the Winds API – and is especially helpful when you need to debug RSS feeds. If you’re interested, the getting started along with all of the commands are listed out here. Example output from running winds rss https://techcrunch.com/feed/: 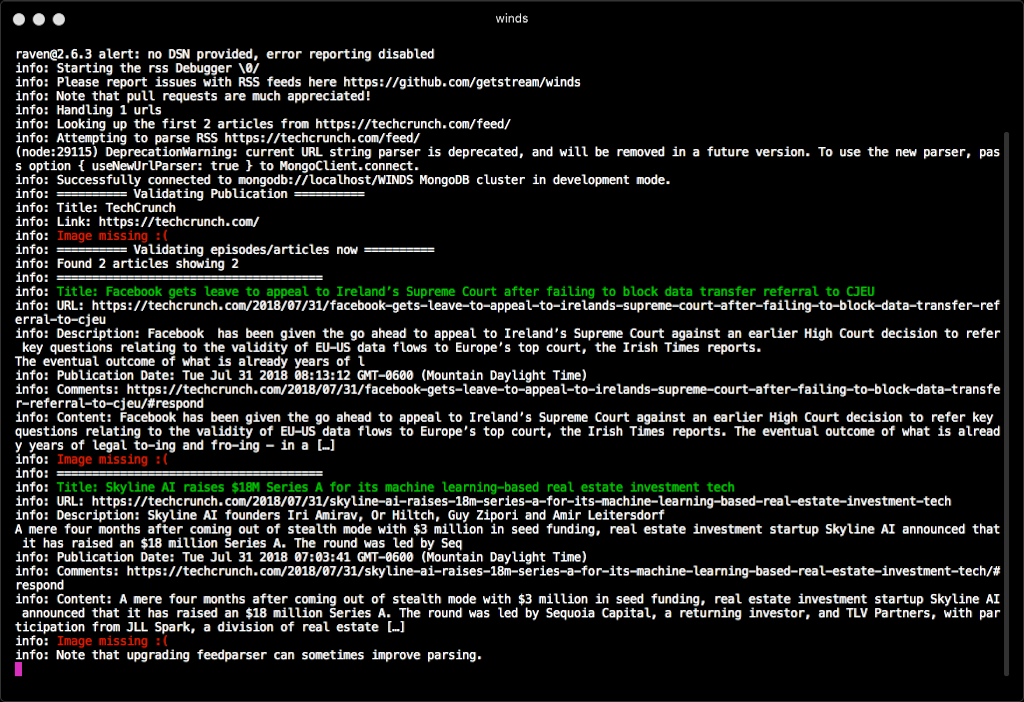
API Tests
Tests are written with Mocha and Chai. You’re welcome to run the test suite at any time (it never hurts to find something that needs to be fixed). At this time, only Workers and API have coverage – and we’re still working on getting to the 100% mark; however, frontend coverage with jest will be coming soon! 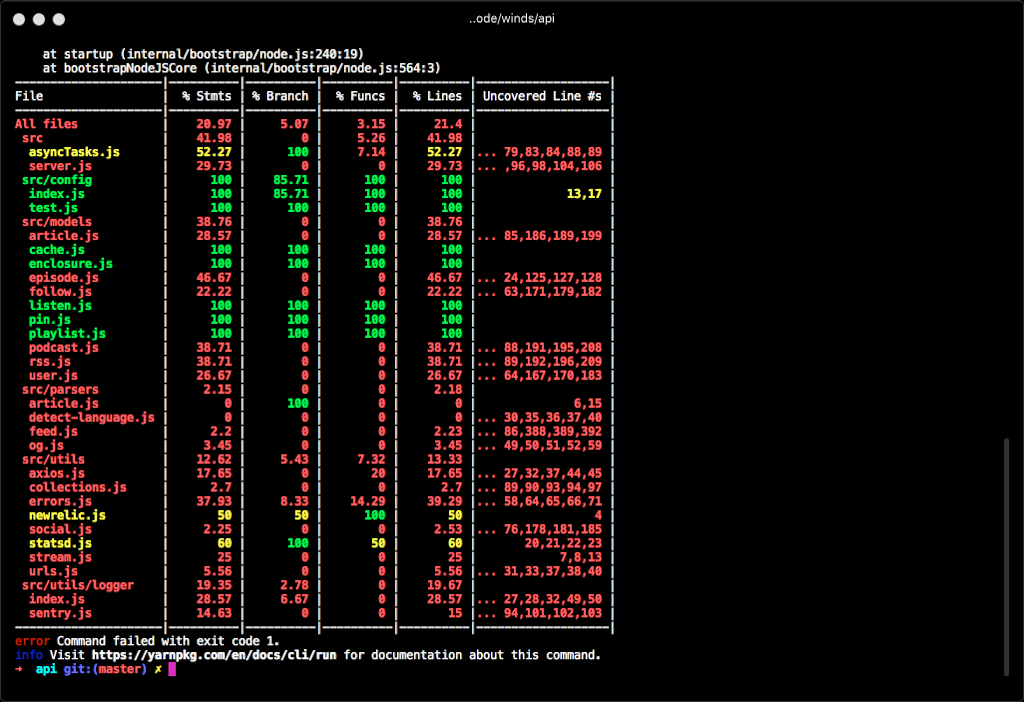
Winds ENV 🌪️
There are two places that require a .env (dotenv) file for running the application: /app/.env as well as /api/tests (assuming you are going to be writing tests). You’ll need to create a .env file inside of /app in order for the application to work. Here’s a boilerplate .env file to help you get started: https://gist.github.com/astrotars/f0fa7453a997e1f297806068149672c0 Note: There are inline notes to help guide you through the setup of your .env file
Running PM2 🏃
PM2 is a process manager and we use it extensively for Winds. It’s an extremely powerful tool and we’re big fans of the project, as well as the maintainers. They are quick to respond if a bug arises, and most importantly, it works very well for what we need to do. Node.js is single threaded by design. This has its ups and downs – it’s extremely fast, but bound to a single I/O operation at a given time. Under the hood, PM2 uses the Node.js cluster module so that the scaled application’s child processes can automatically share server ports. The cluster mode allows networked Node.js applications to be scaled across all CPUs available, without any code modifications. This greatly increases the performance and reliability of the application at hand, depending on the number of CPUs available. I’d recommend learning the commands for PM2 if you are going to be developing on Winds, or if you plan on using PM2 for your own application. In all honesty, the best feature is the watch command that is built-in – it automatically watches for changes and reloads the app when necessary. Here are a few commands that I use daily:
- pm2 start process_dev.json (Starts the processes via commands set in the process_dev.json file)
- pm2 list (Lists all running processes)
- pm2 restart all (Restarts all running processes managed by pm2)
- pm2 log (Tails the logs that the various processes are spitting out)
Note: Use ctrl+c to get out of the tailing logs
Let’s Get Started 👯
You’ve made it this far. Congratulations! All of the dependencies are installed, repo is cloned, your .env is set up… we’re ready to go!
Create a New Branch
Inside of your working directory, create a new branch called “feature”. Here’s the code for it if you need: https://gist.github.com/astrotars/06221e3e86a2133f95bce0fe42fa15fd
Start MongoDB
Now that you have the code cloned to your machine, let’s go ahead and get MongoDB up and running. You can use the following command in a separate terminal. https://gist.github.com/astrotars/e5a8bc3bb070be92cd60894eafe732f3 Note: If you’re looking for a decent GUI for MongoDB, have a look at Compass. You can download it here or run brew cask install mongodb-compass. 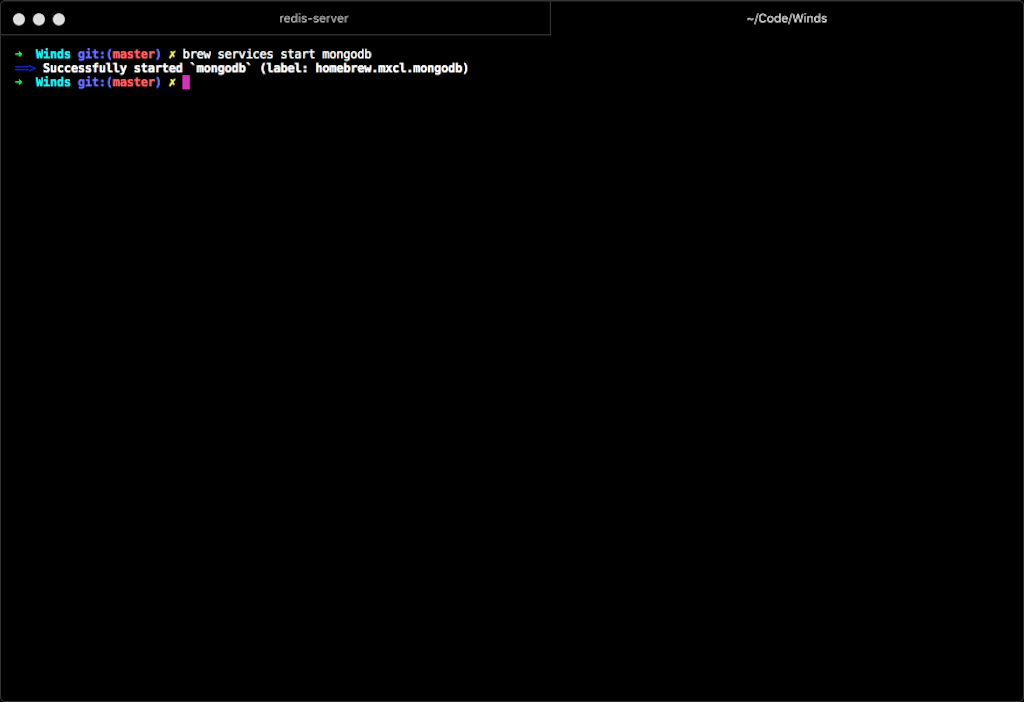
Start Redis
Similarly to MongoDB, let’s go ahead and get Redis up and running. For this, I like to use the native command (from your command line): https://gist.github.com/astrotars/cb3f86777e08b356556ad421649d929c 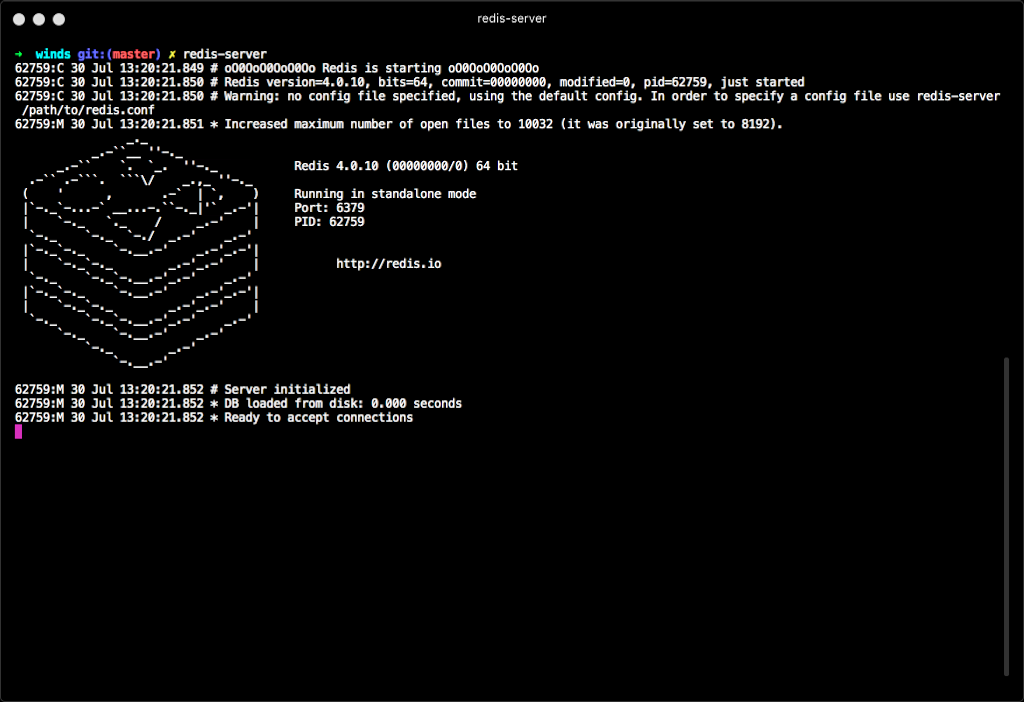 Once started, you should see the Redis logo in the terminal (as shown above).
Start the Winds API & Workers
MongoDB is up and running alongside Redis. Now it’s time to start Winds. Head to the base root of the Winds directory and run the following command: https://gist.github.com/astrotars/567da7761d9bfd3e9f275499c5c33f65 You should see the following once the application spins up: 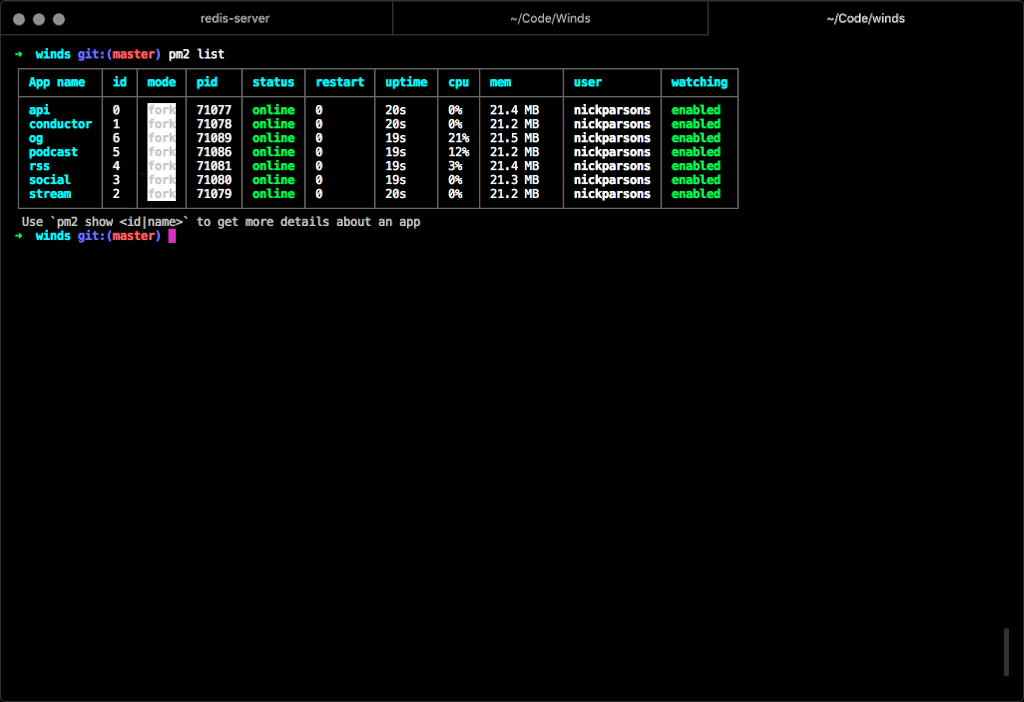
Let’s Start the Winds UI
With Winds, we provide two ways to start the application UI: The first method starts the application inside of an Electron wrapper: https://gist.github.com/astrotars/bf36d3202bdf04f9f27c4d8f506f982e 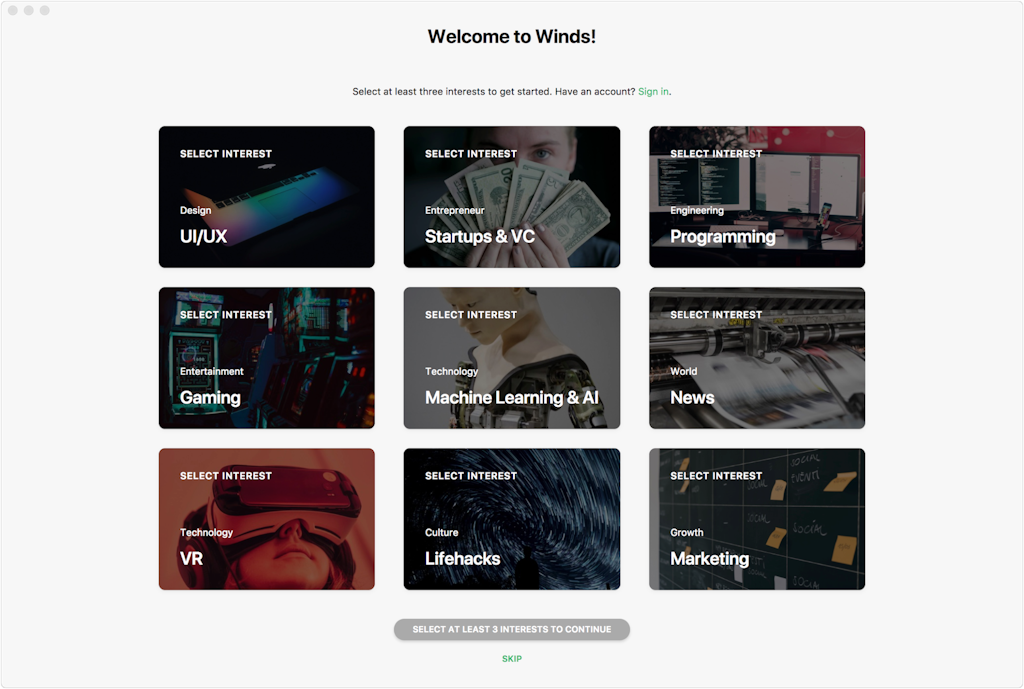 The second option starts the application in a Chrome browser, which is much easier for debugging purposes: https://gist.github.com/astrotars/5bd0e168f52551cb01c237ea2efed473
 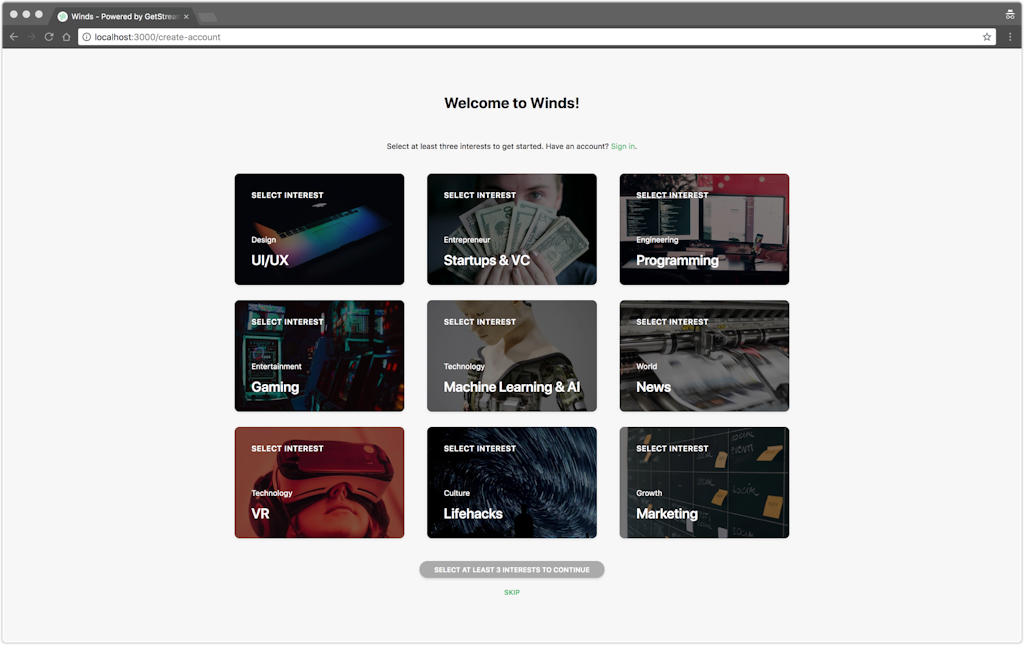 Feel free to choose whichever one you like! I’ll be using the browser version as it’s easier to navigate the DOM and seems to reload faster. Woo! You’ve successfully set up and started Winds on your machine! 🎉
Adding a New Feature 🔔
We’ve covered a lot so far, but nothing concrete when it comes to adding new features to the platform. Since this is our first time showing off how to add a new feature, we’re going to keep it simple – we’ll add a social button to the frontend. Before moving ahead with development, please create an account by selecting 3 or more interests and following the guided steps. 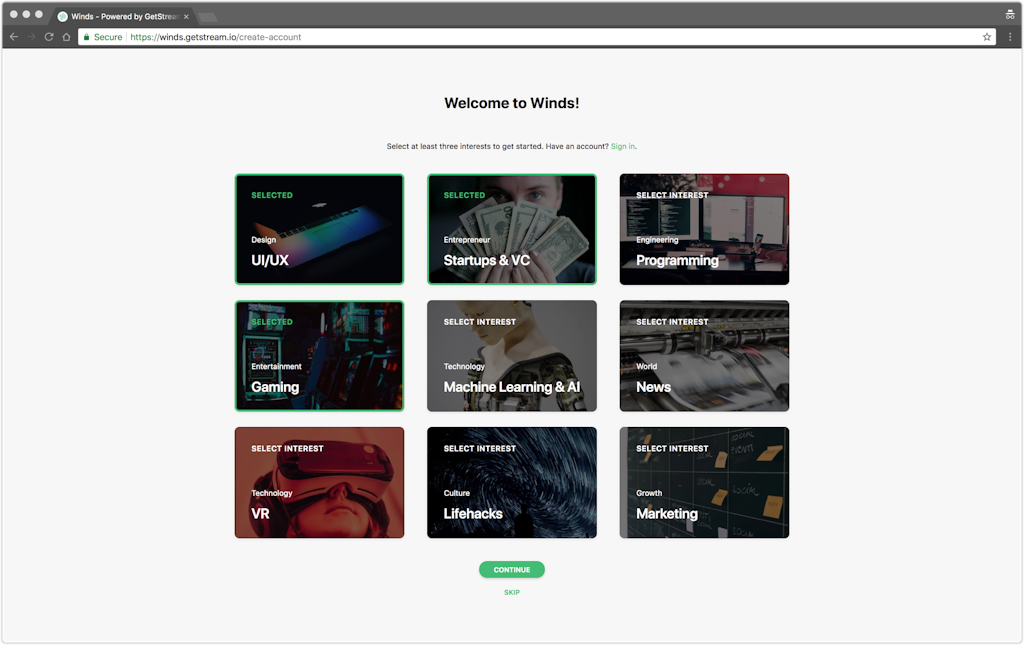
Blank State
Don’t be alarmed when you log in. You’ll see a rather blank screen as we haven't added any content yet. 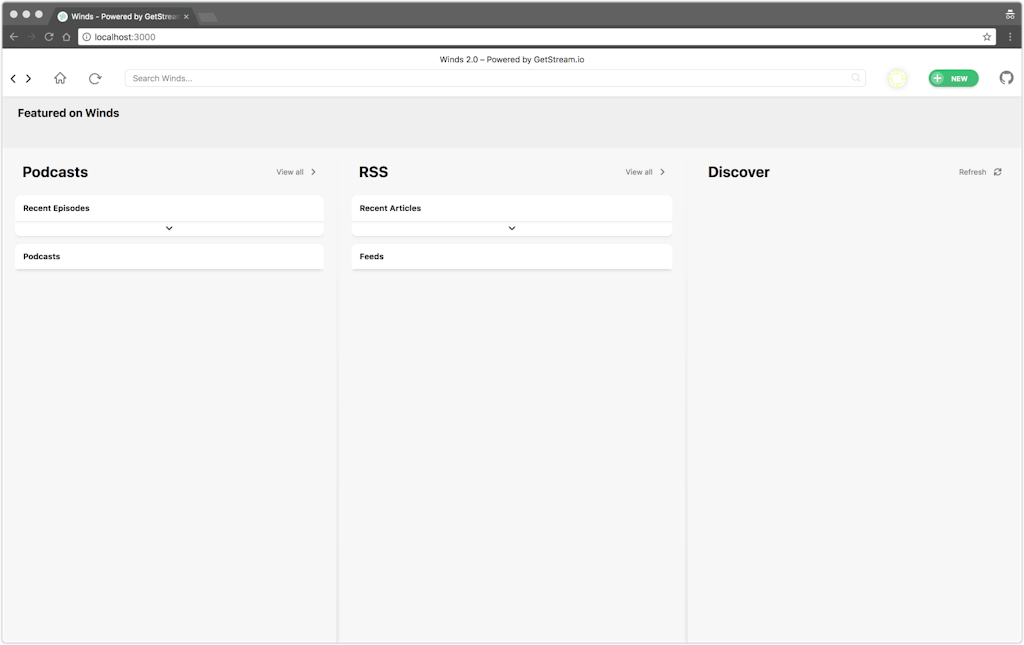 This is easily solved with an OPML file import 😀. Click here to download the OPML file, then follow the instructions below to import it into Winds. Click “New” > “New OPML” and a dialog will appear:
 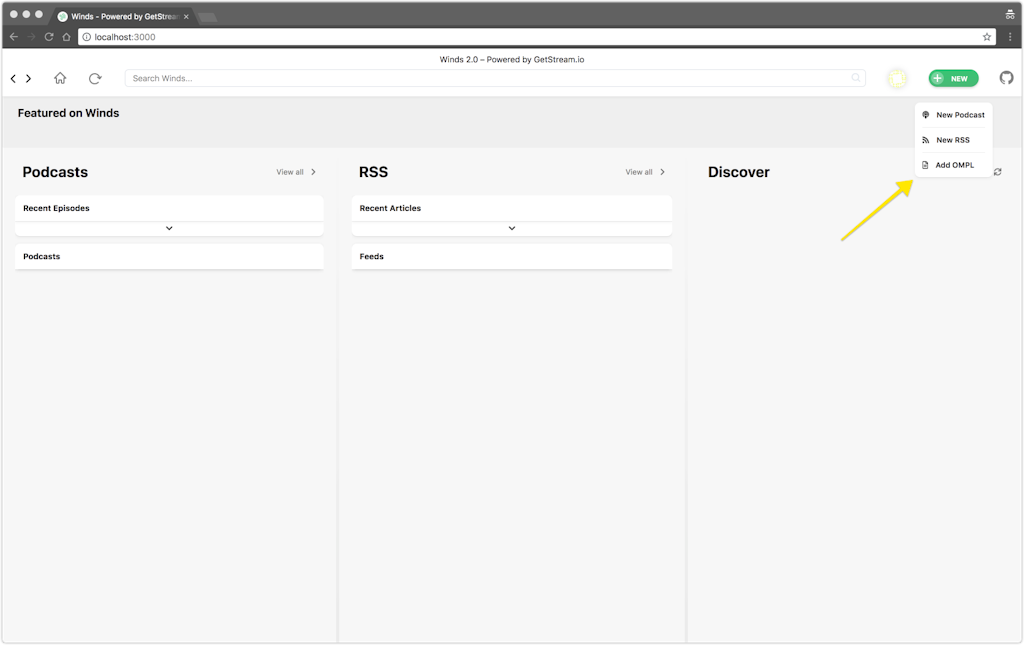 Once the dialog appears, drag and drop the downloaded OPML file into the drop zone.
 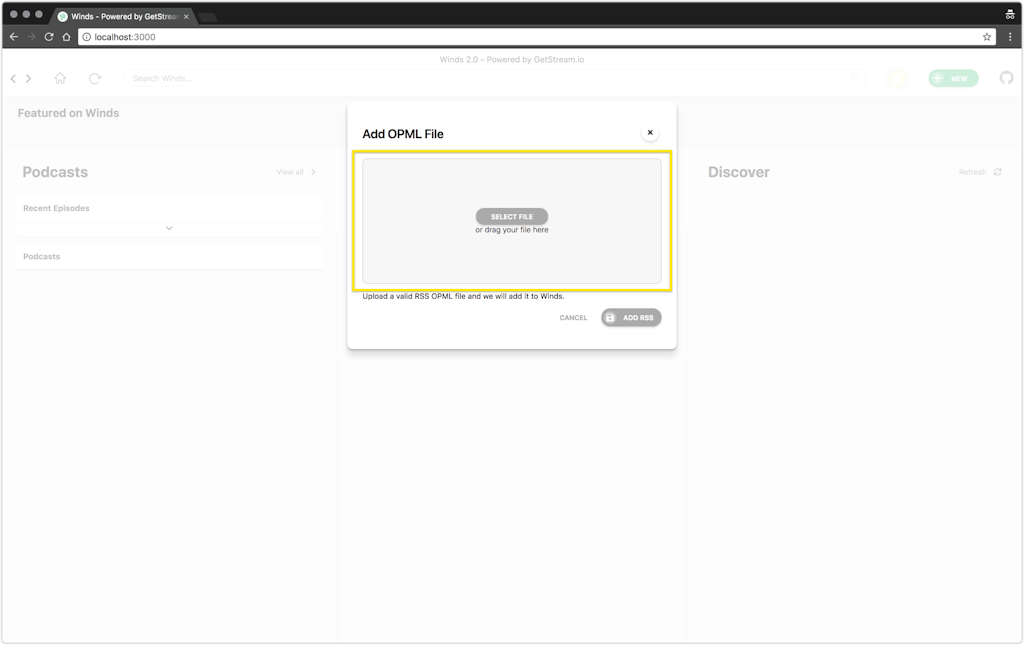 Click “Add RSS”. Reload the page and you should see a list of articles!
 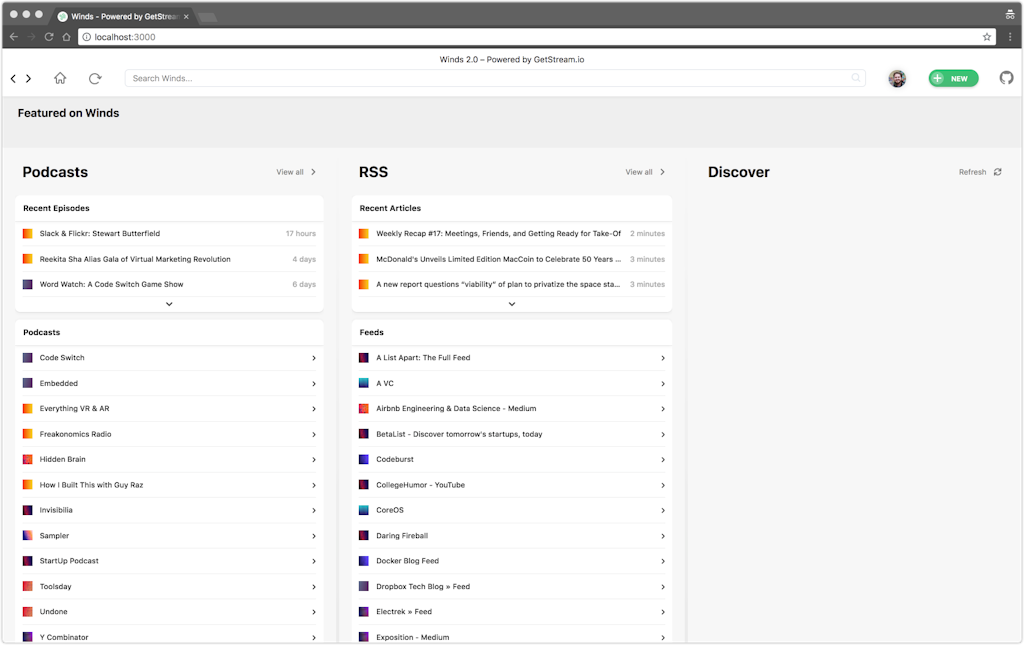 If you’re wondering why the “Featured on Winds” and “Discover” section are empty, it’s for two reasons:
- The Featured on Winds requires that a MongoDB database flag is set to true. For example, it must say “featured: true” on an RSS feed or a Podcast feed.
- The Discover recommendation feature is powered by our machine learning. Machine learning takes time, as it learns from your interactions with content. The more that you interact with your content, the better.
Note: For this tutorial, it’s not necessary to get these two components up and running. But if you want to experiment, I’d suggest jumping into MongoDB Compass and setting an RSS feed’s “featured” key to the boolean value of true.
Starting to Code
As mentioned, we’re going to add a social button to the frontend. For the purpose of this exercise, we’ll add it to the top level RSS feeds. First, click on the RSS section header: 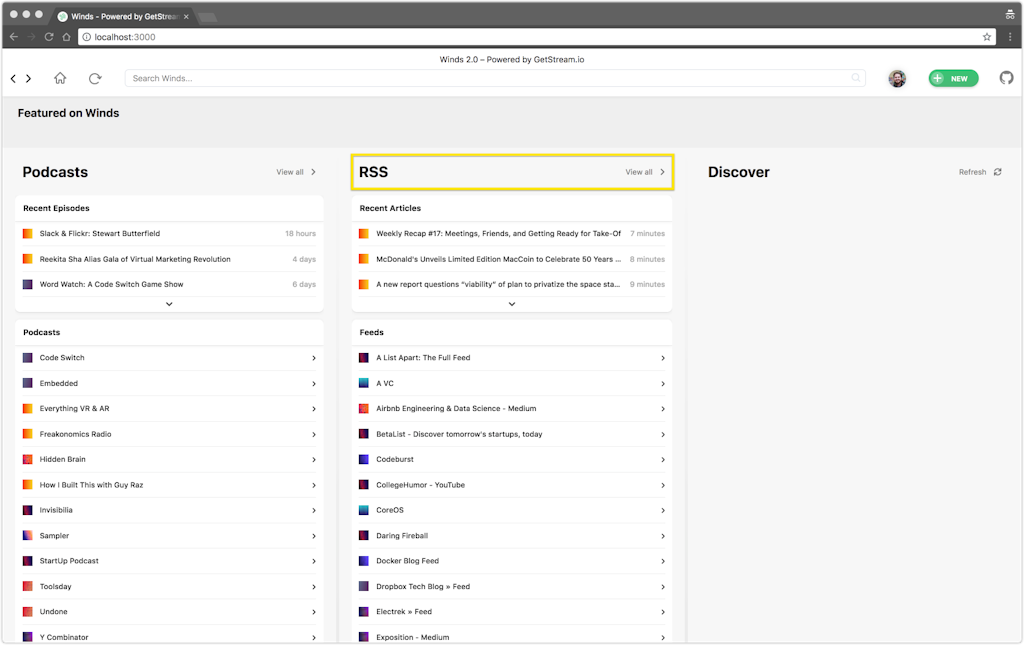 Next, have a look at each element. Notice how they are missing a Twitter logo? We’re going to add that.
 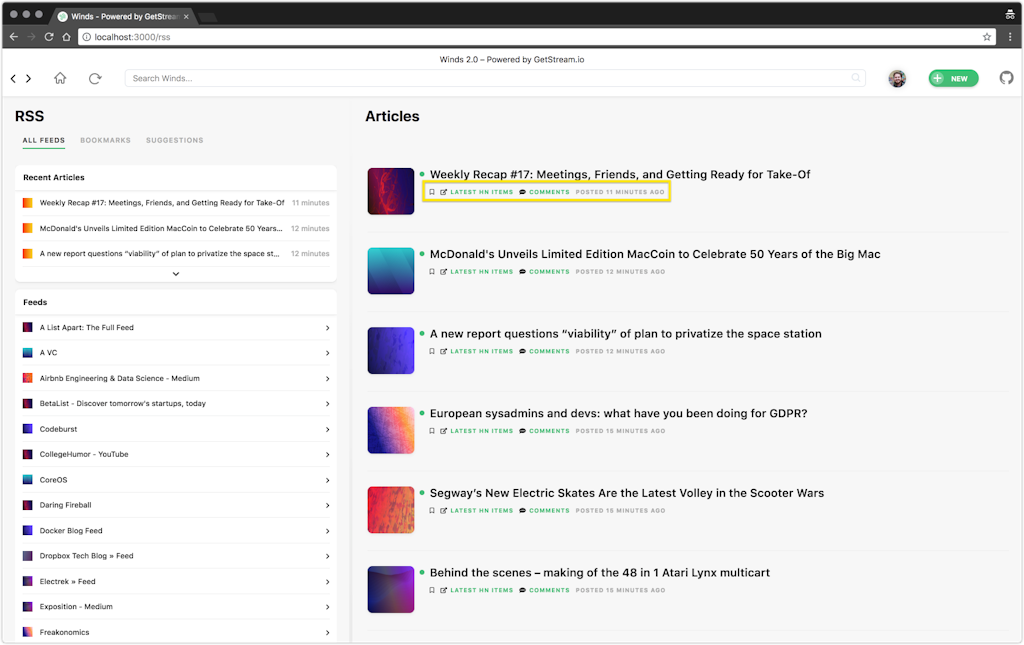 Pro Tip: The easiest way to find what you’re looking for is to find the class name and then search for it in your editor. For this component, we’re going to be looking for two classes – “far fa-bookmark”. You can search for this in your editor, or you can simply go to “app/src/components/ArticleListItem.js” – line number 57.
 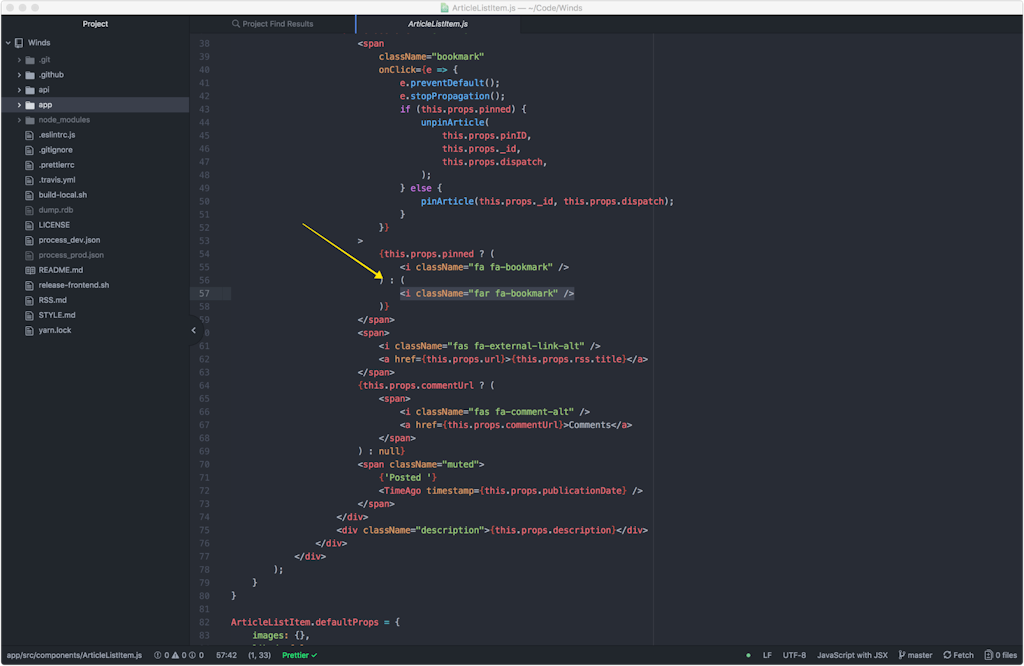 First, we need to include a module called is-electron. This module ensures that we’re only showing an icon (and using functionality) in the web environment. The package is already installed, you just need to add it to the imports at the top of the file like so: https://gist.github.com/astrotars/97300ca03805d27c7af85ff3a88806b0 Between the following ’s on line 59 and line 60, we’re going to add our Twitter button! https://gist.github.com/astrotars/6c74df50d9192199b0bbc9d1bf81c1e2 After adding the code snippet above, your code should look like this:
 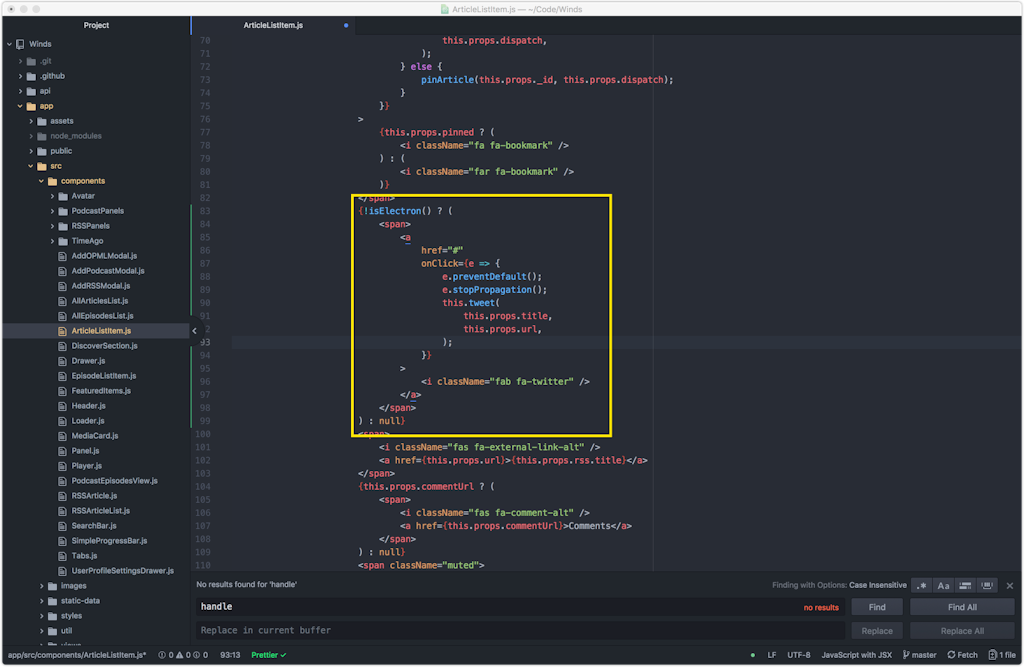 We’re calling the function tweet(), so we’ll want to make sure we create that as well. Just before the render method, create a new method called “tweet”. You can copy and paste the following code: https://gist.github.com/astrotars/a66ab9675f66af437925cd23ed813030
 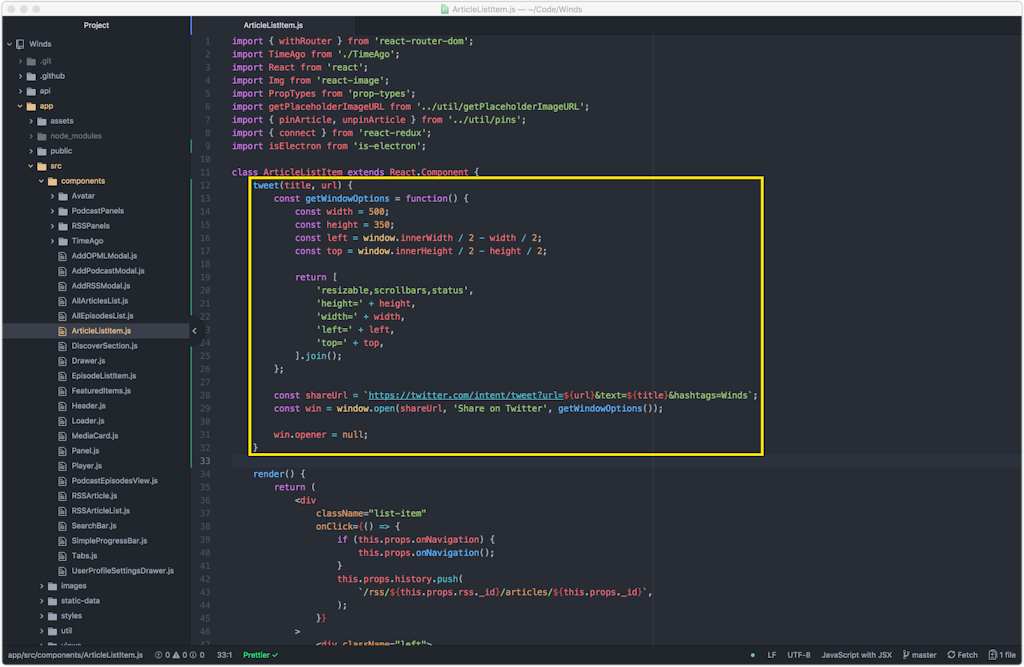 Now, try clicking on the Twitter logo in the UI. If all went well, you should see a Tweet dialog open with the title of the article, along side the URL with the hashtag Winds!
 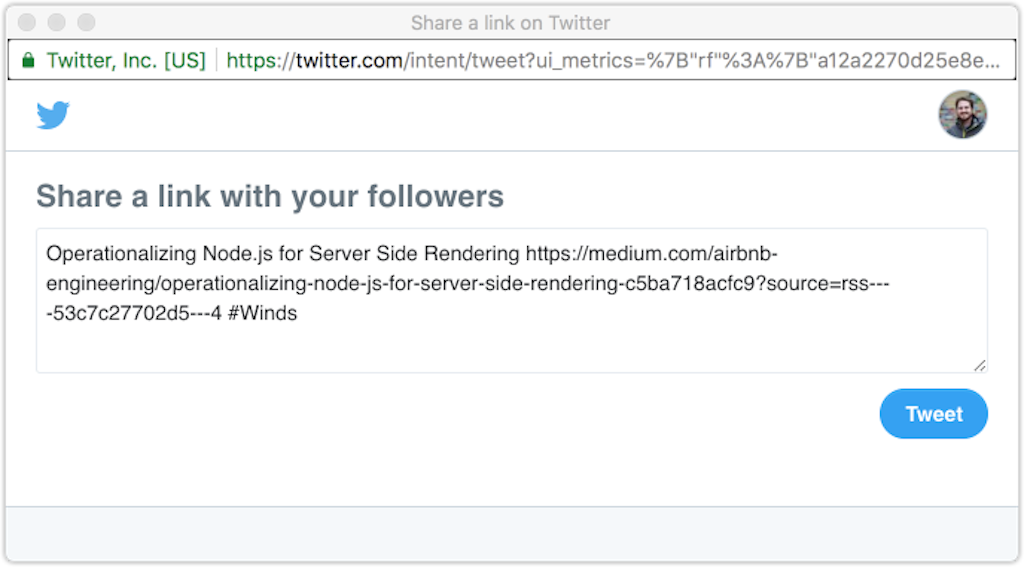 Woo! You created your first feature on Winds – hopefully, one of many! Time to celebrate! 🍾🥂 If you’re still a little fuzzy on the process, run git stash and try it all over again. It doesn’t hurt to do things more than once 😉 Feeling like you have everything down? Let’s see some code! Here are a few ideas that may help you get started:
- Facebook Like Buttons
- Bookmark Support
- Dark mode to support macOS Mojave
- Likes (our API already provides support for them)
- General CSS cleanup
- General JavaScript cleanup
- Test coverage for the API and Workers
Note: We’re also hiring a Full-time (contract) developer to join the team to work on Winds. Think you have what it takes? Ping me here with your LinkedIn profile and any examples of coding work that you’ve worked on as the sole contributor.
Final Thoughts 🤔
Winds is the most popular open-source application of its type – and we couldn’t be more excited. Free desktop applications are available for macOS, Linux, and Windows, and a web version is available as well. The application features several pieces of functionality, notably feeds and personalized content recommendations, all of which are powered by Stream, the leader in API based news feeds, activity streams, and personalization as a service. Thank you for sticking around and learning a bit about Winds! We hope to see some PRs from you in the near future! Happy Coding!